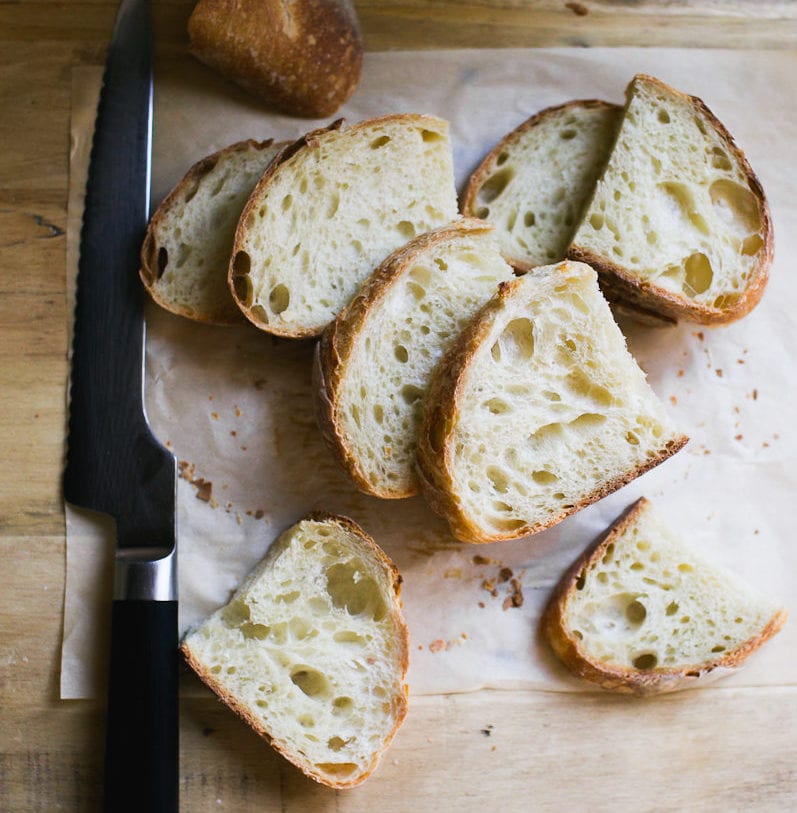
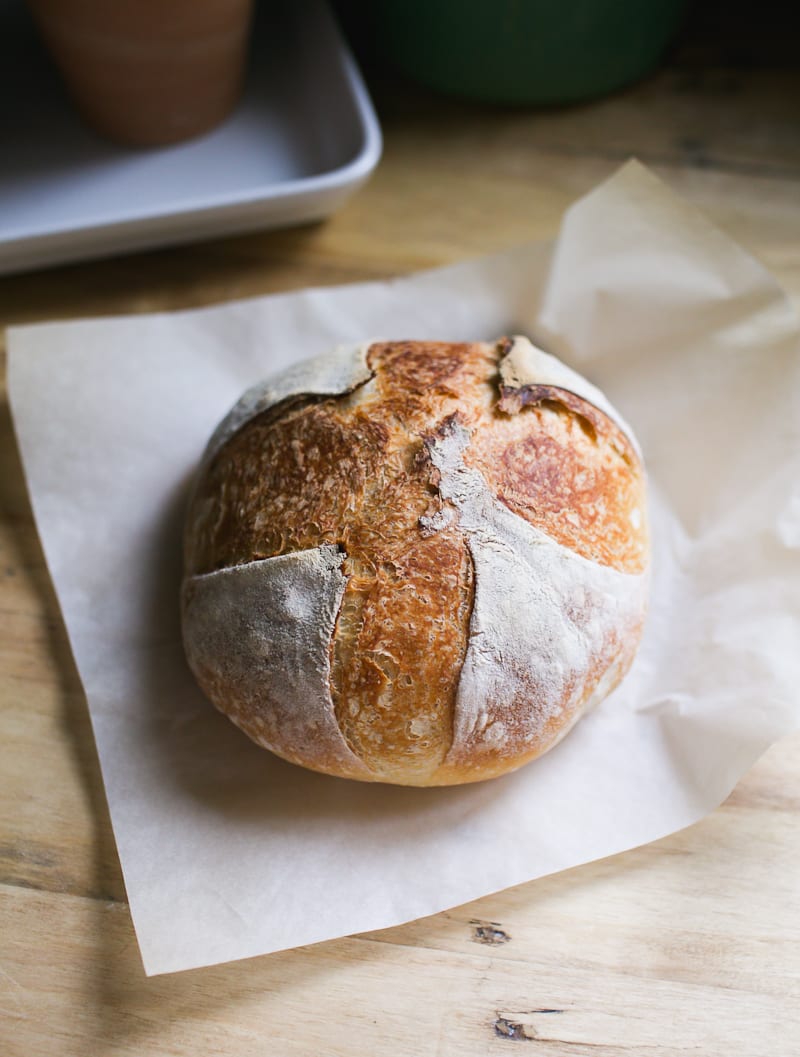
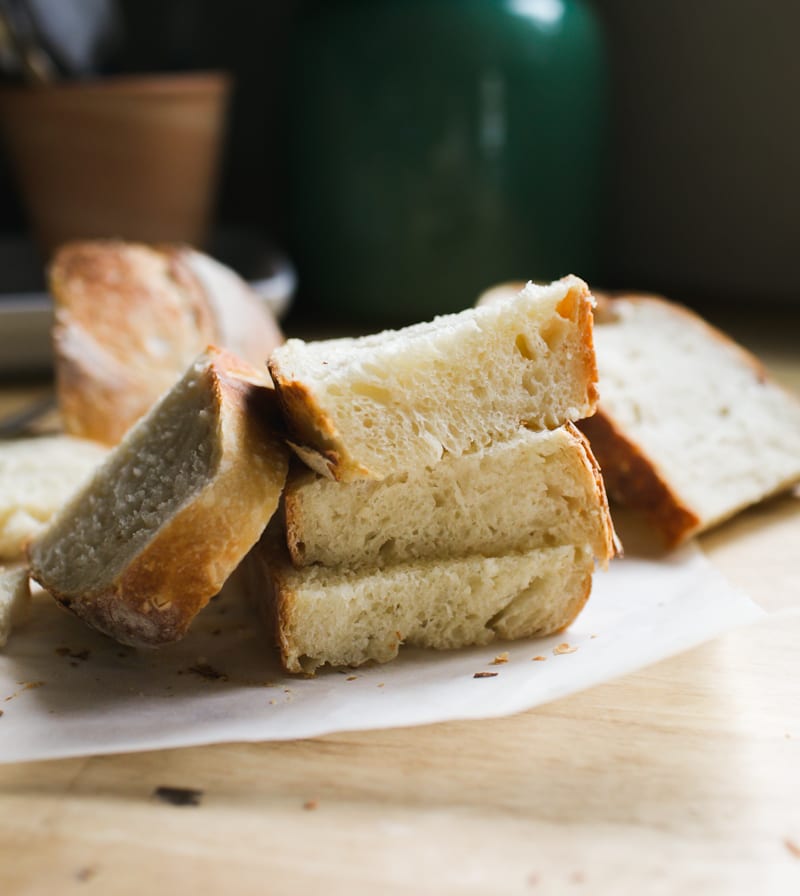
No bread flour? No problem! Learn how to bake artisan sourdough bread using all purpose flour and active sourdough starter. This easy-to-follow recipe features step-by-step photos, helpful tips, and a simple baking schedule to help you create delicious, naturally leavened loaves at home. It’s light crisp and airy!
Bakers all over the world choose bread flour to create exceptional sourdough bread at home. It’s prized for its high protein and gluten content, which helps to create a lofty-high rise. But what if you don’t have any bread flour? Can you make light, airy artisan sourdough with all purpose flour instead?
In this post, you’ll find a clear, step-by-step guide to mastering sourdough with all purpose (or plain) flour with a few key adjustments. You’ll gain the tools and confidence you need to bake delicious bread every time.
All-Purpose Flour vs. Bread Flour: Key Differences
It all boils down to protein content. Bread flour has a higher protein content than all purpose flour, which affects gluten development and the bread’s rise.
I typically use King Arthur flour for bread baking. Their bread flour contains 12.7% protein, and their all purpose flour contains 11.7%. This recipe was formulated to work with King Arthur and Trader Joe’s all purpose flours, which are comparable. (learn more about choosing flour in this post).
Tip: Protein content varies between brands, so stick to one brand first to understand how it behaves. It will be your reference point for future adjustments as you continue to bake.
How to Use All Purpose Flour in Bread Baking
Swapping all-purpose flour for bread flour is not always an even exchange. Because all-purpose flour absorbs less water, you’ll need to reduce the total water in your dough to avoid stickiness. Too much water makes the dough hard to handle, which can cause flat, dense, or gummy bread- you don’t want that.
Ok, So Reduce the Water by How Much?
I typically suggest reducing the water by 15-30g to start. The range depends on the specific sourdough recipe, the amount of sourdough starter, and the flour brand you use.
You’ll have to play around with the texture of the dough, adjusting the flour/water as needed until it “feels right,” which can be frustrating if you lack experience. But stick with it: success requires practice, patience and persistence. For now, let’s focus on visual and tactile cues to guide you through the process.
How to Make Artisan Sourdough Bread with All Purpose Flour {Step-By-Step Recipe}
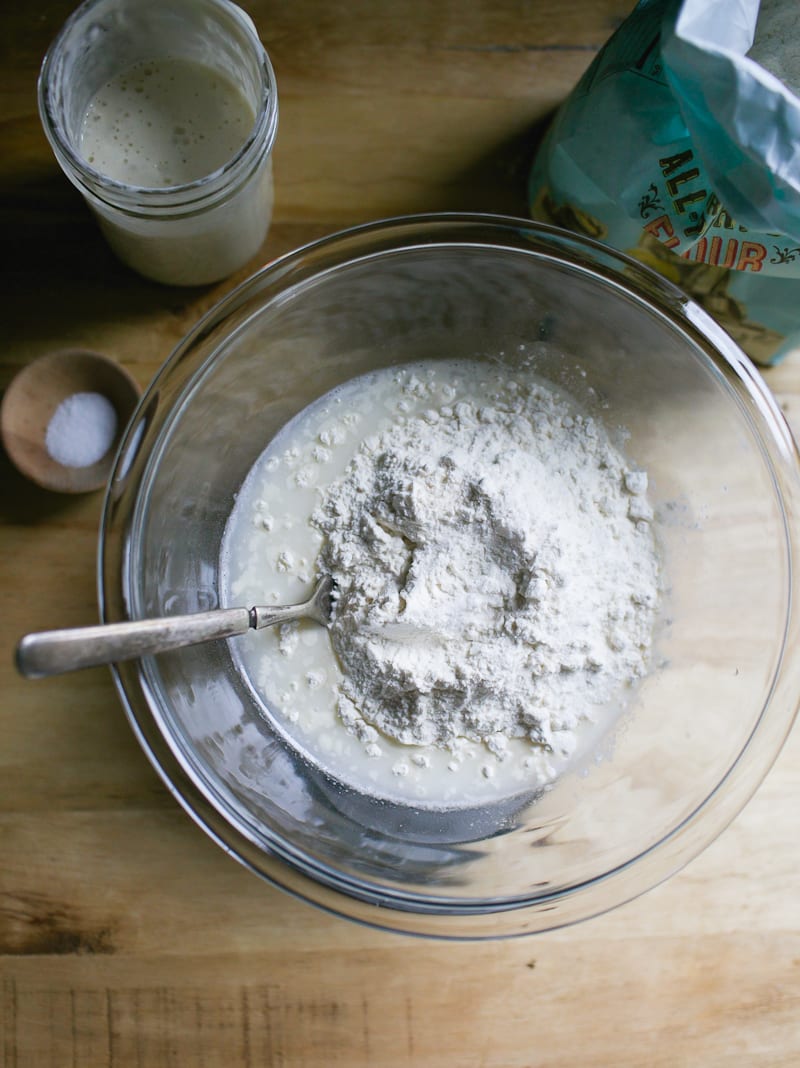
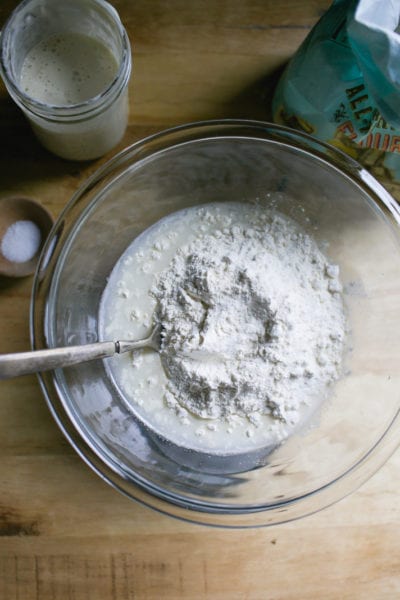
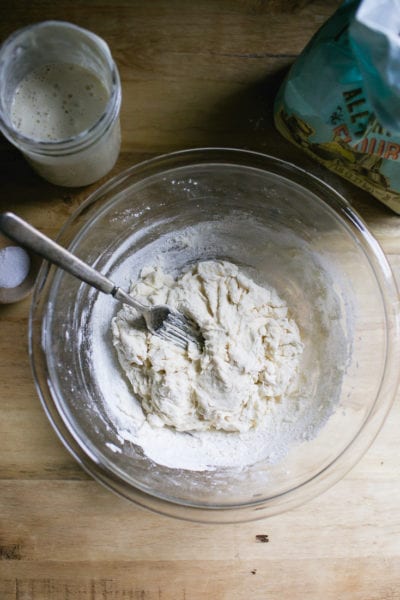
Step 1: Mix the Dough
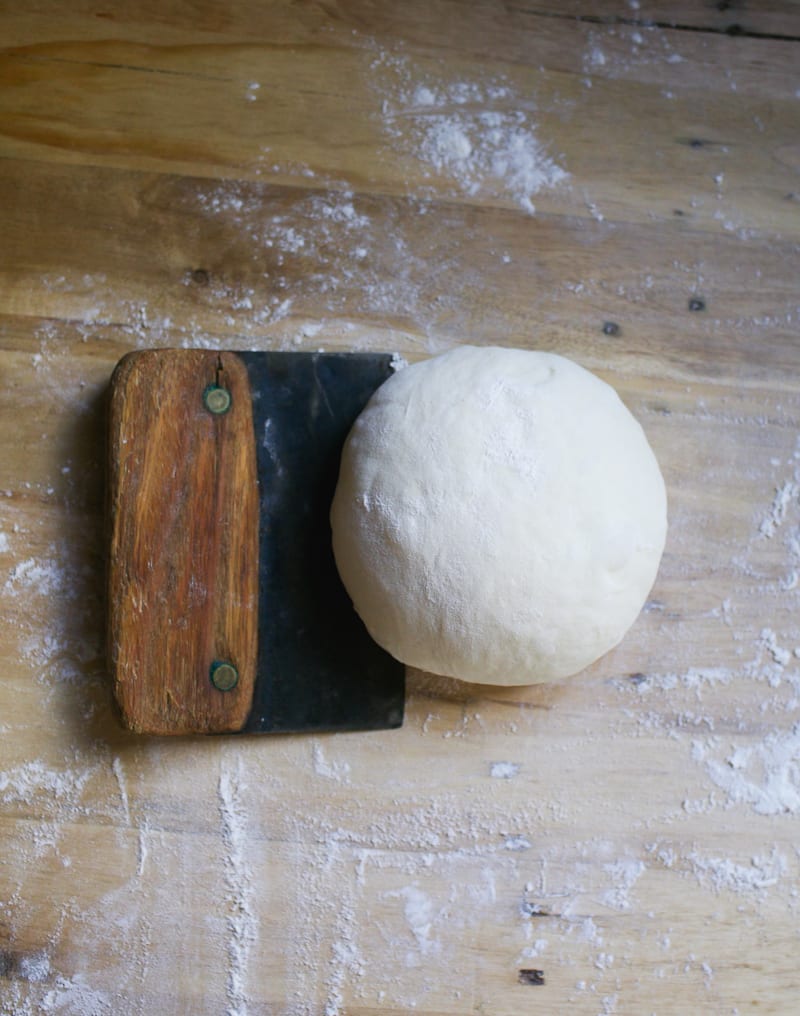
- In a large bowl, whisk your bubbly starter and water together. Add the flour and salt, then mix with a fork until combined. When the dough becomes too stiff to mix with a fork, switch to your hands and knead gently until a rough, shaggy dough forms. This texture is what you’re looking for: slightly sticky but holding together (see images above). Now, cover the bowl with a damp towel or plastic wrap and let rest at room temperature for 30 minutes.
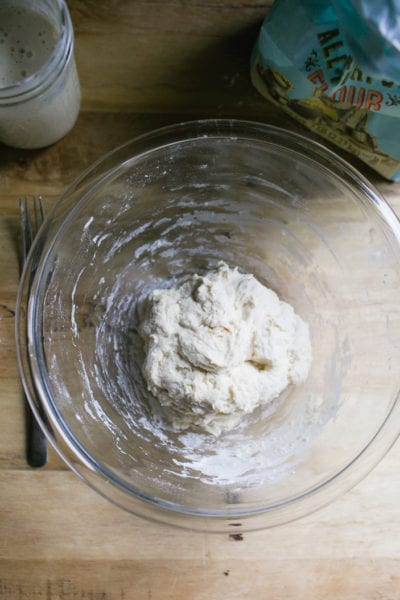
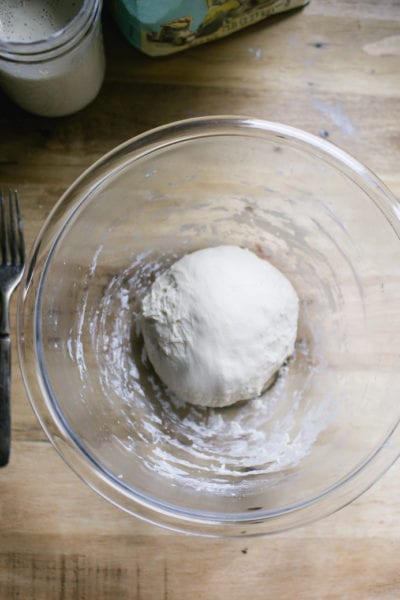
- After the dough has rested, work it into a ball. The surface will appear mostly smooth with a few tears. This is your last chance to adjust the dough’s texture before the bulk rise, so pay attention to how it feels. The dough should be soft and stretchy- not wet, overly sticky, or soupy.
A Few Notes: This recipe makes a small sourdough loaf, ideal for 2–4 people. Smaller loaves are easier to handle, especially if you’re new to sourdough baking. Instructions for a larger loaf are at the end of this post. For best results, you’ll want a digital kitchen scale to measure ingredients accurately, and a Dutch oven (or similar lidded oven-safe pot) for baking. You can find these tools in my shop.
Ste 2: Bulk Rise
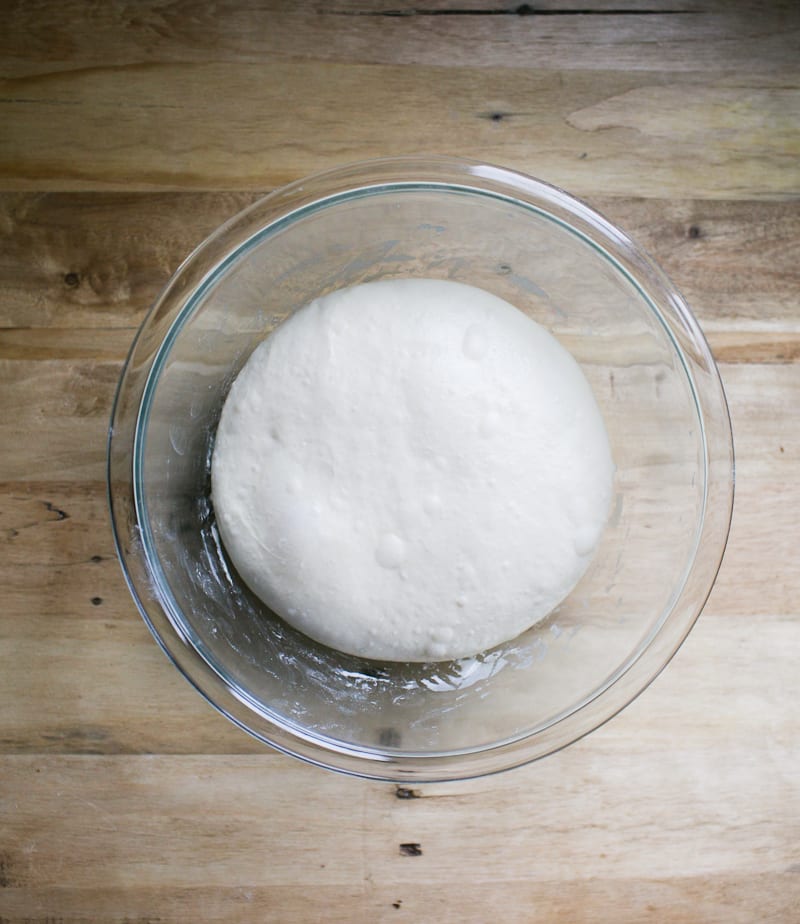
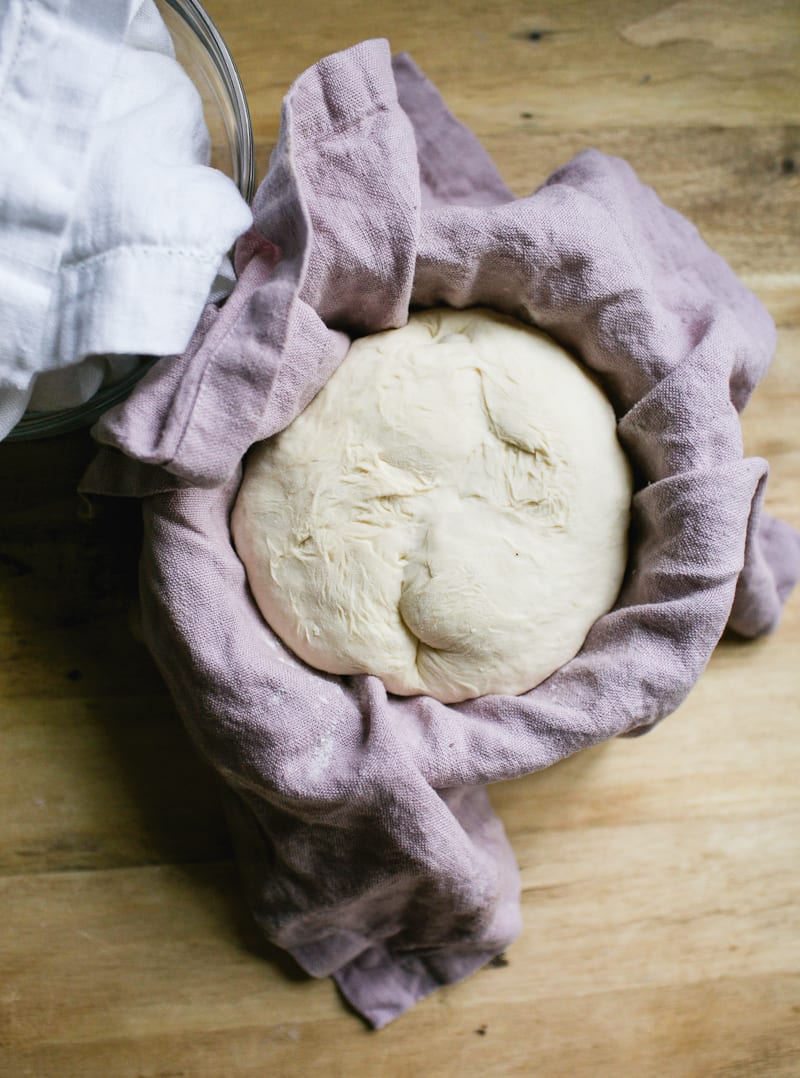
Cover the bowl and let rise overnight, about 10-12 hrs. at room temperature (68 F). The dough is ready when it has doubled in size and looks light and airy. If you’re using a standard 8-inch mixing bowl, the dough should rise to about halfway or two-thirds up the sides, which is perfect for this small loaf.
Optional: Stretch and Fold
This step, done during the bulk rise, helps to strengthen the gluten, improve structure, and give your loaf more height. Watch the video below for additional guidance. Or read the full tutorial: How to Stretch and Fold Sourdough, step-by-step.
About 30 minutes into the rise, perform your first stretch and fold:
- Gently grab one side of the dough, stretch it upward, then fold it over toward the center.
- Rotate the bowl a quarter turn and repeat.
- Continue until you’ve completed four folds (one full set).
- Repeat once more, 30 to 60 minutes later.
Step 3: Shape The Dough
- Line a small bowl with a cotton or linen cloth. Sprinkle generously with flour. Now, you’ll shape the dough twice: first to preshape it, then to build strength and structure.
- Preshape: Remove the dough onto a floured surface. Gently fold the top edge of the dough toward the center. Turn it slightly and repeat, working in a circle until the dough forms a round. Use a bench knife to flip the dough over (smooth side up), then cover and let rest for 20–30 minutes.
- Final Shape: After resting, flip the dough again so the smooth side is facing down. Repeat the folding process to form a tight round. Then flip it back over. With floured hands, gently pull the dough toward you in a circular motion to tighten the shape. Place the dough into the lined bowl, seam side up. Cover the dough with the cloth overhang.
Step 4: Second Rise
Let the dough rest at room temperature for 30 minutes to 1 hour. It’s ready when it looks plump and slightly puffed—it won’t double in size during this stage. While the dough is rising, preheat your oven to 450°F.
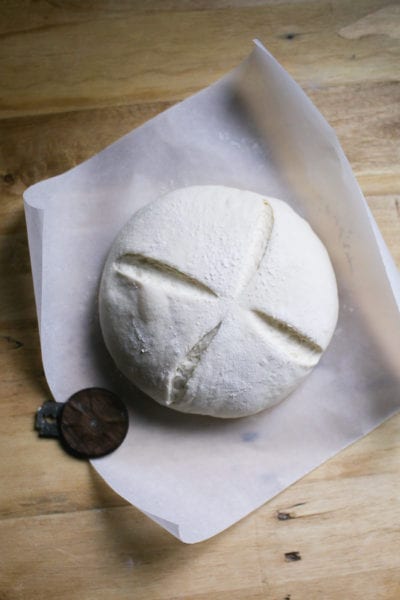
Step 5: Score The Dough
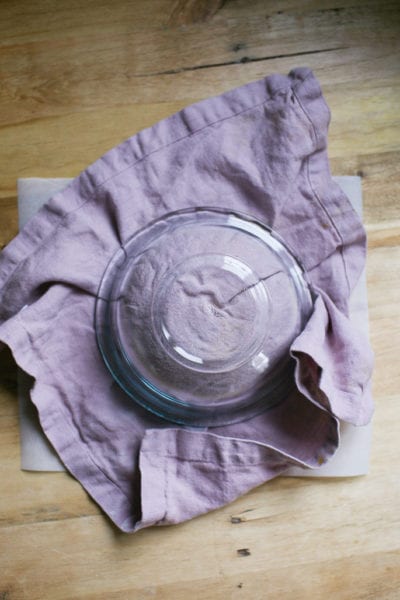
- Invert the bowl of dough onto a sheet of parchment paper. Remove the bowl and cloth.
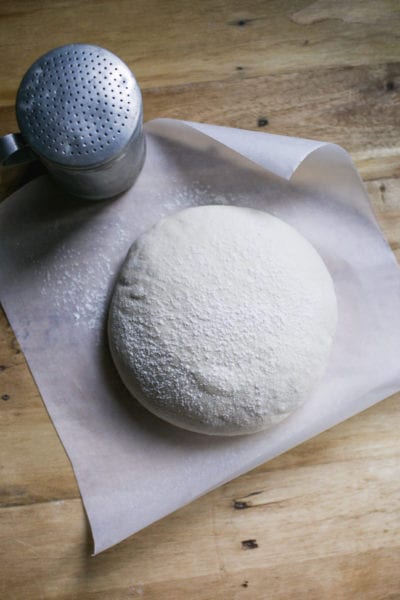
- Sprinkle the dough with flour and smooth the surface with your hands.
- Using a bread lame or a small serrated knife (I used my UFO lame), make four, quick, shallow cuts at 12, 3, 6 and 9 o’clock, turning the parchment paper as you go. Use the tip of the blade as a guide.
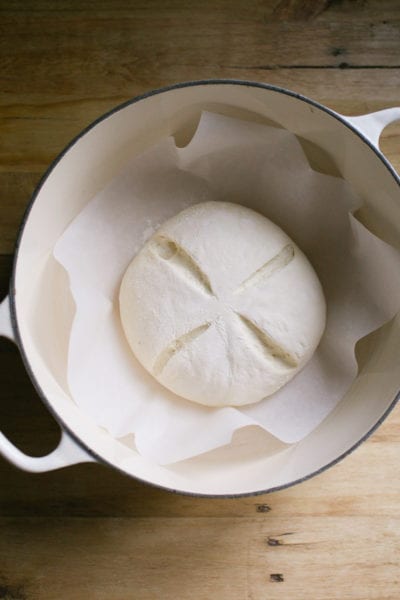
- Lift the dough (still on the parchment) and carefully place it into your Dutch oven. Cover with the lid.
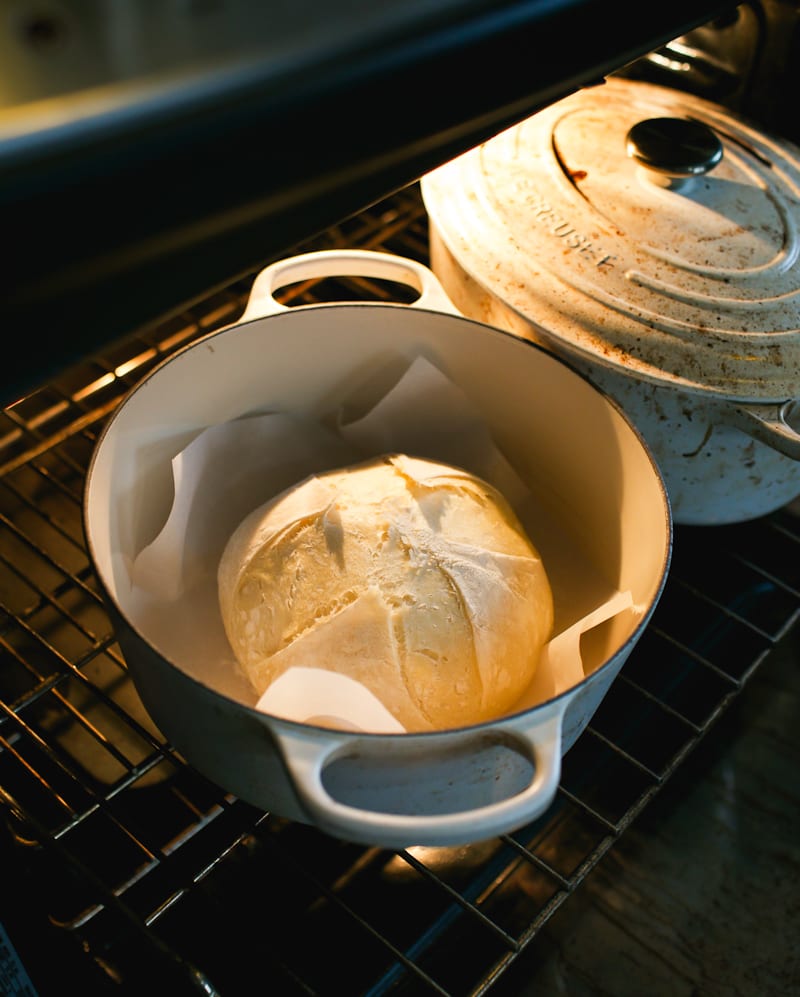
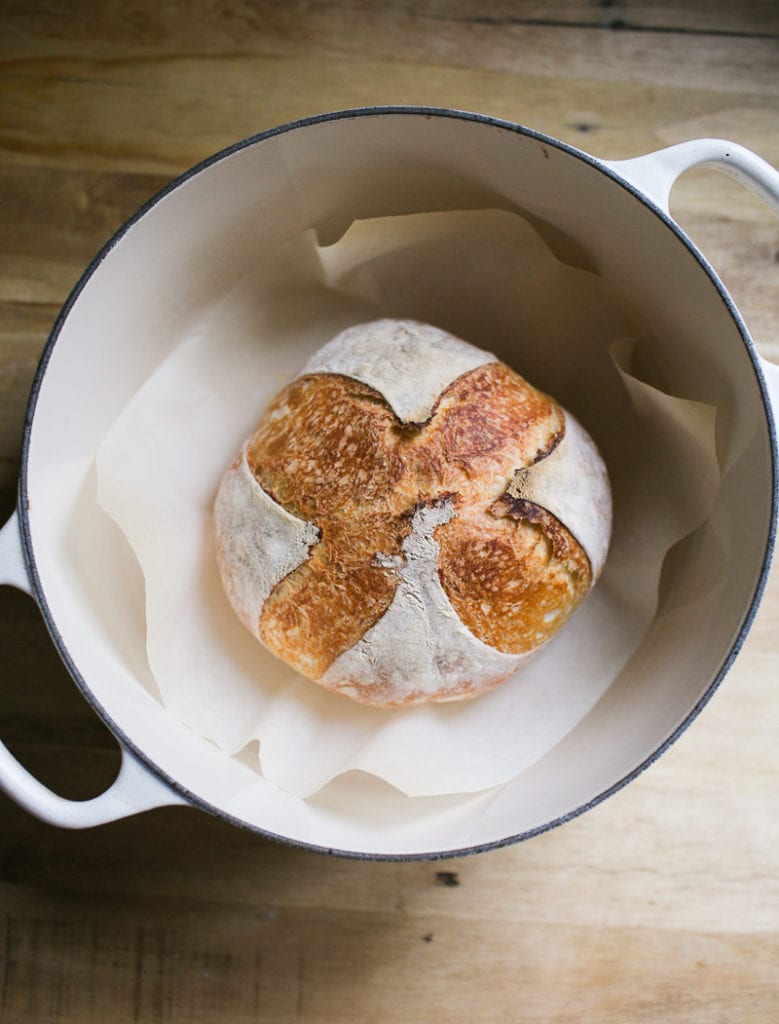
Step 6: Bake The Bread
Place the Dutch oven into the preheated oven, center rack. Reduce the temperature to 425 F. Bake covered for 20 minutes. Then, remove the lid and continue baking for 30–35 minutes, or until the crust is deep golden brown. Cool on a wire rack for 1 hour before slicing.
Sourdough Bread Baking Schedule
Here’s a flexible overnight schedule that works well in most home kitchens (around 68°F). If your kitchen runs warmer, simply start a bit later to prevent over proofing the dough.
The Night Before
7:00 PM – Mix the dough and let rest (30 min)
8:00 PM – First stretch and fold (optional)
9:00 PM – Second stretch and fold (optional)
Cover the bowl and let the dough rise at room temperature (10–12 hours)
The Following Morning
7:00 AM – Check the dough (it should be doubled in size)
7:05 AM – Preshape
7:30 AM – Final shape
7:35 AM – Begin second rise + preheat oven
8:05 AM – Bake
By signing up, you agree to receive emails from The Clever Carrot. Unsubscribe at any time.

Artisan Sourdough Bread Recipe with All Purpose Flour
- Cook Time: 50 minutes
- Total Time: 50 minutes
- Yield: 1 small loaf (2–4 ppl) 1x
- Category: Sourdough Bread
- Method: Oven-Baked
- Cuisine: American
- Diet: Vegetarian
Description
No bread flour? No problem! My artisan sourdough bread recipe with all purpose flour is an excellent substitute. This recipe yields a smaller sized loaf (perfect for up to 4 people) with a crisp crust and a smooth, interior crumb.
Notes & Substitutions
This recipe was formulated to work with King Arthur & Trader Joe’s all purpose flour, which contains 11.7% protein. If using another brand, please see my tip in the recipe below for adjusting the texture of the dough, if needed.
For accuracy and best results: please weigh your ingredients using a kitchen scale.
Ingredients
For a small loaf:
- 50 g (1/4 cup) bubbly, active sourdough starter
- 165 g (1/2 cup + 3 tbsp) water
- 5 g (1 tsp) fine sea salt
- 250 g (2 cups + 1 tbsp) all purpose flour (Trader Joe or King Arthur)
For a larger, standard size loaf:
- 50 g (1/4 cup) bubbly, active sourdough starter*
- 330 g (1 1/3 cup + 1 tbsp) water
- 9 g (1 1/2 tsp) fine sea salt
- 500 g (4 1/4 cups) all purpose flour (Trader Joe or King Arthur)
*Note: I use 50 g of starter for both the small AND standard size loaf. Using a smaller amount of starter with an long, overnight rise will help to prevent over proofed dough in the morning.
Instructions
Make the Dough
In the evening, whisk the starter and water together in a large bowl. Add the flour and salt. Mix with a fork until a stiff dough forms, then finish by hand to fully incorporate the flour. It will feel rough and shaggy, and slightly sticky. Cover with a damp towel or plastic wrap and let rest at room temperature (68 F) for 30 minutes.
After the dough has rested, work the dough into a ball. To do this, grab a portion of the dough and fold it over, pressing your fingertips into the center. Repeat, working your way around the dough until it begins to tighten.
TIP: If the dough feels too wet (and this can happen depending on the brand of flour you’re using), add 1 tbsp. of flour. Mix thoroughly by hand, adding more flour as needed. If you think it’s too dry, add 1 tbsp. of water and see how you go.
Bulk Rise
Cover the bowl (damp towel or plastic wrap) and let rise overnight at room temperature. This will take about 10 to 12 hours at 68 F. The dough is ready when it no longer looks dense and has doubled in size. If using a standard 8-inch bowl, the dough will rise about 1/2 way up the sides.
Optional Step: about 1 hour into the bulk rise, do 1 set of stretch and folds. Repeat 1 hour later. This will increase the overall volume of the bread.
Shape the Dough
The following morning, line a small bowl with a cotton or linen cloth. Sprinkle with flour.
Important: You’re going to shape the dough twice to build extra strength.
Preshape
Remove the dough onto a floured surface. To shape the dough into a round, starting at the top, gently fold the dough over toward the center. Give it a turn and fold over the next section. Repeat until you have come full circle. Using a bench knife, scoop up the dough and flip it over (the smooth side should be facing up). Cover and rest for 20-30 minutes.
Final Shape
After the dough has rested, flip it over again (the smooth side should be facing down now). Shape it again following the steps above. Flip it back over. With floured hands, gently cup the dough and pull it toward you in a circular motion to tighten its shape.
Place the dough into the lined bowl, seam side up. Cover the dough with the cloth overhang.
Second Rise
The dough needs to rise again. Rest for 30 minutes to 1 hour. The dough is ready when it looks puffy and has risen slightly, but has not yet doubled in size.
Preheat your oven to 450. Cut a sheet of non-stick parchment paper to fit the size of your baking pot, leaving enough excess around the sides to remove the bread.
Score the Dough
Place the parchment over the dough and invert the bowl to release. Sprinkle the dough with flour and gently rub the surface with your hands. Using the tip of a bread lame, small, serrated knife or a razor blade, make four shallow 4-inch long cuts at 3, 6, 9, and 12 o’clock around the dough. Use the parchment paper to transfer the dough to the baking pot.
Bake the Dough
Reduce the heat to 425 F. Bake the dough on the center rack for 20 minutes, covered. Remove the lid, and continue to bake for 30-35 minutes and golden brown (40 minutes uncovered for the larger, standard loaf).
When finished, transfer to a wire rack. Cool for 1 hour before slicing, for best texture.
Notes
Sourdough is best consumed on the same day it is baked. To maximize freshness, cool completely and store at room temperature wrapped in plastic, reusable beeswax wrap or bread bag for 1-2 days. Sourdough can also be frozen, for up to 2-3 months. Defrost at room temperature and warm @ 300 F before serving.

Comments
Krystal says
Hi! Just wondering if I’m supposed to oil the bowl when leaving it overnight for the bulk rise?
Emilie Raffa says
Krystal, I do not oil my bowls. However, you are more than welcome to if you think the dough might stick!
Taylor says
Started this dough last night and baked it this morning. I have basically the smallest amount of experience baking but just wanted to say these instructions were so easy and this was BY FAR the best tasting loaf of bread I’ve ever made. Thank you thank you thank you!
Emilie Raffa says
Fantastic, Taylor! Thanks for your feedback :)
Emily says
HI there,
Awesome recipe! I am curious why to double the recipe you double all the ingredients except the starter. Do you not need a larger bacteria colony to work on more dough? Thanks in advance!
Emilie Raffa says
Hi Emily! I use 50 g of starter for all of my standard sized loaves made with 500g of flour. I just happened to use 50 g of starter for the smaller loaf made with 250 g of flour as well. Note: for 2 standard loaves, I would use 100 g.
Aryn says
Hi Emilie, is there a reason your sourdough recipe using bread flour calls for 150g starter? How does a different amount of starter affect the end product?
Emilie Raffa says
Hi there! Simply put: it’s just a different recipe. You don’t always have to use the same amount of starter for every dough. Using more or less is personal. It depends on how much starter you want to maintain in the long run, how fast or slow you want the bulk rise to go for etc.
Sabena says
Hi Emilie,
In my second attempt, I used WW flour and AP flour (equal amounts) in making my sourdough but I noticed the bread was more dense. It is because of the WW? If so, is there a way to make my bread a bit airy and light with a few more holes inside?
Emilie Raffa says
Hi Sabena! The loaf was dense because too much whole wheat flour was added to the original recipe. Try using up to 100 g next time for better results. The more ww flour you use, the less open and airy the inside crumb will be.
Louise says
Hi Emilie! I want to add raisins to your AP sourdough recipe, but I’m not sure how much to add without compromising the bread- what would you suggest?
Emilie Raffa says
Hi Louise! I usually do combo of both raisins and walnuts, about 65 g (appx 1/3 cup) of each. So maybe double? It all depends on how much raisins you’d like in the bread. Before adding to the dough, soak the raisins in warm water (do this during the first 30 minute rest). Drain and pat dry. Add to dough before the bulk rise.
Andrew Meyer says
I just made a double batch of your sourdough dough at about 7:30 pm, but then realized I won’t be able to bake until 2-3 pm tomorrow afternoon. I placed the dough in a 36F fridge. Will it be ok if the dough remains refrigerated for 17 hrs? Should i then let the cold dough come back to room temperature before shaping and baking?
Emilie Raffa says
Hi Andrew! This happens to bakers all the time- don’t worry. It’s fine to put the bulk dough in the fridge overnight. The length of time it will last depends on what the dough looked like before it went in. Was it already double in size? Barely risen? The following day, remove the dough from the fridge and rest at room temperature if it has not yet doubled. If it has indeed doubled, you can proceed with the next step. Hope this helps a bit!
Ivan says
Here in Britain typical plain flour is only 10.5% protein.
What happens if I do a lot of slap and fold to strengthen the gluten after the half hour rest? Will that help? Or will it over-work the flour and loose the strength later?
Emilie Raffa says
Hello Ivan! Your flour will work. If it’s slightly too sticky, a dash of flour will fix the problem.
You can certainly do a slap and fold. I would do it 30 minutes to 1 hour into the bulk rise. It will strengthen the gluten (not over work the flour). The only time the dough will lose strength, assuming the gluten was developed properly, is if the dough was over proofed.
Ivan says
Thanks. I think I have had problems from over-proofing and over-hydrating.
Ivan says
And just made my first soudough that had proper oven spring, round shape, and an ear. All using a truly weird mix of flours as dictated by the Great British Coronavirus Flour Shortage. The trick was to be modest with the water and adjust until the dough was workable. Many thanks for giving us methods for making sourdough with non-ideal flours.
Emilie Raffa says
Excellent. You are well on your way!
Iliana Nunn says
Hi! I was wondering about the last shaping step. Would you be able to explain the part about the cloth lined bowl? I’m used to your other recipe where the second rise happens in the Dutch oven. Thanks!
Emilie Raffa says
Hi! Compared to the Beginner Sourdough, this dough is more wet which means it might spread during the second rise if not contained in a cloth lined bowl. Only low hydration doughs (drier doughs) can withstand a free form second rise in a DO.
Ili says
Gotcha, thought that may be why! It did spread in the DO but my DO is exactly the size of the raised loaf so it ended up being ok. I can see it would be a problem if it was in a bigger DO!
Emilie Raffa says
Ahh! Perfect! xx
Jennifer says
Wow, I love this recipe! First loaf came out great! Doubling the recipe today. My timing is a bit off, is it ok to bulk ferment in the fridge since I will be going past 10-12 hours?
Emilie Raffa says
Hi Jennifer! Totally ok to bulk ferment in the fridge. Just keep your eye on it. If it becomes over proofed, make focaccia ;)
Sabena says
Hi Emilie,
I just wanted to follow-up. My sourdough bread with Whole Foods AP flour turned out great! Total sucess. I’ve tagged you on instagram to see a photo. Thank you for the detailed instructions and explanations. Can’t wait to make my next one… tomorrow.
Emilie Raffa says
Yay! I will definitely check on IG. Can’t wait to see… if I miss it, what’s your handle?
Sabena says
ssabena6
Emilie Raffa says
Thanks :)
Eric says
Emilie,
Hi. Sorry is this was asked and answered already, but why 50g starter in this recipe vs. 150g in the beginner sourdough bread recipe (with basically the same schedule)? Does the type of flour or hydration level influence how much starter you use?
Any info appreciated. Your site has inspired me to make bread weekly now! So grateful.
Emilie Raffa says
Hi Eric! When I first stared baking, I used 150 g of starter. Over time, it was too much starter to maintain. So, I scaled down to 50 g. When paired with a long overnight rise (which is typically the baking schedule my doughs follow) a smaller amount of starter is preferred to control the rise and to avoid over proofed dough in the morning.
PS: flour type and hydration level can influence the amount of starter… but not in the case mentioned above.
Hope this helps!
Eric says
Emilie, thanks for the reply. Is there a telltale visual indicator for overproofing? What do you look for?
I had been using a long, overnight proof (67 degrees in our kitchen) with 150g of starter and getting really good results. Will definitely try lower amount to see what happens next time.
Your overnight schedule is very easy to follow and fits into our day really easily. Please keep the recipes coming!
Eric
Lisa says
Hi! I’m trying this recipe out right now and am ready to do a set of ‘stretch and folds’, however I don’t quite know what that means or how to do that. Do you have photos or a video of this on your site somewhere? Thanks!
Emilie Raffa says
Hi Lisa! Unfortunately, the step by step process is only in my book at this time. In short: about 30 minutes into the bulk rise, grab a portion of the dough, stretch it upwards, and then fold it over towards center of the dough. Give the bowl a quarter turn and repeat. Do this until you come full circle (4 times total).
Donna says
This was my first time ever trying to make bread (of any kind!) and this recipe made it so easy!!! Thank you sooooo much for such an awesome post with easy to understand and concise directions. I wish I could post a picture…. this is just awesome.
Emilie Raffa says
Hi Donna, thank you! I love it when a recipe works out, especially for first timers. Exciting. Enjoy :)
Beckie says
Question, when doubling the recipe do I not need to double the amount of Starter?
Thank you for this, sourdough is frustrating to me :)
Emilie Raffa says
Hi Beckie, you are correct. No need to double the sourdough starter in this particular recipe. When using a long overnight rise, I tend not to go over 50 g of sourdough starter (small or standard loaves) to avoid over proofed dough in the morning. Hope this helps! x
Kiki says
What is stretch and fold? I couldn’t find a way to search for it on your website. Thanks!
Emilie Raffa says
Hi there! It’s a minimal kneading technique that increases the overall volume the bread. The step by step instructions are listed in my book Artisan Sourdough Made Simple. In short: about 30 minutes into the bulk rise, you grab a portion of the dough, stretch it upwards, and then fold it over into the center. You give the bowl a 1/4 turn and then do another stretch and fold. Repeat for a total of 4 times. I might post the instructions to the blog as well for additional clarification!
Angi B says
Success! I baked a wonderful loaf of bread with all purpose flour from Dollar Tree brand lol , Not the finest flour but it came out good. There is no flour anywhere any kind:( I used a different starter. The starter that I made from your recipe was ready in 5 days, perhaps because I kept in front of the pellet stove all day:) It passed the float test so I decided to make bread, it’s bulk rising as I am typing this, I will report back if it it will be another success story!
Emilie Raffa says
Hi there! Amazing. I’m incredibly happy for you. Keep going, Angi!
Angi B says
well, second loaf was a bust, I let it bulk rise too much ;( I am trying again today. With this sub par flour the next day the bread has definitely lost it’s taste and appearance:)
Emilie Raffa says
Hang in there! It just takes practice. It already sounds like you know what to do, which is half the battle. You’ll get there :)
Stephanie says
Hi! Thank you so much for all of your helpful advice and amazing recipes. My friends and I have been sharing your content and really learning a lot from you.
I was wondering if you have measurement conversions from weight/ suggestions for those of us who don’t have a food scale (yet! mine is on the way, but I’m itching to bake before it will arrive). I know it’s not ideal, but wanted to play around with this smaller loaf while I test out my new starter and wait for my scale. Thank you!
Emilie Raffa says
Thank you so much, Stephanie! I’m going to update this for you right now. Totally understand. Stay tuned! xx
Stepphanie says
Wow! Thank you so, so much. You are so kind to do this for us and so quickly – greatly appreciated. xx
Emilie Raffa says
My pleasure :)
Emily says
Hi! Where you list the ingredients to double the recipe to make one larger loaf, you don’t double the starter. Is that correct? Just want to make sure I’m not messing anything up! :) Thanks!!!
Emilie Raffa says
Correct. No need to double the starter. I’ve updated the recipe below with a note for clarification!
Lauren says
I do not know what I’m doing wrong. Starter looks great, passes the float test. This is the second recipe of yours that after I let it ‘rise’ and I come back and it’s flat as a pancake. I weighed everything, but just can’t seem to get it right, oh well.
Emilie Raffa says
Hi Lauren! It sounds like your dough is over proofed (rose for too long). Do you happen to remember how long you’re letting the bulk rise/ second rise go for? And is it particularly warm by you? These factors can contribute to over proofed dough, which can lead to flat and dense loaves. Hope this helps!
Monica says
Hi Emilie, thanks so much for this recipe! I just made this and it was delicious! One question: Is there a rule of thumb timing for when you should use your starter for a recipe based on when you feed it? I feed mine around noon each day, so when would be a good time to bake with it? Can I adjust my feeding schedule on a particular day if I want to use it in the morning or at night? Thank you!!
Emilie Raffa says
Hi Monica! Great question. First, I would get into the habit of feeding your starter around the same time each day. Doing so will train it to rise and fall predictably. Once you’re more familiar with the timing, you’ll know how long it will take to rise (which will determine your baking schedule).
Generally speaking: For overnight doughs feed your starter in the afternoon (when planning to start mixing the dough anytime between 6-8 PM). For morning doughs, feed your starter before you go to bed the night before.
Adjust as needed! It’s flexible!
Morgan Ingraham says
Hello, I have been following your recipes and have successfully baked sourdough bread for the first time ever! My husband and I are elated. I just seem to be having an issue with the bottom of my loaves getting really done, while the rest of the crust is perfect. I was wondering does anyone have any advice to help prevent this? Thanks!
Emilie Raffa says
Hello! This is very common, actually. First, make sure your oven temperature is accurate by using a thermometer. Second, place an inverted cookie sheet on the rack directly below your baking pot (not underneath the pot itself). This will help shield the direct heat from the bottom up. See how you go with these tips!
Crystal says
Thank you so much for this recipe. It was my first time making sourdough and it turned out great.
One question I had: why do you not include kneading the dough as part of your process? Do the stretch and folds and shaping into a ball substitute for that?
How would it affect the bread if we did knead the dough?
Emilie Raffa says
Fantastic, Crystal! I barely ever knead my dough these days, in the traditional sense that is. You don’t have to knead with long, overnight rises (flour + water + time = gluten development). The hands off approach works better for my schedule.
The stretch and fold technique (which is considered minimal kneading) is an optional substitute that helps to increase the overall size of the bread. But it requires you, the baker, to hang around during the rising process.
I don’t think one way is better than the other; it all depends on who much time/effort you want to put into the finished product.
Taylor Orsinger says
Hi, I have not had luck with sourdough because its always too flat when i take it out of the oven and it never gets a good brown, and I think its because i over-proof. I’m gonna try this recipe and i will tell you how it turns out. I’m also here to gloat because my starter barely even doubles in size, but today it quadrupled! I didn’t weigh the flour and water out perfectly because someone said to add flour and water and keep mixing and adding until you get your preference. This time i put more flour than water so it was like a really thick batter and I got good results, if it’s not working for you, maybe try that.
Thank you for your time,
Taylor
Taylor Orsinger says
It turned out perfectly! I let the bread proof for as short as i could and woke up at 4:30 in the morning. I accidentally quadrupled the recipe because i doubled the part written out if you wanted to double it. haha. I put the dough in the bowls when proofing before going in the oven, whereas normally I’d just let it sit in the dutch oven. I also did the optional stretch and fold unlike the other times. I also normally use a bread flour recipes and swap out with AP flour. Since i accidentally quadrupled the recipe there wasn’t room in the dutch oven so I put it on a pan lined with parchment paper and a bowl on top of each of them trying to mimic a dutch oven. Thank you for a great recipe! I also love your sourdough cinnamon rolls (buns?).
Emilie Raffa says
Amazing! Love this! And love that it worked out for you. Now you have a ton of delicious bread to enjoy :)
PS: to avoid an early 4:30 am start time, start the dough later in the evening the night before and/or use cool water in the dough. That will help!
Catherine says
Hi! I just made a loaf and it went tragically wrong. When I did the bulk rise last night, the dough looked nice, soft but still able to hold its shape and be worked. This morning, when I went to shape it, it was so wet and sticky. I had to generously flour my counter. I really floured my proofing basket and the top of the round, but it still stuck to the basket when I flipped it out, causing the most horrible looking top. Yet, I persevered and still cooked it. The finished loaf barely rose and looked more like a sad pancake than bread. It was super dense. I tested my started before I started making it and it passed the float test, so I don’t think that was the issue. Plus, it rose well overnight.
Any tips? Is the dough supposed to be fairly soft? How do I make it workable? This seems to happen to me every time I try making sourdough so I’m beginning to think I’m the problem haha
Emilie Raffa says
Hi Catherine! Not to worry… It sounds like your dough was over proofed (rose for too long). Another possibility, was that there was too much water in the dough. Next time, try shortening the bulk rise time. You can do this by starting later in the evening and baking earlier in the morning. Additionally, you’ll want to weigh your ingredients for the most accurate results. Try these tips and see how you go!
Nicole says
My bread didn’t…rise? Maybe because when I took it out to shape I might have knocked out the air bubbles? I’m really not sure what happened hahaha. when I took it out to shape it was so sticky I couldn’t shape it at all…. that being said I’m trying out the chocolate bread tomorrow! hopefully it goes better than this one hehe
Emilie Raffa says
Hi Nicole! Have a look at this post: Why Won’t My Sourdough Rise?. There’s a ton of info in this article that you’ll find helpful :)
Nicole says
oh by the way, even though it came out pretty dense it was still yummy! so kudos to you and your recipe! Thank you :))
Emilie Raffa says
Hi Nicole! I saw your comment on another post re: weather in Singapore. It’s possible your dough was over proofed here! It rose too quickly! For an overnight dough in hot weather, start later in the evening (8 PM onwards) use cool water, and let rise in the coolest room of the house. Good luck!
Nicole says
Oof okay thanks! I might pop it in the fridge….even though my room is around 24 degrees Celsius it still might be too warm? ahhh I don’t know! anyway, if I put it in the fridge and it hasn’t risen by morning I could just wait longer once I take it out right?
Nicole Seow says
Oh. I just looked at it. It is definitely double the size now. Hmmm it’s nearly midnight here, I’m not sure if I should go out now and bake it HAHA or I might just put it in the fridge and let it deflate or something
Emilie Raffa says
Put it in the fridge to slow down the rise! x
Nicole says
I just did another loaf of sourdough bread today with olives and it came out beautifully! Took your advice on letting it rise for a shorter time and it came out wonderfully fluffy and soft! Thanks so much for your help! :D
Emilie Raffa says
Nicole, I’m so glad it worked out. You’ve got the right idea!
Liz says
Thank you for this great recipe! I really appreciate an All Purpose Flour dough – as there is little to no baking flour to be found anywhere.
Would you also feed your starter with All Purpose Flour?
Emilie Raffa says
Hi Liz! You’re welcome. Absolutely: feed your starter with unbleached ap or bread flour. That’s how I do it!
Anne Taylor says
Hi Emilie,
I have really enjoyed how you have explained everything and given such detailed descriptions, this is my first attempt. I think my starter is ready to try. Can you please give the measurements for making the bread in cups/measuring spoons? I do not have a scale and it would be especially helpful for the amount of starter, the others I can usually convert without a problem.
Thank you so much!!
Emilie Raffa says
Hi Anne, thank you! I will update the recipe with the volume measurements. Stay tuned!
Ophelia Jude says
I’ve been able to make a few loaves successfully with your great posts! So I have two starters going, one in the fridge (which I feed once a week) and one on my counter (feed daily). I’m noticing that my fridge starter, which I fed last two days ago, has some hooch forming. Should I feed it, or can it last 5 more days in the fridge? Thanks again! Addicted to your posts!
Emilie Raffa says
Hello Ophelia! Technically, when we see hooch it’s a signal to feed out starter- it’s tired, hungry and needs more food. However, it’s not an indication of death. Leaving it for another 5 days in the fridge is totally fine. The colder temperature will continue to slow down the fermentation and preserve the yeasts. xx
Kimberly says
Hi there! I have a question about timing. My starter is on a morning feeding schedule (about 6:30am). Your plan has me starting at night though and that’s typically when it’s lost all of its lift. Do I feed it twice tomorrow so that it’s ready in the evening or do I wait to feed it until the afternoon? It hasn’t been fed since this morning so that would be 30 hours or so between feedings. Thank you!
Emilie Raffa says
Hi Kimberly! I would feed it twice. Once at 6:30 AM, per usual and then again in the afternoon. If your starter is strong, and rising and falling predictably it should be ready to use in the evening for an overnight dough.
Emilie Raffa says
Hi Kimberly! Great question. I would feed it twice: once at 6:30 AM to keep it on schedule and then again in the afternoon. This should keep you on target for an overnight dough, that’s specific to your feeding schedule.
Annette says
Hi, just wanted to add another thank you for this recipe and your website. I’d always found the idea of sourdough baking daunting. But having made the starter by your instructions, and now the second loaf from this recipe, everything has turned out heaps better than u expected! The bread is perfect… so thanks again ??
Emilie Raffa says
You are very welcome Annette! Sourdough can definitely seem confusing or intimidating at first. But once you get the hang of it, you’ll quickly realize that it’s not as hard as it seems. The process is incredibly rewarding at the same time. Enjoy! xx
Emilie Raffa says
Annette, this is FANTASTIC! Thanks so much sharing your feedback. You are very welcome. Keep on baking! xx
Lisa says
I found this recipe after I accidentally used the bread flour recipe with AP flour. I made it today following this recipe and it came out perfect. Going to make another loaf tonight.
Emilie Raffa says
Hi Lisa! Excellent. Glad it worked out :)
Emilie Raffa says
Hi Lisa! Fantastic! Thrilled to hear it worked out for you. xx
Therese Bare says
Just made my first loaf! Question can I double this recipe to make 2 small loaves? Also, will this work if I add a small percentage raw wheat germ to my flour?
Emilie Raffa says
Hi there! The instructions to double the dough listed are in the recipe below (I think I’ll update the post to make this more clear!). I’ve never added wheat germ, but I don’t see why not. Let us know how it works out ;)
Chelle says
I tried your Beginner Sourdough, just took it our of the oven. It is supper yummy, but too dense. I did use all purpouse flour. So I am supper excited to try this recipe. Is there anyway to add in the olive oil to this one? I like its particular flavor add.
Emilie Raffa says
Hi there! Absolutely! Try adding 2 tsp. of oil to start… see how the dough feels. If it’s too sticky, add a touch more flour after the first 30 minute rest.
Kyla says
Hi,
I just baked this bread today and it was delicious! It ended up being a bit smaller and denser than I had expected. After the bulk rise when I took it out of the bowl, I feel like a lot of the bubbles that had developed popped and it became much smaller in volume. Could this have contributed to the issue?
Thank you!
Emilie Raffa says
Hi there! It’s hard to say without seeing the dough myself. But it’s possible the dough was over proofed (rose for too long), which can lead to dense bread with little to no bubbles. x
Geri Singleton says
Do you have a recipe for the starter?? Can sourdough be made with a mixture of whole wheat or rye? AND…..have you written a book that offers detailed instructions for sourdough making and baking?? Very new at this. Thank you!
Emilie Raffa says
Hi Geri,
See links below:
Beginner Sourdough Starter Recipe
Artisan Sourdough Made Simple
Recipes for sourdough made with a mixture of whole wheat flour and/or rye can be found in the book listed above.
Thanks!
vanessak says
Hi! I made the artisan sourdough with the all purpose flour and now that i have bread flour I’m starting back with the beginner sourdough recipe. I’m noticing a few differences at the end – in this recipe you do a first shape and then rise and then second shape and then the actual rise in the Dutch oven or proofer. In the beginner sourdough it’s just one shape and rise. Is the first specific to the all purpose flour or just a matter of technique – if the latter, what is the effect on the bread quality? Also this recipe says to dust flour on top but the beginner sourdough doesn’t. Is there any reason behind that? Thank you!!!!
Emilie Raffa says
Hi there! Great observation. Simply put: since one recipe uses bread flour and the other uses ap flour, they require slightly different techniques to benefit that particular style of dough.
The Beginner recipe, which is a dry dough, doesn’t need to be shaped twice. That’s why it does a freestanding second rise in the Dutch oven; it doesn’t usually spread. However, the AP flour dough benefits from the preshape/shape method because the dough is more wet (and this method helps to hold its shape better). It uses a bowl for the second rise to keep the dough contained.
With the dusting of the flour, this is more preference than technique. Sometimes you’ll be in the mood for a flour speckled top, and other times you’ll feel like skipping it. This does not effect the quality or overall bread. It’s just the artistic part.
Finally: the Beginner recipe on my blog was what I first followed when I started baking sourdough (years ago). Since then, I’ve streamlined the process, updating my method and ingredient amounts (more similar to the ap flour recipe). These updated methods can be found in my book Artisan Sourdough Made Simple.
Ili says
I’ve been making your beginner sourdough recipe with AP flour and it always comes out incredible! Tried this recipe today. In the oven now. Will be interesting to see how it comes out!
Emilie Raffa says
Wonderful! Glad you enjoying it! xx
Ili says
Here is the verdict!! This recipe is even more amazing for AP!! Crustier with more ‘holes’ Thanks so much!! Also wanted to say I made your cinnamon rolls which were also incredible.
Emilie Raffa says
AMAZING!!!!! Enjoy every last crumb!
Kim Gabriel says
Hi Emilie, I’ve made this delicious and easy to follow recipe of yours twice (started w the small one as a test, then graduated to the double recipe).
I have a very healthy starter and I’d like to make enough dough for 2 or 3 large loaves at a time so I can share w friends. My guess is I will have to use more starter than 50g for a double and/or triple batch- can you advise how much you’d use?
Also, my guess is I should probably separate the dough after the first test before the bulk rise, right?
Thank you so much!
Kim
Emilie Raffa says
Hi Kim!
For 2 standard sized loaves, use 100g of starter. For 3 loaves, use 150g of starter.
If you’re making the dough in one large container, separate the dough after the bulk rise. Alternatively, make the dough in 2-3 separate bowls.
Dr. PI says
I just made this today and took it out of the oven 5 minutes ago. If it tastes as good as it looks, we’ll be SO happy! Thanks for the recipe.
Emilie Raffa says
Fantastic! Enjoy! You are very welcome :)
Kristan Watson says
We loved this! we want to make a larger loaf this time. Would the cooking time be the same?
Emilie Raffa says
Hi there! The cooking time for doubling the loaf is listed in the recipe section below. Off the top of my head, you’ll do 20 minutes covered and 40 minutes uncovered. Enjoy! x
Lauren says
Hi there! I just got some starter from a friend today and have no idea what I’m doing! I fed it, let it sit for a couple of hours and popped it in the fridge as I don’t plan on baking regularly. But I’m not clear on how to prep it for baking. I’ve seen lots of things about multiple feeds over a couple of days but I’m still a bit confused. I was planning to keep a smaller starter so do you do multiple 1:1:1 feeds until it’s revived and then have to continue that without discarding to get up to the recipe amount? I know it’s only 50g here but I’ve seen many with 2-4c. Thanks so much!
Emilie Raffa says
Hi there! To prep your starter, remove it from the fridge a few days before baking. Feed it at room temperature everyday (store it on the counter at this point; not the fridge). Continue until it bubbles up and doubles in size. It’s best to feed it following the 1:1:1 ratio. Once a day is fine. You do not need to feed it multiple times.
How long will it take to be ready? Depends on the vibrancy of your starter (you’ll just have to be patient!). That’s why I recommend giving yourself a few days to get it back up and running before you plan to bake.
Regarding the amount of starter, 240 g of flat, non bubbly starter (appx. 1 cup) can grow to 2-3 cups after it’s been fed. You will have enough.
Lauren says
Thank you so much for the quick and thorough reply! Just to clarify — do you discard during the daily feedings or just let it peak and fall? And should I be keeping a portion of the starter separate — for the normal weekly feedings and back in the fridge —or do you save part after the daily feedings but before starting to bake as your ongoing starter source? Thank you again! I so appreciate your help!
Emilie Raffa says
Hi Lauren! You’ll always remove and discard as part of the daily feedings. I do not keep a portion of the starter separate (some bakers do this). I simply maintain a smaller amount overall. Much more practical for me. Experiment and see what you prefer!
Amber Harvey says
Thank you so much for sharing all of this online. You’ve helped greatly in refreshing my memory from the 3 month bread class I took in culinary school. When all this craziness with job losses and money problems are over I plan on purchasing your sourdough book. For now though I appreciate the “free” help!
Emilie Raffa says
Hi Amber! That’s fantastic! Thanks so much for the kind feedback :)
Cory Avery says
An update…
Attempt two was an amazing success! I’m pretty confident I let it bulk rise for too long in too warm a place the first time, and it over fermented. I just pulled my 2nd attempt out of the oven and it looks amazing. Can’t wait to taste it!
Thanks again!
Emilie Raffa says
Cory! I’m glad you didn’t give up! The only way is though trial and error. Thanks so much for reporting back :)
Ashley says
A week and 4 loaves later and THIS was the exact recipe I was looking for! I live at high altitude with major tempurature fluctuations so I was giving up hope with finicky starter, no bread flour and dense bread. I’m happy to report I changed nothing and it came out delicious. I started the process early in the morning, baked at night and as almost finished the loaf before bed. Thank you for giving me hope!
Emilie Raffa says
Amazing! I’m so happy to hear this! Thanks so much for letting us know, especially with your high altitude and fluctuating temperature conditions.
Manali says
Hi Emilie! Thanks so much for this post, I am learning to make a sourdough and your posts have been helpful. Wondering if this recipe can be made with Bread flour? I don’t have APF but do have bread flour. Thanks!
Emilie Raffa says
Hi there! Yes, you can certainly make this recipe with bread flour. The texture will be slightly different, but still delicious!
Simon says
Hi, I don’t have a Dutch oven, just a traditional fan oven. What temp and how long should I bake it for? So looking to baking this. With everything going on, it’s so hard to get anything but plain flour. Thanks so much. Simon
Emilie Raffa says
Hi Simon,
The temperature and baking time will remain the same.
Alternatively, you can use any baking pot with lid (that can heat up to 450 F), it doesn’t have to be a Dutch oven. What you’re looking for is steam. The lid will trap it inside. Without baking in covered pot, the crust might form prematurely which will lead to dense bread. Hope this helps!
Bernice says
Thanks for this recipe. My loaf turned out lovely (on the outside), had a nice spring, however, the inside had many fairly large air bubbles, and was not as finely textured as your photo.
My starter was very bubbly, and it had tripled in size prior to using it. I did a 12hr proof (20’c) on my counter wrapped in a tea towel.
I know my oven is a bit cool so I started out at 475 then dropped to 425.
Any trouble shooting ideas? Many thanks as your instructions were so much simpler than others.
Cory Avery says
My first attempt at this bread was a bust… :(
It rose but after the bulk rise, the dough was VERY wet and sticky. Impossible to form or work with. I think I may have left it too long in too warm a place and it was over fermented. Is it too late to add more flour after the bulk ferment?
I am curious about the water in the recipe. Has it already been adjusted, or should I have started by holding back 15 – 30g when I first mixed it to see how the consistency was. I felt it was wet and ended up adding more flour to compensate.
In the end, I’m not sure if it was over hydrated, or over fermented. I’m going to try again tonight.
Thank you!
Emilie Raffa says
Hi Cory! Oh no… sorry to hear that! Did you weigh or measure your ingredients? Sounds like there was too much water in the dough, and the type of ap flour you used couldn’t handle the increased hydration. For best results, always weigh your ingredients including all liquids. It will give you the most accurate results.
It’s best to add the flour after the initial 30 minute rest. If you add it after the bulk rise, you will completely deflate all of the beautiful air bubbles while trying to incorporate the flour. It can be done, but not without risk.
The water in this recipe has already been adjusted. In your case, adding more flour was the correct thing to do. The texture should feel soft but have a “stretch” to it. If it feels gloppy, soupy, and your hands squish right through without any resistance, it’s definitely too wet!
Hopefully this info will help you on your way!
Joanna Termulo says
Hi! I was wondering, if I can do bulk fermentation at the refrigerator? I live in a tropical country and it’s generally faster to rise and I would like to bake in the morning instead of late at night. How long can it be in the refrigerator?
Emilie Raffa says
Absolutely! If you’d like to bake in the morning: I would start the dough (the day before) in the late afternoon; rise at room temperature. Once it’s almost double in size, cover and chill in the fridge overnight. The length of time it can be chilled will all depend on when you started the dough- it will take a bit of experimenting. Hope this helps!
Brenda Lloyd says
Hi Emilie, I love your recipe! I wanted to give my 2 cents here…lol. I live in Hawaii and it is always hot (and humid). I mix my dough in the late afternoon/early evening and do 4 stretch and folds before placing my covered bowels in the refrigerator for overnight. In the morning I place them on the counter to get to room temperature and finish rising…I then finish the rest of the recipe and bake off by mid morning. Comes out great every time! Just wanted to help anyone else living in a warm, humid environment. Thank you for such a great recipe!
Leah says
Hi Emilie, thanks for your easy to follow recipes. I’ve got my starter going great guns (was tripling in size by day 3!) and hoping to make this loaf soon. A couple of questions:
1. Temperature: I live in the Australian tropics where it’s always hot and humid (probably why my starter took off so quickly) which means room temperature is rarely below 25°c (77°F). How significantly will this impact proofing time? Should I aim for minimum times, or could it be substantially less? (Need to figure out when to start).
2. Flour types: living remotely drastically reduces my flour buying options. The plain flour I have is 10.4g protein, and the only bakers flour I can buy is only 11g. Is it worth buying the 12.5kg bag for so little difference? Or will this actually make a bigger difference in bread outcomes?
Thanks so much! I really appreciate it and can’t wait for your book to arrive!
Emilie Raffa says
Hi Leah! Excellent questions!
1.) Your warmer temps will speed up the rise time significantly. You can either start the dough in the morning (to bake in the evening for dinner, let’s say). Or, start the dough as late as possible at night and use cool water to slow down the rise (to bake in the morning). Another option is to start the dough in the afternoon… once it’s almost doubled, cover and chill overnight and bake the following day. You’ll have to play around a bit to see what works.
2.) My very good friend is Aussie, and we talk about the different protein contents in our flours quite often. There is a difference, even though the percentage is minimal. Your bakers flour is similar to my all purpose flour. So for this recipe, I’d use your baker’s flour instead (is that the 12.5 kg bag you’re referring to?). However, if you only have the plain flour, I would just lower the water content in this recipe to account for the difference in protein. Go by feel, following the tips in this post and recipe below.
Hope I’ve answered your questions! x
Leah says
Thanks so much for your quick reply! I’ll give each timing a go and see what works out best. I really appreciate your advice!
Kailyn says
This is the second sourdough recipe I’ve tried was really hoping one specific for AP flour would solve my problems.
Despite having what appears to be a good starter (bubbly, floats, expands in size, toasted marshmallow texture). My dough never rises. Whyyyyyyyytyyt
Emilie Raffa says
Hi there! It could be for a variety of reasons! I’ve written a troubleshooting post will help you. Click here.
Jessica says
Hello,
I am excited to try this tonight (my starter is finally ready!) but want to double the loaf. In the text you say when doubling you double everything except the starter. However, when selecting 2x the recipe in the list, it doubles the starter. If doubling the recipe, should I use 50g or 100g of starter?
Also, is this enough starter to get a good rise? Your beginners sour dough recipe (with olive oil and bread flour) calls for 150g (not 50g!) of starter. Isn’t more starter helpful for more of a ride, especially in a lower gluten bread? Thanks so much! Can’t wait to try!
Emilie Raffa says
Hi Jessica! Thanks for your note. I’m aware of the issue (the 2x function is not working). Someone else just brought it to my attention, too! Looking into it…
To double the loaf, please follow what’s written in the recipe instead.
And yes: 50 g is plenty of starter. You do not need more for a higher rise. It’s just a matter of preference. In comparison to my Beginner Sourdough Recipe, I used to bake with 150 g when I first started out years ago; I no longer do that as I’ve found the amount to be too much to maintain in the long run.
Jessica says
Thanks so much for your quick reply! Can’t wait to bake this tonight!