No bread flour? No problem! Learn how to bake artisan sourdough bread using all purpose flour and active sourdough starter. This easy-to-follow recipe features step-by-step photos, helpful tips, and a simple baking schedule to help you create delicious, naturally leavened loaves at home. It’s light crisp and airy!
Bakers all over the world choose bread flour to create exceptional sourdough bread at home. It’s prized for its high protein and gluten content, which helps to create a lofty-high rise. But what if you don’t have any bread flour? Can you make light, airy artisan sourdough with all purpose flour instead?
In this post, you’ll find a clear, step-by-step guide to mastering sourdough with all purpose (or plain) flour with a few key adjustments. You’ll gain the tools and confidence you need to bake delicious bread every time.
All-Purpose Flour vs. Bread Flour: Key Differences
It all boils down to protein content. Bread flour has a higher protein content than all purpose flour, which affects gluten development and the bread’s rise.
I typically use King Arthur flour for bread baking. Their bread flour contains 12.7% protein, and their all purpose flour contains 11.7%. This recipe was formulated to work with King Arthur and Trader Joe’s all purpose flours, which are comparable. (learn more about choosing flour in this post).
Tip: Protein content varies between brands, so stick to one brand first to understand how it behaves. It will be your reference point for future adjustments as you continue to bake.
How to Use All Purpose Flour in Bread Baking
Swapping all-purpose flour for bread flour is not always an even exchange. Because all-purpose flour absorbs less water, you’ll need to reduce the total water in your dough to avoid stickiness. Too much water makes the dough hard to handle, which can cause flat, dense, or gummy bread- you don’t want that.
Ok, So Reduce the Water by How Much?
I typically suggest reducing the water by 15-30g to start. The range depends on the specific sourdough recipe, the amount of sourdough starter, and the flour brand you use.
You’ll have to play around with the texture of the dough, adjusting the flour/water as needed until it “feels right,” which can be frustrating if you lack experience. But stick with it: success requires practice, patience and persistence. For now, let’s focus on visual and tactile cues to guide you through the process.
How to Make Artisan Sourdough Bread with All Purpose Flour {Step-By-Step Recipe}
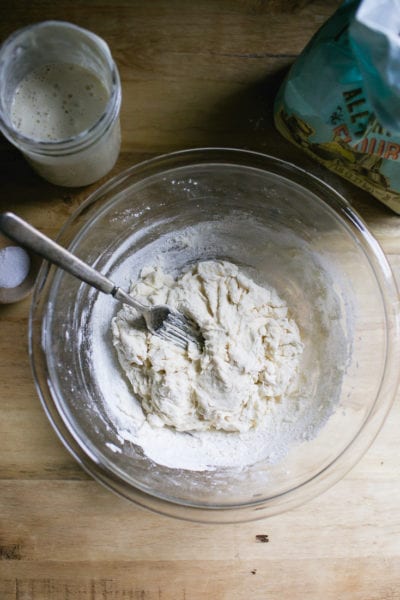
Step 1: Mix the Dough
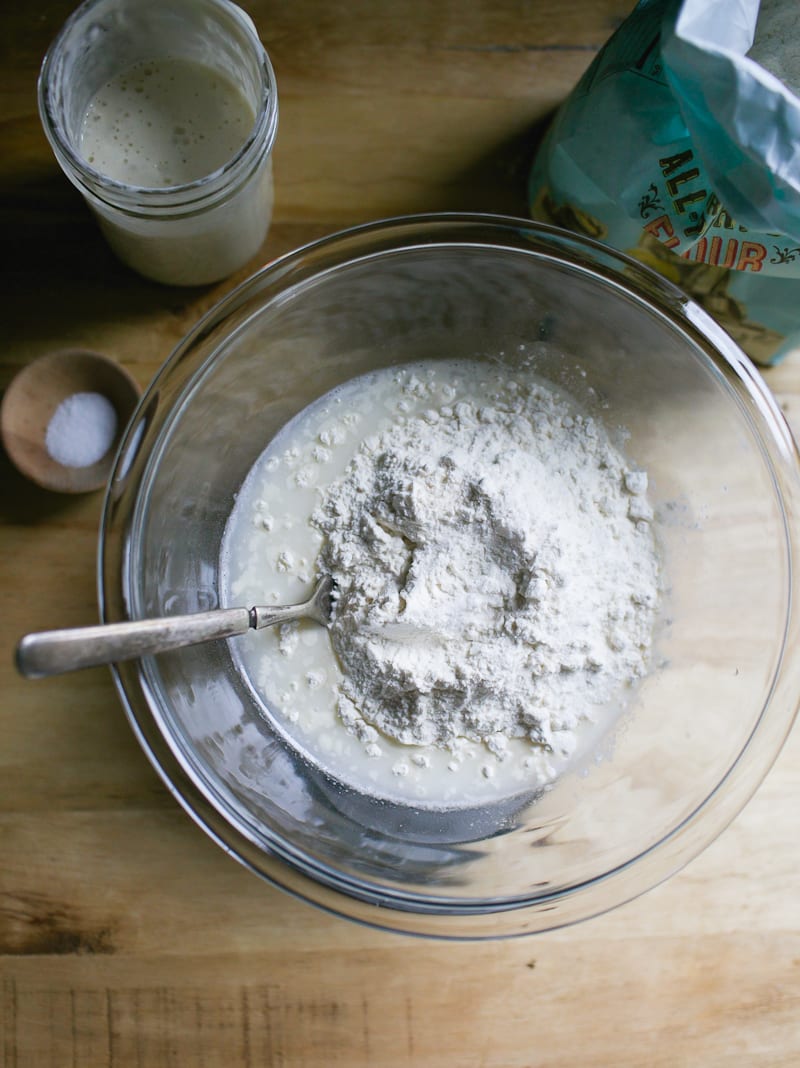
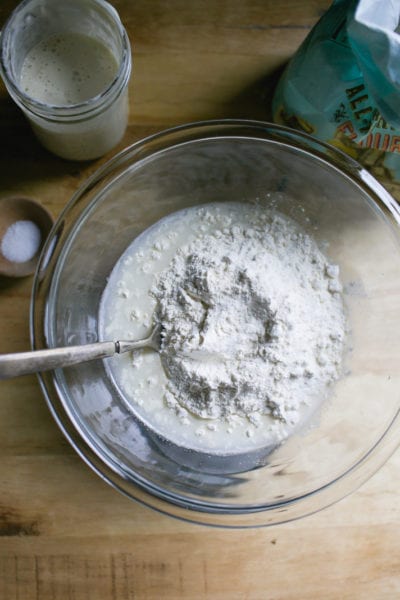
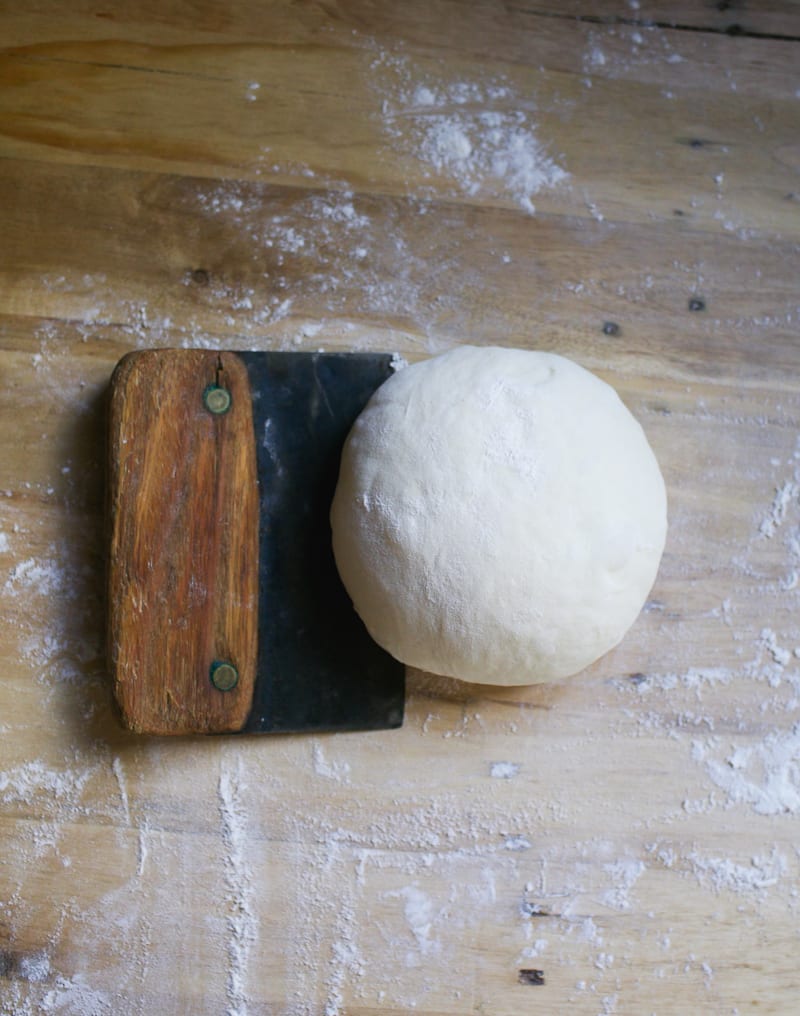
- In a large bowl, whisk your bubbly starter and water together. Add the flour and salt, then mix with a fork until combined. When the dough becomes too stiff to mix with a fork, switch to your hands and knead gently until a rough, shaggy dough forms. This texture is what you’re looking for: slightly sticky but holding together (see images above). Now, cover the bowl with a damp towel or plastic wrap and let rest at room temperature for 30 minutes.
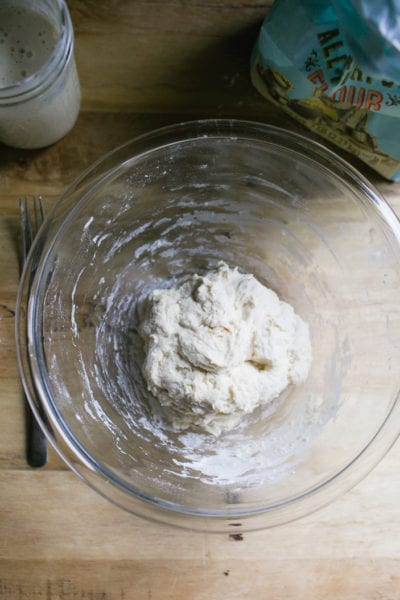
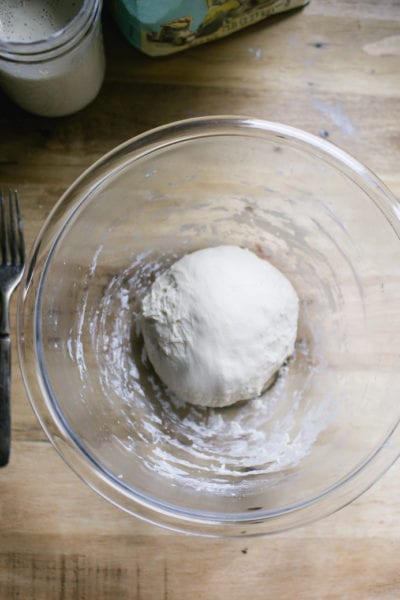
- After the dough has rested, work it into a ball. The surface will appear mostly smooth with a few tears. This is your last chance to adjust the dough’s texture before the bulk rise, so pay attention to how it feels. The dough should be soft and stretchy- not wet, overly sticky, or soupy.
A Few Notes: This recipe makes a small sourdough loaf, ideal for 2–4 people. Smaller loaves are easier to handle, especially if you’re new to sourdough baking. Instructions for a larger loaf are at the end of this post. For best results, you’ll want a digital kitchen scale to measure ingredients accurately, and a Dutch oven (or similar lidded oven-safe pot) for baking. You can find these tools in my shop.
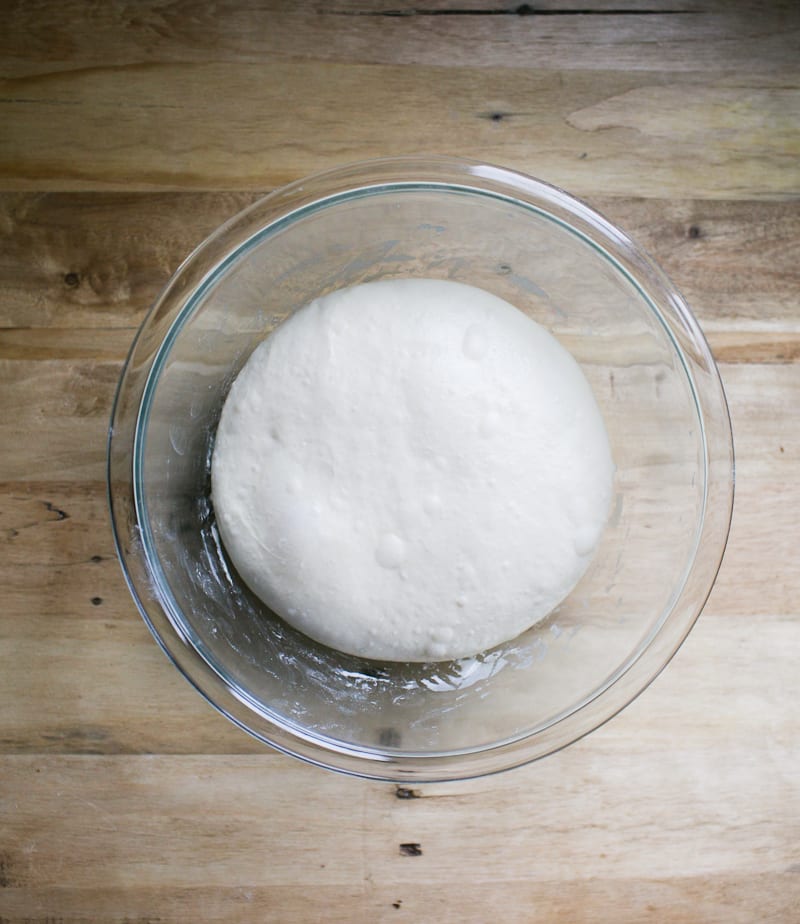
Ste 2: Bulk Rise
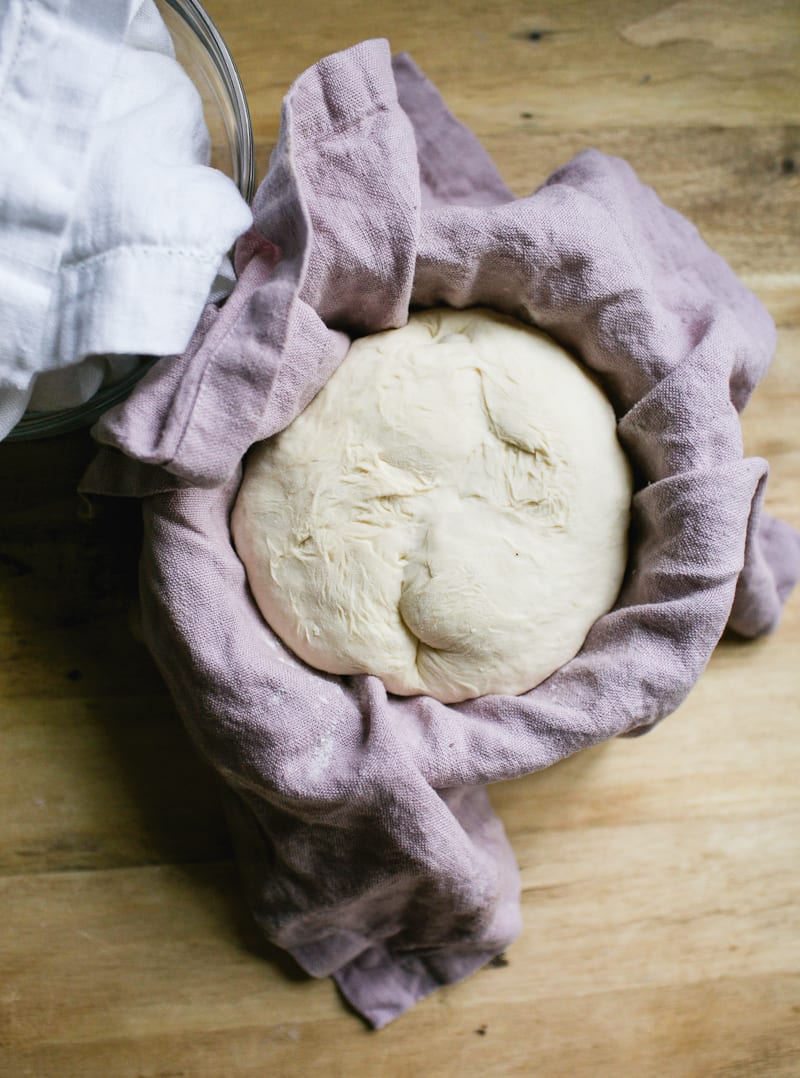
Cover the bowl and let rise overnight, about 10-12 hrs. at room temperature (68 F). The dough is ready when it has doubled in size and looks light and airy. If you’re using a standard 8-inch mixing bowl, the dough should rise to about halfway or two-thirds up the sides, which is perfect for this small loaf.
Optional: Stretch and Fold
This step, done during the bulk rise, helps to strengthen the gluten, improve structure, and give your loaf more height. Watch the video below for additional guidance. Or read the full tutorial: How to Stretch and Fold Sourdough, step-by-step.
About 30 minutes into the rise, perform your first stretch and fold:
- Gently grab one side of the dough, stretch it upward, then fold it over toward the center.
- Rotate the bowl a quarter turn and repeat.
- Continue until you’ve completed four folds (one full set).
- Repeat once more, 30 to 60 minutes later.
Step 3: Shape The Dough
- Line a small bowl with a cotton or linen cloth. Sprinkle generously with flour. Now, you’ll shape the dough twice: first to preshape it, then to build strength and structure.
- Preshape: Remove the dough onto a floured surface. Gently fold the top edge of the dough toward the center. Turn it slightly and repeat, working in a circle until the dough forms a round. Use a bench knife to flip the dough over (smooth side up), then cover and let rest for 20–30 minutes.
- Final Shape: After resting, flip the dough again so the smooth side is facing down. Repeat the folding process to form a tight round. Then flip it back over. With floured hands, gently pull the dough toward you in a circular motion to tighten the shape. Place the dough into the lined bowl, seam side up. Cover the dough with the cloth overhang.
Step 4: Second Rise
Let the dough rest at room temperature for 30 minutes to 1 hour. It’s ready when it looks plump and slightly puffed—it won’t double in size during this stage. While the dough is rising, preheat your oven to 450°F.
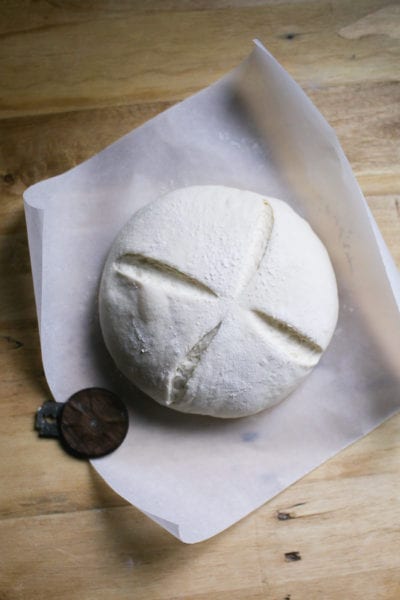
Step 5: Score The Dough
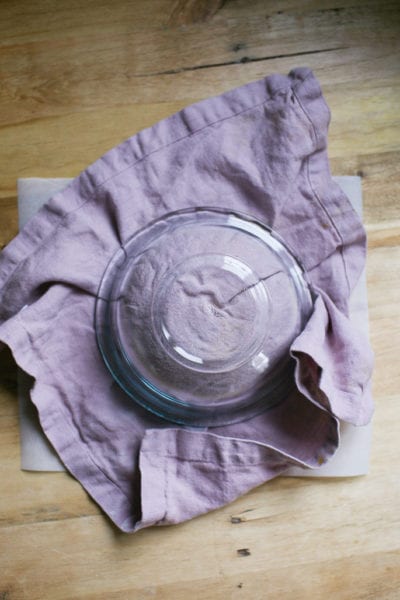
- Invert the bowl of dough onto a sheet of parchment paper. Remove the bowl and cloth.
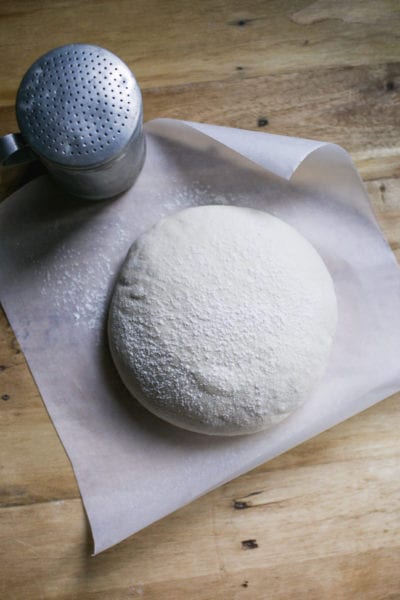
- Sprinkle the dough with flour and smooth the surface with your hands.
- Using a bread lame or a small serrated knife (I used my UFO lame), make four, quick, shallow cuts at 12, 3, 6 and 9 o’clock, turning the parchment paper as you go. Use the tip of the blade as a guide.
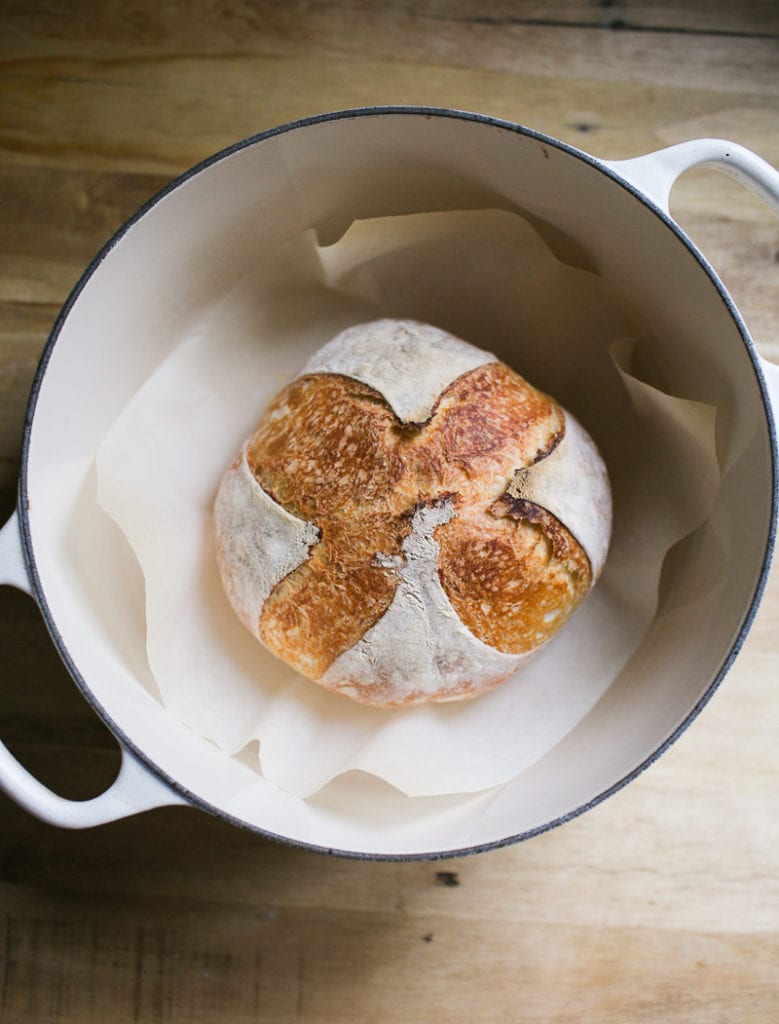
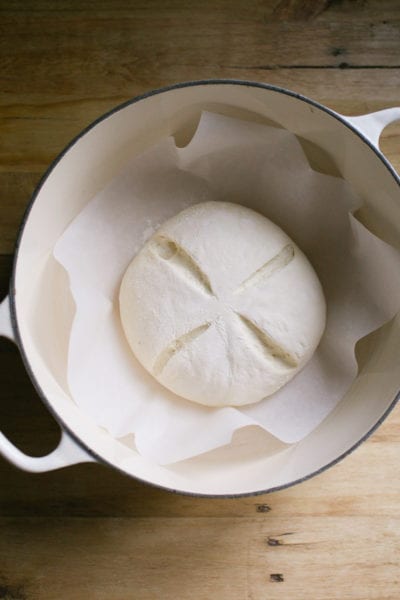
- Lift the dough (still on the parchment) and carefully place it into your Dutch oven. Cover with the lid.
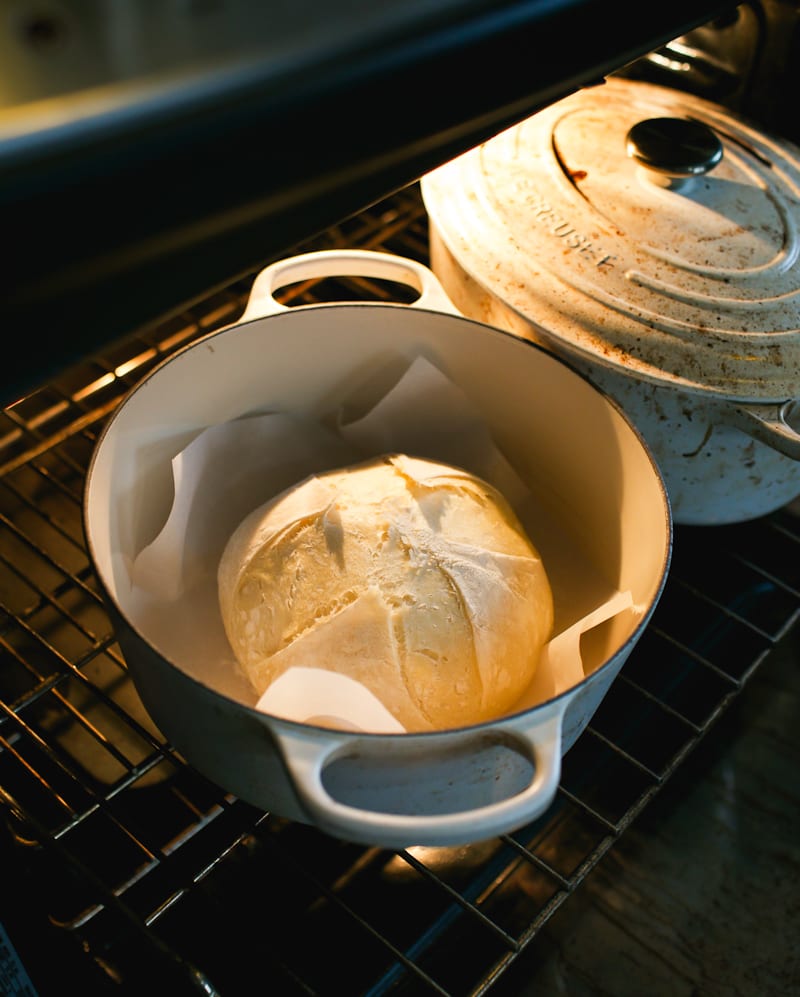
Step 6: Bake The Bread
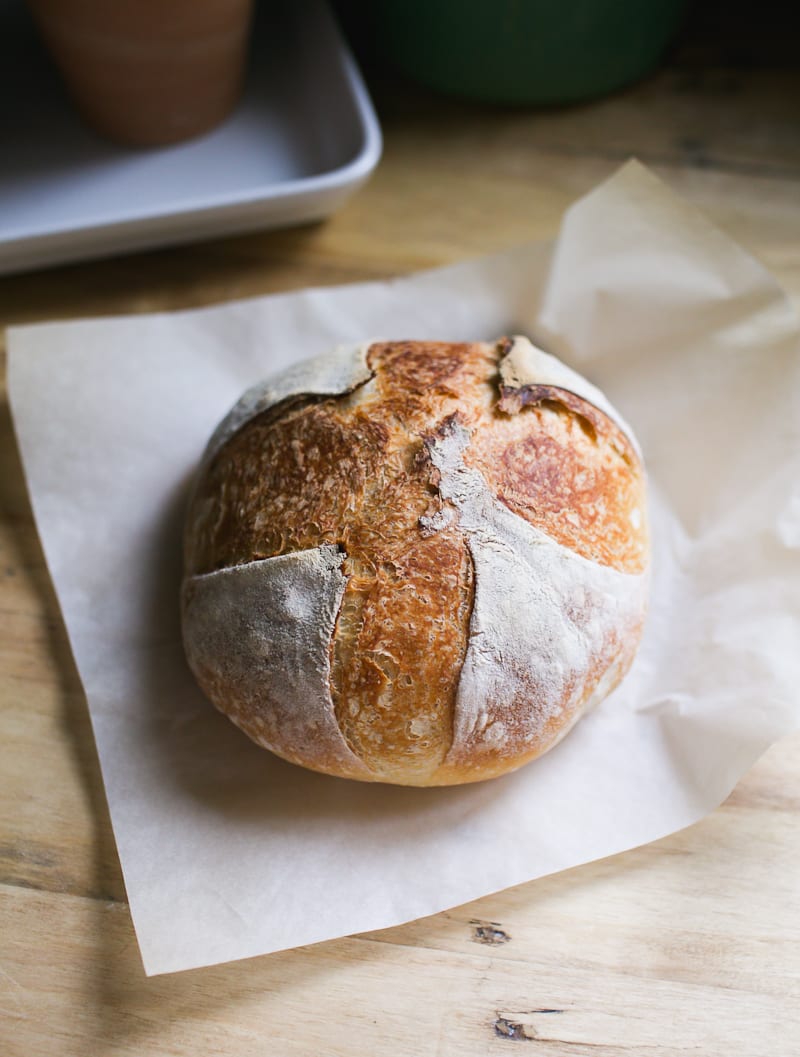
Place the Dutch oven into the preheated oven, center rack. Reduce the temperature to 425 F. Bake covered for 20 minutes. Then, remove the lid and continue baking for 30–35 minutes, or until the crust is deep golden brown. Cool on a wire rack for 1 hour before slicing.
Sourdough Bread Baking Schedule
Here’s a flexible overnight schedule that works well in most home kitchens (around 68°F). If your kitchen runs warmer, simply start a bit later to prevent over proofing the dough.
The Night Before
7:00 PM – Mix the dough and let rest (30 min)
8:00 PM – First stretch and fold (optional)
9:00 PM – Second stretch and fold (optional)
Cover the bowl and let the dough rise at room temperature (10–12 hours)
The Following Morning
7:00 AM – Check the dough (it should be doubled in size)
7:05 AM – Preshape
7:30 AM – Final shape
7:35 AM – Begin second rise + preheat oven
8:05 AM – Bake
By signing up, you agree to receive emails from The Clever Carrot. Unsubscribe at any time.

Artisan Sourdough Bread Recipe with All Purpose Flour
- Cook Time: 50 minutes
- Total Time: 50 minutes
- Yield: 1 small loaf (2–4 ppl) 1x
- Category: Sourdough Bread
- Method: Oven-Baked
- Cuisine: American
- Diet: Vegetarian
Description
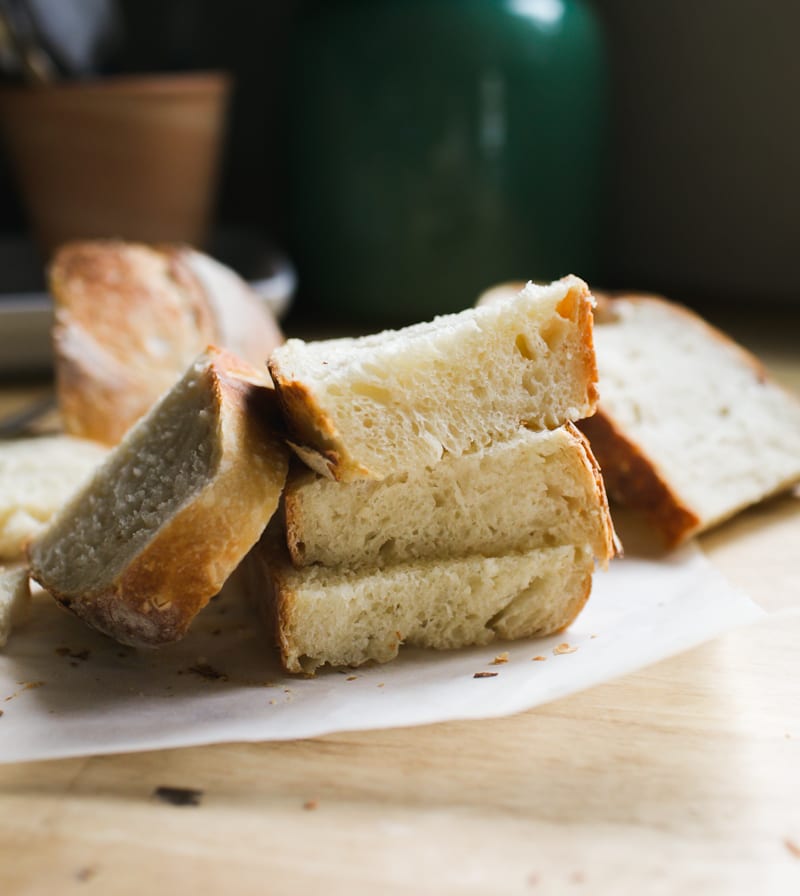
No bread flour? No problem! My artisan sourdough bread recipe with all purpose flour is an excellent substitute. This recipe yields a smaller sized loaf (perfect for up to 4 people) with a crisp crust and a smooth, interior crumb.
Notes & Substitutions
This recipe was formulated to work with King Arthur & Trader Joe’s all purpose flour, which contains 11.7% protein. If using another brand, please see my tip in the recipe below for adjusting the texture of the dough, if needed.
For accuracy and best results: please weigh your ingredients using a kitchen scale.
Ingredients
For a small loaf:
- 50 g (1/4 cup) bubbly, active sourdough starter
- 165 g (1/2 cup + 3 tbsp) water
- 5 g (1 tsp) fine sea salt
- 250 g (2 cups + 1 tbsp) all purpose flour (Trader Joe or King Arthur)
For a larger, standard size loaf:
- 50 g (1/4 cup) bubbly, active sourdough starter*
- 330 g (1 1/3 cup + 1 tbsp) water
- 9 g (1 1/2 tsp) fine sea salt
- 500 g (4 1/4 cups) all purpose flour (Trader Joe or King Arthur)
*Note: I use 50 g of starter for both the small AND standard size loaf. Using a smaller amount of starter with an long, overnight rise will help to prevent over proofed dough in the morning.
Instructions
Make the Dough
In the evening, whisk the starter and water together in a large bowl. Add the flour and salt. Mix with a fork until a stiff dough forms, then finish by hand to fully incorporate the flour. It will feel rough and shaggy, and slightly sticky. Cover with a damp towel or plastic wrap and let rest at room temperature (68 F) for 30 minutes.
After the dough has rested, work the dough into a ball. To do this, grab a portion of the dough and fold it over, pressing your fingertips into the center. Repeat, working your way around the dough until it begins to tighten.
TIP: If the dough feels too wet (and this can happen depending on the brand of flour you’re using), add 1 tbsp. of flour. Mix thoroughly by hand, adding more flour as needed. If you think it’s too dry, add 1 tbsp. of water and see how you go.
Bulk Rise
Cover the bowl (damp towel or plastic wrap) and let rise overnight at room temperature. This will take about 10 to 12 hours at 68 F. The dough is ready when it no longer looks dense and has doubled in size. If using a standard 8-inch bowl, the dough will rise about 1/2 way up the sides.
Optional Step: about 1 hour into the bulk rise, do 1 set of stretch and folds. Repeat 1 hour later. This will increase the overall volume of the bread.
Shape the Dough
The following morning, line a small bowl with a cotton or linen cloth. Sprinkle with flour.
Important: You’re going to shape the dough twice to build extra strength.
Preshape
Remove the dough onto a floured surface. To shape the dough into a round, starting at the top, gently fold the dough over toward the center. Give it a turn and fold over the next section. Repeat until you have come full circle. Using a bench knife, scoop up the dough and flip it over (the smooth side should be facing up). Cover and rest for 20-30 minutes.
Final Shape
After the dough has rested, flip it over again (the smooth side should be facing down now). Shape it again following the steps above. Flip it back over. With floured hands, gently cup the dough and pull it toward you in a circular motion to tighten its shape.
Place the dough into the lined bowl, seam side up. Cover the dough with the cloth overhang.
Second Rise
The dough needs to rise again. Rest for 30 minutes to 1 hour. The dough is ready when it looks puffy and has risen slightly, but has not yet doubled in size.
Preheat your oven to 450. Cut a sheet of non-stick parchment paper to fit the size of your baking pot, leaving enough excess around the sides to remove the bread.
Score the Dough
Place the parchment over the dough and invert the bowl to release. Sprinkle the dough with flour and gently rub the surface with your hands. Using the tip of a bread lame, small, serrated knife or a razor blade, make four shallow 4-inch long cuts at 3, 6, 9, and 12 o’clock around the dough. Use the parchment paper to transfer the dough to the baking pot.
Bake the Dough
Reduce the heat to 425 F. Bake the dough on the center rack for 20 minutes, covered. Remove the lid, and continue to bake for 30-35 minutes and golden brown (40 minutes uncovered for the larger, standard loaf).
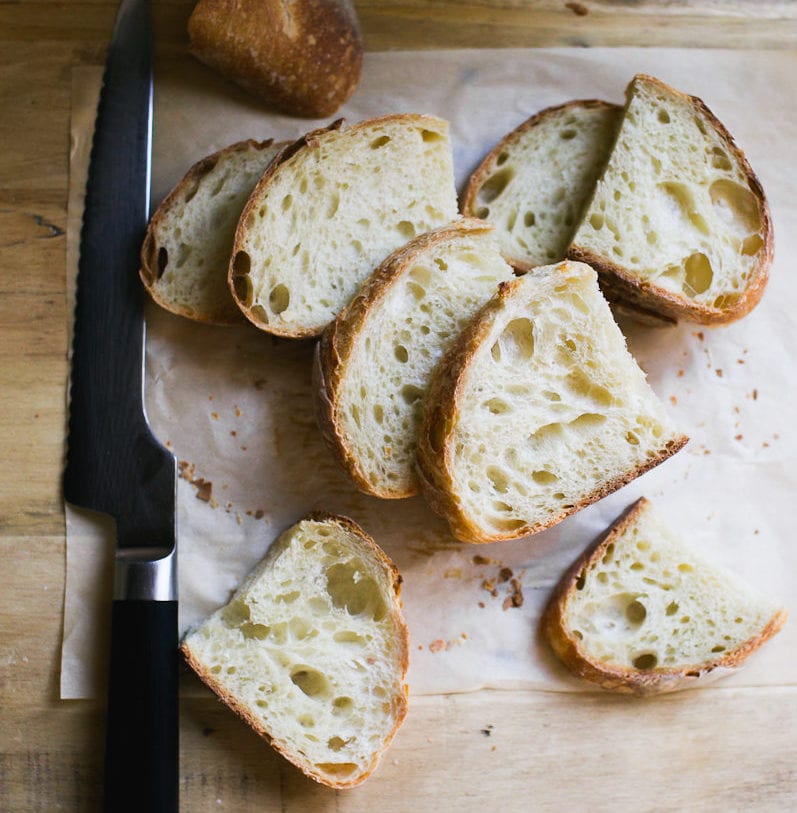
When finished, transfer to a wire rack. Cool for 1 hour before slicing, for best texture.
Notes
Sourdough is best consumed on the same day it is baked. To maximize freshness, cool completely and store at room temperature wrapped in plastic, reusable beeswax wrap or bread bag for 1-2 days. Sourdough can also be frozen, for up to 2-3 months. Defrost at room temperature and warm @ 300 F before serving.

Comments
Karen Adams says
Hi, thanks for the recipe; I can’t find any bread flour. I usually put a little whole wheat flour in my sourdough. Can Ii do that with this recipe? Karen
Emilie Raffa says
Hi there! You can, but I haven’t tested it myself (so I’m unsure of the exact amounts). Let us know if you experiment!
Ana says
I tried this recipe with 10% whole wheat flour (emmer) and it worked perfectly!
I suspect you could go up to 20ish percent without an issue, after that you might need to adjust hydration levels!
Emilie Raffa says
Sounds perfect, Ana! Thanks for sharing your tips with us. x
Charles says
Hello! On the basis of the above I swapped out 100g of AP for Whole Wheat and the loaf, while a little denser, was delicious! I would suggest going a little longer on the bake with the Whole Wheat, maybe 3-5 minutes, but otherwise perfect!
Emilie Raffa says
Great! Adding ww flour will always make bread more dense. But in the right proportions, it’s all good. Thanks for your tips!
Alp says
I am almost done with my starter and started planning the sourdough. My oven has both regular bake and convection bake settings. Which one does your recipe use? Thanks!!
Emilie Raffa says
Hi there! My recipes are formulated to work with regular oven settings.
Sabrina says
This is such an easy to follow and simple recipe with amazing results. Thank you!!! Even if you mess up at least you’re not wasting a ton of ingredients. I bake sourdough sandwich loaves every week for school lunches, but the crispy traditional sourdough has always been tricky for me. This was my best bread yet and the family devoured it in one setting. I could feasible make this everyday…. but that’s maybe not the best diet idea.
Emilie Raffa says
Hi Sabrina! Thanks for the lovely feed back and star rating- I really appreciate it. And yes, that is the idea… it’s a fabulous everyday loaf! xx
Ioana says
Love this recipe! Can I add raisins and cinnamon without making any other changes? Thanks!
Emilie Raffa says
Thank you! You can add both. However two things to consider:
1.) Soak the raisins first in warm water (or a splash of vanilla extract). They do not have to be submerged; just wet. Drain well before adding to the dough.
2.) Cinnamon can be added, but it will slow down the rise of the dough. Alot. A cinnamon swirl would be a better alternative.
Ioana says
Thank you so much! Very helpful. I made this recipe today without the cinnamon and raisins and it was perfect! Will try again with them added.
Emilie Raffa says
Wonderful! Thanks so much for your feedback! :)
Rhea says
Hello! So pleased you’ve put this recipe up with the current shortage of bread flour… My starter was ready a lot earlier in the day and I wanted to use it so I’ve started the process at 1:45pm instead of 7. What tips do you have for bulk fermentation in the fridge as opposed to outside on the counter? Or perhaps fermenting the the oven with just the light on? Would that mean I can reduce the time and bake late tonight?
Emilie Raffa says
Hi there! Great question. For a late afternoon start time, this is kind of tricky because you run the risk of over proofed dough in the morning. However, everyone’s situation is different, so a little experimenting is in order.
Here are two options:
Try doing the bulk rise at room temperature (per the instructions here), keeping an eye on it to see how fast/slow it rises. Refrigerate the dough overnight. Bake in the morning.
Or, you can ferment with the dough in a warm spot (oven light or oven set to 75-80 F then turned off immediately). It will rise faster, but I do not have an exact time. When it’s ready you can bake it.
Rhea says
You are amazing! Thank you so much for your prompt response. I’ll keep an eye on it and report back. Hope you’re having a good weekend :)
Brinna says
Rhea, which option did you go for, and how did it turn out? I’m in exactly the same place — just started my bulk rise at 15:15… oops!
Emeline says
Here the same. I just started the bulk rise at 3.30pm – any advice on which option to use? Rhea? Brinna?
Victoria says
So with the bulk rise can you put it in the fridge right away ? Or do you do your 2 folds? Can it be in fridge longer than 12 hours and last question please do you let it warm up before you do the preshape then? Thank You!!
Emilie Raffa says
For this recipe, I don’t refrigerate the dough during the bulk rise. I leave it out at room temperature overnight. If you want to refrigerate the dough during the bulk rise, do it when it has just about doubled (if you do it too early it won’t rise much). The folds would be done before the dough is chilled. You can preshape cold if you want. Bake the dough at room temperature.
Bruno says
Third attempt at this recipe and another frustrating fail. The stickiness of this dough made it impossible for me to complete the steps as written. ‘Fold the dough’ – half the dough ends up on my hands. ‘Flip over using bread knife’ – half the dough ends up on the scraper. ‘Cover with cloth’ – remaining dough sticks to floured cloth. The only remedy for this seems to be (A lot) more flour which made the dough tougher and lost all airiness. I also read to wet your hands while working the dough but that just makes it more soupy, not less. Followed the instructions to a tee, used a digital scale, etc, and I still end up with a flat gummy loaf each time. Bummer
Emilie Raffa says
Hi Bruno! So sorry to hear that! The dough is not supposed to be sticky. This means there is too much water in the dough and/or the type of flour you’re using is not absorbing as much liquid. What brand of flour are you using?
Sam stirek says
Hi! I’m so inspired by your blog. I’m a nurse trying to find a therapeutic hobby for my days I’m not at work during all this chaos. I was wondering if you sell your book directly? It’s not available on Amazon right now :( second, what size Dutch oven do you recommend for baking sourdough? Thank you for all the help and inspiration! Xo Sam
Emilie Raffa says
Hi Sam! Wonderful! That’s so awesome to hear- thanks :) Ahh… I’m out of author copies at the moment so I’m not selling directly. Regarding Amazon, the book keeps going in and out of stock daily (kind of strange…). But as of this morning it’s available again. Click here.
For Dutch oven sizes, 5 1/2 qt and up.
Geoff says
Came here to ask the dutch oven size question. Thanks!
My first ever loaf goes in the oven in about an hour.
Emilie Raffa says
5 1/2 or 6 qt round is fine.
Aja says
Hi Sam,
I don’t know if you ever found a copy, but I found one through my local bookstore who is shipping it to me. May poke around and see if there’s a small bookshop selling it?
Happy baking!
Emilie Raffa says
Yes! the books is sold out on Amazon. As of right now, you can purchase from The Book Depository with FREE worldwide shipping.
Robbie says
I love your book and have made most everything in it. I have always wondered what temperature is considered warm?
Emilie Raffa says
Hi there! Are you referring to the water temperature? Or environmental? Or both ;)
Hannah L says
Thanks so much for the AP sourdough recipe! I have the book on kindle but I couldn’t find any reference to AP flour for the low hydration loaf. Quick question, I just took out the baked loaves out of the oven so I can’t cut into them yet. What are the dimensions of the finished/baked loaves when using 500g of flour? Thanks!
Emilie Raffa says
Hi there! Unfortunately, I don’t have this info off the top of my head. Next time I bake this recipe I’ll update here. :)
Andria says
Dear Emilie,
I started my adventure with sourdough in the fall and was so overwhelmed. Similar to you, I was curious and went down the rabbit hole trying to understand all there is to it! My mom bought me your book for Christmas and I am so glad she did. It was just what I needed to happily bake and I wanted to thank you for creating your book :)
I am getting more comfortable experimenting. I would like to make some simple hamburger buns. Do you think I can use your Overnight Sourdough Bialys recipe and skip the shape and assemble step? I am thinking I’ll need to adjust the bake time too because they will be round. I’m thinking 25-30 mins. Do you think these modifications will yield a nice rise?
Emilie Raffa says
Hi Andria! You are very welcome. Glad to hear you are enjoying the book.
To answer your question: Yes! The Overnight Bialy Sourdough recipe would make delicious burger buns. Just divide and shape them into balls, and skip the assembling part. I’m not exactly sure about the bake time since I haven’t tested it myself. I would just keep you eye on them while they bake and see how you go.
Andria says
Thanks for your reply Emily! They tuned out great.
Andria says
Sorry Emilie (not Emily)!
Frances Curcio says
I have a question re: sour dough starter. When I discard 1/2 of the starter sometimes it is very bubbly do I stir it first then discard or just discard without stirring. Thank you, first time trying a sour dough starter.
Emilie Raffa says
Hi there! You can do it both ways, it doesn’t matter. I typically discard without stirring, because if there is hooch on top (dark, smelly liquid), I like to get rid of it.
Erica says
Thank you! Your explanations and the timing schedule are exactly what I needed. I can’t wait to start this tonight.
Emilie Raffa says
You’re welcome, enjoy! xx
Maree says
Cheers Emilie, going to share with my Aussie support group! Thanks for acknowledging the AP=Plain terminology. Stay safe over there.
Maree Simply Sourdough
Emilie Raffa says
Hi Maree! So happy to see you here! Thanks so much for sharing… I will pop over and say hi :) Stay safe and BIG HUGS from NY. xx
Jennifer says
Hi Emilie! This is perfect. I’m totally out of bread flour! Can’t wait to give this a try. I make your foccacia that calls for AP flour so I’m sure I’ll get the hang of this . Also, I tried ordering your book for a friend on Amazon but they are out of stock. Do you know when they will be getting more? Hope you and your family are well.
Thanks! Jennifer
Emilie Raffa says
Yay! I think you’re going to like this recipe- it’s a good one.
Re: Amazon… the stock goes up and down everyday (it’s strange!). I just checked right now (it’s Saturday, April 4th) and it’s back in stock. GO! And thanks for the support :)
Roberta says
I have gluten can I add that to all purpose to make it more like bread flour?
Gayle Jow says
You read my mind, Emilie! No bread flour to be found in stores here, so have frantically been trying to find sourdough recipes that use all purpose flour. I found a recipe online for sourdough focaccia bread — at the end the baker gave credit for the recipe to Artisan Sourdough Bread Made Simple. I could’ve just opened my cupboard, lol!
I was a complete newbie to baking homemade bread last summer, but using your Artisan Sourdough recipes, I have made the high hydration loaf, choc chip loaf, focaccia bread, cinnamon sugar waffles, and bread basket rolls, all with amazing success. I am in love : ). Thank you!
Mallory says
How would you scale this recipe back up to a larger loaf like in your book? My family can go through the 500g loaf at dinner no problem. Thank you for this recipe! We’e been living on the focaccia in your book since it only requires all purpose and we ran out of bread flour.
Jordi says
Great recipe! I really appreciate an artisan sourdough with all purpose flour
Just a question. The dutch oven was inside the oven when it was preheating?
Thanks
Emilie Raffa says
Hi Jordi! Thank you! Ahhh… that second pot in the picture? There’s actually nothing inside; I store it in my oven due to lack of space! Forgot to take it out, lol. Great eye!
Sharon Kirts says
I’ve seen advice both ways = preheat the Dutch oven or not
Emilie Raffa says
Absolutely. You can preheat or not- it’s up to the baker. I don’t preheat anymore, myself.
Paula says
My first 5 loaves were a failure because I didn’t preheat my dutch oven! Now I always preheat, so I wonder if people have made successful loaves without preheating
Emilie Raffa says
Hi there! I don’t preheat my Dutch oven and my loaves come out great! However, I know some bakers prefer to preheat which is fine too. It’s all about finding what works for you ;)
Joe Podegracz says
Thank you thank you!
I read a number of recipes online and opted for yours. Turned out to be delicious and looked amazing. Only modification I made was to the scoring – I put my wife’s initial on the loaf :)
Emilie Raffa says
Thank Joe! Sounds absolutely incredible. Bet she loved it! :)
Nicole D Regent says
Hi. I just made this recipe and it looked great up until the very final step when I took it out of my final shaping bowl on the the parchment. It seemed kind of flat and wide rather than a tight ball like in the pictures. It’s in the oven now. Hoping that I get a huge oven spring. I will let you know. But any ideas what I did wrong?
Emilie Raffa says
Hi there! I could be a few things… sounds like the second proof was a tad too long and/or there was too much water in the dough. Weigh your ingredients for the most accurate results and perhaps shorten the second rise next time? Additionally, it could be the brand of flour you’re using. Might have to decrease some of the water to get the texture right.