Learn how to make fresh homemade ravioli (from scratch!) with easy step-by-step recipe instructions & video, plus a creamy, 5-ingredient cheese filling with fresh basil. No ravioli makers or molds required. Serves 4.
Once you’ve mastered fresh homemade pasta and lasagna noodles, try making filled pasta, like homemade ravioli, to level up your skill. They’re pillowy soft, super tender, and can be stuffed with a variety of fillings!
I’ve experimented with my master pasta dough, sourdough pasta, and this vibrant green spinach pasta dough. Each pairs beautifully with my homemade pasta sauces.
But before you dive in, know this: homemade ravioli is a project. Do not attempt on a Tuesday night after work or soccer practice (or both)! It takes time and repetition. A glass of wine perhaps? Once you find your rhythm, the process becomes surprisingly therapeutic with spectacular scratch-made results.
What To Expect:
My recipe breaks down the process into 5 steps: making pasta dough, mixing the filling, rolling, assembling and cutting ravioli. You’ll have enough to feed up to 4 people with make-ahead storage options to streamline the process (yes, you can freeze them).
For the filling, I’ve made a creamy, 5-ingredient cheese filling with ricotta, mascarpone and fresh basil that’s so light and delicate, full permission is granted to lick the spoon.
How To Make Ravioli {Step-By-Step Recipe}
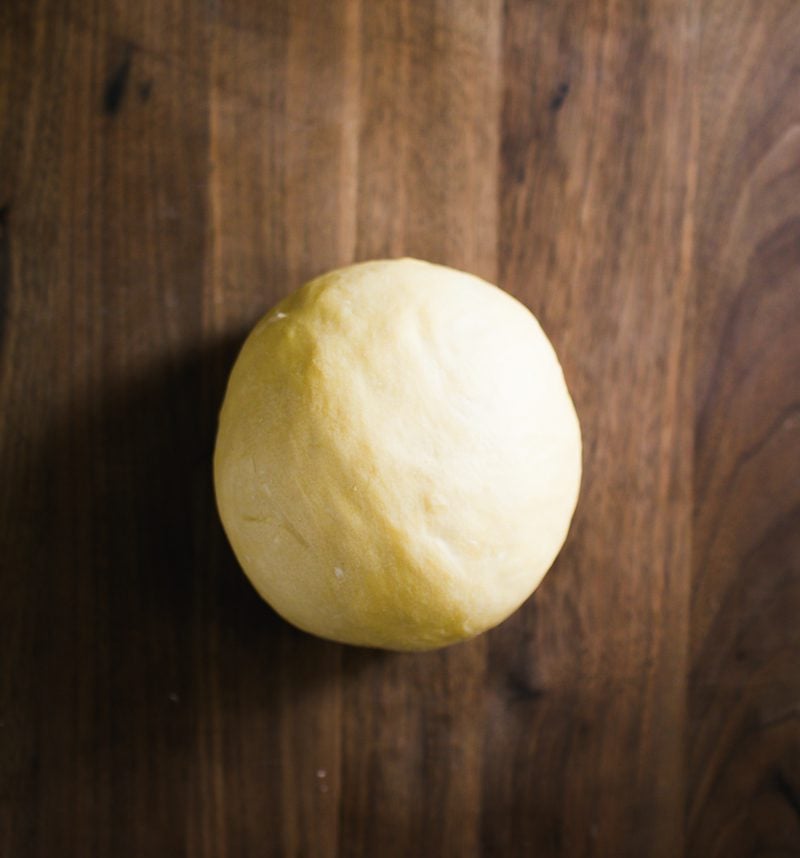
Step 1: Make Pasta Dough
There are a few ways to do it. I often use a food processor because it’s the fastest.
Add the flour and eggs to a food processor and run the machine, about 15-20 seconds to form dough. Remove onto your work surface and cover for 5 minutes (resting makes the dough easier to knead in the next step).
Then knead the dough for 1-2 minutes until its becomes a smooth ball. Don’t go crazy here; the food processor did most of the kneading for you. Wrap tightly in plastic wrap and rest for 1 hour. I use this time to make the filling.
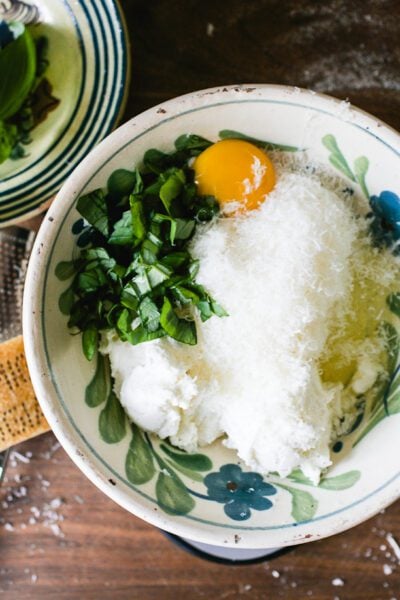
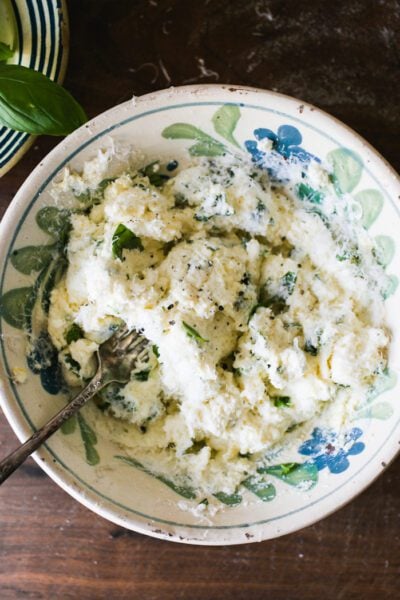
Step 2: Make Ravioli Filling
Combine drained ricotta, mascarpone, chopped basil leaves, Parmesan cheese, and egg in a bowl. Season generously with salt and pepper. Chill until ready to use. This step can be done 1-2 days in advance.
Don’t forget to drain store-bought ricotta. Skip this step, and you’ll be sorry! The ravioli filling will be watery, grainy, and seep out all over the place. I measured a whopping 80 g (3 oz) of residual liquid from a 454 g (1 lb) container of drained ricotta! Use any leftover ricotta to make my famous one-bowl Italian ricotta cake.
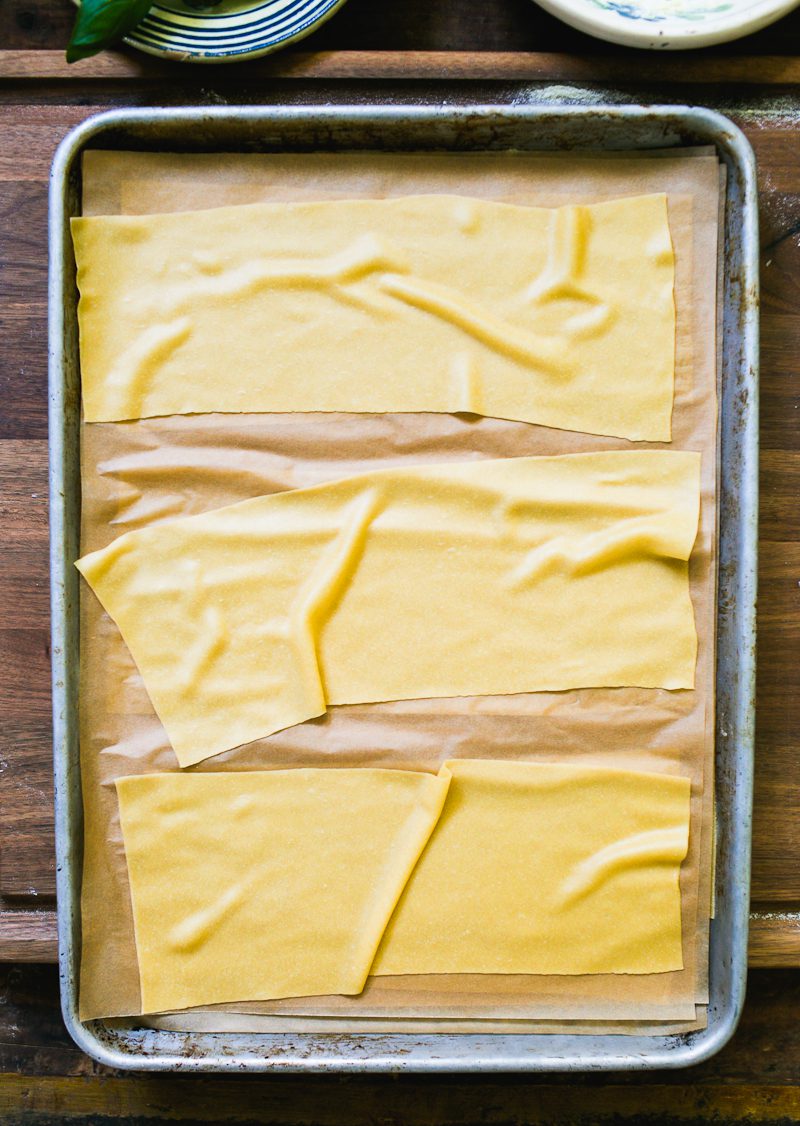
Step 3: Roll Pasta Sheets
Now its time to go back to your pasta dough. Cut into 4 equal pieces. Flatten one piece into a disc.
I have the KichenAid roller attachment, so that’s what I use to roll thin pasta sheets. You can also try a hand-crank pasta machine. I don’t recommend rolling the dough by hand with a rolling pin unless you’re very experienced. It takes time, patience, and ample space to do it.
Here’s my personal rolling formula: (3x) on setting #1. Then (2x) on settings #2-4. When you get to #5, send it through once. If you want it thinner, send it through again but be careful- the sheet might crumple up. Trim and cut into 10-12-inch long sheets.
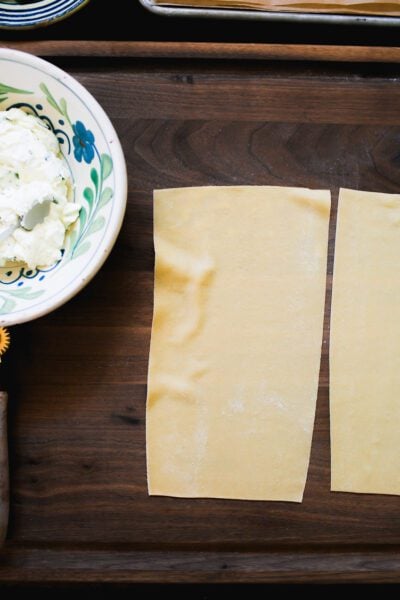
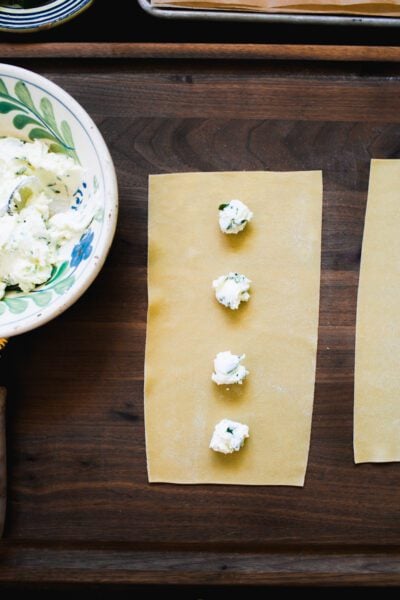
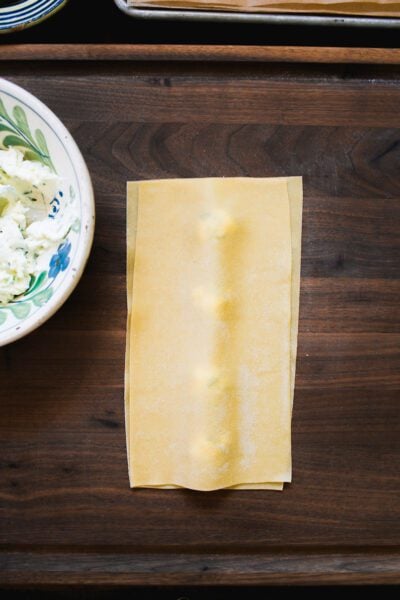
Step 4: Assemble & Fill Ravioli
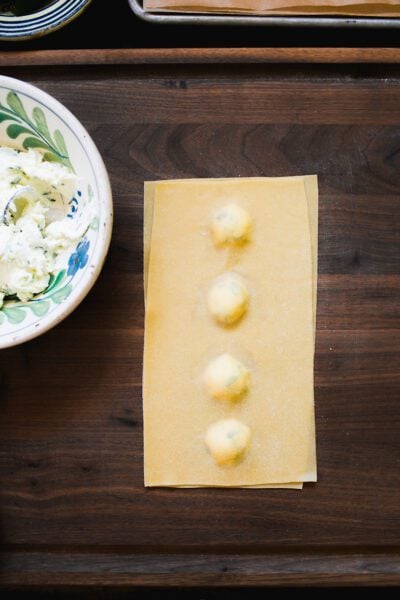
With one pasta sheet: dollop the cheese filling in rounded teaspoons down the center, spaced 2 finger-widths apart.
Place a second sheet on top, like you’re making a sandwich. Smooth the pasta sheet to get the air bubbles out. I use my pinkies. Press to seal the edges and sides.
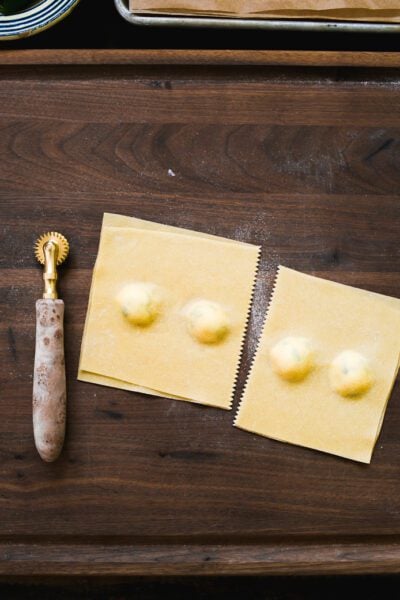
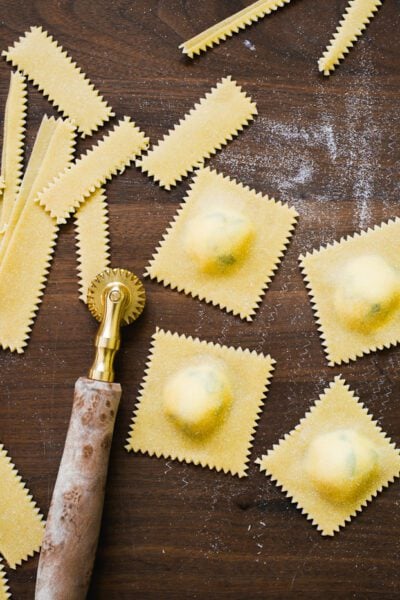
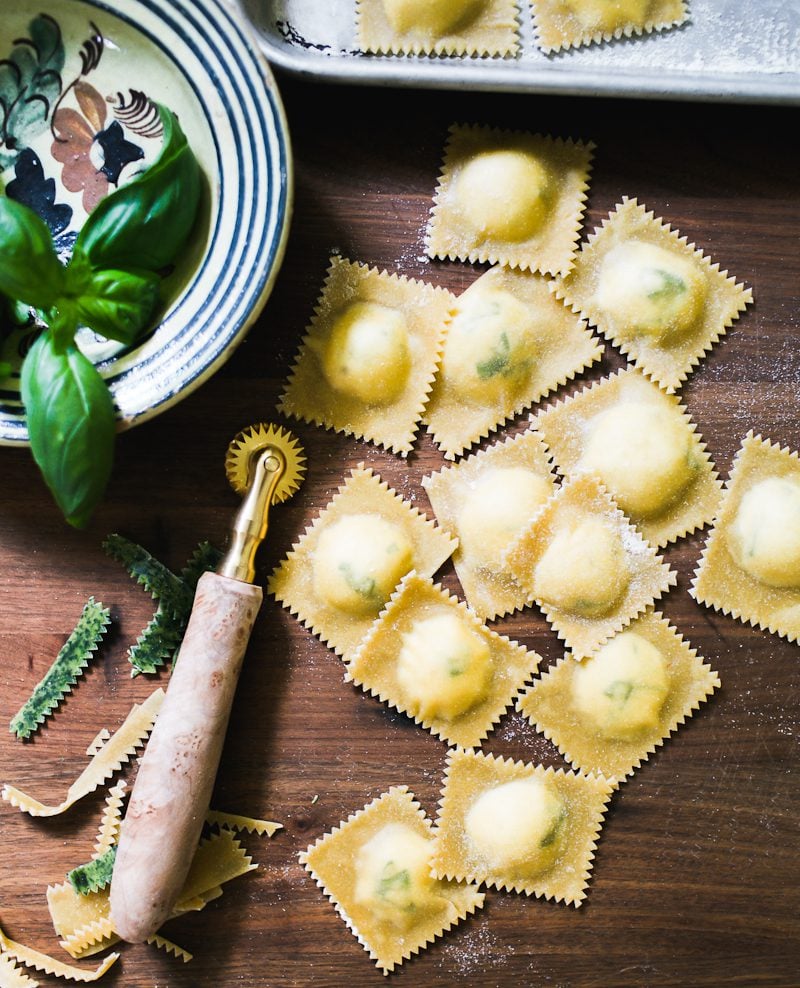
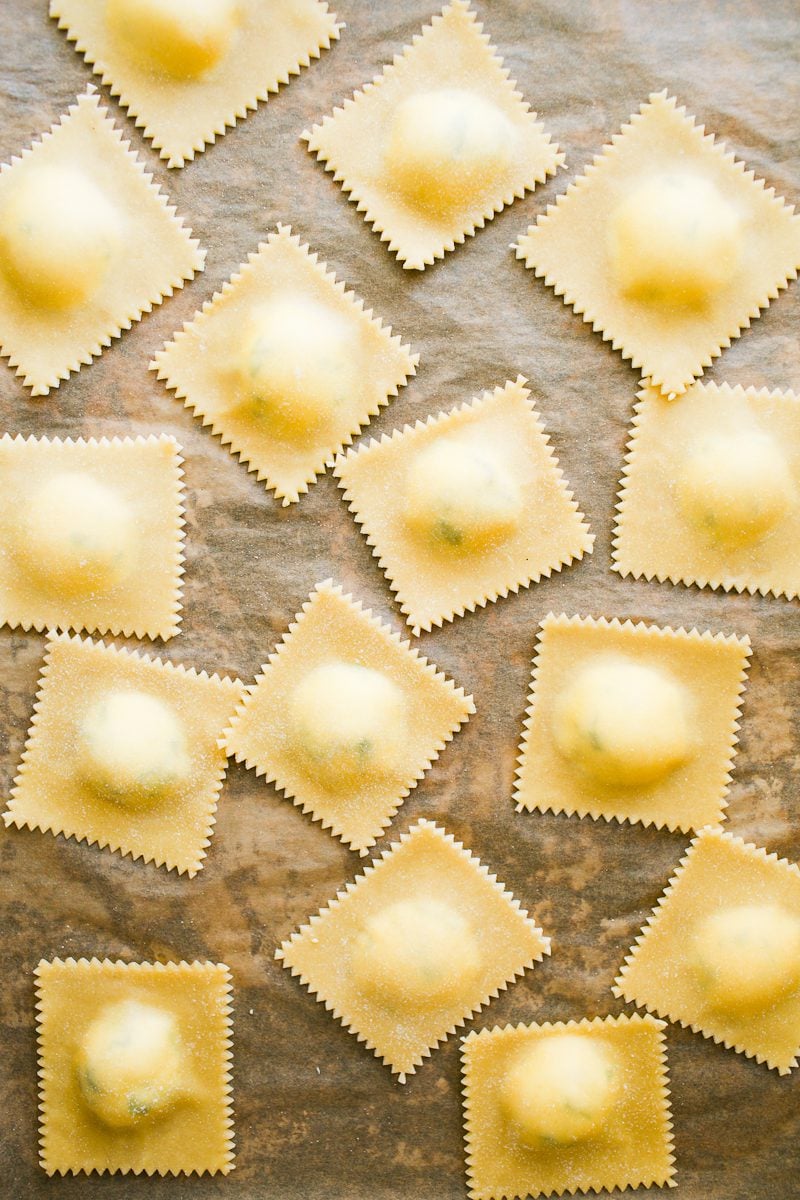
Step 5: Cut Ravioli Into Squares
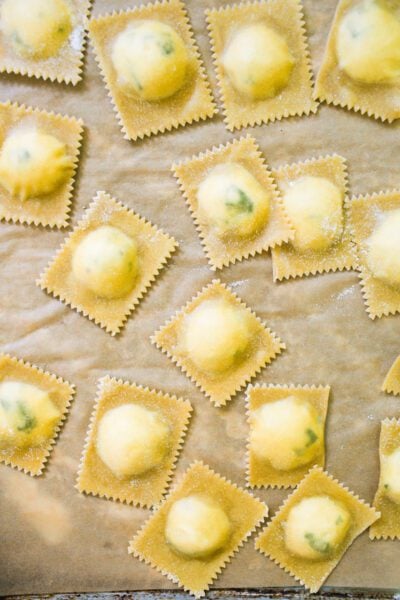
This is the fun part! Cut the ravioli in half with a ravioli cutter and then into strips. Trim into 2 1/2- 3-inch ravioli squares. You’ll end up with lots of pasta scraps (jump here for ways to utilize them). Place onto a parchment-lined sheet pan dusted with semolina flour. Keep covered while you make the the rest.
How To Store & Serve Homemade Ravioli
Homemade ravioli cannot sit around for too long. They’ll get soft and soggy. Store at a moderate room temperature for 1 hour, in the fridge (up to 4 hours) or frozen. I use this high-sided pan w/ lid for easy storage convenience. Serve with a simple pomodoro sauce or this exceptional creamy tomato butter sauce with onions.
My Sample Ravioli Cooking Timeline
- Day 1 (AM): Drain ricotta overnight & make the ravioli sauce. Both can be done 1-2 days in advance.
- Day 2 (AM): Make pasta dough, the cheese filling & assemble the ravioli. When finished, my recommendation is to freeze them immediately if not cooking within the hour. They will hold their shape perfectly.
- Day 2 con’t (PM): Cook Ravioli. Warm up your sauce. Dinner is done in under 30 minutes.
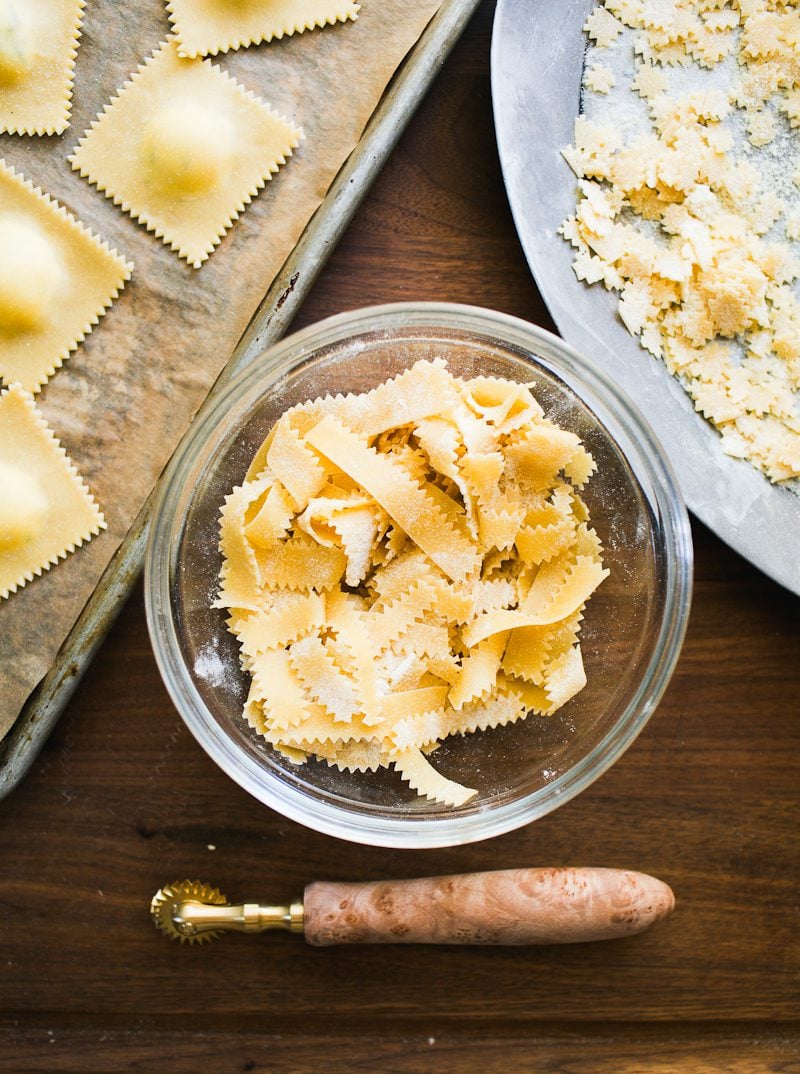
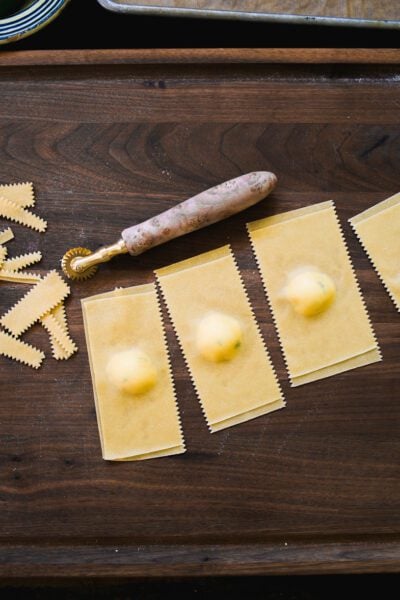
What About The Pasta Scraps?
Either discard or collect as you go, keeping them covered and separated to prevent sticking. Then use your fluted ravioli cutter to make decorative strips or little shapes as pictured above.
I dry my scraps over 2 days and store in an airtight container. When ready to cook, I toss them with my Ragù Bolognese, peas, and tons of Parmesan cheese. I love them in my Italian chicken brodo for a nourishing soup.
By signing up, you agree to receive emails from The Clever Carrot. Unsubscribe at any time.

Beginner’s Guide to Fresh Homemade Ravioli
- Prep Time: 2.5 hours
- Cook Time: 5 minutes
- Total Time: 2 hours 5 minutes
- Yield: 4 people 1x
- Category: Homemade Pasta
- Method: Boil
- Cuisine: Italian
- Diet: Vegetarian
Description
This recipe will teach you how to make fresh homemade ravioli (from scratch!) with step-by-step instructions & video. I’ve also included a creamy, 5-ingredient cheese filling with basil. For timing, my method is broken down into 5 steps: making pasta dough, followed by the cheese filling, rolling the dough into sheets and finally: assembling & cutting the ravioli. See storage options (at the end of the recipe) for chilling and freezing ravioli for future use.
Notes & Tips:
- Ravioli Yield: ~16-32 ravioli, depending on size and whether you do 1 or 2 rows of filling per sheet. It’s enough for 4 ppl as a light first course or main meal.
- Drain store-bought ricotta. Otherwise the ravioli will be soggy.
- Think ahead. Drain the ricotta overnight and pick a pasta sauce to serve. I tackle both 1-2 days in advance.
- Make space. A large, clutter-free work surface is ideal to roll out the pasta dough. Don’t overlook this tip. Pasta sheets can measure up to 3ft. long!
Ingredients
For The Pasta Dough
(1x) Fresh Homemade Pasta Dough (ingredients below) or Sourdough Pasta
- 300 g Tipo 00 Flour*
- 3 large eggs*
- 1 large egg yolk
- Olive oil*
- Semolina flour, for dusting
*Note: For the Tipo 00 flour, I recommend Molino Grassi or Caputo. For the eggs & yolk, the total combined weight (cracked) should be 185 g. Because eggs size vary, make up the difference (if needed) with olive oil. For example, if you end up with a total of 175 g eggs + yolk, you’ll need 10 g olive oil to equal 185 g. Olive oil makes the dough more soft, supple and satisfying to work with.
Ravioli Cheese Filling
- 100g (1/2 cup) drained whole milk ricotta or 100 g homemade ricotta
- 100 g (1/2 cup) mascarpone cheese
- 10 g (1/4 cup) chopped basil leaves
- 30 g (.90 oz) freshly grated Parmesan cheese
- 1 egg
- Salt & Pepper, to taste
Pasta Equipment
- Kitchen Aid Stand Mixer (w/ roller attachment) OR Hand-Crank Pasta Machine to roll the pasta dough into sheets.
- Parchment paper (6 pcs). I like pre-cut sheets for convenience
- Sheet pan
- Digital scale
- Fluted ravioli cutter
- High-sided pan w/ lid (optional)
Instructions
Before you begin: If using store-bought ricotta, drain it overnight (if using my homemade ricotta recipe, skip this step). Scoop the ricotta into a fine mesh strainer set over a bowl. Cover and chill overnight and/or up to 2 days in advance.
Step 1: Make Pasta Dough
- Add the flour, eggs and olive oil (if using) to a food processor fitted with the metal blade. Process to form dough, about 15-20 seconds. Remove to your work surface, push the dough together a few times, and cover with an upturned bowl. Rest for 5 minutes.
- Knead the dough into a smooth ball, about 1-2 minutes. Cover again, and let rest for 30 minutes to 1 hour to relax the gluten. I prefer a 1 hour rest for long pasta sheets. Use this resting time to make the ravioli filling.
Step 2: Make the Ravioli Filling
- Combine the drained ricotta, mascarpone, chopped basil leaves, Parmesan cheese, and egg in a bowl. Season with salt and pepper; mix well. Give it a taste (it should be highly seasoned). Cover and chill until ready to use. This step can be done 1-2 days in advance.
Step 3: Roll Pasta Dough Into Sheets
Set up your work station: Choose a large, clutter-free work surface to spread out (I like the kitchen table). Dust your work surface and the pasta machine/roller with semolina flour to prevent sticking. Line (2x) sheet pans with parchment paper, no overhang. Cut 4 additional pieces to layer in between the pasta sheets as you roll them out; set aside.
- Cut the pasta dough into 4 equal pieces. Working with one dough at a time, roll it into a 6-8 inch oval disc with a rolling pin. You want it the approximate width of your pasta machine.
- Send the disc through the roller attachment (or pasta machine) (3x) on #1. Then (2x) on settings (#2-4). Then 1x only, on setting #5. If you want it thinner, run it through again. If at any point the dough becomes soft, doughy, or sticky, dust with a bit of fine semolina flour. The pasta sheet is ready when it’s slightly translucent and you can see your hand underneath, about 1 mm thick.
- When finished, lightly trim the rounded edges. Cut into 10-12-inch long sheets. The sheets do not have to look perfect — you’ll trim more later on. Place onto your sheet pan and cover with parchment paper. Repeat to roll the remaining 3 pieces of dough.
Step 4: Assemble & Fill Ravioli
- Grab a pasta sheet. Dollop the cheese filling in rounded teaspoons down the center, spaced 2 finger widths apart. Place a second sheet on top, like making a sandwich. (Tip: If you’re feeling confident, you can do two rows of filling, instead of one. Two rows is not necessarily harder; it requires more practice and patience when smoothing out the pasta sheets. You will have enough cheese filling to do so, and your total number of ravioli will increase. Perhaps start with one row, and then work your way up if you’re in the mood).
- Smooth the pasta sheet with your fingertips, working around the filling to get the air bubbles out. Press to seal the edges and sides. Refer to my video for guidance.
Step 5: Cut Ravioli Into Squares
- With a fluted ravioli cutter, cut the assembled and filled pasta sheet in half, and then into strips. Trim into 2 1/2- 3-inch ravioli squares. Transfer to a parchment-lined sheet pan dusted with semolina flour. Cover with towel or an inverted sheet pan. Repeat to assemble and cut the remaining ravioli.
Storage Options:
Homemade ravioli is best enjoyed on the same day its made. If they sit around for too long, they’ll get too soft and soggy, and the filling will seep out through the dough. Cook right away, or choose one of the storage options below.
- At Room Temperature (1 hr): Arrange homemade ravioli on a parchment-lined sheet pan dusted with semolina flour to prevent sticking. Cover tightly with plastic wrap. Store at a moderate room temperature for 1 hour.
- To Refrigerate (4 hours): Arrange the ravioli as indicated above. Chill up to 4 hours. Do not refrigerate overnight. The pasta will oxidize and discolor, and the filling will create soggy ravioli.
- To Freeze (1 month): Arrange the ravioli as indicated above, minus the plastic wrap. Freeze directly on the sheet pan. Once frozen solid, transfer to a parchment-lined air-tight container. Freeze up to 1 month.
How To Cook Homemade Ravioli:
When dealing with fresh homemade pasta of any kind, I recommend cooking a test batch first to gauge the correct time. Plunge 1-2 ravioli into a pot of boiling water- make sure it’s generously salted. Cook for 3-6 minutes or more, depending on thickness (the thicker the pasta, the longer the ravioli will take to cook). Taste for doneness. When finished, gently transfer the ravioli to a serving dish with a slotted spoon or fine mesh strainer- be careful, they are delicate! Top with sauce.
To Cook Frozen Ravioli: No need to defrost beforehand; cook directly from frozen. Drop a few ravioli into a pot of boiling salted water. When the water returns to a boil, cook for up to 5 minutes or more.

Comments
Everleigh clarke says
hi, my name is Everleigh i am 9 years old and I made this recipe by myself but i got my mom to help me cut the ravioli and cook them too. this recipe is so easy but a lot of work. It tastes delicious and so flavourful. It took me a long time but it was worth the effort. I would have added something sweet to the filling but it was still really good i made my own homemade ricotta cheese for the filling.
Thx Everleigh Clarke
Terry says
Good job! I will be making it tomorrow. You have given me inspiration and confidence!
💖 Emilie loved this comment!
Oneida Davis says
Hi…I want to make homemade ravioli with a cheese filling. I have only used store bought frozen ravioli. They have very little filling. I want to bread them with Panko and deep fry them. Do I need to boil (cook) them, then freeze them before I deep fry them? Thank you.
Penelope Licitra says
Could I substitute all purpose flour if that’s all I have?
Emilie Raffa says
Hi Penelope! Yes, you can use all purpose flour. Your ravioli will still taste great.
Penelope Licitra says
Thank you so much!
Shahnawaz says
Hii , im shahnawaz working as a continental cdp chef , its very helpful to gain my knowledge though all your recipes and methods and what you make it’s wonderful 😍😍
Mae says
Substitute for mascarpone cheese
Emilie Raffa says
Hi there! I’d just use more ricotta- same amount.
Deb says
I can’t wait to make! Thank you for the easy recipe so easy to follow. Yummy ❤️ 😋
Nancy says
This recipe was very easy to follow and easy to understand thank you
Emilie Raffa says
You’re very welcome, Nancy. I’m glad you’ve found it helpful!
Oca Dive Club says
Loved this beginner’s guide! Breaking down homemade ravioli into simple steps makes it so approachable. The creamy cheese filling sounds delicious, and the tips on prep and storage are super helpful. Can’t wait to try making fresh ravioli at home—thanks for the inspiration and easy-to-follow advice!
Mary DeRuntz says
Thank you so much for the detailed directions! I’m a “newbe” and need as much detail as possible. These sound amazing! I will add to this after I make your recipe.
Yes ur recipe is a 5* for detail. I will confirm when I come back.
Emilie Raffa says
You re very welcome Mary. I think detailed directions are super helpful when it comes to making ravioli- there are a few ways to do it! Have fun with the recipe 🥰
Beth says
Can I double this pasta recipe? I need more ravioli
PM McKay says
It truly is an effort of love and something to share on a special occasion!!! I made the fast method sour dough ravioli and the pomodora sauce. I used one large can of whole tomatoes and a small can of crushed roasted tomatoes along with the scallions and garlic with garlic infused olive oil salt and pepper and rendered the sauce down until right consistency.
I didn’t have 00 so used bread flour and it worked fine. I had to make my own version of filling using what I had on hand so it was a mix of whipped cream cheese with cottage cheese and spinach and parmesan.
Your is amazingly soft and light and creamy!!! Thank you…
Emilie Raffa says
Agreed. A beautiful labor of love indeed! Your pomodoro sauce sounds delicious. I’m imagining the taste of the scallions paired with the creamy filling. Yum. Bread flour is an interesting tip; what brand did you use?
Melissa says
In your recipe for ravioli you say to let the ricotta drain overnight unless it is your homemade recipe. Do I just let the ricotta drain 10-15 minutes? Also does freezing affect the texture of the filling?
Emilie Raffa says
Hi there! Great eye. Yes, it’s intentional. When making filled pasta, the rolled pasta sheets need to stick together in order to create a seal. So for example: when making ravioli per the method in my post, the top sheet must stick to the bottom sheet otherwise the filling will spill out. The same goes for tortellini. If the pasta sheets are too dry, they won’t stick together. No seal. Now, if you ever find that your pasta sheets are too dry anyway, lightly spray the sheets with water from a spray bottle. I have a mini one that I keep handy in the kitchen. Works like a charm!
AJ says
Ha! I made tortellini yesterday from sheets that had dried out a bit, and that little sprayer came in VERY handy.
Great minds, great minds…:)
Emilie Raffa says
Agreed. Too funny… ;)
Satyavati says
Hi Emilie! I wanted to ask if you have a way to adjust the recipe to make it eggless?
Charisse says
Curious why you can’t collect the scraps and roll them into a new sheet?
Emilie Raffa says
Great question. The texture is not as soft like cookie or pastry dough; fresh pasta dough is a lot drier so it won’t stick together as easily. You could certainly give it a try though!
Carissa says
I’ve done it twice now, and there were no complaints. Just happy tummies!
Emilie Raffa says
Excellent! Thanks for circling back. I actually tried this recently, the re-rolling of scraps, and although they looked a little funny at first they ended up turning out great.🥰
Melody says
Can I make the dough in my kitchen aid mixer instead of a food processor?
Emilie Raffa says
Sure can. Use the dough hook to mix the ingredients. Once combined knead on speed #1 or #2 for about 4 minutes or longer.
Melody says
Great, thanks. I am giving it a go tomorrow, my first attempt – wish me well :-)
Mike says
1) Delicious. I have been making my own pasta for a while, but I came here for some guidance on ravioli in particular.
2) If you missed the part where you need to drain the ricotta, do not fear. Take some paper towels and a firm cutting board and you can press the liquid out of your ricotta. I pressed 30g of liquid out of the initial 100g of ricotta that I threw on the scale.
Thank you!
Stacy says
Can we bake instead of boil ravioli?
Emilie Raffa says
For best results, boil the ravioli first (and then bake according to the recipe you’re following).
Kristina says
Kristina says
These were the best raviolis I have made. The dough is delicate and the filling was perfect.
Emilie Raffa says
Thank you so much Kristina. I’m thrilled you liked the recipe!
Joe Zeff says
For those of you who don’t know, 00 flour is just Italian for pastry flour. In an emergency you can use equal amounts of AP and cake flour BY WEIGHT, not volume.
Emilie Raffa says
Joe, this is an excellent tip. Thanks for sharing.
Guylene Weister says
I don’t know how much flour and olive oil to use if I’m measuring in cup increments
Jim says
So simple recipe and great instructional video, love all your work
Joe Catoir says
Okay I saw eggs and olive oil then if the eggs didn’t weigh enough add oil I’ve oil to bring it to the correct amount. I didn’t think that was the only olive oil you put. That’s what I did and it came out fine.
Joe Catoir says
How much olive oil do you add to the dough
Emilie Raffa says
Hi Joe! It depends on the total (cracked) weight of your eggs. 185 g is the number you want. So for example, let’s say you crack and weigh 3 large whole eggs + 1 large egg yolk per the recipe, and the total weight is only 175 g. You’ll need 10 g of olive oil to make up the difference to equal 185 g.
Mary Ann says
We had a Christmas craving for homemade ravioli. Your method and recipe helped us have a wonderful dinner. The instructions and photographs helped so much. We made a mushroom filling with a pesto and browned butter sauce. So good for a first time adventure!
Thank you and happy holidays! 12-25-2022
Emilie Raffa says
Mary Ann, thanks so much for your kind feedback. This was a thrill to read on Christmas. And your mushroom pesto filling sound absolutely delicious! I’m going to make a note of the combination. Happy New Year!
Robin Wiegand says
What steps for rolling out the dough would you take for those who don’t have a pasta attachment on a kitchen aid?
Sarah says
After getting the pasta attachment for my kitchen aid I couldn’t wait to learn how to make pasta. It makes sense to use those sheets to make ravioli. Can’t wait to try this method. Your instructions are super clear and thorough as always. Love the video too!!
Emilie Raffa says
You’re very welcome, Sarah :) Yes! You can use the pasta sheets to make ravioli per the instructions here, or lasagna noodles and even decorative pasta if you have a fluted pastry wheel.