Light and fluffy gnocchi recipe? You’re in the right spot! Make fresh homemade potato gnocchi with just 4 ingredients and simple step-by-step instructions. My secret is Yukon Gold potatoes, egg yolk (only) and fine milled Tipo 00 flour for best texture and flavor. Serves 4.
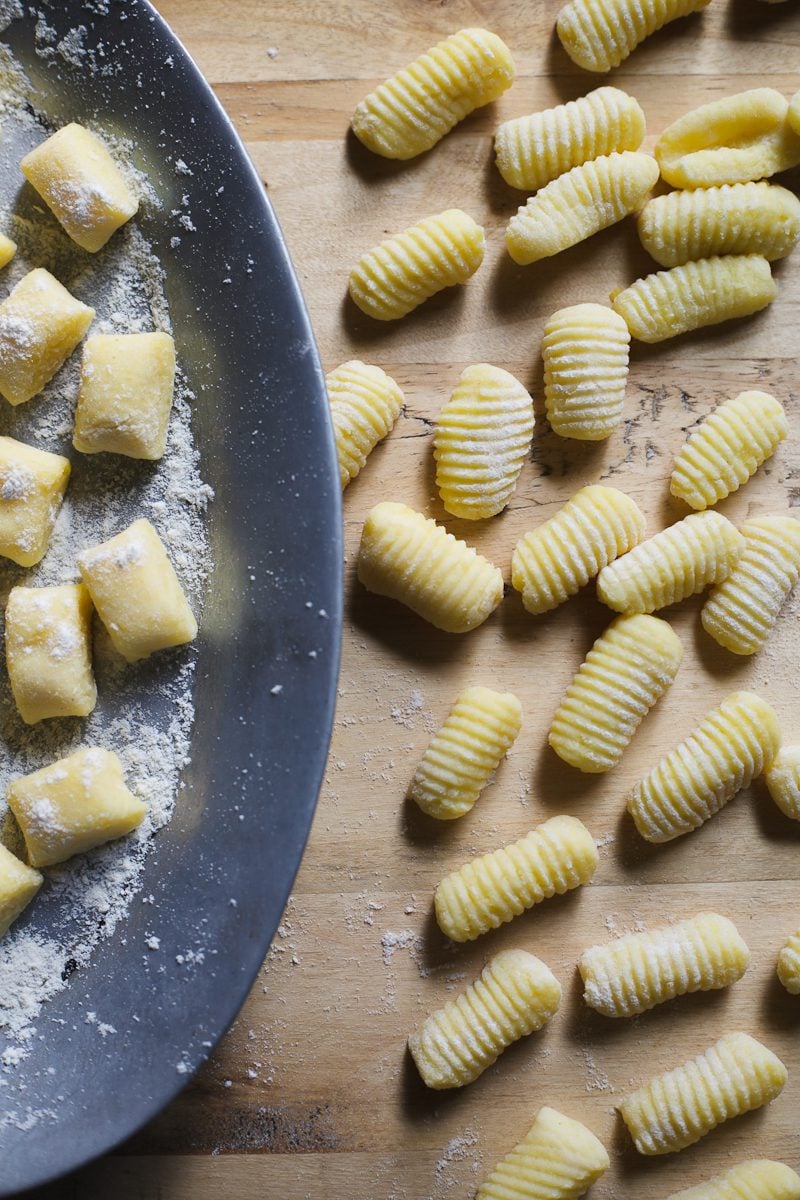
My first attempts at homemade gnocchi were too dense and chewy, and not in a good, toothsome kind of way. The defeat was crippling. Where were those light and fluffy clouds everyone raves about?!
What I eventually learned is this: gnocchi isn’t just a recipe. Just like sourdough bread or homemade pasta, it’s an understanding of ingredients, how they work together, and what the dough should look and feel like in your hands. It takes practice.
My beginner’s guide teaches exactly that. From choosing the best potatoes, the right flour, to understanding eggs (oh the controversy!) you’ll learn how to avoid dense and chewy gnocchi, so you too, can achieve light, etherial clouds.
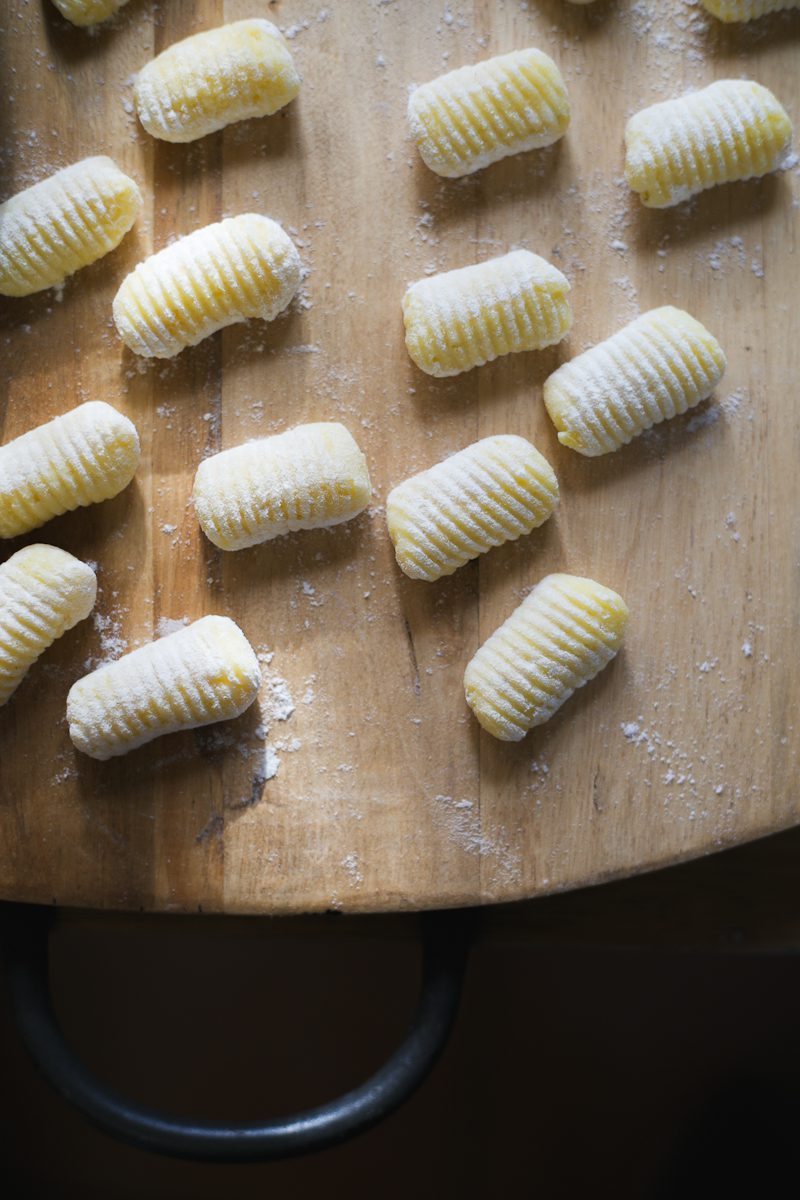
Understanding Eggs: The Great Debate
You’ll come across two types of gnocchi: with eggs or without. This is important. Eggs act as binders, holding the dough together so the gnocchi won’t dissolve into smithereens is rapid boiling water.
But oftentimes, whole eggs lead to dense and chewy gnocchi (this is from the egg whites), which is why some purists avoid them altogether. But go fully eggless, and the dough becomes notoriously difficult to work with!
The solution? Use egg yolks only, a tip I learned from Gennaro Contaldo and it really works. The yolks bind the dough without adding chewiness, producing gnocchi that are light, tender and a beautiful golden color.
How To Make Fresh Homemade Potato Gnocchi {Step-by-Step}
Step 1: Cook & Rice The Potatoes
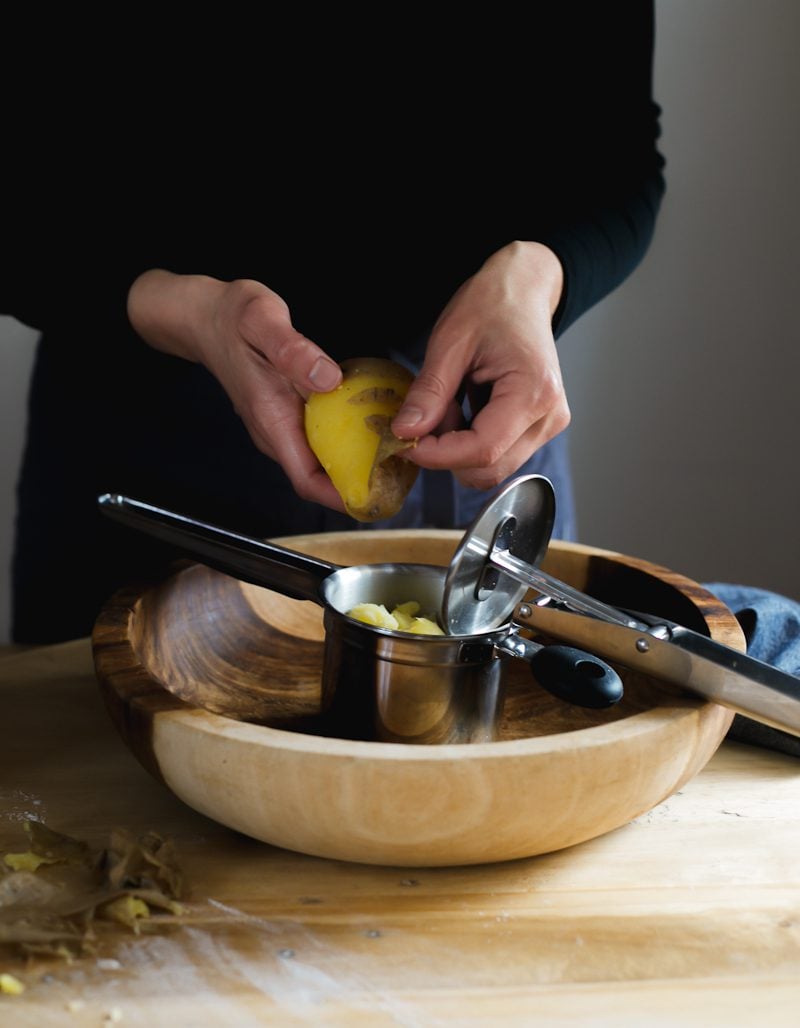
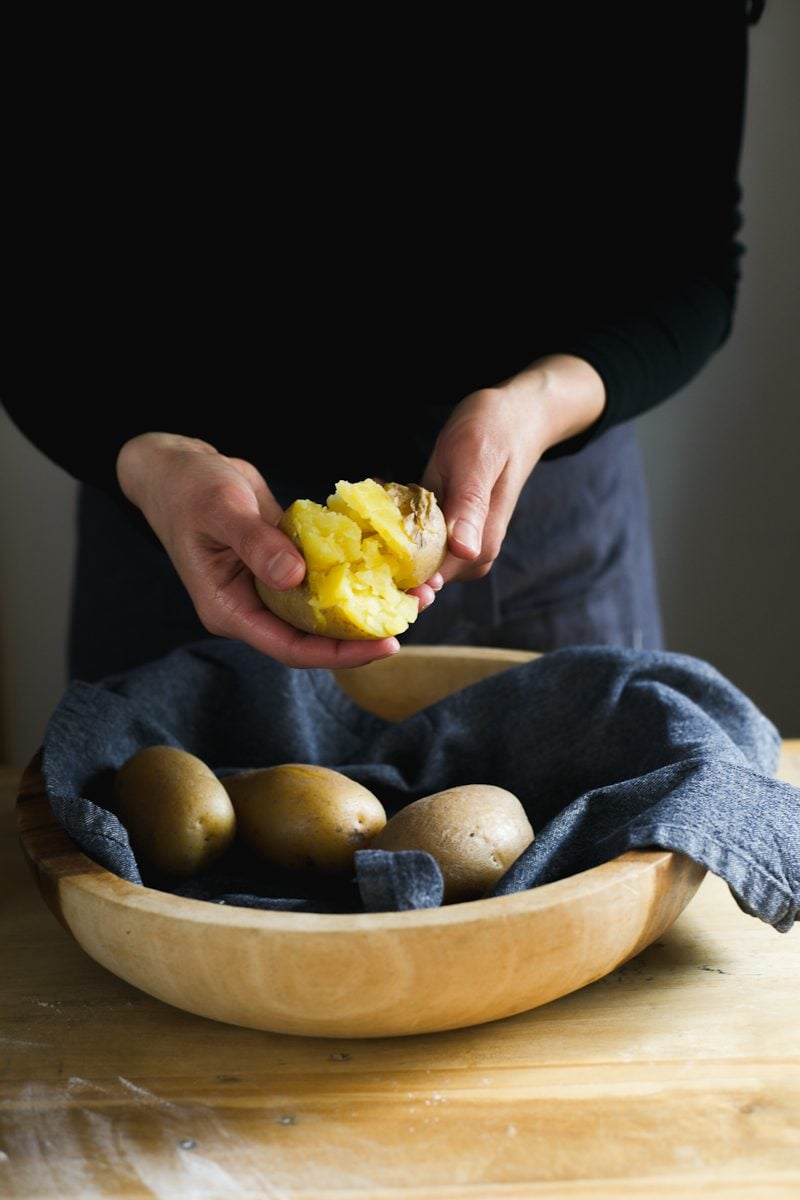
To start, boil the potatoes, skin on, until tender. I recommend Yukon Golds over floury Idaho or Russet potatoes. They’re creamier, semi-waxy, and do not retain a ton of moisture. You want that for gnocchi. Stick a knife in one of them to check for doneness; it should slide right out. Drain, dry, and remove the skins while still warm.
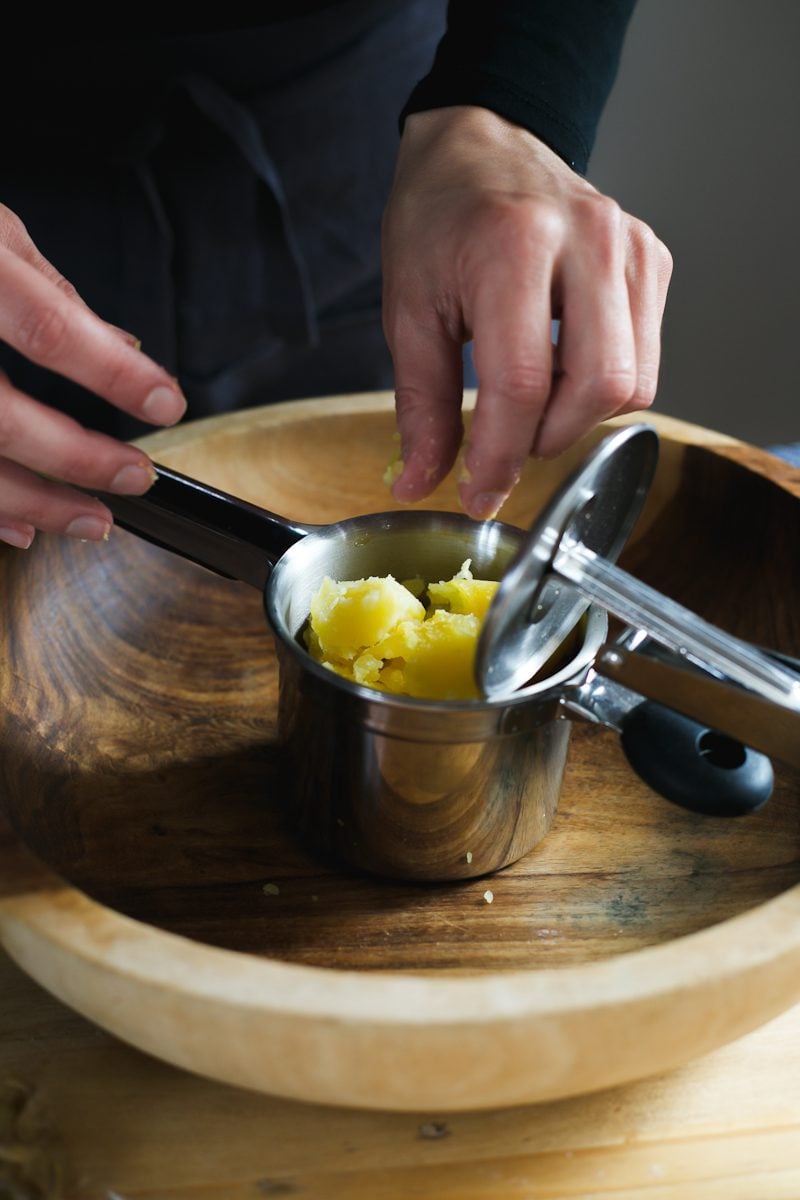
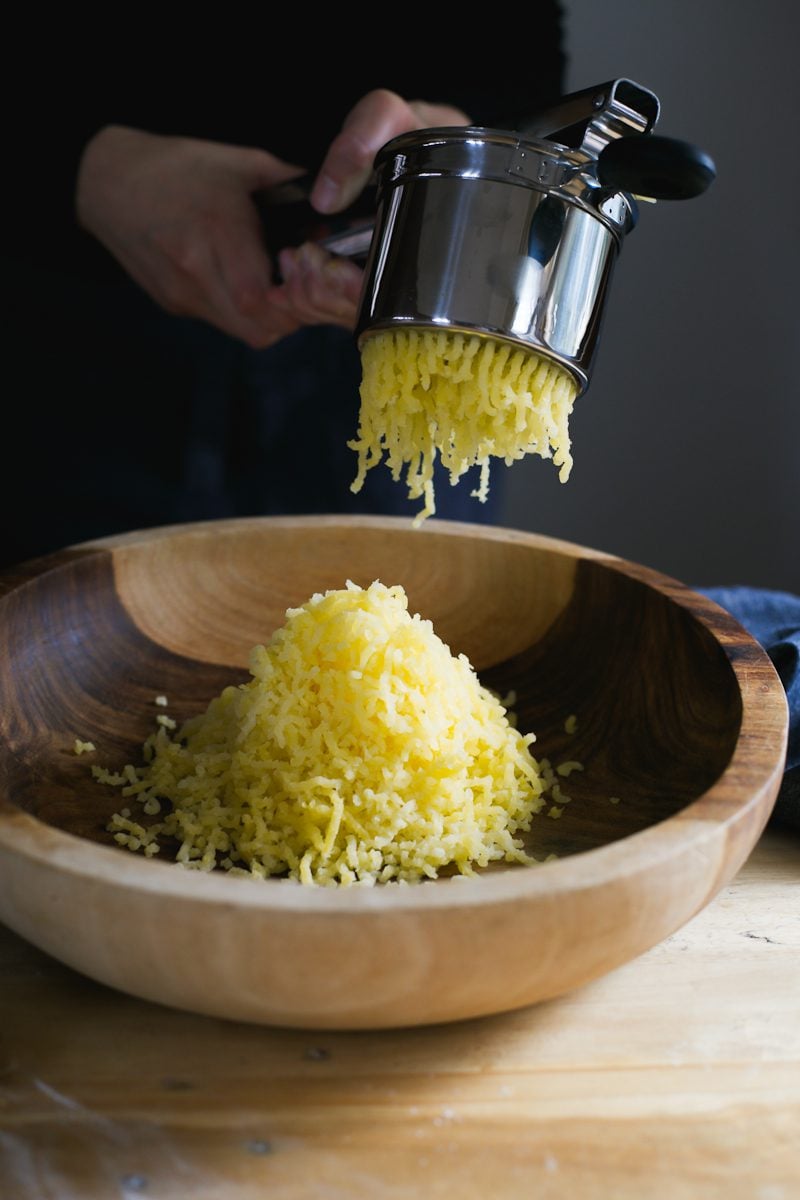
Rice your potatoes directly over a large bowl. Yes, you need a potato ricer if you want lump-free potatoes. Alternatively, use a food mill or mash gently with a fork (if you have the patience for that).
Step 2: Mix the Dough
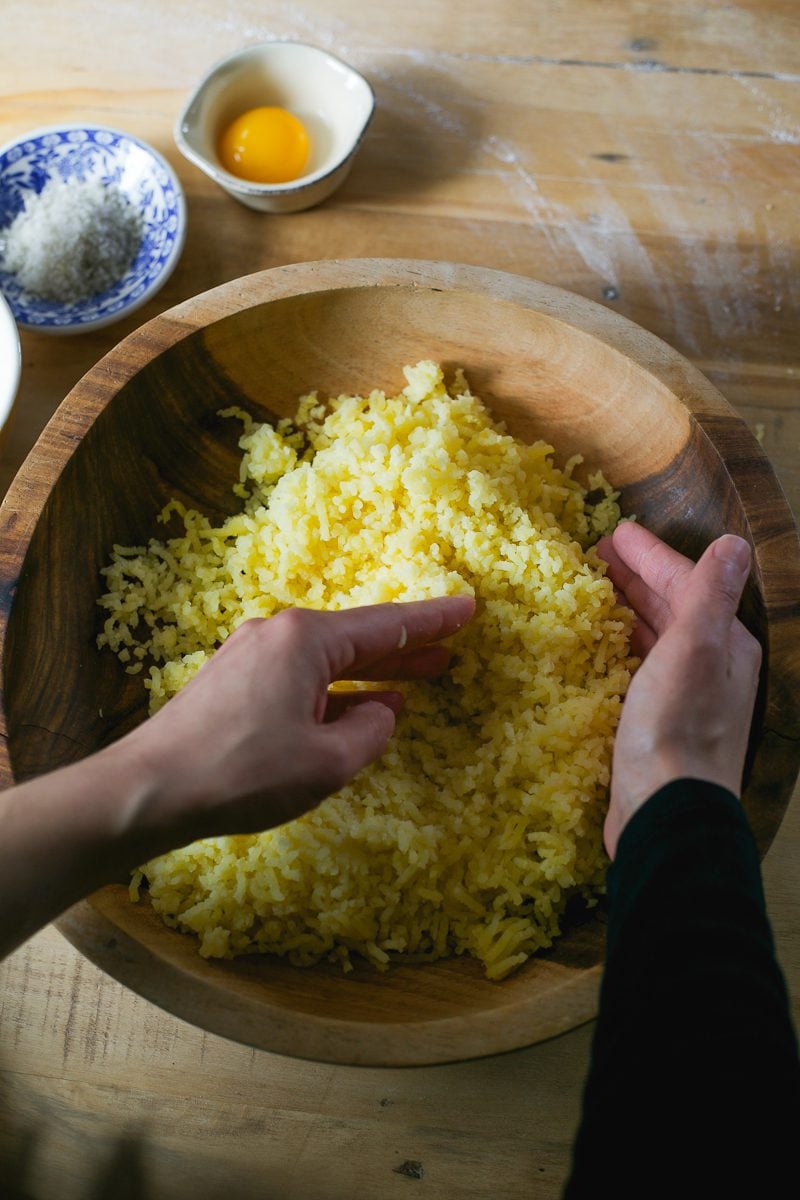
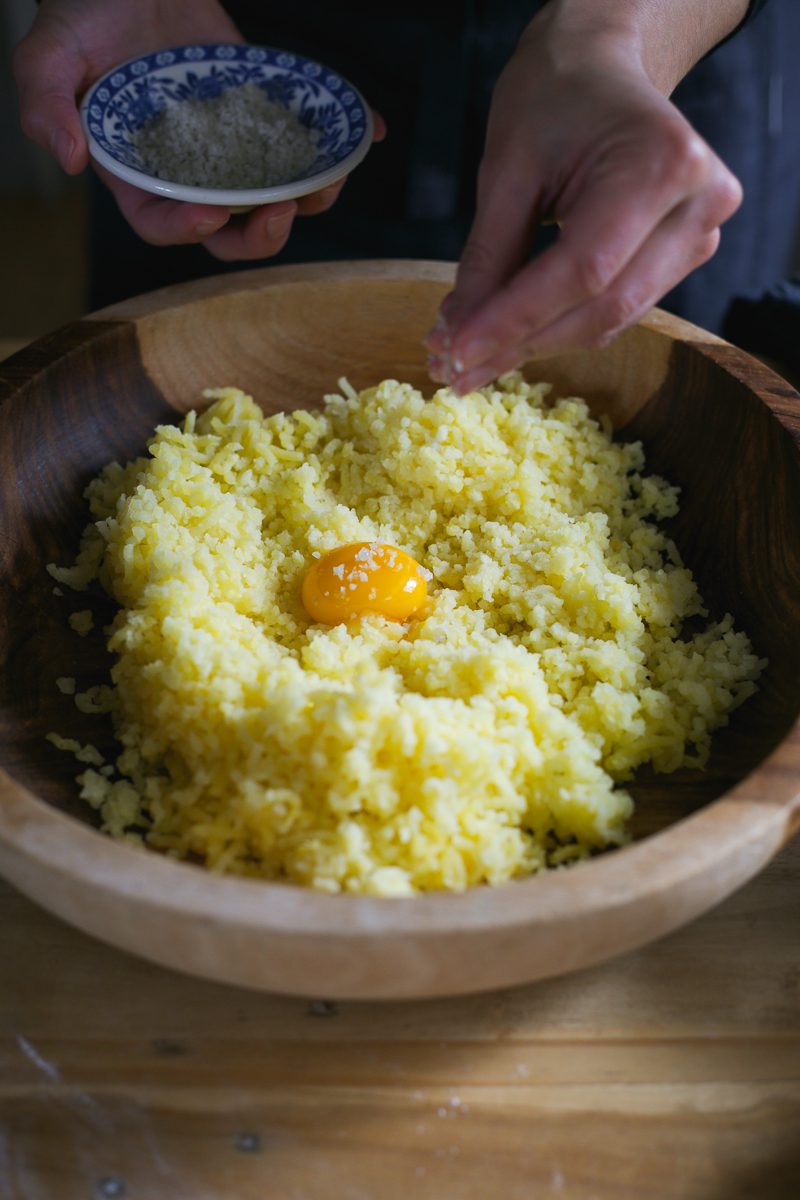
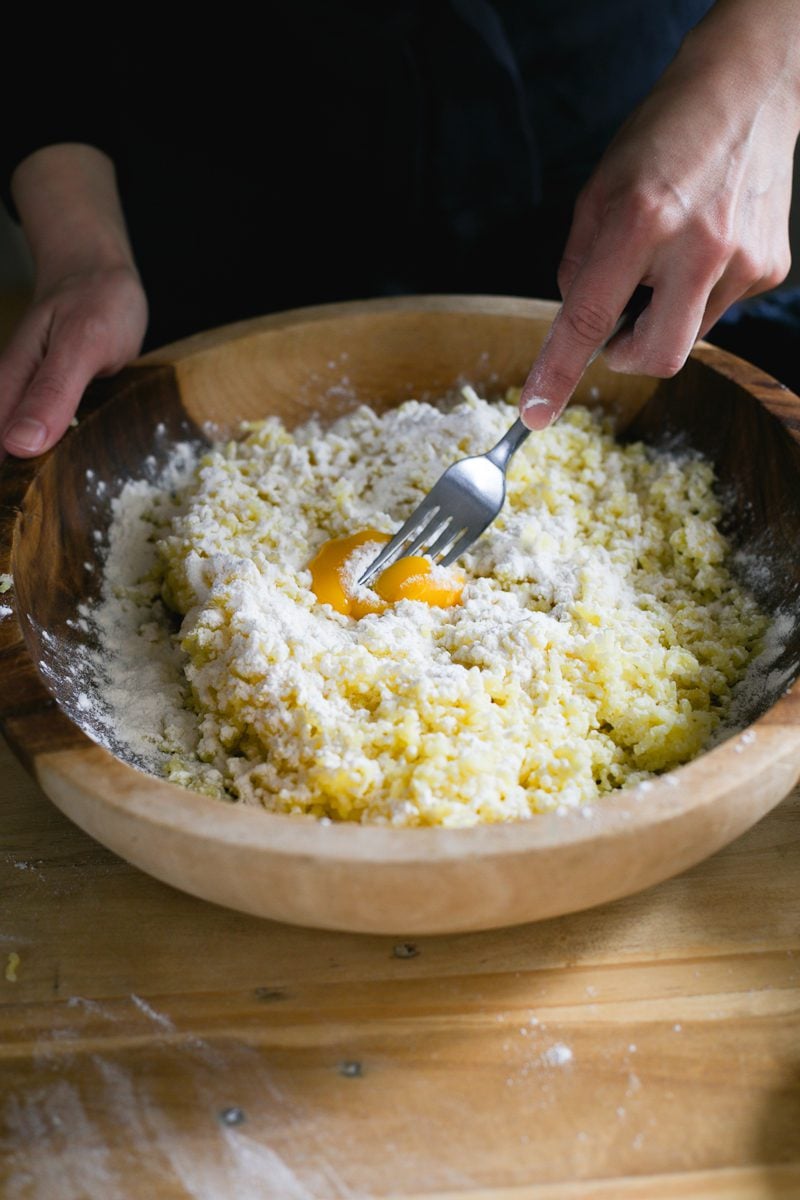
Now, form a well in the center of the potatoes. Add the egg yolk, salt, and sprinkle some of the flour on top. I use Italian 00 flour, which is a fine-milled soft wheat flour.
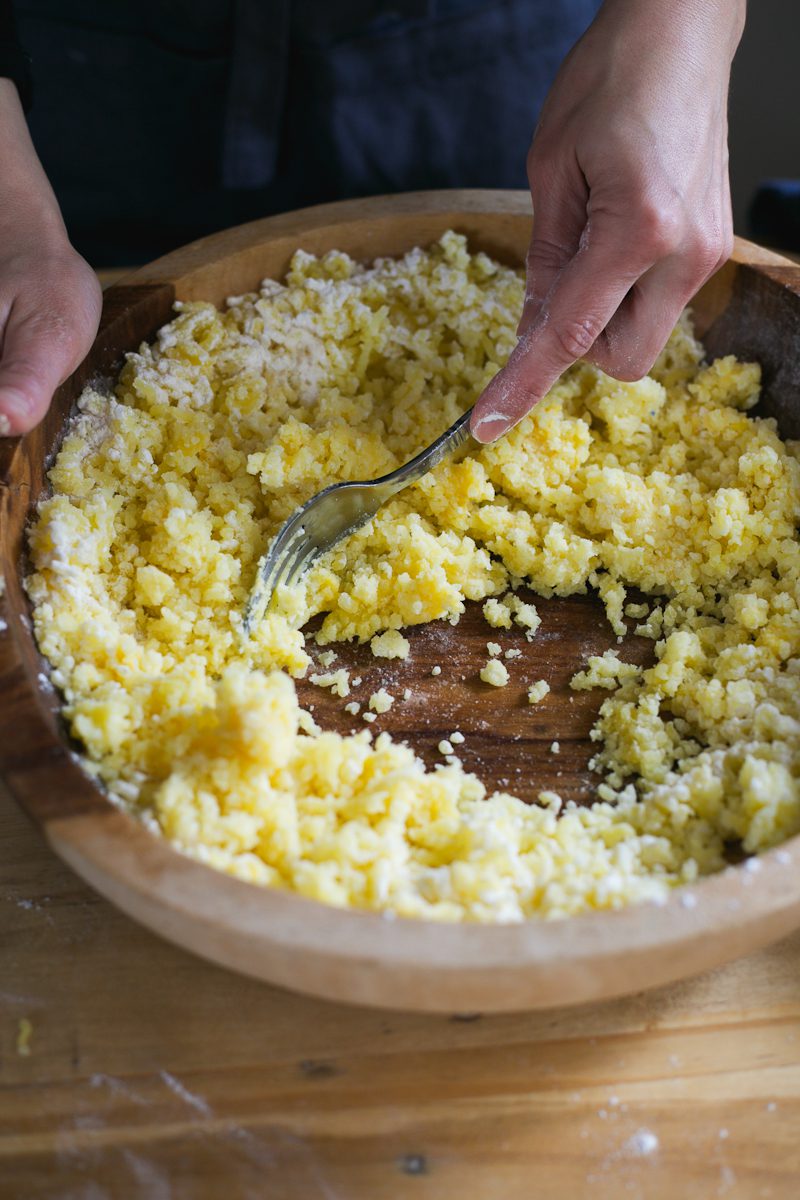
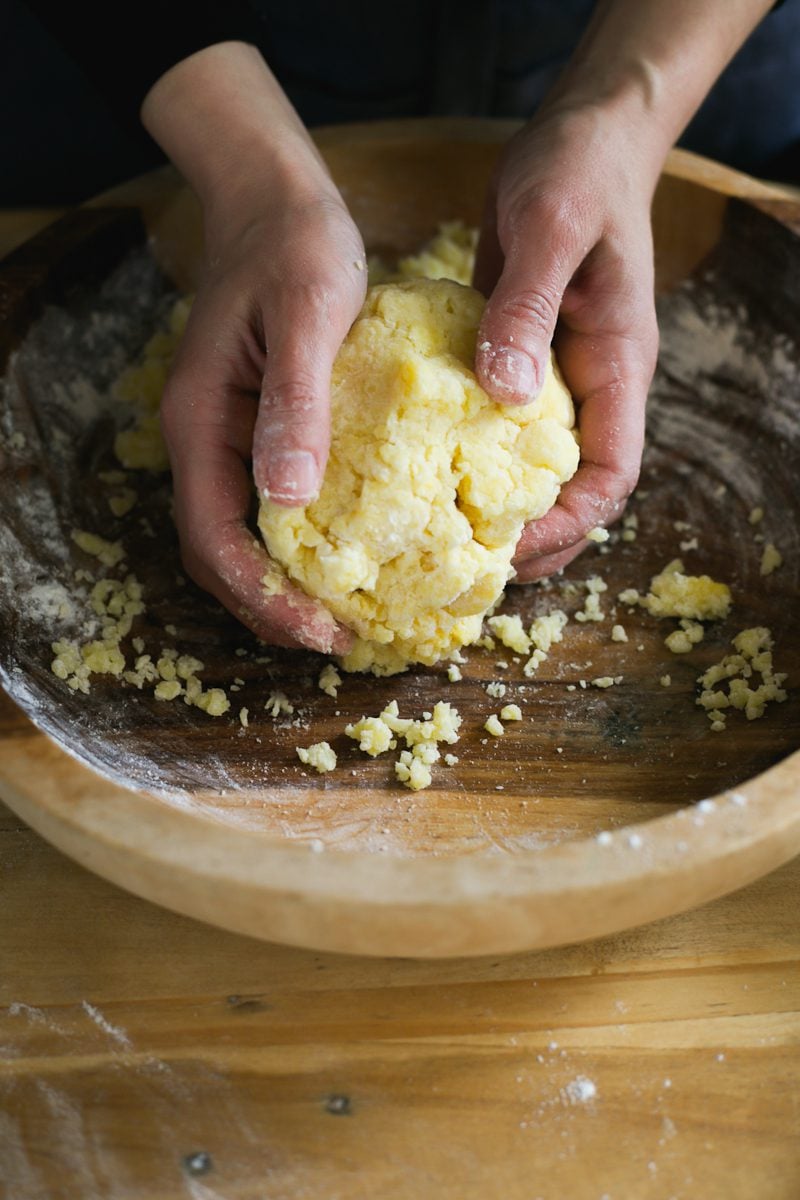
Gently mix a few times with a fork, gradually adding the rest of the flour as you go. Once the dough starts to stick together (but is not yet a ball) stop. You’re going to finish by hand.
Mix the Dough (Cont.)
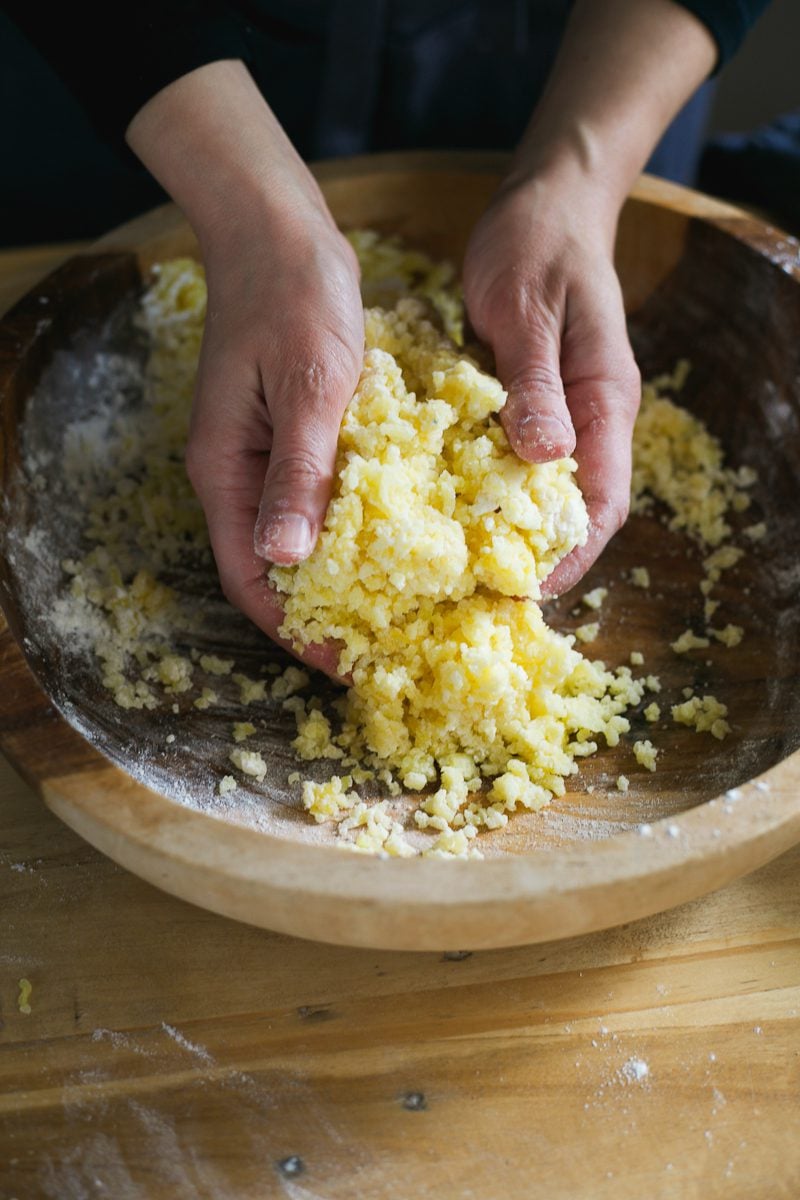
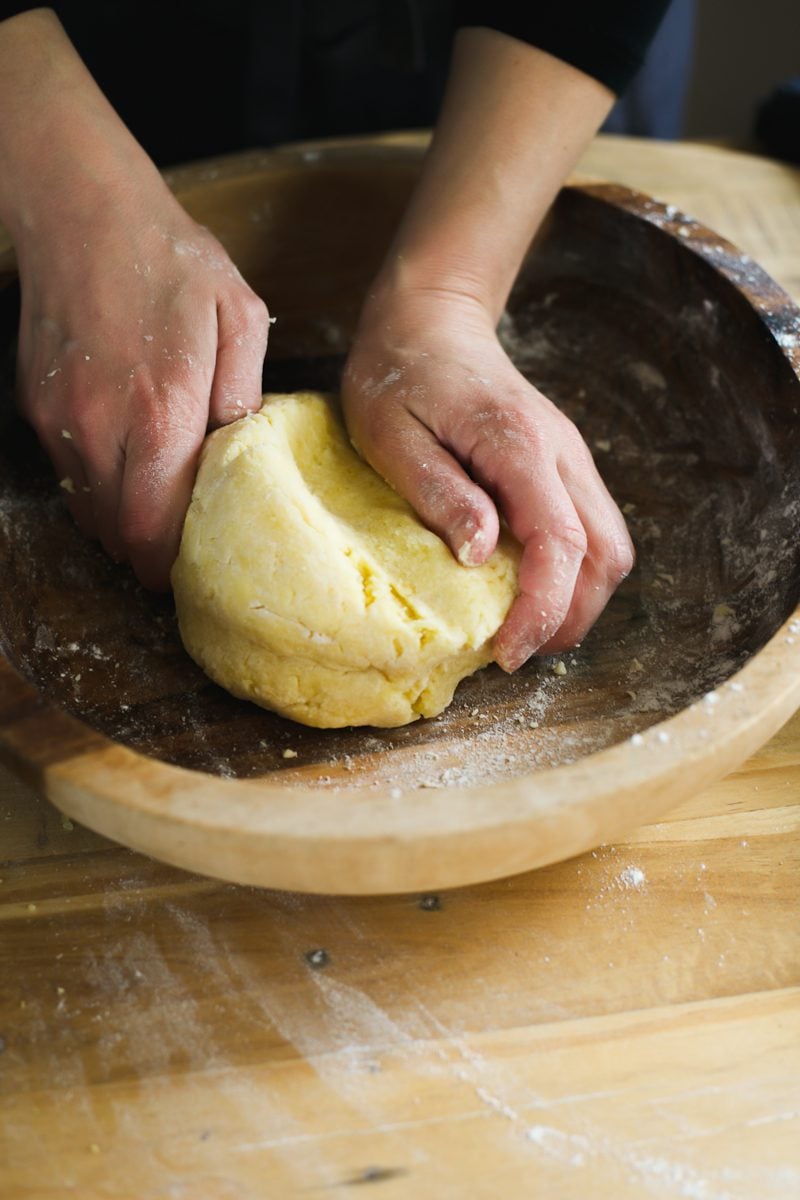
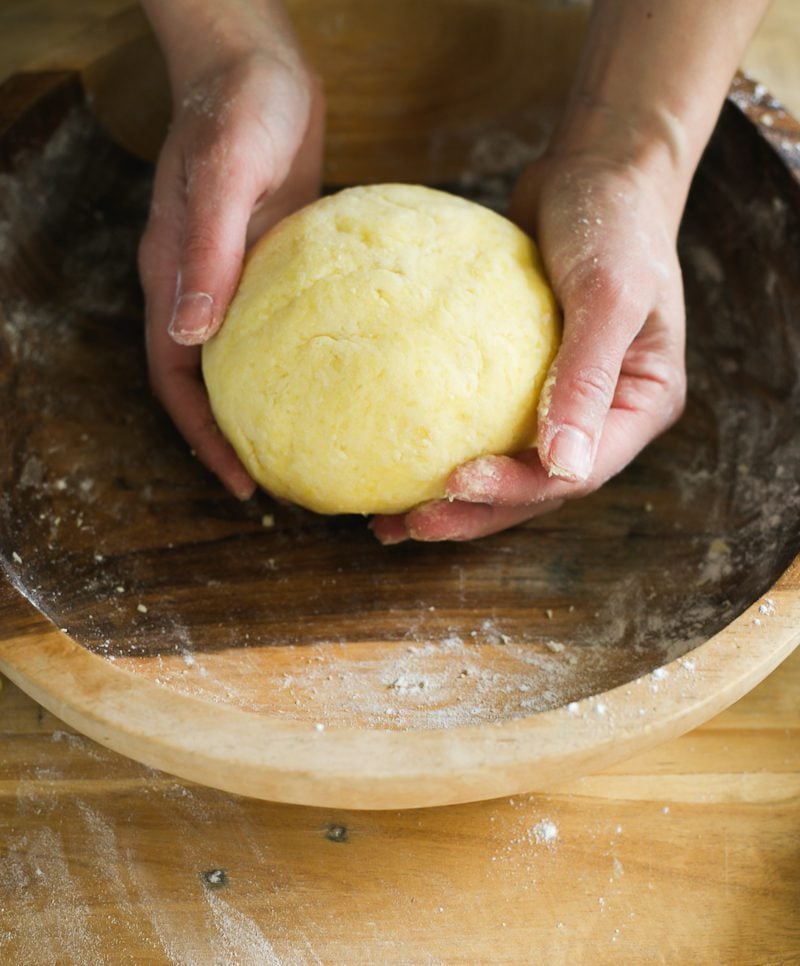
Gently bring the dough together to form a cohesive ball. The texture should feel warm, light, fluffy and smooth, like a giant mashed potato ball. If it’s sticky, add more flour. Cover and let rest for 10 minutes.
Tip: How to avoid dense and chewy gnocchi? Most gnocchi recipes insist chewiness comes from overworked dough, which is only partially true. This is actually difficult to achieve by hand unless you’re intentionally manhandling it, which over develops the gluten (and makes the potatoes gummy.) The chewiness usually comes from adding too much flour if the dough is sticky and/or using whole eggs.
Step 3: Make Gnocchi!
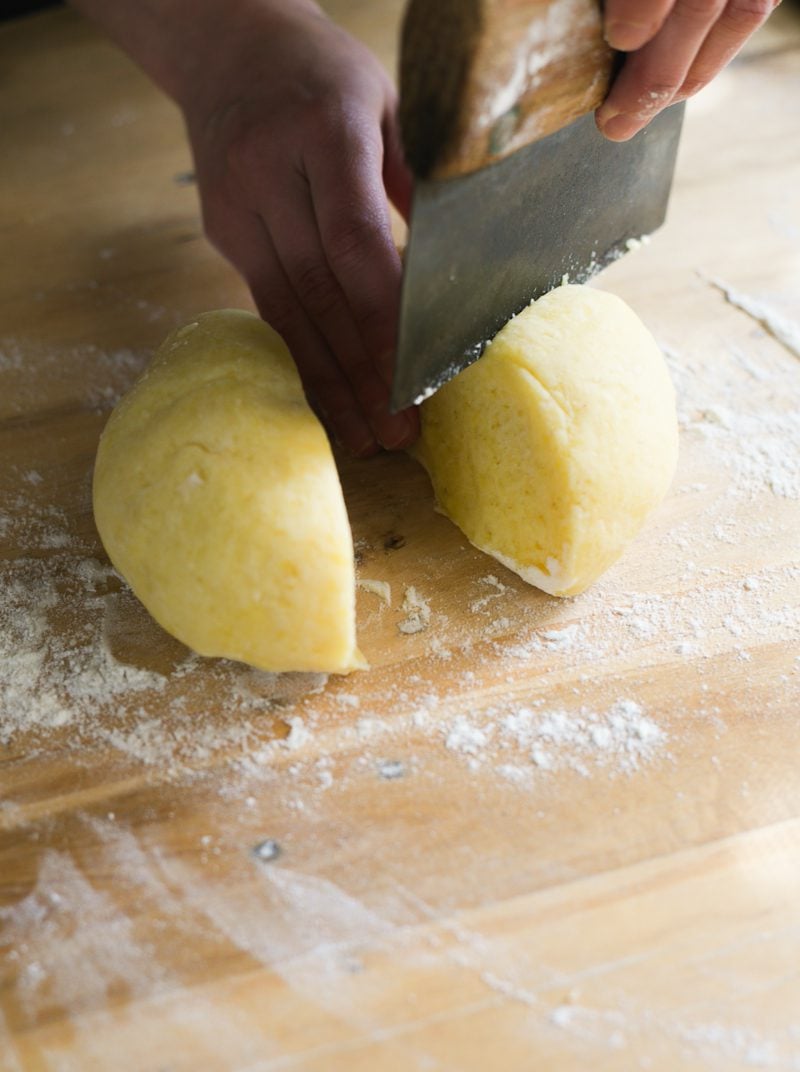
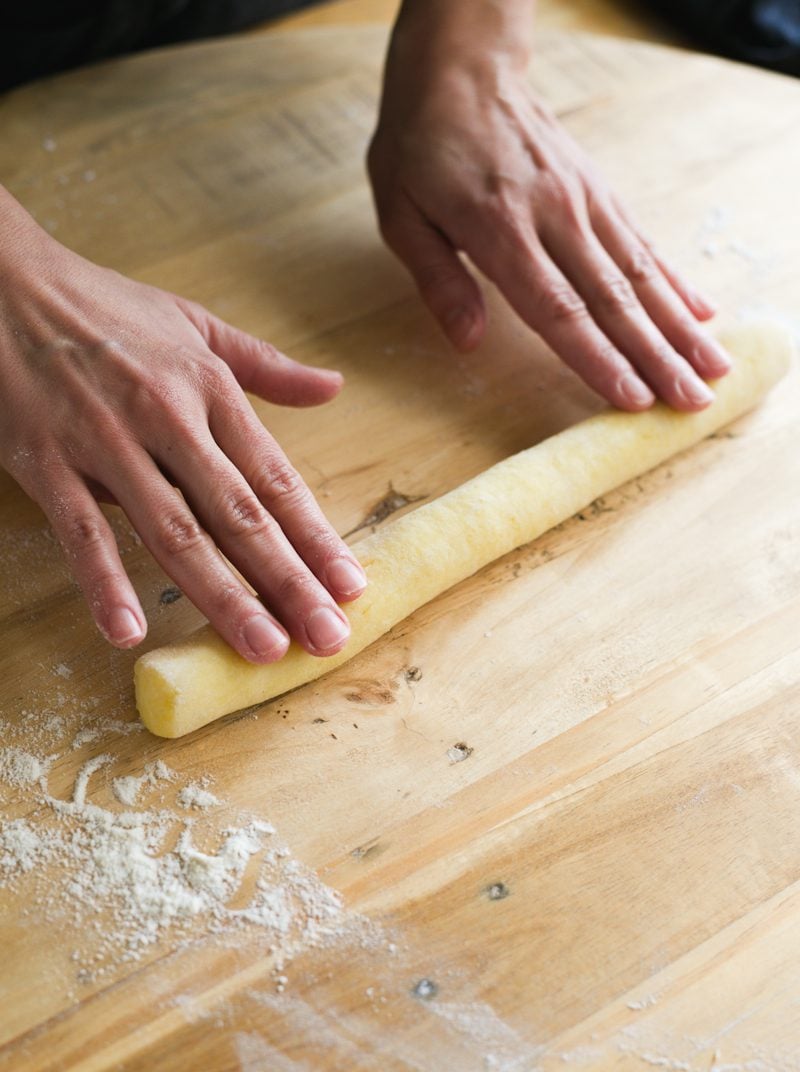
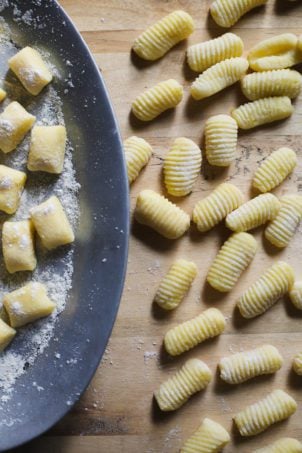
This is the fun part. Cut the dough ball into 4 equal pieces, then roll one piece into a 10-12 inch (25-30 cm) log.
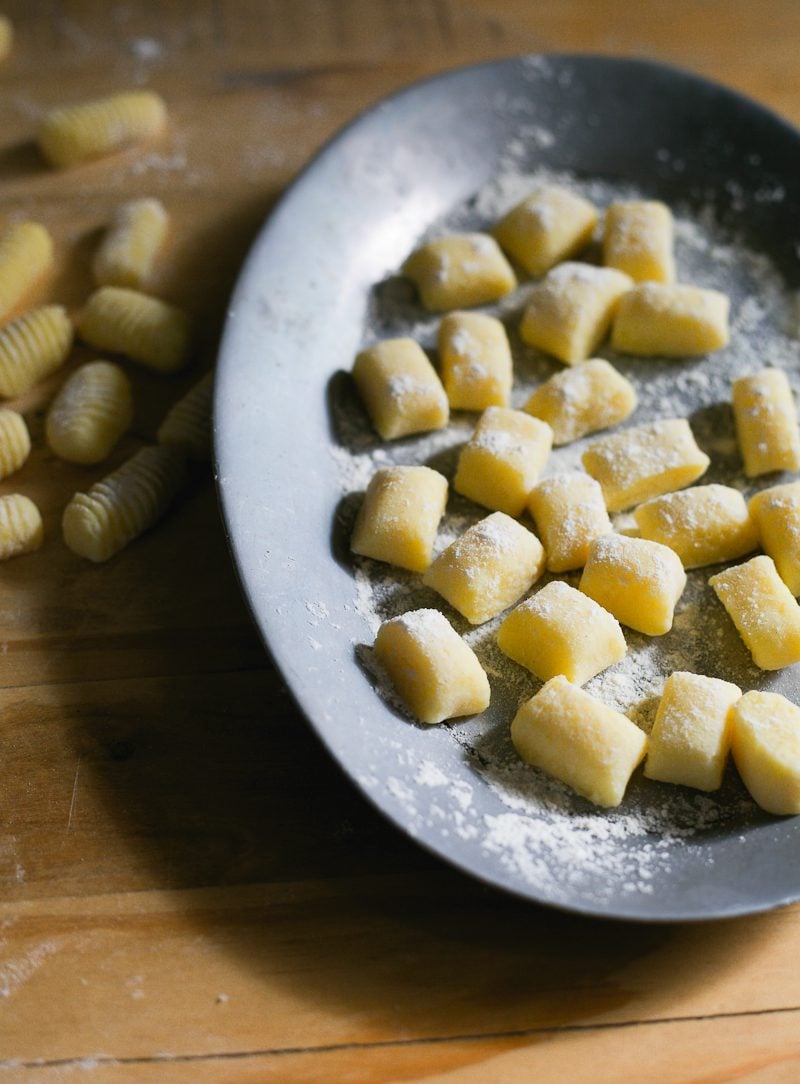
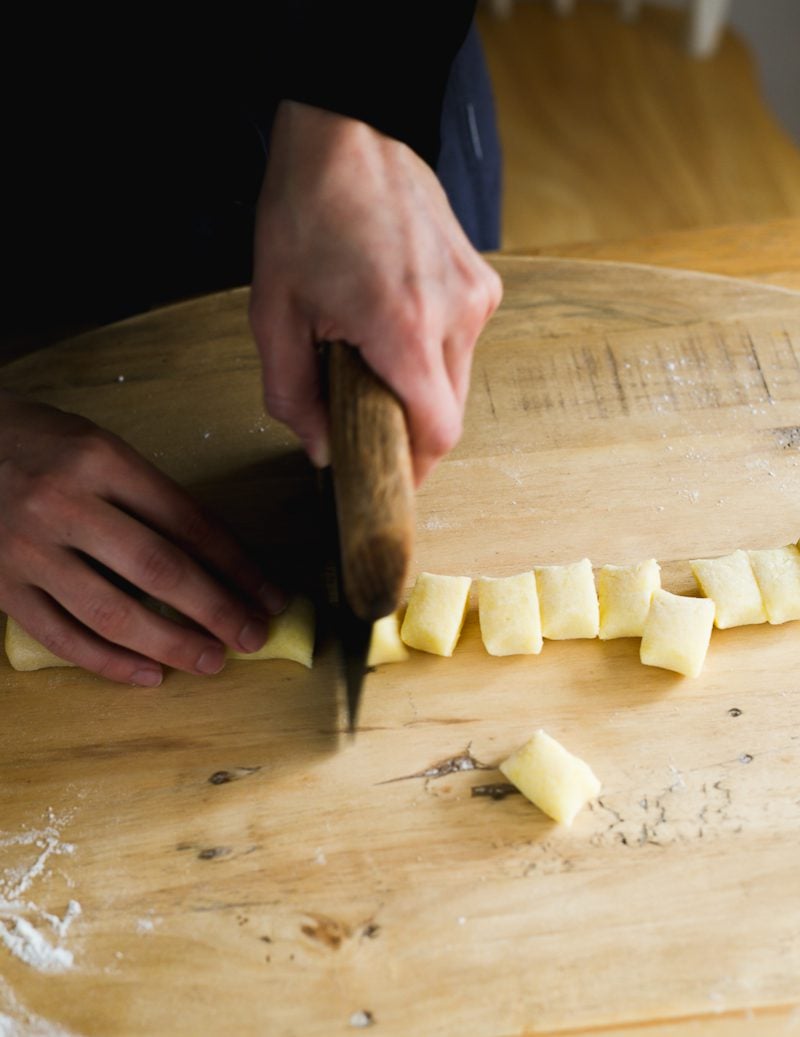
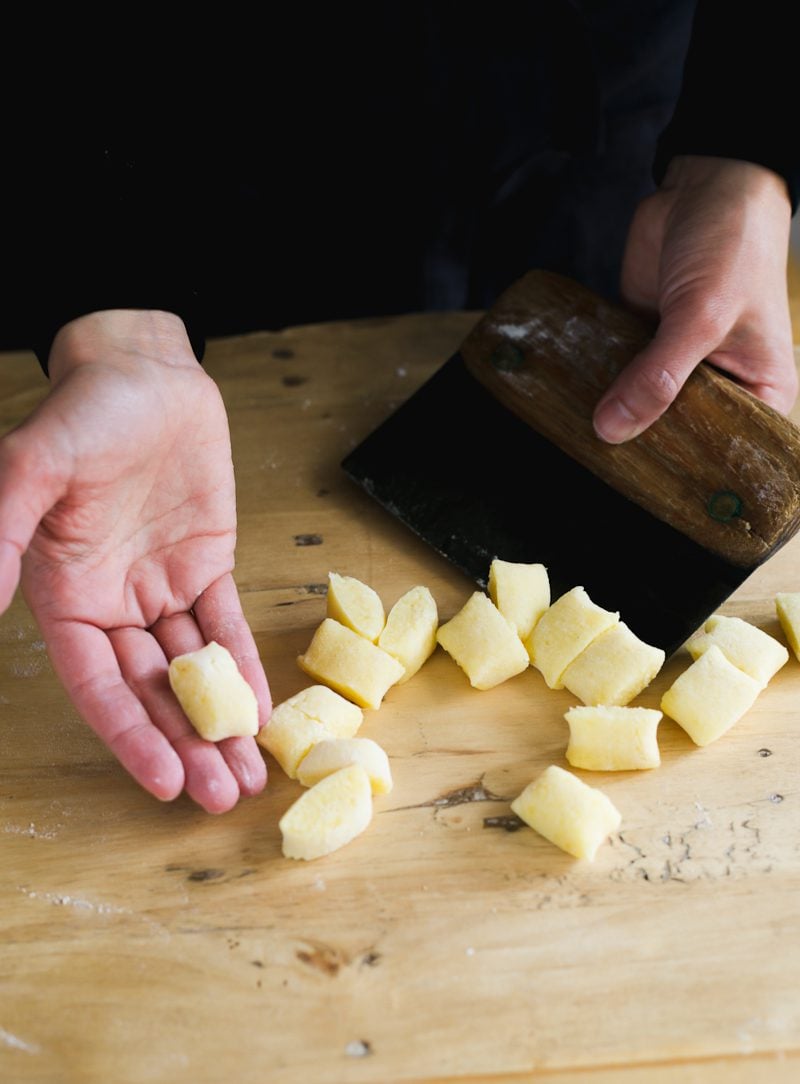
Cut across into 20-22 gnocchi, about 1/2-inch (1.25 cm) to create little pillows. I don’t like making gnocchi bigger than this because they are filling once cooked.
Transfer to a sheet pan dusted in semolina flour to prevent sticking. Repeat with the remaining pieces.
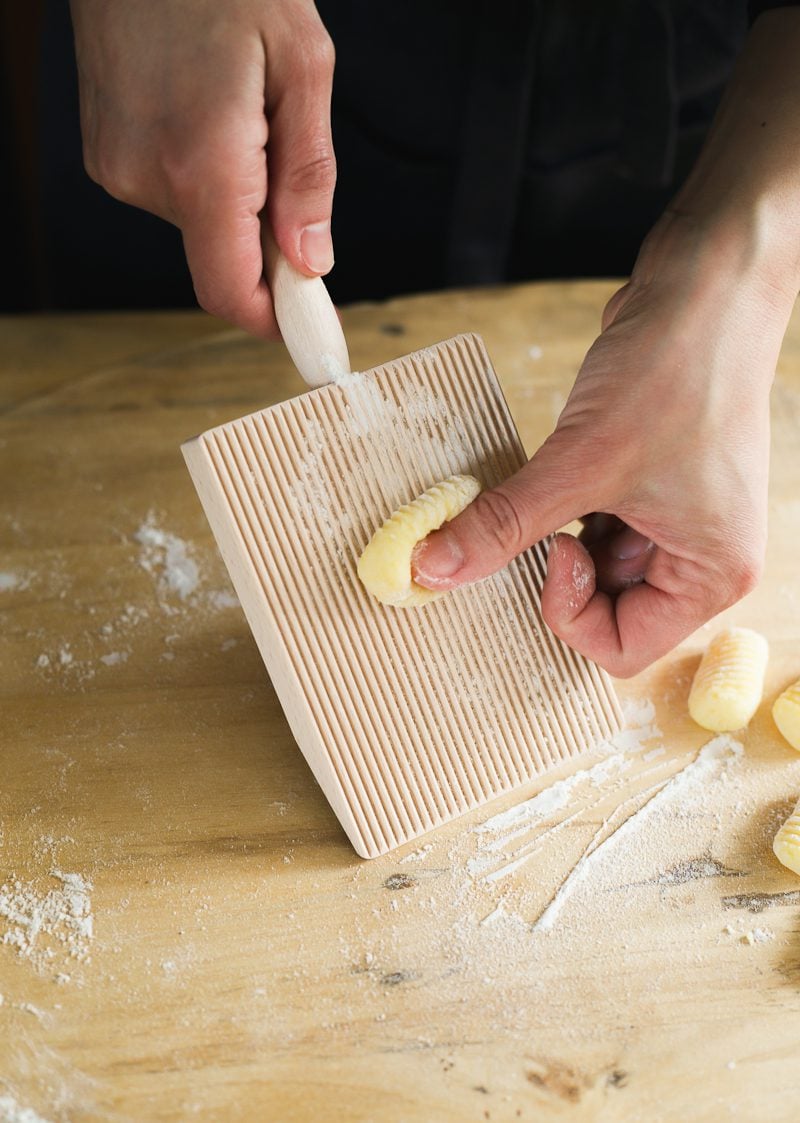
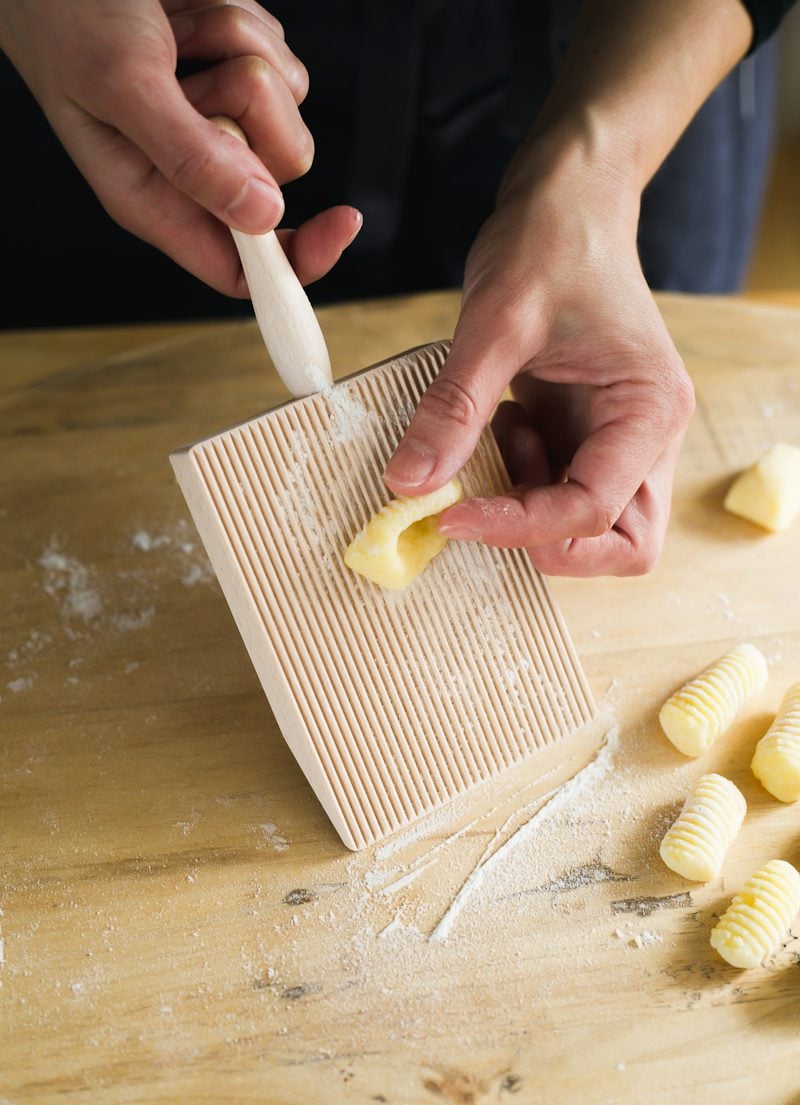
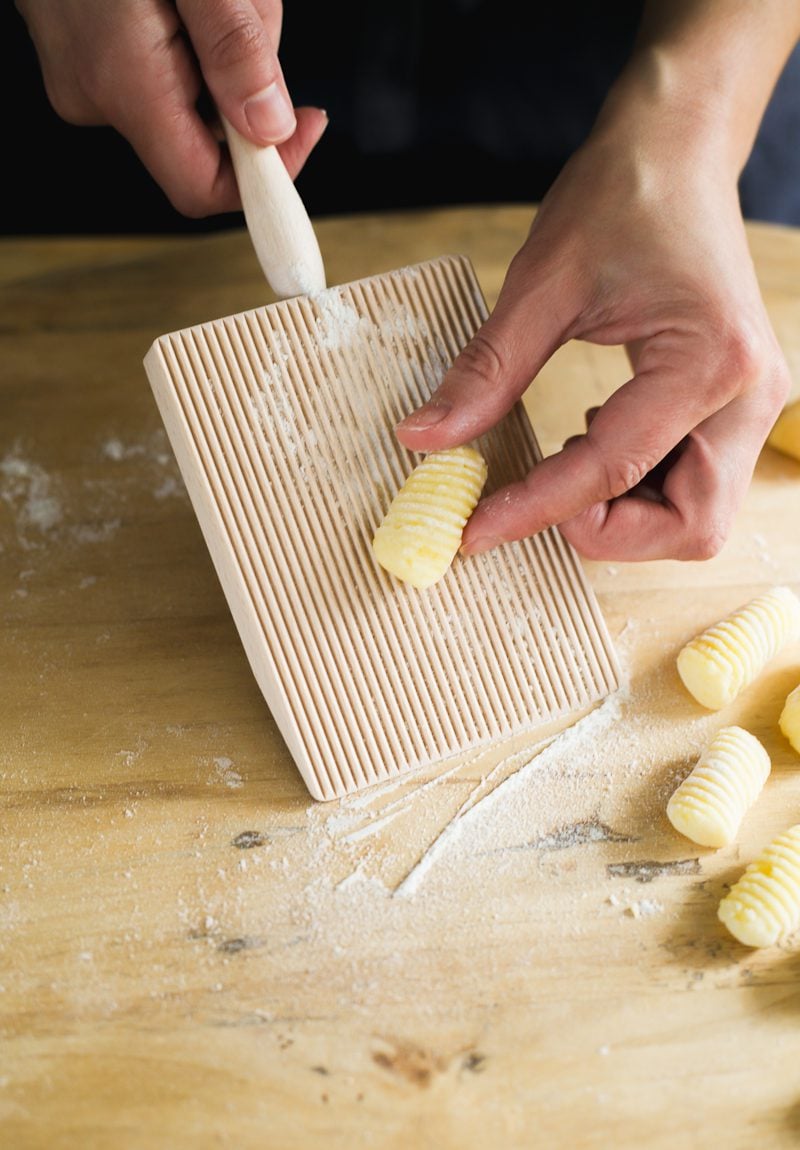
Make Ridges (optional)
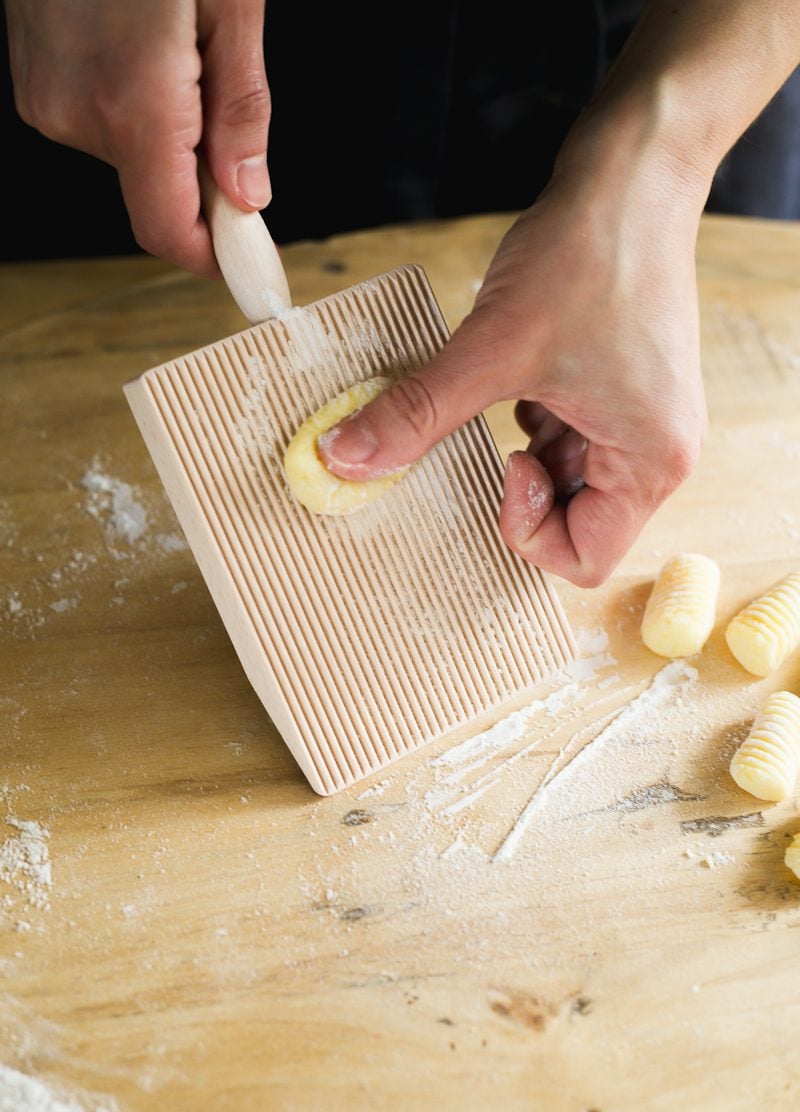
If you have a gnocchi board, roll to create ridges. This creates interesting texture which traps the sauce.
Position one gnocco at the top. Gently press down with your thumb, while pushing it forward to roll over itself. Then flip it over.
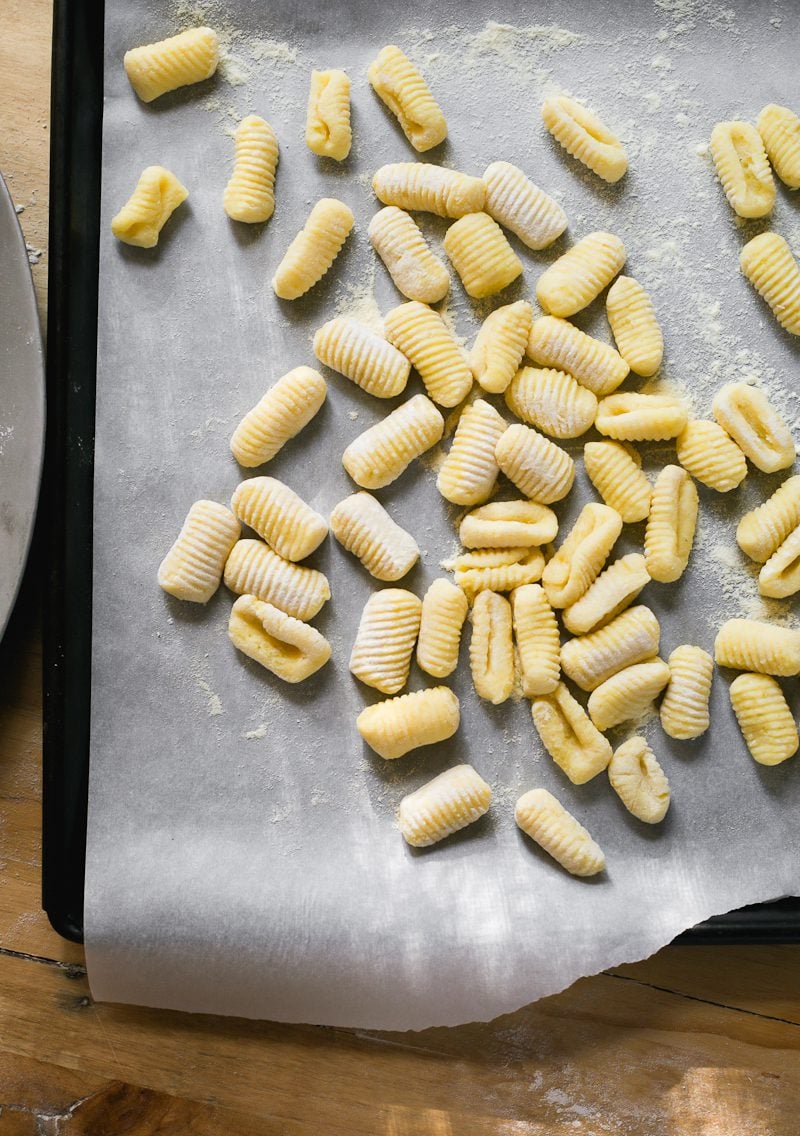
How To Serve Gnocchi
Gnocchi take about 1 minute to cook, tops. So, have your sauce premade, simmering, and ready to go! I usually have frozen sauce on standby for this very reason. My Ragù Bolognese and pomodoro sauce are excellent starting points.
By signing up, you agree to receive emails from The Clever Carrot. Unsubscribe at any time.
Beginner’s Guide to Fresh Homemade Potato Gnocchi
- Prep Time: 45 minutes
- Cook Time: 1 minutes
- Total Time: 46 minutes
- Yield: Serves 4
- Category: Homemade Gnocchi
- Method: Hand-Shaped
- Cuisine: Italian
- Diet: Vegetarian
Description
An easy recipe for light and fluffy homemade potato gnocchi. My secret is Yukon gold potatoes, egg yolk (only) and fine milled Tipo 00 flour for best texture and flavor.
Ingredients
- 450 g (1 lb) Yukon gold (or regular gold) potatoes.
- 1 egg yolk
- 1/4 tsp. fine sea salt
- 85 g Tipo 00 flour (or all purpose flour), plus more as needed
- Semolina or rice flour, for dusting
Tips, Notes & Substitutions:
- For smooth, lump free gnocchi you will need a potato ricer for this recipe. Alternatively, use a food mill of mash the potatoes gently with a fork.
- If you cannot find Yukon gold potatoes, any “gold” variety potato will do. You’re looking for a potato that’s semi waxy, creamy and dense. Floury potatoes, such as Idaho potatoes and Russets retain too much moisture and can be too mealy when cooked.
- Think ahead: if you’re going to cook the gnocchi right away, have your sauce simmering and ready to go. Gnocchi are quick to cook; you’ll transfer the little dumplings via slotted spoon directly into the sauce. Otherwise, see the storage options below.
Instructions
- Boil the potatoes, skin on, until tender about 25 minutes. Pierce with a small knife to check for doneness; if slips out with ease, the potatoes are ready. Note: if your potatoes are old or dry, they will take longer to cook. Drain the potatoes and dry well (moisture and gnocchi do not get a long).
- Once cool enough to handle, but still warm: peel off the skin and then pass through a potato ricer over a large, wide bowl. Allow the steam to evaporate. Tip: The potatoes shouldn’t be hot or cold- warm to the touch is crucial for ingredient incorporation. You won’t need extra flour later on if the dough is sticky.
- Form a well in the center of the potatoes. Add the egg yolk, salt and sprinkle some of the flour on top. Gently mix a few times with a fork to combine, gradually adding the rest of the flour as you go. Once the dough starts to stick together (but is not yet a ball) stop. You’re going to finish by hand.
- With your hands, gently bring the dough together to form a cohesive ball. You’re basically smushing the dough together. You do not need to “work” or knead the dough (this is not pasta or bread dough). The texture should feel soft, warm and smooth- like a giant mashed potato ball. If it’s notably sticky, add a sprinkle of flour. Cover with an upturned bowl and let rest for 10 minutes (do not skip this step- the dough will be easier to roll out).
- Cut the dough ball into 4 equal pieces. Roll one piece into a 10-12 inch (25-30 cm) log. Cut across into 20-22 gnocchi, about 1/2-inch (1.25 cm) in size to create little “pillows.”Transfer to a sheet pan dusted in rice flour or semolina flour to prevent sticking. Repeat with the remaining pieces.
- (Optional Step) If you have a gnocchi board, roll each piece to create ridges. Holding the board on a slight angle, gently press the gnocchi into the board with your thumb. In one forward motion, use your thumb to gently roll the gnocchi down the board. Then flip it over. Repeat to roll the rest of the gnocchi.
How to Cook Gnocchi: Working in batches, drop a few gnocchi into boiling, salted water. This is your test batch. It’s important the water is generously salted, otherwise the gnocchi will taste bland. Cook for 30 seconds to 1 minute (when they float to the top, they’re ready). Transfer via slotted spoon directly into your sauce. Do not use a colander to drain the gnocchi; they are too delicate.
How to Store Gnocchi: Fresh homemade gnocchi can be stored at room temperature, covered, for 30 minutes to 1 hour. They have a tendency to become sticky if held longer than that; make sure your sheet pan is well dusted in semolina flour. Cover with an inverted sheet pan or a clean kitchen towel. Alternatively, cover with plastic wrap and chill for a few hours
How to Freeze Gnocchi: Freeze gnocchi in one single layer on a flour dusted sheet pan. Once frozen, transfer to an airtight container (they shouldn’t stick together). Label, date and freeze up to 3 months. To use: cook straight from frozen in batches.

Comments
Rebecca says
How long would you cook them from frozen?
Alfie Rowden says
I’m certainly no expert, but Incase no one gets back to you, I’ve seen a few times online to cook gnocchi until it floats? Probably the same I guess 🤷♂️
DeeDee says
Hi, I made this recipe, and it tastes great! I used a slightly gritter flour to dust, and this tastes nice and squishy, especially when dipped and lightly coated in marinara sauce. I could add more salt next time, but that was on me.
Jaynie says
Fantastic recipe!! Follow Emilie’s notes&tips to a T & you WILL get soft pillows! So delicious! Awesome texture, husband approved!
Rose Brethen says
I’m really excited to have found your website. I originally found it because I’m been making sourdough. I’ve taken a couple advance classes. But the more I learn the more I realize I don’t know and I really like the way you break it down and explain things. Then I found out your Italian recipes because I’ve been wanting to tackle Pasta and I have the KitchenAid attachment. You explain things and you help to understand why things are done. My questions regarding semolina. I have the Durham wheat betties, so when I need semolina I grind it. To use it in pasta making do I just grind it as fine as my grinder will go? Do I need to run it through a sieve Before I use it? Thanks for a wonderful website and I’m excited about exploring your recipes.
Chris says
Hi, I’ve been making gnocchi for quite some time. I am 65 this year and Ive learned making gnocchi from my mom, who in turn, learned it from my Nonna.
This is my recipe which normally works unless I overcook the potatoes. I take five pounds of yellow potatoes, four cups of all-purpose flour, and two large eggs (white in) and a bit of salt in the palm of my hand.
Depending on the size of potatoes, I will cut them so that the cook the same as the smaller ones. I then remove them from the stove and into a callander. I then peel the skins and put them thru the strainer into the flour and salt in a large bowl. The potatoes are usually still very warm at this point, so they still might be cooking while I proceed with the rest. Once all have been riced, I add two eggs and mix. It’s extremely tedious and sticky, but eventually manage to make it into a ball. Most times it works out, but not always.
T says
Can I pan fry these instead of boiling? Or should I boil than pan fry? Thanks!
Victoria says
Hello!!
I don’t have a potato ricer, would mashing work or would it be too much?
I have made your scones, sourdough pasta, sourdough pizza and the olive bread and can honestly say they are absolutely delicious and can’t wait to keep making more of your recipes!! YUM.
mikka says
Think this is the 4th time i have made these (first time with this recipe) and the egg yolk (and the resting and light touch with the flour) made these incredibly light and soft. Best effort so far:) As always I panic at the cooking stage but worked perfectly.
I don’t see the rating gadget but it would be a 5 star (or max) if I did
Brigitte Cook says
Can I substitute with sweet potato?
Emilie Raffa says
Great question. I’ve never tried it! If you experiment, please let me know and I’ll update the notes here. My sense is that you might need to add additional flour if the sweet potatoes seem too wet :)
Inez says
Be careful with using a food processor. Ours creamed our potatoes very fast and then we had to add twice as much flour to get it to the right consistency. Ended up tasting a bit floury. I recommend using a cheese grater instead if you don’t have a potato ricer. Otherwise, I really like the recipe. Thank you!
Emilie Raffa says
I don’t recommend using a food processor for gnocchi. You run the risk of overworking the potato starches, which creates an unpleasant gluey texture. This is probably why you had to add more flour to compensate. I always use my potato ricer. However, as you’ve mentioned, a cheese grater will work too!
Aaron says
Amazing recipe. Thank you!!!
Anonymous says
kim says
This wasy first time making gnocchi and they came out perfect! Thank you.
Taz says
I accidentally cooked up two pounds of potatoes. So I doubled my recipe. Even the normal batch made a lot. I just kept them pillows. I didn’t not use a gnocchi board.
Very delicate and light.
Carissa Renard says
Do we have to boil the potatoes whole? Mine aren’t fork tender within 25 minutes so I feel like if you’re cooking all 4 whole it’s more like 50 mins till an hour to make sure they’re cooked all the way
Emilie Raffa says
Yes. With the skin on. Timing will definitely vary depending on the size of the potatoes and freshness. So it’s 100% OK if yours took longer than 25 minutes! You want to make sure they are cooked through.
Carissa says
I just made these and they turned out okay, a little softer than I expected and the dough stayed sticky a lot longer than I thought it would so I had to add a bunch more flour.
I heard that russet potatoes are drier so I might try using those next time for gnocchi as that’s what serious eats recommends