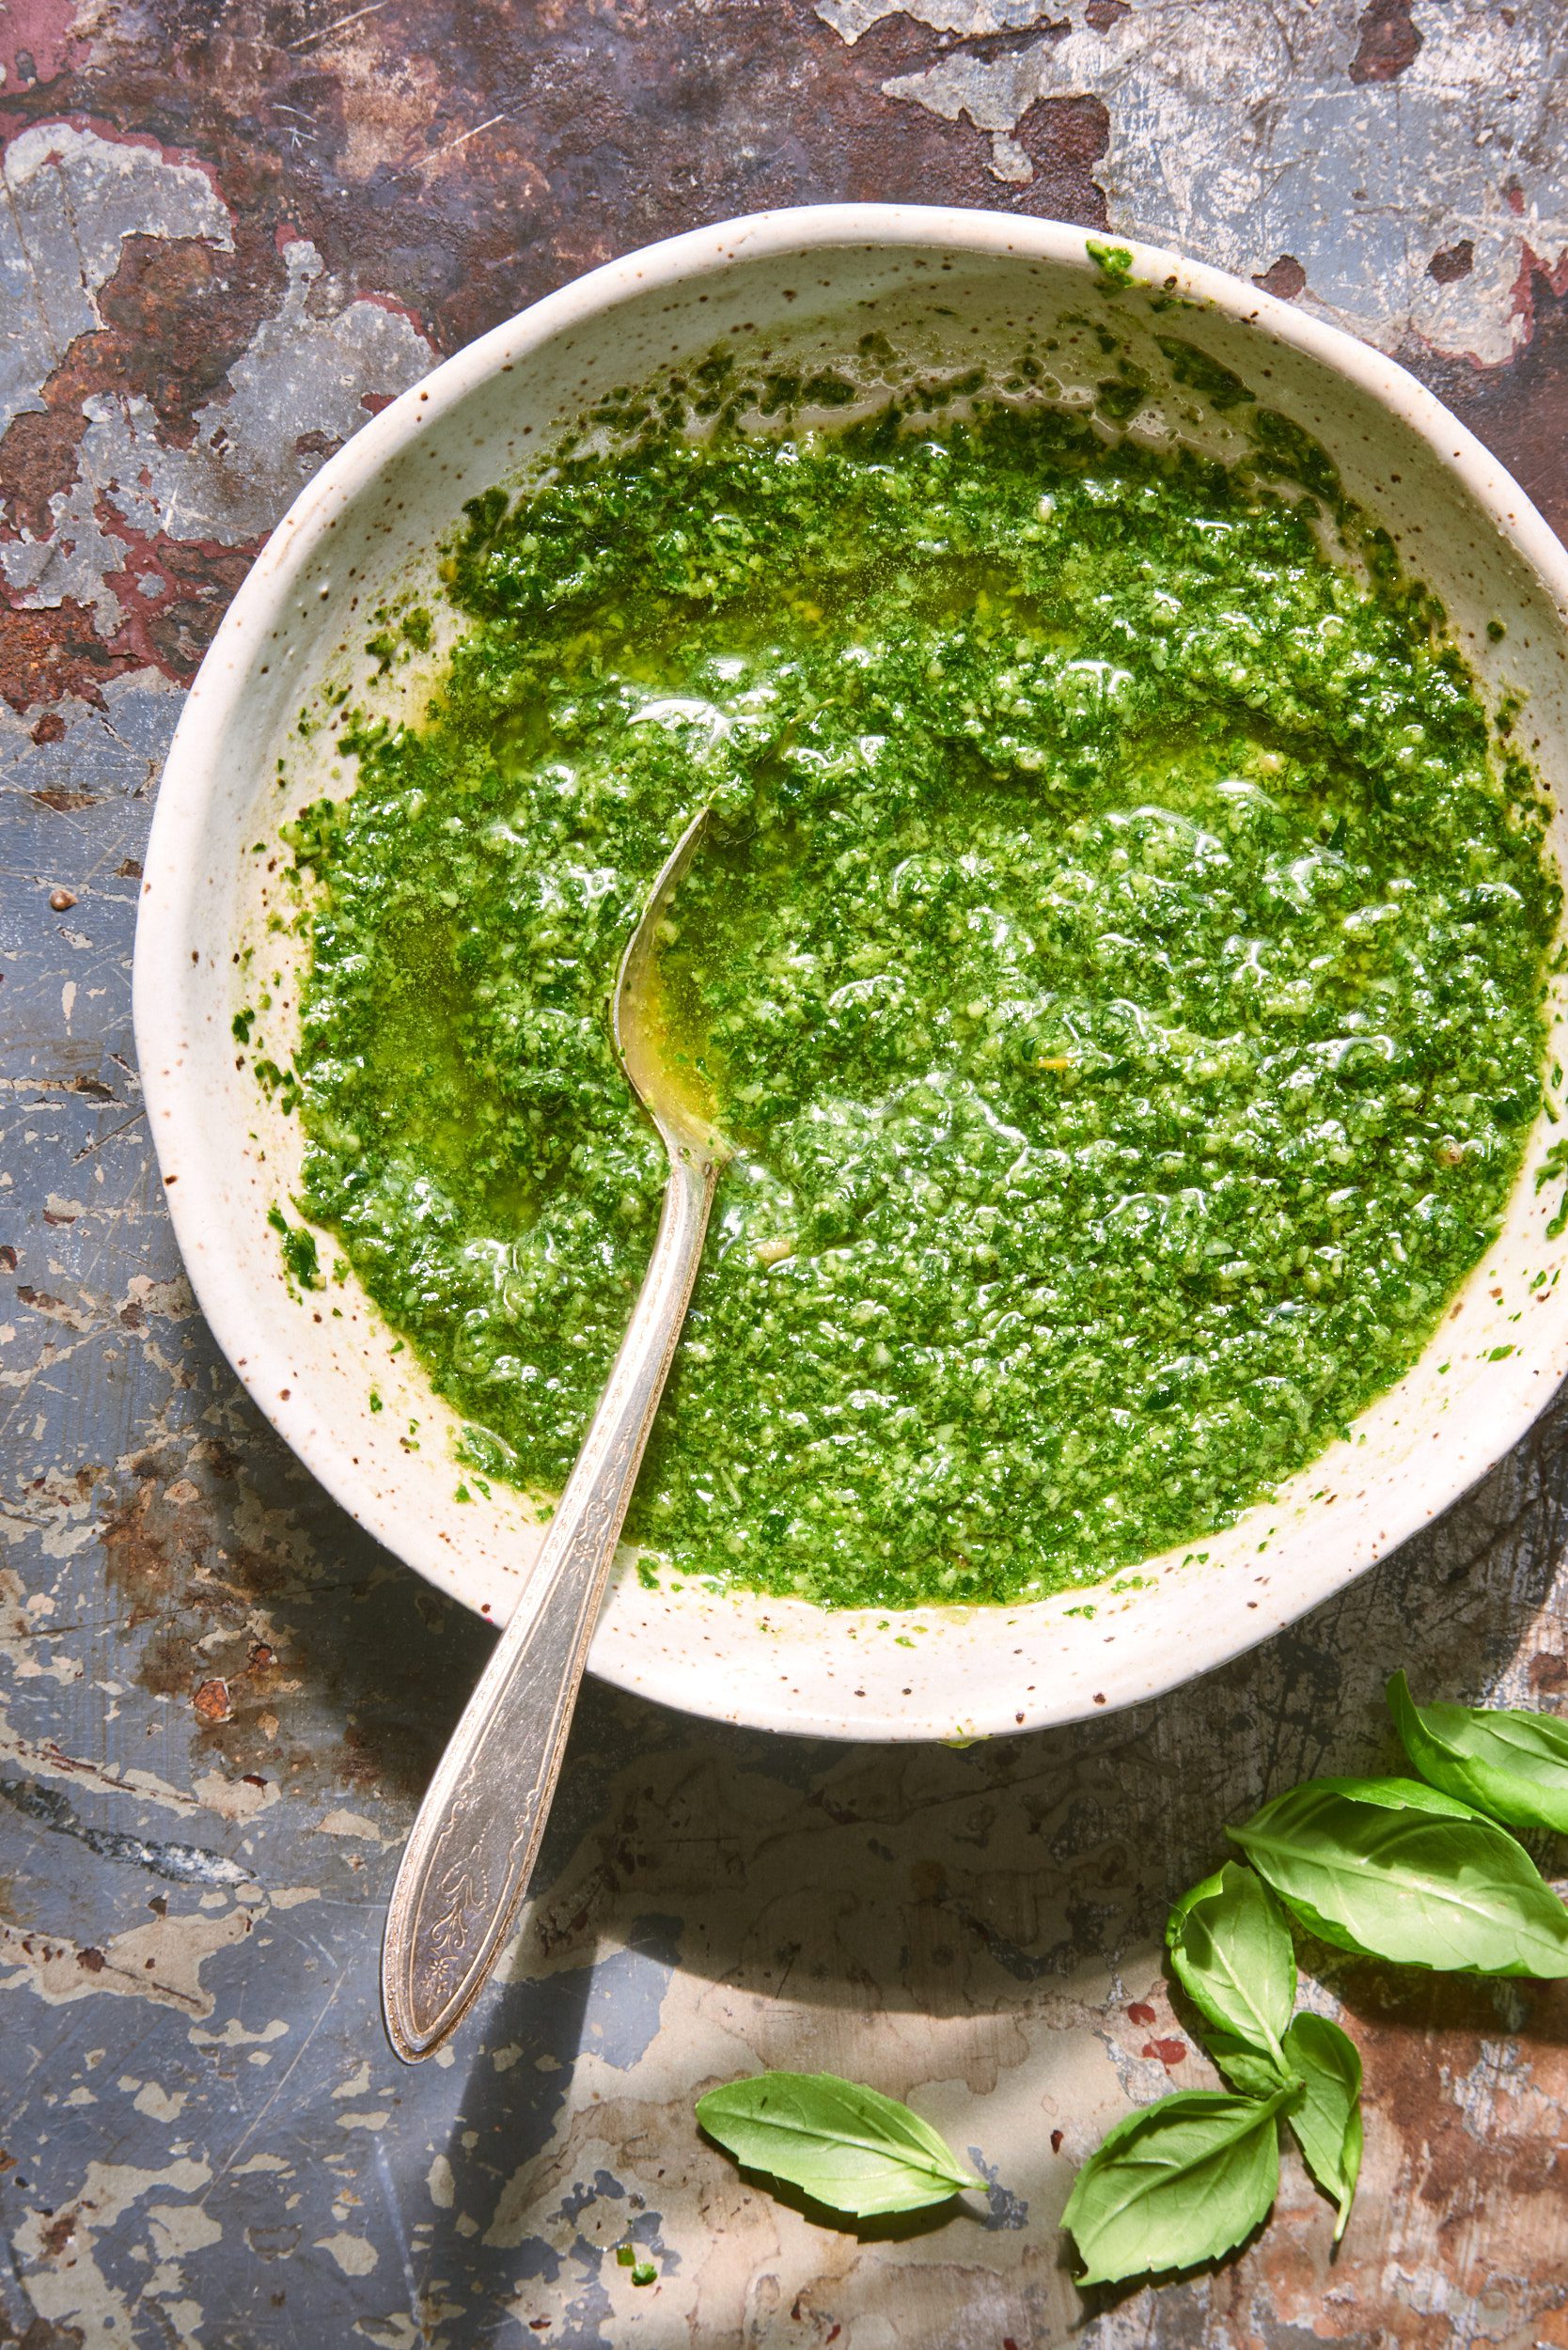
This classic Italian basil pesto with pine nuts is the only recipe you’ll ever need! My secrets? Chill your olive oil, use small Genovese basil leaves, and blend in batches. Makes ~ 1 cup.
I’ve always struggled with basil pesto. Sometimes it was black. Other times, it was too garlicky. And more often than not, my prized homegrown basil leaves tasted like licorice!
Curiosity lured me to the book Liguria by Laurel Evans, revealing clever tips and tricks I never knew before. For example: chilling the olive oil helps to keep the pesto bright green. Small basil leaves are better than the big ones.
While most pesto recipes are similar by nature, mine focuses on the importance of ingredient selection and method (wait until you read the tips!). Pesto is an art.
Tell Us More…
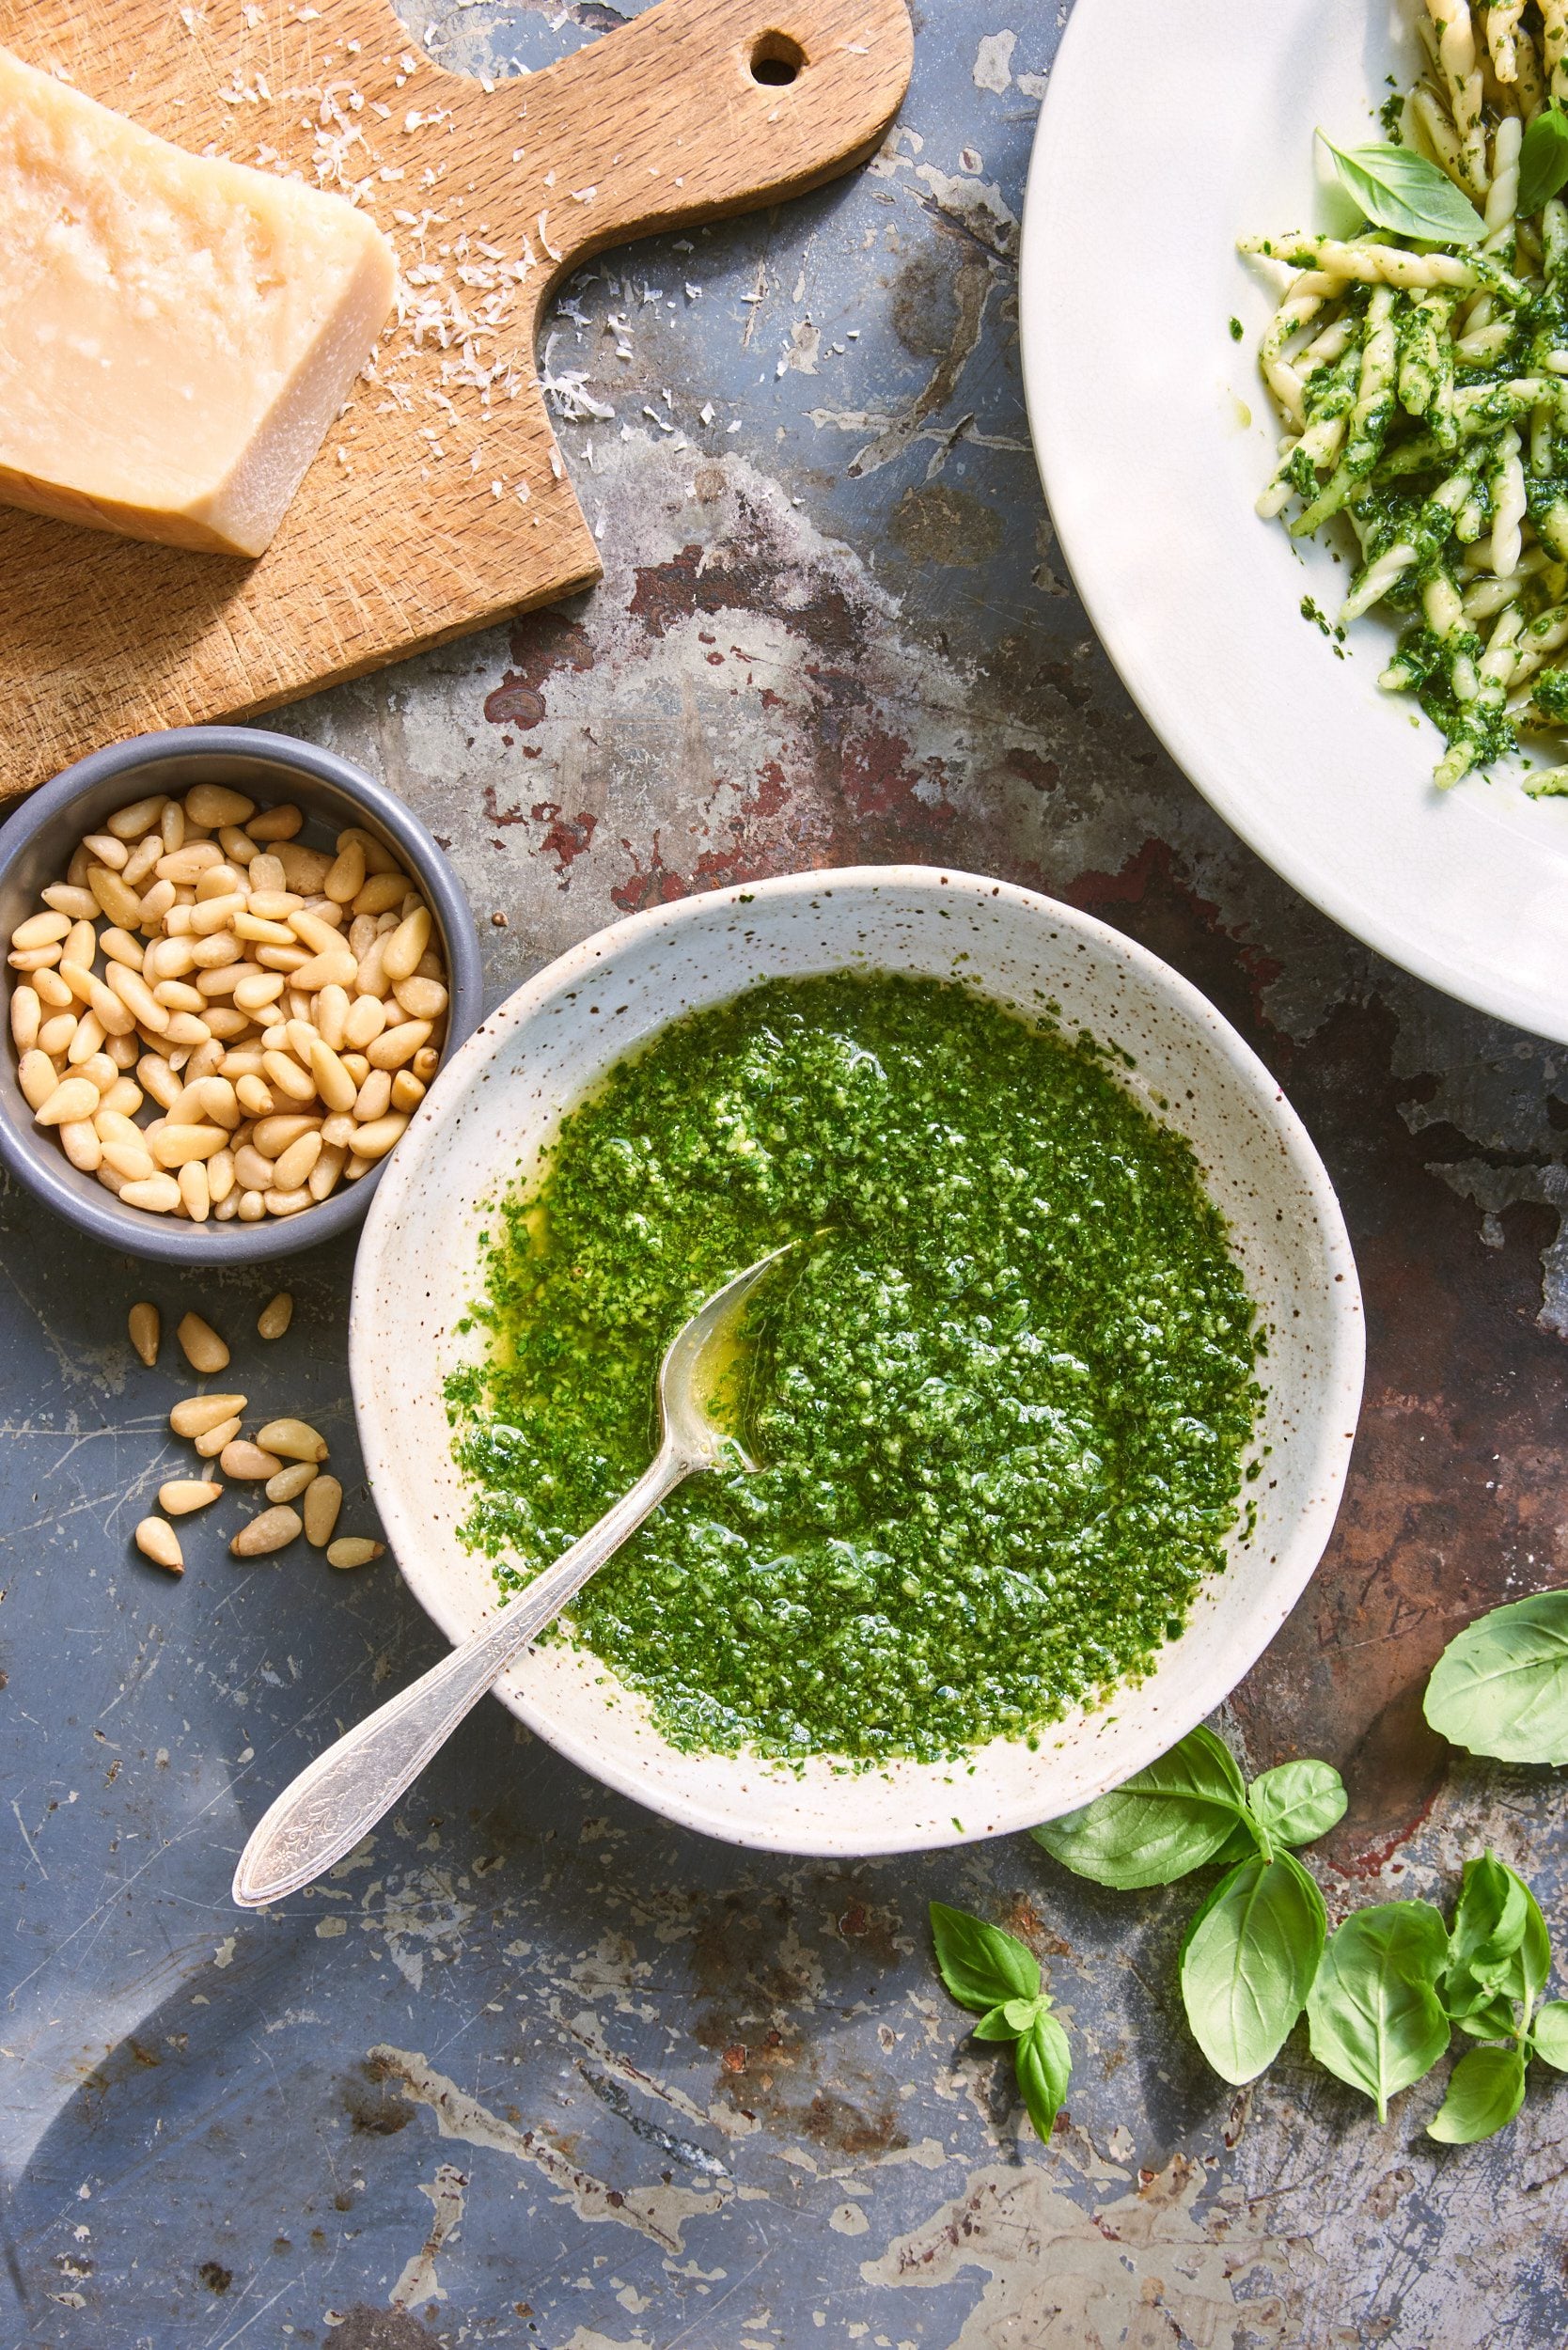
My pesto alla Genovese is made from fresh basil, garlic, olive oil, and a blend of Parmesan and Pecorino cheese.
It comes together quickly in a blender or food processor. It will last up to 1 week in the fridge with a slick of olive oil on top. My Dad takes it a step further and floats a lemon slice to prevent browning (genius).
There are so many clever ways to use it. I make pesto pappardelle, toss it with homemade gnocchi, and spoon it over this sourdough bread recipe (grilled). It’s delicious with minestrone soup too.
Want Bright Green Pesto?
The biggest problem with homemade basil pesto is oxidation. And life’s too short for swampy brown pesto. The following tips come from Enrica Monzani, a finalist at the World Pesto Championship. They are excellent.
- Chill the bowl and blade (food processor or blender). This prevents oxidation. Pesto can turn brown pretty quickly from the mechanical heat of the blades. Chill for at least 30 minutes (I actually freeze them).
- Chill your olive oil! Again, this helps with oxidation. 30 minutes in the fridge is sufficient.
- Blend in batches. The final texture is better this way. You’ll see.
- Use small basil leaves. Not the big ones that smell like mint! They’re too strong. You’re looking for basil stems no longer than 6 inches.
- Do you wash your basil? This removes some of its aromatic, essential oils (I didn’t know this). If doing so, use cold water and wash quickly. Do not soak for ages. Dry thoroughly in a salad spinner, and then lay flat on a clean kitchen towel to dry further. The leaves cannot be wet. PS: make sure to remove the stems too. They contain a lot of water.
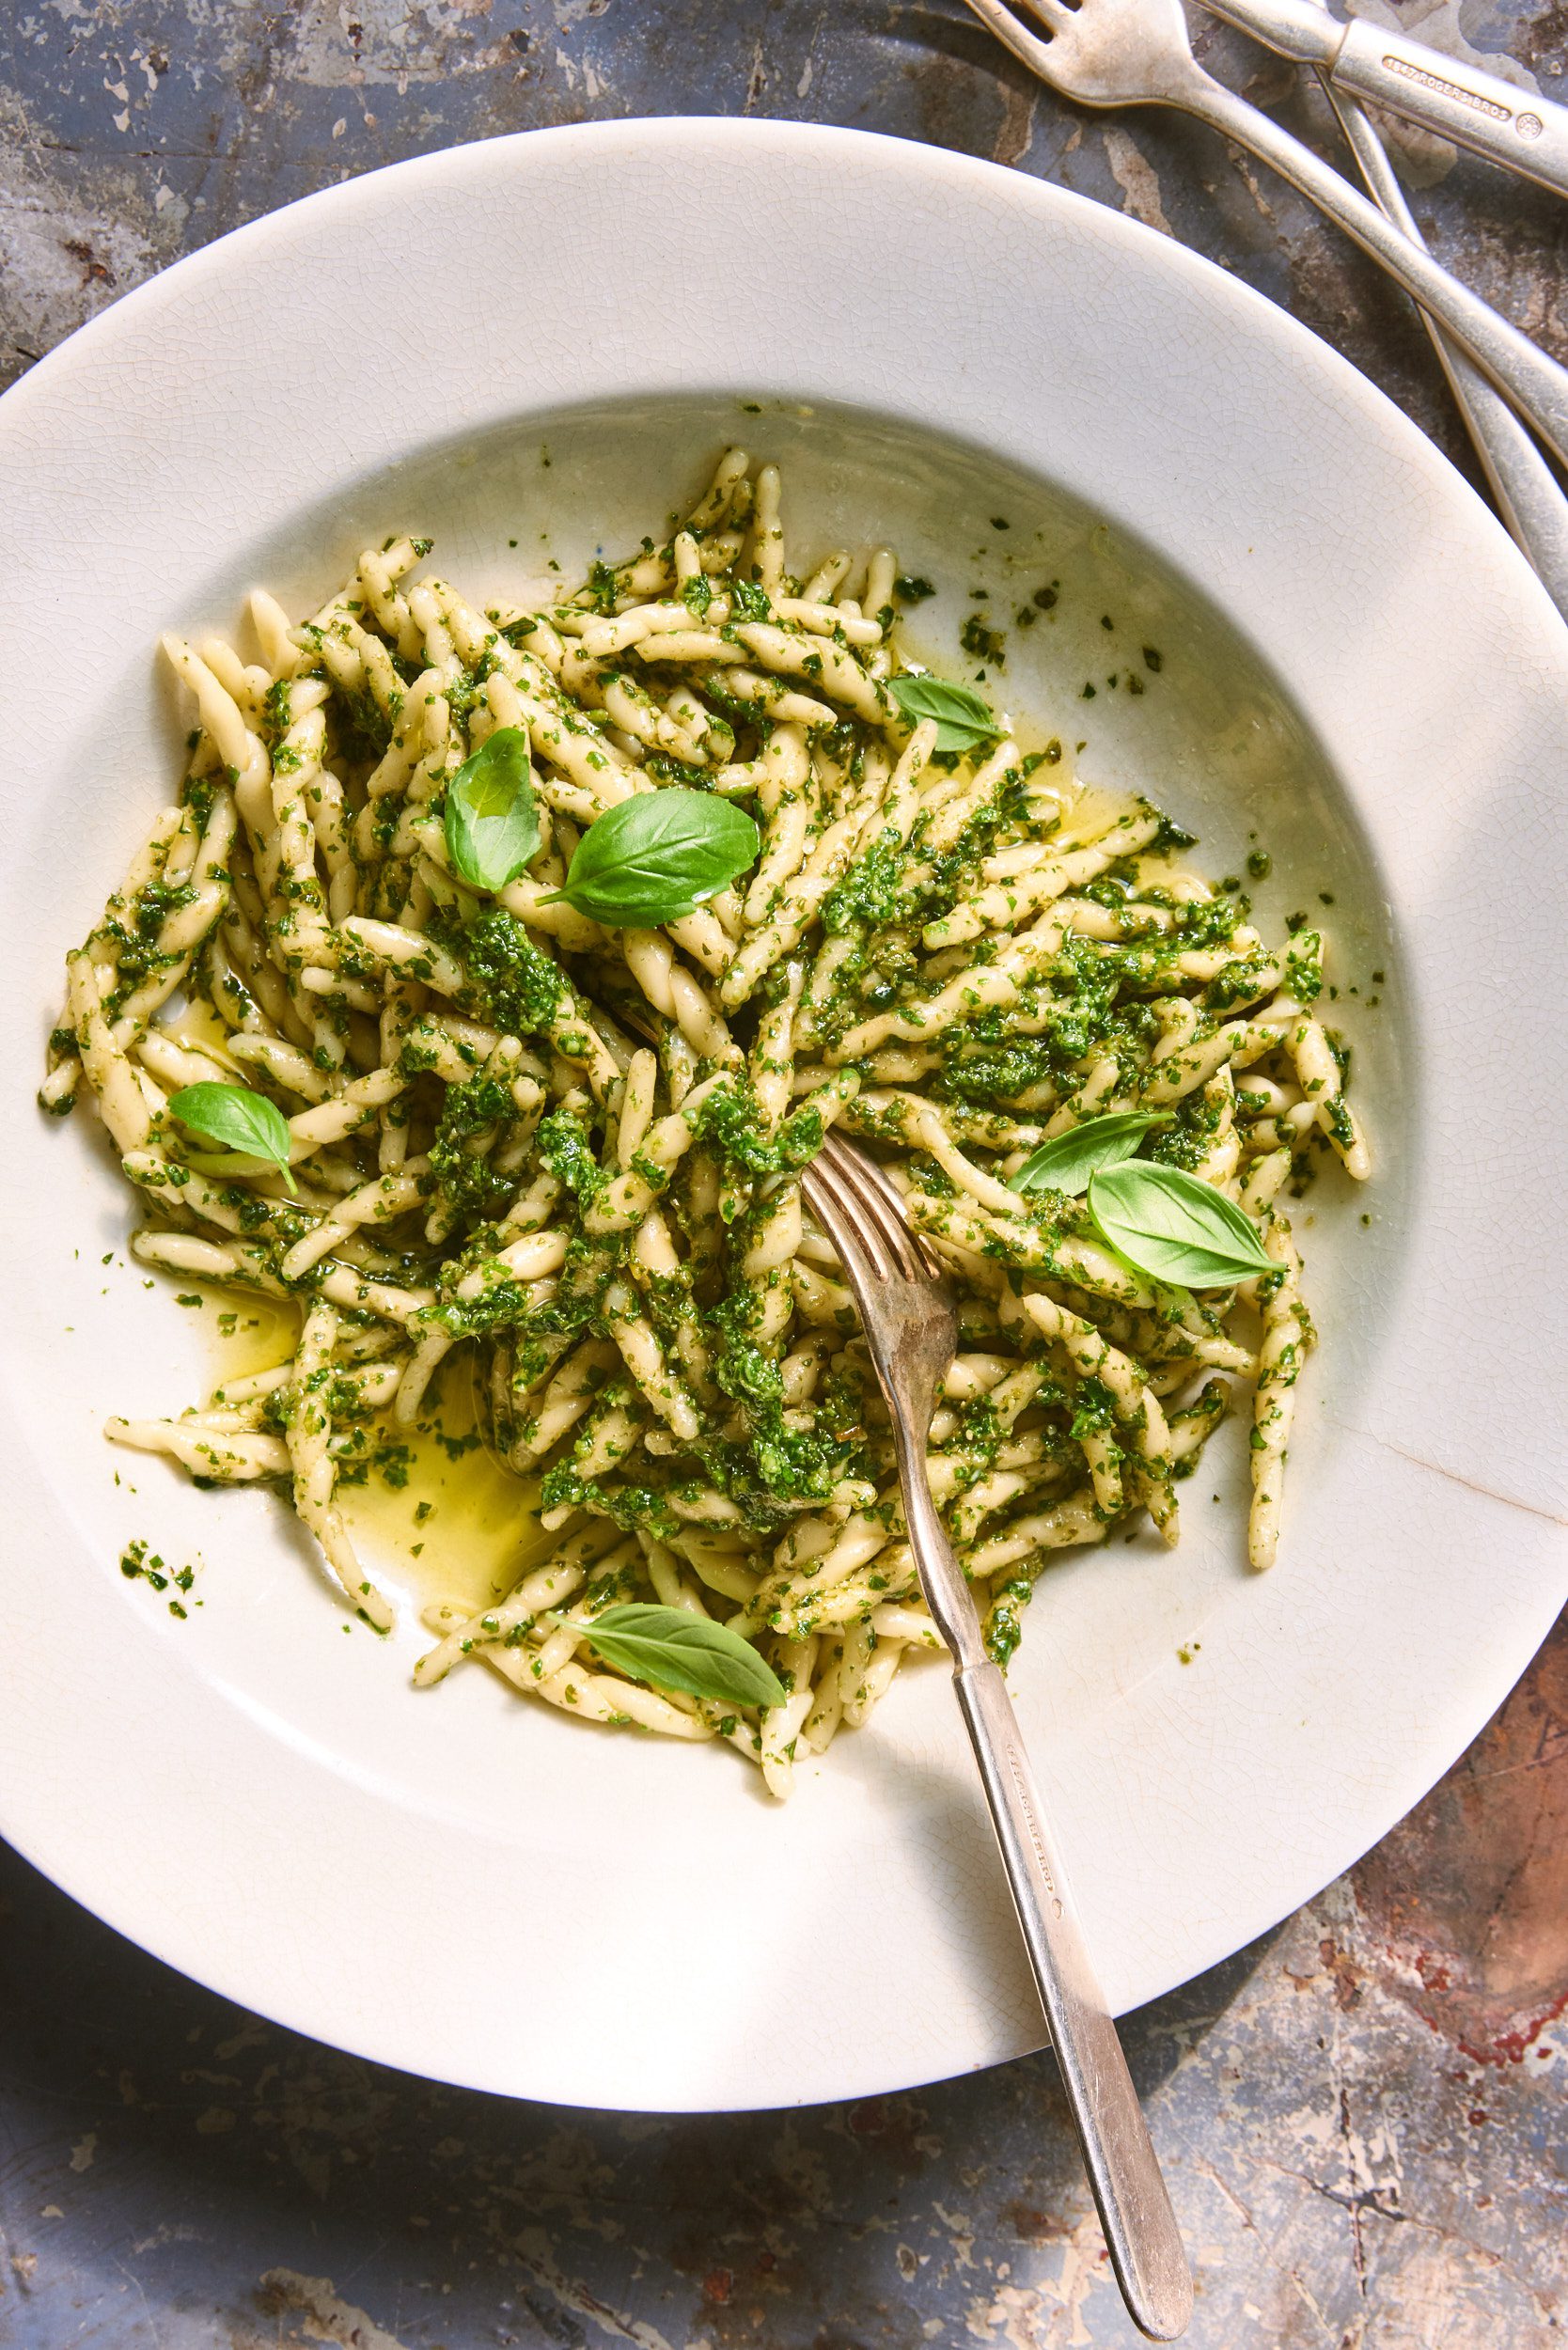
Photo credit & styling: Melina Hammer
By signing up, you agree to receive emails from The Clever Carrot. Unsubscribe at any time.

Classic Italian Basil Pesto (Pesto alla Genovese)
- Prep Time: 5
- Total Time: 5 minutes
- Yield: 1 cup 1x
- Category: Pasta Sauce
- Method: No-Cook
- Cuisine: Italian
- Diet: Vegetarian
Description
A simple, classic Italian Basil pesto recipe with pine nuts. It comes together quickly in the food processor or blender. Make sure to read the helpful tips to prevent oxidation! Recipe adapted (with changes) from Liguria by Laurel Evans.
Ingredients
- 70 g (appx. 2 1/2 – 3 cups), small, basil leaves (see note)
- 1 fresh garlic clove, smashed and roughly chopped
- 3 tbsp. pine nuts
- 1/2 cup olive oil, divided, plus more as needed
- 6 tbsp. (packed) grated Parmesan cheese
- 2 tbsp. (packed) grated Pecorino cheese
- Pinch fine sea salt
Pesto Notes & Tips:
- For the basil: choose small, baby basil leaves (Genovese variety). This is key. Grab a few potted plants if you cannot find this basil in bunches. The leaves should be small and curl under. They are tender and delicious!
- For the olive oil: Light and delicate extra virgin olive oil is a must! Ligurian olive oil is excellent for pesto. It’s mild, fruity and it doesn’t overpower. Problem is, you won’t be able to find it in the store. Sub with a good-quality mild oil that’s not peppery or dark green in color (the flavor will be too strong, and the color will be too dark). I recommend: Lucini, California Olive Ranch and La Tourangelle.
- Blend the pesto in batches, per the recipe. Doing so, paired with chilling the food processor or blender bowl, blade and olive oil, helps to prevent the basil from bruising and turning black. You’ll also achieve the best texture and flavor.
Instructions
Before you begin: Freeze the bowl and blade of your food processor (or blender) for 30 minutes. Refrigerate the olive oil for 30 minutes. This will prevent the basil from oxidizing.
- Add the garlic, pine nuts and 2 tbsp. of oil to the food processor. Pulse a few times until minced. Scrape down the sides of the bowl.
- Add the basil leaves and another 2 tbsp. of oil. Pulse until finely chopped. Add the cheeses.
- With the machine running, slowly stream in the rest of the olive oil and blend until creamy. Scrape the pesto into a bowl.
- Taste, and adjust seasoning with salt (if needed). Stir in more olive oil to loosen the texture (if needed). It shouldn’t look like a thick glob.
- To store: transfer pesto to a small jar. Top with a layer of olive oil to prevent browning. Refrigerate until ready to use. It should last up to 1 week.
Note: if serving pesto with pasta, thin the pesto with a little bit of the pasta cooking water first. Otherwise, it won’t coat the pasta correctly- it will be too thick.

Comments
Hazel Peters says
Thanks for the tips!
Adara says
So delicious! It’s just like the pesto I had in Italy. The tip the reserve some pasta water for pasta worked great to help thin it and coat the pasta without being too oily.
Jake says
My pesto did not have a vibrant green color. What did I do wrong? Thanks.
Emilie Raffa says
Hi there! You would have to walk me through your exact process. Did you chill the olive oil & blades? What type of basil did you use? Thanks!
Lukas says
I was dissapointed that small basil leaves are better i had a plant with giant leaves that i was gonna use
Emilie Raffa says
Hi there! The larger leaves are definitely still usable. You’ll just get a different flavor. It’s up to you!
Paul says
Looking forward to trying this recipe! Is this for one pound of pasta? Also, how many grams of cheese (instead of tablespoons) would that be? We really enjoy your recipes! Thanks!
Kelly Chadwick says
Hi, thanks for the recipe. I appreciate the allegiance to the traditional pure style and its excellence. One aspect I found confusing is the amount of basil and cheese. Both can be vastly different amounts depending how you pack them and grate the cheese. I would like more clarity on this in the recipe. I made your pesto two nights in a row and it turned out noticeably different due to these factors but was hard to quantify.
Ricky Booby says
Great recipe. I added more garlic that I how I like it. I have an abundance of basil this year so making a couple of batches everyday. I bought a type of basil called “columnar basil” as the green house had old out of the usual paler green basil I am accustom to. Dark green leaves and amazing stronger flavour made a great pesto. Also provided a lot more leaves than the other type (sorry, don’t know the name) What type of basil do you recommend?
Scott Thompson says
You mentioned using a slice of lemon… Where is this incorporated in the recipe? Is it something blended into it… Or just placed on top of the layer of oil?
Emilie Raffa says
Hi there! Lemon is not used in the actual recipe. As a tip, my Dad places a slice on top of the pesto (in a jar) to prevent browning.
Janna says
I tried this recipe and it turned out really good. What else can I add to the recipe? Thanks for the recipe.
Emilie Raffa says
Fantastic! Ooo, that’s a good question. Not sure if I’d add anything else to the classic recipe… However, if you want to play around, consider adding some fresh parsley or walnuts instead of pignoli to change it up. Or try my Sicilian Pesto with tomatoes- that one is really good.
Lukas says
You can also try it with sunflower seeds instead off pine nuts
Ann says
Incredible!
Emilie Raffa says
Thank you! Glad you enjoyed it :)
Erin says
Thank you for these tips! I am allergic to pine nuts and walnuts. Do you have any suggestions of alternative nuts that have a similar taste? Would almonds be nutty enough? Thank you!
Emilie Raffa says
Hi Erin! Absolutely. Almonds work, although I wouldn’t toast them (if this even crossed your mind). The flavor would be too pronounced. Also: Brazil or Macadamia nuts would be nice; they naturally echo the creamy, waxy texture of pine nuts.
Chris says
I have used unsalted sunflower seeds. Works good and much cheaper than pine nuts.
Sabrina says
thank you, wonderful tips, I have a recipe that I like but never chilled my olive oil or used small Genovese basil leaves, so definitely worth trying, much appreciated!
Emilie Raffa says
Oh yes! Definitely try it! I’m telling you, the chilling step works like a charm. You can apply it to any recipe.
Joseph Campisi says
Love it, I freeze some in ice cube trays, with out the cheese, use in I pot roast and other dishes. If I’m going to use it with pasta I then add the cheese.
Emilie Raffa says
Hi Joseph! I’ve never used pesto in pot roast before and it sounds outrageously good. I will be thinking about this for the rest of the day now- I’m hungry!
Renee G says
I always wondered how to keep it from turning brown. I tried sprinkling a little white wine vinegar which seems to help. I like the idea from Catmum’s comment, putting in baby jars! Looking forward to trying this method.
Emilie Raffa says
I know… pesky brown pesto is the worse. I’ve never heard of white wine vinegar tip before. So interesting… can you detect the flavor in the pesto?
Don says
My wife and I took the “Let’s Pesto” seaside class at the wonderful seaside “Nessun Dorma” restaurant in Manarola, Cinque Terre last May, and their secret to bright green pesto was, upon carefully destemming each basil leaf, drop it into a bowl of ice water until all the leaves are destemmed, then rapidly and thoroughly shake the water out of those leaves in loosely clasped hands. Try that!! And if you EVER have the good fortune to visit Cinque Terre, prebook this experience on their website – it was the highlight of our trip, coupled with local wine and food to accompany what you have made, from the elevated seaside loverlookinbg Cihque Terre’s most beautiful small bay!!
catmum Piper says
We grow our own basil and garlic and look forward to making pesto every year. We use the small glass baby food storage containers with the airtight snap lids to freeze our pesto, this works well to keep it fresh and from browning, and means we can use these small portions easily. We also make zhoug with cilantro we grow and do the same thing (because it too will turn brown quickly)
Emilie Raffa says
Yes! We do the same. Small portions of frozen pesto can’t be beat. I love pesto in soup :)
Off topic, we are growing garlic for the first time this year. Do you have any tips? I’m so impatient, I want to pull it out of the ground now, lol.
claire piper says
If you were lucky enough to get any scapes, from hardneck garlic generally, those need to be cut off before the flowers bloom…and of course eat them, or make pesto. You want that energy diverted to the bulbs rather than making flowers and seeds. Even some softneck garlic will make scapes if it is slightly stressed or you are just lucky ;-)
Most of the time your garlic plants should have at least 6-8 fully formed green leaves (the leaves represent the layers of paper wrappers around the bulb). Let the soil dry a bit and then gently pull the soil back on a few bulbs to check how big the bulb is. If it is still too small, gently cover it back up and wait a week or so, then check again. If the bulb looks substantial, the wrappers tight, and the cloves well-formed, it’s ready to be pulled. A reliable harvest indicator is when half the leaves have died off, and half are still green. The leaves start to die off from the bottom up. When most of your crop has reached this stage (aim for at least 50 to 75 percent of your crop, assuming you planted them all at the same time), stop watering for at least a week and allow the soil to dry out a bit to prevent rot and make harvesting easier. If your soil is soft and loose, you can gently pull the plants out; you can also CAREFULLY use a potato fork to tease them out. Do NOT wash them. Brush the dirt off and hang the whole plants upside down someplace cool and dry for at least a couple weeks. The leaves will dry up, you can then braid them, or cut the leaves off. I store the heads in the basement in a slat-sided wooden crate, layered with crumpled paper, in the dark. Save the best heads to plant again in late August. We are in Saint Louis, and will probably be harvesting mid-to-late June. Different varieties and locations, of course, ymmv ;-) Good luck!
Angi says
Apparently when you plant your garlic in the fall, plant the largest cloves of garlic and it will insure that your heads are bigger. I haven’t tried this yet, but it makes sense.