No bread flour? No problem! Learn how to bake artisan sourdough bread using all purpose flour and active sourdough starter. This easy-to-follow recipe features step-by-step photos, helpful tips, and a simple baking schedule to help you create delicious, naturally leavened loaves at home. It’s light crisp and airy!
Bakers all over the world choose bread flour to create exceptional sourdough bread at home. It’s prized for its high protein and gluten content, which helps to create a lofty-high rise. But what if you don’t have any bread flour? Can you make light, airy artisan sourdough with all purpose flour instead?
In this post, you’ll find a clear, step-by-step guide to mastering sourdough with all purpose (or plain) flour with a few key adjustments. You’ll gain the tools and confidence you need to bake delicious bread every time.
All-Purpose Flour vs. Bread Flour: Key Differences
It all boils down to protein content. Bread flour has a higher protein content than all purpose flour, which affects gluten development and the bread’s rise.
I typically use King Arthur flour for bread baking. Their bread flour contains 12.7% protein, and their all purpose flour contains 11.7%. This recipe was formulated to work with King Arthur and Trader Joe’s all purpose flours, which are comparable. (learn more about choosing flour in this post).
Tip: Protein content varies between brands, so stick to one brand first to understand how it behaves. It will be your reference point for future adjustments as you continue to bake.
How to Use All Purpose Flour in Bread Baking
Swapping all-purpose flour for bread flour is not always an even exchange. Because all-purpose flour absorbs less water, you’ll need to reduce the total water in your dough to avoid stickiness. Too much water makes the dough hard to handle, which can cause flat, dense, or gummy bread- you don’t want that.
Ok, So Reduce the Water by How Much?
I typically suggest reducing the water by 15-30g to start. The range depends on the specific sourdough recipe, the amount of sourdough starter, and the flour brand you use.
You’ll have to play around with the texture of the dough, adjusting the flour/water as needed until it “feels right,” which can be frustrating if you lack experience. But stick with it: success requires practice, patience and persistence. For now, let’s focus on visual and tactile cues to guide you through the process.
How to Make Artisan Sourdough Bread with All Purpose Flour {Step-By-Step Recipe}
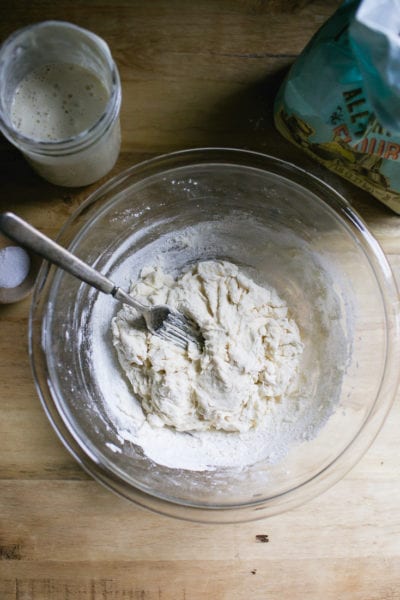
Step 1: Mix the Dough
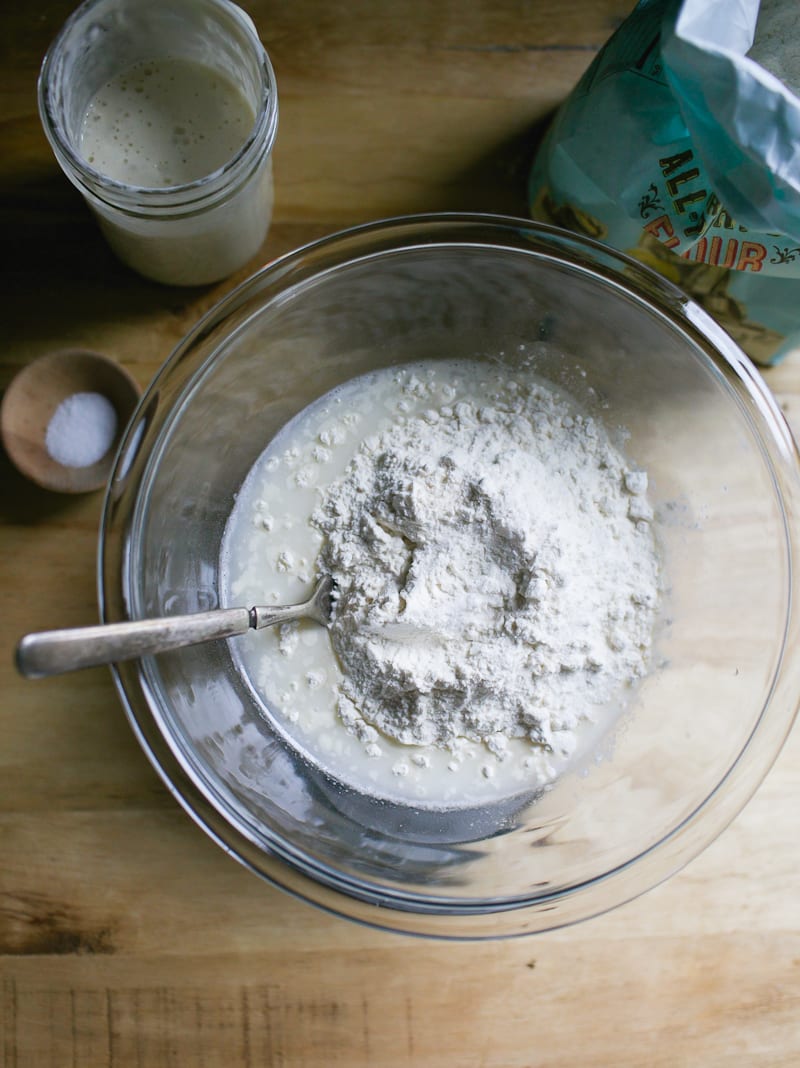
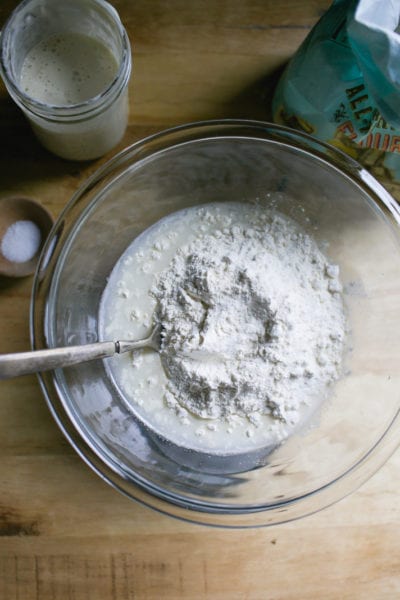
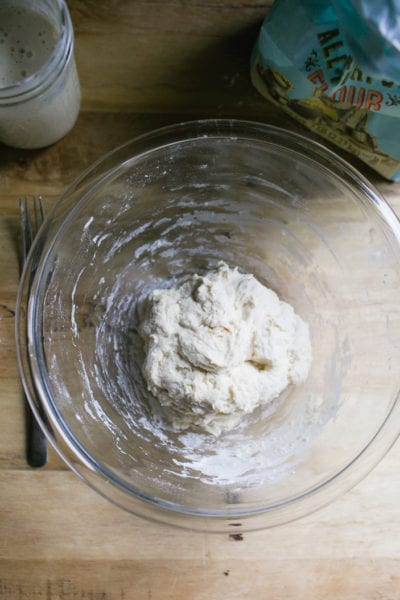
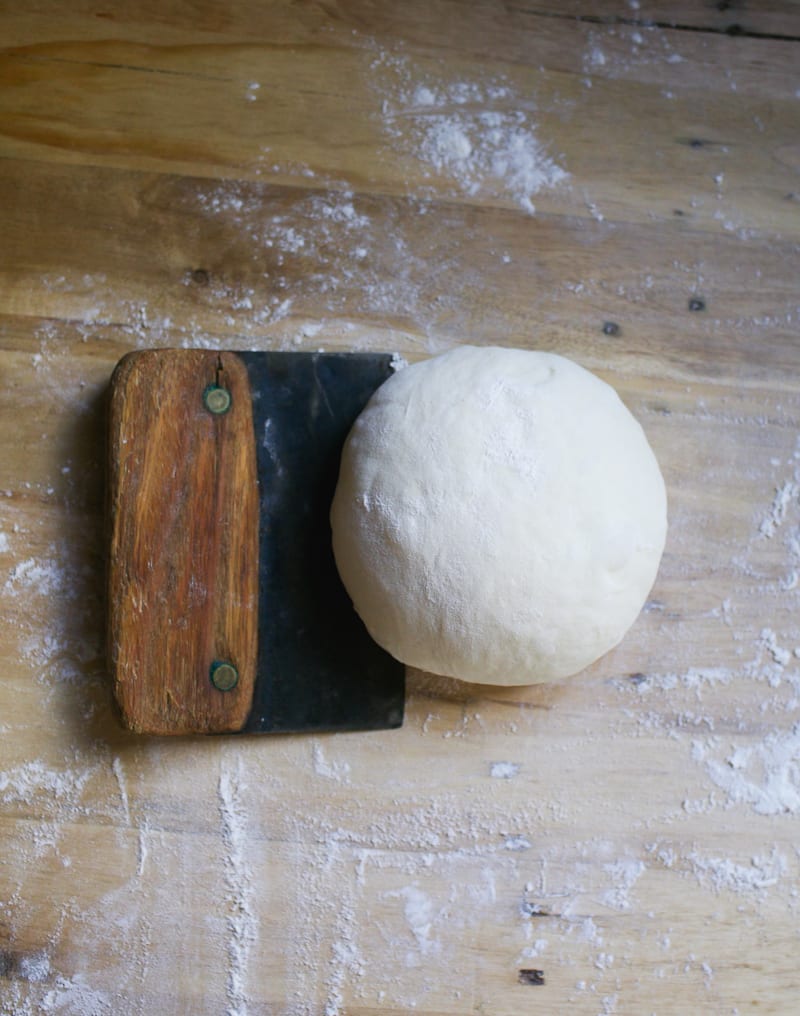
- In a large bowl, whisk your bubbly starter and water together. Add the flour and salt, then mix with a fork until combined. When the dough becomes too stiff to mix with a fork, switch to your hands and knead gently until a rough, shaggy dough forms. This texture is what you’re looking for: slightly sticky but holding together (see images above). Now, cover the bowl with a damp towel or plastic wrap and let rest at room temperature for 30 minutes.
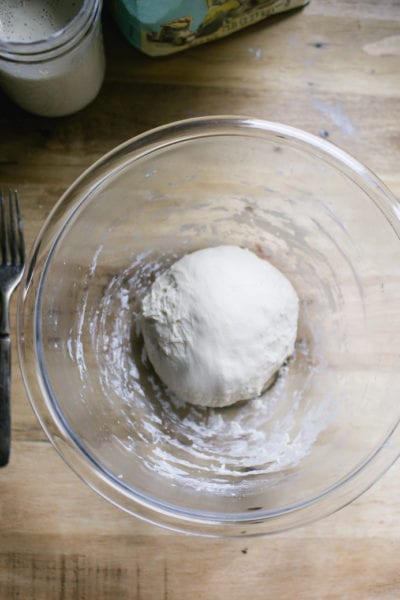
- After the dough has rested, work it into a ball. The surface will appear mostly smooth with a few tears. This is your last chance to adjust the dough’s texture before the bulk rise, so pay attention to how it feels. The dough should be soft and stretchy- not wet, overly sticky, or soupy.
A Few Notes: This recipe makes a small sourdough loaf, ideal for 2–4 people. Smaller loaves are easier to handle, especially if you’re new to sourdough baking. Instructions for a larger loaf are at the end of this post. For best results, you’ll want a digital kitchen scale to measure ingredients accurately, and a Dutch oven (or similar lidded oven-safe pot) for baking. You can find these tools in my shop.
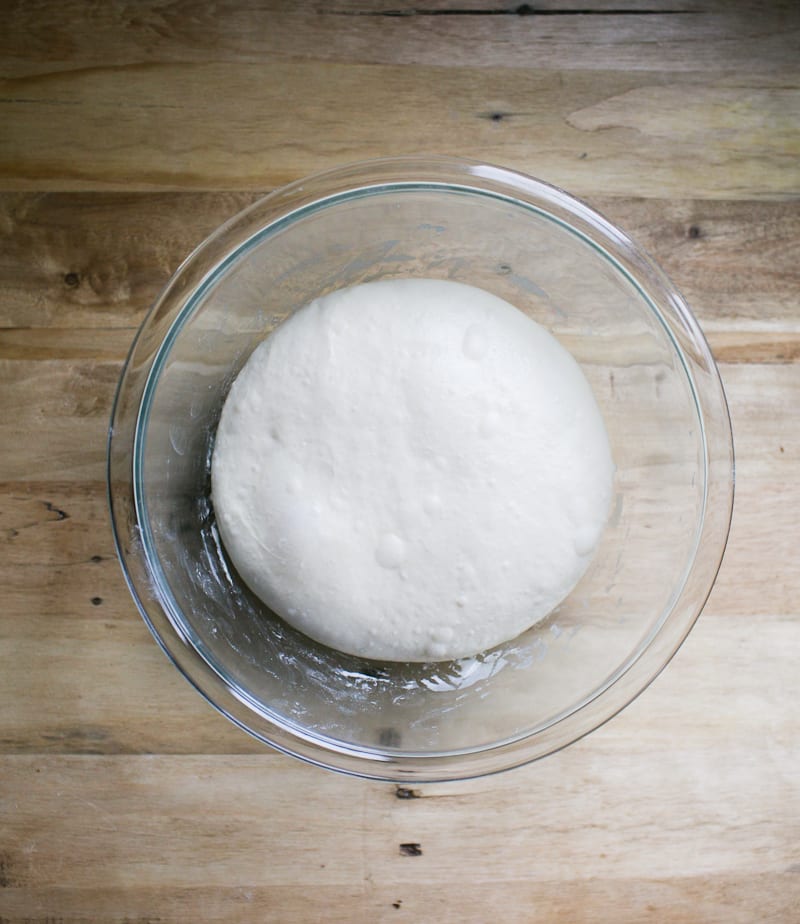
Ste 2: Bulk Rise
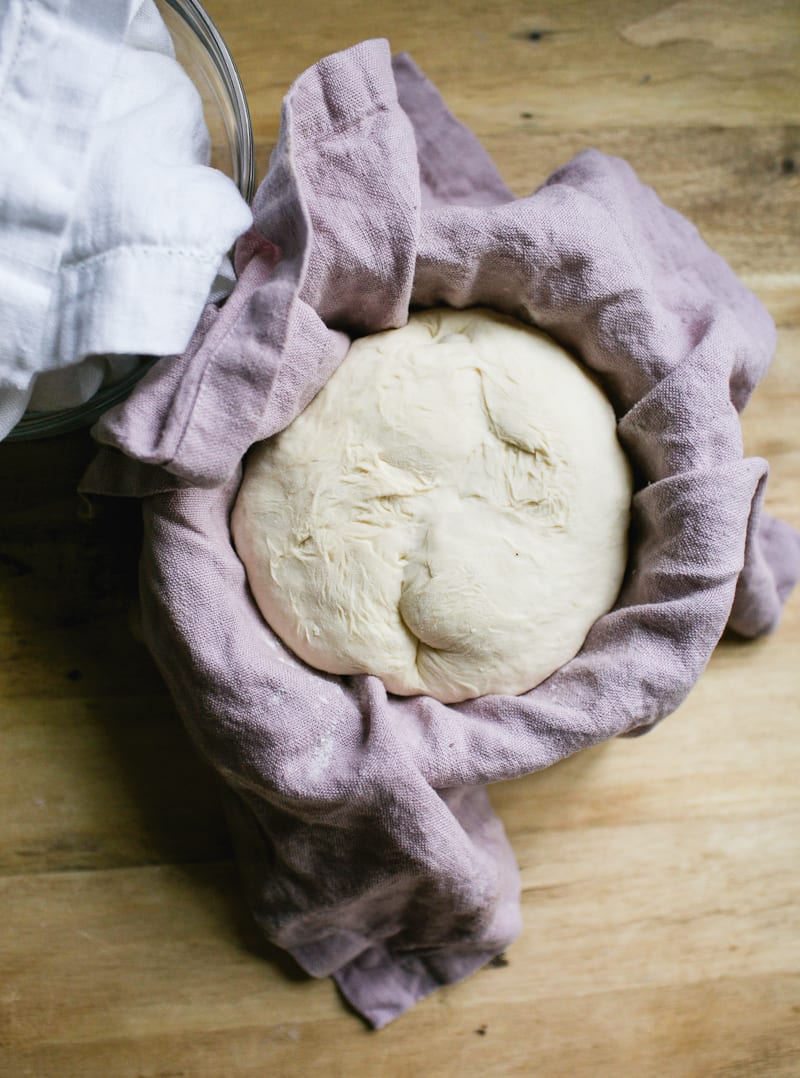
Cover the bowl and let rise overnight, about 10-12 hrs. at room temperature (68 F). The dough is ready when it has doubled in size and looks light and airy. If you’re using a standard 8-inch mixing bowl, the dough should rise to about halfway or two-thirds up the sides, which is perfect for this small loaf.
Optional: Stretch and Fold
This step, done during the bulk rise, helps to strengthen the gluten, improve structure, and give your loaf more height. Watch the video below for additional guidance. Or read the full tutorial: How to Stretch and Fold Sourdough, step-by-step.
About 30 minutes into the rise, perform your first stretch and fold:
- Gently grab one side of the dough, stretch it upward, then fold it over toward the center.
- Rotate the bowl a quarter turn and repeat.
- Continue until you’ve completed four folds (one full set).
- Repeat once more, 30 to 60 minutes later.
Step 3: Shape The Dough
- Line a small bowl with a cotton or linen cloth. Sprinkle generously with flour. Now, you’ll shape the dough twice: first to preshape it, then to build strength and structure.
- Preshape: Remove the dough onto a floured surface. Gently fold the top edge of the dough toward the center. Turn it slightly and repeat, working in a circle until the dough forms a round. Use a bench knife to flip the dough over (smooth side up), then cover and let rest for 20–30 minutes.
- Final Shape: After resting, flip the dough again so the smooth side is facing down. Repeat the folding process to form a tight round. Then flip it back over. With floured hands, gently pull the dough toward you in a circular motion to tighten the shape. Place the dough into the lined bowl, seam side up. Cover the dough with the cloth overhang.
Step 4: Second Rise
Let the dough rest at room temperature for 30 minutes to 1 hour. It’s ready when it looks plump and slightly puffed—it won’t double in size during this stage. While the dough is rising, preheat your oven to 450°F.
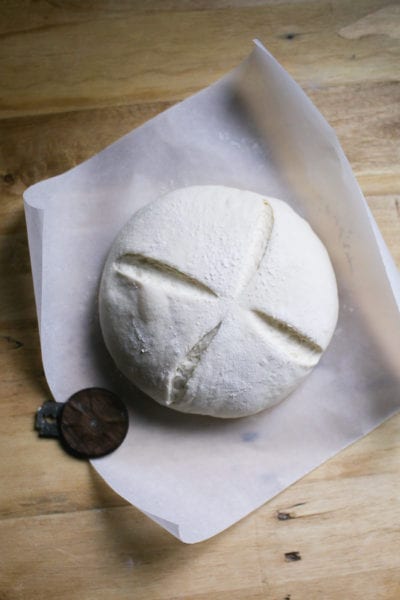
Step 5: Score The Dough
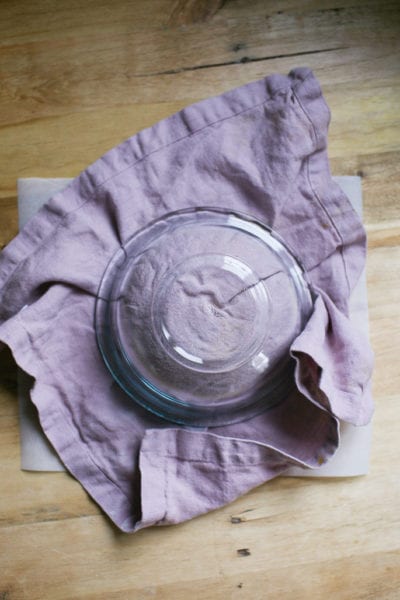
- Invert the bowl of dough onto a sheet of parchment paper. Remove the bowl and cloth.
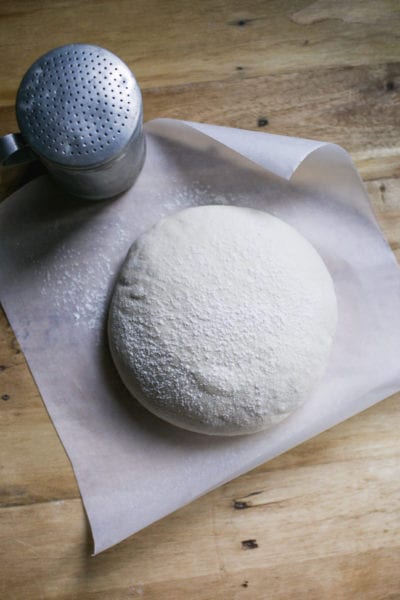
- Sprinkle the dough with flour and smooth the surface with your hands.
- Using a bread lame or a small serrated knife (I used my UFO lame), make four, quick, shallow cuts at 12, 3, 6 and 9 o’clock, turning the parchment paper as you go. Use the tip of the blade as a guide.
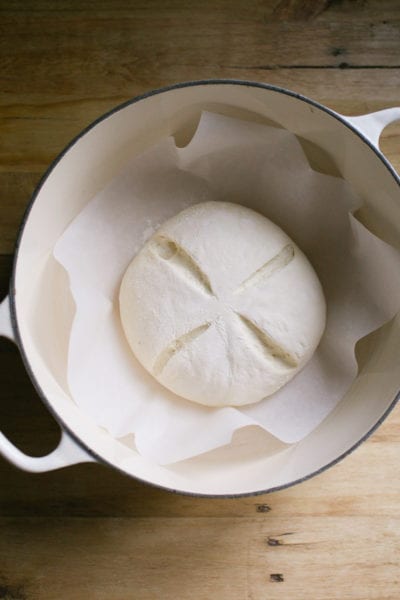
- Lift the dough (still on the parchment) and carefully place it into your Dutch oven. Cover with the lid.
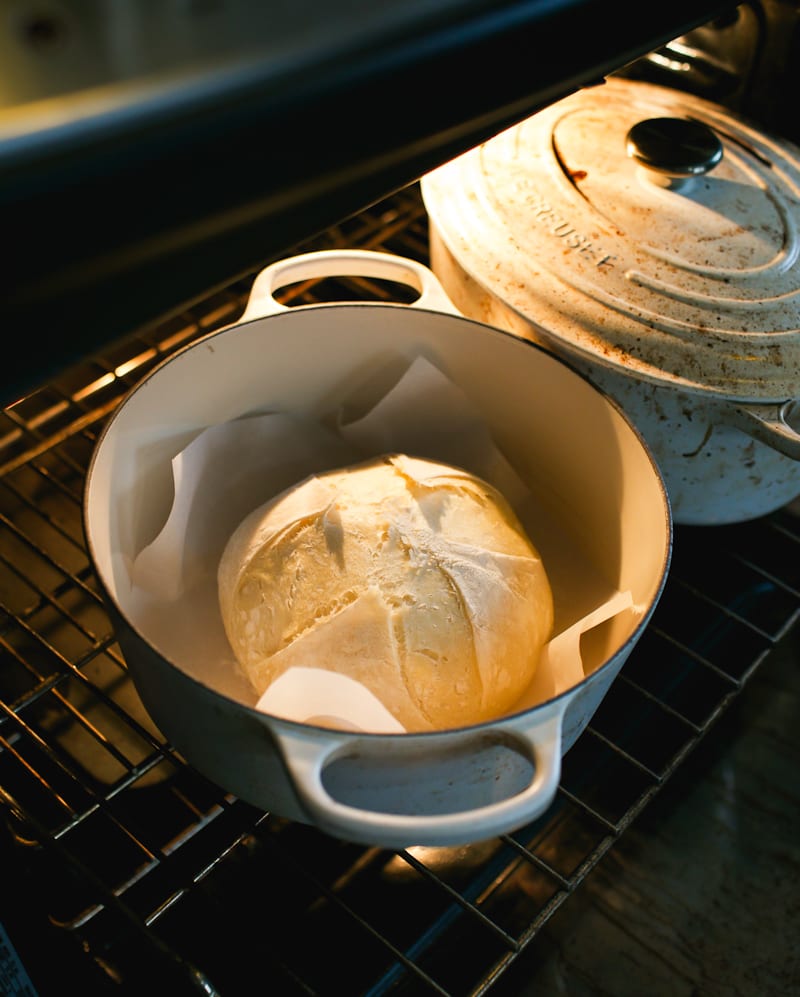
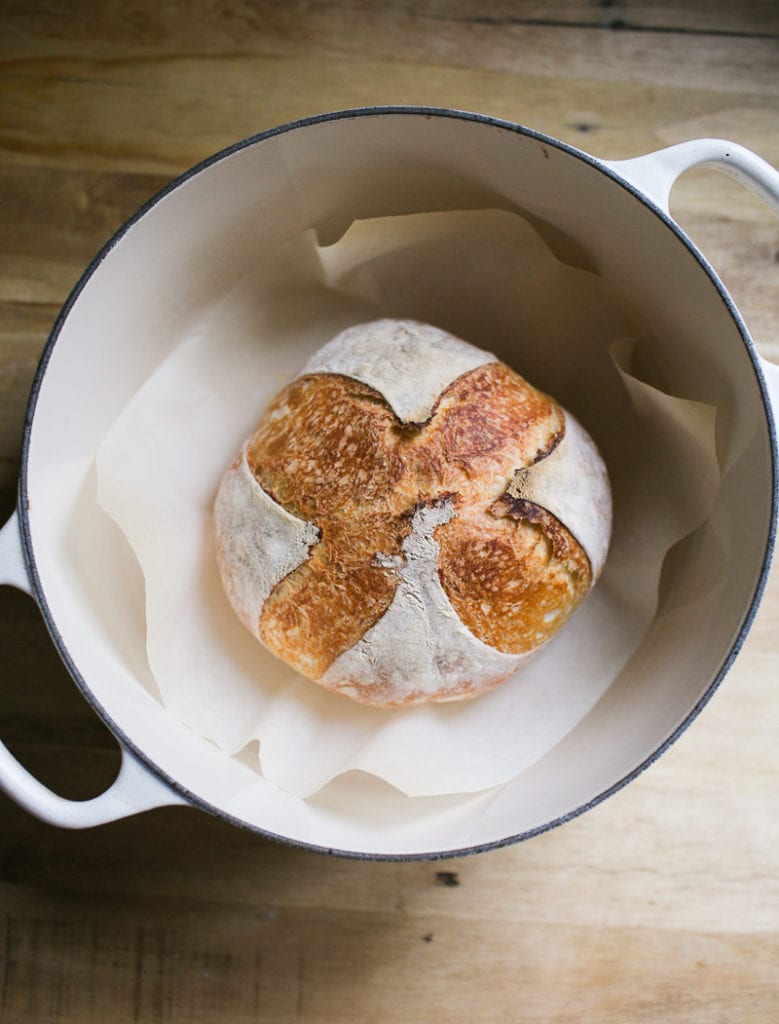
Step 6: Bake The Bread
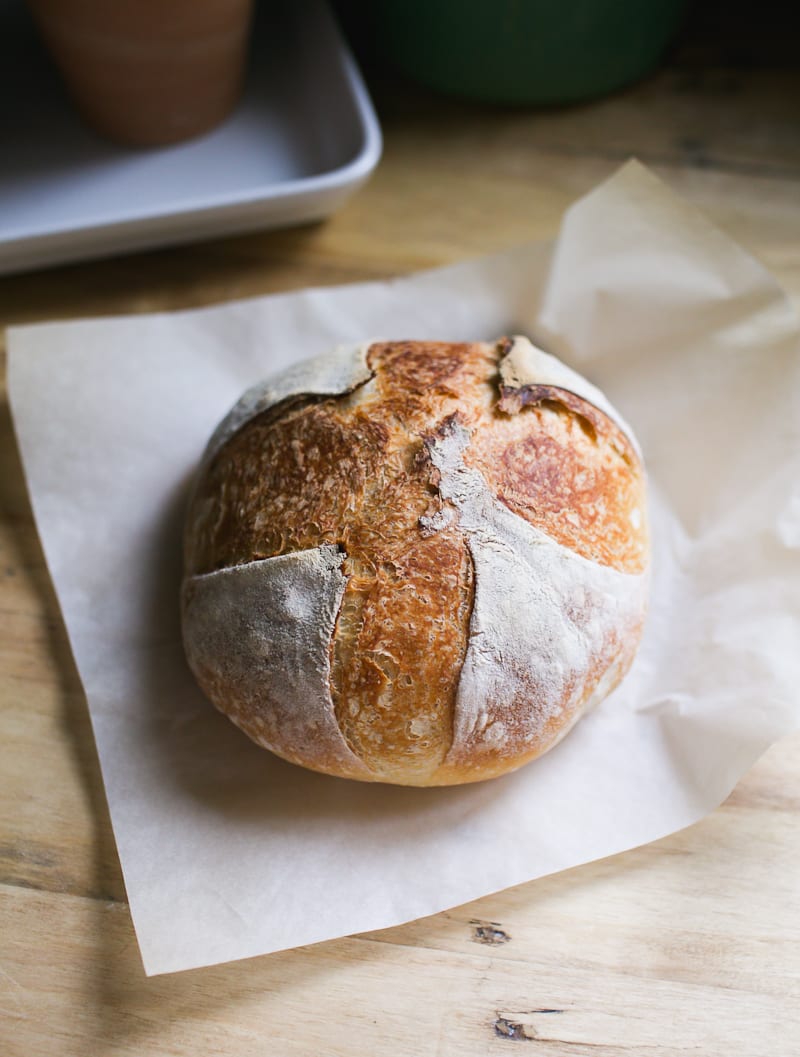
Place the Dutch oven into the preheated oven, center rack. Reduce the temperature to 425 F. Bake covered for 20 minutes. Then, remove the lid and continue baking for 30–35 minutes, or until the crust is deep golden brown. Cool on a wire rack for 1 hour before slicing.
Sourdough Bread Baking Schedule
Here’s a flexible overnight schedule that works well in most home kitchens (around 68°F). If your kitchen runs warmer, simply start a bit later to prevent over proofing the dough.
The Night Before
7:00 PM – Mix the dough and let rest (30 min)
8:00 PM – First stretch and fold (optional)
9:00 PM – Second stretch and fold (optional)
Cover the bowl and let the dough rise at room temperature (10–12 hours)
The Following Morning
7:00 AM – Check the dough (it should be doubled in size)
7:05 AM – Preshape
7:30 AM – Final shape
7:35 AM – Begin second rise + preheat oven
8:05 AM – Bake
By signing up, you agree to receive emails from The Clever Carrot. Unsubscribe at any time.

Artisan Sourdough Bread Recipe with All Purpose Flour
- Cook Time: 50 minutes
- Total Time: 50 minutes
- Yield: 1 small loaf (2–4 ppl) 1x
- Category: Sourdough Bread
- Method: Oven-Baked
- Cuisine: American
- Diet: Vegetarian
Description
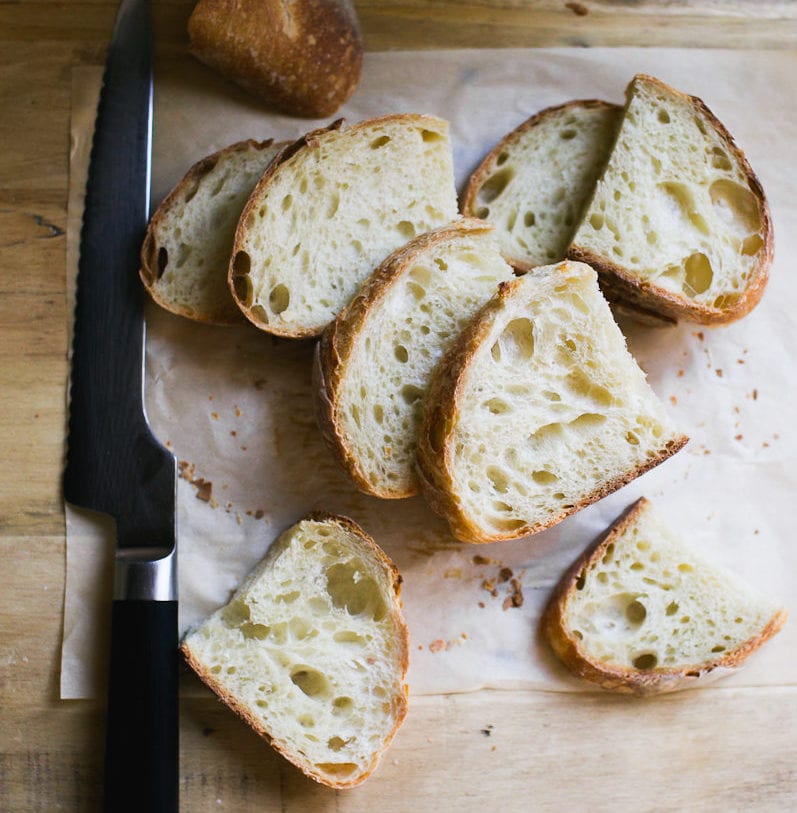
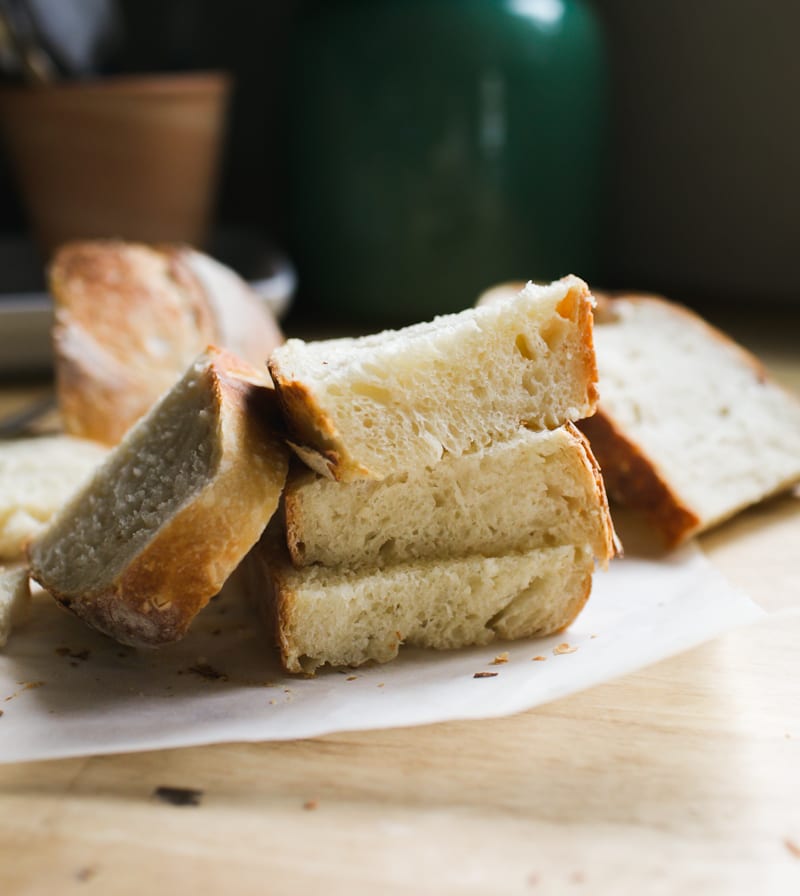
No bread flour? No problem! My artisan sourdough bread recipe with all purpose flour is an excellent substitute. This recipe yields a smaller sized loaf (perfect for up to 4 people) with a crisp crust and a smooth, interior crumb.
Notes & Substitutions
This recipe was formulated to work with King Arthur & Trader Joe’s all purpose flour, which contains 11.7% protein. If using another brand, please see my tip in the recipe below for adjusting the texture of the dough, if needed.
For accuracy and best results: please weigh your ingredients using a kitchen scale.
Ingredients
For a small loaf:
- 50 g (1/4 cup) bubbly, active sourdough starter
- 165 g (1/2 cup + 3 tbsp) water
- 5 g (1 tsp) fine sea salt
- 250 g (2 cups + 1 tbsp) all purpose flour (Trader Joe or King Arthur)
For a larger, standard size loaf:
- 50 g (1/4 cup) bubbly, active sourdough starter*
- 330 g (1 1/3 cup + 1 tbsp) water
- 9 g (1 1/2 tsp) fine sea salt
- 500 g (4 1/4 cups) all purpose flour (Trader Joe or King Arthur)
*Note: I use 50 g of starter for both the small AND standard size loaf. Using a smaller amount of starter with an long, overnight rise will help to prevent over proofed dough in the morning.
Instructions
Make the Dough
In the evening, whisk the starter and water together in a large bowl. Add the flour and salt. Mix with a fork until a stiff dough forms, then finish by hand to fully incorporate the flour. It will feel rough and shaggy, and slightly sticky. Cover with a damp towel or plastic wrap and let rest at room temperature (68 F) for 30 minutes.
After the dough has rested, work the dough into a ball. To do this, grab a portion of the dough and fold it over, pressing your fingertips into the center. Repeat, working your way around the dough until it begins to tighten.
TIP: If the dough feels too wet (and this can happen depending on the brand of flour you’re using), add 1 tbsp. of flour. Mix thoroughly by hand, adding more flour as needed. If you think it’s too dry, add 1 tbsp. of water and see how you go.
Bulk Rise
Cover the bowl (damp towel or plastic wrap) and let rise overnight at room temperature. This will take about 10 to 12 hours at 68 F. The dough is ready when it no longer looks dense and has doubled in size. If using a standard 8-inch bowl, the dough will rise about 1/2 way up the sides.
Optional Step: about 1 hour into the bulk rise, do 1 set of stretch and folds. Repeat 1 hour later. This will increase the overall volume of the bread.
Shape the Dough
The following morning, line a small bowl with a cotton or linen cloth. Sprinkle with flour.
Important: You’re going to shape the dough twice to build extra strength.
Preshape
Remove the dough onto a floured surface. To shape the dough into a round, starting at the top, gently fold the dough over toward the center. Give it a turn and fold over the next section. Repeat until you have come full circle. Using a bench knife, scoop up the dough and flip it over (the smooth side should be facing up). Cover and rest for 20-30 minutes.
Final Shape
After the dough has rested, flip it over again (the smooth side should be facing down now). Shape it again following the steps above. Flip it back over. With floured hands, gently cup the dough and pull it toward you in a circular motion to tighten its shape.
Place the dough into the lined bowl, seam side up. Cover the dough with the cloth overhang.
Second Rise
The dough needs to rise again. Rest for 30 minutes to 1 hour. The dough is ready when it looks puffy and has risen slightly, but has not yet doubled in size.
Preheat your oven to 450. Cut a sheet of non-stick parchment paper to fit the size of your baking pot, leaving enough excess around the sides to remove the bread.
Score the Dough
Place the parchment over the dough and invert the bowl to release. Sprinkle the dough with flour and gently rub the surface with your hands. Using the tip of a bread lame, small, serrated knife or a razor blade, make four shallow 4-inch long cuts at 3, 6, 9, and 12 o’clock around the dough. Use the parchment paper to transfer the dough to the baking pot.
Bake the Dough
Reduce the heat to 425 F. Bake the dough on the center rack for 20 minutes, covered. Remove the lid, and continue to bake for 30-35 minutes and golden brown (40 minutes uncovered for the larger, standard loaf).
When finished, transfer to a wire rack. Cool for 1 hour before slicing, for best texture.
Notes
Sourdough is best consumed on the same day it is baked. To maximize freshness, cool completely and store at room temperature wrapped in plastic, reusable beeswax wrap or bread bag for 1-2 days. Sourdough can also be frozen, for up to 2-3 months. Defrost at room temperature and warm @ 300 F before serving.

Comments
Theresa says
How do I keep the bottom from burning? I use a silicone bottom for the bread instead of the parchment
Emilie Raffa says
In my experience, parchment paper will always brown slightly. However, it shouldn’t burn. Check the brand you’re using: is it oven safe? What temperature does it heat up to? Is it advertised as non-stick? Back in my early baking days, I purchased cheap parchment from the dollar store and it burnt to a crisp every time (turns out it wasn’t really parchment at all – a faux type!). Alternatively, a silicone bottom or bread mat is fine to use.
Theresa says
I dont use parchment at all. I only use the silicone mat and the bottom of my loaf burns. Should I be using parchment also?
Tiff says
The bottom of my loaves tend to get a little darker than I’d like as well so I put a thin layer of black rice at the bottom (white works too but smells a little charred at the end). Now my bottoms cook evenly!
Brandi Lopes says
This recipe is one of the simplest I’ve ever used for sourdough bread. The fact that it uses all purpose flour makes it that much more amazing! I did the mini and it came out fantastic! Wish I could post a picture. Thank you so much for this wonderful recipe.
B says
If I want to double the recipe for two large loaves, do I double the starter too?
Emilie Raffa says
Hi there! For 2 larger loaves (using the 500g of flour option) just double the recipe. If you don’t have a large enough bowl, split the dough in two and use two separate bowls. Otherwise, you can use a high sided dough tub linked here.
Gloria says
Cn you bake in loaf pan.
Susan says
Hello sorry to bother you but a quick question! If I’m to double the recipe do I double everything including the starter? Or keep it at 50g? Thank you so much for your help! We really love the recipe and we go through it so fast we thought to just double it so it’ll last longer! Thank you again!
Brianna says
Hello! i was looking to modify this to fit around a work day schedule. what would be the recommended method? and when to use the fridge to slow it down. Thanks!
Beth says
Another great recipe! I followed it exactly as written using King Arthur unbleached all purpose flour. The bread was absolutely delicious and there wasn’t a crumb left after dinner.
Ashley says
Canadian all-purpose flour contains a higher percentage of protein 12% – 13%. I would like to try your recipe (it looks so good), should I add in 15g to 30 g extra water into the recipe to start to adjust for this? Thank you.
Anusha Kathiravel says
I am also looking to replace with 13% protein all-purpose flour. I think I will use the same amount of water and potentially add a few more grams (about 5g-10g) of water if needed. Please let me know if you have already tried this !
M says
Hello! If you were making this in a Pullman pan for sandwich bread, what changes would you make? Thanks for making sourdough feasible for us!
Mellisa Reeves says
After have great success making your sourdough focaccia, i decided to give this recipe a go. To be honest i have struggled to find a recipe that is soft and requires very little effort but has a nice crust. This recipe delivered my best loaf yet, so soft and delicious thank you.
I do admit i use a box to make my dough ready when i want and that does make making sourdough so much easier in my busy life.
I recommend everyone give this recipe a go
Sophie says
Hi, new to making sourdough. I’m wondering if my starter just isn’t “mature” enough. I’ve had it for about 10 days now, and it gets super bubbly and will triple in size. However, my dough just is not rising properly. After the bulk rise, I woke up to see it looking glossy/wet and a bit sticky. Are there any other causes for this besides an immature starter? Thank you!
Amber says
So you might be over bulk fermenting the dough. What you can do is cold ferment the dough in the fridge for 24-48 hours. If your house or were you keep your dough is hotter than the temp she recommends it could be done sooner than the 10-12 hours. So next time maybe make the dough during the day so you can watch it during the bulk fermentation or throw it in the fridge.
JC Garcia says
OMG! First time making bread and I just can’t believe I did it right the first time. Beginners luck?
Thank you so much for sharing your God given talent with us!
Jill Bridell says
I am relatively new to the world of sourdough. I have tried numerous recipes, and this one is by far the best I have tried, and it was also the most “professional” appearance. It’s even better than King Arthur’s recipe. This recipe was perfect, from the light, crispy crust to the texture inside. I was getting frustrated trying to bake a great loaf, and tonight I told my husband that I thought I was done baking sourdough, but then I pulled this loaf out of the oven! Thank you, Emilie!!
FYI -Also, making sure my starter wasn’t too runny and had gluten strands after it rose was key.
Kelley says
Can I skip the switching bread flour for all purpose and still make this recipe or does it only work with all purpose flour?
Caitlyn says
Hello, I really love this recipe and its worked very well for me. I’m wondering if you’ve ever done cold ferment with this recipe. If so, any tips you can share? Thank you!
Elise says
I made it with bread flour and a 12-hour cold proof and it might be the best loaf I’ve made yet!
Ell says
What was the process once you removed it from the fridge / timeframe before baking ?
Amy says
Delicious and sooo much easier than other recipes! I really liked The boat fermenting at night and then shaping it the next day. That really helped my game for sourdough. I’ve definitely got to get your book. Thank you so much for this awesome recipe that I can do now.
Kayla says
Thank you, thank you, thank you! This recipe came out beautifully. It was my very first time making a loaf, so I went with this smaller loaf version, and it’s absolutely delicious! Soft and fluffy on the inside with the perfect crunchy exterior.
Jay says
How much liquid should I use when using Cotswold strong white Canadian flour?
Kari says
I am just getting started with sourdough and am really enjoying your recipes and the process! Quick question. If I’d like to add herbs and cheese to the sour dough, when would I do that?
Briseis says
You would want to add the add-ins while you are doing the stretch-and folds during the bulk rise
Lindsey says
Great recipe! I had no bread flour but my starter was ready to go! I found this recipe and have made twice now. Just a great mellow flavored bread. I do suggest if you preheat your Dutch oven on the small loaf, I only cooked for 25 minutes after taking the cover off. It would have been burnt if it went any longer.
Jesus loves you says
So I was a bit silly and began the bulk rise at 3 pm but I want to bake it in the morning can I just put it in the fridge or will it go wrong?
Thank you
Emilie Raffa says
Hi there! Absolutely. You can use the fridge to “hold” your dough at any point in the process. The cold fridge temperature will slow down the rise giving you more flexibility in your baking schedule. With that said, when ready to continue, you’ll need to assess the dough first before baking: Does it need more time to rise? If so, watch the dough (not the clock) and proceed with the rest of the steps.
BJ Bellamy says
Hi! I seen in the sourdough recipe for using bread flour it includes oil in the recipe and this one doesn’t. Is there a reason for that?
Amanda says
Can you corporate any add ins for this bread? I’m thinking of doing garlic and Parmesan but not sure which step to add it in. Thanks!
Dana Brunner says
Can you let it rise for 4 hours and bake ?
Lisa Marie says
Came out perfectly and am trying for a second small loaf a day later. Will try pretzels next.
Ivone says
I’ve tried making the small loaf , but my bread turns sour . Is it because I use too much of sourdough or it’s kept for rising for long?
Dana Brunner says
Can I pre heat the Dutch Oven ?
Emilie Raffa says
Sure thing. It’s an optional step if you want to include it.🥰
Cass says
Great recipe! easy directions to follow for beginners. I will be sharing the bread and recipe in the future.
Chantal says
My dough is so dense it’s nearly impossible to do a stretch and fold. What have I done wrong? Can it be saved?
Briana says
Where I would start is…. was your starter strong and active? is the temperature of your space warm enough? do you need to let it rise a bit more before your stretch and folds?
Ursula says
I have made this recipe 5 times now, and each time it comes out perfect!!!!
Nicole says
Try moving your rack up one in the oven!
Susan says
How is the bread different if you skip the stretch and folds? Does it taste the same? Is it dense or light and airy?
Brittany says
Love it! Such an easy recipe to follow. Only question I have is, how do you get the bottom to not be so hard when it’s done cooking?! lol. It’s a bit too much for us.
Cooked in a cast iron Dutch oven with parchment paper.
Leah says
I put a cookie sheet underneath my Dutch oven and that helped it not get too hard on the bottom if that helps!
Michelle says
I also sprinkle a little oatmeal on the bottom of the Dutch oven so the parchment paper is resting on that! Not too much though – just a single layer
Kate says
This is the best recipe for my sourdough. I’ve tried many, but this works the best for me, and is delicious! So glad I found you!
Emilie Raffa says
Kate, this is such great feedback thank you! Welcome to sourdough! 🥰
Jim G says
Hi, trying to salvage my mistake of using all-purpose flour (actually 400g AP and 100g rye) for your Dukka bread recipe! So I found your recipe for AP flour, but my dough already has 150g of 50/50 starter. Is there a way to adjust the bulk rise and proofing process? Thanks, I’ve had good success with your light WW sourdough recipe!
Shannon Alexander says
After the final rise, could a person put this in the fridge for a cold proof overnight like a lot of recipes call for?
Emilie Raffa says
Hi Shannon! You can with adjustments. A cold proof is only successful if your bulk rise doesn’t go for too long. Otherwise, the dough will overproof in the fridge on the overnight. So, rise the dough to about 50-75% only, shape, and then chill overnight.
Judy Hoar says
First time making sourdough have made lots of regular breads great receipe turned out awesome thank you!!
Madison Wiggins says
Seriously the best sourdough recipe I have seen. I’ve tried a dozen recipes, with not a great result but this one was perfection. Will be using again!
Jen says
I’m a sourdough newb but didn’t want to commit to having bread flour on hand as I live in a tiny town and it’s not always readily available. This recipe is AMAZING! So easy to follow, great results, all with ingredients I always have in the house. I’ve added mixins to it as well and have had super results.
Leah says
Very delicious, very easy, very forgiving! This recipe always works for me, even though I measure the flour and always add a little whole wheat, sprouted whole wheat, or spelt flour.
Jen says
I made the smaller loaf and it turned out perfectly! I happen to only have Trader Joe’s all purpose flour on hand and wanted to stress bake 🤣the smaller loaf is so cute , and perfect size for my husband and I :)
Macaila Scarano says
Hi! I’ve been following your all purpose recipe for quite some time now. I made my starter 1.5 years ago with all purpose flour. Am I able to transition to using bread flour? Or do I have to make a new starter with bread flour..? Thank you!
Gigi says
I made the recipe you have using the bread flour. It was delicious! I added a teaspoon of honey. I want to try this recipe using all purpose flour but I noticed you don’t include the use of olive oil. Is it ok to add olive oil to this or not? I feel like the olive oil gives it a nice flavor also but maybe it’s excluded when using all purpose flour for a reason?
Paula Kraus says
Wonderful recipe! Do you ever preheat the Dutch Oven before you put the dough in it to bake? Many sourdough recipes do that, and I wondered if that would work for this recipe, or if it is better to put the dough/parchment into a cold Dutch Oven. Thanks!
Devyani says
I just wanted to share that I tried your sourdough bread recipe, and on my third attempt, it turned out really well! Thanks for the great recipe!
Janell says
Great recipe and easy to follow ! thank you
Stephanie Lien says
This is the easiest recipe to follow. I have made about 10 loaves of bread and they were perfect!!! The directions are so easy to follow and the results are fantastic every time.
Thank you!!!
Lecia A Blackmon says
This was my first time making the Artisian Sourdough and it turned out so well. Normally I make your sourdough sandwich bread. Thank you for your good clear instruction. I’ll be making the granola today.
suzanne hogan says
HELP! I make the smaller loaf of this bread in a 31/2 quart dutch oven. My loaf comes out short and squat cause my pan is too big. (the larger loaf is perfect) What size pan should I use for the smaller loaf?
Annie Chalnick says
I am going to make my dough around eight tonight and then will let is rest for a bulk rise but I won’t be able to start shaping until 11 the next morning resulting in a 15 hour bulk rise. Can I put my dough in the fridge to slow down the fermentation process for the bulk rise portion and then continue as normal for the rest of the recipe?
Amanda Desbiens says
Is it OK to allow the bread to sit a while longer on the second rise? I have to leave the house and wondering if it’ll harm the process if it sits 2 hours or more on the second rise before scoring? Thanks!
Melissa says
I love this recipe! I’ve made quite a few other social media influencer recipes and this one was perfect for my starter. This is the only one where I got my bread to rise perfectly and taste just as good.
Emilie Raffa says
Excellent! So great to hear Melissa! Thank you for sharing your feedback. 🥰