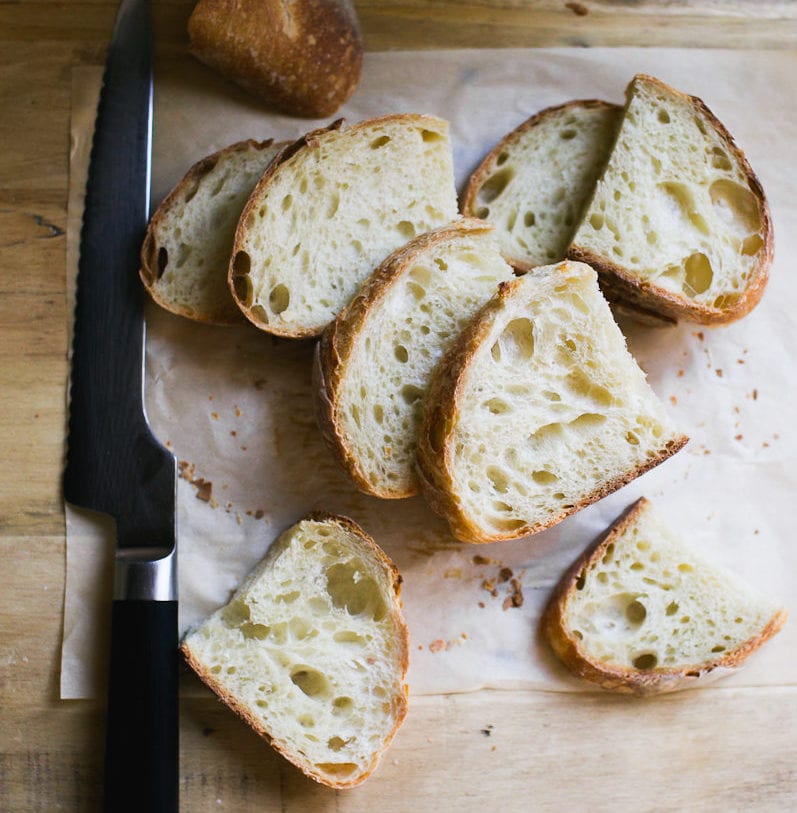
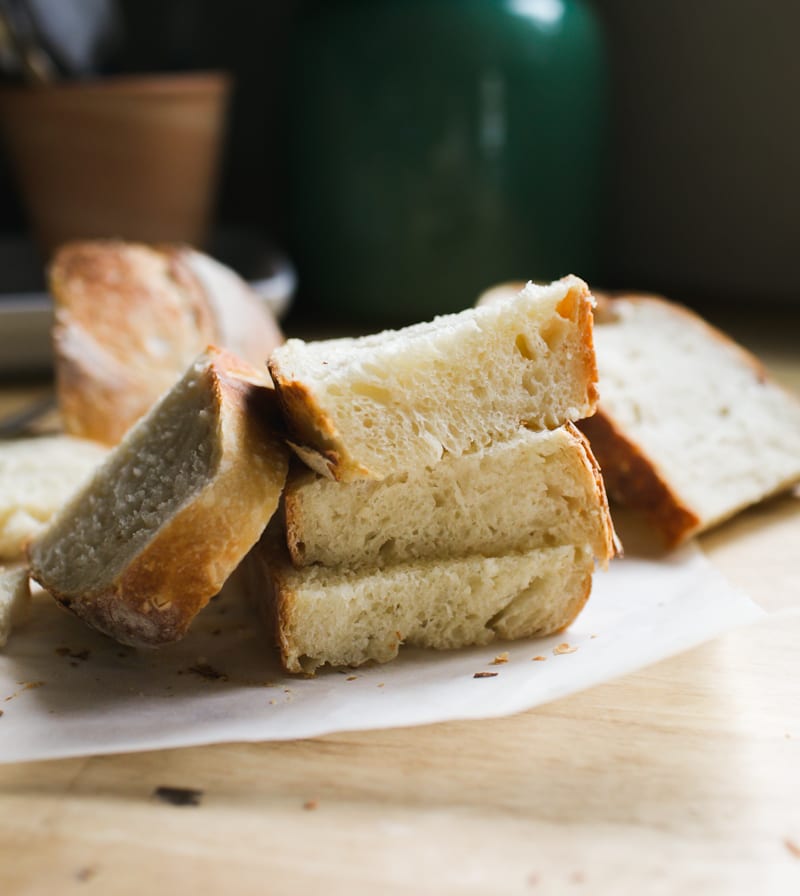
No bread flour? No problem! Learn how to bake artisan sourdough bread using all purpose flour and active sourdough starter. This easy-to-follow recipe features step-by-step photos, helpful tips, and a simple baking schedule to help you create delicious, naturally leavened loaves at home. It’s light crisp and airy!
Bakers all over the world choose bread flour to create exceptional sourdough bread at home. It’s prized for its high protein and gluten content, which helps to create a lofty-high rise. But what if you don’t have any bread flour? Can you make light, airy artisan sourdough with all purpose flour instead?
In this post, you’ll find a clear, step-by-step guide to mastering sourdough with all purpose (or plain) flour with a few key adjustments. You’ll gain the tools and confidence you need to bake delicious bread every time.
All-Purpose Flour vs. Bread Flour: Key Differences
It all boils down to protein content. Bread flour has a higher protein content than all purpose flour, which affects gluten development and the bread’s rise.
I typically use King Arthur flour for bread baking. Their bread flour contains 12.7% protein, and their all purpose flour contains 11.7%. This recipe was formulated to work with King Arthur and Trader Joe’s all purpose flours, which are comparable. (learn more about choosing flour in this post).
Tip: Protein content varies between brands, so stick to one brand first to understand how it behaves. It will be your reference point for future adjustments as you continue to bake.
How to Use All Purpose Flour in Bread Baking
Swapping all-purpose flour for bread flour is not always an even exchange. Because all-purpose flour absorbs less water, you’ll need to reduce the total water in your dough to avoid stickiness. Too much water makes the dough hard to handle, which can cause flat, dense, or gummy bread- you don’t want that.
Ok, So Reduce the Water by How Much?
I typically suggest reducing the water by 15-30g to start. The range depends on the specific sourdough recipe, the amount of sourdough starter, and the flour brand you use.
You’ll have to play around with the texture of the dough, adjusting the flour/water as needed until it “feels right,” which can be frustrating if you lack experience. But stick with it: success requires practice, patience and persistence. For now, let’s focus on visual and tactile cues to guide you through the process.
How to Make Artisan Sourdough Bread with All Purpose Flour {Step-By-Step Recipe}
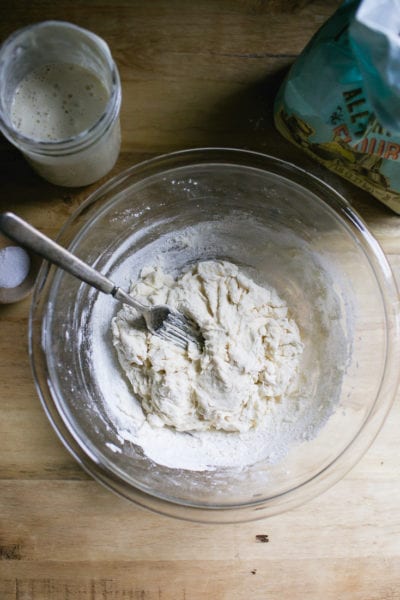
Step 1: Mix the Dough
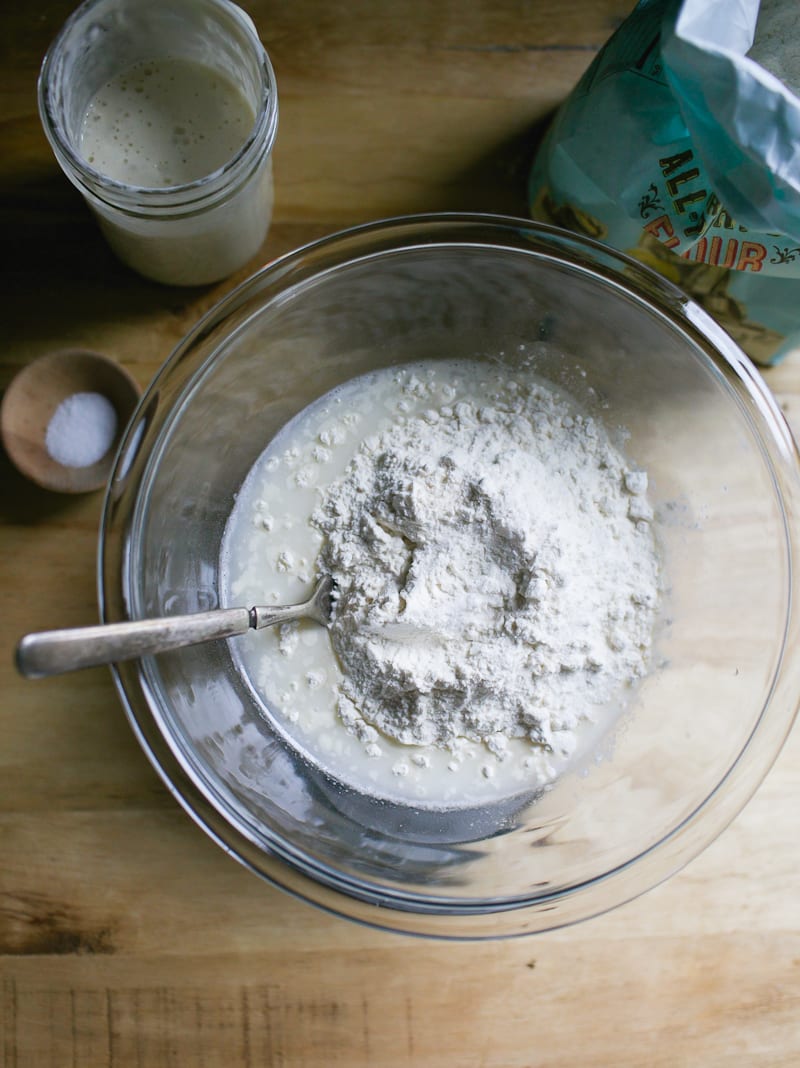
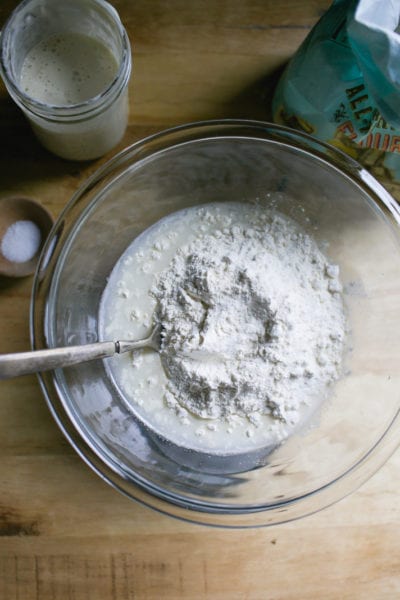
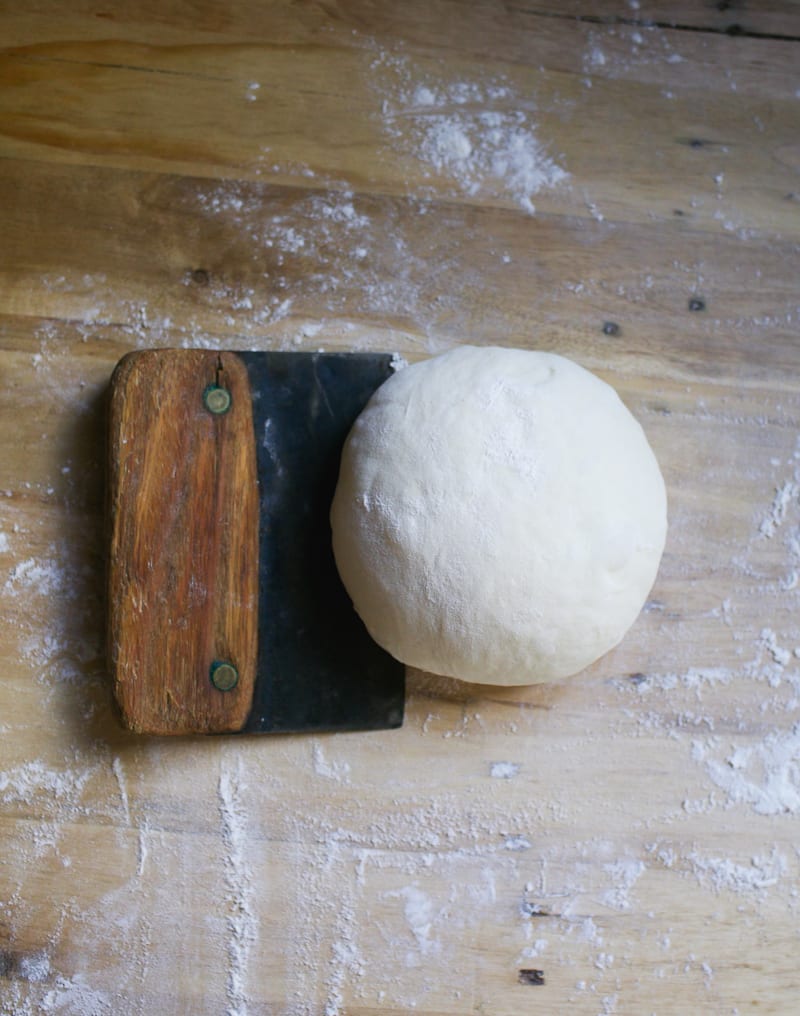
- In a large bowl, whisk your bubbly starter and water together. Add the flour and salt, then mix with a fork until combined. When the dough becomes too stiff to mix with a fork, switch to your hands and knead gently until a rough, shaggy dough forms. This texture is what you’re looking for: slightly sticky but holding together (see images above). Now, cover the bowl with a damp towel or plastic wrap and let rest at room temperature for 30 minutes.
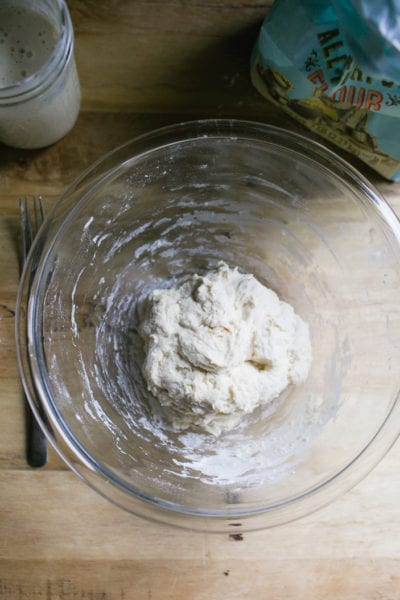
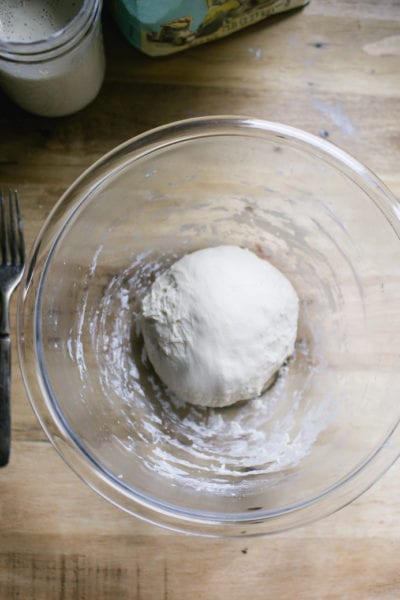
- After the dough has rested, work it into a ball. The surface will appear mostly smooth with a few tears. This is your last chance to adjust the dough’s texture before the bulk rise, so pay attention to how it feels. The dough should be soft and stretchy- not wet, overly sticky, or soupy.
A Few Notes: This recipe makes a small sourdough loaf, ideal for 2–4 people. Smaller loaves are easier to handle, especially if you’re new to sourdough baking. Instructions for a larger loaf are at the end of this post. For best results, you’ll want a digital kitchen scale to measure ingredients accurately, and a Dutch oven (or similar lidded oven-safe pot) for baking. You can find these tools in my shop.
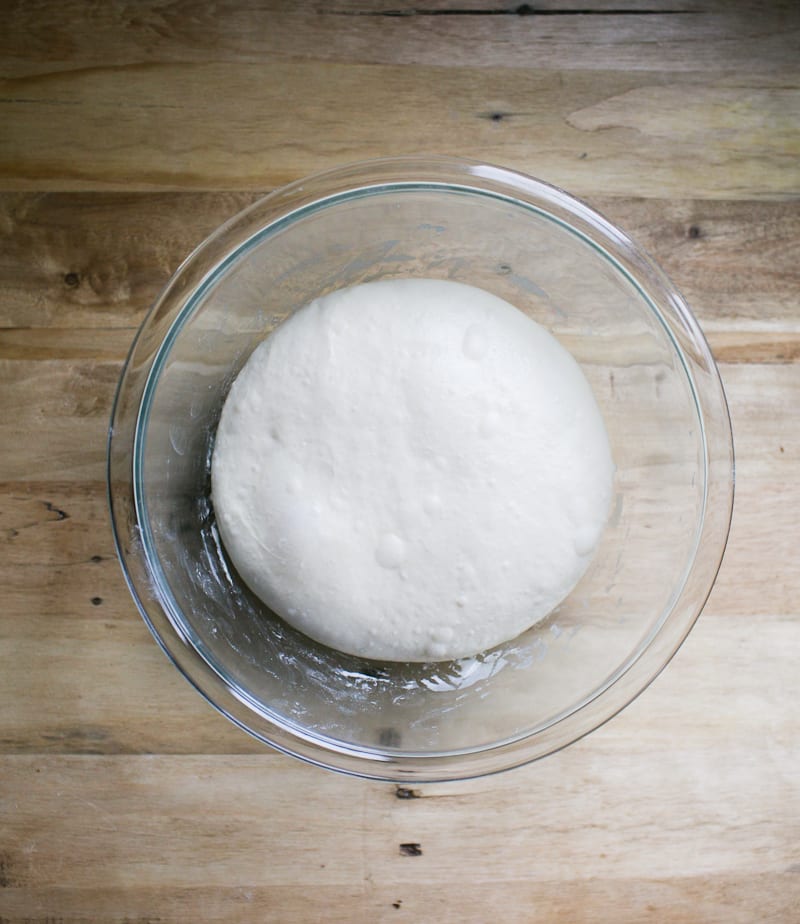
Ste 2: Bulk Rise
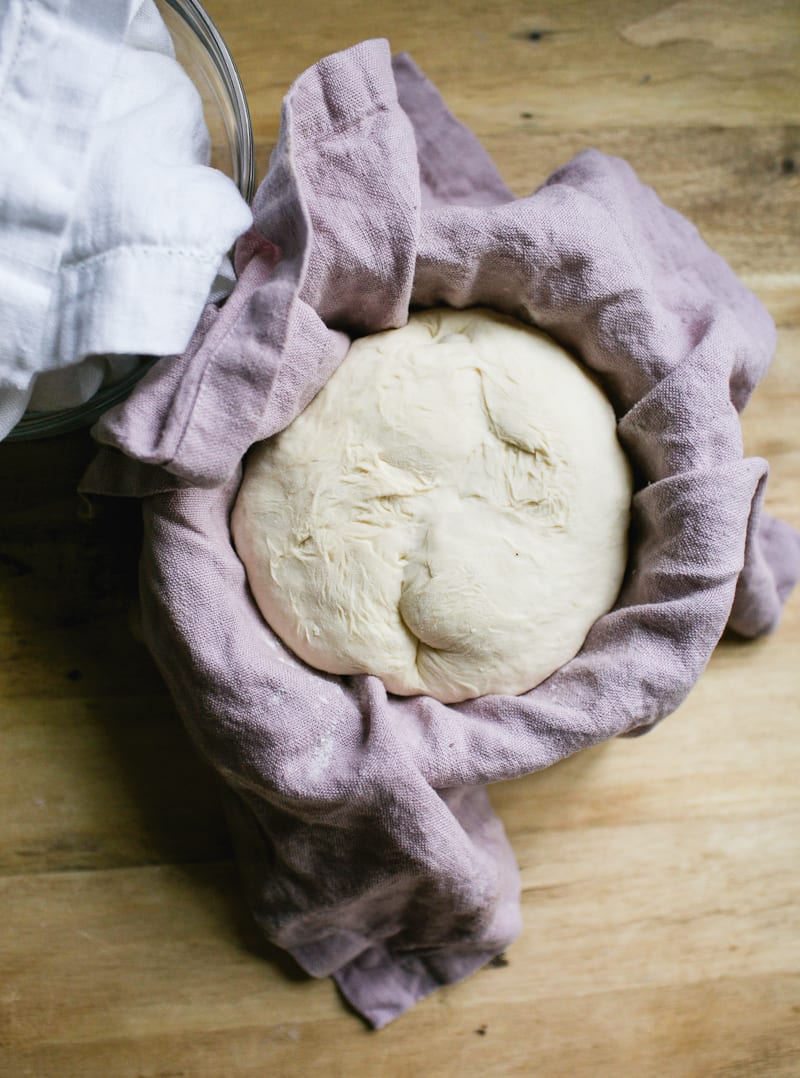
Cover the bowl and let rise overnight, about 10-12 hrs. at room temperature (68 F). The dough is ready when it has doubled in size and looks light and airy. If you’re using a standard 8-inch mixing bowl, the dough should rise to about halfway or two-thirds up the sides, which is perfect for this small loaf.
Optional: Stretch and Fold
This step, done during the bulk rise, helps to strengthen the gluten, improve structure, and give your loaf more height. Watch the video below for additional guidance. Or read the full tutorial: How to Stretch and Fold Sourdough, step-by-step.
About 30 minutes into the rise, perform your first stretch and fold:
- Gently grab one side of the dough, stretch it upward, then fold it over toward the center.
- Rotate the bowl a quarter turn and repeat.
- Continue until you’ve completed four folds (one full set).
- Repeat once more, 30 to 60 minutes later.
Step 3: Shape The Dough
- Line a small bowl with a cotton or linen cloth. Sprinkle generously with flour. Now, you’ll shape the dough twice: first to preshape it, then to build strength and structure.
- Preshape: Remove the dough onto a floured surface. Gently fold the top edge of the dough toward the center. Turn it slightly and repeat, working in a circle until the dough forms a round. Use a bench knife to flip the dough over (smooth side up), then cover and let rest for 20–30 minutes.
- Final Shape: After resting, flip the dough again so the smooth side is facing down. Repeat the folding process to form a tight round. Then flip it back over. With floured hands, gently pull the dough toward you in a circular motion to tighten the shape. Place the dough into the lined bowl, seam side up. Cover the dough with the cloth overhang.
Step 4: Second Rise
Let the dough rest at room temperature for 30 minutes to 1 hour. It’s ready when it looks plump and slightly puffed—it won’t double in size during this stage. While the dough is rising, preheat your oven to 450°F.
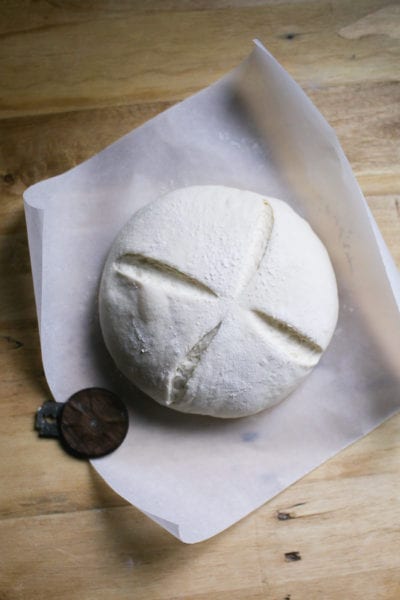
Step 5: Score The Dough
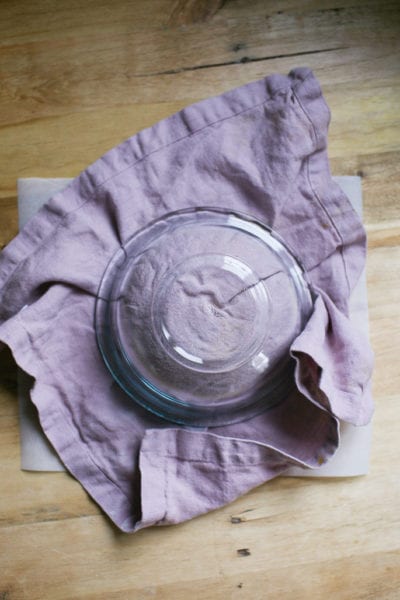
- Invert the bowl of dough onto a sheet of parchment paper. Remove the bowl and cloth.
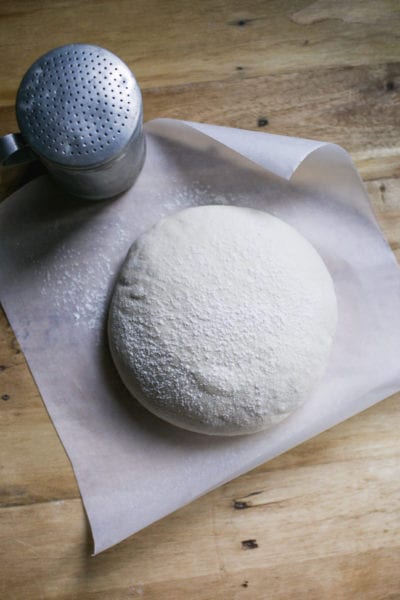
- Sprinkle the dough with flour and smooth the surface with your hands.
- Using a bread lame or a small serrated knife (I used my UFO lame), make four, quick, shallow cuts at 12, 3, 6 and 9 o’clock, turning the parchment paper as you go. Use the tip of the blade as a guide.
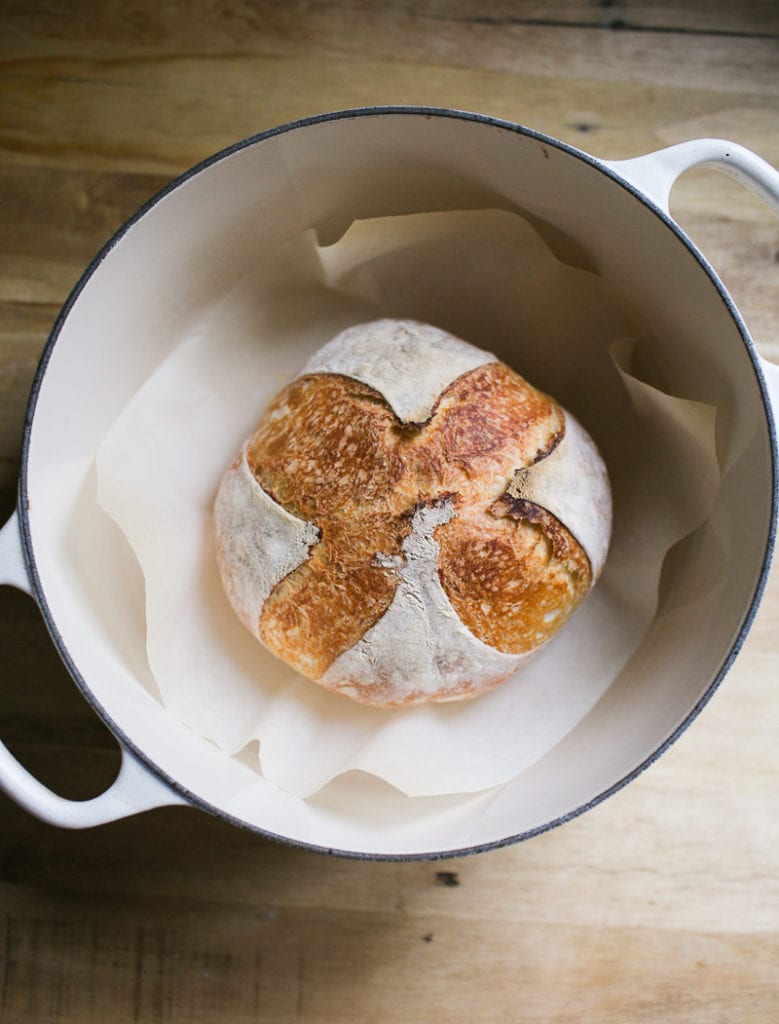
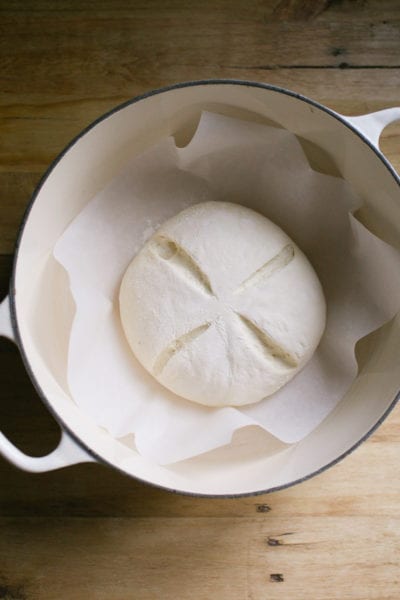
- Lift the dough (still on the parchment) and carefully place it into your Dutch oven. Cover with the lid.
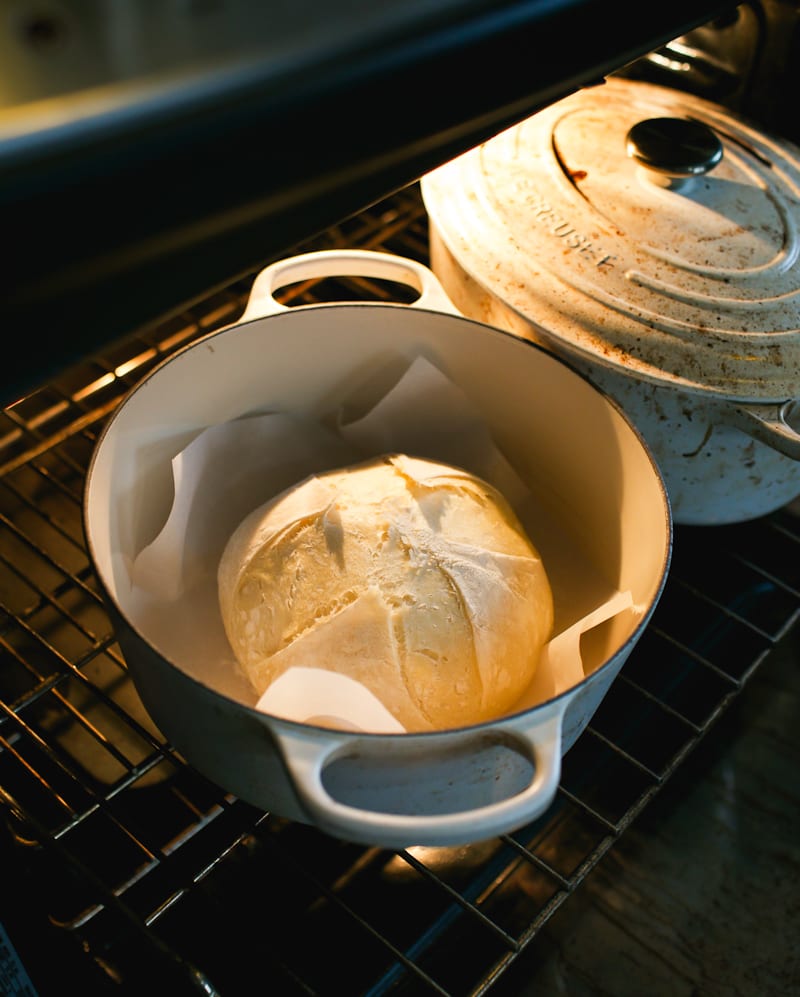
Step 6: Bake The Bread
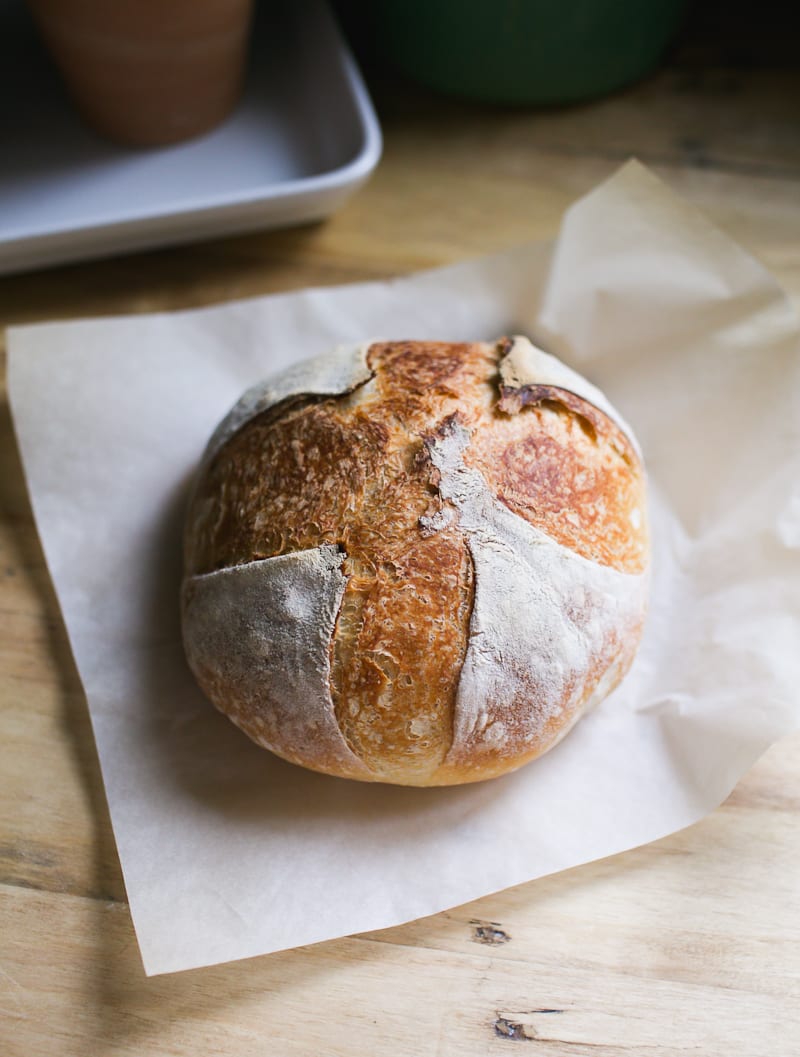
Place the Dutch oven into the preheated oven, center rack. Reduce the temperature to 425 F. Bake covered for 20 minutes. Then, remove the lid and continue baking for 30–35 minutes, or until the crust is deep golden brown. Cool on a wire rack for 1 hour before slicing.
Sourdough Bread Baking Schedule
Here’s a flexible overnight schedule that works well in most home kitchens (around 68°F). If your kitchen runs warmer, simply start a bit later to prevent over proofing the dough.
The Night Before
7:00 PM – Mix the dough and let rest (30 min)
8:00 PM – First stretch and fold (optional)
9:00 PM – Second stretch and fold (optional)
Cover the bowl and let the dough rise at room temperature (10–12 hours)
The Following Morning
7:00 AM – Check the dough (it should be doubled in size)
7:05 AM – Preshape
7:30 AM – Final shape
7:35 AM – Begin second rise + preheat oven
8:05 AM – Bake
By signing up, you agree to receive emails from The Clever Carrot. Unsubscribe at any time.

Artisan Sourdough Bread Recipe with All Purpose Flour
- Cook Time: 50 minutes
- Total Time: 50 minutes
- Yield: 1 small loaf (2–4 ppl) 1x
- Category: Sourdough Bread
- Method: Oven-Baked
- Cuisine: American
- Diet: Vegetarian
Description
No bread flour? No problem! My artisan sourdough bread recipe with all purpose flour is an excellent substitute. This recipe yields a smaller sized loaf (perfect for up to 4 people) with a crisp crust and a smooth, interior crumb.
Notes & Substitutions
This recipe was formulated to work with King Arthur & Trader Joe’s all purpose flour, which contains 11.7% protein. If using another brand, please see my tip in the recipe below for adjusting the texture of the dough, if needed.
For accuracy and best results: please weigh your ingredients using a kitchen scale.
Ingredients
For a small loaf:
- 50 g (1/4 cup) bubbly, active sourdough starter
- 165 g (1/2 cup + 3 tbsp) water
- 5 g (1 tsp) fine sea salt
- 250 g (2 cups + 1 tbsp) all purpose flour (Trader Joe or King Arthur)
For a larger, standard size loaf:
- 50 g (1/4 cup) bubbly, active sourdough starter*
- 330 g (1 1/3 cup + 1 tbsp) water
- 9 g (1 1/2 tsp) fine sea salt
- 500 g (4 1/4 cups) all purpose flour (Trader Joe or King Arthur)
*Note: I use 50 g of starter for both the small AND standard size loaf. Using a smaller amount of starter with an long, overnight rise will help to prevent over proofed dough in the morning.
Instructions
Make the Dough
In the evening, whisk the starter and water together in a large bowl. Add the flour and salt. Mix with a fork until a stiff dough forms, then finish by hand to fully incorporate the flour. It will feel rough and shaggy, and slightly sticky. Cover with a damp towel or plastic wrap and let rest at room temperature (68 F) for 30 minutes.
After the dough has rested, work the dough into a ball. To do this, grab a portion of the dough and fold it over, pressing your fingertips into the center. Repeat, working your way around the dough until it begins to tighten.
TIP: If the dough feels too wet (and this can happen depending on the brand of flour you’re using), add 1 tbsp. of flour. Mix thoroughly by hand, adding more flour as needed. If you think it’s too dry, add 1 tbsp. of water and see how you go.
Bulk Rise
Cover the bowl (damp towel or plastic wrap) and let rise overnight at room temperature. This will take about 10 to 12 hours at 68 F. The dough is ready when it no longer looks dense and has doubled in size. If using a standard 8-inch bowl, the dough will rise about 1/2 way up the sides.
Optional Step: about 1 hour into the bulk rise, do 1 set of stretch and folds. Repeat 1 hour later. This will increase the overall volume of the bread.
Shape the Dough
The following morning, line a small bowl with a cotton or linen cloth. Sprinkle with flour.
Important: You’re going to shape the dough twice to build extra strength.
Preshape
Remove the dough onto a floured surface. To shape the dough into a round, starting at the top, gently fold the dough over toward the center. Give it a turn and fold over the next section. Repeat until you have come full circle. Using a bench knife, scoop up the dough and flip it over (the smooth side should be facing up). Cover and rest for 20-30 minutes.
Final Shape
After the dough has rested, flip it over again (the smooth side should be facing down now). Shape it again following the steps above. Flip it back over. With floured hands, gently cup the dough and pull it toward you in a circular motion to tighten its shape.
Place the dough into the lined bowl, seam side up. Cover the dough with the cloth overhang.
Second Rise
The dough needs to rise again. Rest for 30 minutes to 1 hour. The dough is ready when it looks puffy and has risen slightly, but has not yet doubled in size.
Preheat your oven to 450. Cut a sheet of non-stick parchment paper to fit the size of your baking pot, leaving enough excess around the sides to remove the bread.
Score the Dough
Place the parchment over the dough and invert the bowl to release. Sprinkle the dough with flour and gently rub the surface with your hands. Using the tip of a bread lame, small, serrated knife or a razor blade, make four shallow 4-inch long cuts at 3, 6, 9, and 12 o’clock around the dough. Use the parchment paper to transfer the dough to the baking pot.
Bake the Dough
Reduce the heat to 425 F. Bake the dough on the center rack for 20 minutes, covered. Remove the lid, and continue to bake for 30-35 minutes and golden brown (40 minutes uncovered for the larger, standard loaf).
When finished, transfer to a wire rack. Cool for 1 hour before slicing, for best texture.
Notes
Sourdough is best consumed on the same day it is baked. To maximize freshness, cool completely and store at room temperature wrapped in plastic, reusable beeswax wrap or bread bag for 1-2 days. Sourdough can also be frozen, for up to 2-3 months. Defrost at room temperature and warm @ 300 F before serving.

Comments
Jennifer says
This turned out great! I think using a scale and measuring is key.
Emilie Raffa says
It definitely is. Makes a huge difference!
Cheryl says
Can you use unbleached all purpose flour instead of regular all purpose flour?
Emilie Raffa says
Yes!
Vincent says
Hello! I made this recently and i thought it turned out really well. Great oven rise and thin Crunchy crust. However, I didn’t get an open crumb. Any suggestions?
Raquel says
Thanks so much for the tips and insight!
I finally got a nice bread at my third attempt (:
Emilie Raffa says
FANTASTIC!
Russ says
I have been making tour beginner recipe using bread flour successfully. My only failure was proofing more than an hour. Bulk rise is usually 5-6 hours in a 75 degree kitchen.
I tried this recipe with the AP flour and failed totally. The dough
looked and felt fine but got no oven bounce and ended flat frisby.
I rate recipe five but my execution 0
Kristen says
This recipe is amazing, thank you!!! I got a wicker proofing basket for my birthday, is that something I can use for this recipe? If so, which steps would I use it for?
Emilie Raffa says
Absolutely! After you shape the dough, place it seam side up in the proofing basket for the second rise. For best results, line it with a cloth dusted with flour for easy removal :)
Tran Ngo says
Thank you so much for the recipe. I followed your starter making from scratch 6 weeks ago then I tried some other recipes on Internet which i found the dough was always wet to handle, let alone some strange shapes haha. After that, I come back to your page and followed your instructions to T, then everything becomes going well. Every time opening the fridge and seeing my levain, I just wanna bake more bread 😊.
Julie says
Hello! Thank you so much for this easy, delicious recipe! This is the one I’m sticking to! I was just curious why we reduce the heat from 450 to 425, and if we put the bread in while it’s reducing or wait until it’s cooled down. Thank you!
Pja says
Hi there! I’m just now realizing I asked you a question under the wrong recipe. Ive been making your all purpose flour sourdough recipe since the beginning (2 months ago) but I do still have a question regarding a faster rise time and the amount of starter you use in this all-purpose recipe.
If I added around 60-70g of starter to quicken the rise time, would I need to adjust the amount of water added in the recipe or the amount of flour?
Thank you so much and I apologize for making you answer this question again under a different recipe!
Emilie Raffa says
Hi there! No worries- I actually recognize this comment ;) Ok, so for this recipe (as opposed to the beginner one) adding an additional 60 g or 70 g of starter (to the 50 g already included in the recipe) means you will need to decrease the total amount of water to achieve a similar texture dough. For the standard size loaf, if using 110 g of starter decrease the water to 320 g. For 120 g of starter the decrease in water is roughly the same, coming in at 318 g.
Pauline Hope says
Hello there, I’m in New Zealand and am trying to make sourdough bread. I’m now on my 3rd starter, not sure what happen with the others, and all is well now. I find your instructions perfect and so easy to follow so will continue until my starter is ready to help me make the best sourdough bread ever. Keep up the good work.
Hailie says
Hi there
I mistakenly bought freshly milled AP flour and it’s been falling flat in my normal sourdough recipe
I thought maybe switching to this AP recipe, could increase my chances of success
If my kitchen is resting around 72 degrees, should i bulk ferment in the fridge instead? I’ve played around a bit thinking it’s over proofing, but haven’t solved my issue yet and would like to try a different recipe altogether to see….
Thanks!
Emilie Raffa says
I would continue to bulk at your room temp, 72 F. Sourdough takes forever to rise in the fridge. It’s not like dough made with instant commercial yeast, where it continues to rise when chilled.
Regarding flat loaves: it’s possible the new AP flour you have paired with the old recipe just doesn’t work due to how that particular flour absorbs the water. I would decrease the water in that recipe and see how you go.
Hailie says
Thank you!
Decreased the water and it did the trick
Appreciate your advice
Anji says
Emilie, I’ve made your sourdough with AP flour recipe four times now and it’s been perfect every time! I’ve had no issues by following your instructions exactly (albeit with a bit more flour than a tablespoon added when shaping the dough into a ball, as I live in a humid climate). Thank you for making it so easy. I have a degree in professional cooking and baking but hadn’t made sourdough in quite some time; the first recipe I used from another website detailed an overly complicated, somewhat arcane process that left me with a loaf roughly the density and hardness of a Louisville slugger. I thought, “Now, I KNOW it can’t be this hard,” so I went looking further and found you. I’m so glad I did! I really appreciate the depth of knowledge you’ve shared on your website and that it’s written so clearly and so comprehensively.
Ian says
Have made this three times and they came out great (with the exception of using wax paper instead of parchment the first time, which stuck to the bread). Have also made the sourdough sandwich recipe, which came out good, but was a little bit heavy as compared to this recipe. Is it possible to make this recipe in a loaf pan? If so, are any changes necessary? Thanks.
Emilie Raffa says
You can definitely use a loaf pan. Make sure to coat the pan before baking (oil or butter) and bake at 375 F for 45-50 minutes or until the internal temp is between 205- 210 F. I do not score the dough. The texture will be chewy with a crisp crust (like regular sourdough bread); my sandwich bread recipe is enriched with butter so the crumb is not quite as chewy and the crust is soft.
Lexi Cotcamp says
Hey there! I made this recipe with all purpose, and it turned out great! The dough was fairly taught throughout stretch and folds though (guessing from the lower hydration?), which made the crumb quite tight upon bake. Any recos on how to increase hydration for a more open crumb?
Emilie Raffa says
Hi there! Did you weigh or measure your ingredients? This dough is actually quite elastic at the stretch and fold stage. Perhaps there was too much flour in your dough and/or the brand of flour had a higher protein content. Thanks!
Arlene says
Thank you for this AMAZING recipe! I’ve made several boules and shared with friends. I’m going on a road trip and want to gift a boule to a friend, but won’t see them for a few days into the trip. What do you suggest for best quality? Should I bake the boule for 20 minutes then give it to them to finish baking or should I bake completely and freeze? I’m not sure I’ll be able to keep it frozen until I see them.
Stephanie says
Hi Emilie! Thank you for your comprehensive, amazing recipe! I made the high hydration variation and don’t think I’ll eat another bread😊! Is it possible to freeze the high hydration dough before it is baked? Please advise. Thank you so much!
Emilie Raffa says
Hi there! I typically do not freeze unbaked sourdough dough (it can mess with the starter strength). I just freeze the baked loaf.
Anwesha Pal says
What is the hydration percentage of the starter that you’ve used for this recipe?
Emilie Raffa says
100% hydration.
Anwesha Pal says
Perfect. Will post a feedback soon!
Anwesha Pal says
Hi. I have another question. Why don’t you place the dough in fridge and allow it to retard?
Emilie Raffa says
Because this dough follows a long, overnight bulk rise. Additional (lengthy) time in the fridge can lead to over proofed dough.
Anwesha Pal says
Hi Emilie. Thanks for the reply. The temperature right now (10:30 P.M) where I live is 29C. Naturally in the morning, the temperature rises even further. Would you suggest any alternative method for proofing for me since the dough will proof extremely fast if I leave it at room temperature? Can I let it bulk proof at room temperature for a while, refrigerate it, and then continue proofing at room temperature till it has doubled it size the next day?
Emilie Raffa says
Absolutely. Bulk rise during the day, chill the dough, and then finish the rest of the steps the following day.
Karen Moses says
Loved your recipe. My first ever sourdough loaf and it came out beautiful. I even used starter that I created myself.
T Hartwig says
Great recipe and easy to follow procedure! Thank you! My bread is turning out wonderfully now; in fact, my confidence is such that I can now experiment with adding more whole wheat flour, and am still getting great results!
Here’s a funny thing: I have two cast iron pots, one is 5l, one is 3l, and I get more oven spring in the 3l, even though it’s a tighter fit. Perhaps more steam?
It’s great to be able to relax with this process, and I thank you for that!
Best wishes.
Cathy says
I made this for the first time after using another recipe that was the same ingredients, but wetter. Your explanation of AP flour was spot on. I can’t get bread flour right now, so it was so helpful to find this recipe. My bread turned out really well; made the larger loaf and compared to my first loaf, was higher, crumb less wet and the crust was sooo delicious.
It was much warmer than 68 degrees, so I waited until later in the evening to start the bulk rise, put it in a room with all the windows open hoping it would cool overnight; it did! When I first looked at the dough in the morning, I thought I was going to have a lot of trouble working the dough, but I did not. I floured my hands very lightly and was so happy with the results.
You made this process much easier and less fussy than the other site I use.
mitalhungrymig says
The taste of my sourdough was wonderful and I enjoyed your clear instructions – thank you! I wasn’t able to get the same ears / open crumb but the taste is great and I found this recipe less hassle than a few others. Appreciate you sharing this recipe!
Christy says
Great recipe with fantastic results! Flipped the timing and did the baking in the evening, and when I woke up, my husband had devoured half the loaf! Looks like our starter won’t be living in the refrigerator…
Rachel says
Hi –
I’m making this for the first time today! So far the dough seems stretchy and like the right consistency.
My question is about the 1st rise time. In the blog post and recipe, you start the 10-12 hour clock before the stretch & fold technique. But in your baking schedule, it looks like the 10-12 hours starts AFTER the folding. Which way is correct?
I am hoping to start my time after the folds, because I didn’t plan the schedule very well. Obviously, I don’t want to overproof, but also don’t want to wake up at 4am (which would be the 12 hour mark if you meant to start the clock before folding).
Thanks!
Emilie Raffa says
Stretch and folds are always done during the bulk rise, which starts after the first rest (which is 30 minutes to 1 hr in this recipe).
Carol says
Emilie, these were just the answers I was searching for – thank you!! I began my sourdough journey only a month ago & have been nurturing my starter “Angelina” given to me by a dear friend. Your book Artisan Sourdough Made Simple has been on my bookshelf for a year and a half (the purchase inspired by Robin Sloan’s fun book Sourdough) and now has been a huge help understanding the making of sourdough breads.
I have made your Roasted Garlic & Rosemary Focaccia 3 times – we LOVE it!! I am anxious to try your loaves, but have been having trouble figuring out how to make the schedule work. I now think I have an idea how do so as well as how to substitute AP for Bread flour!
Thanks so much for the education and the inspiration!
Emilie Raffa says
You are very welcome, enjoy! xx
Elyse says
As a sourdough newbie, I’ve made this recipe a dozen times now and it’s turned out just like the pictures every time! I’ve made both sizes, used two different flours, tried add-ins, and forgotten about it for an hour or two (life with a baby), but the recipe has been very forgiving. The mini boule is perfect for 1-2 people to eat immediately, and I actually prefer it for the high crust to inside ratio, but the standard size is great for slicing and sharing. Thank you so much for the excellent and detailed recipe!!!
Emilie Raffa says
Fantastic, Elyse! Enjoy :)
Zainab says
Hello,
Is it okay if my dough bulk rises for more than 12 hours? I plan on making it in the evening and baking it the evening of the next day, since i don’t have time in the morning after 12 hours.
Thank you :)
Emilie Raffa says
It might over proof. I would bulk rise the dough for the 12 hrs overnight, and then shape and chill it (second rise) until ready to use. It still might be slightly over proofed by the time you get to it, but it all depends on your timing and temperature.
Catherine says
Hi Emilie,
I’ve tried this twice and it’s been a bust both times. Basically, the dough never does a final rise. The bulk rise goes well, but after the morning preshape and shape, it never plumps up. It just sits there. The baked loaf is not round, and it’s too dense and chewy. What am I doing wrong? I thought I might have overproofed it the first time, so the second time, I only let it rise 10 hours, and it doubled nicely. But the same final result. It’s also quite sticky. I added a little more flour early on as the recipe suggests until it seemed the right consistency, but in the morning, it again feels sticky. It’s hard to get out of the bowl. (My starter is nice and bubbly and passed the float test. I am using Farmer Ground all-purpose flour. The flours you recommend have not been available to me during covid.) Thanks for any help.
Emma Stroud says
This is exactly my situation. It rises beautifully overnight but once deflated in the morning it’s basically a sticky mess. I have no idea how to create a ball out of it, to let it rise again. I get a flat spread on the counter… happened twice now!
Emilie Raffa says
Sounds like the dough might be over proofed! This can happen especially when the weather warms up the the rise becomes faster.
Sheila says
hello! I tried a few other recipes- not realizing that bread flour was more absorbent than AP flour. With the pandemic, it’s difficult to get flour, let alone bread or whole wheat flour. I found your recipe & LOVE it! The smaller loaf fir perfectly in my 3qt Dutch oven & toaster oven. (Living in nyc small apartment) I finally found wheat flour and would like to incorporate it into this recipe, What is the percentage that I should add? While maintaining this hydration level? Thank you! :)
sheila says
The smaller loaf Fits perfectly (not firs) :) -Sheila
Emilie Raffa says
Try 20% ww flour and see how you go. Might need to add a splash more water to get the right consistency. But it’s a good start without having to make additional changes.
Catherine Lowrey says
What do you think it means when my loaf is bursting out the bottom? I cut 4 slashes in the top, but both of my loaves have large horizontal cracks near the bottom. They still taste delicious, though! Added Kalamata olives to one of them. Thanks again for the great recipe! Katie
Emilie Raffa says
It’s hard to say without seeing a picture. However, my guess is that the crust hardened too quickly causing it to hinder the oven spring (which caused the cracks). Make sure to bake in a Dutch oven (or another oven safe pot with lid) for steam. That will help! x
Mindy says
This recipe is amazing!! I made a starter using unbleached AP flour (no name brand – my new favourite) and use the same flour for making the bread. I do add about 5g extra flour at the start (both the small and larger loaf) as I found I was always adding flour at the first set of stretch and folds. Works perfect every time! Have a loaf on the counter cooling to eat at lunch. I have also shared this recipe with friends and they have all enjoyed it and experienced success! Thank you for a very straight forward and easy to follow recipe. :)
JOHN LEVY says
Just eating it now! great oven spring, excellent flavor, perfect airy crumb delicious crust
Anjana says
Hi Emilie. Great recipe using AP flour ! I have a question though. Say I start the process earlier in the day and leaving the dough till next morning for the bulk rise is not an option would retarding it in the refrigerator overnight after a bulk rise of say about 6-7 hrs outside and then continuing the rest of the rise again in the morning effect the final product ? Thanks!
JOHN LEVY says
Why no proof step in the fridge? Curious because all the other sourdough recipes call for an overnight stay in the refrigerator
Emilie Raffa says
John, an overnight second rise is not necessary for all sourdoughs especially for doughs that have bulked overnight. It’s up to the baker and the specific method you’re following. :)
Chantelle Vanderveen says
Thank you so much for this recipe!! I was starting to get discouraged because all prior attempts at dutch oven sourdough weren’t working. It was only until I found your site + helpful, detailed, recipes that I’ve had success! I’ve made about half a dozen loafs now following this recipe + they’ve turned out perfect everytime! Thanks again!
LindaBeth says
This is the only recipe I have found for a smaller sized loaf and living along (especially during shelter at home) it’s the ideal size. Question–I finally managed to obtain some bread flour so wanted to know how I would modify the ingredients to use the bread flour instead of all-purpose. Thanks for a great recipe!
Emilie Raffa says
Yes! You can use bread flour, adding a touch more water to obtain the same consistency.
Jessica says
I have been using this recipe for my first experiments with sourdough – I have made probably 10 loaves over the past few weeks, some plain, others with mix-ins (cinnamon raisin, roasted garlic, etc) and they have all turned out impeccably. Thank you for such a straightforward and reliable recipe!
Raya says
Failure! This dough was incredibly wet. I weighed out all ingredients for the large loaf and it was practically soup. I added more flour bit by bit, hoping it would come together into dough. I let it go through the bulk rise, hoping that somehow the water would be absorbed into the flour, but it was still too wet to do anything with. I mixed in more flour, preshaped, and my balls turned into puddles. Added more flour, shaped, let rise, and my balls looked like puckered frisbees. I finally just threw them into the oven to bake, and I now have a couple of sourdough frisbees. Surprisingly, the bread actually seems OK with a decent crumb, but it is UGLY.
I used supermarket brand all purpose flour, because this is what I have. Ultimately, I must have added at least another cup of flour to the recipe. I did check on the volume/weight of the water in the recipe based on another comment, and found that 1 + 1/3 cups + 1 Tbs of water weighs 300 g, not the 330 in the recipe that I added. I think less water might have helped, but I feel like something else was really off.
I will stick with the recipe on the Sourdough beginner’s page, which has come out perfectly every time. However, if anyone has suggestions, please let me know!
Emilie Raffa says
Hi there! Sorry to hear that! This dough shouldn’t be wet and sticky like soup. Something was definitely off. It could have been due to an accidental measurement (even if the ingredients were weighed), the brand of flour used (not all ap flours absorb the same amount of liquid) or the temperature (if it’s really warm the dough will be stickier). Additionally, weight and volume measurements are not equivalent; they’re only approximate which is why the amount of water measured by volume was different than indicated in the recipe. Hope this helps!
C.K.M says
Hi –
Thanks for this! I made this once and it was good- but still had a small dense patch in the middle. I am using Red Robin AP flour.
I am fiddling around with the recipe – the 330 g water and 500 g flour is a 65% hydration. I suspect that my flour has a lower protein content, so in this case I would lower the amount of water correct? I am going to try 60% hydration, so 300 g water, but want to get your thoughts on this as well!
Appreciate it :)
Emilie Raffa says
Hi there! You can absolutely try that. I wouldn’t worry too much about the hydration %; it’s all relative based on the protein content of your particular flour. But yes: it would be around 60% if you don’t count the starter.
Jennifer says
I am a regular baker, but I have never baked a loaf of bread in my life. I purchased a reliable starter from a local fermentation store, and I followed your recipe exactly. The bread turned out really great (to my own surprise). I shared it with a few friends/family, and they agreed. So I’m sharing the starter and your webpage with one friend. Thanks for your detailed website.
D says
Hi,
Thanks for the awesome recipe–I had great results with the small loaf!
Do you have a sense for how big the baking vessel needs to be for the large/standard loaf? I’d like to try this one, but I’m not sure if it will fit into my 5-quart dutch oven.
Thanks!
Megan says
Hi!
I’m about to order a Dutch oven. I was going to get a matte white one. Does the bread baking make them really dirty on the outside? Are you able to clean it off easily?
Can’t wait to try the recipe!
Thanks 😀
Emilie Raffa says
Hi! I have two white matte Dutch ovens. They’re very pretty, but they do get dirty. You can clean them with a bit of elbow grease or just choose a darker color ;)
brenda says
post helpful. why dont you say to preheat the Dutch oven? recipes I been reading say to preheat it. I want to make your beginners guide bread. and this one. just wondering. thx. hope you get back to me
Jon says
Brenda, I’ve made this recipe twice and preheated the Dutch oven both times because that’s what I’ve always done. The bottom crust is as tough as leather and your question made me realize the instructions don’t say to preheat. So I’ll try again without preheating and hope for a better crust.
Lorna says
Hi Emilie
I’m am just loving my sourdough baking, we’ve had pancakes and cinnamon swirls this weekend. I’ve a question tonight though as I’m making overnight baguette twists from your book, I added 360g of water, weighed out on my digital scales and my dough wasn’t a dough as it was too wet, I measured 1.5 cups on the scales and it was a lot less than 360g. I’m in the Uk and wonder if I’m missing something with regards to may e different cup measurements, we don’t tend to use cups here but I’ve had some I got from the US about 30 years ago which I used.
I’ve added more flour and hoping it will work out, if not no worries, it’s all experimenting, the fam are loving the everyday loaf and I’m super proud of my starter.
Thanks
Lorna
Ashley says
Hi! This is my first time making sourdough and my dough is a bit stiff – it’s not stretching without tearing (and only stretches a little) and doesn’t have that satisfying plop and jiggle when I pulled it last night. My starter was very bubbly and about 2.5x doubled. During the overnight rest, my dough did double but it deflated immediately when I turned it out on the counter this morning. Where did I go wrong? I added about 20g of extra water already after mixing because it was so dry initially but I was afraid to keep adding more and end up with a goopy mess. I used King Arthur organic all purpose flour.
Also…I mixed the dough according to directions here but I kept re-reading to make sure there was no kneading step. Did I miss that? When I googled to trouble shoot stiff dough, everything pointed to over-kneading. But I didn’t knead this at all, I just gently mixed with fork and fingers until it came together.
Gail says
Emilie, before I start my first try at your recipe, I’m curious as to why you didn’t include Olive Oil in the All Purpose Flour recipe but you did in the recipe using Bread Flour? Can olive oil be added? If so, how much? Thanks.
Emilie Raffa says
Hi Gail: they are just two different recipes. I do not include oil in all of my breads. If you want to add oil here, you could add the same amount as the beginner recipe and reduce the water.
Liz says
Hi, this recipe worked wonderfully a few times. But since the weather has gotten warmer my dough is overproofed in the morning after 8 hours. Do you have an alternative proofing/baking schedule for summer — maybe doing a shorter proof during the day or proofing in the refrigerator overnight? Thanks!
Emilie Raffa says
Yes! Bulk during the day. When the dough doubles, wrap and chill the whole bowl overnight. Shape and bake the next day.
LindaBeth says
I also did this last weekend–let the dough sit for 30 mins (not an hour), do folds, wait another half hour, do folds, another half hour, folds, so this is 1.5 hours in my 80+ degree kitchen. I put the dough in the fridge for about 16 hours, took it out and let it warm on the counter for about 2 hours, then do the preshape and pick the recipe up from there. Worked perfectly! My best loaf yet, actually. I’m in LA and really struggle with temperature, since we will be 70-80 into the evening but can drop down to 65 overnight.
Tess says
While my bread comes out delicious, I have two issues:
1. While all my rises do what they’re supposed to, the final loaf seems a bit ‘floppy’ – it doesn’t keep its form and tends to sag and spread out. It rises when baking, though, and is acceptable, but still a bit flat.
2. It sticks to the towel no matter how much flour I put on it! Do I have to use the towel?
I weight everything and use KA ap flour, but I think I need to add more flour (which I’ve done, but still have these issues). Thoughts?
Shellie says
You are not alone! I have had the same exact issues!
Rumi says
#1 may be shaping related? #2 I found information from a few sources about “unsticking” the cloth using a mist of water from a spray bottle on the cloth. Then gently peel back the cloth. Spray top of cloth again if it doesn’t release. It’s magic and I no longer worry about the amount of flour I use on the cloth.
Heather says
I’ve had really good luck (using a bowl and a banneton) with a damp towel and rice flour. I haven’t had a loaf stick yet.
Shirley L says
I have made this 5 times now. The first 3 were failures, but the 4th with stretch and folds and the 5th without them were beautiful successes.
My question is if I wanted to put my dough in the fridge at what stage do I put it in? And what do I do when I want to take out and bake?
Christina Lockerby says
I was SO worried. I did the smaller loaf and right from the get go, I didn’t put enough water in the dough so it was pretty dry and not super staying together. So I added a couple tablespoons during the first stretch and fold the night before and went with it. It didn’t really rise that I could see while it was resting the night before, but it seemed to proof just fine overnight. After working with it in the morning it definitely ended up about the size it was before proofing and didn’t really rise very much if at all before putting it in the oven. Not sure if that’s normal, but the bread came out pretty decent in the end, I think! It’s probably too dense… I noticed it didn’t really expand the scores I made and there is really just one air bubble towards the top of the inside of the loaf. Can you offer any guidance? I thought my starter was super active… I fed it every 12 hours for like a week and used it when it was crazy bubbly, about four hours after it’s last feeding… I’m pretty pleasantly surprised for my first loaf, but definitely want to do better next time haha!
Karen says
Thanks for this recipe. I am not great at following instructions to the letter. However, i measured everything carefully and tried to duplicate your process. I was not optimistic, but much to my surprise ( and delight) the result was delicious and looked beautiful too. I can see where my less than perfect timing and technique compromised the end product somewhat -but it appears that this recipe is somewhat forgiving, and the process resulted in “lessons learned”. I expect my next loaf to be even better and the one after that = perfect. Speaking of lessons learned – there is more to baking than ingredients and process – it takes attention, practice and experience to master – that’s the “zen”, fun and satisfaction. Much needed during these difficult days. Thanks again. Karen