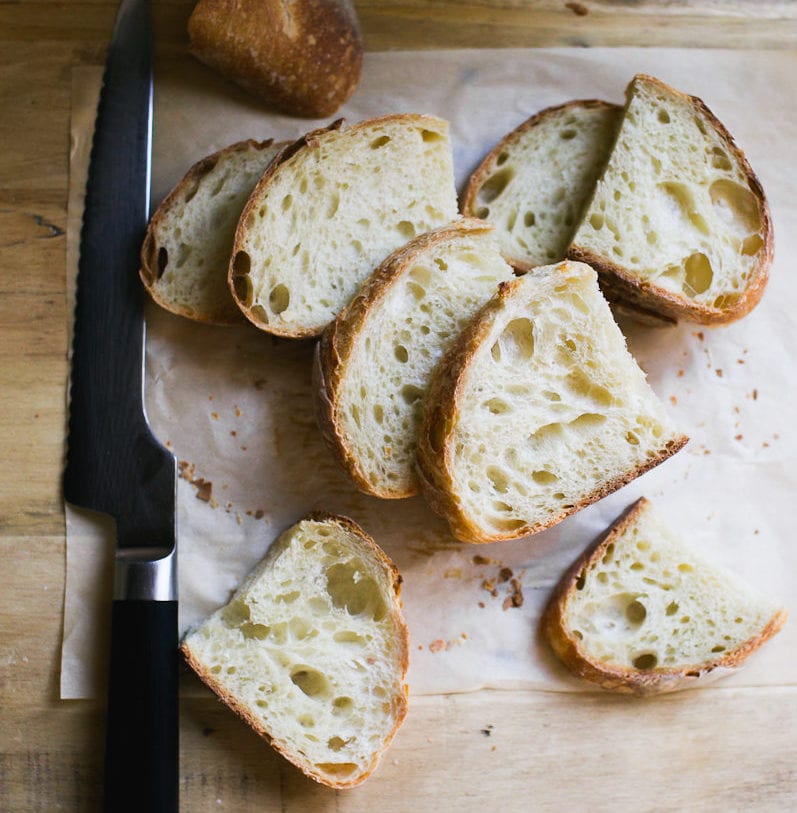
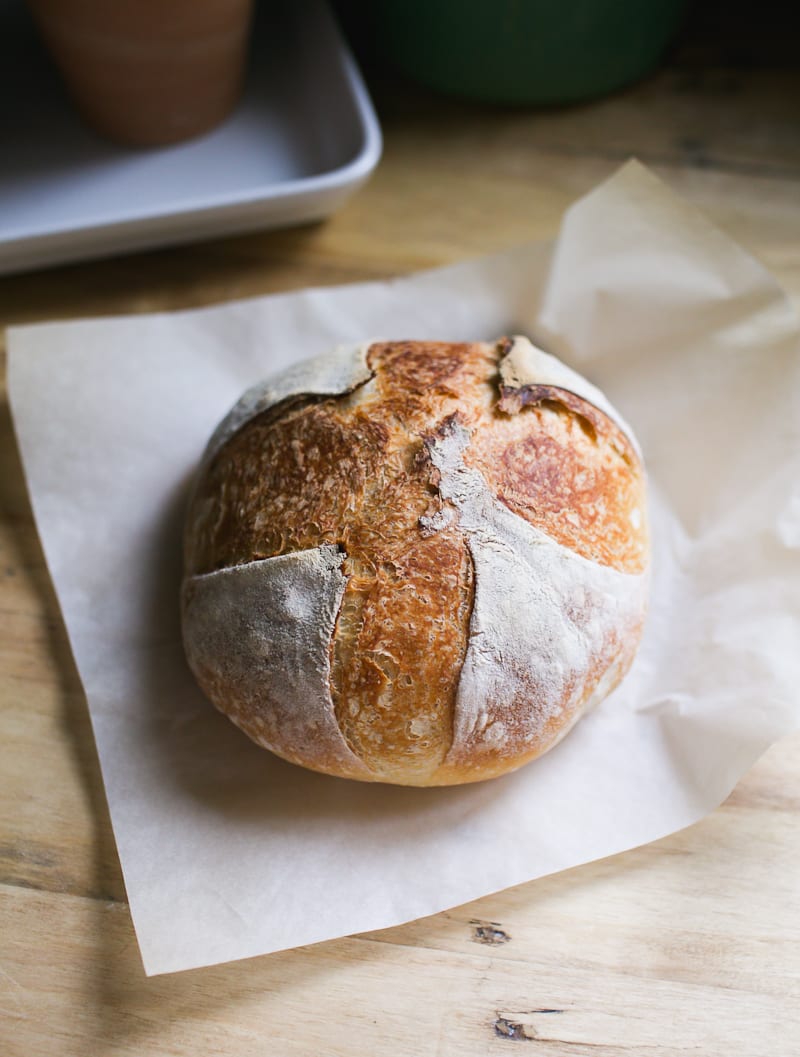
No bread flour? No problem! Learn how to bake artisan sourdough bread using all purpose flour and active sourdough starter. This easy-to-follow recipe features step-by-step photos, helpful tips, and a simple baking schedule to help you create delicious, naturally leavened loaves at home. It’s light crisp and airy!
Bakers all over the world choose bread flour to create exceptional sourdough bread at home. It’s prized for its high protein and gluten content, which helps to create a lofty-high rise. But what if you don’t have any bread flour? Can you make light, airy artisan sourdough with all purpose flour instead?
In this post, you’ll find a clear, step-by-step guide to mastering sourdough with all purpose (or plain) flour with a few key adjustments. You’ll gain the tools and confidence you need to bake delicious bread every time.
All-Purpose Flour vs. Bread Flour: Key Differences
It all boils down to protein content. Bread flour has a higher protein content than all purpose flour, which affects gluten development and the bread’s rise.
I typically use King Arthur flour for bread baking. Their bread flour contains 12.7% protein, and their all purpose flour contains 11.7%. This recipe was formulated to work with King Arthur and Trader Joe’s all purpose flours, which are comparable. (learn more about choosing flour in this post).
Tip: Protein content varies between brands, so stick to one brand first to understand how it behaves. It will be your reference point for future adjustments as you continue to bake.
How to Use All Purpose Flour in Bread Baking
Swapping all-purpose flour for bread flour is not always an even exchange. Because all-purpose flour absorbs less water, you’ll need to reduce the total water in your dough to avoid stickiness. Too much water makes the dough hard to handle, which can cause flat, dense, or gummy bread- you don’t want that.
Ok, So Reduce the Water by How Much?
I typically suggest reducing the water by 15-30g to start. The range depends on the specific sourdough recipe, the amount of sourdough starter, and the flour brand you use.
You’ll have to play around with the texture of the dough, adjusting the flour/water as needed until it “feels right,” which can be frustrating if you lack experience. But stick with it: success requires practice, patience and persistence. For now, let’s focus on visual and tactile cues to guide you through the process.
How to Make Artisan Sourdough Bread with All Purpose Flour {Step-By-Step Recipe}
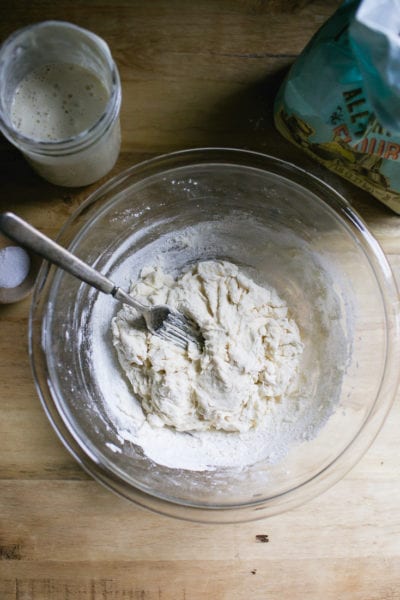
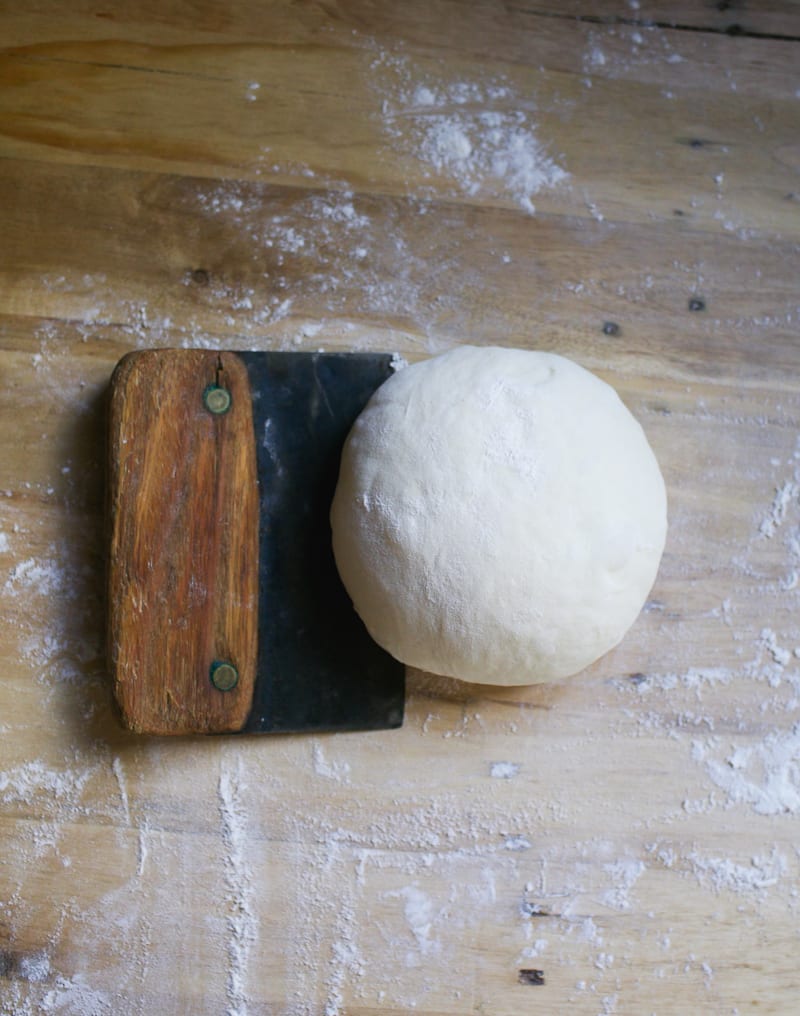
Step 1: Mix the Dough
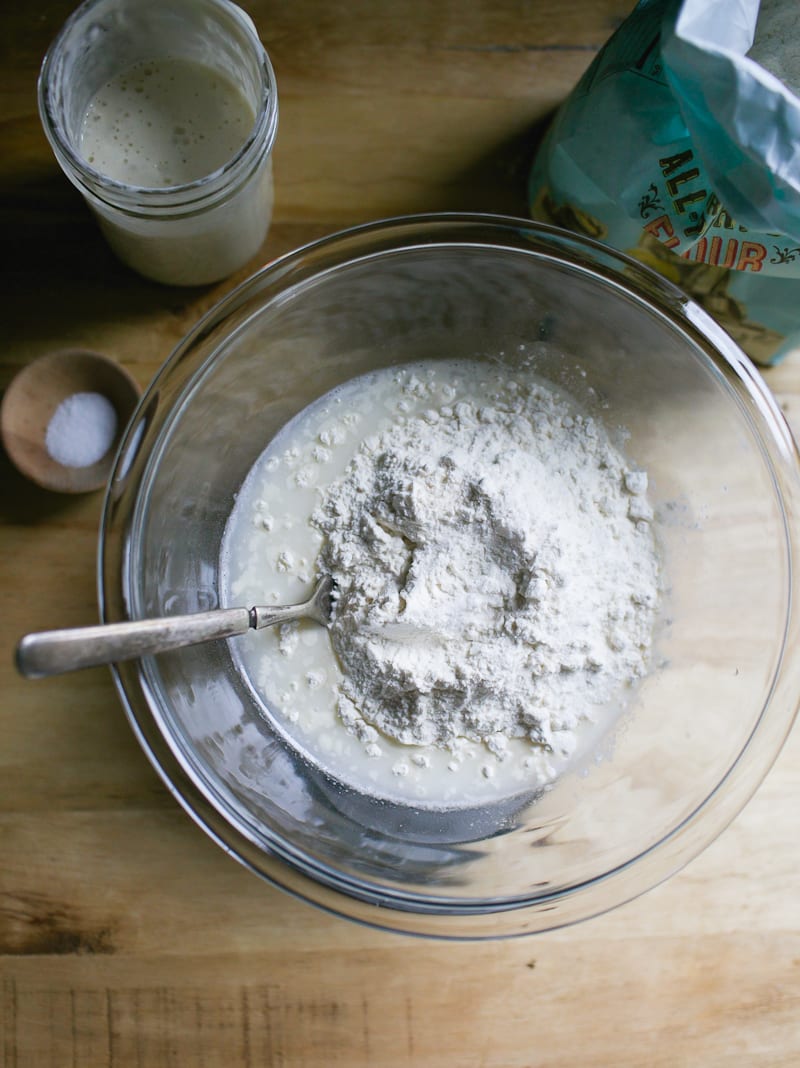
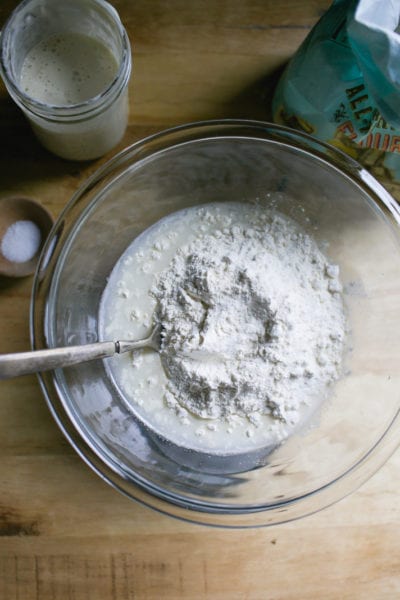
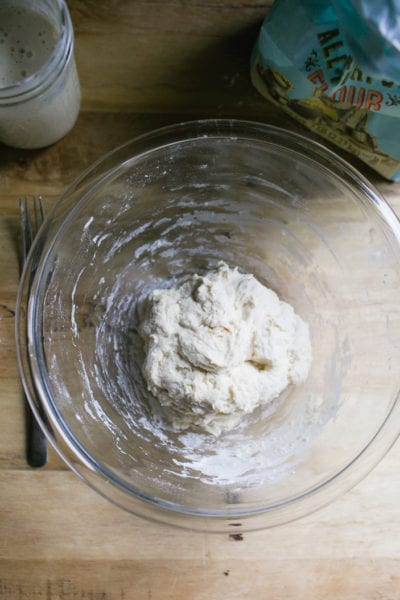
- In a large bowl, whisk your bubbly starter and water together. Add the flour and salt, then mix with a fork until combined. When the dough becomes too stiff to mix with a fork, switch to your hands and knead gently until a rough, shaggy dough forms. This texture is what you’re looking for: slightly sticky but holding together (see images above). Now, cover the bowl with a damp towel or plastic wrap and let rest at room temperature for 30 minutes.
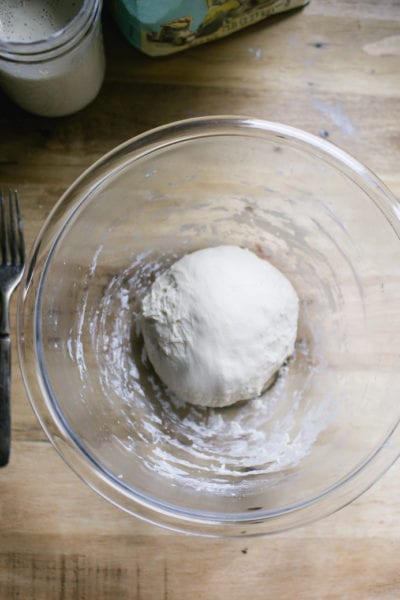
- After the dough has rested, work it into a ball. The surface will appear mostly smooth with a few tears. This is your last chance to adjust the dough’s texture before the bulk rise, so pay attention to how it feels. The dough should be soft and stretchy- not wet, overly sticky, or soupy.
A Few Notes: This recipe makes a small sourdough loaf, ideal for 2–4 people. Smaller loaves are easier to handle, especially if you’re new to sourdough baking. Instructions for a larger loaf are at the end of this post. For best results, you’ll want a digital kitchen scale to measure ingredients accurately, and a Dutch oven (or similar lidded oven-safe pot) for baking. You can find these tools in my shop.
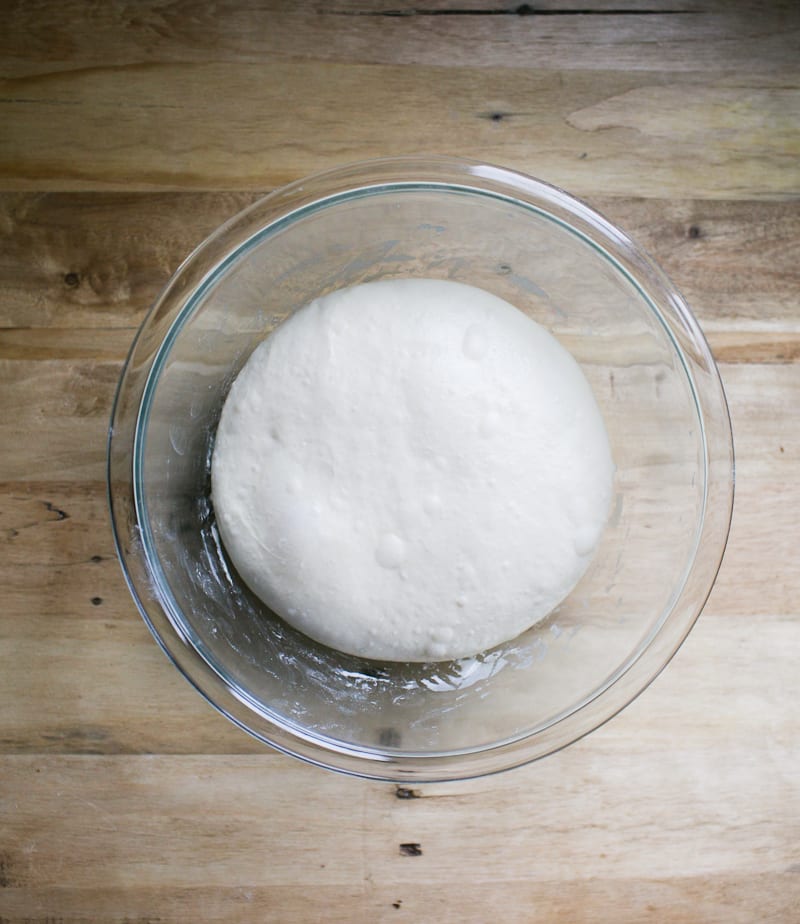
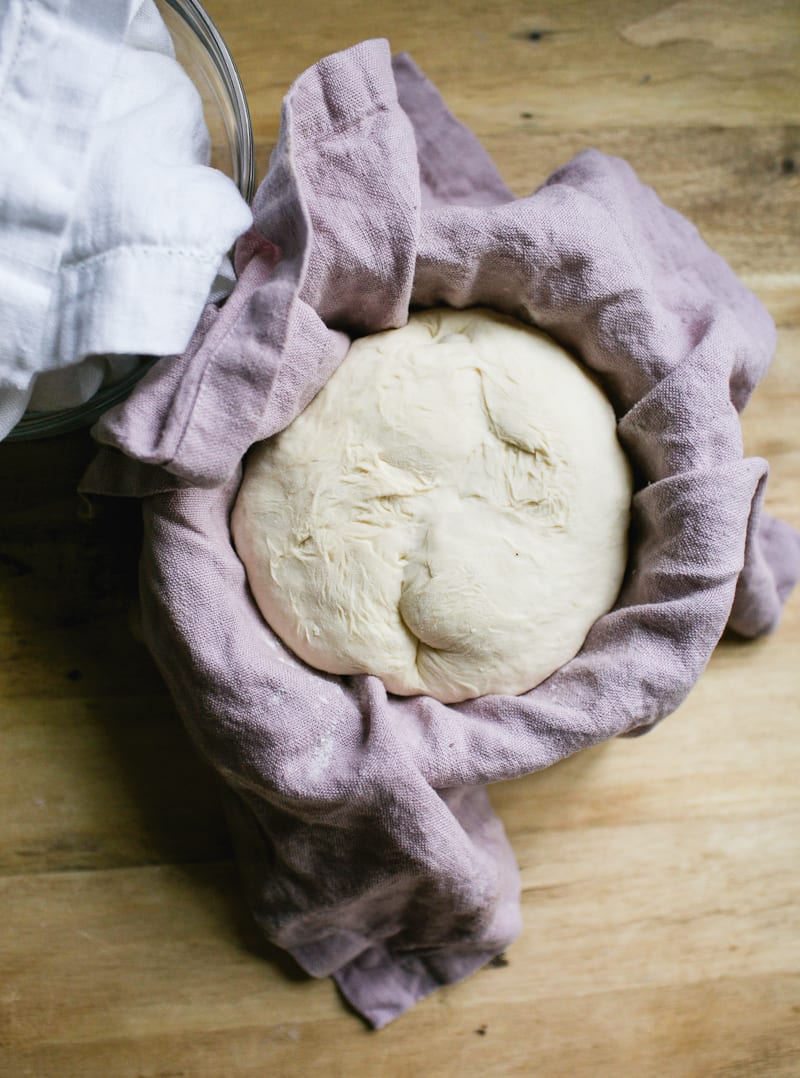
Ste 2: Bulk Rise
Cover the bowl and let rise overnight, about 10-12 hrs. at room temperature (68 F). The dough is ready when it has doubled in size and looks light and airy. If you’re using a standard 8-inch mixing bowl, the dough should rise to about halfway or two-thirds up the sides, which is perfect for this small loaf.
Optional: Stretch and Fold
This step, done during the bulk rise, helps to strengthen the gluten, improve structure, and give your loaf more height. Watch the video below for additional guidance. Or read the full tutorial: How to Stretch and Fold Sourdough, step-by-step.
About 30 minutes into the rise, perform your first stretch and fold:
- Gently grab one side of the dough, stretch it upward, then fold it over toward the center.
- Rotate the bowl a quarter turn and repeat.
- Continue until you’ve completed four folds (one full set).
- Repeat once more, 30 to 60 minutes later.
Step 3: Shape The Dough
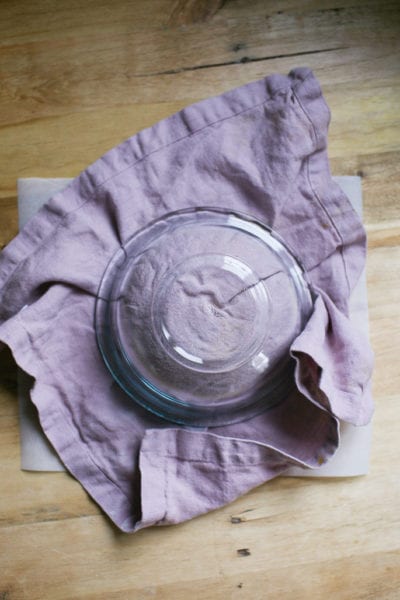
- Line a small bowl with a cotton or linen cloth. Sprinkle generously with flour. Now, you’ll shape the dough twice: first to preshape it, then to build strength and structure.
- Preshape: Remove the dough onto a floured surface. Gently fold the top edge of the dough toward the center. Turn it slightly and repeat, working in a circle until the dough forms a round. Use a bench knife to flip the dough over (smooth side up), then cover and let rest for 20–30 minutes.
- Final Shape: After resting, flip the dough again so the smooth side is facing down. Repeat the folding process to form a tight round. Then flip it back over. With floured hands, gently pull the dough toward you in a circular motion to tighten the shape. Place the dough into the lined bowl, seam side up. Cover the dough with the cloth overhang.
Step 4: Second Rise
Let the dough rest at room temperature for 30 minutes to 1 hour. It’s ready when it looks plump and slightly puffed—it won’t double in size during this stage. While the dough is rising, preheat your oven to 450°F.
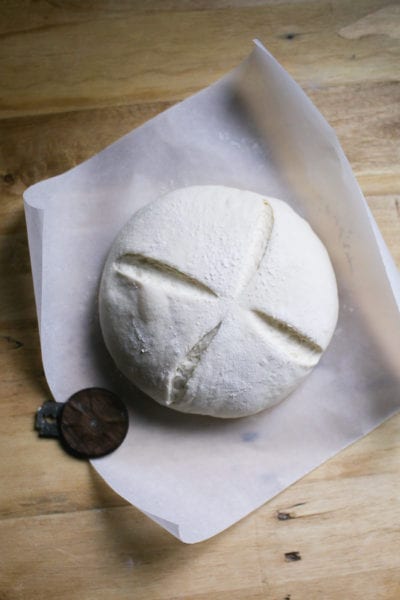
Step 5: Score The Dough
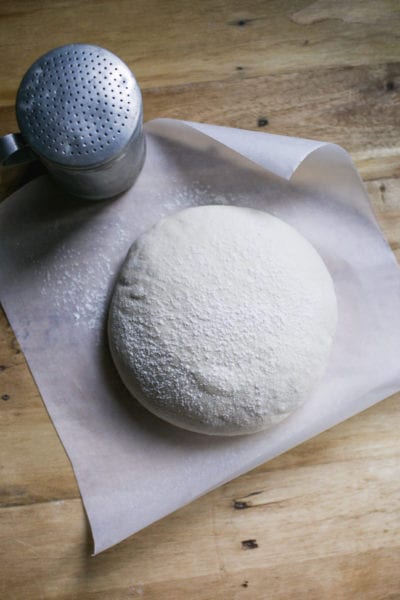
- Invert the bowl of dough onto a sheet of parchment paper. Remove the bowl and cloth.
- Sprinkle the dough with flour and smooth the surface with your hands.
- Using a bread lame or a small serrated knife (I used my UFO lame), make four, quick, shallow cuts at 12, 3, 6 and 9 o’clock, turning the parchment paper as you go. Use the tip of the blade as a guide.
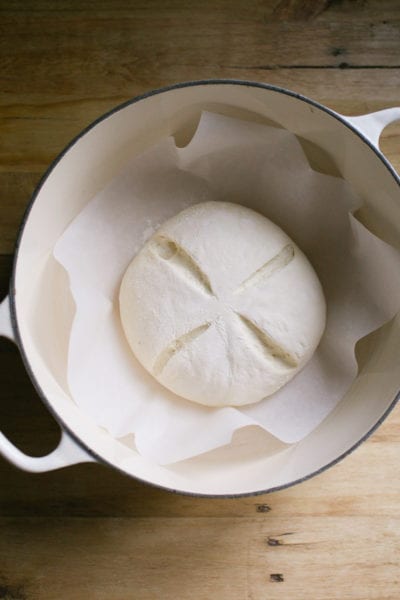
- Lift the dough (still on the parchment) and carefully place it into your Dutch oven. Cover with the lid.
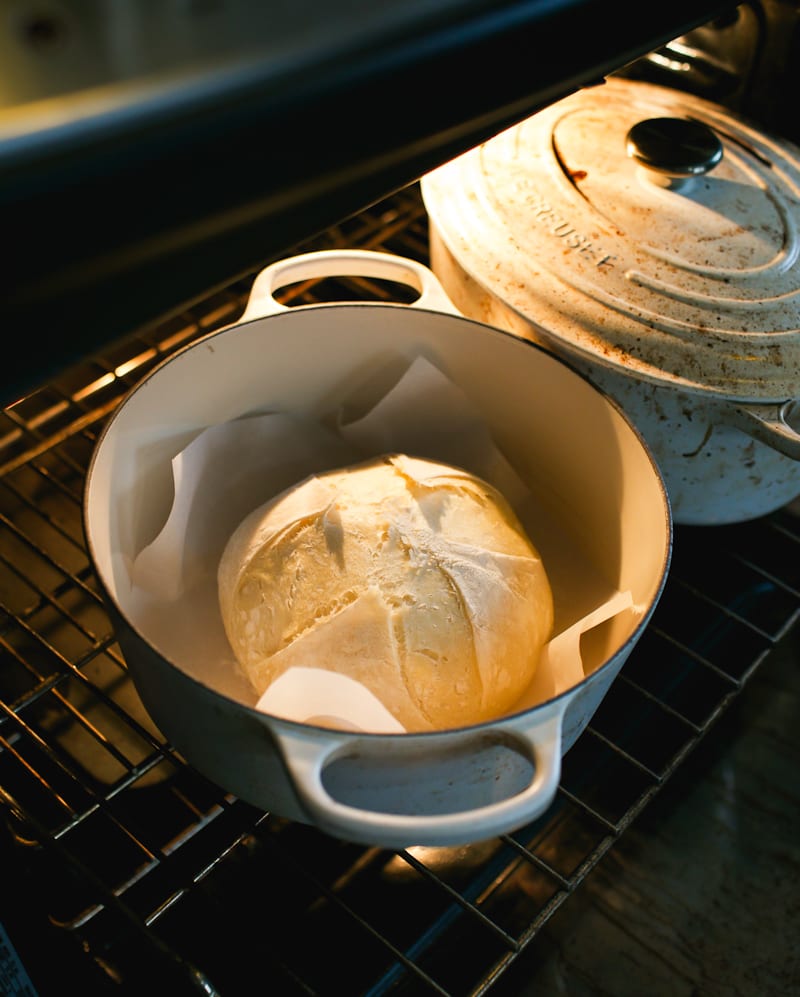
Step 6: Bake The Bread
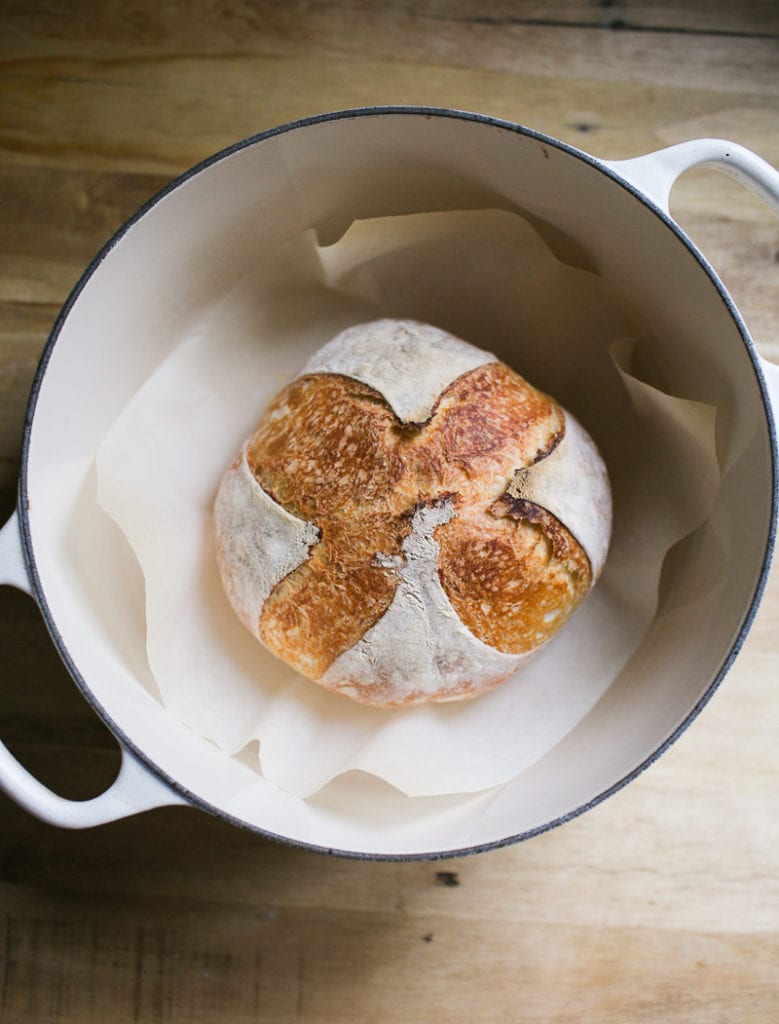
Place the Dutch oven into the preheated oven, center rack. Reduce the temperature to 425 F. Bake covered for 20 minutes. Then, remove the lid and continue baking for 30–35 minutes, or until the crust is deep golden brown. Cool on a wire rack for 1 hour before slicing.
Sourdough Bread Baking Schedule
Here’s a flexible overnight schedule that works well in most home kitchens (around 68°F). If your kitchen runs warmer, simply start a bit later to prevent over proofing the dough.
The Night Before
7:00 PM – Mix the dough and let rest (30 min)
8:00 PM – First stretch and fold (optional)
9:00 PM – Second stretch and fold (optional)
Cover the bowl and let the dough rise at room temperature (10–12 hours)
The Following Morning
7:00 AM – Check the dough (it should be doubled in size)
7:05 AM – Preshape
7:30 AM – Final shape
7:35 AM – Begin second rise + preheat oven
8:05 AM – Bake
By signing up, you agree to receive emails from The Clever Carrot. Unsubscribe at any time.

Artisan Sourdough Bread Recipe with All Purpose Flour
- Cook Time: 50 minutes
- Total Time: 50 minutes
- Yield: 1 small loaf (2–4 ppl) 1x
- Category: Sourdough Bread
- Method: Oven-Baked
- Cuisine: American
- Diet: Vegetarian
Description
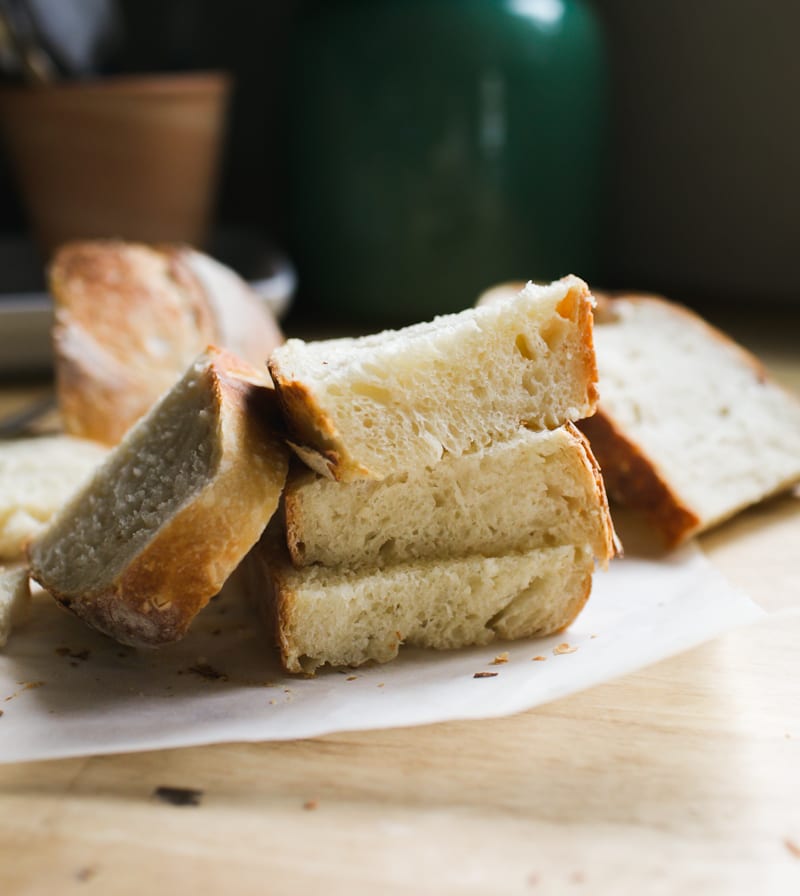
No bread flour? No problem! My artisan sourdough bread recipe with all purpose flour is an excellent substitute. This recipe yields a smaller sized loaf (perfect for up to 4 people) with a crisp crust and a smooth, interior crumb.
Notes & Substitutions
This recipe was formulated to work with King Arthur & Trader Joe’s all purpose flour, which contains 11.7% protein. If using another brand, please see my tip in the recipe below for adjusting the texture of the dough, if needed.
For accuracy and best results: please weigh your ingredients using a kitchen scale.
Ingredients
For a small loaf:
- 50 g (1/4 cup) bubbly, active sourdough starter
- 165 g (1/2 cup + 3 tbsp) water
- 5 g (1 tsp) fine sea salt
- 250 g (2 cups + 1 tbsp) all purpose flour (Trader Joe or King Arthur)
For a larger, standard size loaf:
- 50 g (1/4 cup) bubbly, active sourdough starter*
- 330 g (1 1/3 cup + 1 tbsp) water
- 9 g (1 1/2 tsp) fine sea salt
- 500 g (4 1/4 cups) all purpose flour (Trader Joe or King Arthur)
*Note: I use 50 g of starter for both the small AND standard size loaf. Using a smaller amount of starter with an long, overnight rise will help to prevent over proofed dough in the morning.
Instructions
Make the Dough
In the evening, whisk the starter and water together in a large bowl. Add the flour and salt. Mix with a fork until a stiff dough forms, then finish by hand to fully incorporate the flour. It will feel rough and shaggy, and slightly sticky. Cover with a damp towel or plastic wrap and let rest at room temperature (68 F) for 30 minutes.
After the dough has rested, work the dough into a ball. To do this, grab a portion of the dough and fold it over, pressing your fingertips into the center. Repeat, working your way around the dough until it begins to tighten.
TIP: If the dough feels too wet (and this can happen depending on the brand of flour you’re using), add 1 tbsp. of flour. Mix thoroughly by hand, adding more flour as needed. If you think it’s too dry, add 1 tbsp. of water and see how you go.
Bulk Rise
Cover the bowl (damp towel or plastic wrap) and let rise overnight at room temperature. This will take about 10 to 12 hours at 68 F. The dough is ready when it no longer looks dense and has doubled in size. If using a standard 8-inch bowl, the dough will rise about 1/2 way up the sides.
Optional Step: about 1 hour into the bulk rise, do 1 set of stretch and folds. Repeat 1 hour later. This will increase the overall volume of the bread.
Shape the Dough
The following morning, line a small bowl with a cotton or linen cloth. Sprinkle with flour.
Important: You’re going to shape the dough twice to build extra strength.
Preshape
Remove the dough onto a floured surface. To shape the dough into a round, starting at the top, gently fold the dough over toward the center. Give it a turn and fold over the next section. Repeat until you have come full circle. Using a bench knife, scoop up the dough and flip it over (the smooth side should be facing up). Cover and rest for 20-30 minutes.
Final Shape
After the dough has rested, flip it over again (the smooth side should be facing down now). Shape it again following the steps above. Flip it back over. With floured hands, gently cup the dough and pull it toward you in a circular motion to tighten its shape.
Place the dough into the lined bowl, seam side up. Cover the dough with the cloth overhang.
Second Rise
The dough needs to rise again. Rest for 30 minutes to 1 hour. The dough is ready when it looks puffy and has risen slightly, but has not yet doubled in size.
Preheat your oven to 450. Cut a sheet of non-stick parchment paper to fit the size of your baking pot, leaving enough excess around the sides to remove the bread.
Score the Dough
Place the parchment over the dough and invert the bowl to release. Sprinkle the dough with flour and gently rub the surface with your hands. Using the tip of a bread lame, small, serrated knife or a razor blade, make four shallow 4-inch long cuts at 3, 6, 9, and 12 o’clock around the dough. Use the parchment paper to transfer the dough to the baking pot.
Bake the Dough
Reduce the heat to 425 F. Bake the dough on the center rack for 20 minutes, covered. Remove the lid, and continue to bake for 30-35 minutes and golden brown (40 minutes uncovered for the larger, standard loaf).
When finished, transfer to a wire rack. Cool for 1 hour before slicing, for best texture.
Notes
Sourdough is best consumed on the same day it is baked. To maximize freshness, cool completely and store at room temperature wrapped in plastic, reusable beeswax wrap or bread bag for 1-2 days. Sourdough can also be frozen, for up to 2-3 months. Defrost at room temperature and warm @ 300 F before serving.

Comments
Beth Rice says
I love this recipe and the simplicity of it. BUT, the bottom of my bread ALWAYS burns…how can I keep that from happening?
Tyler says
Hi Beth! I have had this problem as well. Someone previously asked this and Emilie replied with some tips:
This is actually extremely common. Could be your oven, could be the type of pot you’re using, could be the placement of the pot etc. To remedy this, first use an oven thermometer to determine the exact temp of your oven. Then, place a cookie sheet on the rack below your baking pot (not underneath it); this will shield the heat from the bottom up which should prevent a burnt crust.
LarV says
I put my Instant Pot wire trivet in the bottom of the Dutch oven and put the parchment and dough on top of that. Worked great! No more too-dark bottoms!
Elizabeth says
Thank you for this tip! I did this and it came out perfect!!
Hannah says
I’ve tried this recipe once already with moderate success, so I’m excited to try again and make it even better. I just got a starter a month ago so I’m still learning how to make a good sourdough.
What I like about this recipe is how comprehensive it is, as the step-by-step combined with the pictures make for a clear recipe. I like that a schedule is included, and there is a “long” recipe version and a “short” recipe version. I will be remaking today.
StellarJay says
This recipe was handed down along with the starter from a kind neighbor & Sourdough enthusiast. It turned out amazing on the first try. The internet is saturated with recipes. I am as thankful for receiving this recipe as I am for the gifted starter. No kneading, simple & delicious recipe. IMO Perfect!!! Thank You Clever Carrot
Kristine says
I’m a newbie at baking sourdough bread- this recipe resulted in a fluffy loaf! I was elated to finally achieve the texture I was hoping for!
Railya says
I made my first perfect sourdough following your recipe. Thank you. The bread turned out amazing!
Emilie Raffa says
Excellent, Railya! So great to hear. Enjoy and happy baking :)
Bhagya Hettiarachchi says
Instead of using all-purpose flour, can I swap it for bread flour?
Emilie Raffa says
Sure, bread flour will work. Depending on the brand, you might want to increase the overall amount of water in the dough so it’s not too dry.
Lars Jeppesen says
Perfect on my first try; I tagged you in my IG and FB posts with photos. Thanks for sharing with kindness https://www.instagram.com/larsjeppesen/
ken says
In other recipes the dutch oven is preheated, but not here. Would that cause problems if it was preheated?
Emilie Raffa says
Not at all. If you prefer to preheat, you’re more than welcome to do so for this recipe.
Adam Hetherington says
I have a feeling I overproofed the dough. I let the bulk go around 14 hours because I was waiting for the dough to double in volume. I stopped the bulk short of doubling. When I dumped out the dough on the counter is was very sticky and slack. I’m going to keep going but do you have any suggestions for why this is happening and what I should change. Overnight temp was around 70F. Thanks!
Pamela F. says
Hi! I have made numerous batards using your beginner’s sourdough recipe. They have come out perfectly. Why do you not use olive oil in the AP flour recipe? (I’m out of bread flour.)
Swati says
Hi. I have many questions.
There is no oil in this recipe. Any reason? Also can I leave the dough to rise in an oiled bowl. Since It becomes very warm here during summers, if I start the process early morning, can I bake the same day. Do I need to increase the amount of starter. I have a very active starter🙂
Emilie Raffa says
Hi there! Oil is optional; my ap flour sourdough is a different recipe for variety. Oil changes the texture of the crumb and crust (see which one you like best!). Totally fine re: oiled bowl to rise the dough. And yes: bulk rise during the morning/day and chill the whole bowl overnight, or when you’re ready to bake later in the day. You do not need to increase the quantity of starter for a same day bake in hot weather.
Gary says
Use 20-30g less water… Don’t let it quite double in size during bulk rise.
Dagmar's Dough says
This came out perfect. Thank you so much for the All Purpose flour recipe.
Trish Chalmers, Trish’s Dish’s says
Hey first time making sour dough so did the small loaf. Had fun with some ups and downs. Thought my starter was non active, yet stuck with it and rising happened!!! Can’t lose faith! Starter is growing to as I am now feeding it to tackle a big loaf!! In Mexico and had no cast iron, so used Pyrex with lid and it worked. Will use cast iron for large loaf and reg oven!!
Proud maker!!! Trish of Trish’s Dish’s. Here’s a pick!!
Katherine says
Hello there, thank you for sharing this recipe, I love how simple it is to follow. I tried to search through the comments to see if I can find answers, but I’m not sure if the feature is available.
I’m on my 3rd round of trying this recipe and my dough has been really sticky each time. I use King Arthur flour and there is a good rise at about 10 hours at about 68 degrees fahrenheit, but the dough will flatten before it’s bake time. Do you have any suggestions? Please and thank you =)
Luke says
Your comment is what I was thinking would happen in my case if I followed this recipe. Your dough is likely way over proofed. Dough should be “on the rise” not the fall to get a good oven spring, and if I were to leave my dough out overnight with my sourdough starters it would be way over proofed by the morning. You could try adjusting the amount of starter you use by half to see if that helps, or you can do your bulk proof in the fridge (after shaping the dough) to avoid over proofing your dough. In that case, you’d want to possibly increase the starter size and bulk ferment so you are closer to where you want to be before shaping and placing in the fridge.
Rowan Skinner says
hi there,
i was wondering if i can use whole wheat instead of all purpose flour?
Emilie Raffa says
Hi there! I wouldn’t do an even swap; whole wheat flour absorbs more water than reg. white flour, and in some cases, the dough will become more dry. It will change the entire texture of the finished bread. You can read more here.
As an alternative to this recipe, I would try my Light Whole Wheat Sourdough. Enjoy!
Pam says
Can I use my warming drawer to proof sourdough? I keep my house very cool and I’m not getting the proper rise….
Kate says
This is a great beginner recipe and has been my go to as I just started my sourdough journey (I got a seasoned starter from a friend recently).
I personally would like to have my sourdough to have a more tangy/sour flavor. I was thinking to either do a cold bulk rise with a room temp proof with this recipe or do a room temp bulk rise with an overnight cold proof. Any advice on which would help with achieving a more sour flavor and for how many hours you recommend any of these techniques to be carried out for? Thanks!!!
Claude says
J’adore vos recettes tout est bien expliqué tout est clair et simple je vous remercie beaucoup de votre aide c’est très pratique pour apprendre à bien cuisiner du bon pain merci beaucoup. THANKS a lot ! Les résultats sont merveilleux…🥰🥰🥰
Briana says
I made this for the first time and it was a bit dense. I believe my starter still needs time to be fully ready. It has been a slow starter to mature. Also, I am not sure what may be going on, but the top of my baked bread has a weird, metallic like flavor. Could that be from the cast iron Dutch oven I’m using or something else? The flavor of the bread and crust on bottom are wonderful, just trying to figure out what is going on with the top crust. Thanks!
dida says
I tried your recipe step by step I dont know why I failed twice. it is not easy
Emilie Raffa says
Hi there! If you can provide additional information, including the type/brand of flour used, if you weighed or measured your ingredients, along with additional changes made to the original recipe, I’m happy to help troubleshoot.
Eleanor says
I made this for the first time and it was gorgeous! The instructions were easy to understand! Thank you so much!
Vincent J. Guarrasi says
Question: Emilie, I keep some ready made bread dough in my refrigerator. Is it acceptable to mix my sourdough starter with it instead of with flour? will the bread still be ‘sourdough?’
Emilie Raffa says
Hi there! I believe so. I’ve never done it before, but I’ve seen bakers do it. As for it being sourdough, it depends on what your ready made dough is made of. If it contains commercial yeast, then it would be a hybrid :)
Erica says
I made this bread and it turned out amazing! I might have slightly under-proofed it because it didn’t have a lot of big holes, but my family said it was amazing and very light. Do you have any tips for next time? (I only proofed it for about 10hrs because it was more than doubling in size). Also, how would I go about adding in fruit like strawberry?
Emilie Raffa says
Hi Erica! It’s tricky to say without seeing a picture of the bread (under proofed vs. over proofed). However, with practice and repetition, big holes will come with getting to know the dough, proper fermentation time, temperature and gentle handling. For the strawberries, I’ve never done this before! Sounds yummy! I would add dried (chopped) strawberries and not fresh ones; they will be too wet.
Gilles Caron says
I was looking for a sourdough recipe that would work well for me, after many bad results…, and found this one that I will try this week. Very nice and complete tutorial. Being from Canada, After reading about the protein percentage of bread vs AP flour, I checked about the one I normally use and saw that it was 13.3% … not bad for an AP flour. But it could explain why I don’t get the same result with recipes using AP flour…
Emilie Raffa says
Gilles, I agree with you regarding Canadian ap flour. Check out the comment section in this post if you haven’t already (a few baker’s discuss Canadian flour). In your case, 13.3% protein is high for ap flour. You can always add more water to the dough if it ever feels too dry.
Sara says
I’ve made this a few times and it always turns out perfect!
Sadie says
Excellent! I bake bread once a week using a different recipe each time, and although I’ve maintained a sourdough starter for about 5 years I’ve used it primarily to replace some of the flour and liquids in yeasted bread douoghs. This is the first time I’ve relied on the starter alone as a leavener. I made the small loaf and it looked just like the one pictured with this posting. The outside crust was shatterinly crisp. The crumb was moist, chewy, tangy, and had lots of big holes. The detailed instructions and photos given with the recipe are very helpful. The unbleached all-purpose flour I use has a protein content of 13.3%. I used the weight measures and didn’t have to make any adjustments in the flour or water. I did the optional stretch and folds before resting the dough overnight. The dough was slow to rise. The bulk rise took 13 hours and the final rise was 1 1/2 hours. The total bake time was 40 minutes which is shorter than the bake time noted in the recipe. The bread baked for 25 minutes covered, and 15 minutes uncovered to an internal temperature of 210°. The hands on time for this delicious bread is only a few minutes. The hardest part is waiting for the bread to cool enough to slice!
Honey says
Hii… I’m baking a sourdough bread for the first time and was very confused by all the online recipes. But thank you so much for this recipe. You really explained very well. I tried this recipe out & it worked well. The bread was delicious. But the only issue I’m facing is that the top crust of my bread has big holes & the holes kind of tear off. Can u explain why this is happening? Thank you!
Tali B says
I loved this recipe and I love your book! I’ve tried 2/3 of the recipes and everything came out amazing.
Question: if I want to prepare a batch for 2 large loaves, should I use 100 gr of the starter or still 50 gr? Thank you
Emilie Raffa says
Yay! So glad to hear this! For 2 large loaves, you’ll need 100g of starter. Enjoy :)
Ana says
Hi! I love your recipe and have made it multiple times and it always turns out beautiful. Thank you!!!
If I want to make a flavored loaf (I want to try an olive loaf or a roast garlic Rosemary) at what point should I add the flavors?
Emilie Raffa says
I would add them after the first rest (30 minutes- 1 hr). The dough will be more manageable at this stage, making the add-ins easier to incorporate. Alternatively, if you forget, you can always add them during your first or second stretch and fold (if doing).
Cece says
Hi! This was my first time making sourdough & I cant say it turned out perfect. So, I used the large loaf recipe , the starter was very bubbly, & I used a measuring scale for ingredients. I also did the stretch& fold and shaping steps. But I let it bulk rise for more like 20 hours since it hadn’t risen enough by 11pm . 😕 Although in the morning I woke up & it had risen & had a nice solid layer on top. After baking, the end result was a flat loaf as if I never let it rise. It did have a lot of tangy sourdough flavor. Did I let the dough sit too long or could it have been too warm resting by my pellet stove? I should mention it was room temp for a while ,but moved it by the stove before I went to bed- hoping it would help it. Also, during the shaping, everything under the top layer was sticky & moist… it wasnt a solid ball of dough ( it expanded on the floured surface almost like a pancake on a griddle). Could it have depended on flour brand?
Nancy says
This sounds to me like it was overproofed. When I plan to let it proof longer to bake early afternoon (instead of morning) I put it in the cold basement to slow down the process. You can also put it in the fridge. I encourage you to try again, I have made this loaf countless times and it always comes out great!
Jen says
I’ve made this several times now and it comes out every time! My technique is getting better with the stretch and folds. Love having fresh sourdough bread in the house.
Art Watanabe says
Hi Emilie,
Out of all of the sourdough bread recipes I’ve tried, yours has been the most successful! Using your recipe, I actually have control of the dough, instead of the other way around. I was wondering if I can modify this particular recipe, to make the chocolate version? Your sourdough noir looks more labor intensive than this recipe
Thank you, Art
Diana says
hi Emilie!
I love this recipe, I have been making my first attempts at sourdough bread with it and for the first couple of times, it turned out great! It looked great and was almost right on the inside.
However, even though I keep making the bread without changing anything (as much as that’s possible), for the last three loaves I’ve made, when I open the lid after 20 minutes in the oven, the top still looks glossy… And the bread does not “open up” along the cuts :( I’ve broken my brain trying to understand what it could be, does this at all sound like an issue you can troubleshoot?
Thanks a lot for all your recipes, I’ve tried so many and they always turn out great! <3
Emilie Raffa says
Hi Diana! I just need a bit more info to help troubleshoot :)
Can you tell me the length of your bulk rise? And the temp? Length of second rise (and temp)? Brand of ap flour? Weighing ingredients? And any other changes you’ve made, even if they seem insignificant? Thank you!
Karen says
Thank you SO MUCH for your beautiful, informative website! I love everything about it and have tried both of your sourdough recipes! I am a beginner so your photos, and most importantly, your videos are invaluable! I know how much time it takes to create all of that!
I am wondering if I can use KA white-whole wheat flour or their whole wheat flour as a substitute in your “All Purpose Flour” recipe without any changes. Or, maybe add half white-whole wheat and half white All Purpose flour? I always use KA flour but realize that the protein content is different for the whole wheat varieties.
Also, do you have any suggestions for changing the recipe for high altitude – 7000 feet?
Thank you so much!
Rania says
Hey this looks like a great recipe but I was wondering if I could make this without a baking pot or if I can substitute the baking pot for something
Emilie Raffa says
Hi there! if you don’t have a baking pot, you’ll need to add another form of steam to your oven. Steam is necessary for a lofty high rise, and a burnished artisan-style crust. Alternatively, try my Easy Sourdough Sandwich Bread instead.
Julie says
I use my crock pot insert and put a baking pan over it. I’ve made this recipe countless times and it always comes out great with those items!
Emilie Raffa says
That is an EXCELLENT tip, thank you Julie!
Sharyn says
Hi just wondering why there is no oil used in the all purpose flour recipe.
Emilie Raffa says
Hi there! It’s just a different recipe. Oil is not required for all sourdough recipes, however some include it for variety. :)
KB says
Hi – thank you for the recipe! I’m in the process of making this now. My dough just began the bulk rise. One question: Do you put your dutch oven in the oven when it is preheating? And pull it out just when you need to pop the dough in? Thank you.
Emilie Raffa says
Hi there! No, I don’t. But some bakers do. You are more than welcome to incorporate a preheated pot into this recipe :)
Suzanne says
Hello.
Have made this recipe, small and big loaf, about 10 times or so. Still not 100% pleased with the results thought. IT kever has looked as soft as the sliced bread in the picture above. Also, when I am about tot flip the bread into the pan, it doesn’t stay as tight. Did the shape and preshape exactly the same, and tight, without flour in order to close the dough well.
The bulk rise doubled in size. The (organic) all purpose flour I use contains 10,6g protein. Could this be the cause?
Suzanne from The Netherlands
Emilie Raffa says
Hi there! It’s tough to say without seeing a picture. There are so many factors that come into play. However, based on what you’ve described consider decreasing the water (try 30 g) to compensate for the lower protein content of your flour (mine is 11.7%). This will help. Also, do not allow the second rise go for too long. If the dough over proofs at this stage it won’t hold its shape. Also, I’m curious: you mentioned flipping the bread into the pan… in this recipe the dough is transferred into the pot on parchment paper. Thanks!
Trisha says
Hello! I do not have a Dutch oven or a pot that is suitable for the oven. What would you suggest as an alternative?
Tina McCartney says
This bread is INCREDIBLE! Made it for the first time today along with your starter (took about 10 days until i was happy with it) I read and reread your instructions almost daily while waiting for the starter. I was concerned for baking as I have a convection oven. I made the large loaf and final time after first 20 minutes was 35 minutes. I put the dutch oven in the oven while it was preheating, put some cornmeal in the bottom and then the parchment with loaf. Your instructions and videos and timeline suggestion was PERFECT. Thank you so much for sharing!
Emilie Raffa says
Yay! So great to hear! Thanks, Tina :)
Kayla says
I have the sourdough starter going! I am so super excited to make actual sourdough bread. I have made a cheater loaf a few times with a powdered starter, but this is something that I can’t wait for! Like crown jewels in my baking escapades. Thank you for your easy to follow instructions 😊
Emilie Raffa says
Like crown jewels indeed!! Love this comment. Enjoy, Kayla! xx
Priya says
hi, I used this recipe and by starter passed the float test and infact was quite bubbly too! but my loaf turned our flat and very dense. I’m not sure where I went wrong….
Emilie Raffa says
Hi there! Dense and flat bread is extremely frustrating- I know.
Here are a few general tips on how to fix it:
1.) Make sure to weigh (not measure) your ingredients for best results.
2.) Allow the dough to double in size during the bulk rise. Rush this step, and the gluten will not form properly resulting in flat bread.
3.) Avoid over proofed dough. It’s possible the dough rose for too long, which would account for the flat and dense texture. Make sure it doubles only.
4.) Shorten the second rise, if necessary. Again, the dough could be over proofed.
5.) For best results, do not make any changes to the original recipe as written, at least the first few times arounds. Flour types, rise times and temperatures all work together.
Hope this helps!
Michelle says
Hi Emilie, I’ve had such success with this recipe that I ended up buying your book (made the waffles this morning with the discarded starter – so good!). I love the small size of this loaf and wanted to ask if there is a general rule of thumb for halving the recipes in the book. Do I keep the same starter amount and just halve everything else? Or do I need less/more water or flour to balance things out? Does the oven temperature and baking time change (I assume so)? Thanks!
Emilie Raffa says
Ah, love it! Thanks so much for your support, Michelle. Enjoy the book :)
Unfortunately, there’s no one size fits all approach to halving recipes (mine or otherwise). It really depends on the recipe itself, the type of flour used, temperature, method etc… and what might work for one recipe, may not work for another recipe. Trial and error is involved.
With that said however, it can be done with adjustments. Go to this website brdclc.com. In the dough calculator, plug in the quantities for the original recipe and note the hydration %. Then, to halve this particular recipe (I’m assuming you’re referring to the artisan-style loaves in the book), keep the original amount of starter the same, and adjust the flour and water quantities until you hit roughly the same hydration % as the original version.
The baking temperature should remain the same; the bake time might be slightly shorter around 50 minutes.
Hope this helps!
Emilia says
Hi Emilie,
I’ve been using this recipe for about a month now and I LOVE it, I haven’t had a bad loaf yet.
There’s a problem with the print format however, I’ve printed the recipe out and I just printed it again for my sister and I don’t know if it’s something you can fix but the video is attached at the bottom of the printing format and there’s no way to get rid if it, it uses so much printer ink, I just thought I’d let you know.
Thank you again for providing such a detailed and easy to follow recipe, it’s superb!
-Emilia
Emilie Raffa says
Ooo, this is great to know. Thanks so much for bringing it to my attention- I’ll look into it :)
Laura says
Hi!!
Thank you so much for the recipe! I’ve been using it for months now, and it’s delicious.
I do have a question for you-
The bread gets a great rise, crispy crust but has lately been quite dense. I’m trying to get some more holes in the loaf and a little lighter in texture, but don’t know where to start.
I have been doing 4x your small recipe to make 2 larger loafs at a time and use 100g of starter.
Any insight would be so appreciated!
(I just read the comment about the sheet pan on the bottom rack to prevent an over done bottom – trying that tomorrow!!)
Thanks again!
Laura
Alice says
Hello! Thank you SO MUCH for this wonderful recipe. I’ve been using it for months and love it so much!!
I traveled to Colorado and brought my starter and am wondering if you have any tips for baking this at high-altitude?? The starter is already much thicker and I will be reducing flour, but haven’t tried to bake yet here.
Any tips appreciated!
Thank you so much!
Alison says
Would the two different sizes need different cooking times please? Is the quoted time for the small loaf?
Emilie Raffa says
Hi Alison! Bake times for both sizes are included in the printable recipe section at the bottom of the post. The smaller loaf is 50-55 minutes total and the larger one is 60.
Bella says
How do I keep the bottom of my loaf from burning? Everything else turned out great but this is also something I’ve noticed happening in the past with other recipes? Does it have to do with placement in the oven or should I insulate the bottom of my cast iron pot more?
Thanks!
Bella
Emilie Raffa says
Hi Bella! This is actually extremely common. Could be your oven, could be the type of pot you’re using, could be the placement of the pot etc. To remedy this, first use an oven thermometer to determine the exact temp of your oven. Then, place a cookie sheet on the rack below your baking pot (not underneath it); this will shield the heat from the bottom up which should prevent a burnt crust.
Clare says
Something I also do is put some cornmeal under the loaf or the parchment paper. This provides a barrier between the loaf and the base of the dutch oven, thus preventing the base of the crust from burning or getting overly crisped.
Tomás says
Hello! I made my first real sourdough loaf yesterday, and it turned out great with your Beginner’s Guide recipe – thanks for the help!
I had a question about this recipe. You say that using all-purpose flour absorbs less water, and so you should use less water in the recipe – this makes sense. However, when comparing the flour/water ratio in this page’s recipe and the Beginner’s Guide, it seems that this recipe actually has a higher water-to-flour ratio than the latter, which recommends using bread flour. My only guess is that it has something to do with the amount of starter used, but the explanation is unclear to me. How would you explain this difference?
(FWIW, I used Gold Medal Unbleached Flour when I made my loaf, and it turned out well by my beginner’s standards – I’d be interested to see for myself the difference in using bread flour!).
Emilie Raffa says
Hi there! My all purpose flour sourdough comes in at 67.6% hydration, whereas my beginner recipe made with bread flour is about 60.9%, including the olive oil. So yes, my AP recipe has a higher water-to-flour ratio and the smaller amount of starter does come into play. However, in comparison they are just two different styles of sourdough. The Beginner Sourdough (dough) is a lot dryer, slightly easier to work with because of its stiffer texture, and often times yields a higher rise due to the protein content in the bread flour. I hope I’ve answered your question! ;)
Rhae says
I’m so glad I found your website and your sourdough book. Your step-by-step instructions are so helpful! I noticed that In your book, most of your breads bake at 450. Why do you bake the all-purpose flour loaf at 425? Thank you!
Emilie Raffa says
Hi there! When I make smaller loaves, sometimes I bake at a lower temperature just to keep an eye on it. But it most certainly can be baked at 450! It’s flexible.