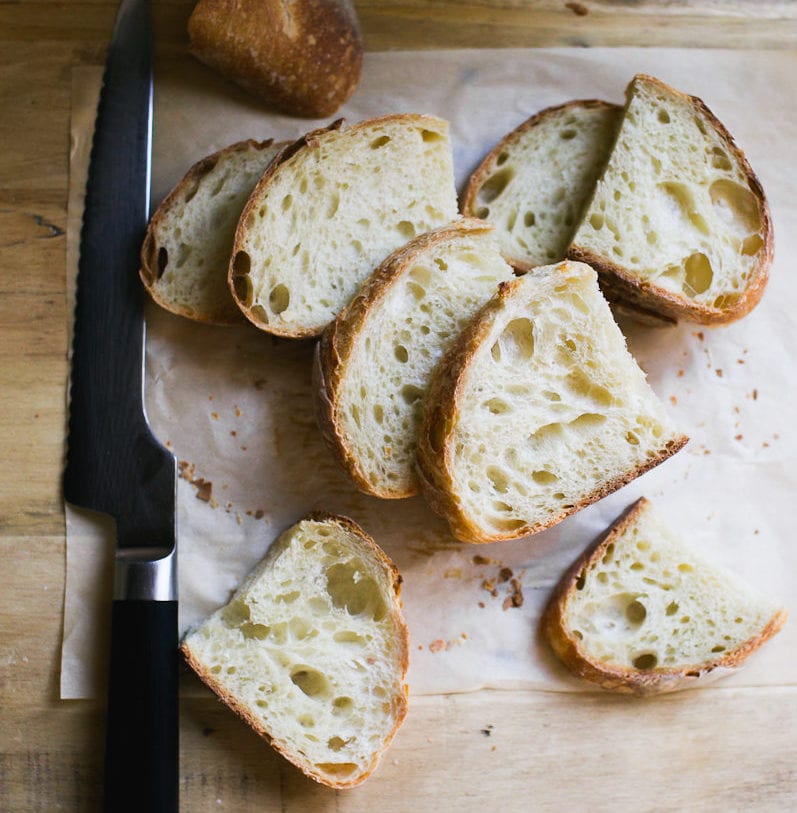
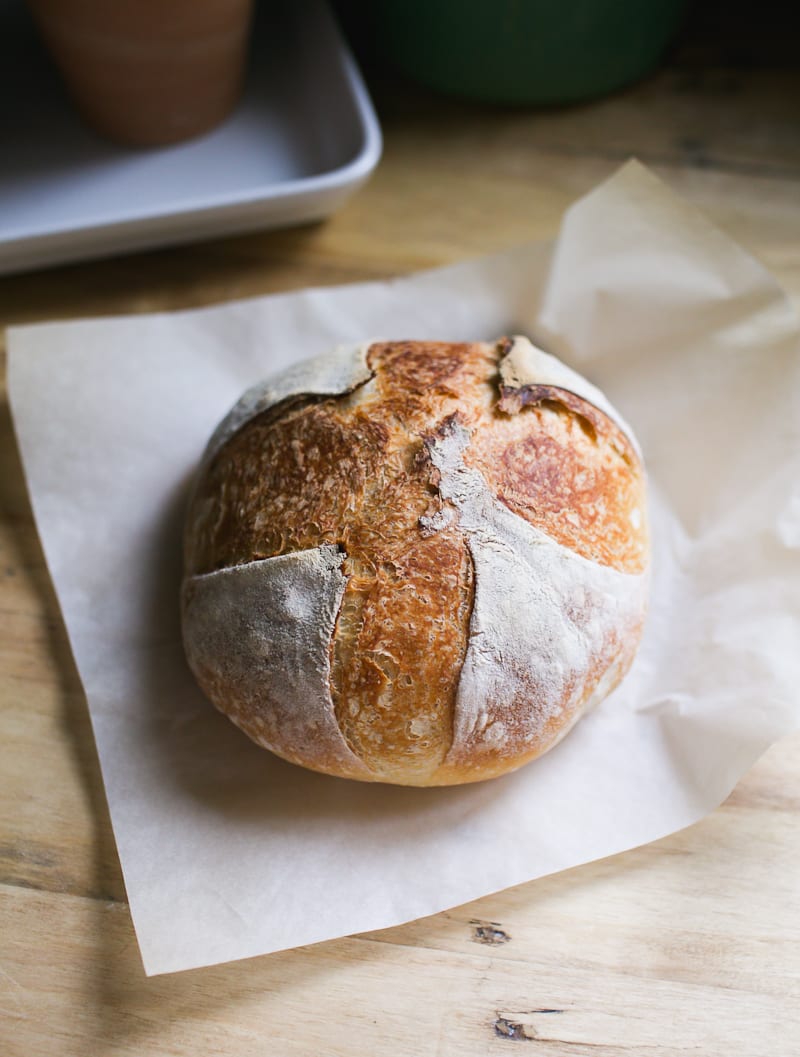
No bread flour? No problem! Learn how to bake artisan sourdough bread using all purpose flour and active sourdough starter. This easy-to-follow recipe features step-by-step photos, helpful tips, and a simple baking schedule to help you create delicious, naturally leavened loaves at home. It’s light crisp and airy!
Bakers all over the world choose bread flour to create exceptional sourdough bread at home. It’s prized for its high protein and gluten content, which helps to create a lofty-high rise. But what if you don’t have any bread flour? Can you make light, airy artisan sourdough with all purpose flour instead?
In this post, you’ll find a clear, step-by-step guide to mastering sourdough with all purpose (or plain) flour with a few key adjustments. You’ll gain the tools and confidence you need to bake delicious bread every time.
All-Purpose Flour vs. Bread Flour: Key Differences
It all boils down to protein content. Bread flour has a higher protein content than all purpose flour, which affects gluten development and the bread’s rise.
I typically use King Arthur flour for bread baking. Their bread flour contains 12.7% protein, and their all purpose flour contains 11.7%. This recipe was formulated to work with King Arthur and Trader Joe’s all purpose flours, which are comparable. (learn more about choosing flour in this post).
Tip: Protein content varies between brands, so stick to one brand first to understand how it behaves. It will be your reference point for future adjustments as you continue to bake.
How to Use All Purpose Flour in Bread Baking
Swapping all-purpose flour for bread flour is not always an even exchange. Because all-purpose flour absorbs less water, you’ll need to reduce the total water in your dough to avoid stickiness. Too much water makes the dough hard to handle, which can cause flat, dense, or gummy bread- you don’t want that.
Ok, So Reduce the Water by How Much?
I typically suggest reducing the water by 15-30g to start. The range depends on the specific sourdough recipe, the amount of sourdough starter, and the flour brand you use.
You’ll have to play around with the texture of the dough, adjusting the flour/water as needed until it “feels right,” which can be frustrating if you lack experience. But stick with it: success requires practice, patience and persistence. For now, let’s focus on visual and tactile cues to guide you through the process.
How to Make Artisan Sourdough Bread with All Purpose Flour {Step-By-Step Recipe}
Step 1: Mix the Dough
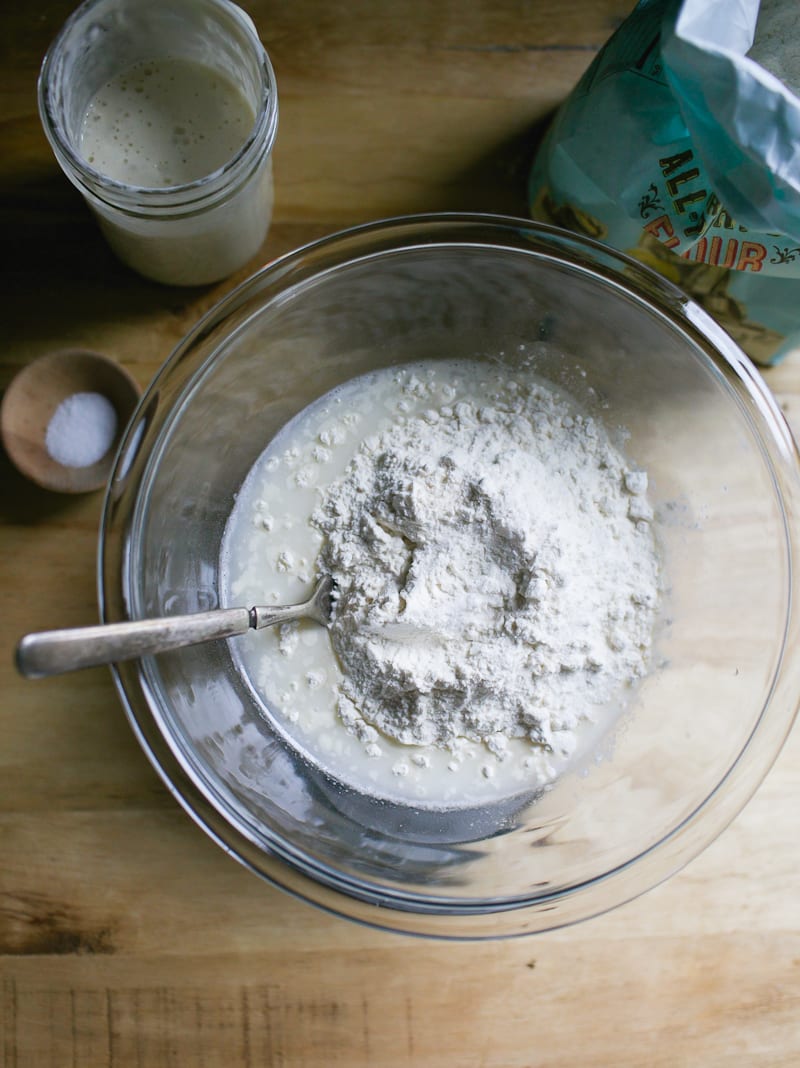
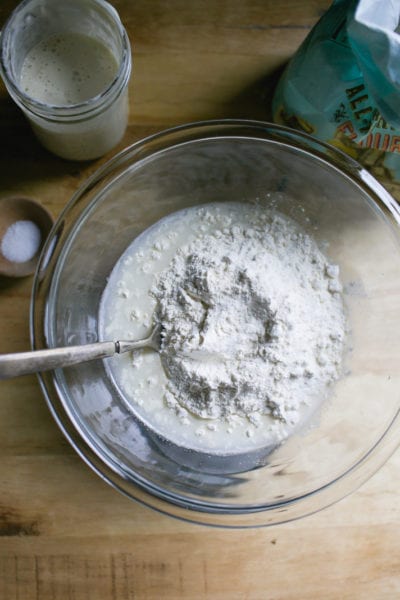
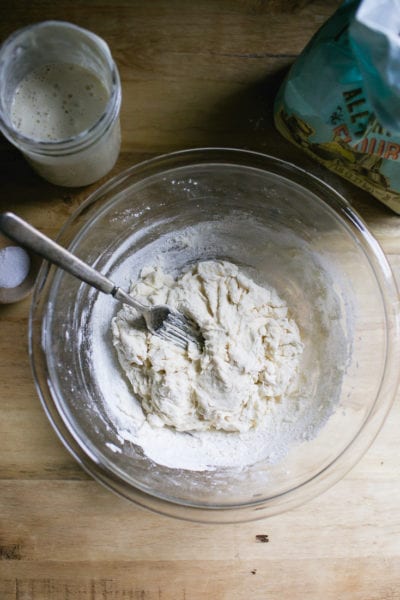
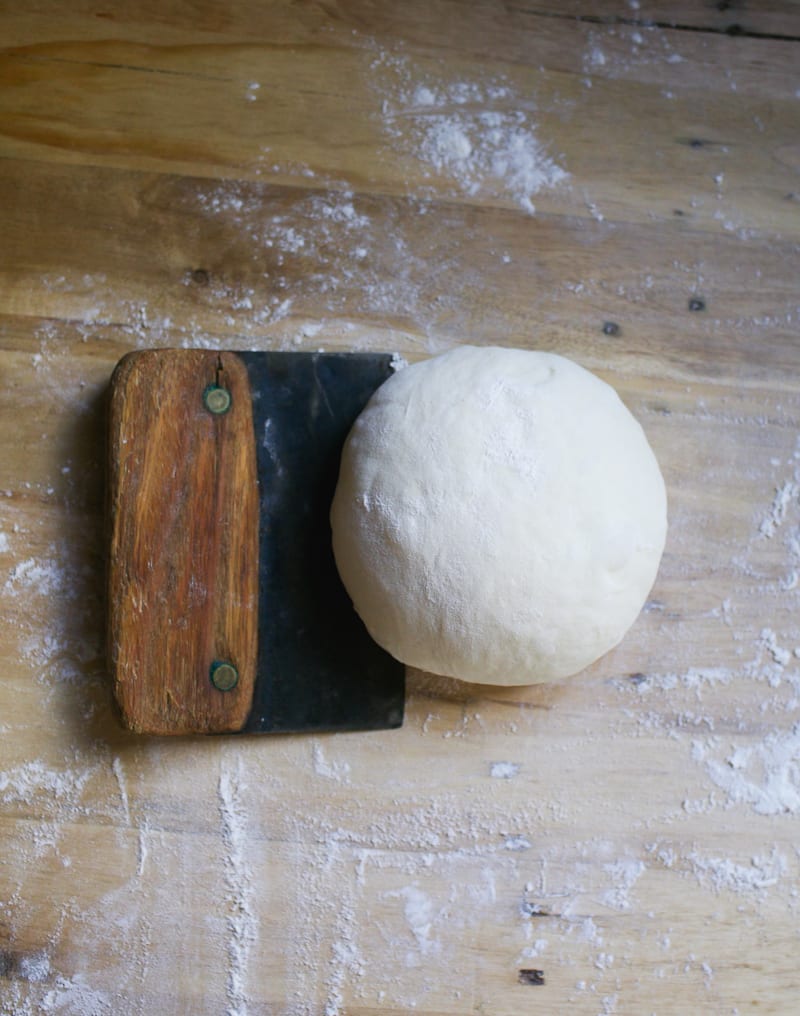
- In a large bowl, whisk your bubbly starter and water together. Add the flour and salt, then mix with a fork until combined. When the dough becomes too stiff to mix with a fork, switch to your hands and knead gently until a rough, shaggy dough forms. This texture is what you’re looking for: slightly sticky but holding together (see images above). Now, cover the bowl with a damp towel or plastic wrap and let rest at room temperature for 30 minutes.
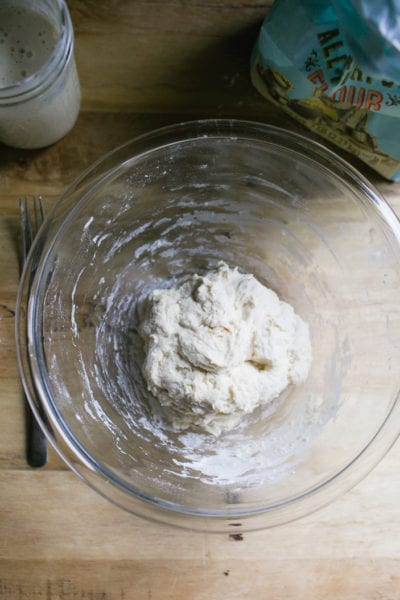
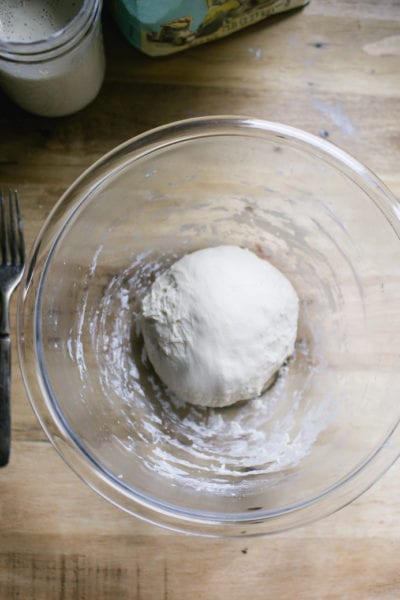
- After the dough has rested, work it into a ball. The surface will appear mostly smooth with a few tears. This is your last chance to adjust the dough’s texture before the bulk rise, so pay attention to how it feels. The dough should be soft and stretchy- not wet, overly sticky, or soupy.
A Few Notes: This recipe makes a small sourdough loaf, ideal for 2–4 people. Smaller loaves are easier to handle, especially if you’re new to sourdough baking. Instructions for a larger loaf are at the end of this post. For best results, you’ll want a digital kitchen scale to measure ingredients accurately, and a Dutch oven (or similar lidded oven-safe pot) for baking. You can find these tools in my shop.
Ste 2: Bulk Rise
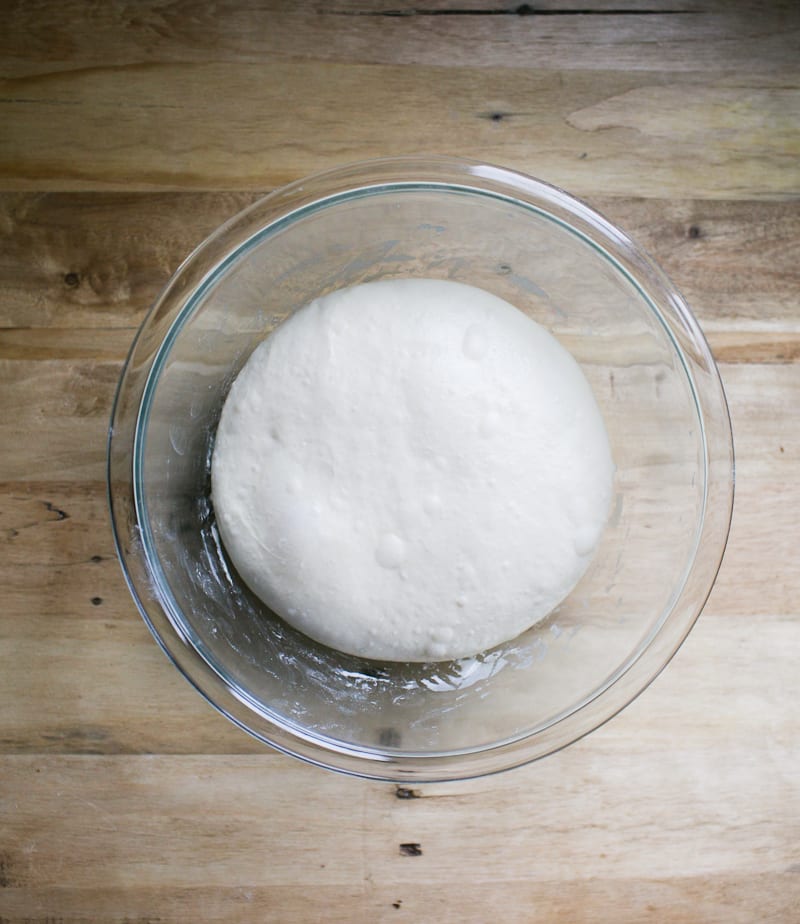
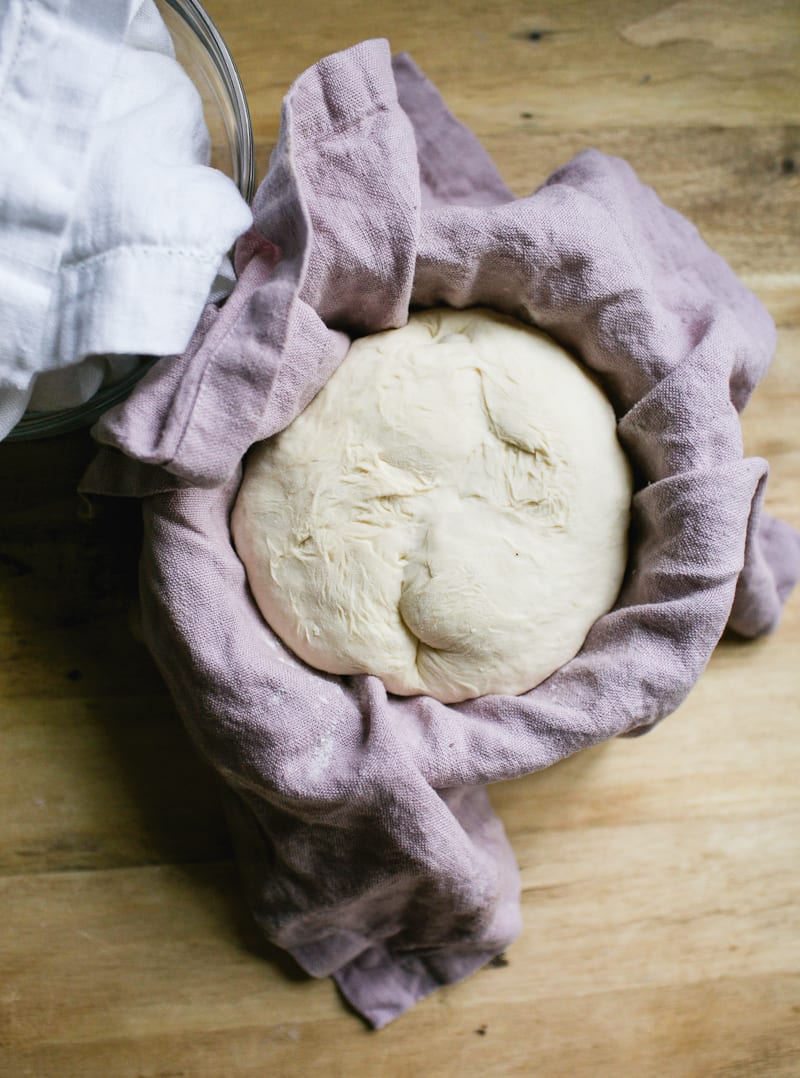
Cover the bowl and let rise overnight, about 10-12 hrs. at room temperature (68 F). The dough is ready when it has doubled in size and looks light and airy. If you’re using a standard 8-inch mixing bowl, the dough should rise to about halfway or two-thirds up the sides, which is perfect for this small loaf.
Optional: Stretch and Fold
This step, done during the bulk rise, helps to strengthen the gluten, improve structure, and give your loaf more height. Watch the video below for additional guidance. Or read the full tutorial: How to Stretch and Fold Sourdough, step-by-step.
About 30 minutes into the rise, perform your first stretch and fold:
- Gently grab one side of the dough, stretch it upward, then fold it over toward the center.
- Rotate the bowl a quarter turn and repeat.
- Continue until you’ve completed four folds (one full set).
- Repeat once more, 30 to 60 minutes later.
Step 3: Shape The Dough
- Line a small bowl with a cotton or linen cloth. Sprinkle generously with flour. Now, you’ll shape the dough twice: first to preshape it, then to build strength and structure.
- Preshape: Remove the dough onto a floured surface. Gently fold the top edge of the dough toward the center. Turn it slightly and repeat, working in a circle until the dough forms a round. Use a bench knife to flip the dough over (smooth side up), then cover and let rest for 20–30 minutes.
- Final Shape: After resting, flip the dough again so the smooth side is facing down. Repeat the folding process to form a tight round. Then flip it back over. With floured hands, gently pull the dough toward you in a circular motion to tighten the shape. Place the dough into the lined bowl, seam side up. Cover the dough with the cloth overhang.
Step 4: Second Rise
Let the dough rest at room temperature for 30 minutes to 1 hour. It’s ready when it looks plump and slightly puffed—it won’t double in size during this stage. While the dough is rising, preheat your oven to 450°F.
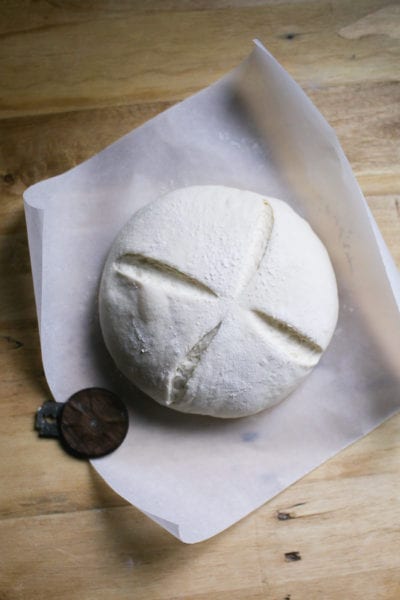
Step 5: Score The Dough
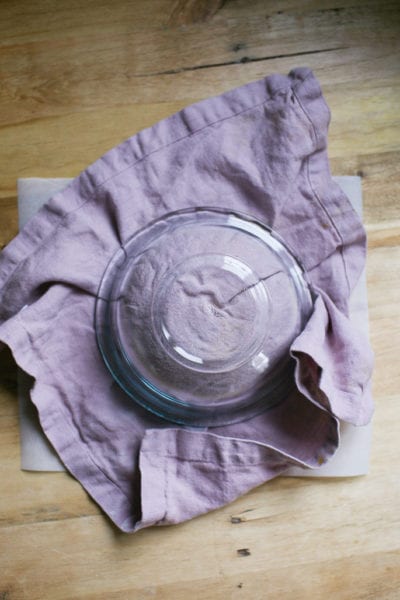
- Invert the bowl of dough onto a sheet of parchment paper. Remove the bowl and cloth.
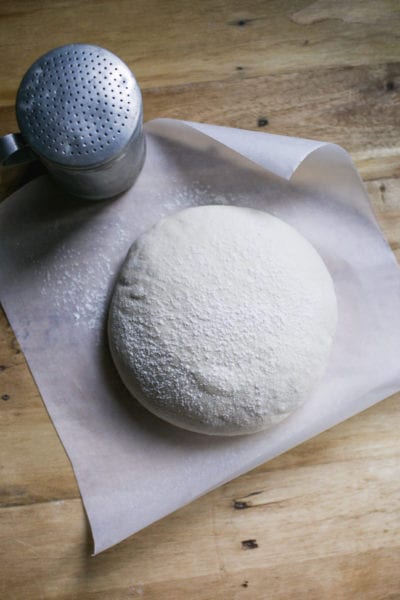
- Sprinkle the dough with flour and smooth the surface with your hands.
- Using a bread lame or a small serrated knife (I used my UFO lame), make four, quick, shallow cuts at 12, 3, 6 and 9 o’clock, turning the parchment paper as you go. Use the tip of the blade as a guide.
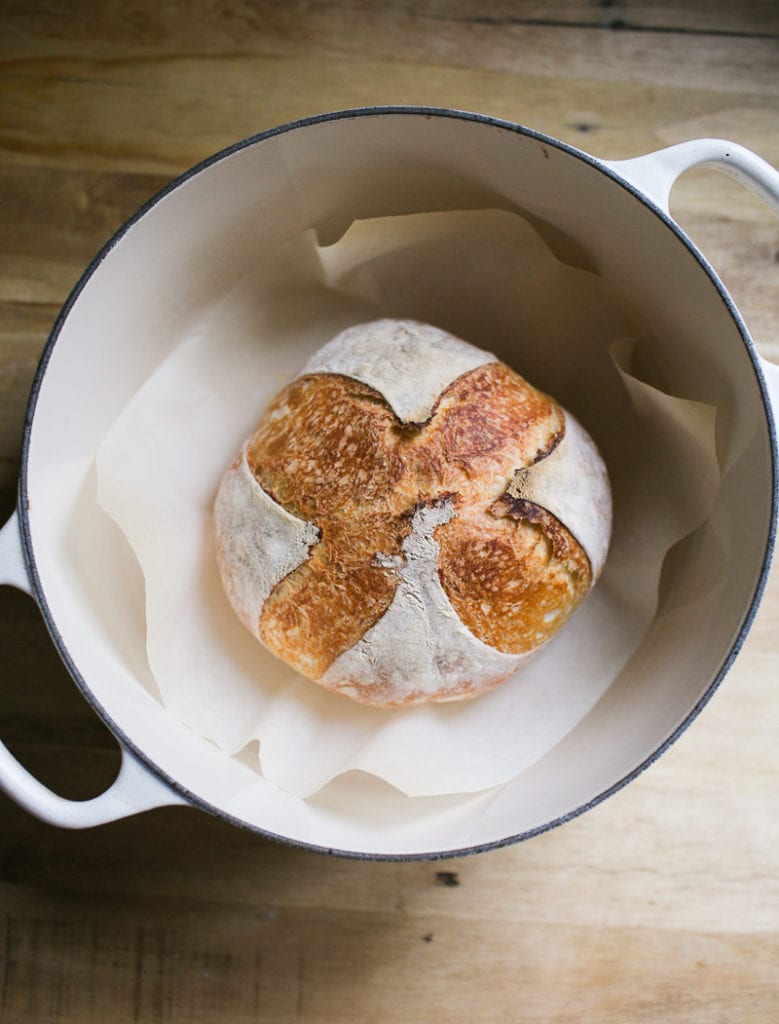
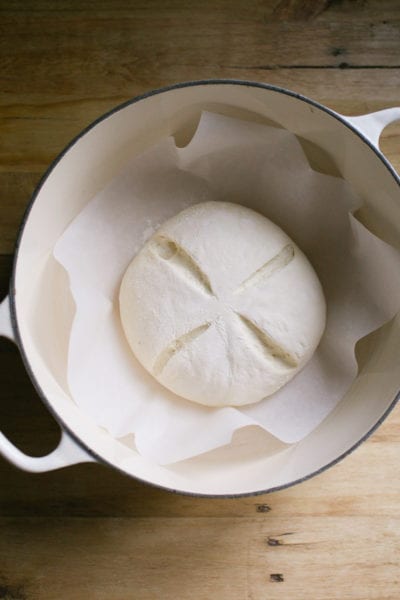
- Lift the dough (still on the parchment) and carefully place it into your Dutch oven. Cover with the lid.
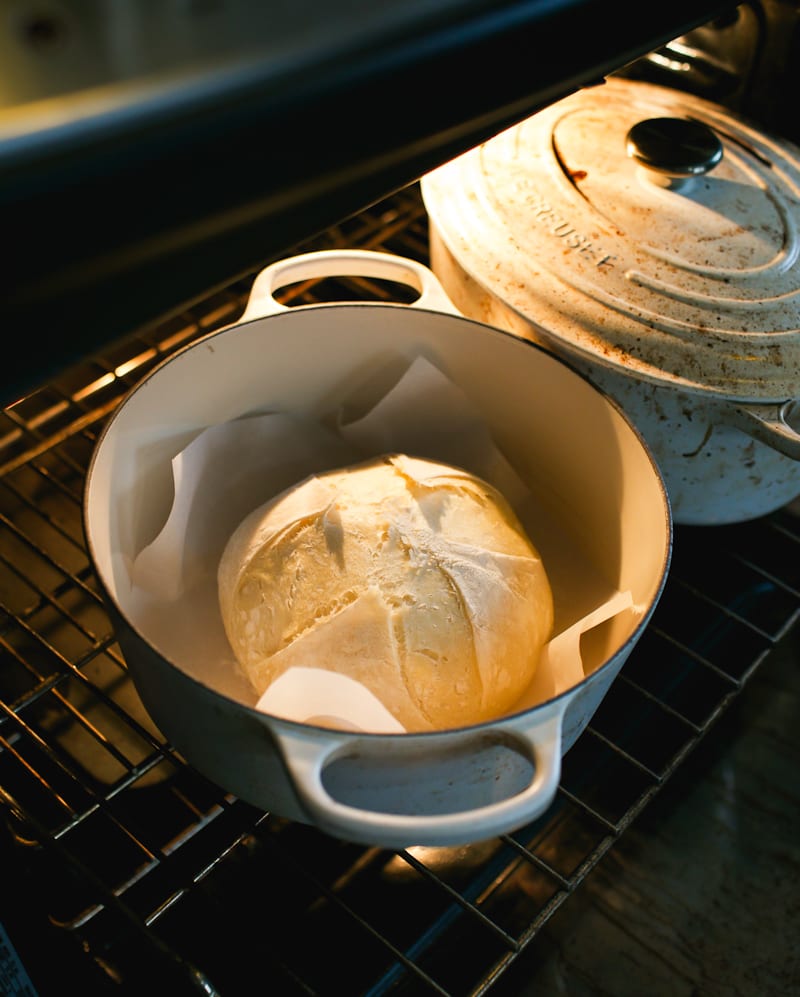
Step 6: Bake The Bread
Place the Dutch oven into the preheated oven, center rack. Reduce the temperature to 425 F. Bake covered for 20 minutes. Then, remove the lid and continue baking for 30–35 minutes, or until the crust is deep golden brown. Cool on a wire rack for 1 hour before slicing.
Sourdough Bread Baking Schedule
Here’s a flexible overnight schedule that works well in most home kitchens (around 68°F). If your kitchen runs warmer, simply start a bit later to prevent over proofing the dough.
The Night Before
7:00 PM – Mix the dough and let rest (30 min)
8:00 PM – First stretch and fold (optional)
9:00 PM – Second stretch and fold (optional)
Cover the bowl and let the dough rise at room temperature (10–12 hours)
The Following Morning
7:00 AM – Check the dough (it should be doubled in size)
7:05 AM – Preshape
7:30 AM – Final shape
7:35 AM – Begin second rise + preheat oven
8:05 AM – Bake
By signing up, you agree to receive emails from The Clever Carrot. Unsubscribe at any time.

Artisan Sourdough Bread Recipe with All Purpose Flour
- Cook Time: 50 minutes
- Total Time: 50 minutes
- Yield: 1 small loaf (2–4 ppl) 1x
- Category: Sourdough Bread
- Method: Oven-Baked
- Cuisine: American
- Diet: Vegetarian
Description
No bread flour? No problem! My artisan sourdough bread recipe with all purpose flour is an excellent substitute. This recipe yields a smaller sized loaf (perfect for up to 4 people) with a crisp crust and a smooth, interior crumb.
Notes & Substitutions
This recipe was formulated to work with King Arthur & Trader Joe’s all purpose flour, which contains 11.7% protein. If using another brand, please see my tip in the recipe below for adjusting the texture of the dough, if needed.
For accuracy and best results: please weigh your ingredients using a kitchen scale.
Ingredients
For a small loaf:
- 50 g (1/4 cup) bubbly, active sourdough starter
- 165 g (1/2 cup + 3 tbsp) water
- 5 g (1 tsp) fine sea salt
- 250 g (2 cups + 1 tbsp) all purpose flour (Trader Joe or King Arthur)
For a larger, standard size loaf:
- 50 g (1/4 cup) bubbly, active sourdough starter*
- 330 g (1 1/3 cup + 1 tbsp) water
- 9 g (1 1/2 tsp) fine sea salt
- 500 g (4 1/4 cups) all purpose flour (Trader Joe or King Arthur)
*Note: I use 50 g of starter for both the small AND standard size loaf. Using a smaller amount of starter with an long, overnight rise will help to prevent over proofed dough in the morning.
Instructions
Make the Dough
In the evening, whisk the starter and water together in a large bowl. Add the flour and salt. Mix with a fork until a stiff dough forms, then finish by hand to fully incorporate the flour. It will feel rough and shaggy, and slightly sticky. Cover with a damp towel or plastic wrap and let rest at room temperature (68 F) for 30 minutes.
After the dough has rested, work the dough into a ball. To do this, grab a portion of the dough and fold it over, pressing your fingertips into the center. Repeat, working your way around the dough until it begins to tighten.
TIP: If the dough feels too wet (and this can happen depending on the brand of flour you’re using), add 1 tbsp. of flour. Mix thoroughly by hand, adding more flour as needed. If you think it’s too dry, add 1 tbsp. of water and see how you go.
Bulk Rise
Cover the bowl (damp towel or plastic wrap) and let rise overnight at room temperature. This will take about 10 to 12 hours at 68 F. The dough is ready when it no longer looks dense and has doubled in size. If using a standard 8-inch bowl, the dough will rise about 1/2 way up the sides.
Optional Step: about 1 hour into the bulk rise, do 1 set of stretch and folds. Repeat 1 hour later. This will increase the overall volume of the bread.
Shape the Dough
The following morning, line a small bowl with a cotton or linen cloth. Sprinkle with flour.
Important: You’re going to shape the dough twice to build extra strength.
Preshape
Remove the dough onto a floured surface. To shape the dough into a round, starting at the top, gently fold the dough over toward the center. Give it a turn and fold over the next section. Repeat until you have come full circle. Using a bench knife, scoop up the dough and flip it over (the smooth side should be facing up). Cover and rest for 20-30 minutes.
Final Shape
After the dough has rested, flip it over again (the smooth side should be facing down now). Shape it again following the steps above. Flip it back over. With floured hands, gently cup the dough and pull it toward you in a circular motion to tighten its shape.
Place the dough into the lined bowl, seam side up. Cover the dough with the cloth overhang.
Second Rise
The dough needs to rise again. Rest for 30 minutes to 1 hour. The dough is ready when it looks puffy and has risen slightly, but has not yet doubled in size.
Preheat your oven to 450. Cut a sheet of non-stick parchment paper to fit the size of your baking pot, leaving enough excess around the sides to remove the bread.
Score the Dough
Place the parchment over the dough and invert the bowl to release. Sprinkle the dough with flour and gently rub the surface with your hands. Using the tip of a bread lame, small, serrated knife or a razor blade, make four shallow 4-inch long cuts at 3, 6, 9, and 12 o’clock around the dough. Use the parchment paper to transfer the dough to the baking pot.
Bake the Dough
Reduce the heat to 425 F. Bake the dough on the center rack for 20 minutes, covered. Remove the lid, and continue to bake for 30-35 minutes and golden brown (40 minutes uncovered for the larger, standard loaf).
When finished, transfer to a wire rack. Cool for 1 hour before slicing, for best texture.
Notes
Sourdough is best consumed on the same day it is baked. To maximize freshness, cool completely and store at room temperature wrapped in plastic, reusable beeswax wrap or bread bag for 1-2 days. Sourdough can also be frozen, for up to 2-3 months. Defrost at room temperature and warm @ 300 F before serving.

Comments
Danae Walters says
I have a few questions. I was wondering why you use oil in your recipe with bread flour, but not in this recipe. Also the water amount seems higher to me and you said that you have to reduce the water when using all purpose. Thank you.
Michelle says
How would you time the bake for 150g hoagie rolls, I plan on spraying them with water
Emilie Raffa says
Michelle, this is a great question. I’m afraid I don’t have the answer for your since I haven’t tested it myself. I’m unable to advise with specifics. If you experiment, please let me know!
Lauren says
Hi there!! I didn’t see anything about putting the Dutch oven to preheat. Does it go in or not? Thank you
HMH says
I’ve also read other bakers don’t preheat the D.O. with different success rates…guess it depends on the oven as well?
I have a convection oven and usually have to lower the temperature by 25° to match most recipes… Would love to know if anyone had success with this recipe in a “cold” D.O. ?
JetStream says
I just made my first ever bread with this recipe and I used a cold DO. I started at 450 for 20 minutes covered then 30 minutes uncovered was enough to finish it. Convection oven and enameled DO. Looks perfect and I can’t wait to try it! It looked a like the picture in the recipe after 20 minutes or _maybe_ a little lighter but this is my very first attempt so I’m not a great judge.
Thanks Emily!!
Emilie Raffa says
Excellent! I’m SO thrilled to hear this. Love a good success story. Thanks for your feedback!
JetStream says
I’ve taken a few liberties today (mostly with timing) hopefully everything will still work out. Thanks again and sorry I mis-spelled your name.
Emilie Raffa says
Yes. In fact, it depends on a multitude of factors including sourdough starter vitality, proper dough fermentation (very important), shaping, scoring, oven temp. etc. Preheating your DO only enhances the bake if the previous factors have worked harmoniously together; does that make sense? This takes practice. Hope this helps!
Emilie Raffa says
Hi there! No preheat. It’s common in sourdough baking, but not necessary. You are more than welcome to do so if you are drawn to it.
Bnelli says
Hello, thank you for the recipe! Should the starter be fed or straight out of the fridge?
Emilie Raffa says
Always feed it first. Don’t use it straight from the fridge (see *note below). You’ll need to do this every time prior to making bread dough to re-activate it. For timing, give yourself a couple of days to do so, to perk it back up. *Note: the only exception to using a starter straight from the fridge is if you have fed it at room temperature the day before, placed it in the fridge, and it has become active on the overnight. This is an advanced tip that works with practice and observation.
Janet says
I LOVE the look of your coiled book and your recipes and it’s always with me in this new obsession of mine, HOWEVER, in your recipe of everyday sourdough, you have 350g of water listed (above is 330g) and mine both my attempts were flops. They were too dense & moist inside. A friend mentioned to add more starter next time and this did help. I’m wondering what your thoughts on this might be? I am still giving you 5 stars because, it’s not you and your recipes…it’s me! lol. I’ve made your Country Farmhouse White but added a bit more starter (30g) but it didn’t rise as much but tasted delicious! (perhaps although it was a great starter…maybe needed more strength.). The best so far is your Soft Honey Whole Wheat – this came out so perfect that my mother stole the whole loaf from me after one slice!
T
Kyla C. says
This is my favourite recipe so far. It’s so much easier to have all purpose on hand and I substitute 100g of the flour for whole wheat and it turns out great. I also do half the salt (personal preference). My starter is just from this spring and it does so well having the long counter rise. It also gives great flavour. My baking time/temp is a little different from practice with my oven and what I like. I put the cold DO in at 475 and turn it down to 425. 30 min lid on, 30 min lid off :) thanks for the great recipe
HMH says
Thnk u for sharing your details!
I swear I ve learned just as much from other commenters!
Emilie Raffa says
I know. We have a great community of bakers here who genuinely want to help and support others by sharing their experience with sourdough. Super cool.
Emilie Raffa says
It is. That’s why I created this recipe, for convenience and ease! I like your tip about using 100 g of whole wheat flour. Sounds perfect. Thank you for sharing your feedback, Kyla!
Sarena Quintanilla says
Hi. Small loaf has been the best loaf I’ve ever made consistently in my life. Can the regular size loaf be put into a Pullman pan as is or does the recipe need any tweaking? What temp would you bake and would you need a tray of water and to spray the loaf?
Estrella Harris says
When can I add inclusions?
Nicole Haddow says
I made this last weekend! Best sourdough I have made yet and with all purpose flour! I made two of the larger loaves. Could not bake uncovered for 40 minutes…too long! I think it was in for maybe 20 minutes? I used organic unbleached Robin Hood flour (Canada). After proofing 10 hours, I shaped and placed in bannetons for another 24 hours. Magical! Thank you!
Jennifer Hawkins says
Did you put them in the refrigerator for the 24 hours? And if yes, how long do you let them come to room temperature before putting in the oven?
TIA
Nicole Haddow says
Only until the oven hit temp. I turned it over onto the parchment, scored it, and sprayed it with a little water and put it in.
HMH says
Thnk u for sharing your details!
I swear I ve learned just as much from other commenters!
Good to know someone else in Canada using RobinHood successfully!
Emilie Raffa says
Love this. So great. I can only imagine how much your starter absolutely loves this vibrant flour! The right flour makes all the difference in the world. I’m curious: what is the name of the mill? I’d love to learn about their heritage seed flour.
Nicole Haddow says
All the info is on their site westcountrymills.com
Emilie Raffa says
Hi Nicole! Wonderful! Thank you for sharing ☺️
Amber Provenzano says
Hi there can someone tell me the ratios for making a double loaf of bread using this recipe ? Thank you in advance.
Amber
Frances says
Hi!! Using your recipe as a beginner. I have followed it closely but just realized I have to work in the morning! Is there a way I can follow all the steps, and then put the dough in the fridge after the 10-12 hour rise and after shaping it? This way I can bake it when I get home? Or should I put it in the fridge now and do the shaping tomorrow?
Thanks!!!
Buchman Glenda says
Hi! I’m thinking about doing the same thing. Did it work
for you?
Sarena Quintanilla says
Hi I put my bread in the fridge for the final proofing (after the shaping and in the banneton) 12 hours usually. It’s more sour that way.
Emilie Raffa says
Hi Frances! You can do both, actually. See below for options:
Option #1: Chill the whole bowl of dough overnight (I would cover with lightly oiled plastic wrap so it doesn’t stick to the top). In the morning, shape the cold dough and proceed with the last steps.
Option #2: To chill dough that has been shaped, you’ll need to shorten the bulk rise to about 75% to survive an overnight proof in the fridge. Otherwise, the dough might over proof. If “75%” is hard to visualize, consider purchasing a high-sided dough tub with measuring marks so you can track the dough’s growth as it begins to rise.
Becki R Killion says
I tried with regular flour and King Arthur’s.King Arthur’s was better. I also did not need 4.5 cups flour.Worked best with 4 cups flour.Delicious bread.
Emilie Raffa says
Great! Thank you Becki!
Britt says
The most perfect recipe. I baked a small loaf and the regular size loaf at the same time with this recipe, one for a friend and one for my family. Literally AMAZING. And my loaves look just like the photos. Thank you so much for another perfect recipe!!! I swear by your sourdough guides and recipes, they’re the only ones I use! Thank you, Emilie!!
Becky says
I am new to sourdough baking but this was the best flavor and process so far! Easy enough for a beginner. I’m getting better at it! The instructions are very easy. I like the density that the lower amount of starter and flour gives vs the ratios I was using. The dough is way easier to work with. I started with the smaller version and this morning I baked the big one. Can’t keep my hands off of it!
Carol says
I had a customer ask for a last minute artisan loaf. I found this recipe and went with it because I did not have enough time for my traditional high hydration dough. My starter was running low and REFUSED to get active like usual, but had some signs of activity after some time (was a high ratio feed). I followed your recipe to a T and went with it even though I planned to have the worst flop there was from the start. Woke up the next morning and the dough didn’t look like it did anything (again… used to a higher hydration), but decided to shape it and bake it anyway. The customer messaged me a photo of the crumb (my only requirement since I gave it to her free not knowing how it would turn out) and WOW! It was dang near perfect. This recipe works even for the most ridiculous circumstances that I seemed to have to go through. I’m going to make it for myself next time haha!
Thanks for another great recipe!
Taylor says
Hi! I have been making this recipe for a few weeks now and absolutely love it!! I am looking to add inclusions to the bread (sun dried tomatoes and Parmesan). At what stage would I add these inclusions?
Thank you!!
Senada says
Not sure if you got a response but I’ve been adding inclusions right before cold proofing! It’s come out perfect every time. Might I suggest cinnamon and brown sugar or jalapeño and cheddar was DIVINE as well. This recipe is AMAZING.
Catherine says
I made this recipe and it turned out really well! This was my first time making sourdough so i’m totally shocked how well it turned out! I left my dough in the fridge overnight after shaping it and putting it into a bowl. I pulled it out the next morning and let it sit for an hour and a half before reshaping. I baked it on a preheated sheet tray with my kitchen aid bowl as the lid (getting creative in lieu of a dutch oven). the crust is so crisp and the inside is tender and chewy!!
Danielle Schrader says
I am in the process of making a sourdough chocolate swirl loaf. Plan on making a chocolate butter and raspberry jam to pair it with. I want to make this artisan sourdough but I want to alter the flavor so I am wondering if I need to prepare a levain like I do for my chocolate swirl or can I just add the ingredients directly to the mix :)
Ruthie says
Hi! Would baking time differ if I wanted to make mini loaves by splitting the small loaf in two?
Sarah says
My bread will have been sitting out for 12 hours during day. Can I refrigerate over night and reshape and bake in morning?
-thank you
Best recipe!
Emily says
I would say yes- I did exactly this with my ‘clever carrot’ focaccia recipe and simply threw it in the oven first thing in the morning.
But yes I would reshape it first, in this recipe’s case and also put into a pre-heated Dutch oven (or vessel of your choosing).
Anonymous says
Katy Boatright says
I like the post and was quite hopeful I would be successful in my attempt to bake my first loaf of bread, however, I was as not. Not sure what I did not do. My starter never doubled, even after 14 days of feeding and discarding.
Emilie Raffa says
Hi there! Sourdough takes time, patience and perseverance. Hang in there! If your starter never doubled, it’s not active; therefore you cannot make bread (the dough won’t rise). So, that’s the #1 and most important issue that needs to be addressed first. My specific recommendation for you is to read the following articles below and see what resonates. Feel free to circle back with any questions:
1.) https://www.theclevercarrot.com/2021/01/feeding-sourdough-starter-my-best-tips-tricks/
2.) https://www.theclevercarrot.com/2018/03/troubleshooting-your-sourdough-starter/
3.) https://www.theclevercarrot.com/2018/01/why-wont-sourdough-rise/
Anne says
Awesome 👌 Easy to make, lovely soft bread, nice crust.
Heidi says
Excellent! I made the large loaf adding 5 grams of vital wheat gluten. I used KAF AP flour. My starter is a rye starter and pairs perfectly with this recipe. Question, do you think I could double the large loaf, to make two loaves? Or even triple?
Dani says
Used your starter Recipe and then this and successfully made my first ever loaf!! It turned out great!! thank you!
Laura says
Trying this for the first time and neglected the start time will it be ok to rest overnight in the fridge after the bulk?
Emily says
Yes absolutely! “Cold rest” as I call it is okay. It just makes the sourdough sleepy and will need to be reshaped before going into preheated Dutch oven/vessel in the am!
Vivian says
Dear Clever Carrot, for years and years, I have tried to perfect sourdough bread to no avail. I’ve collected sourdough bread recipes and sourdough starter recipes and have never been successful. So after years of disappointment, I tried your sourdough starter and sourdough bread recipe. They turned out absolutely beautiful and delicious. Thank you for sharing your recipe.
Ariana says
My first ever sourdough and it turned out great, THANK YOU! I want to laminate in some freeze dried berries and chocolate on my next loaf – when would you recommend I do that?
Andrea says
Can I add tthe olive olive in the artisan recipe?
Daniel says
So to be honest I’ve never actually tried using only AP or bread flour….but half whole wheat turns out beautifully! The crumb is probably slightly less open than an all white flour loaf, but still pretty open, I would’nt call it dense at all. Plus it has a great whole wheat taste, gorgeous crust, and comes out with a nice ear. I keep reading about how you have to adjust recipes for whole wheat but I didn’t find that was necessary at all.
Jazmin says
Hi Daniel,
Quick question so you followed this recipe but used half wheat half aAP flour?
Andrea says
Can I also use rye flour for this recipe not only all purpose flour?
Andrea says
I want to use the recipe the all purpose flour but why won’t this version have olive oil?
Emilie Raffa says
Hi there! It’s just a different recipe for variety. Olive oil changes the interior crumb structure (makes it more plush).
Janelle says
Do I put my Dutch oven in while preheating or wait until the temperature decrease to 425?
Tarah says
I have the same question!
Jennifer huston says
This has been very helpful, thank you…I do have a question… since I’ve had my starter, I have used all purpose, unbleached flour my starter for about two weeks do I have to continue to use all purpose unbleached flour or can I switch it to unbleached bread flour?
Casey says
I live in an extremely dry environment and had to double the amount of liquid to make this dough and it was still too hard to shape twice. Do you have any advice regarding desired texture before shaping? It’s in the middle of bulk rise. So not sure how it will turn out yet, but I used your starter recipe and its amazing so far.
Cory says
Great recipe. I was wondering if I don’t have time to bake it, mine bulk rise will be done at 11 p.m, could I put it in the fridge for the night?
Melissa Roland says
I’m trying this now, I can let you know in the morning if it worked!
Catherine says
How do I get it to be less crusty? It’s so hard to chew. I kept the lid on the entire time this time, and had a trivet between its bottom and the pot, and it’s got a much softer, and unburnt bottom, but the top is still crusty. Next I might experiment with cooking it at a lower temp, but then I’m guessing I should bake it longer.
Overall, love this recipe! It was the first sourdough bread I wasn’t too intimidated to try! The cup measurements and all purpose flour really helped with that.
Chris says
If I pull 50g out of my starter for this recipe isn’t it just 50g of discard ? I’m new to sourdough and I don’t understand the difference.
M says
50g of active starter is different from 50g of discard. Discard implies that the yeast might not be active, and you want active yeast to make sourdough bread. You want to take 50g of active starter that has just doubled so you can be sure it’s ready to work. Hope that’s helpful!
Maddi says
Just follow the instruction and 100% success rate guaranteed, I’ll probably reduce the final baking time 2-3 mins due to my dutch oven is really large while oven is too hot
andrea Hofer says
Can I also mix rye flour for this recipe not just all-purpose flour?
Cindy says
I use sprouted rye flour for 1/4 of the total flour required and it’s wonderful. No other adjustments are needed.
Elizabeth Z. says
I have used this recipe and baking schedule to encourage many folks who were disappointed with their sourdough journey. Great for beginners, but also for seasoned bakers needing a simple sourdough loaf that doesn’t need much tending. Just about to throw the first two rounds of the year into the oven!
Brandy S says
This was the first recipe and directions that allowed me a successful attempt at making sourdough. Thank you!
Ashley says
First time baking anything sourdough related and it turned out BEAUTIFULLY. i was so impressed with the appearance and my entire family was impressed with the taste, it didn’t even make it through the day lol. i loved how easy it was so understand and you made it very clear for every step. i can’t wait to try more from you!
Erin says
“Night of the living bread” has now made 5 successful loaves! My starter is thriving and the bread is excellent. I’ll be making more for Christmas dinner.
Happy Holidays!
Dana says
I’m excited to try this recipe! I am wondering if the dutch oven goes into the oven while it preheats to 450, or if the dutch oven doesn’t go in until it has the dough with it after being reduced to 425? Thank you!
Nancy Kennedy says
I’m a beginner and this will be my fourth attempt at sourdough bread. My first loaf was your beginner sourdough which has olive oil in the ingredients. I tried two other recipes from other sites that did not contain olive oil and I liked your recipe the most. Don’t know if it was the olive oil but the others were very bland in taste and didn’t contain oil. Does oil make a difference in taste? Can I add oil to this recipe? I want to try this one because it looks nice and airy. The other was good but I’m looking for something less dense. Thank you!
Ashley says
is it normal for the dough to be kind of sticky?
Raul says
Great recipe, as usual, Emilie! Hope you’re well.
I recently saw (can’t remember where) that, to strengthen the gluten when utilising gen purpose flour, you can add 20g of lemon juice to the dough mix. It’s worked for me when I ran out of bread flour.
Cheers from hot & sunny Joburg!
Raul
Kim says
Is it ok to use this recipe as it’s written with bread flour?
Daniel says
I followed this recipe almost exactly, but used 375 grams water for a higher hydration loaf with half AP flour and half whole wheat (500 grams total), after following another article from this site on how to make a sourdough starter. It turned out beautifully!! I wish I could upload a photo.
Andrea says
How dose your bread look useing half all-purpose and whole wheat?
Dave says
Ive followed this recipe 3 times now with a starter i also created only using ap flour. I cant believe i actually made bread, i feel like an old timey farmer. Easy recipe to work with for first time bakers like myself, thanks!
Nancy says
I made the small loaf. It came out great. This will be my go to sourdough recipe. Love the small size. I’m going to adjust the times so the loaf is done an hour before dinner.