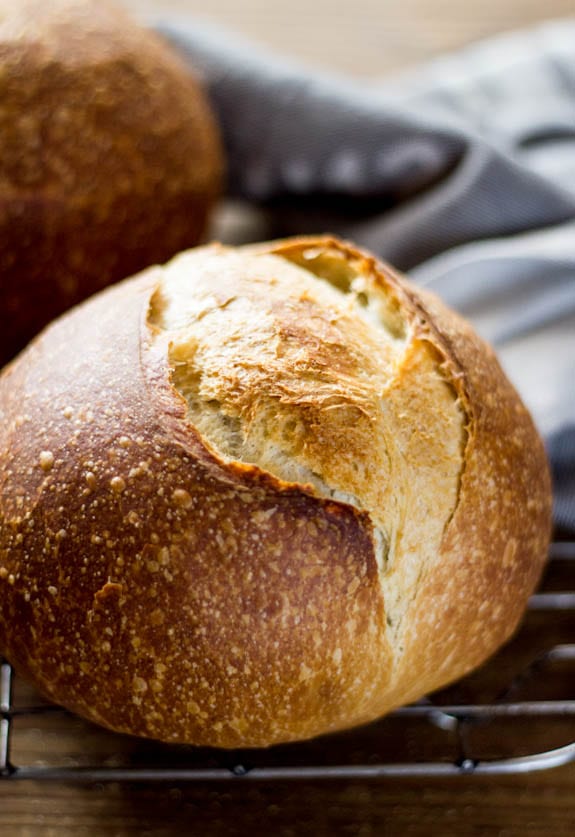
Think you can’t bake fresh, homemade sourdough bread? This easy sourdough bread recipe—trusted by beginner bakers for over a decade—shows you how, step-by-step. No yeast. No kneading. Just simple ingredients and 10 minutes hands on time for soft, crisp sourdough bread at home.
Reader review
“I have tried MULTIPLE sourdough bread recipes and this one has been the very first to make a successful (fully risen) loaf of bread. I am relatively new to sourdough and for some reason, the other recipes just didn’t produce good bread. These instructions and detailed explanations really make a huge difference to someone who is new to the world of sourdough.”
—Savannah
To anyone who thinks their sourdough bread isn’t good enough, I get it. Back in 2013, I set a goal: bake more bread. I tested, failed, succeeded (and tried again). What began with an easy no-knead artisan loaf eventually led to the holy grail: homemade sourdough bread.
Admittedly, I had beginner’s luck. My early scratch-made loaves were light, plump and airy, everything you want sourdough to be! And then? Down the rabbit hole I went: Hydration? Baker’s %? Proofing times?
Now, with 13+ years baking experience and a professional culinary background, I know what holds people back: the confusion, hesitation, comparison. I teach from a straight forward practical perspective because sourdough is not just a written recipe; it’s an understanding.
This sourdough bread recipe has been the most popular on my blog for over a decade- millions of views and the inspiration behind my bestselling book Artisan Sourdough Made Simple, a deeper dive into sourdough bread recipes. So, if you’re at the end of your rope (and just want to make good bread), you’ve made it. Welcome to the journey.
What Sets My Recipe Apart:
- One bowl, 5 ingredients
- Olive oil = soft, plush crumb & crisp, golden crust
- No stand mixer
- No bread machine
- Flexible baker’s schedule
- Personalized support in the comments
But before we make bread, let’s discuss what drives it: your sourdough starter. Once you understand what it is, and how it works, your path will be crystal clear. Have questions? Ask in the comment section. I respond with personalized help.
Where To Get A Sourdough Starter
A sourdough starter is a live fermented culture of flour and water. It naturally leavens bread dough without commercial yeast. There are all different types: homemade, purchased or gifted (ask a fellow baker!). I use two different starters at home: one I made myself, and a vibrant Australian starter gifted from my friend Celia.
But is doesn’t stop there. Once your have your own sourdough starter, it must be kept alive and well with regular feedings to maintain its rising power. Sourdough is not static; it’s a living process. Here’s my personal feeding schedule which you can adapt to suit your style:
How To Feed Sourdough Starter
- Remove and discard half of your sourdough starter
- Feed what’s left in the jar with equal parts flour and water by weight (1:1:1 feeding ratio).
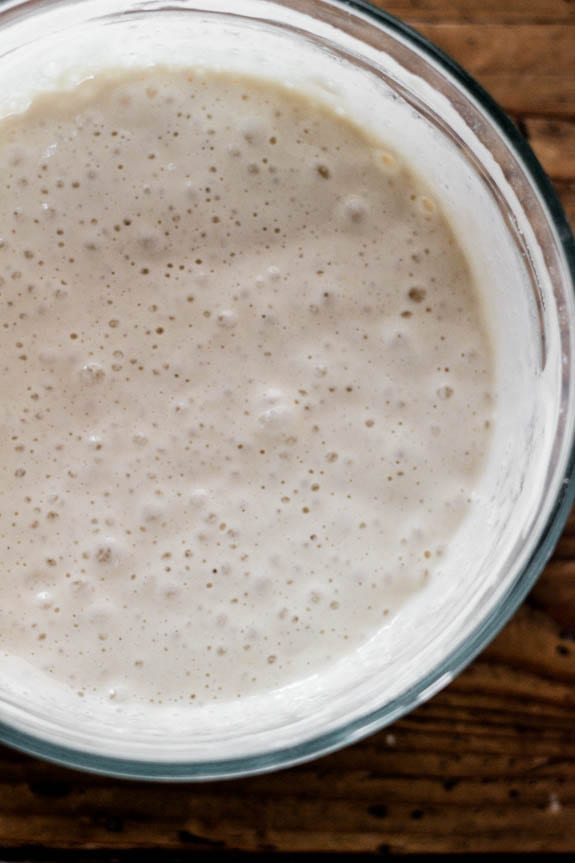
- Let rise at room temperature (loosely covered or airtight) ideally 75+F until bubbly, active and double in size (2-12 hrs). I use this sourdough starter jar.
Recommended Reading: Feeding Sourdough Starter: My Best Tips & Tricks
When Is Sourdough Starter Ready To Use?
Your fed starter is ready to use when it’s bubbly, active, and doubles in size. This can take 2-12 hours or more, depending on the temperature of your kitchen and the strength of your starter. My best advice? Be patient, plan ahead, and make sure your starter is in a warm place (ideally 75 F). The process is not instant.
Float Test: If you’re unsure whether your starter is ready, drop 1 tsp at peak height into a glass of water. If it floats to the top it’s ready to use. If it sinks, feed your starter again.
Storing Your Starter
Most people don’t realize that your feeding schedule is directly related to your baking preferences. If you only bake a few times a month, store your starter in the refrigerator and feed it once a week. If you bake often, store it at room temperature and feed it once a day.
How To Make Sourdough Bread: Step-By-Step Recipe
To Start: Feed your starter until it’s bubbly and active first (remember this can take anywhere from 2-12 hours, so plan ahead). Then mix the dough. Detailed instructions follow below. For a printable recipe & sample baking schedule, scroll to the end.
Step 1: Mix The Dough
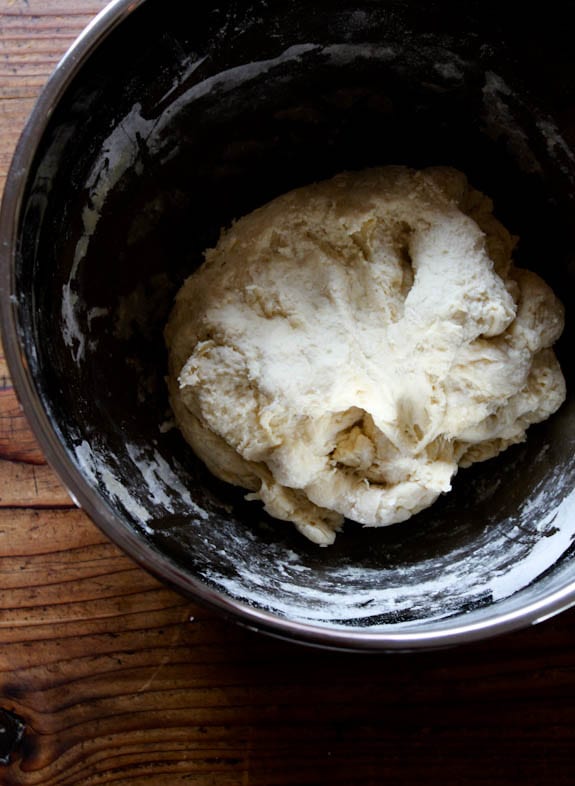
- Add water, sourdough starter, and olive oil to a large bowl. Whisk well to combine, making sure the starter is fully dissolved. Then add the bread flour and salt. Continue mixing (I use a fork at this point) until the flour is absorbed. The dough will feel rough and shaggy, which is normal.
- Cover the bowl and let rest (autolyse) for 30 minutes to 1 hour at room temperature. Then shape the dough into a rough ball. It doesn’t have to look perfect.
Tip: Weigh your ingredients with a digital kitchen scale. Measuring cups vary in size and don’t account for ingredient density which can lead to dry, dense, or overly sticky dough.
Why Autolyse Matters
Autolyse is the first rest after mixing bread dough. It jumpstarts gluten development without kneading, making the dough stronger, stretchier, and easier to shape I never skip it. For this recipe, rest for at least 30-45 minutes (or when time permits, I’ll do 1 hour for an even softer, more manageable dough). To learn more about common sourdough bread terms read my Sourdough Baking Glossary. I’ve included the only 12 you need to know!
A Note on Salt: Some bakers only add salt after autolyse, believing it slows down gluten development. I’ve followed that method for years, but now mix everything at once. It’s simpler, faster, and still makes excellent loaves (plus, you won’t forget to add the salt later on!). I’ll leave the choice up to you.
Want To Add Inclusions?
Mix in flavor additions after autolyse, when the dough is softer and more pliable. This is another reason not to skip the autolyse step. Alternatively, inclusions can be added during the first stretch and fold.
A few ideas:
- Roasted garlic
- Chopped olives
- Fresh or dried herbs (rosemary, thyme)
- Seed or nuts
- Cheese
- Dried fruit (raisins, cranberries)
- Jalapeños

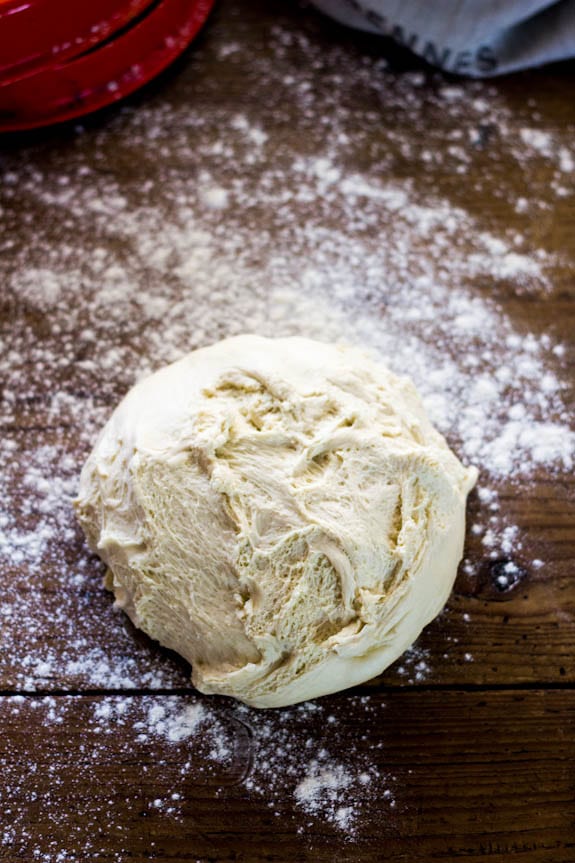
Step 2: Bulk Rise
Now the dough is ready to rise. Cover the bowl with lightly oiled plastic wrap so the dough doesn’t stick to the top, or transfer to a dough tub. Let rise at room temperature, about 68-70 F (20-21 C).
How Long Does It Take For Sourdough Bread To Rise?
The dough is ready when it’s puffy, slightly domed and nearly double in size. This can take 3-12 hours depending on room temperature, the quantity and strength of your sourdough starter, and seasonal conditions. All variables work together. See my example below:
For My Sourdough Bread Recipe (with ~150 g sourdough starter):
- In the summer: ~2-4 hours @ 80 F (26 C)
- In the winter: ~10-12 hours @ 68 F (20 C)
Diving Deeper: Temperature controls time. This is where I see the majority of beginner baker’s make mistakes- the temperature is overlooked. Sourdough takes longer to rise than yeasted bread, and it’s highly dependent on your specific environment. My kitchen might be 75 F. Yours? 68 F. Watch the dough, not the clock. For more details and troubleshooting read my companion article: Why Won’t My Sourdough Bread Rise?
Stretch And Fold The Dough (Optional Step)
About 30 minutes into the bulk rise, you can perform a series of “stretch & folds” to strengthen the bread dough. This step is not mandatory; however it has the potential to add height and structure to the finished loaf. Check out my how to stretch and fold sourdough guide to learn more, step-by-step. It’s easy and fun to do!
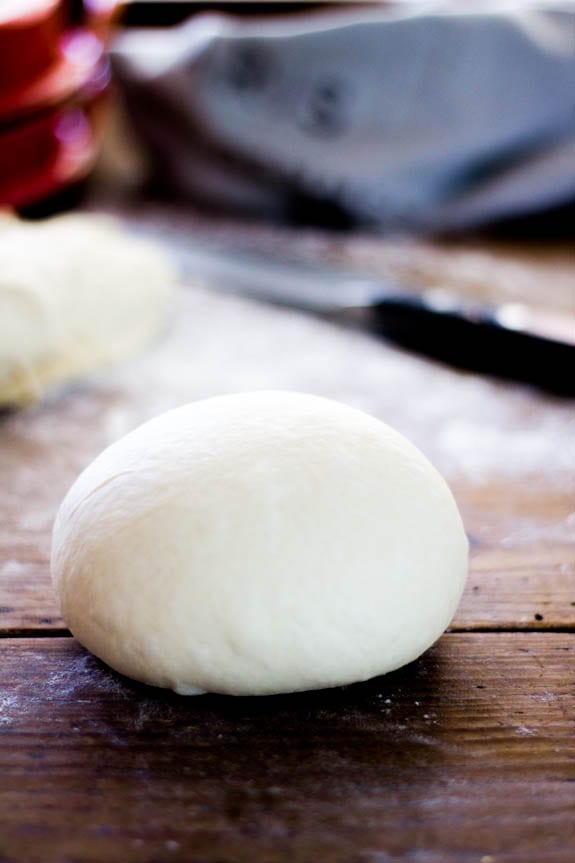
Step 3: Divide & Shape The Dough
At this stage, remove the dough onto a lightly floured surface. For two smaller loaves, divide the dough in half. For a single, standard size loaf leave it whole.
How To Shape A Round Sourdough Boule (Loaf)
Starting at the top of the dough, fold it over toward the center. Give it a slight turn, and then fold over the next section of dough. Repeat until you have come full circle to form a tight round. This creates surface tension for better oven spring. You can also try the envelope-style fold.
Tip: I used to get so nervous when shaping bread dough because you only had one chance to get it right. So intuitively, I would practice using a piece of Play-Doh or with a kitchen towel to go through the motions at my own pace.
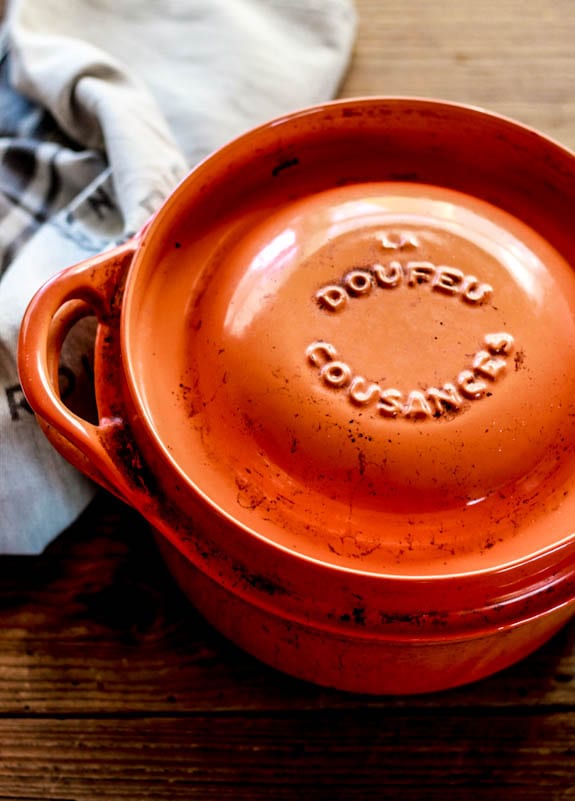
Step 4: Choose The Right Baking Pot
If you want bakery-style results, bake sourdough bread in a Dutch oven. Why? Pots trap steam which is the secret to homemade sourdough with bold rise and golden crust. Without steam, the crust will set too fast casing the loaf to harden, split or bake unevenly. I’ve been there and it’s not pretty.
What If You Don’t Have A Dutch Oven?
You’ll need another oven-safe pot with a lid to create steam. It must be able to withstand up to 450 F/232 C (lid and handles included).
A few options:
- Enamel roasting pan with lid (or sheet pan to cover)
- Cast iron skillet with upside down roasting pan to cover
- Covered sandwich loaf pans
- Clay Baker or Romertopf (soaked first)
- Preheated baking stone w/ metal bowl to cover
Here’s what happened to me: I tried the “no pot” baking route in the past, using just about everything from pizza stones, to baking sheets with no luck! The crust always hardened too quickly. Then I tried various steaming methods to remedy this (e.g. ice cubes in a hot pan, spraying my loaves with water) but my personal oven could not retain enough moisture. The environment was always too dry. For me, using a Dutch oven was the only reliable solution that worked with consistent results.
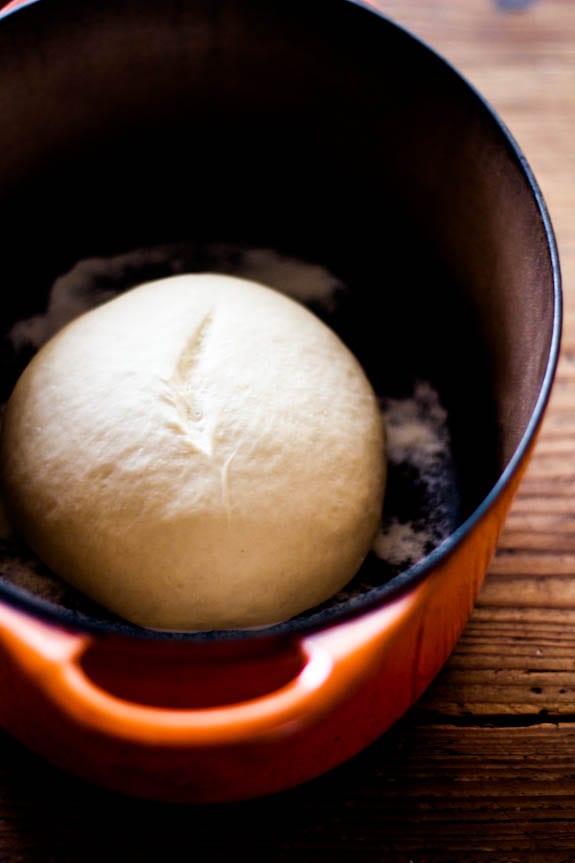
Step 5: Second Rise (Proofing)
- After shaping, your dough needs to rise again. To do so, generously dust the bottom of your Dutch oven with cornmeal, or line with non-stick parchment paper to prevent sticking. Gently place the dough inside (see tip below)
- Let the dough rise for 30 minutes to 1 hour, or until it’s visibly puffy and no longer feels dense. It doesn’t need to double in size. While the dough proofs, preheat your oven to 450 F (232 C).
Tip: Want better shape and structure? Proof the dough in a floured, cloth-lined, 8-inch bowl or banneton instead of directly in the Dutch oven. This will contain the dough and hold its shape without spreading. Bread flour or rice flour is fine for dusting.
Step 6: Score The Dough
- Right before the dough goes into the oven, make a shallow slash down the center of the dough, about 2-3 inches long. Use a small serrated knife, sharp knife or bread lame. This lets the steam escape, and allows the bread to “bloom” or expand in the oven.
- Admittedly, this step is a bit nerve racking, so I don’t want to gloss over it. Be quick and confident. I’ll share what my sourdough mentor told me: “Slash with panache!”
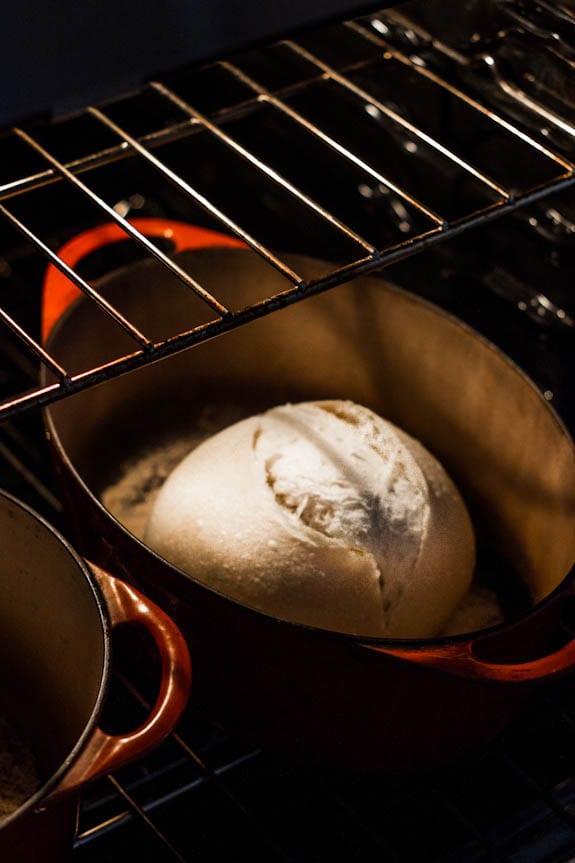
Step 7: Bake The Bread
You’re at the finish line now! Bake on the center rack (lid on) for 20 minutes. Then remove the lid. Your bread will look pale and slightly shiny. Then finish baking (uncovered) for 40 minutes or until the crust is deep golden brown. The internal temperature should be 205-210 F/96-98 C.
Tip: During the last 10 minutes of baking, crack open the oven door to let the moisture out. This creates a crispier crust. Or, remove the bread from the hot Dutch oven and bake directly on the oven rack. The latter creates the crispiest finish.
Step 8: Cool & Slice
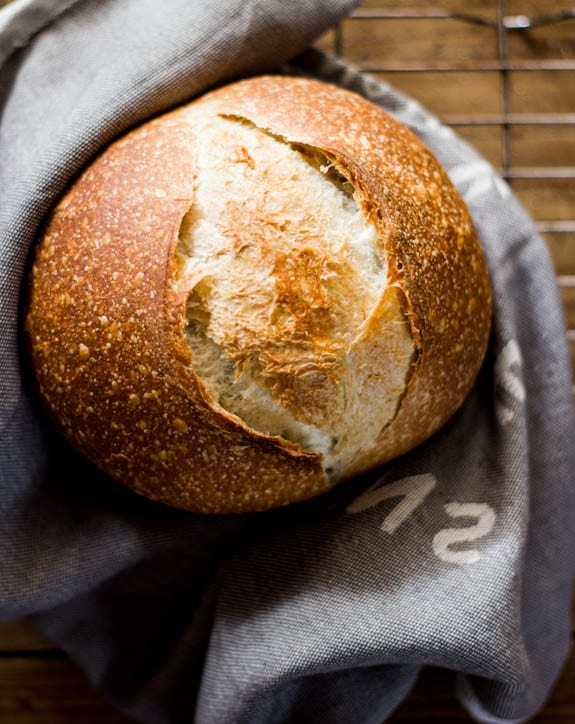
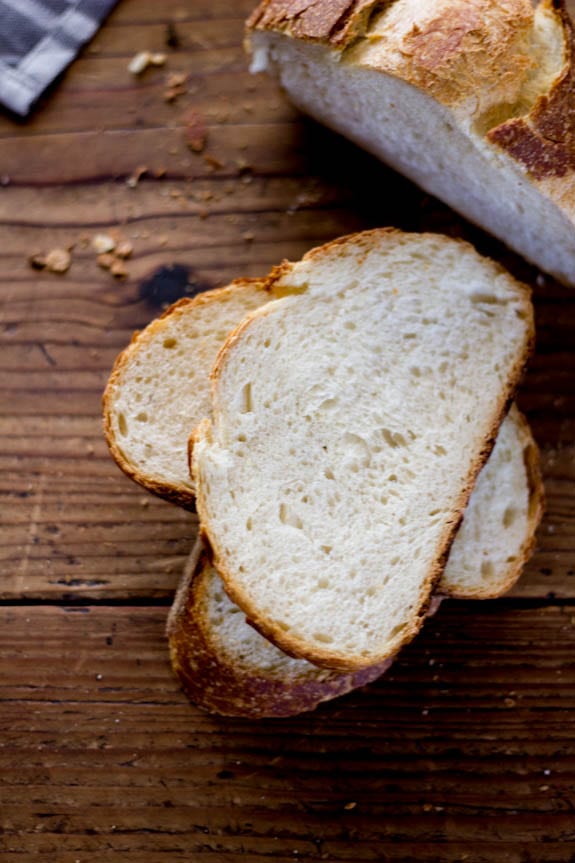
Cool the bread on a wire rack for at least 1 hour before slicing. Be patient! If you cut into it too soon, the texture will be damp and gummy. Life’s too short for sub par bread.
Final Thoughts
There are a gazillion sourdough bread recipes out there. No two loaves look alike. Start with this guide, master the basics and then branch out: try my golden sourdough focaccia recipe, this easy sourdough sandwich bread, or my one-bowl sourdough pancakes for breakfast! Once you have a few loaves under your belt, the process will become an imminent rhythm and you’ll become a sourdough pro in no time.
Sourdough Baking Schedule
- Friday Evening: Feed your starter, cover the jar, and leave it on the counter overnight. If you keep your starter in the fridge, it might need two feedings to perk back up (feed it in the morning & in the evening).
- Saturday Morning: Check your starter: if it’s alive and bubbling, you can make the dough to rise during the day. Or, feed it again in the afternoon to make the dough in the evening for an overnight rise. Remember to use the float test mentioned above to make sure your starter is ready to use.
- Saturday Morning/Evening (or whenever your starter is ready): Make the dough. Leave on the counter to bulk rise at room temperature. In the summer, if your dough rises quickly and you’re not ready to bake, cover the whole bowl with lightly oiled wrap and chill until ready to use.
- Sunday Morning: cut and shape the dough. Place in Dutch oven for second rise. Slash. Bake. Cool. Eat.
By signing up, you agree to receive emails from The Clever Carrot. Unsubscribe at any time.

Sourdough Bread: A Beginner’s Guide
- Prep Time: 13 hours
- Cook Time: 1 hour
- Total Time: 14 hours
- Yield: 1 loaf 1x
- Category: Sourdough Bread Recipes
- Method: Oven-Baked
- Cuisine: American
- Diet: Vegan
Description
New to sourdough? My easy beginner sourdough bread recipe makes the best artisan-style loaf at home with just 5 simple ingredients: bread flour, active sourdough starter, water, salt and olive oil—my signature addition—known for creating a light, plush crumb and a crisp golden crust. Follow my clear, step-by-step instructions and video guidance to bake fresh sourdough bread with confidence (even on your first try!).
Ingredients
- 150g bubbly, active sourdough starter
- 250g warm water (see Note 2)
- 25g olive oil
- 500g bread flour (not all purpose flour)
- 10g fine sea salt
- fine ground cornmeal or non-stick parchment paper
Notes, Tips & Equipment
- Weigh your ingredients with a digital scale for best results
- For a more soft and pliable dough, increase the water up to 300 g- 325 g total. Use a floured, cloth-lined bowl or proofing basket (instead of the Dutch oven) for the second rise.
- You will need a 5 1/2 or 6 quart Dutch oven for baking
- This recipe was tested with King Arthur Bread Flour, Gold Medal Bread Flour, Pillsbury Bread Flour
Instructions
Make The Dough
In a large bowl, add the sourdough starter, water and olive oil. Mix with a fork to combine, then add the flour and salt. Continue mixing until the dough becomes stiff, then squish it together with your hands to incorporate all the flour. The dough will be rough and shaggy.
Cover the bowl with plastic wrap, reusable wrap, or very damp kitchen towel. Let rest (autolyse) for 30 minutes to 1 hour.
After resting, return to the bowl and work the dough into a rough ball, about 15 seconds.
Bulk Rise (First Rise or Bulk Fermentation)
Cover the bowl with lightly oiled plastic wrap. Alternatively, transfer the dough to a high-sided dough tub. Let it rise in a warm place, ideally 70-75 F. The dough is ready when it no longer looks dense and has almost doubled in size.
Note: The bulk rise time will be different for everyone. For example, in the summer, expect ~2-4 hours @ 80 F/ 26 C. In the winter, ~10-12 hours @ 68º F/ 20º C. Watch the dough and not the clock.
Optional Step: Stretch & Fold The Dough
During the bulk fermentation, you can do a series of ‘stretch & folds’ to strengthen the dough. Start 30-45 minutes in: lift a portion of the dough, stretch it upwards, and fold it over itself. Rotate the bowl ¼ turn and repeat until you’ve come full circle (1 set). Do 1-2 additional sets, spaced ~1 hour apart. Click here for a step-by-step video tutorial.
Note: Dough made with 250g water will feel stiffer; 300-325g water will be more stretchy and elastic. Let it rest longer in between sets if it resists stretching.
Shape The Dough
Remove the dough onto a lightly floured surface. Starting at the top, fold the dough over toward the center. Turn slightly, and then fold over the next section. Repeat until you have come full circle. Flip the dough over, seam side down. Gently cup the sides and rotate in a circular motion to tighten the shape. The goal is to build surface tension to create a tight ball (too much flour will cause the dough to slide around).
Second Rise
Now the dough needs to rise again. If you’ve used 250g water, you can do a free-form second rise in the Dutch oven (if not, see note below). Line the pot with a piece of parchment paper (this is what I do) or coat with cornmeal. Place the dough inside, cover and let rise for about 30 minutes to 1 hour. It’s ready when slightly puffy, but not double in size. Preheat your oven to 450 F/ 232 C.
Note: If your dough contains more than 250g water, skip the free-from rise. Your dough will spread. Instead, use a floured, cloth-lined, proofing basket to help hold its shape.
Score The Dough
Right before baking, make a shallow 2-3 inch slash (or longer) in the center of the dough using a bread lame, razor blade, or small sharp knife. The cut should be ~1/4-inch deep.
Bake The Dough
Place the bread in the oven on the center rack (lid on) and reduce the temperature to 400 F/ 204 C. Bake for 20 minutes, then remove the lid, and continue to bake (uncovered) for an another 40 minutes, until deep, golden brown. All ovens are different; feel free to make minimal adjustments to these temperatures.
Check for doneness with a digital thermometer: 205-210 F/ 96-98 C for sourdough.
Remove the bread from the hot Dutch oven, and cool on a wire rack for at least an hour before slicing.


Comments
Waggs says
It’s been many years since I’ve made sourdough bread and I found I’d forgotten a huge amount of information along with my original Starter.
So I first followed the instructions on the Beginner Starter pages. It WORKED! No, what makes you think I was surprised? I had memories of a Starter gone bad and smelling up my whole kitchen, Starters with unidentified pink and yellow fuzzies on top, and other minor disasters. I lost my last Starter in my divorce (along with many other things) and gave up on baking sourdough bread when I became a single mother of 2 children, going back to school part time and working a part time job. No time left to nurture a sourdough Starter.
Fast forward thirty five years and throw in a Pandemic. Someone decided my new part time job was not essential and I had more time than I knew what to do with. My job was teaching sewing and machine embroidery. I miss it, but you can only sew so many cloth masks. So I went back to baking. Boring. I needed a challenge. Did I mention my interim job had been as the Night Charge Nurse in a NY hospital Emergency Room? I was ready for Sourdough.
Enter The Clever Carrot Starter and Beginner’s Bread Recipes. I’m on my third batch of bread. My starter is getting tangy-er with each batch. My husband loves the crispy, but not jaw-breaking crust. I can hardly wait to try some of the recipes for the discard Starter.
Thank you Emilie! Who needs work when you can have such beautiful bread? Sorry if this comment was too long. Waggs
Liesl J Coates says
Thank you Emilie, your instructions are perfect and your patience even more amazing.! xx
Emilie Raffa says
Haha… hugs to you Liesl! :)
Franca says
Followed your starter recipe, and it smells and looks great so far! I decided to make bread on the 10th day – as I dropped some starter into the water to test it and it floated perfectly. I thought it was ready to go! Although, I wasn’t happy with the outcome of the bread. It was heavy, dense and looked uncooked on the inside – didn’t rise at all. Wondering if you can share how much starter to use to make one loaf, how to dissolve the starter before you add the ingredients? Temperature of oven? and last, although the bread didn’t rise, I was able taste it and it was very sour tasting. Suggestions on how to make the starter less sour a bit. Thank you!
Emilie Raffa says
Hello Franca! The good news, is that it sounds like your starter is bubbly and active.
As far as the bread: heavy, dense, and uncooked bread can mean numerous things. It’s possible the gluten development was insufficient (bulk rise was too short), the second rise was too long (over proofed), and as for the uncooked part? That just means it didn’t bake for long enough. It also sounds like your oven temperature might be too hot, which will create a loaf that looks done on the outside (but not on the inside). Please use an oven thermometer for best results.
Regarding the starter and oven temperature, all of the information is listed in the recipe at the very bottom of the post.
Here is an article I wrote that will help you: Why won’t my sourdough rise?
Try a few of these suggestions first. We have to go step by step. Then we can tackle the sour flavor; it might resolve itself.
Hope this helps!
Leslie Thornton says
Emilie, All of your information has been so helpful – thank you!! I have already passed along your sourdough english muffin and banana bread recipes on The Kitchn site on FB. Question for you! I am going to try this recipe tonight/tomorrow. I made my first loaf this morning (a combo of a few recipes) and while it is very tasty, I am ready to again for a smaller, rounder boule. While I am baking the first one, does the second go back in the refrigerator? Silly, I know, but had to ask. Thank you again for all of your sound and experienced advice! Onward!
Emilie Raffa says
Thank you, Leslie! That is so very kind of you :) Not a silly question at all… yes: you can put the second loaf in the fridge while the first one is baking. This will slow down the second rise so that it doesn’t over proof. xx
Laura Hopkins says
Can you repost how you would double and triple the recipe? I really like the big boules for my big family! I just ordered your book – I am very grateful for your thorough guidance! You’ve done a really nice job developing these recipes and teaching them!
Emilie Raffa says
Hi Laura! To double/triple the recipe for the home kitchen, I would just make 2 or 3 separate bowls of dough (instead of one large triple batch). You’ll have the most success with this.
And thank you so much for the kind words! xx
Meg says
Hi-thank you so much for sharing your knowledge! Question – I bought high-gluten flour from our local bagel store, and have all-purpose flour (can’t find bread flour right now during the pandemic). Could I mix these two together to follow this recipe, to approximate bread flour, and if so in what proportion? The high-gluten flour produced an awesome pizza dough yesterday, but not sure what else I can do with it.
Emilie Raffa says
Hi Meg! Great question. You could either mix the 2 flours for this recipe (50% of each) OR just use the ap flour only to make my Artisan Sourdough with All Purpose Flour.
Marilyn says
Love this recipe!! I used all-purpose flour since bread flour is hard to find right now. It worked out great. Love the taste and texture. Thank you for sharing this recipe and including all the detailed notes!
Emilie Raffa says
Fantastic! Thanks so much for your feedback! xx
Liesl J Coates says
I am proud to say that I just finished baking my first loaf of your sourdough beginner’s recipe. It is not perfect (a tad bit too dense) as I think I let it rise too long on either the first or second rise; next time I am going to use a marked clear bowl- the proofing box isn’t available right now and I think it’s too expensive for me. My biggest encouragement: read everything that is written on the long instructions; every time I go back and re-read I answer another question of mine! I do want to add, however, an interesting piece about my loaf. So I didn’t have Bread flour, but since I’m near Bob’s Red Mill, I got some Vital Wheat Gluten flour that you can add to the AP flour to make it into Bread Flour. You use 1.5 teaspoons per cup. I think it worked! Oh and the flavor of the bread is amazing:)
Emilie Raffa says
Amazing. I’m so happy for you. Mostly, because you stuck with the process- from starter to loaf. Sourdough is such a rewarding craft and you are well on your way! And thanks for the tips re: vital wheat gluten! I know a few other readers were asking about this too. x
Cyru says
Hello Emilie,
I plan to bake this Sourdough bread using Sourdough starter based on your recipe.
Based on my calculations, at the end of 7 days, I will have about 180 gms of Starter available. This recipe calls for 150 gms of Starter. So at the end I will be left with 30 gms of Starter.
How would I go about maintaining that Starter? Do I feed it 30gms AP flour + 30 gms water (every day if at room temperature or once a week if I store in refrigerator)?
Guidance would be much appreciated.
Emilie Raffa says
Hi there! Yes: whatever’s left in the jar (in your case, 30 g) feed it 30 g flour + 30 g water (daily at room temp OR 1x per week in the fridge). If you want to increase the overall amount to maintain a larger starter, simply do not discard before the feedings until you have reached the size you want.
Pat says
I made my first couple of batches of sourdough bread using your recipe. They are delicious. I have one quick question about a post cooking issue I am having. The loaf looks perfect coming out of the oven but when it completely cools, it cracks all over. Like crackle paint. How do I keep this from happening? Thanks.
Emilie Raffa says
Hi Pat! I’m so glad to hear this! Bread crackling is very normal. It’s the steam trying to escape coupled with temperature shock. When the loaf is finished, let it cool down inside of the oven with the door ajar (and turned off). This will help.
olivia rossi says
The easiest / most easy to understand recipe I found on the subject. The test suggested to check if the starter is ready by dropping some of it in the water to see if it floats, was also hugely helpful as, for some reason, no one else explains clearly how to know when a starter is ready. And after 9 or so days of trying, it certainly was a huge relief ;)
Just baked my first loaf following the Beginner’s Guide and (although it could look prettier), it (THANKSFULLY!) tastes absolutely delicious. So, so, so happy!
Thank you.
Emilie Raffa says
Olivia, thank you. Your feedback and start rating is much appreciated :) Enjoy your first loaf!! xx
Ed Bruford says
Just wanted to say a big thank you for putting this recipe and instructions together. My first attempts have come out looking just like your picture and are so tasty.
Lockdown in Bristol, England, has a very flavoursome future now.
Emilie Raffa says
Ed, thank you so very much. You are quite welcome. Finding comfort through sourdough these days is just incredible. Enjoy. x
susan says
If you make one large loaf instead of dividing, does that change amount of time in oven? I don’t have room in my oven for two dutch ovens during baking…
Emilie Raffa says
Hi Susan! For 1 large loaf, the baking time is appx. 60 minutes. For two smaller ones it’s about 50 minutes.
Lisa says
Oops- one more Q- do you cover the dough for the second rise step?
Emilie Raffa says
Hi! If using a DO for the second rise, cover with the lid or a damp cloth. If using a proofing bowl, the cloth overhang is fine to cover the dough.
Lisa says
Thank you so much for responding so quickly. It’s in the oven now- I’m so excited!
When I pull it out of the oven, do I take it out of the DO to cool on the cooling rack or leave it in the DO?
Emilie Raffa says
Take it out of the DO and cool on the rack!
Lisa says
Thank you so much! I’m starting my second boule right now. I don’t see in your instructions if it’s supposed to be covered during the autolyse rest. Please confirm when you’ve got a moment? Thanks again.
Emilie Raffa says
As a rule of thumb: anytime the dough rests, autolyse or otherwise, it’s best to cover it so it doesn’t dry out. I updated the instructions for clarification.
Lisa says
Hi there!
I’m in the middle of my first boule using your recipe. I have a couple quick q’s for you.
1. Do I have to use the same type of flour in my recipe as I did to feed my starter? If not, if I’m only using one type of flour for my recipe, should it then be the same as what I used in my starter?
2. In step 2 it says that after the dough has rested, work the dough in the bowl into a rough ball, about 15 seconds.
Is this with a dough hook on electric mixer or just with your hands?
3. Your recipe says to do the last rise in the DO. In other recipes and instructions, it says to put the DO in the oven to get hot first and then put your dough in it. Which is best? It heating the DO is,
Emilie Raffa says
Hi Lisa! See below:
1.) No, it’s not necessary to do so. Feed your starter with the same flour it’s made from. Bread flour, ap flour is fine.
2.) You can do either one- it’s up to you. I do it by hand.
3.) I used to preheat my DO for baking, but I no longer do that. I’ve had comparable results skipping this step with less hassle (and wrist burns).
Erin says
Emilie, hi! I began my sourdough starter about a month and a half ago and it was finally ready a couple weeks ago. I baked my first loaf right away and it turned out great! With my starter (his name is Breadmyn – my daughter named him!), I’ve also made some pizza crust, your blueberry crumb cake, and your carrot cake. Everything has turned out great! I attempted my second loaf last night, as Breadmyn was super active and happy. The bulk fermentation overnight turned out great and it rose well. I woke up this morning to shape the dough and get ready to bake but it was SO STICKY. Too sticky. I knew it wouldn’t work if I put it in the Dutch oven right away so I oiled some parchment paper in a bowl and stuck it in there. I’m worried it’s not going to work. Anyhow, is there a remedy for this in case it happens again?
Emilie Raffa says
Hi Erin! OMG love your starter’s name :) Your dough either has too much water in it and/or it’s over proofed (rose for too long). Make sure you’re using bread flour instead of all purpose flour and weigh your ingredients for accuracy. Additionally, check the bulk rise time. If it goes for too long, the dough will get sticky. Try these tips and see how you go!
Michele says
This is my first one, all was going well, float test – check, first rise with one round of folding – check, shapping – not so good. It is really sticky. I let it rise overnight it was at least 1 1/2 times higher. I used my scraper to fold the dough to the center, as it just stuck to my hands. The twisting didn’t really work as the dough stuck to the countertop surface. It’s in the dutch oven now for the second rise. Is it supposed to be on the sticky side of tacky? I wish I could post a picture so you could see. Do you have a video anywhere of this process?
Emilie Raffa says
Hi Michele! Sounds like there was too much water in the dough; it’s not supposed to be sticky. In fact, this dough is on the dry side. Did you use all purpose flour instead of bread flour? Did you weigh or measure your ingredients? These two things could be the cause. Additionally, dough that is over proofed (rose for too long) can be sticky.
Sally Lo says
First, let me thank you for your extremely detailed and thorough directions. After feeding my sourdough starter baby for 17 days, I finally baked my first loaf today…and it worked. The flavor was excellent. My only comment is that the bread was a bit dense…not as “holey” looking as your pictures. My loaf is about 4″ tall and nicely domed. Should it have been taller? Did I not let it rise enough in the 2nd proofing? I let it rise for about 45 minutes. It wasn’t terribly warm this morning in my Northern California kitchen. Or is this more of a sandwich type bread? Which recipe should I try for a more rustic loaf with irregular holes in the grain?
Emilie Raffa says
Hi Sally! You’re quite welcome :) Typically, when bread is dense it’s either over or under proofed. It’s hard to tell without seeing the loaf myself. But, my guess is that it was over proofed (rose for too long). This could have happened during the bulk or second rise. I would recommend shortening both the bulk and second rise and see how you go next time. Yes: the loaf should have been taller.
This is a low hydration loaf, which means you’ll get a smooth even crumb. For bigger holes, it’s a combination of both recipe, technique and practice! You can try the High Hydration Load in my book Artisan Sourdough Made Simple . You might also like my Artisan Sourdough with All Purpose Flour as well.
natalie scott says
after accidentally cooking my last batch of starter (sob fest), i was finally ready to bake! I followed the directions carefully with a 1:1:1 very happy and vigorous starter. I bulk fermented in my oven with the light on and it had doubled in 3.5 hours. I went on to bake! It is beautifully round and plump, I’m watching the clock waiting to cut into it! Drool city!
I forgot to crack the door, but i like a soft bread so I’m okay with this. I’ll try to remember when i make my next loaf….probably tomorrow!
Thank you SO much for the great instructions and especially for the synopsis with the recipe portion. Super handy to refer back to without endlessly scrolling.
XOX
Emilie Raffa says
Hello Natalie! Oh no! Don’t worry, you’re not the first person to do this ;)
Thanks so much for the feedback and star rating! Your success makes me SO happy!!! Enjoy.
Alex says
Hello, came over here from your starter recipe :) I wanted to ask a, perhaps, simple question about the transition from starter to dough.
I think I’ve understood that when you’re preparing your starter for this recipe, you take out some of your starter the night before, feed it and let it ferment on the bench top overnight, and then in the morning you’re got active starter ready to mix into your dough. If you need 150 g of starter for use in this recipe, have you taken out 50 g of starter, and fed with 50 g flour + 50 g water for a total 150 g of starter? Or have I drastically misunderstood, and you take that 150 g all directly from your jar of starter, after it’s been fed and has bubbled up? Thanks!
Emilie Raffa says
Hi Alex! Great question. You can do both. For the beginner recipe, I feed the starter in a separate bowl. But these days, because I maintain a smaller amount of starter altogether, I feed what I have directly in the jar (and pour off 150 g to use when ready). Does this make sense? I’m going to update that post to make it more clear. It’s a bit easier. Excited to hear about your bakes! xx
Alex says
Made perfect sense ;)
First loaf baked last Sunday, pleasantly surprised with the results! My starter had found it’s rhythm by Friday, and I fed it that evening (made some fairly decent pancakes with the discard the next morning), and made this loaf over the next two days (I let it prove in the fridge). Happy to say the dough functioned more or less exactly as per your recipe. Didn’t have any appropriate lidded oven dish to cook in, but I happened to be using a Miele Moisture Plus oven, to which I decided to entrust the steaming. Had a worry when the oven didn’t seem to suck up any water from the cup at all, but the bread rose well and formed a nice crust, and tasted pretty nice! Took a commemorative photo. Thank you so much for the wisdom, and your tireless responses to all the questions!
Emilie Raffa says
You are very welcome, Alex. This is all so fantastic to hear!
Kim says
In your weekend schedule when you take your starter out of the fridge and put some in a bowl are you feeding the amount that’s in the bowl and feeding the amount that goes back in the fridge? If you are feeding them out that’s in the bowl how much are you feeding it and how much are you feeding the amount that goes back in the fridge?
Emilie Raffa says
Hi Kim! In this particular post, I pour some starter out and feed it in a separate bowl. These days however, because I maintain a smaller amount of starter altogether, I just feed what I have directly in the jar.
Bethany Curnow says
Can you bake the sourdough bread in a roasting pan? If not, can you link the dutch oven you use?
Emilie Raffa says
Hi Bethany! You most certainly can. Make sure you have a lid for it and the entire vessel can heat up to 450 F. The Dutch oven I use is in my shop.
Sara says
Hello!
I made my first batch of sourdough with some very active starter and following your recipe and directions today. I let it proof over night and it had definitely doubled in size by this morning. After shaping, I let it proof again for 2 hours, though I didn’t notice much difference. It tastes great, but is very dense and didn’t rise in the oven. Any advice?
Emilie Raffa says
Hi Sara! based on what you’ve described, it sounds like the 2nd proof went for too long. Try shortening it to 30 minutes- 1 hour (instead of 2 hrs). The dough should look puffy and plump when ready. Hope this helps!
Liz says
This was a great recipe! I am still very new to sourdough (my 3rd time attempting to bake bread) and this came out perfect. I had a mishap the first time on my part with the baking times but I tried again today and it came out perfect!
Moh says
I usually go for high hydration Sourdough but gave your recipe a try. It came out true to the pictures. It was so easy to handle and bake. It is still cooling in the rack. Will give it a try later today. I may slowly experiment with a slightly higher hydration and see if it can hold a decent shape without being cumbersome. Thanks a lot for your write up.
Emilie Raffa says
You are quite welcome! For a high hydration sourdough, there is a recipe in Artisan Sourdough Made Simple you can try. Or, give the Artisan Sourdough with All Purpose Flour (linked) a go. Enjoy!
Anna says
Hello! I asked my Instagram friends what Starter and dough recipe I should follow for my first loaf of sourdough, and yours came up multiple times! I began my stater a little over a week ago, I followed your directions to a T, and I swear I was doing it wrong, but day 4/5 Doug was bubbly and doing exactly what you said he would do! I got to make my first loaf this past weekend, and it is, AMAZING. I didn’t slash it enough (I got nervous) and I think he needs a little more crispy outside – Do you just cook for longer with the oven door open?. Thanks for the east, fool-proof recipes!
Emilie Raffa says
Hi Anna! Wonderful, welcome to sourdough! For a darker crust, I wouldn’t bake this particular dough for any longer; it might become tough. Instead, I would remove the bread from the pot during the last 10 minutes of baking to finish baking directly on the center oven rack. Let it cool with the oven door ajar. Additionally, you could always experiment with increasing the oven temperature until you are happy with the bread’s appearance.
maxwell family says
Hi Emilie – having a blast with my homemade starter i began first day of lockdown when i took your words to heart about not taking it too seriously. with 2 kids and a newborn that was never going to be an option! we’ve been working through all our recipes daily! can you please advise me about using wholemeal flour – do i need to make any particular adjustments to the recipes?
thanks from the maxwell family in NZ
Emilie Raffa says
Hi there! You’ve go the right idea! If looking to add wholemeal to this recipe, I’d start in small increments, perhaps 50 g (not sure what style of bread you’re looking for) and increase the water, using 1 tbsp at a time, until you have a dough that’s not too dry. Wholemeal flour is very thirsty!
Laurie says
Thanks for The Recipe! I am brand new to making bread… first time. So this is probably a dumb question. After the autolyze step… step 3 starts with once your dough is mixed. Did I miss the mixing step? do you do this after the autolyze? Or was the mixing with the hands in step one all I do? If not how long do I mix it? What consistency am I looking for? Sorry, this is probably basic bread knowledge.
Emilie Raffa says
Hi Laurie! Not a silly question at all! I see where the confusion is… the info was updated in the actual recipe card at the bottom, but not in post itself!
After the first rest (autolyse), you’ll work the dough into a rough ball- it doesn’t have to be perfect. The consistency of the dough will be a lot smoother then when you first mixed it. It might have a few tears. Cover the bowl when finished. The bulk rise begins now.
Hope this helps!
Ashley says
Hello!
I am in the bulk ferment as I type this, and I’m so excited!
If I follow the option to cut into 2 loaves, should I keep the baking temperature and time the same as if I were to bake 1 loaf?
Emilie Raffa says
Hi Ashley! For two loaves, shorten the bake time by 10 minutes or so. The temperature is the same!
Lou says
I am so happy, my bread looks like exactly like the one on the pictures! Thank you very much for your wonderful explanations.
I changed the recipe a bit by mixing a bit of wholemeal flour (150 or 200 gr) to white flour, next time do you recommend adjusting also the amount of water and sourdough starter if I plan to use wholemeal again?
Emilie Raffa says
Fantastic, Lou! So great to hear. Yes: I would add more water to the dough. This particular dough (as is) is pretty low hydration, so adding ww flour will make the texture even more dry. I would add the water in 1 tbsp increments, mix, and then see how you go.
Brent G says
I have made this recipe at least a dozen times. Of all the different recipes I’ve tried, this one is my favorite. It is my go to recipe when introducing people to sourdough baking. The best method is to do the bulk fermentation overnight. I’ll start a batch about 8:00 pm. Do a couple stretch and folds before bed. Do the 2nd proof in the morning while my coffee is brewing. We have fresh bread by noon. The results have been very consistent and delicious. Follow the instructions and be patient!
Emilie Raffa says
Fantastic, thanks Brent! I literally follow the exact same schedule for pretty much all of my doughs. Super practical. Having my coffee now :)
Brittany says
Hi there! Thank you so much for the clear and lovely instructions, you have made this bread baking novice feel like such a rock star in the kitchen. I just have a quick question, if you’re making this recipe into two smaller loaves, does the baking time change? Also, I only have one Dutch oven, will the second loaf be okay to rest while the first smaller loaf bakes? Again, thank you! Bread has been so hard to come by but being able to make it myself has been such a fulfilling experience.
Emilie Raffa says
Hi Brittany! You are very welcome :)
For two smaller loaves, the bake time should be about 10 minutes shorter (if I recall from memory!). The second loaf will be okay to baker after the first one; you can rest the dough in the fridge while the first one bakes. I would shape it first, place in a cloth lined bowl (seam side up) and cover until ready to bake.
Enjoy!
Lisa says
My first attempt came out very poorly. It was flat like a pancake and the dough was so wet it was sticking to my fingers. After watching your video, it’s clear my dough was far wetter than yours. I’m going to try again this weekend, but if I still come out with a wet dough, then would my solution be to add more flour? I used a kitchen scale with your measurements the first time around. I’m also going to make sure I do the water test first and also I’m going to bulk ferment overnight.
Emilie Raffa says
Hi Lisa! Oh no… sorry to hear that! Thanks for the info you’ve provided. A few things… it’s possible there was too much water in the dough (accidental measurement). This happens to the best of us. Also: did you use ap flour instead of bread flour for this recipe? It doesn’t absorb water in the same way, which can lead to wet and sticky dough. This dough is actually on the dry side.
PS: I wouldn’t add more flour after the bulk rise. Working the dough after it has risen will deflate the air bubbles, which will create dense and flat loaves. You’d add the additional flour, if needed, after the first rest (autolyse).
Lisa says
I am indeed using AP flour. I found your recipe that is adjusted for that and will be using that going forward until I have access to bread flour again. I got my starter from a friend. Hers was doing great. After taking it out of the fridge yesterday, dumping out half of it (and making biscuits with the unfed) I fed the starter and have it resting on the counter wrapped in a tea towel. It’s a bit bubbly, but it didn’t pass the float test this morning. I fed it again and will test it again this evening. What do I do if it still isn’t passing the float test?
Emilie Raffa says
Hi Lisa, for the float test make sure you’re doing it when your starter has doubled in size. It you do it too late, when it falls, it might not pass.
Maria says
Hi!
I am new to sourdough bread making and am so glad I came across your website. I am on day 3 of making my own starter (3rd attempt – I think it may have been my tap water causing problems so I used filtered water this time – so far so good!). So excited to be able to try your sourdough recipe. Just a question – how big is your Dutch oven? (In litres as well as centimetres) I don’t have one and am looking to buy one but I don’t want to get one thats too small! Thanks ?
Emilie Raffa says
Hi Maria! I use a round 5 1/2 qt Dutch oven. It’s 5.2 litres and appx. 26 cm.
Joy says
What’s the difference between step 2 and step 3? Step 2 is to autolyse for 30mins then step 3 is to rise for 3-12 hours. Is there a step between letting it sit for 30mins and letting it sit for 3-12hrs?
Emilie Raffa says
Hi Joy! Yes: after step 2, you’ll work the dough into a ball before the bulk rise, which is step 3.
Austen says
Thanks for the question (and answer) – I was wondering the same thing..
Rebecca says
hi, emilie! are you still answering questions on this post years after you first published it?! I had perfected my sourdough using this recipe in 2015 but life got busy and I didn’t have much time to bake anymore. now, with so many activities canceled I pulled my dried up starter from the back of my fridge and brought her back to life! so when I start my bulk fermentation, my dough will sit in a pretty nice ball, but after it rises all night, it’s kind of loose. it does stay together enough to bake into a loaf but it’s not nice and tight like yours, and it’s a little lumpy by the time it’s risen. and the baked loaf is flatter than it should be. any advice to help?
Emilie Raffa says
Hi there! Yes! It seems the whole world is baking bread right now ;)
To answer your question: it’s possible the dough is over proofed. Start mixing the dough later in the evening to avoid this next time. Additionally, make sure to use bread flour (not ap flour for this recipe) and use a cloth lined bowl for the second rise- it will hold its shape better.
Ann says
Thank you so much for this easy to understand sourdough recipe. I have a question though, I started my sourdough starter 2 days ago and it is so bubbly it is threatening to overflow my container. Can I use it even though it’s only a couple of days old?
Emilie Raffa says
Great question! I would continue to feed it for the full 7 days to build up proper strength. You’re almost there! x
Teresa Webster McCreight says
Hi,’s sha
I working on my third try. I am creating my dough and letting it rise overnight. In the morning it is a gooey mess that will not retain it’s shape.
I could use some advice!
Emilie Raffa says
Hi there! It sounds like there’s too much water in the dough. Please weigh your ingredients for best results, and make sure to use bread flour in the recipe (not all purpose flour- it absorbs water differently). These 2 factors could be the issue! Hope this helps :)
Chelsea Davies-Kneis says
Hi there!!
I’m commenting from the era of COVID-19 with limited flour options in stores right now! Would something like Cake & Pastry Flour yield acceptable results?? Also, is there a way to bake it without a Dutch oven? Would another vessel work as well?
Thanks!
Chelsea
Emilie Raffa says
Hi there! I totally get it- regular flour is a commodity these days! Unfortunately, cake and pastry flour won’t work at all for this recipe. If you cannot find bread flour, I’ve written a sourdough recipe with all purpose flour instead (linked here). You can bake in another oven safe pot with lid (up to 450 F).
Jane says
Thank you so much your process is clear and simple and I have had great success. I have to tell you twice I have left the dough out at night uncovered, accidentally of course, and I was still able to make perfect bread with your recipe. Thanks again from Canada.
Emilie Raffa says
Hi Jane! Wow, that’s incredible! I love stories like this :)
Mardre le Roux says
Hi
I have started with the sourdough starter this morning. I want to try your sourdough bread as above, but I am also looking for a recipe for a slightly darker or more robust bread with bigger holes. Hope I am describing it correctly. I am from South Africa, we are in total lockdown and there is no way for me to get your cookbook. Can you please help me with an additional recipe?
Also then… if I want to follow any other sourdough recipe online, how am supposed to know and calculate how much from your starter I need? The grams always differs. Some say 50g. Some say 150g, like this recipe. Others say 250g. I try to look at the starter – flour – water ratio, but no luck.
Last question… if I understand correctly from the remarks above, I am supposed to stay at the ratio of 60g starter, 60g flour and 60g water. That is 180g. So if I use your recipe and use 150g, I am left with 30g? How do I bulk this up again to use the next time? Do I add flour and water at once to bring the weight up again to 180g? Or gradually?
Thanks for your awesome post and explanations. An email will be appreciated, I do not know if I will be able to see your answer in the comments, there is a lot! Regards, Mardrè.
Emilie Raffa says
Hi there! It sounds like you’re looking for a high hydration sourdough. There is a recipe and method in my book. You can order from the Book Depository (linked here) for free worldwide shipping. To achieve this style of bread, it’s both part recipe and method, which is too in depth to explain fully here. In short however, you’ll need to increase the water, increase the baking temperature, and handle the dough with care to preserve the large air bubbles. You might find my Artisan Sourdough with All Purpose Flour helpful. It’s also a beginner recipe (linked here).
Regarding the sourdough starter amounts, all recipes are different. If you maintain 1 cup (240 g) of starter at all times, you should have enough to use.
For the feeding amount, using a 1:1:1 ratio is most reliable. If you have 30 g of starter leftover, you can add 30 g + 30 g flour and water. To bulk it up, do not discard any starter before the next feeding.
Samantha Cyr says
Finally!!!! A recipe I can follow. I’ve now made 3 loaves with this recipe and it’s the first time I’ve had successful loaves! Thank you
Emilie Raffa says
Excellent! Thanks so much Samantha! Happy baking :)
Ashley says
I tried this for the first time and pleasantly surprised! I live at high altitude (9000 ft) and was a bit concerned but overall was pleased with the outcome. Any thoughts on adjustments to the recipe for altitude? I also attempted another loaf about 12 hours after feeding my starter. The top 3/4 of the starter in the jar was bubbly and frothy and had almost doubled in size and it floated in water…should I have not mixed the frothy/liquidy stuff before making another loaf and just waited till the whole jar was bubbly? Im 12 hrs into bulk ferment with no rise. Thank you for the recipe!
Lauren says
I made bread for my first time ever today following your instructions on sourdough and it came out perfectly!! Your instructions were so thorough and well written. Thank you for taking the time to put this all together and share!
Emilie Raffa says
Fantastic! Thanks for the feedback and star rating. Much appreciated! ;)
Penny says
Hello, I am a beginner/first time sourdough baker and tried your recipe now that “we’re staying home” a bit more. Thank you for your very detailed and rational steps and explanations. I did want to tell you that when one clicks on the 2x or 3x boxes to double or triple the recipes, the grams of sourdough starter don’t change. The ounces do, but the grams remain the same. My first loaves were delicious, but very heavy with impenetrable crusts. I’m going to go check out your troubleshooting guide next. :-)
Emilie Raffa says
Hi Penny! Thanks so much for your note. Another reader just brought this to my attention as well. Working on it!
For tough crusts, make sure you’re baking the loaves in a Dutch oven or use an alternative steaming method. This will help. xx
Bonnie says
Aloha from Hawaii! I’m attempting to make this recipe, but running into issues. Followed the recipe exactly. Started bulk fermentation yesterday morning. Checked it every hour. Not much activity. Put in fridge overnight. Took it out and put in oven this morning to see if warmth helped. It helped a little, but the dough just doesn’t seem to be rising much, and it’s been about 28 hours since I started it yesterday. My starter that I used was ready and active -nice and bubbly and passed the float test. What could be The issue?
Emilie Raffa says
Aloha Hawaii! Have you read this troubleshooting post? . Hopefully you will find a nugget of useful information in there. Let us know! x
Paul says
I am having trouble finding a 6 court dutch oven, only 5 1/2. Is there one you would recommend?
Emilie Raffa says
Hi Paul, a 5 1/2 qt will work just fine :)
Ell says
Hey hun!
Love this post and am now a crazy bread making lady haha
Only thing is the last few loaves I’ve made, the sides are a bit soft and not as crisp as they have been in the past.
Any idea what I’m doing wrong ?
Thanks heaps
Ell ?
Emilie Raffa says
Hello! During the last 10 minutes of baking, remove the bread from the baking pot and bake it directly on the oven rack instead.
Michelle Wigand says
Hello Emilie,
I took the time during our shelter in place to learn to make bread. A friend of mine recommended your website and book. Today I’m making my fourth and fifth loaves! I’ve always be intimidated by bread but I you’re directions and method have been so clear and accessible. Thank you so much. You helped me cross something off my bucket list.
I do have a question about when the loaf is increased. I increased my last batch and double it (per your directions). When I removed the dough from the bowl I divided it into two loaves. The loaves are now shaped and doing their second rise. I placed one in the Dutch oven it will bake in and the other in a bowl (which also has cornmeal also at the bottom). I plan to bake them both today one right after the other using there temp to determine if they are done. Is there any advice you can give me when I move the second loaf to the dutch oven that it will bake in? Handling? Should the dutch oven be cool? Etc…
Thank you in advance.
Emilie Raffa says
Hi Michelle! Thank you so much for this very kind feedback :)
To answer your question: when doing the second rise in a bowl (or proofing basket), the bowl must be lined first with a cloth sprinkled with flour. Otherwise, you won’t be able to remove the dough easily. Did the dough stick to the cornmeal in the bowl? Just want to make sure I’m understanding your question correctly.
Additionally: in the book, there is a step by step guide with pictures on how to transfer the dough from a bowl or proofing basket into the Dutch oven. The process will be much easier to follow visually.
I don’t preheat my Dutch ovens at all for baking :)
Hope this helps!
Louie says
I am a complete rookie at this but I love sourdough bread so I tried a starter on my own. I used 1 cup whole wheat flower (organic) and 1/2 cup water. I fed it 24 hours later with a cup of enriched flour and 1/2 cup of water then again the next day. I then fed twice daily using enriched organic white flour for all the feeding. My starter is goo. This is my second attempt at this! Both have failed, the first I think the started died and this one I’m still working on but it’s really gooey. I don’t really know what it should look like but I’m not sure goo is correct. What am I missing here? It seems so simple yet I’m now on my second attempt and I must be doing something wrong.
Emilie Raffa says
Hi there! Please visit my Sourdough Starter Troubleshooting Page for more details! Additionally, you need a new starter recipe, you can find that here.
Joy says
the recipe indicated 150g of starter to make the bread. In the starter recipe, how much starter is created? Is 150g all of the starter or part of the started?
Emilie Raffa says
Hi Joy! My Beginner Stater Recipe creates approximately 240 g starter. You will have enough for this loaf. :)