Think you can’t bake fresh, homemade sourdough bread? This easy sourdough bread recipe—trusted by beginner bakers for over a decade—shows you how, step-by-step. No yeast. No kneading. Just simple ingredients and 10 minutes hands on time for soft, crisp sourdough bread at home.
Reader review
“I have tried MULTIPLE sourdough bread recipes and this one has been the very first to make a successful (fully risen) loaf of bread. I am relatively new to sourdough and for some reason, the other recipes just didn’t produce good bread. These instructions and detailed explanations really make a huge difference to someone who is new to the world of sourdough.”
—Savannah
To anyone who thinks their sourdough bread isn’t good enough, I get it. Back in 2013, I set a goal: bake more bread. I tested, failed, succeeded (and tried again). What began with an easy no-knead artisan loaf eventually led to the holy grail: homemade sourdough bread.
Admittedly, I had beginner’s luck. My early scratch-made loaves were light, plump and airy, everything you want sourdough to be! And then? Down the rabbit hole I went: Hydration? Baker’s %? Proofing times?
Now, with 13+ years baking experience and a professional culinary background, I know what holds people back: the confusion, hesitation, comparison. I teach from a straight forward practical perspective because sourdough is not just a written recipe; it’s an understanding.
This sourdough bread recipe has been the most popular on my blog for over a decade- millions of views and the inspiration behind my bestselling book Artisan Sourdough Made Simple, a deeper dive into sourdough bread recipes. So, if you’re at the end of your rope (and just want to make good bread), you’ve made it. Welcome to the journey.
What Sets My Recipe Apart:
- One bowl, 5 ingredients
- Olive oil = soft, plush crumb & crisp, golden crust
- No stand mixer
- No bread machine
- Flexible baker’s schedule
- Personalized support in the comments
But before we make bread, let’s discuss what drives it: your sourdough starter. Once you understand what it is, and how it works, your path will be crystal clear. Have questions? Ask in the comment section. I respond with personalized help.
Where To Get A Sourdough Starter
A sourdough starter is a live fermented culture of flour and water. It naturally leavens bread dough without commercial yeast. There are all different types: homemade, purchased or gifted (ask a fellow baker!). I use two different starters at home: one I made myself, and a vibrant Australian starter gifted from my friend Celia.
But is doesn’t stop there. Once your have your own sourdough starter, it must be kept alive and well with regular feedings to maintain its rising power. Sourdough is not static; it’s a living process. Here’s my personal feeding schedule which you can adapt to suit your style:
How To Feed Sourdough Starter
- Remove and discard half of your sourdough starter
- Feed what’s left in the jar with equal parts flour and water by weight (1:1:1 feeding ratio).
- Let rise at room temperature (loosely covered or airtight) ideally 75+F until bubbly, active and double in size (2-12 hrs). I use this sourdough starter jar.
Recommended Reading: Feeding Sourdough Starter: My Best Tips & Tricks
When Is Sourdough Starter Ready To Use?
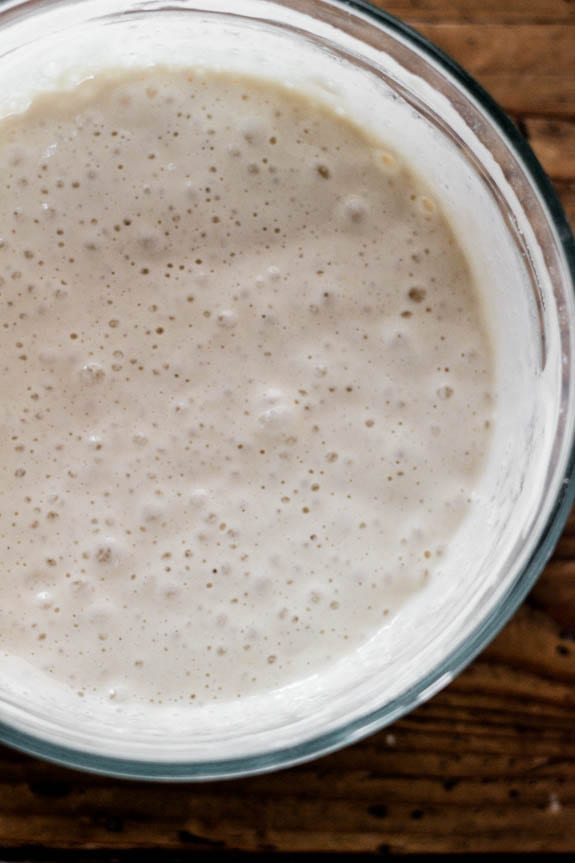
Your fed starter is ready to use when it’s bubbly, active, and doubles in size. This can take 2-12 hours or more, depending on the temperature of your kitchen and the strength of your starter. My best advice? Be patient, plan ahead, and make sure your starter is in a warm place (ideally 75 F). The process is not instant.
Float Test: If you’re unsure whether your starter is ready, drop 1 tsp at peak height into a glass of water. If it floats to the top it’s ready to use. If it sinks, feed your starter again.
Storing Your Starter
Most people don’t realize that your feeding schedule is directly related to your baking preferences. If you only bake a few times a month, store your starter in the refrigerator and feed it once a week. If you bake often, store it at room temperature and feed it once a day.
How To Make Sourdough Bread: Step-By-Step Recipe
To Start: Feed your starter until it’s bubbly and active first (remember this can take anywhere from 2-12 hours, so plan ahead). Then mix the dough. Detailed instructions follow below. For a printable recipe & sample baking schedule, scroll to the end.
Step 1: Mix The Dough
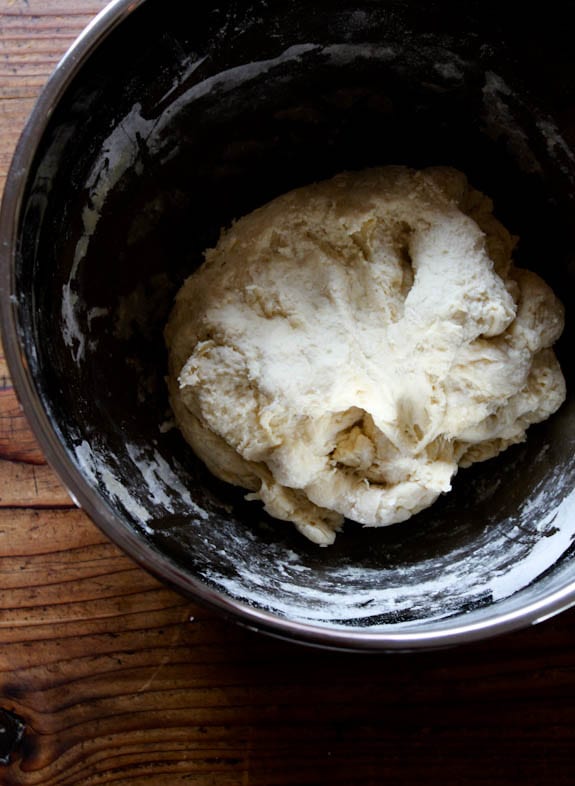
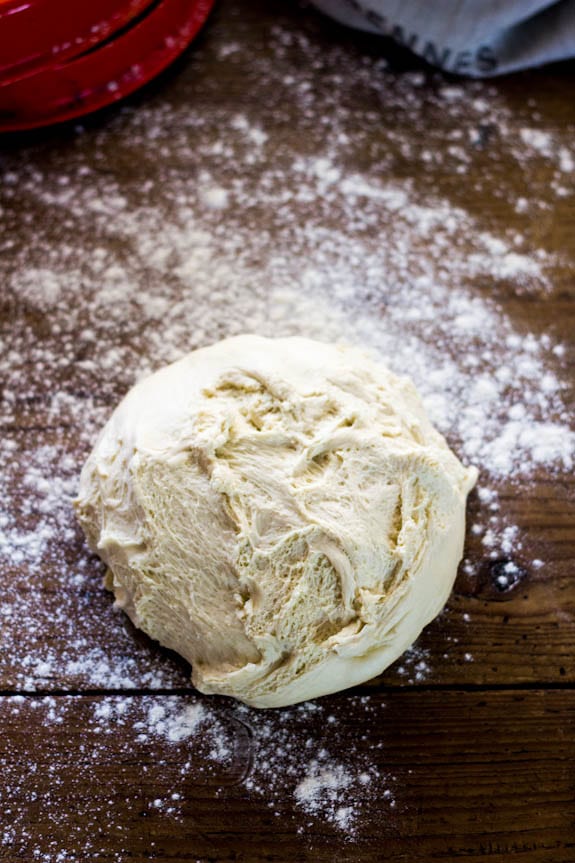
- Add water, sourdough starter, and olive oil to a large bowl. Whisk well to combine, making sure the starter is fully dissolved. Then add the bread flour and salt. Continue mixing (I use a fork at this point) until the flour is absorbed. The dough will feel rough and shaggy, which is normal.
- Cover the bowl and let rest (autolyse) for 30 minutes to 1 hour at room temperature. Then shape the dough into a rough ball. It doesn’t have to look perfect.
Tip: Weigh your ingredients with a digital kitchen scale. Measuring cups vary in size and don’t account for ingredient density which can lead to dry, dense, or overly sticky dough.
Why Autolyse Matters
Autolyse is the first rest after mixing bread dough. It jumpstarts gluten development without kneading, making the dough stronger, stretchier, and easier to shape I never skip it. For this recipe, rest for at least 30-45 minutes (or when time permits, I’ll do 1 hour for an even softer, more manageable dough). To learn more about common sourdough bread terms read my Sourdough Baking Glossary. I’ve included the only 12 you need to know!
A Note on Salt: Some bakers only add salt after autolyse, believing it slows down gluten development. I’ve followed that method for years, but now mix everything at once. It’s simpler, faster, and still makes excellent loaves (plus, you won’t forget to add the salt later on!). I’ll leave the choice up to you.
Want To Add Inclusions?
Mix in flavor additions after autolyse, when the dough is softer and more pliable. This is another reason not to skip the autolyse step. Alternatively, inclusions can be added during the first stretch and fold.
A few ideas:
- Roasted garlic
- Chopped olives
- Fresh or dried herbs (rosemary, thyme)
- Seed or nuts
- Cheese
- Dried fruit (raisins, cranberries)
- Jalapeños

Step 2: Bulk Rise
Now the dough is ready to rise. Cover the bowl with lightly oiled plastic wrap so the dough doesn’t stick to the top, or transfer to a dough tub. Let rise at room temperature, about 68-70 F (20-21 C).
How Long Does It Take For Sourdough Bread To Rise?
The dough is ready when it’s puffy, slightly domed and nearly double in size. This can take 3-12 hours depending on room temperature, the quantity and strength of your sourdough starter, and seasonal conditions. All variables work together. See my example below:
For My Sourdough Bread Recipe (with ~150 g sourdough starter):
- In the summer: ~2-4 hours @ 80 F (26 C)
- In the winter: ~10-12 hours @ 68 F (20 C)
Diving Deeper: Temperature controls time. This is where I see the majority of beginner baker’s make mistakes- the temperature is overlooked. Sourdough takes longer to rise than yeasted bread, and it’s highly dependent on your specific environment. My kitchen might be 75 F. Yours? 68 F. Watch the dough, not the clock. For more details and troubleshooting read my companion article: Why Won’t My Sourdough Bread Rise?
Stretch And Fold The Dough (Optional Step)
About 30 minutes into the bulk rise, you can perform a series of “stretch & folds” to strengthen the bread dough. This step is not mandatory; however it has the potential to add height and structure to the finished loaf. Check out my how to stretch and fold sourdough guide to learn more, step-by-step. It’s easy and fun to do!

Step 3: Divide & Shape The Dough
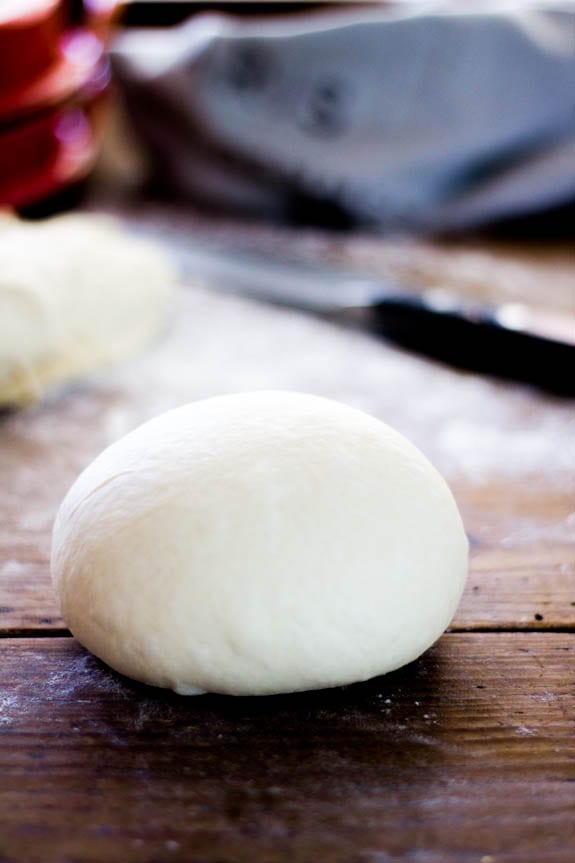
At this stage, remove the dough onto a lightly floured surface. For two smaller loaves, divide the dough in half. For a single, standard size loaf leave it whole.
How To Shape A Round Sourdough Boule (Loaf)
Starting at the top of the dough, fold it over toward the center. Give it a slight turn, and then fold over the next section of dough. Repeat until you have come full circle to form a tight round. This creates surface tension for better oven spring. You can also try the envelope-style fold.
Tip: I used to get so nervous when shaping bread dough because you only had one chance to get it right. So intuitively, I would practice using a piece of Play-Doh or with a kitchen towel to go through the motions at my own pace.

Step 4: Choose The Right Baking Pot
If you want bakery-style results, bake sourdough bread in a Dutch oven. Why? Pots trap steam which is the secret to homemade sourdough with bold rise and golden crust. Without steam, the crust will set too fast casing the loaf to harden, split or bake unevenly. I’ve been there and it’s not pretty.
What If You Don’t Have A Dutch Oven?
You’ll need another oven-safe pot with a lid to create steam. It must be able to withstand up to 450 F/232 C (lid and handles included).
A few options:
- Enamel roasting pan with lid (or sheet pan to cover)
- Cast iron skillet with upside down roasting pan to cover
- Covered sandwich loaf pans
- Clay Baker or Romertopf (soaked first)
- Preheated baking stone w/ metal bowl to cover
Here’s what happened to me: I tried the “no pot” baking route in the past, using just about everything from pizza stones, to baking sheets with no luck! The crust always hardened too quickly. Then I tried various steaming methods to remedy this (e.g. ice cubes in a hot pan, spraying my loaves with water) but my personal oven could not retain enough moisture. The environment was always too dry. For me, using a Dutch oven was the only reliable solution that worked with consistent results.
Step 5: Second Rise (Proofing)
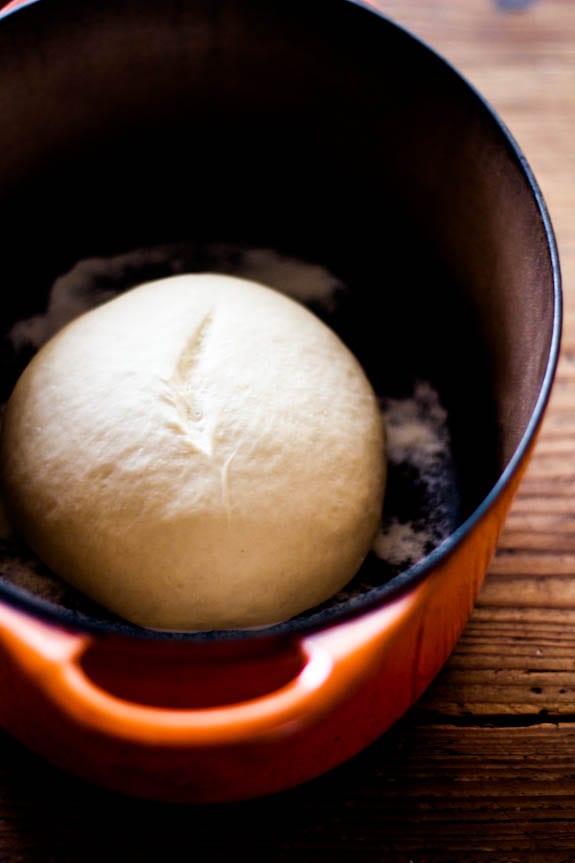
- After shaping, your dough needs to rise again. To do so, generously dust the bottom of your Dutch oven with cornmeal, or line with non-stick parchment paper to prevent sticking. Gently place the dough inside (see tip below)
- Let the dough rise for 30 minutes to 1 hour, or until it’s visibly puffy and no longer feels dense. It doesn’t need to double in size. While the dough proofs, preheat your oven to 450 F (232 C).
Tip: Want better shape and structure? Proof the dough in a floured, cloth-lined, 8-inch bowl or banneton instead of directly in the Dutch oven. This will contain the dough and hold its shape without spreading. Bread flour or rice flour is fine for dusting.
Step 6: Score The Dough
- Right before the dough goes into the oven, make a shallow slash down the center of the dough, about 2-3 inches long. Use a small serrated knife, sharp knife or bread lame. This lets the steam escape, and allows the bread to “bloom” or expand in the oven.
- Admittedly, this step is a bit nerve racking, so I don’t want to gloss over it. Be quick and confident. I’ll share what my sourdough mentor told me: “Slash with panache!”
Step 7: Bake The Bread
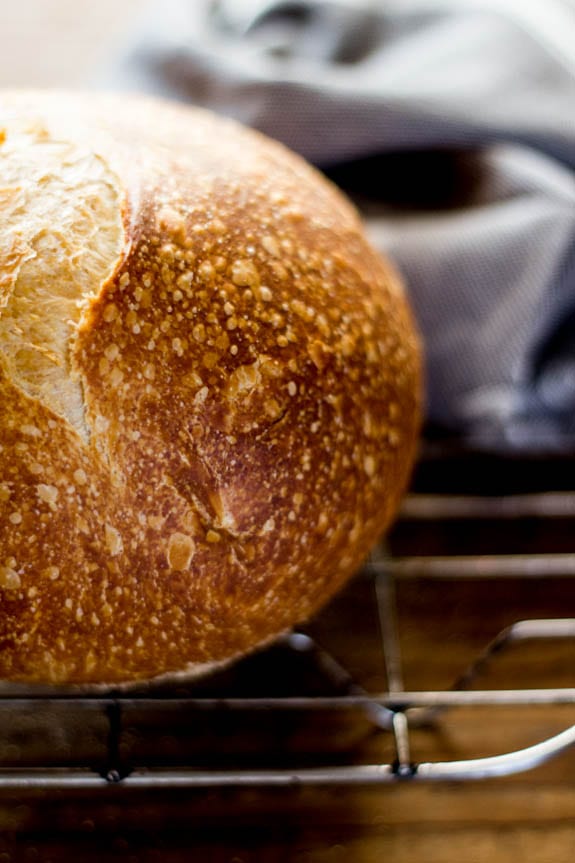
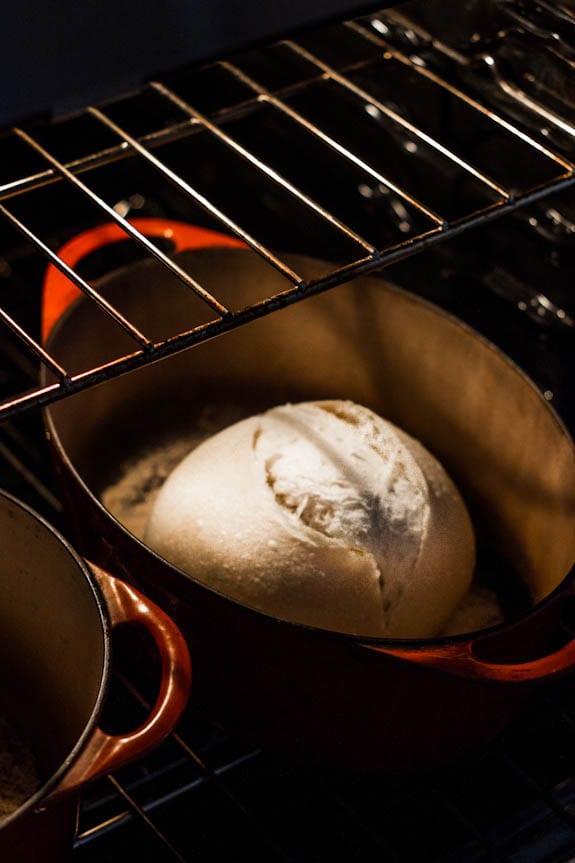
You’re at the finish line now! Bake on the center rack (lid on) for 20 minutes. Then remove the lid. Your bread will look pale and slightly shiny. Then finish baking (uncovered) for 40 minutes or until the crust is deep golden brown. The internal temperature should be 205-210 F/96-98 C.
Tip: During the last 10 minutes of baking, crack open the oven door to let the moisture out. This creates a crispier crust. Or, remove the bread from the hot Dutch oven and bake directly on the oven rack. The latter creates the crispiest finish.
Step 8: Cool & Slice
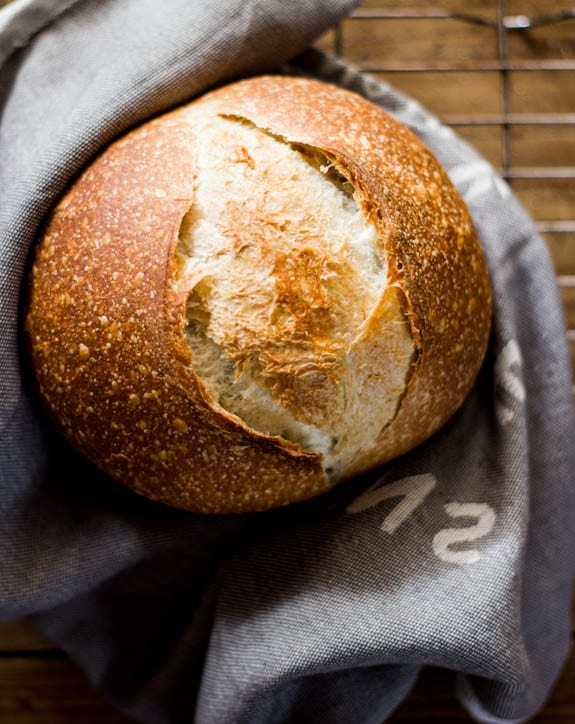
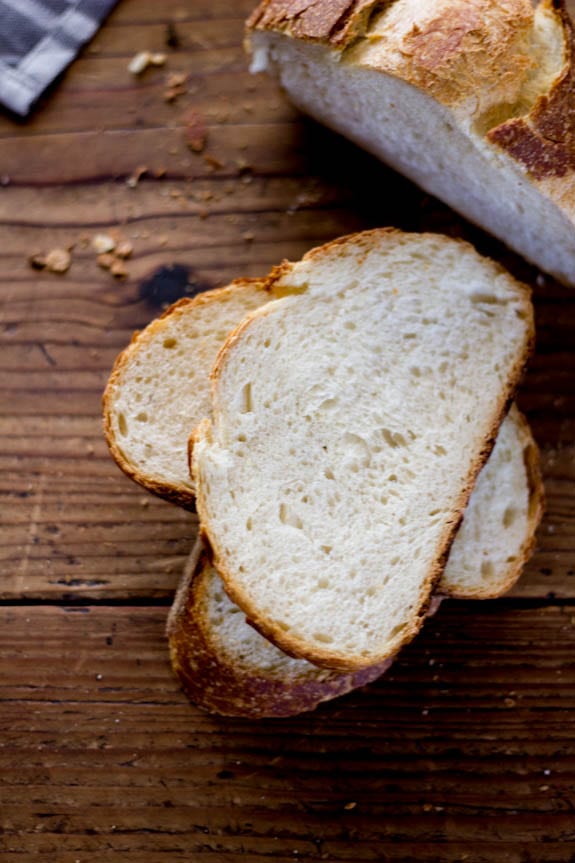
Cool the bread on a wire rack for at least 1 hour before slicing. Be patient! If you cut into it too soon, the texture will be damp and gummy. Life’s too short for sub par bread.
Final Thoughts
There are a gazillion sourdough bread recipes out there. No two loaves look alike. Start with this guide, master the basics and then branch out: try my golden sourdough focaccia recipe, this easy sourdough sandwich bread, or my one-bowl sourdough pancakes for breakfast! Once you have a few loaves under your belt, the process will become an imminent rhythm and you’ll become a sourdough pro in no time.
Sourdough Baking Schedule
- Friday Evening: Feed your starter, cover the jar, and leave it on the counter overnight. If you keep your starter in the fridge, it might need two feedings to perk back up (feed it in the morning & in the evening).
- Saturday Morning: Check your starter: if it’s alive and bubbling, you can make the dough to rise during the day. Or, feed it again in the afternoon to make the dough in the evening for an overnight rise. Remember to use the float test mentioned above to make sure your starter is ready to use.
- Saturday Morning/Evening (or whenever your starter is ready): Make the dough. Leave on the counter to bulk rise at room temperature. In the summer, if your dough rises quickly and you’re not ready to bake, cover the whole bowl with lightly oiled wrap and chill until ready to use.
- Sunday Morning: cut and shape the dough. Place in Dutch oven for second rise. Slash. Bake. Cool. Eat.
By signing up, you agree to receive emails from The Clever Carrot. Unsubscribe at any time.

Sourdough Bread: A Beginner’s Guide
- Prep Time: 13 hours
- Cook Time: 1 hour
- Total Time: 14 hours
- Yield: 1 loaf 1x
- Category: Sourdough Bread Recipes
- Method: Oven-Baked
- Cuisine: American
- Diet: Vegan
Description
New to sourdough? My easy beginner sourdough bread recipe makes the best artisan-style loaf at home with just 5 simple ingredients: bread flour, active sourdough starter, water, salt and olive oil—my signature addition—known for creating a light, plush crumb and a crisp golden crust. Follow my clear, step-by-step instructions and video guidance to bake fresh sourdough bread with confidence (even on your first try!).
Ingredients
- 150g bubbly, active sourdough starter
- 250g warm water (see Note 2)
- 25g olive oil
- 500g bread flour (not all purpose flour)
- 10g fine sea salt
- fine ground cornmeal or non-stick parchment paper
Notes, Tips & Equipment
- Weigh your ingredients with a digital scale for best results
- For a more soft and pliable dough, increase the water up to 300 g- 325 g total. Use a floured, cloth-lined bowl or proofing basket (instead of the Dutch oven) for the second rise.
- You will need a 5 1/2 or 6 quart Dutch oven for baking
- This recipe was tested with King Arthur Bread Flour, Gold Medal Bread Flour, Pillsbury Bread Flour
Instructions
Make The Dough
In a large bowl, add the sourdough starter, water and olive oil. Mix with a fork to combine, then add the flour and salt. Continue mixing until the dough becomes stiff, then squish it together with your hands to incorporate all the flour. The dough will be rough and shaggy.
Cover the bowl with plastic wrap, reusable wrap, or very damp kitchen towel. Let rest (autolyse) for 30 minutes to 1 hour.
After resting, return to the bowl and work the dough into a rough ball, about 15 seconds.
Bulk Rise (First Rise or Bulk Fermentation)
Cover the bowl with lightly oiled plastic wrap. Alternatively, transfer the dough to a high-sided dough tub. Let it rise in a warm place, ideally 70-75 F. The dough is ready when it no longer looks dense and has almost doubled in size.
Note: The bulk rise time will be different for everyone. For example, in the summer, expect ~2-4 hours @ 80 F/ 26 C. In the winter, ~10-12 hours @ 68º F/ 20º C. Watch the dough and not the clock.
Optional Step: Stretch & Fold The Dough
During the bulk fermentation, you can do a series of ‘stretch & folds’ to strengthen the dough. Start 30-45 minutes in: lift a portion of the dough, stretch it upwards, and fold it over itself. Rotate the bowl ¼ turn and repeat until you’ve come full circle (1 set). Do 1-2 additional sets, spaced ~1 hour apart. Click here for a step-by-step video tutorial.
Note: Dough made with 250g water will feel stiffer; 300-325g water will be more stretchy and elastic. Let it rest longer in between sets if it resists stretching.
Shape The Dough
Remove the dough onto a lightly floured surface. Starting at the top, fold the dough over toward the center. Turn slightly, and then fold over the next section. Repeat until you have come full circle. Flip the dough over, seam side down. Gently cup the sides and rotate in a circular motion to tighten the shape. The goal is to build surface tension to create a tight ball (too much flour will cause the dough to slide around).
Second Rise
Now the dough needs to rise again. If you’ve used 250g water, you can do a free-form second rise in the Dutch oven (if not, see note below). Line the pot with a piece of parchment paper (this is what I do) or coat with cornmeal. Place the dough inside, cover and let rise for about 30 minutes to 1 hour. It’s ready when slightly puffy, but not double in size. Preheat your oven to 450 F/ 232 C.
Note: If your dough contains more than 250g water, skip the free-from rise. Your dough will spread. Instead, use a floured, cloth-lined, proofing basket to help hold its shape.
Score The Dough
Right before baking, make a shallow 2-3 inch slash (or longer) in the center of the dough using a bread lame, razor blade, or small sharp knife. The cut should be ~1/4-inch deep.
Bake The Dough
Place the bread in the oven on the center rack (lid on) and reduce the temperature to 400 F/ 204 C. Bake for 20 minutes, then remove the lid, and continue to bake (uncovered) for an another 40 minutes, until deep, golden brown. All ovens are different; feel free to make minimal adjustments to these temperatures.
Check for doneness with a digital thermometer: 205-210 F/ 96-98 C for sourdough.
Remove the bread from the hot Dutch oven, and cool on a wire rack for at least an hour before slicing.


Comments
Michael says
A word of warning for any other newbies out there that think, like me, that they can cleverly mix the salt in with the starter and water in the beginning to avoid any difficulty incorporating it in the dough: DON’T DO THAT. You will either kill or maim that poor starter that you worked so hard and so patiently to cultivate, and then you’ll end up with a dense, underdone “loaf” (though, for the record, it still tasted pretty good and even a little tangy).
Gonna give it another go next weekend, this time following the recipe word for word :)
Robin says
I am a novice baker and tried this recipe three times with poor results. Just bought a break baker/dutch oven, so hoping that will help. I noticed each time that my dough is dry despite measuring ingredients in grams and following the video.
Emilie Raffa says
Hi Robin! Sorry to hear that it didn’t work out. For best results (as indicated in the tutorial and recipe), it’s best to use a dutch oven or baking pot from the very beginning to produce an artisan-style loaf. Skipping this step without adding an alternative steaming method to your oven will not work. Regarding the dough, if you find that it’s too dry simply add more water (I’ve given a range of amounts above) and/or use a stand mixer to really incorporate the mix. Additionally, increasing the first rest (autolyse) from 30 minutes to 1 hour will help hydrate the flour as well. Hope this helps!
Eric says
My first loaf turned out incredible, THANK YOU SO MUCH :). You took me from intimidated novice to a real baker in one go!
Timothy Burgess says
Thanks for the awesome info!
Can you clarify:
“Here’s my method: I pour off some of the culture (about half) ”
Do you mean you halve the starter into 2?
Ie. Culture = starter.
You are having here as you will use half to make your bread & the other half to continue as the starter for future bread?
valerie van tine-janzen says
This recipe is easy and incredibly fun to make! We’ve enjoyed the delicious results many times in the past few weeks! Thank you for sharing…we will continue to experiment with ingredients and sharing our bread with friends and neighbours (’cause we make too much to eat ourselves ;) )
Scotty M says
Excellent recipe. I braided the loaves and sprayed lightly with lukewarm water before popping them into the oven.
I have been a baker for many years but was always intimidated by ” the starter”.
Your instructions were clear and precise and I am happy to say the loaves look and taste wonderful. Thank you very much.
Scotty M, Morro Bay, Ca.
K says
Question: I made the dough and am currently on the bulk rise, but it doesn’t seem to be rising at all, after almost 3 hours despite the warm weather. I had it outside(about 80 degrees and around 50% humidity) for a good while but when nothing happened I was afraid maybe it was too hot? So I brought it inside to my kitchen(much cooler) with my separate sourdough starter(not part of the recipe but I had it around and I thought it would help gauge if it was correct environment) next to it as a control, and sure enough the starter bubbles up but the dough stays small and dense. I believe I followed all the instructions well and even did the stretch and fold step, but nothing is happening. I know I shouldn’t rush it, but is there anything I can do to help it along? Will putting it back outside in the heat help or harm it, or do anything at all? Thank you for this recipe to occupy my abundance of time in this quarantine, and thanks in advance for the help!
Emilie Raffa says
Hi there! If your starter is strong, the ingredients were weighed (and the correct amount of starter was used), and the dough was in a warm environment, it should rise given the proper amount of time. How did it come out? Sometimes it’s hard to be patient!
Snowsuisse says
Thank you for sharing the recipe. It’s my first sourdough bread and it came out perfectly. I was too hungry so I started to cut edges after cooling for 15 minutes. It was great!!
Nikki says
Hi! So with covid happening I thought why not try to make sourdough? I’ve never made sourdough before now but it was a huge success! I followed the recipe exactly (including the optional stretch and fold) and it came out beautiful each time (I’ve made it 3 times now). I live in southern utah, so it gets really hot and dry in the summer (100° F + with only 10% humidity) and our house is kept around 75° F. Each loaf I tried a different amount of time during the bulk rise since I’m still not super sure how to tell if it’s ready just by looking at it. I tried 6, 10, and 8 hours and they all turned out great but I liked 8 hours the best because it stayed more spherical and tall when it baked vs spreading out and being a little shorter.
I also used your starter recipe but tweaked it a bit. When I was trying to get my starter to grow, it was having a hard time. It kept getting hungry and forming the hooch (I think that’s what it’s called?) on top even though I fed it daily. I looked at other recipes and combined the idea with your recipe. So in the morning I discarded half and added back the water and flour like you said, but then 12 hours later at night I’d add around 2 tablespoons of flour (I didn’t measure I just gave it a good spoonful). This fixed the issue of it getting hungry overnight and always having a hooch (?) in the morning!
I also have a question. I’ve seen some recipes say the bulk rise can be done in the fridge. Can I do this with this recipe? I love this recipe and don’t want to try a different one at the moment, because I’m worried I’ll mess it up haha, but I like the idea of being able to prepare it at night and bake it in the morning. And since it rises relatively fast where I live, I worry if I left it overnight it would rise for too long. What are your thoughts? Can I do it in the fridge? How long, should I still do the stretch and fold, do you bake it right from the fridge or does it need to warm to room temp first? If this recipe isn’t compatible with bulk rising in the fridge, do you have a different recipe that is or could you direct me to one? Thank you!!
Thank you for your recipe!! It’s so fun, beautiful, and delicious:)
Emilie Raffa says
Hi Nikki! This all sounds so great! Playing around with the rise times and your starter is what sourdough is all about ;)
Regarding the bulk rise, sourdough does not rise in the fridge like a dough made with commercial yeast. It takes a really, really long time.
Here are two options you can work with instead:
1.) Make the dough during the day. When it just about doubles in size, pop the whole bowl into the fridge (with lightly oiled wrap) to sit overnight. It will barely continue to rise from that point on. The next day, take it out and leave at room temperature to finish rising (if needed) and then complete the rest of the steps.
2.) Alternatively, bulk rise during the day, shape the dough, and do the second rise in the fridge overnight. Let the dough sit out at room temperature before baking while the oven heats up. Keep in mind however, this option takes a bit of practice and trial and error. Sometimes the dough will be over proofed in the morning and/or the temperature of the dough before baking will change the overall texture.
I recommend choosing option #1 for now and see how you go. Hope this helps!
Nikki says
Hi Emilie, thanks for responding! That makes sense. So it sounds like with the first way you mentioned, the fridge kind of pauses things. I’ll try that sometime! Thank you:)
Helen Gray says
Emilie, my neighbor gave me some starter and pointed me to your tutorials and blog — it’s just what I need in my life now. I made my first loaf yesterday, which turned out fine in the end, and am now in the Bulk Rise phase today of a second try. My concern/question is about stickiness. I am doing the optional stretch and turn, so I am touching the dough several times in Bulk Rise. Unfortunately, my doughs have really stuck to the bowl, the towel, some wax paper between the towel and dough (I thought that would be a good alternative to plastic wrap — not at all, terrible sticking). After the 3rd stretch-and-turn, I broke down and used plastic wrap and towel, and it stuck to the towel on the edge not covered by plastic. You don’t use plastic in your videos and your dough responds when you pull it toward you, no resistance or sticking. How do you get your dough to not stick to your bowl sides or your hands? I’m in Denver, baking at altitude if that matters. Also, I was exact on my ingredient weights. Thanks for your advice on stickiness!
Emilie Raffa says
Hi there! Great question. What brand of flour are you using? And is it bread flour and not all purpose? It sounds like there’s too much water in the dough and/or altitude is effecting the the texture. This is actually a low-hydration dry dough so it shouldn’t be really sticky. Thanks!
Helen says
Emilie, thanks for your reply question about which brand of flour I’m using. It is Bob’s Red Mill Artisan Bread Flour. I will continue to tinker, even though you are very clear in your remarks about exact weights and that this is a low-hydration dough. Part of the fun is trying and not getting discouraged!
Madi Yates says
Hi Emily, I have made this beginner sourdough bread at least 10 times and am ready to branch out so I just got your book Artisan Sourdough and wonder why this recipe calls for 150 grams of starter and many of the other recipes in the book call for 50 grams. I want to be sure before I dive in with the other recipes! Thanks so much!
BTW, my first starter using a different recipe was a flop as was my first loaf of bread. So I was very happy to find your recipes, precise instructions and videos om the Clever Carrot.
Madi
Emilie Raffa says
Hi Madi! That’s fantastic! I’m glad you’re finding the recipes and videos helpful :)
To answer your question, please visit the FAQ Section at the very bottom of this post (it’s located under the printable recipe).
Madi Yates says
Perfect! And Thank you for being so very helpful! Its clear that you really care about what you are doing and today, I am moving along to a new recipe from your book! I bake once a week and that has been working out great so far!
Madi
Rob says
Hi, new to sourdough. I just tried making my own starter. Today is day 8. I have been discarding. Then feeding and it has not doubled in the jar??? Should I bake with it?
Thanks
Rob
Emilie Raffa says
Hi there! It sounds like it’s not ready, which is common when first creating a starter. Sometimes it can take up to two weeks or more to become active. Do the float test when the starter doubles to ensure it’s ready. That’s the best way to check.
Judy says
The recipe was easy, but the bread was too dense and hard crust. What am I doing wrong?
Emilie Raffa says
Dense bread is typically a result of insufficient gluten development. Make sure the dough doubles in size before going on to the next step; otherwise the baked loaf will be dense. Do not rush this step.
Patrick says
I’ve had the same problem with two attempts. The bread tastes great but it was a bit more dense than it should have been. The second attempt I used half whole wheat flour (without reading your warning above) and I have some cracks along the side and bottom.
Is there a way to tell you have kneaded too little or too much? I get good rise and it doubles (or more) in size for the bulk rise but not so much for the initial rise.
Emilie Raffa says
Patrick, dense bread can be due to a few things: changing the recipe (as you found out!), inaccurate measuring (please weigh your ingredients), insufficient bulk rise and/or too long of a second rise. The most common mistake I see is letting the second rise go for over an hour after a long bulk rise; this leads to flat and dense bread.
Regarding the kneading, it’s actually very difficult to over knead dough by hand. I do not think this is the issue for you. Hope this helps a bit!
Jason Jason says
Just made this, great recipe. I have an existing sourdough culture I was strengrhening and wanted to utilize the pour off. I mixed dough by hand, allowed 30 min first rise. Added oil to the bottom of the mixing bowl to allow dough ball to slide, and started folding my dough from the edge to middle. This forms a nice ball and stretches the dough into round loaf shape. Do this about 30 times. Flip the folded edge side down into my baking crock lined with parchment, do 1 additional rise in the baking crock. Bake 450 covered 20 min 400 uncovered 35 min. Came out perfect, 207 internal temp, good crust not too hard on the edge. Major flavor. Strength and quality of your culture deternines your bread outcome.
Christine Matos says
Thank you so much! Turned out great, I made mine into two loaves, I added a bit of citric acid for a little more sourness into the water with the salt and olive oil, I had left them a bit too long on the second rise but it didn’t matter,,cooked them together in my turkey roasting pan. The crust is wonderful, easy recipe for this sourdough bread beginner,can’t wait to do more!
patty tynan says
Can I use gluten free flour in the starter( to feed it) and for the actual flour in the recipe?
Emilie Raffa says
For the starter, yes. For the bread, no. I don’t believe it will work. Gluten free baking is very specific and because I haven’t tested this recipe with GF flour(s) myself, I’m unable to advise on the exact instructions. I’d search for a dedicated GF sourudough bread and start with that for best results :)
Jolene says
I use the scraping method found on “baking with Jack” to feed my starter. I use the sourdough out of my jar, I cap it and put it in the fridge. Generally about a tablespoon of scrapings left in the jar. When I’m ready to bake, I take it out and feed it however much I’m going to need for that recipe. It has never failed to double for me the first time out of the fridge. I generally put it in the oven with the light on only. When I pour the starter out to weigh it, I cap it and put what’s left in the fridge until the next time.
Stephanie says
First of all, thank you, Emilie, for this amazing recipe and your availability to answer questions! Monday I made the higher hydration bread variation on this recipe. I don’t think I’ll ever eat another bread again😊! It’s been gone so now I want to make a few boules at once. If I make several boules of unbaked dough can I freeze them to bake at a later date? Please advise. Thank you so much!
Emilie Raffa says
Hi there! I typically do not freeze my unbaked sourdough dough (sometimes it can mess with the starter strength), but that doesn’t mean you can’t experiment! I just freeze the already baked loaves. If you play around with this, please let us know!
Jay Smith says
I a, new to sourdough, and followed your instructions to the letter. I have now made about 6 excellent loaves, all delicious and muchh appreciated by my family. Thanks!
Lauren says
Hi there,
I’ve been using a lot of your recipes, and they have all turned out great, but I’m a tad confused about the baking schedule. In this case, you said you remove the starter from the fridge on Friday night and feed it. If it’s ready on Saturday morning, you mix the dough. I assume you are then doing bulk fermentation during the day in that situation and not overnight? Would you then, do your second rise in the fridge overnight and then bake on Sunday? Or can you complete the whole process during the day on Saturday? Thanks!
Emilie Raffa says
Hi! To clarify: if your starter is ready in the morning or afternoon, the bulk rise would happen during the day. You can either bake on the same day OR do the second rise overnight in the fridge (to bake the following morning). Hope this helps :)
Cindy says
This bread was easy and delicious. I also loved that I could make it in one day during the summer.
Julia says
Thank you for teaching me how to make sourdough! I have made this multiple times and it is delicious. I do have a question—my loaves have never, ever been as smooth as yours. Even from when I combine the flour / starter / water, the mixture doesn’t seem to absorb all of the flour, and it’s bumpy and knobbly—almost like tree bark—from there on out. Most of the time this isn’t a huge problem for taste, just appearance. But sometimes when the starter hasn’t been as potent, the crust is really hard. Do you have any tips? For the record, I don’t weigh my ingredients.
Chloe says
Hi Julia! Well, firstly, the difference in mass of your ingredients might be an issue. Since you don’t weigh your ingredients, I assume you use a mass-to-cup converter. As a converter is a good tool for reference, I personally don’t think it works as well as when you measure by weight since depending on how you measure, the volume of ingredient differs. I would recommend investing in a kitchen scale, especially if you’re making bread often. Apart from that, maybe if you’re at high-altitude, try adding a bit more water to the dough until you feel it isn’t like ”tree bark”.
Hope this helps and good luck with your bread-making!
Chloe :)
Hutoxi Irani says
How to feed a starter, and which flour to use?
Lisa Reed says
I finally made a fantastic sourdough bread! This recipe is simple to follow and the bread was great. I tried 2 other recipes with so-so results but this one was the best. My only downfall was I didn’t add the correct amount of salt, my mistake, I was rushing. The consistency and bite of the bread was everything you’d expect in a loaf. Crispy crust and nice texture. Here’s my facts-I had a healthy mature starter, which makes a difference. My slash kind of disappeared after baking because I did not use a bread lame. I forgot to do the stretch and folds. I did opt to let the bread bake directly on the rack with the parchment paper for the last 10 minutes.
I was so excited that I forgot to take a picture.
Peta says
I have just made my first loaf. I don’t have a bread lame so I used my kitchen scissors to snip the slash….seemed to work just fine.
Regina says
Hello, if my oven has a “bread proof” setting Will 3 hours be enough for the first rise and 30 min for the second regardless of the temperature outside?
Thanks! So excited for my first attempt
Emilie Raffa says
Hi there! It depends on the temp. of your “bread proof” setting in the oven. If it’s around 80 F let’s say, it will rise quickly with 150 g of starter, so keep you eye on it and plan accordingly. Always watch the dough and not the clock.
Karin says
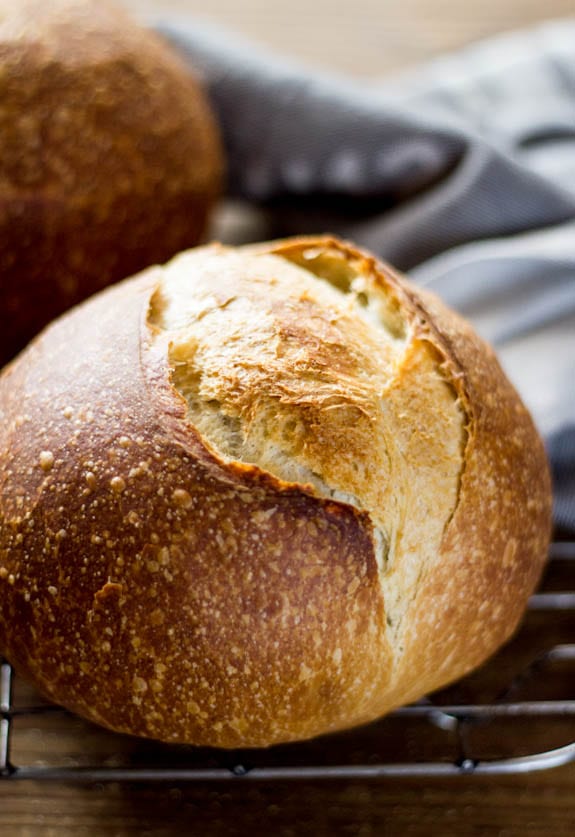
Hey! Just a quick one, your recipe says it yields one load but in your pictures you show two smaller round loaves. If you choose to do one loaf will that need to go in a massive dutch oven or similar to fit?
Emilie Raffa says
Yes: the larger loaf will need to go in a 5/12 or 6 qt Dutch oven.
MsSoandSo says
My sourdough is currently on its 2nd proof in my Dutch oven! I’m very excited. Thank you for these (mostly) easy to follow instructions!
Just as a little thing, I didn’t think to scroll down past the FAQ to see if you’d listed the ingredient measurements (bc honestly why would a recipe be below an FAQ?? My bad). You mention using a digital scale at the start of your instructions with no measurements and I was endlessly confused! I would’ve put those before your longer written instructions. I cross referenced with a different recipe to get a ratio, so hopefully it still works out. Now I’ve scrolled all the way down to the comments and actually found the ingredients! I don’t get why so many food bloggers format their blogs this way, though…maybe I’m missing something :p
Ian Russ says
Thanks for the recipe. Very easy to follow. I have baked about 7 loafs before and followed different instructions every time to experiment.
One thing I started doing that slightly differs from your recipe is I let 2nd rise to happen outside of dutch oven. Instead, I heat up the oven for about 30-45 minutes and I heat the dutch oven for 30 minutes before baking. Seems to have better consistent results since I started to do it.
Halie says
I was looking for a comment like this! My friend makes great sourdough and I know she does this technique as well. I think I’ll incorporate it into this recipe when I try it today rather than do the second rise in the Dutch oven.
Peter Murphy says
Thank you for this recipe – it took me ages to make my own successful starter and the bread recipes didn’t work. This one turned out well, but I wonder why it’s not as chewy and sour as the sourdough loaves I buy?
Emilie Raffa says
Hi there! It’s tough to say… Sourdough by nature is typically chewy. You might want to try my Artisan Sourdough with All Purpose Flour to cross reference.
PamG says
Happy to have found a recpie that works easily for me. Thank you so much for your time, research and translation! Yum :)
krissy collins says
Can you break down the bulk ferment overnight in the fridge? Do we shape and fold then place in fridge? Take out in the morning and cut and shape right away? I’m just confused about this. Will the dough rise in fridge? Please help! Thank you!!
Emilie Raffa says
Krissy, I typically never do the entire bulk rise overnight in the fridge; the dough doesn’t rise as fast as one made with instant yeast. To answer your questions, you can do two things: refrigerate the dough once it has doubled in size (without shaping it first- just cover and stick the whole bowl in the fridge) OR shape it, place it into a proofing basket, and chill until ready to bake.
Carol says
Regarding an overnight rise – I just tried it. My timing didn’t work out so I refrigerated after the bulk rise and final shaping. I then allowed the dough to warm up and proof. Although the loaf was very good, cooked up perfectly brown and crusty, the inside of the bread was a bit more dense than it probably would have been had I continued the proofing/baking straight through. Refrigerated/overnight proofing doesn’t seem to work the same as yeast breads. I am OK with this and will be sure to time things out better next time.. I love this recipe – produces a lovely loaf and is so much less complex than other sourdoughs. I am new to this, having been nurturing my starter for the last 4-5 months and have baked with it only a handful of times. This was my best loaf so far. You will get there!
Emilie Raffa says
Carol, it sounds like your dough was over proofed (rose for too long). For beginners, I typically do not recommend a refrigerated second rise due to timing reasons. It can be done, but with repetition and practice! And you are correct: they are not like commercial yeasted doughs which can withstand longer periods of time in the fridge and continue to rise. Next time, if you do the overnight rise, plan on baking in the morning when it’s ready. Or, if you need to buy additional time, shape and chill the dough but only for a for an hour or two max and then bake right away.
Cheo Yu Jin says
Hi, is it possible to achieve a more open crumb structure with this recipe? and if it is, does it depend on the maturity of the starter or is there something I can actively do to the dough to get a more open crumb structure. Thanks in advance for your advice.
Emilie Raffa says
This is a low hydration dough, characterized by smaller holes. So it’s possible, but unlikely. For larger holes, you’ll need a dough that’s has a higher hydration. Heads up though: an increased amount of water is not the only factor that will get you big open holes. It’s a combination of both recipe, technique, temperature and finesse. Try this recipe for cross referencing and see how you go.
Mairi says
When A friend gave me some sour dough starter and I started making sour dough bread, I came across the Clever Carrot and loved the recipe description. I used it with great success the first time and have not needed Any other recipe. I am now on loaf number 6 I think and the only failure was when I left the second proving unavoidably too long. And I knew it would fail even before I put it in the oven because of all the clear descriptions provided by Emilie. Thank you.
For anyone wanting to try sour dough bread, i thoroughly recommend it. It is delicious and I really found Emilie’s recipe perfect. The most difficult part is timing the start point so you don’t find yourself up at 2am to ‘catch the moment’ When the bread needs baking! Generally, I prove over night (I take the starter out and feed it around 4pm), autolyse (if starter ready of course) around 9pm and leave to bulk rise (after stretching)from 11pm until 6am approximately. Then I have beautiful fresh bread to eat by 9am!
Emilie Raffa says
This is fantastic. Thanks for sharing your tips! The timing with sourdough can be the trickiest part :)
Amy says
Thanks for the recipe. Very new to bread baking and this was my second attempt but first time using this recipe. Definitely turned out better than my first but very dense. I am suspecting I needed to prove a little longer but was also wondering if my starter is the issue. My starter is whole wheat; would I be better off using a whole wheat starter with a whole wheat bread recipe?
Emilie Raffa says
Using a whole wheat starter for an white sourdough will definitely give it a different look, feel, and taste especially if you are using a larger amount. It’s possible it contributed to the dense texture, although I suspect under prooving was the main issue. In the future, you can always split your starter into 2x jars; feed one with what you’re using now and the other with white flour to use in white sourdough recipes.
Amy says
Thanks for the tip! Didn’t even think to do that will give it a go this weekend
Doris says
This was my 6th try and 3rd recipe – finally made a loaf that was successful (and more then 1″ tall). Followed all the steps and have a beautiful loaf of bread. Noe Valley Bakery in San Francisco has been giving away free starter every Sunday. The other 2 recipes rose but the dough looked like a big bowl of bubbling starter – very wet and rolling into a ball was not possible. Thanks for the step by steps and all the hints.
Elizabeth MacLean says
I’ve been looking everywhere for a link to these grayish blue Paris dish towels you have! Where did you get them? Where can I find them? Thanks!
Emilie Raffa says
Oh my goodness- I purchased the towel from Sur La Table ages ago. Not sure if they still have it!
Grace Rowehl says
Hi, Love this recipe, it was fun to follow and came out great, first try. My question is, if I make the Sandwich Loaf, do I score the top or bake it without scoring. TIA
Grace
Emilie Raffa says
It’s up to you! Typically, I don’t score my sandwich loaves. But it can be done, if preferred.
Lewis says
Thank you for your in-depth, clear instructions! Quick question that I haven’t seen asked… I just finished my first attempt, and it came out well, but could’ve been airier. I wouldn’t call the dough THAT sticky after the bulk rise, but I did notice that when I poured it onto my floured work surface, it was sticking to the bowl, therefore stretching and I could see that it was deflating a great deal of air pockets as it “un-stuck” and a layer of it was left sticking onto the bowl… Would this be solved by oiling or flouring the bowl before I add the dough to bulk rise? Thanks again!
Emilie Raffa says
Lewis, the dough will always stick slightly to the bowl. Lightly coating the bowl in oil will help. However, so will stretch and folding the dough during the bulk rise. In my experience, if you do 3-4 sets of stretch and folds, the dough will easily release from the bowl without the ned to oil it first.
Brianna says
I used your sourdough starter instructions to get a starter going and I have tried making this recipe twice now with the starter, and both times the dough has not risen! I do not understand what I am doing wrong. I have left the dough overnight only to find that it is the same size and does not hold any shape. Any suggestions on what to do?
Emilie Raffa says
Brianna, it’s hard to say… there are so many factors! Have you read my troubleshooting post? Perhaps you will find something helpful in that article.
Robin says
Thanks to your instructions, for the first time my bread achieved some height,. Despite my use of AP flour instead of bread flour, and several hours the dough spent in the fridge prior to the first rise while I was at work, the resulting loaf had a lovely crisp crust with an almost delicate crumb, and the flavor was great. I appreciated the no-knead approach, and the folding method worked marvelously well (and was fun, too).
Bonnie Nieves says
Wow, we finally made bread! Thank you for this recipe, it worked no hockey pucks. I used your starter recipe as well and found your videos helpful. My niece and I have been trying different recipes and not been too successful but this worked. Last night, Devyn also tried your chocolate chip cookie recipe all vegan, they turned out amazing as well.
We are planning our next bake!
Bonnie and Devyn
Nick says
This is a great recipe and thank you for the guidance. I have moved to this recipe after little success with higher hydration doughs. I have a question about the final proofing. I have to say that I took certain liberties and have been cross-referencing with other bread recipes that are no-kneed. In any case I made the dough, did the stretch and fold for the bulk ferment, beautiful dough, and put it in the fridge overnight. The next day I didn’t have time to bake it, but I took it out and shaped it into a boule and put it into a banneton for another night in the fridge. The next day I took it out for a couple hours to warm up. At this point when I touched the dough my fingerprint would only slightly spring back. Have I over proofed the dough? When I flipped it onto parchment it spread out a bit. I’ve tried higher hydration doughs with the same problem where it spreads out after flipping it and I’m not sure if its because they’re high hydration or over-proofed. On one sight they suggest after the final shaping, putting the dough in the fridge in a banneton and the next day, heating up the oven and then going straight from the fridge to the oven. I felt your suggested one after of second rise was too short, because the bread didn’t rise very much. So my question is, where is my error with the dough? Thank you. Love your site.
Marissa says
I’ve made 3 loaves of bread already, and this recipe is very consistent and delicious! It’s a lengthy process but very easy. Thanks for sharing your tips and tricks! This bread is delicious :)
Nigel M says
Hi
I’ve made your sourdough bread once following your recipe and it came out really well. It was a bitdenser Thani would have liked, so this time I have increased to water to 300ml. Should I cook it for longer or at a different temperature? Thanks
Brad MacCachran says
I’ve now made five single loaves of this recipe during the pandemic and it’s great. Didn’t weigh ingredients, used bread flour (King Arthur and Bob’s Red Mill), I think my starter (the King Arthur recipe) is active, and if you follow the instructions for the bread closely including the baking temps and time (and use a dutch oven), it’s pretty hard to screw this up. I’ve done the bulk rise at room temp and in the refrigerator (both overnight) with no discernible difference in flavor, I live in northern New England where it tends to be cool. Really tasty, even my two white-bread-loving teenagers devour this recipe.
Crystal says
Worked amazingly!
Robert D Grant says
Finially!!! A sourdough recipe the actually works. I don’t know how many I tried and how many times I tried to
make a good sour dough loaf. A real big thank you.
Ella says
Thanks for the great recipe, made my first ever loaf successfully last night! I was wondering, I know this recipe calls for bread flour, but it doesn’t specify exactly which type. I have come across many varieties of bread flour (Strong white bread flour, strong Wholemeal bread flour etc) and wondered if they’re all useable for this recipe, as long as it’s ‘bread flour’? Or will only white work? Thanks!
Emilie Raffa says
If you’re in the UK, choose strong bread flour for this recipe. Wholemeal bread flour won’t work without making additional adjustments to the recipe; the two types are not always interchangeable.
Camille says
Made this recipe yesterday and I got the most beautiful and tasty loaf! I just can’t believed I made that myself.
Thanks for this recipe.
marill says
hi! i used to only let this bread rise approximately 8 hours. i was wanting a less dense bread so i experimented & made sure to let it rise 12 hours & i only knead it 8 minutes, & it is fluffier. but i was wondering how i could make this bread even less dense? i’ve tried using bread flour & the dough just doesn’t rise. :(
1 c. water
2 1/2 c. starter
3 1/2 c. flour
1 T salt
knead well for 15-20 minutes. or until elastic. divide dough into two 1.5 qt. loaf pans. let rise overnight or 12 hours. bake at 400F for 25-30 minutes.
Eniko says
Do the optional folding, it does wonders to reduce denseness
Pamela O'Briant says
I decided to try to make sourdough with so much time on my hands. I was surprised at how easy it was and how delicious! Thanks for the expert instructions. I was so proud of myself and now my family keeps asking for more. Getting ready to bake again and share with friends. This may become a new hobby!