Think you can’t bake fresh, homemade sourdough bread? This easy sourdough bread recipe—trusted by beginner bakers for over a decade—shows you how, step-by-step. No yeast. No kneading. Just simple ingredients and 10 minutes hands on time for soft, crisp sourdough bread at home.

Reader review
“I have tried MULTIPLE sourdough bread recipes and this one has been the very first to make a successful (fully risen) loaf of bread. I am relatively new to sourdough and for some reason, the other recipes just didn’t produce good bread. These instructions and detailed explanations really make a huge difference to someone who is new to the world of sourdough.”
—Savannah
To anyone who thinks their sourdough bread isn’t good enough, I get it. Back in 2013, I set a goal: bake more bread. I tested, failed, succeeded (and tried again). What began with an easy no-knead artisan loaf eventually led to the holy grail: homemade sourdough bread.
Admittedly, I had beginner’s luck. My early scratch-made loaves were light, plump and airy, everything you want sourdough to be! And then? Down the rabbit hole I went: Hydration? Baker’s %? Proofing times?
Now, with 13+ years baking experience and a professional culinary background, I know what holds people back: the confusion, hesitation, comparison. I teach from a straight forward practical perspective because sourdough is not just a written recipe; it’s an understanding.
This sourdough bread recipe has been the most popular on my blog for over a decade- millions of views and the inspiration behind my bestselling book Artisan Sourdough Made Simple, a deeper dive into sourdough bread recipes. So, if you’re at the end of your rope (and just want to make good bread), you’ve made it. Welcome to the journey.
What Sets My Recipe Apart:
- One bowl, 5 ingredients
- Olive oil = soft, plush crumb & crisp, golden crust
- No stand mixer
- No bread machine
- Flexible baker’s schedule
- Personalized support in the comments
But before we make bread, let’s discuss what drives it: your sourdough starter. Once you understand what it is, and how it works, your path will be crystal clear. Have questions? Ask in the comment section. I respond with personalized help.

Where To Get A Sourdough Starter
A sourdough starter is a live fermented culture of flour and water. It naturally leavens bread dough without commercial yeast. There are all different types: homemade, purchased or gifted (ask a fellow baker!). I use two different starters at home: one I made myself, and a vibrant Australian starter gifted from my friend Celia.
But is doesn’t stop there. Once your have your own sourdough starter, it must be kept alive and well with regular feedings to maintain its rising power. Sourdough is not static; it’s a living process. Here’s my personal feeding schedule which you can adapt to suit your style:

How To Feed Sourdough Starter
- Remove and discard half of your sourdough starter
- Feed what’s left in the jar with equal parts flour and water by weight (1:1:1 feeding ratio).
- Let rise at room temperature (loosely covered or airtight) ideally 75+F until bubbly, active and double in size (2-12 hrs). I use this sourdough starter jar.
Recommended Reading: Feeding Sourdough Starter: My Best Tips & Tricks
When Is Sourdough Starter Ready To Use?
Your fed starter is ready to use when it’s bubbly, active, and doubles in size. This can take 2-12 hours or more, depending on the temperature of your kitchen and the strength of your starter. My best advice? Be patient, plan ahead, and make sure your starter is in a warm place (ideally 75 F). The process is not instant.
Float Test: If you’re unsure whether your starter is ready, drop 1 tsp at peak height into a glass of water. If it floats to the top it’s ready to use. If it sinks, feed your starter again.
Storing Your Starter
Most people don’t realize that your feeding schedule is directly related to your baking preferences. If you only bake a few times a month, store your starter in the refrigerator and feed it once a week. If you bake often, store it at room temperature and feed it once a day.

How To Make Sourdough Bread: Step-By-Step Recipe
To Start: Feed your starter until it’s bubbly and active first (remember this can take anywhere from 2-12 hours, so plan ahead). Then mix the dough. Detailed instructions follow below. For a printable recipe & sample baking schedule, scroll to the end.
Step 1: Mix The Dough
- Add water, sourdough starter, and olive oil to a large bowl. Whisk well to combine, making sure the starter is fully dissolved. Then add the bread flour and salt. Continue mixing (I use a fork at this point) until the flour is absorbed. The dough will feel rough and shaggy, which is normal.
- Cover the bowl and let rest (autolyse) for 30 minutes to 1 hour at room temperature. Then shape the dough into a rough ball. It doesn’t have to look perfect.
Tip: Weigh your ingredients with a digital kitchen scale. Measuring cups vary in size and don’t account for ingredient density which can lead to dry, dense, or overly sticky dough.
Why Autolyse Matters
Autolyse is the first rest after mixing bread dough. It jumpstarts gluten development without kneading, making the dough stronger, stretchier, and easier to shape I never skip it. For this recipe, rest for at least 30-45 minutes (or when time permits, I’ll do 1 hour for an even softer, more manageable dough). To learn more about common sourdough bread terms read my Sourdough Baking Glossary. I’ve included the only 12 you need to know!
A Note on Salt: Some bakers only add salt after autolyse, believing it slows down gluten development. I’ve followed that method for years, but now mix everything at once. It’s simpler, faster, and still makes excellent loaves (plus, you won’t forget to add the salt later on!). I’ll leave the choice up to you.
Want To Add Inclusions?
Mix in flavor additions after autolyse, when the dough is softer and more pliable. This is another reason not to skip the autolyse step. Alternatively, inclusions can be added during the first stretch and fold.
A few ideas:
- Roasted garlic
- Chopped olives
- Fresh or dried herbs (rosemary, thyme)
- Seed or nuts
- Cheese
- Dried fruit (raisins, cranberries)
- Jalapeños


Step 2: Bulk Rise
Now the dough is ready to rise. Cover the bowl with lightly oiled plastic wrap so the dough doesn’t stick to the top, or transfer to a dough tub. Let rise at room temperature, about 68-70 F (20-21 C).
How Long Does It Take For Sourdough Bread To Rise?
The dough is ready when it’s puffy, slightly domed and nearly double in size. This can take 3-12 hours depending on room temperature, the quantity and strength of your sourdough starter, and seasonal conditions. All variables work together. See my example below:
For My Sourdough Bread Recipe (with ~150 g sourdough starter):
- In the summer: ~2-4 hours @ 80 F (26 C)
- In the winter: ~10-12 hours @ 68 F (20 C)
Diving Deeper: Temperature controls time. This is where I see the majority of beginner baker’s make mistakes- the temperature is overlooked. Sourdough takes longer to rise than yeasted bread, and it’s highly dependent on your specific environment. My kitchen might be 75 F. Yours? 68 F. Watch the dough, not the clock. For more details and troubleshooting read my companion article: Why Won’t My Sourdough Bread Rise?
Stretch And Fold The Dough (Optional Step)
About 30 minutes into the bulk rise, you can perform a series of “stretch & folds” to strengthen the bread dough. This step is not mandatory; however it has the potential to add height and structure to the finished loaf. Check out my how to stretch and fold sourdough guide to learn more, step-by-step. It’s easy and fun to do!

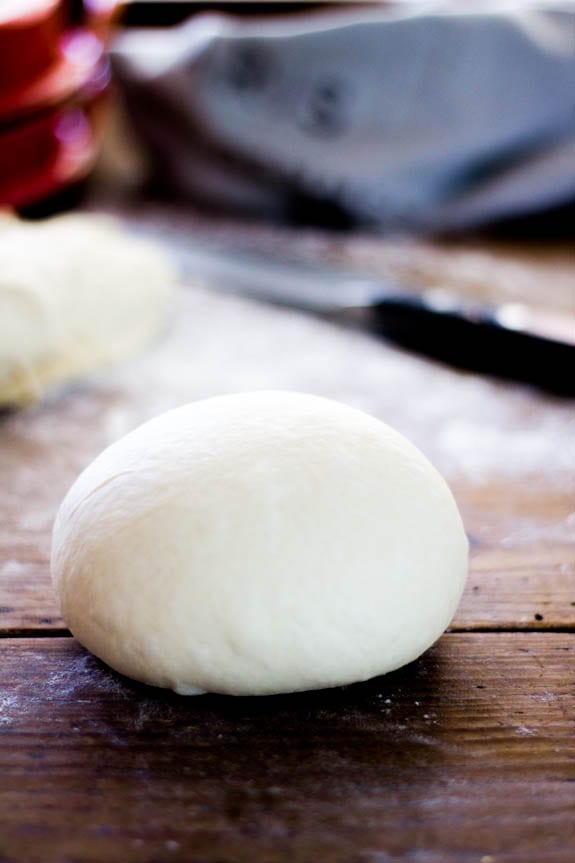
Step 3: Divide & Shape The Dough
At this stage, remove the dough onto a lightly floured surface. For two smaller loaves, divide the dough in half. For a single, standard size loaf leave it whole.
How To Shape A Round Sourdough Boule (Loaf)
Starting at the top of the dough, fold it over toward the center. Give it a slight turn, and then fold over the next section of dough. Repeat until you have come full circle to form a tight round. This creates surface tension for better oven spring. You can also try the envelope-style fold.
Tip: I used to get so nervous when shaping bread dough because you only had one chance to get it right. So intuitively, I would practice using a piece of Play-Doh or with a kitchen towel to go through the motions at my own pace.

Step 4: Choose The Right Baking Pot
If you want bakery-style results, bake sourdough bread in a Dutch oven. Why? Pots trap steam which is the secret to homemade sourdough with bold rise and golden crust. Without steam, the crust will set too fast casing the loaf to harden, split or bake unevenly. I’ve been there and it’s not pretty.
What If You Don’t Have A Dutch Oven?
You’ll need another oven-safe pot with a lid to create steam. It must be able to withstand up to 450 F/232 C (lid and handles included).
A few options:
- Enamel roasting pan with lid (or sheet pan to cover)
- Cast iron skillet with upside down roasting pan to cover
- Covered sandwich loaf pans
- Clay Baker or Romertopf (soaked first)
- Preheated baking stone w/ metal bowl to cover
Here’s what happened to me: I tried the “no pot” baking route in the past, using just about everything from pizza stones, to baking sheets with no luck! The crust always hardened too quickly. Then I tried various steaming methods to remedy this (e.g. ice cubes in a hot pan, spraying my loaves with water) but my personal oven could not retain enough moisture. The environment was always too dry. For me, using a Dutch oven was the only reliable solution that worked with consistent results.

Step 5: Second Rise (Proofing)
- After shaping, your dough needs to rise again. To do so, generously dust the bottom of your Dutch oven with cornmeal, or line with non-stick parchment paper to prevent sticking. Gently place the dough inside (see tip below)
- Let the dough rise for 30 minutes to 1 hour, or until it’s visibly puffy and no longer feels dense. It doesn’t need to double in size. While the dough proofs, preheat your oven to 450 F (232 C).
Tip: Want better shape and structure? Proof the dough in a floured, cloth-lined, 8-inch bowl or banneton instead of directly in the Dutch oven. This will contain the dough and hold its shape without spreading. Bread flour or rice flour is fine for dusting.
Step 6: Score The Dough
- Right before the dough goes into the oven, make a shallow slash down the center of the dough, about 2-3 inches long. Use a small serrated knife, sharp knife or bread lame. This lets the steam escape, and allows the bread to “bloom” or expand in the oven.
- Admittedly, this step is a bit nerve racking, so I don’t want to gloss over it. Be quick and confident. I’ll share what my sourdough mentor told me: “Slash with panache!”

Step 7: Bake The Bread
You’re at the finish line now! Bake on the center rack (lid on) for 20 minutes. Then remove the lid. Your bread will look pale and slightly shiny. Then finish baking (uncovered) for 40 minutes or until the crust is deep golden brown. The internal temperature should be 205-210 F/96-98 C.
Tip: During the last 10 minutes of baking, crack open the oven door to let the moisture out. This creates a crispier crust. Or, remove the bread from the hot Dutch oven and bake directly on the oven rack. The latter creates the crispiest finish.
Step 8: Cool & Slice
Cool the bread on a wire rack for at least 1 hour before slicing. Be patient! If you cut into it too soon, the texture will be damp and gummy. Life’s too short for sub par bread.


Final Thoughts
There are a gazillion sourdough bread recipes out there. No two loaves look alike. Start with this guide, master the basics and then branch out: try my golden sourdough focaccia recipe, this easy sourdough sandwich bread, or my one-bowl sourdough pancakes for breakfast! Once you have a few loaves under your belt, the process will become an imminent rhythm and you’ll become a sourdough pro in no time.
Sourdough Baking Schedule
- Friday Evening: Feed your starter, cover the jar, and leave it on the counter overnight. If you keep your starter in the fridge, it might need two feedings to perk back up (feed it in the morning & in the evening).
- Saturday Morning: Check your starter: if it’s alive and bubbling, you can make the dough to rise during the day. Or, feed it again in the afternoon to make the dough in the evening for an overnight rise. Remember to use the float test mentioned above to make sure your starter is ready to use.
- Saturday Morning/Evening (or whenever your starter is ready): Make the dough. Leave on the counter to bulk rise at room temperature. In the summer, if your dough rises quickly and you’re not ready to bake, cover the whole bowl with lightly oiled wrap and chill until ready to use.
- Sunday Morning: cut and shape the dough. Place in Dutch oven for second rise. Slash. Bake. Cool. Eat.
By signing up, you agree to receive emails from The Clever Carrot. Unsubscribe at any time.

Sourdough Bread: A Beginner’s Guide
- Prep Time: 13 hours
- Cook Time: 1 hour
- Total Time: 14 hours
- Yield: 1 loaf 1x
- Category: Sourdough Bread Recipes
- Method: Oven-Baked
- Cuisine: American
- Diet: Vegan
Description
New to sourdough? My easy beginner sourdough bread recipe makes the best artisan-style loaf at home with just 5 simple ingredients: bread flour, active sourdough starter, water, salt and olive oil—my signature addition—known for creating a light, plush crumb and a crisp golden crust. Follow my clear, step-by-step instructions and video guidance to bake fresh sourdough bread with confidence (even on your first try!).
Ingredients
- 150g bubbly, active sourdough starter
- 250g warm water (see Note 2)
- 25g olive oil
- 500g bread flour (not all purpose flour)
- 10g fine sea salt
- fine ground cornmeal or non-stick parchment paper
Notes, Tips & Equipment
- Weigh your ingredients with a digital scale for best results
- For a more soft and pliable dough, increase the water up to 300 g- 325 g total. Use a floured, cloth-lined bowl or proofing basket (instead of the Dutch oven) for the second rise.
- You will need a 5 1/2 or 6 quart Dutch oven for baking
- This recipe was tested with King Arthur Bread Flour, Gold Medal Bread Flour, Pillsbury Bread Flour
Instructions
Make The Dough
In a large bowl, add the sourdough starter, water and olive oil. Mix with a fork to combine, then add the flour and salt. Continue mixing until the dough becomes stiff, then squish it together with your hands to incorporate all the flour. The dough will be rough and shaggy.
Cover the bowl with plastic wrap, reusable wrap, or very damp kitchen towel. Let rest (autolyse) for 30 minutes to 1 hour.
After resting, return to the bowl and work the dough into a rough ball, about 15 seconds.
Bulk Rise (First Rise or Bulk Fermentation)
Cover the bowl with lightly oiled plastic wrap. Alternatively, transfer the dough to a high-sided dough tub. Let it rise in a warm place, ideally 70-75 F. The dough is ready when it no longer looks dense and has almost doubled in size.
Note: The bulk rise time will be different for everyone. For example, in the summer, expect ~2-4 hours @ 80 F/ 26 C. In the winter, ~10-12 hours @ 68º F/ 20º C. Watch the dough and not the clock.
Optional Step: Stretch & Fold The Dough
During the bulk fermentation, you can do a series of ‘stretch & folds’ to strengthen the dough. Start 30-45 minutes in: lift a portion of the dough, stretch it upwards, and fold it over itself. Rotate the bowl ¼ turn and repeat until you’ve come full circle (1 set). Do 1-2 additional sets, spaced ~1 hour apart. Click here for a step-by-step video tutorial.
Note: Dough made with 250g water will feel stiffer; 300-325g water will be more stretchy and elastic. Let it rest longer in between sets if it resists stretching.
Shape The Dough
Remove the dough onto a lightly floured surface. Starting at the top, fold the dough over toward the center. Turn slightly, and then fold over the next section. Repeat until you have come full circle. Flip the dough over, seam side down. Gently cup the sides and rotate in a circular motion to tighten the shape. The goal is to build surface tension to create a tight ball (too much flour will cause the dough to slide around).
Second Rise
Now the dough needs to rise again. If you’ve used 250g water, you can do a free-form second rise in the Dutch oven (if not, see note below). Line the pot with a piece of parchment paper (this is what I do) or coat with cornmeal. Place the dough inside, cover and let rise for about 30 minutes to 1 hour. It’s ready when slightly puffy, but not double in size. Preheat your oven to 450 F/ 232 C.
Note: If your dough contains more than 250g water, skip the free-from rise. Your dough will spread. Instead, use a floured, cloth-lined, proofing basket to help hold its shape.
Score The Dough
Right before baking, make a shallow 2-3 inch slash (or longer) in the center of the dough using a bread lame, razor blade, or small sharp knife. The cut should be ~1/4-inch deep.
Bake The Dough
Place the bread in the oven on the center rack (lid on) and reduce the temperature to 400 F/ 204 C. Bake for 20 minutes, then remove the lid, and continue to bake (uncovered) for an another 40 minutes, until deep, golden brown. All ovens are different; feel free to make minimal adjustments to these temperatures.
Check for doneness with a digital thermometer: 205-210 F/ 96-98 C for sourdough.
Remove the bread from the hot Dutch oven, and cool on a wire rack for at least an hour before slicing.


Comments
Nancy says
Question
I have only managed to get my starter to day four on several occasions and then all I end up with is a rubbery mast of the “mix” on top of the flour/water mix in my jar, please help, what is going wrong?
How do I correct this problem and move ahead to come to a full made starter, I’m not making out well with this process.
Any help would be gratefully received, thank-you.
Nancy
Ivan Williams says
I’ve had this issue too, during winter here in Qld.
I’ve been using 50g flour, 50g water.
I cut the water down to 35g for a couple of days and used proper bread flour..
It flattened again after day 9.
So discarded 2/3rds of it and using the measure above it went gang buster.
Wendy says
Thank you so much for your wonderful,detailed recipe. My bread improves with every try. I’m still learning but I’ve even given a loaf or two away as gifts and heard great things. Thanks!
Wendy says
Thank you for your recipe. I have relied on it. I appreciate the detailed explanations and the helpful tips. I am still just a beginner but I am getting better with every loaf. I’ve even s
Tara Crean says
I’ve been trying various recipes for a few months now and this is the first one that has produced a result that I’m super happy with – it gives great oven spring, texture, colour and flavour.
Emilie Raffa says
Thank you for taking the time to comment, Tara! I appreciate your feedback AND I’m super thrilled you are happy with the results 🥰
Renu says
I highly recommend this recipe. After trying so many recipes, i always ended up over fermented dough. But I stumbled upon this recipe (i’m glad i did) i am not going back to any other recipe. I have done inclusions, even left it to cold ferment before baking , every time I get nearly perfect results! Thank you for sharing this magical recipe :)
Emilie Raffa says
You’re very welcome, Renu! This is excellent, helpful feedback. Thank you 🥰
Eleanor says
This is an incredible free resource. Thank you
Fingers crossed I’m eating my own sourdough soon🤞🏻
Steve S says
Is the first autolyse done after the starter has been incorporated into the dough, or done with only flour?
Emilie Raffa says
Hi Steve! It’s done after the starter has been incorporated into the flour.
Grace says
Can you use the discard for another loaf adding to it as with the original loaf
Emilie Raffa says
Hi there! Can you clarify this comment with additional info? I’m not sure I’m understanding it correctly. Thanks!
Elizabeth says
I LOVE this recipe!!! I’ve used it several times! My only question is can I double it to make it larger? I have a large Dutch oven for it. Or could I double the dough, cut the dough in half, and bake two loaves?
Emilie Raffa says
Hi Elizabeth! I would double the dough, cut it in half, and bake 2 loaves- you’ll have more consistent results.
Melissa says
New to sourdough but want to create my own starter! When I follow the instructions for your starter and am ready to make a loaf, do I still need to feed it again before turning into bread? How do I keep the starter alive so that I always have starter ready for when I want to bake bread? So overwhelmed with how to make sourdough!
Charlene K says
My first time making sour read was a success! Well the second half of my dough. The first I burnt the bottom in the Dutch oven so I used an air fryer insert the second time. The instructions were great! So clear I kept coming back to them throughout the process.
MARTHA GRAF says
LOOKS VERY INTERESTING. .Y HUSBAND IS ON A GOUT DIET WHICH DOES NOT ALLOW YEAST. THERFORE I NEED TO LEARN TO MAKE SOURDOUGH BREADS.
virginia austin says
I just received your Artisan Sourdough Made Simple. I am confused in your on line recipe for sour dough it calls for 2 T olive oil.
In your book it don’t call for the olive oil, I would like to know do I use olive oil or not. Your book is very nice can’t wait to try the recipes.
V. Austin
Emilie Raffa says
Hi Virginia! They are two completely different recipes, both beginner level. Try them both for comparison!
Bruce Vincent says
Hello – I am brand new to this, but determined. STEP 6 – you say to preheat the oven to 450 deg F., score the top w/ serrated knife. Then it says put cover on pot, put bread in oven and reduce oven temp to 400 def. F and bake for 20min. Why do you preheat to 450 and cook at 400? Did I miss something? Are you assuming that I know something about it? Like I said, I am brand new to this.
Jenny says
Hi, I am relatively newer to sourdough and only been doing it for a couple months… I’ve never seen a recipe for a loaf with olive oil. What does the olive oil do?
Emilie Raffa says
Hi there! Welcome. Olive oil is a “tenderizer” and adds a beautiful, plush texture to the interior crumb. It also increases the crispiness of the crust.
Donna says
She’s didn’t answer your question but here is my u derstanding , for what it is worth lol
I jumps starts the cooking process like sets the dough. Then by reducing the temp helps it fully cook for then on. I hope this helps.
Tara says
Im a beginner and found your recipe! Seemed easy to follow. I didn’t read to the comments and I’m hoping I didn’t ruin my loaf. I followed this recipe but used my all purposes flour. Is my dough ruined? What do I do now?
Emilie Raffa says
Not at all! If you used the lower amount of water in this recipe (I’ve given a range) the dough should still be easy to handle. For reference, all purpose flour absorbs less water than bread flour which sometimes, not all the time, can cause wet and sticky dough (this also depends on the rest of formula). This recipe has a bit of wiggle room.
Helen Roberts says
I was given this recipe by a local (to me) cook when I first started making sourdough 10 months ago. It is my go-to recipe as it produces a wonderful loaf every time, well worth 5 stars.
Emilie Raffa says
Excellent! Thank you so much, Helen. I really appreciate your feedback 🥰
Marcy says
I’m sure you’ve answered this question a bunch of times but I haven’t found the answer yet. When you remove half of the starter each time can you just add it to another jar to have another starter going? It just seems such a waste to take 1/2 out and not do anything with it. Crazy
Dylan says
I’m also new to sourdough and had the same thought. I’ve found that you can bake with the “discard” instead of “bubbly, active starter,” it just takes a lot longer to proof (overnight for me). My starter is 225g. I use 150g for this recipe (leaving 75g starter) and add 75g each of flour and water to get back to 225g. Refrigerate the starter and repeat every week.
Pam says
Hi. I’m also new to sourdough and felt the same. I found the answer to this in my research before starting. It said you can absolutely use the discard to beging another starter. And I did and it works great. You can also use the discard for other things. I used mine to make pancakes and pizza dough. Both turned out great.
Emilie Raffa says
Hi there! If the amount of starter you’re removing is in good condition, it can 100% be repurposed. The most common application is to incorporate it into a sweet or savory sourdough discard recipe, like pancakes or crackers. Other bakers save it to make new starters to share with friends and family. I recommend reading my companion articles below for further understanding:
– Sourdough Discard 101: Recipes & Faq’s Answered
– 20+ Sourdough Discard Recipes
Shahrokh says
Thank you for the recipe, I did not make it yet . But I will .
I am trying to make the starter for last two days it is ready , but I have to make sure it is good .
Emilie Raffa says
That’s the most important part- good luck! Strong starter = good sourdough.
Tiffanie says
😋
Tonya says
I am new to making sourdough and used the recipe in your book Artisan Sourdough Made Easy. I wasn’t as successful as I am with this recipe and instruction. I like the details for timing and what to do if not ready for a certain step. I think the olive oil is a good addition. I have made this twice now and both have good height and flavour. I think I still need to work on my scoring and baking times in my oven a little more. Thanks for sharing your expertise.
Emilie Raffa says
You’re very welcome! I’m glad you found what works! Isn’t the olive oil a nice? 🥰
Carson Trevino says
Finally!!! This is probably the fourth recipe I’ve tried to make sourdough. Granted, I finally realized after this success that I need a lower hydration recipe because it’s super humid where I live.
All this to say, this recipe produce a soft , plush crumb, a soft crust, and a delightful soft tang that I’m going to try to strengthen next batch with a longer cold ferment.
Thank you for this recipe!!
Emilie Raffa says
That’s it. You nailed it. Beginner loaves should be low-hydration (especially in humid weather!) because the dough is softer and easier to handle compared to the more wet, glamorous and super-stretchable doughs you see on social media. I’m thrilled it turned out well for you! 🥰
AW says
Hi “After the dough has rested: return to the bowl and work the dough into a rough ball, about 15 seconds.” should the time be 15 minutes? Bread is tasty but seems not fluffy.
terri says
No she means 15 seconds for the final shaping. If your bread is not fluffy do not omit the stretch and folds (I’m surprised she says it is optional … it isn’t!!). Ideally, do 4 sets of stretch and folds spaced 30 minutes apart for fluffy bread (also known as oven spring). If you don’t know how to do stretch and folds, watch a YouTube video – there are many out there. I promise you it’s the secret to fluffy bread. I learned this the hard way.
Emilie Raffa says
Hi there! In Step 1, the 15 seconds refers to the approximate length of time it should take you to form the dough into a rough ball (in preparation for the bulk rise). You are not doing a full-on knead here, although you are more than welcome to do so if you feel called to it. Kneading exclusively doesn’t guarantee fluffy bread. Adequate gluten development, proper fermentation, shaping and temperature do too (plus, other variables). As another reader mentioned, you can incorporate the stretch and fold technique for added dough strength. You can watch my stretch and fold video here.
Valerie says
Hi! I’m very new to this and the first loaf of bread was a flop, I am trying your recipe now.
This may sound dumb but here it goes anyway:
I am wondering, what do you do with the discard? Do you literally throw it out? Can you just keep adding the discard to another jar and keep it in the refrigerator? Like I said I’m very new to this so any advice you can give is greatly appreciated!
Thank you
Valerie
Lizzi says
Yes you can but you’ll have to wake up any portion of discard you refrigerate and it doesn’t last forever in the fridge. I like to make and freeze sourdough chocolate chip cookie dough with my discard. Endless cookie hack.
Jim N. says
I put it straight into a frying pan and make a “pancake” out of it, then top with fruit and yogurt.
If my grandkids are here, I make pancake batter with it.
There are so many different things you can do with your discard.
Emilie Raffa says
Hi Valerie! If your discard is in good condition (not smelly, discolored, super watery or old), you don’t have to throw it out. It can be incorporated into a sourdough discard recipe. Have a look at my articles below for further understanding!
– Sourdough Discard 101: Recipes & Faq’s Answered
– S”>20+ Sourdough Discard Recipes
andrea Hofer says
Would a 3.5 dutch oven work for baking this bread?
Emilie Raffa says
Yes, it should work. It will be a bit snug but that’s OK!
Barb says
I had this same issue, the bread was delicious but no sour taste. My daughter recommended feeding the starter with whole wheat flour and I haven’t had a non-sour loaf since then!
Belinda Rodriguez says
Love the bread and the easiest recipe I have used to date. My only issue is scoring. Just can’t seem to get it right and bread does not split as it should.
Jim says
Great recipe. I tried 250 300 and 325 g of water and I like the 325 the best. Has larger air pockets. All are great. I made an asiago cheese loaf and it was fantastic. Thanks so much.
Tonya says
My sister sent me this recipe and it was great! The only change I tried was to add some honey. I baked it in a loaf pan and had to use a piece of foil over the top the last 5 to 10 mins, my bread was getting very dark.
Would this recipe work to add inclusions or would you suggest changing anything? Thank you for a great recipe!
CK says
I love your page and tips! I am very very new at this and hoping for some feedback/tips. Mine turned out kind of flat and dense and doesn’t seem like it has fluff/ air. It aMSO isn’t golden brown on top other than a few areas. Everything seemed on track up / as described until the second rise. I don’t think it got puffy when I went to bake it but it proofed for 1hr. How do I know if it’s my starter or my rising process (or patience)? I appreciate any feedback!
Cheri says
I made my first loaves using your techniques. I did one regular loaf and one using 300g water. They both turned out awesome. But I was wondering how to increase the sour flavor.
Barb says
I had this same issue, the bread was delicious but no sour taste. My daughter recommended feeding the starter with whole wheat flour and I haven’t had a non-sour loaf since then!
Chelsea says
I always cold-proof my sourdough in the fridge overnight. This enhances the sour flavor and I think makes for a better finished product all around. I follow all the instructions up to the second rise- I just do the second rise in the fridge for 10-12 hours. The next morning I score the dough and follow the baking instructions. It does take longer, but I think it is well worth it to get that delicious classic sourdough flavor.
Claire says
Hi Emilie
Thank you, I have just made my first loaf and it is awesome. What do I do with the starter now? I will not make another loaf for a week so should I just feed it and leave it in the fridge until I am ready to make another loaf? Then do I take it out of the fridge the day before the bake and feed it again and leave on the counter top? Many thanks
Felicia A Estores says
How do you store your starter once you made it successfully?
Thanks
Nicole says
Hi there – doesn’t matter if I use kosher salt vs sea salt? Thank you!
Tricia Earl says
I used your step by step sourdough starter recipe, including the handy daily print out guide and my first boule came out perfect! I am over the moon! Question, to keep my starter going, how much do I discard every day (when using it more often) and then how much do I discard if I refrigerate and feed it weekly? Thank you!!
Teresa says
Hi Emilie!
I am new to sourdough. Thank you for your videos, tips and beginner’s guide for a sourdough starter. Finally, my sourdough is active and I cannot wait to use it.
Maria says
So 50g and 150g of starter? No difference? Does it change bread consistency etc? If not, why use more when there is no need? Thank you
Maria says
Hi can I make a double or triple recipe then divide dough after the bulk rise? Do the times differ? Thanks
Georgina Falzon says
Thanks so much for this! Before trying to make your starter, I’m wondering if I can get my starter to liven up again. It had hooch on the top of it from being starved in the fridge for so long, so I removed the hootch as you suggested, and I fed it. It’s been sitting for almost 24 hours on my countertop, but it’s about 78 degrees in my place, is that OK? What do I do now? How do I know when it ready to use again and do I need to keep going through the discard process? How will I know when to stop?
Janet says
Thank you for advising me to add a little whole wheat to the sour dough starter, I stuck with it and it worked like a charm. I’m ridiculously proud of my first loaf! I’ve tried to post a photo but haven’t been able to.
Barbara says
My sourdough starter exploded on the 6th day and only left about a third of the starter in the jar. Can I still use it?
jules says
I just made my second loaf with this recipe and it tastes great! I’m so happy that I’m able to make sourdough at home. However, despite using the 250g of water, my dough is very sticky and keeps spreading during proofing and in the oven. I can’t seem to get a very high dough because when it grows in size, it grows out instead of up, and when I take it out of the bowl to shape it or move it, it spreads.
Any tips on how I can get closer to the loaf I see in your pictures and videos? Thank you!
Melissa Teoh says
I’m on the step for Bulk Rise. the dough is very sticky and unable to do work on. What did I do wrong? What shall I do next?
Marilyn says
I used this recipe to make my very first sourdough loaf. It seemed much less complicated than others I’d looked at. I cut the salt in half and measured with cups rather than by weighing, so I wasn’t sure how it would work, but it turned out perfect! It’s a keeper.
Steve says
Hello Emilie,
I have used your book with much success in baking my sourdough bread. I’m researching the benefits of adding both diastatic malt powder & barley malt syrup to my rye sourdough bread for the qualities they add to the final bread for better rise & shelf life respectively.
What would be the percentages for each ingredient?
I would be interested in your opinion.
Thank you in advance for your advice.
Best regards,
Steve L
Ita says
Hey!
I’m a new baker and just got your book I’ve been working through the beginner sourdough recipe and I’m currently on my third try. I’m really enjoying the process, but I’ve noticed that my loaves are still coming out a bit dense inside.
I’ve been following the recipe from the book, but I noticed it’s a little different from the method you shared online for example, the version online includes oil, which isn’t mentioned in the book. That got me a bit confused about which method to follow.
I’d love some guidance on how to improve my crumb and get a more open, airy interior. Would adding stretch and folds help? And if so, where in the process should I incorporate them?
Thanks so much, looking forward to baking better!
Wade says
A friend gave me some starter from Montana (I am in MN) years ago when I said I wanted to try sourdough, I have been using that “same” starter since then, and have sent it with friends all over the country.
This was the recipe I first tried, knowing nothing, and it has worked perfectly every time.
I know it by heart, but refer back to my printed copy every now and then. I came back today because my copy is so stained/torn/unreadable I needed to print out a new one.
I have sent many people here for instructions, because they are so clear and thorough.
Thank you so much for this resource.
Jinte Laarmans says
Hey there,
how do I plan the dough if I want to let it rise overnight?
thanks
Emilie Raffa says
Hi there! What is your current ambient temperature? You’ll want to start there. Then we can dial in on timing.
Rhonda Gilmore says
My sourdough turned out beautifully!
Emilie Raffa says
Congrats Rhonda! Thank you for sharing this with me! 🥰
Destiny Ramsey says
Why did I just barely have enough starter for the bread recipe? How am I suppose to keep a starter going if I don’t have any to spare? Should I double the starter recipe next time?
Emilie Raffa says
Great question. For context, all bakers keep different amounts of starters to begin with. There are a multitude of reasons for this including overall preference, the specific recipe they’re following, baking schedule, how much they want to manage etc. A good rule of thumb is at least 1 cup or ~236 g. This way, you’ll have enough for this recipe (150g) and then some leftover to feed again to keep your starter alive, vibrant, and ready to go for next time.
If you ever feel “short” on starter, which I’m sensing is the initial reason for this comment, you’ll need to build it up. To do so: feed it 1x/day (over the course of few days), only discarding a small portion in between each feeding until you reach your desired amount. Hope this helps!