My easy homemade sourdough cavatelli pasta is made by hand with fine semolina flour and sourdough discard (no egg). They’re soft, tender, and irresistibly chewy. Choose from a same-day or overnight fermentation option to deepen the flavor. This is a small batch recipe (feeds 2-4 people).
I’ve been making homemade sourdough pasta for over 5 years, and here’s what I know from consistent practice: producing large batches of small, hand-formed pasta shapes (like cavatelli, tortellini and pici to name a few) is an Olympian sport.
I realize my small batch solution isn’t novel. My intent is to emphasize its efficiency!
With just a small lump of dough, you’ll gain enough practice and repetition to master the cavatelli shaping technique without the overwhelm of large scale pasta production.
More importantly, scaling back will inspire you to make them again. This recipe feeds 2-4, depending how hungry you are (they’re filling). The addition of sourdough starter in my opinion tenderizes the dough.
And to feed a crowd? I’ve been testing this cavatelli maker from Italy with my youngest son. We made 2 lbs. of soft, irresistibly chewy sourdough cavatelli in under 10 minutes. Tossed with my famous Ragù Bolognese sauce it was very, very good.
Good To Know:
- Use fine semolina flour. There are two types – fine and coarse. Choose fine semola rimacinata for best texture.
- Don’t use cold water. Semolina is a thirsty, high protein flour; warm water softens the dough and makes it easier to knead by hand.
- Sourdough starter (active or discard is fine). Use a 100% hydration starter or thicker, for a pliable pasta dough that holds its shape.

How To Make Sourdough Cavatelli, Step-By-Step Recipe
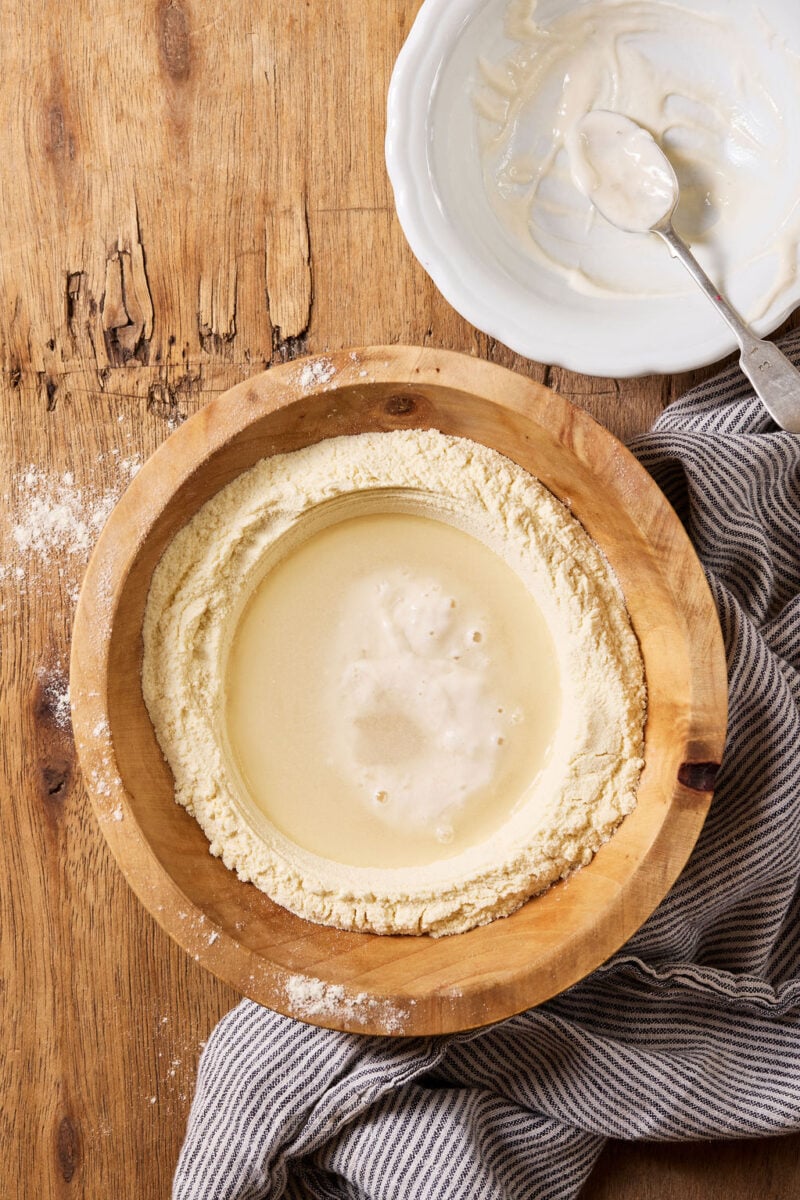
Step 1: Make The Dough
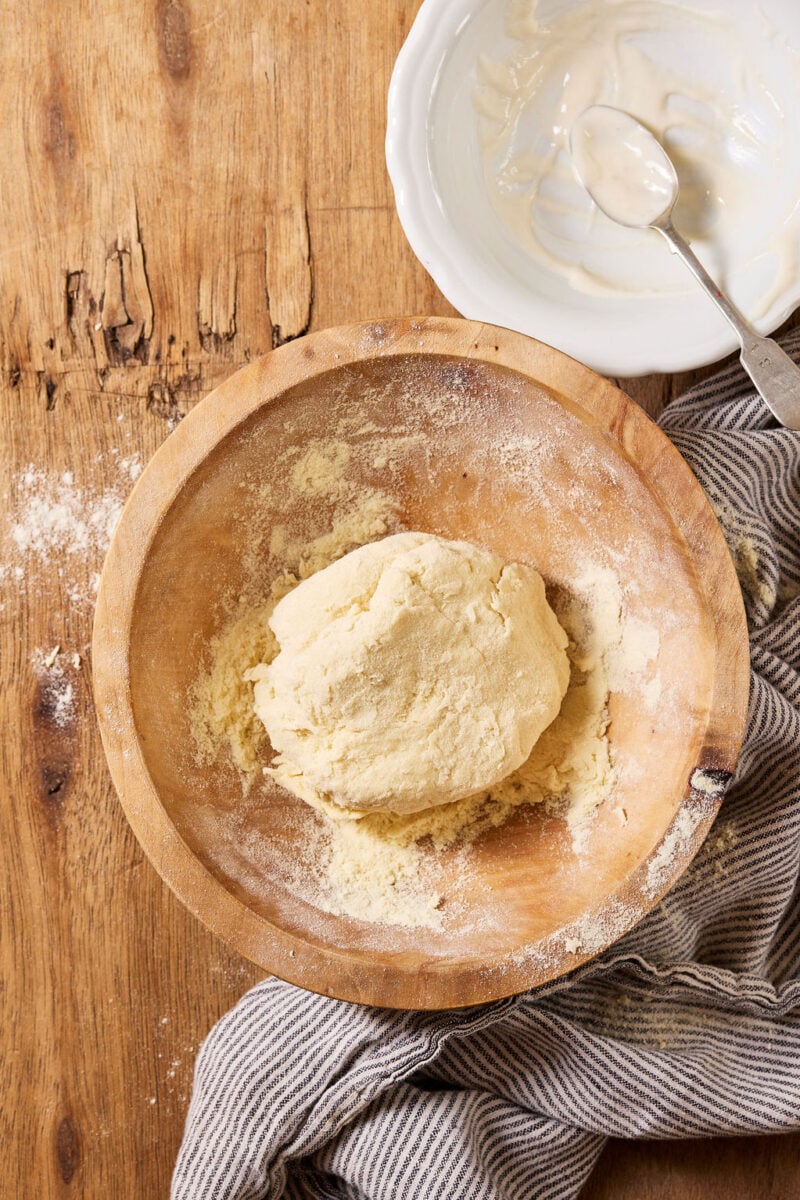
To Start: Add fine semolina flour to a wide shallow bowl. Make a well in the center (I use the bottom of a small bowl and move it around in a circular motion). Add warm water and sourdough starter. By the way, traditional Italian semolina pasta dough is usually egg-free, so that’s what we’re doing here.
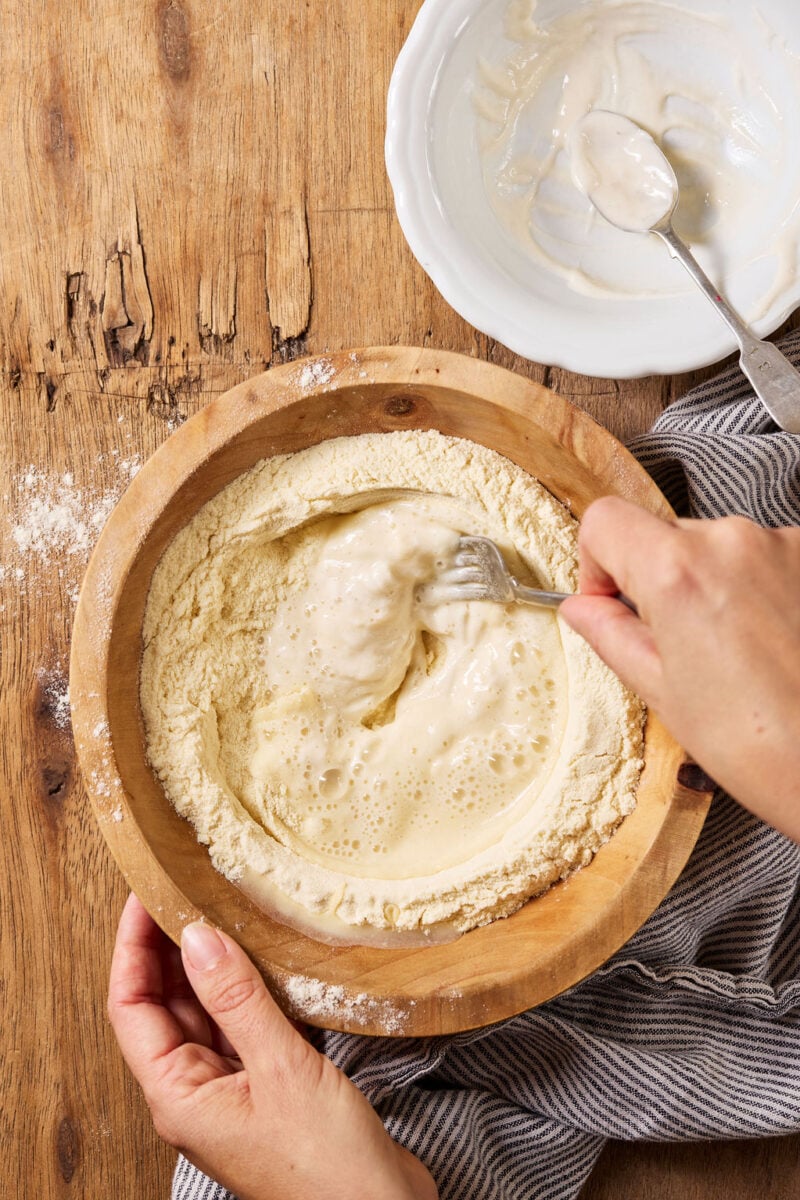
Start mixing. The texture will look like creamy at first, and then turn crumbly like wet sand. You’ll then smush this “sand” together to form a rough dough. It will feel oddly stiff and gritty at first (nothing’s wrong, you’re doing it right). But don’t compare it to my regular sourdough pasta made with Italian 00 flour and eggs. It won’t feel the same.
Now, cover and rest the dough for up to 10 minutes while you clean up. Most recipes skip this brief resting step, yet I’ve found that it’s the secret to making stiff dough easier to knead by hand! Why? The flour needs time to absorb the water. This makes the texture softer and easier to work with. Just look at how the dough transforms once you begin to knead it…
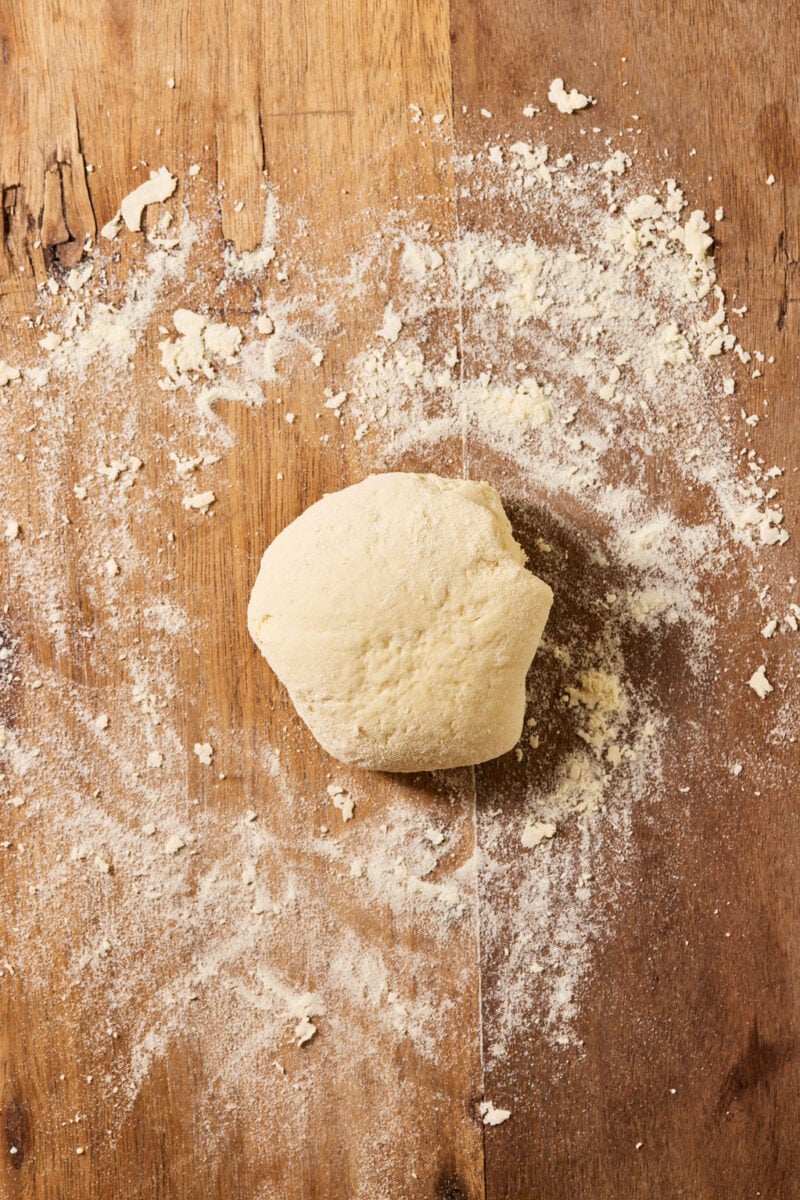
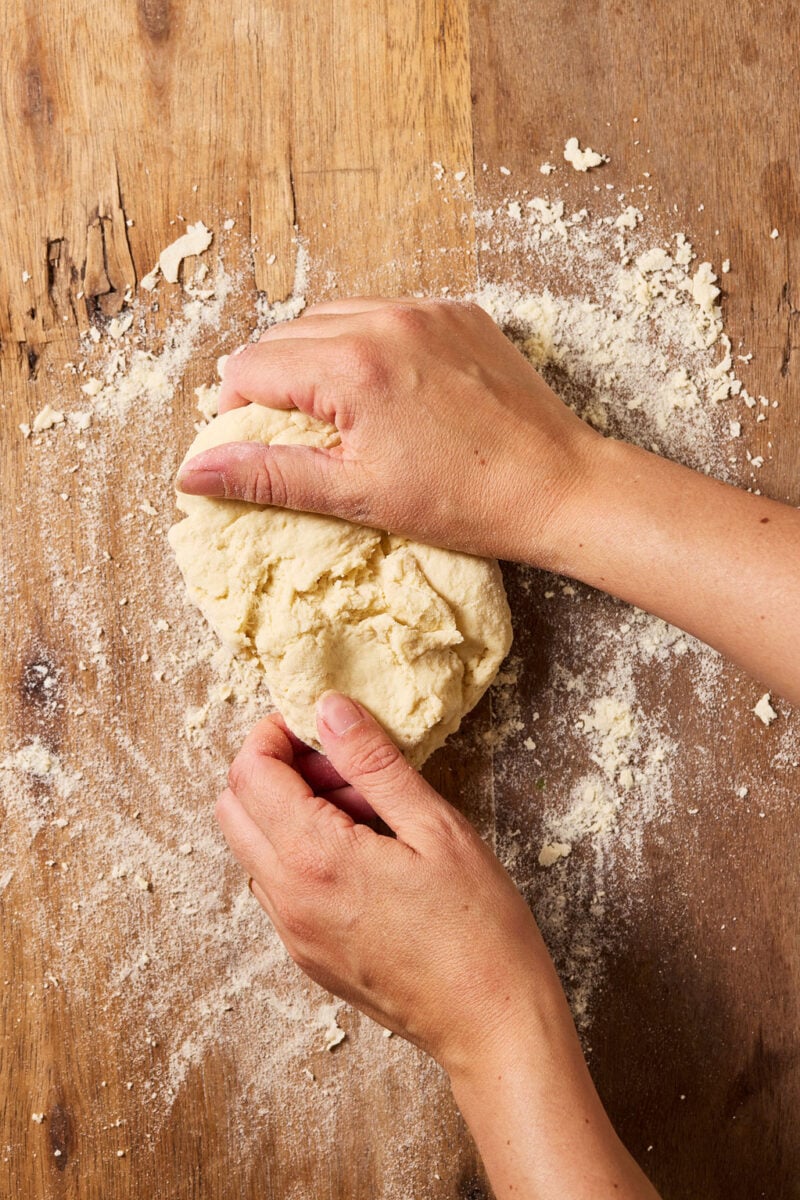
Knead the Pasta Dough
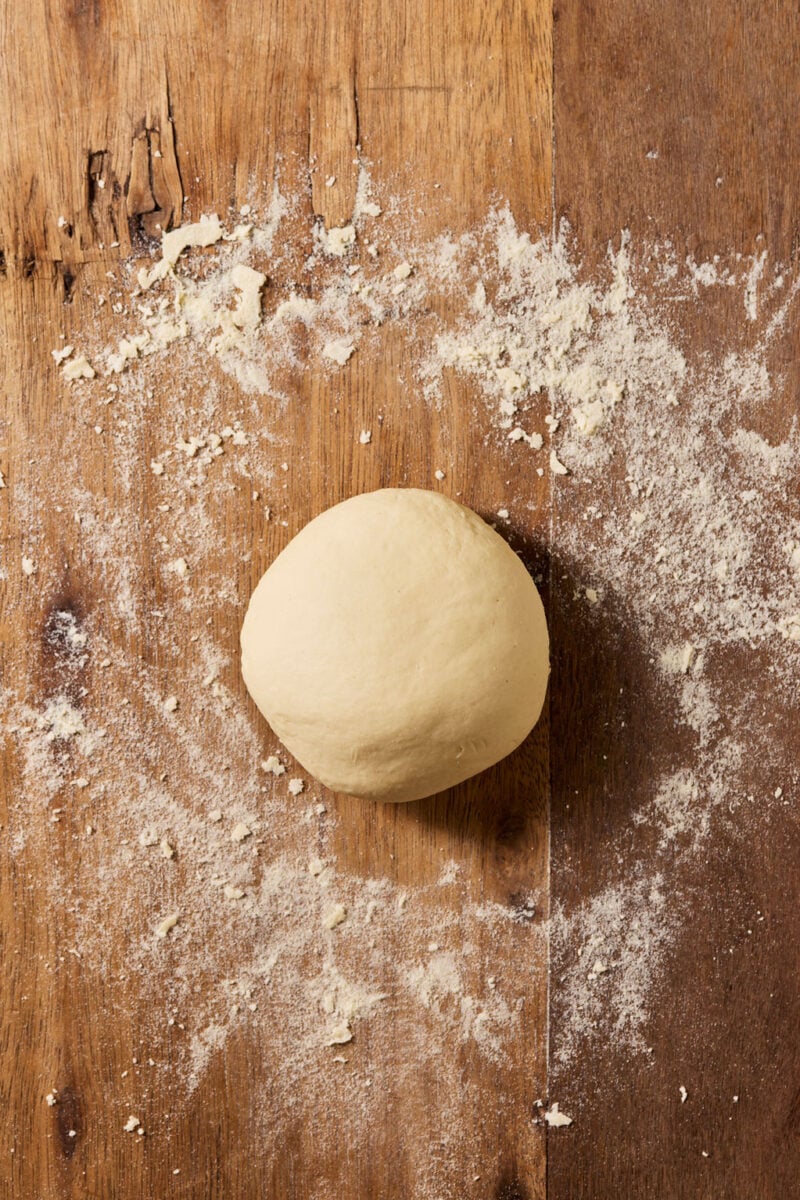
Do this by hand until it goes from gritty, to soft and chalky on the surface. That’s when you’ll know it’s done. About 2-4 minutes or so? I do this by feel.
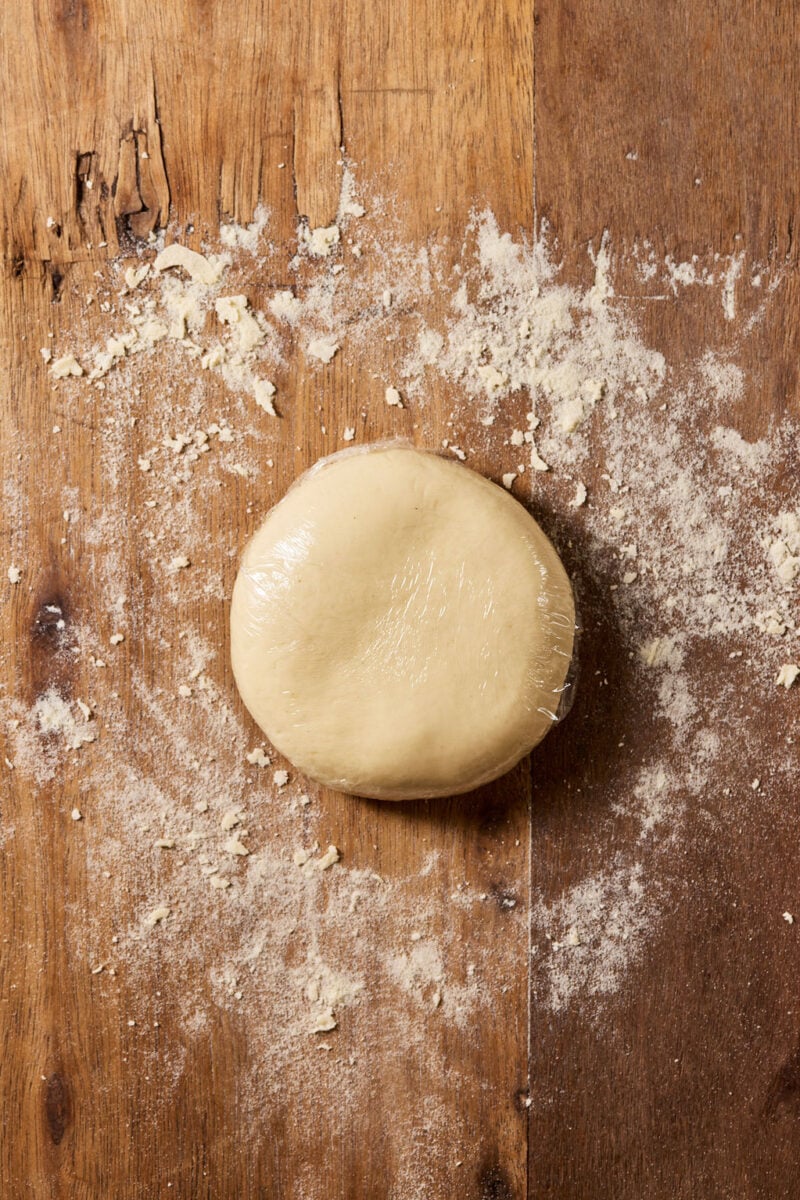
Then flatten into a plump disc, cover with plastic wrap and rest for 1 hour for same-day sourdough cavatelli (or chill overnight in the fridge to ferment). I use this time to make a nice pasta sauce or defrost one from the freezer. The dough is done.
Step 2: Roll & Cut The Dough
The process is just like making gnocchi.
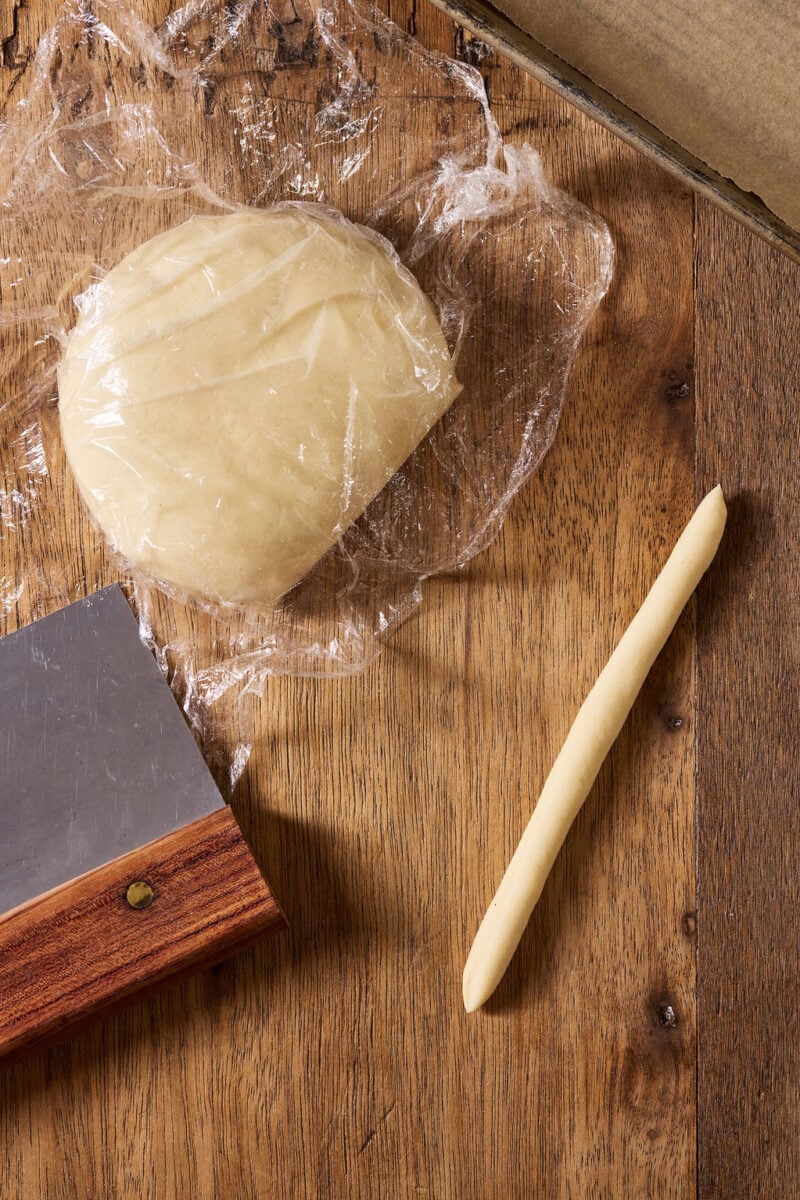
Cut off a finger-width strip of dough. Roll into a long rope (e.g. thicker than a pencil, but slightly thinner than a Sharpie). Size matters! In the past, I made my ropes way too thick which produced extremely doughy cavatelli when cooked. I didn’t take water absorption into account. On the flip side, too thin, and the cavatelli will tear when rolled down the gnocchi board.
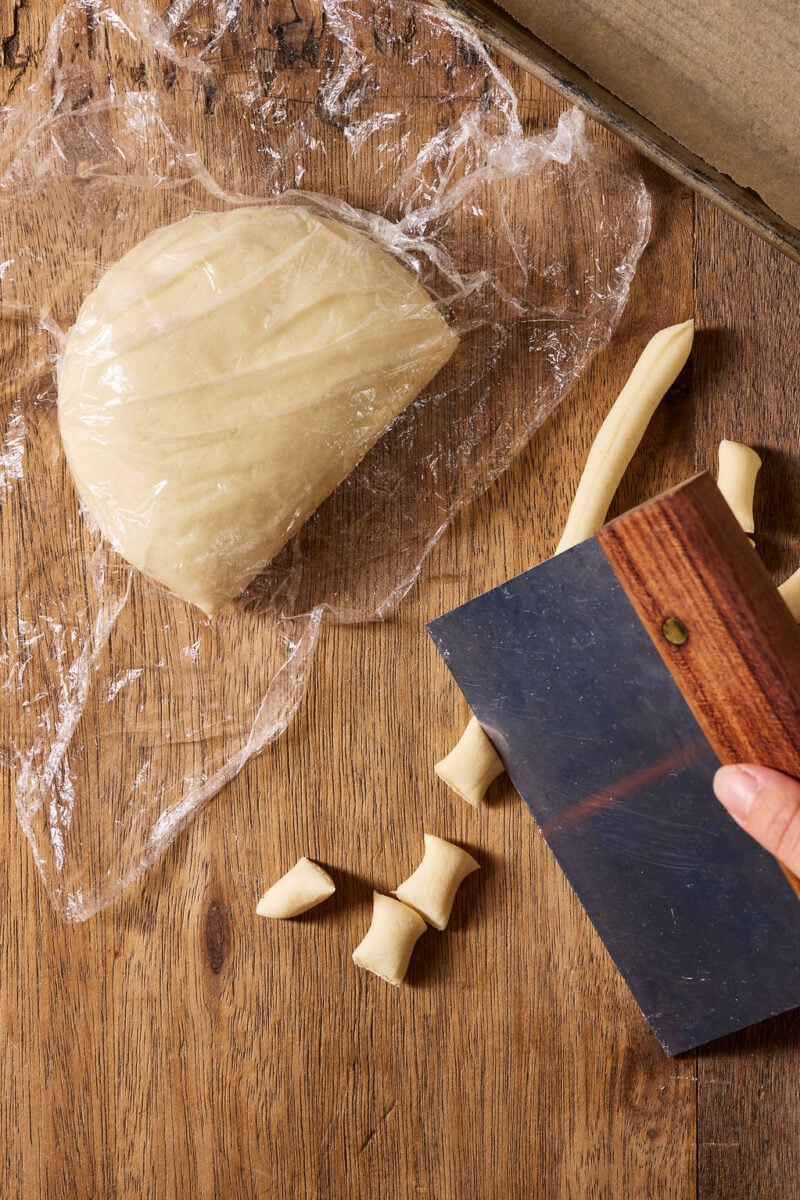
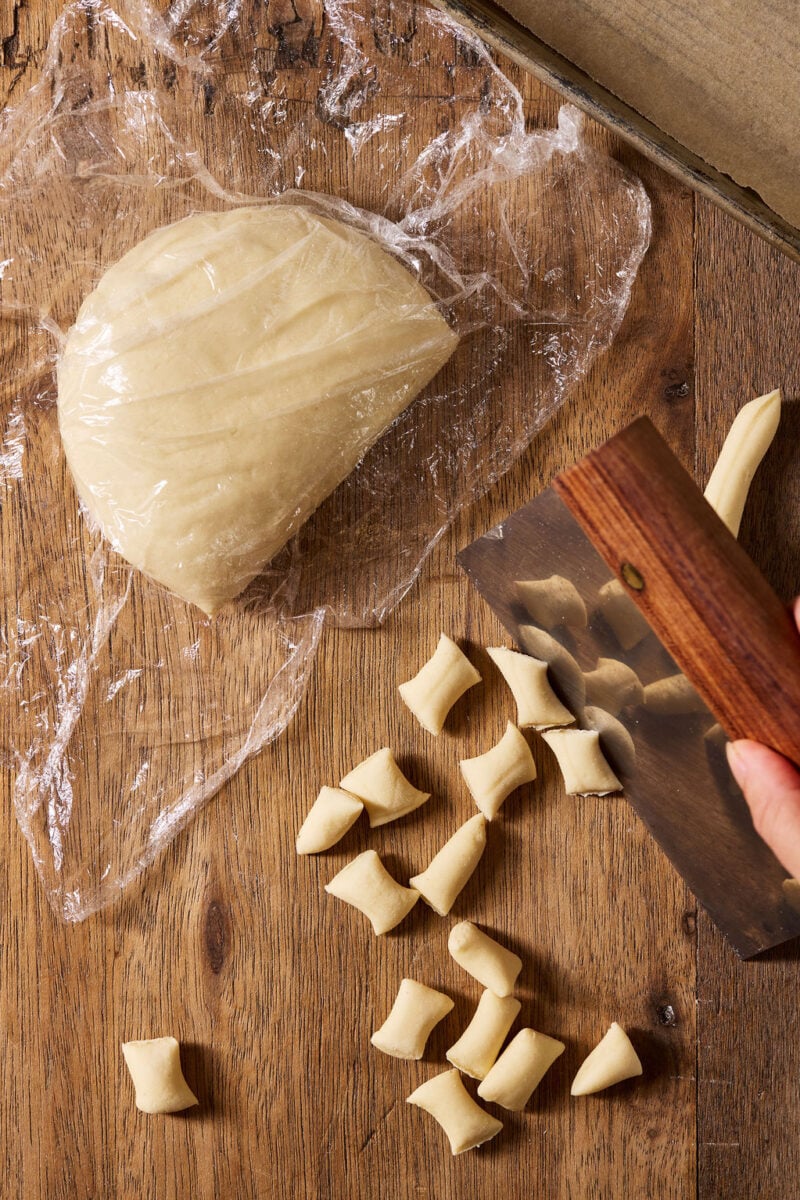
To finish, cut across into 3/4-inch pieces.
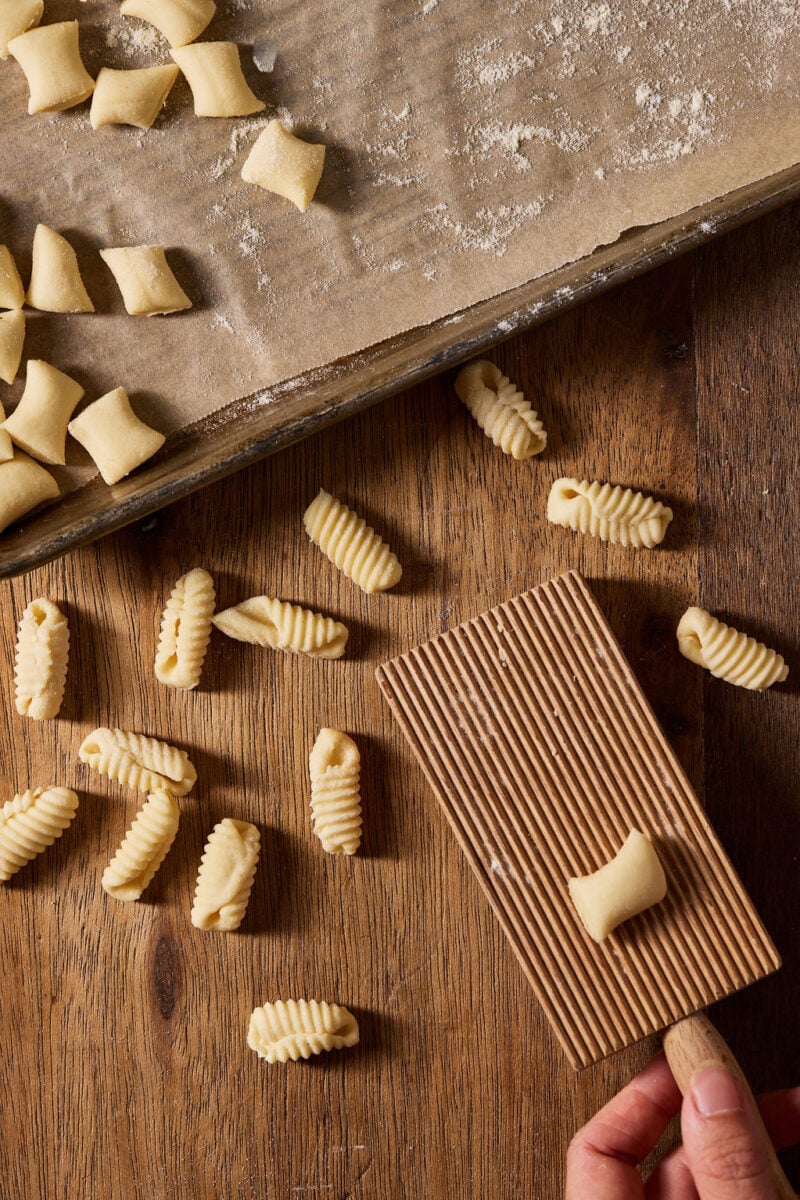
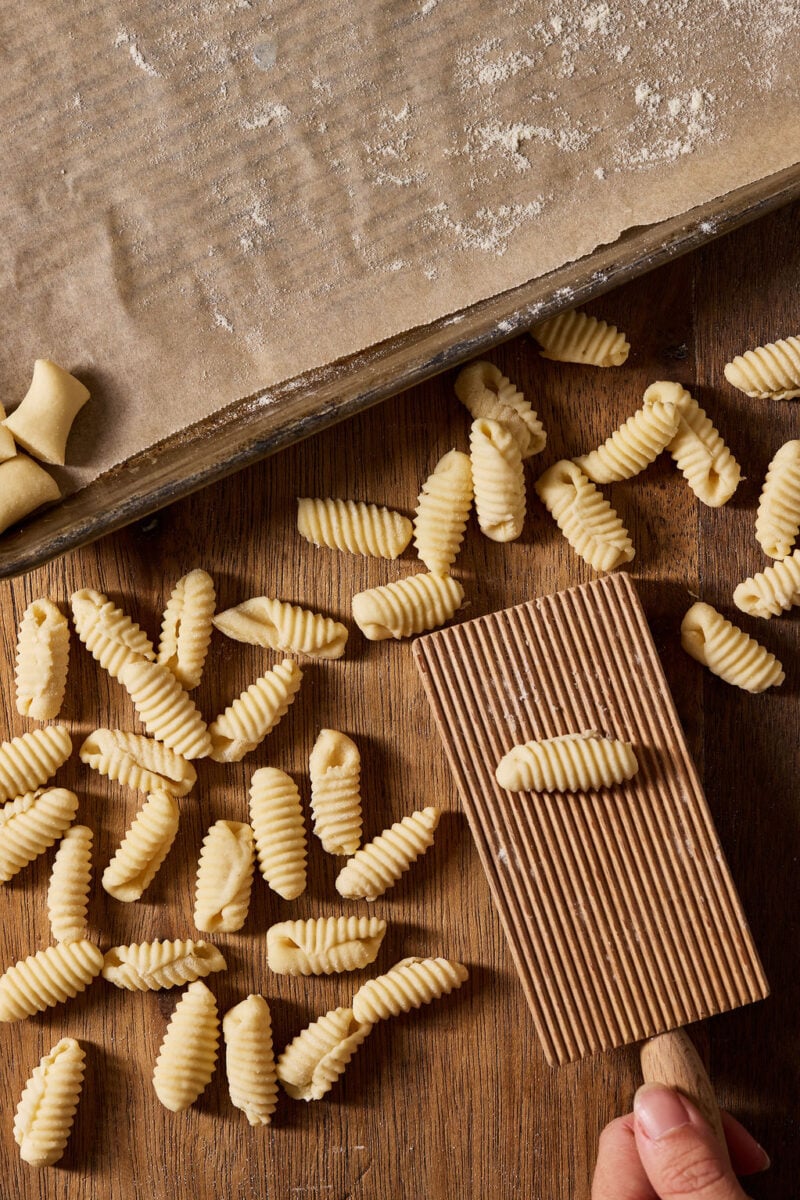
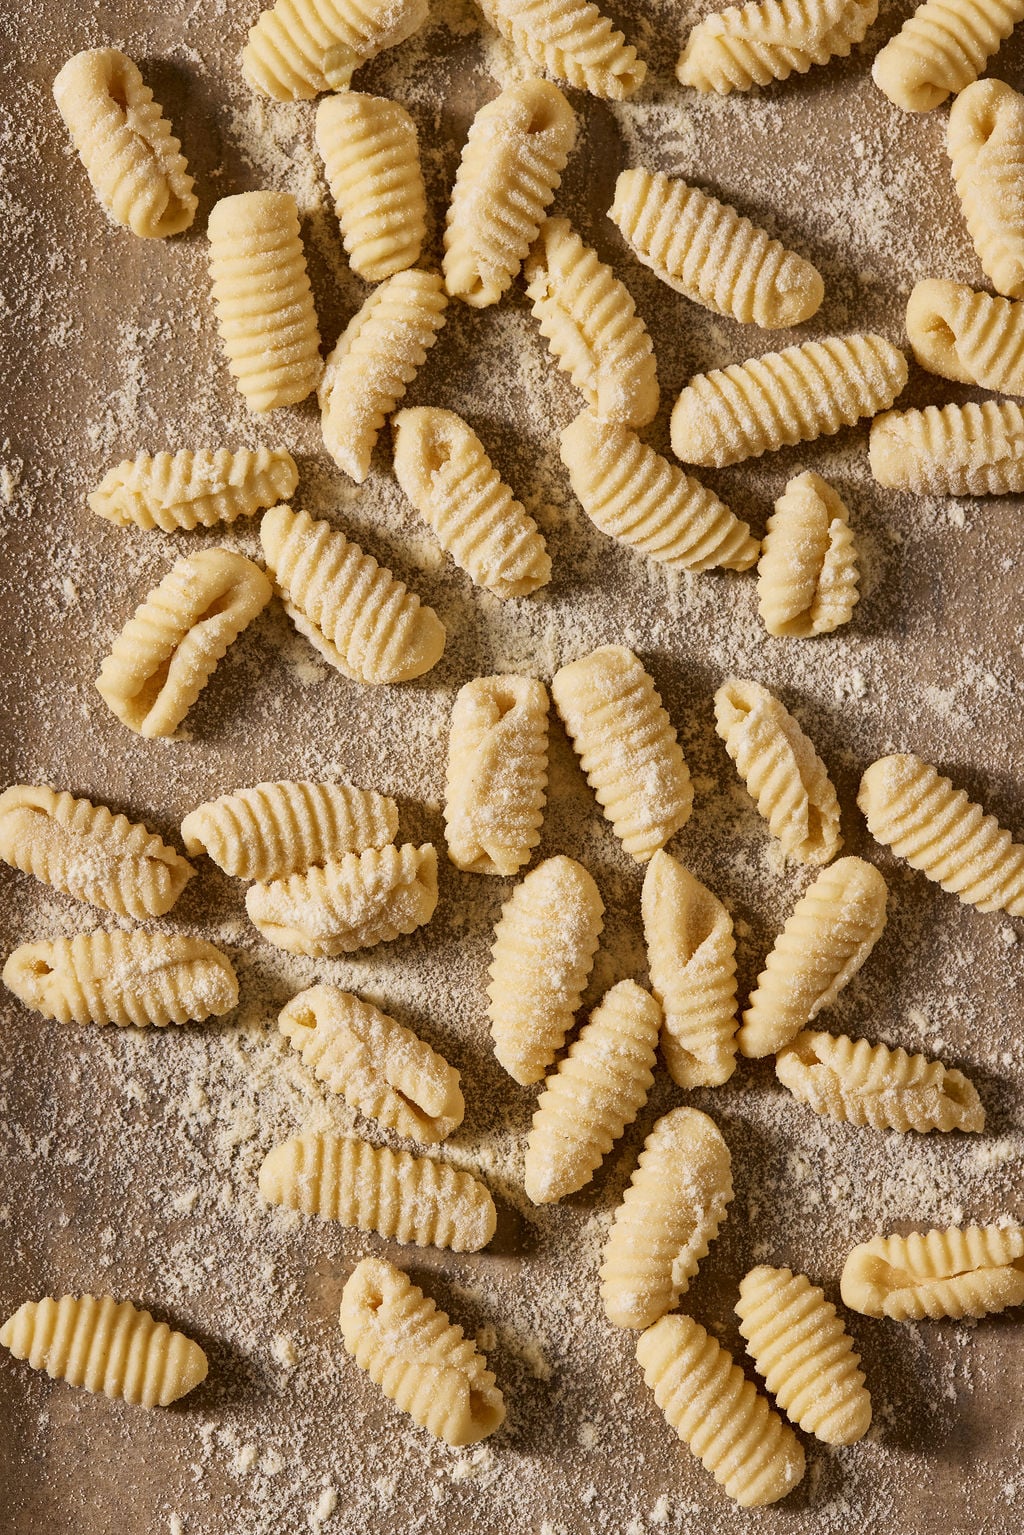
Step 3: Shape The Cavatelli
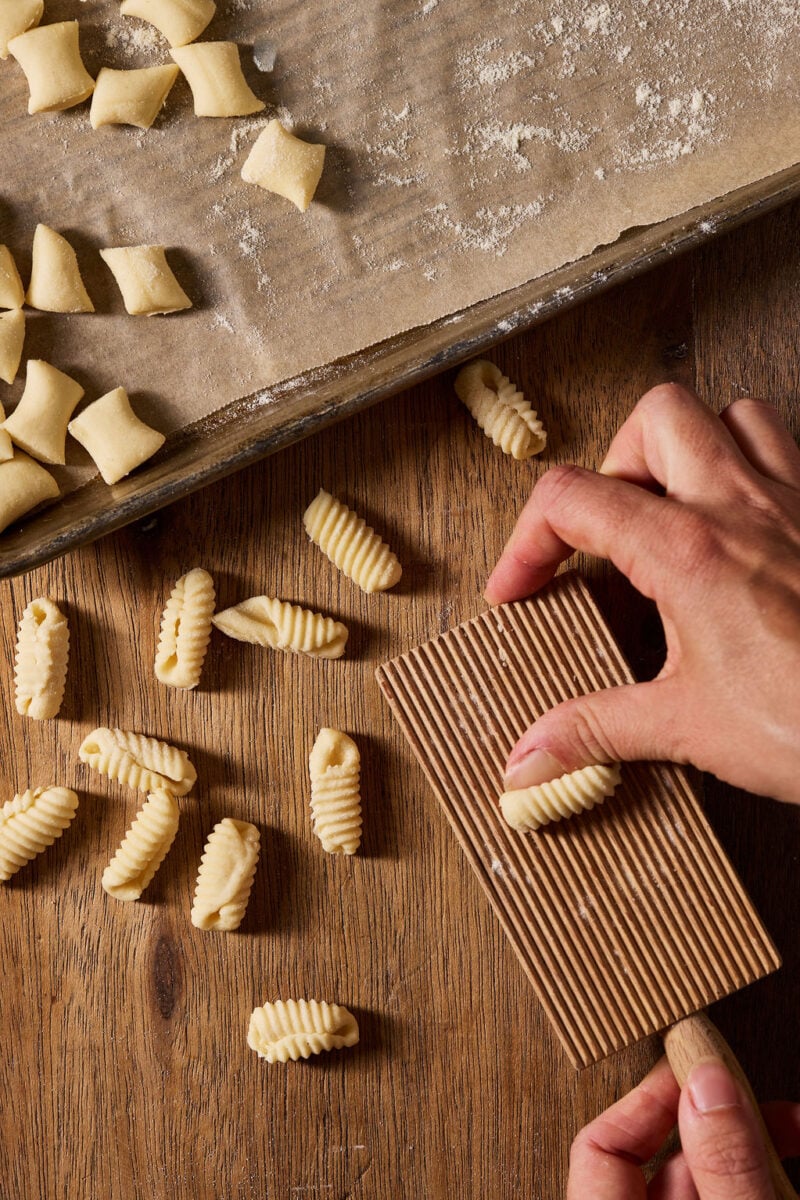
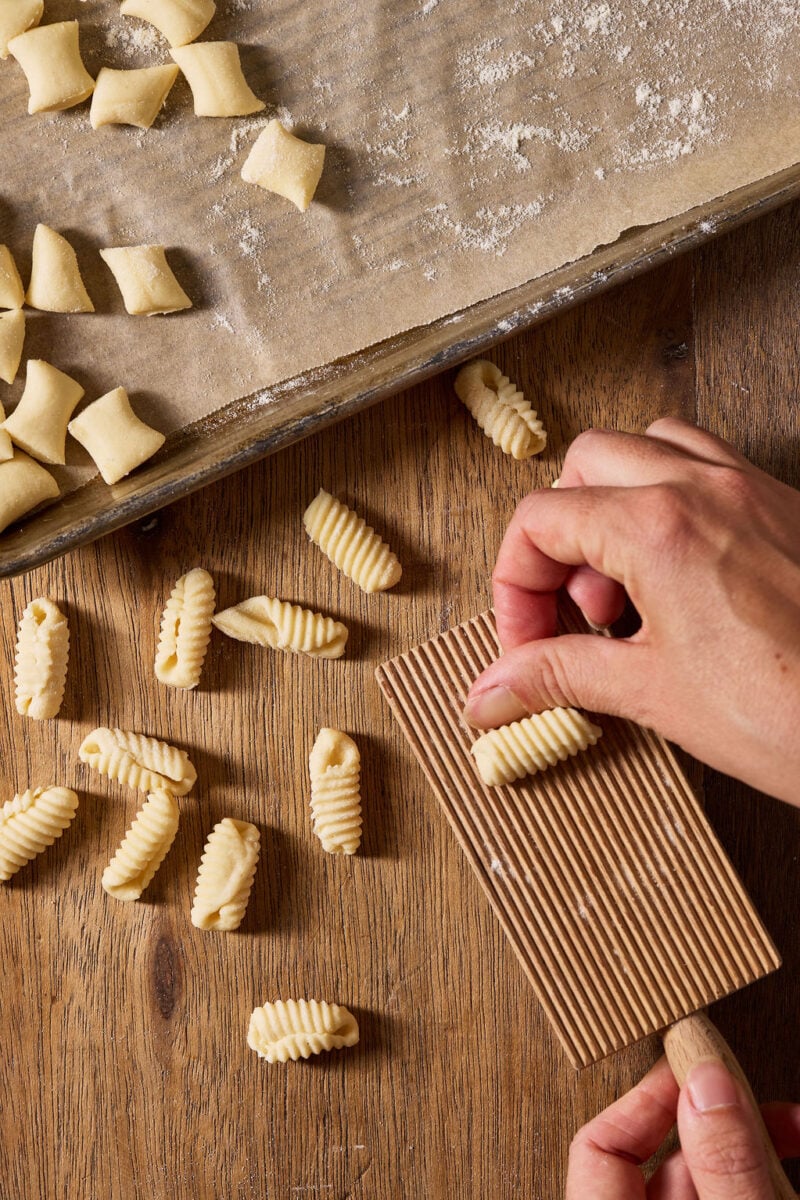
Grab a gnocchi board. Position one cavatello at the top near the handle. Press down while pushing it forward, allowing the cavatello to roll over itself. Be firm when pressing. You want to create a little dip in the center to catch the sauce.
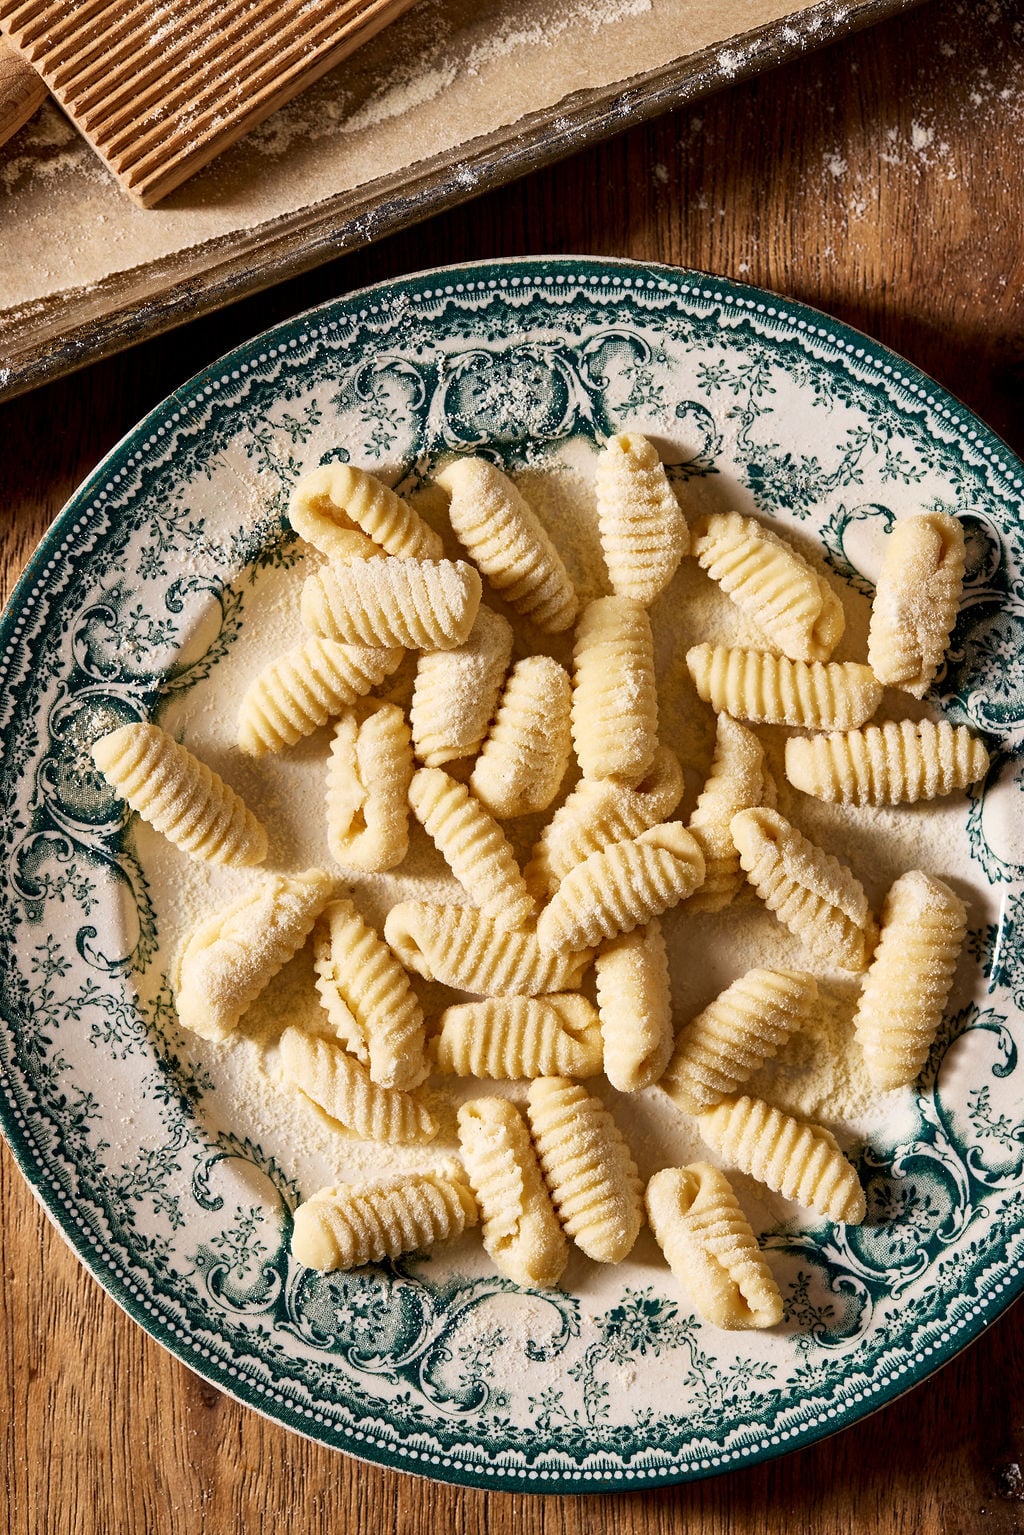
A few shaping nuances: when I rolled from the center downwards, my cavatelli came out squat and fat like caterpillars. When I rolled from the top corner down, I got a football shape instead with slightly pointed tips. Do it however you want. Those of you with eagle eye vision will spot the difference in the photo below (hint: bottom right corner, the two cavatelli side-by-side). I recommend watching my shaping video at the top of this post for guidance.
To Cook & Serve
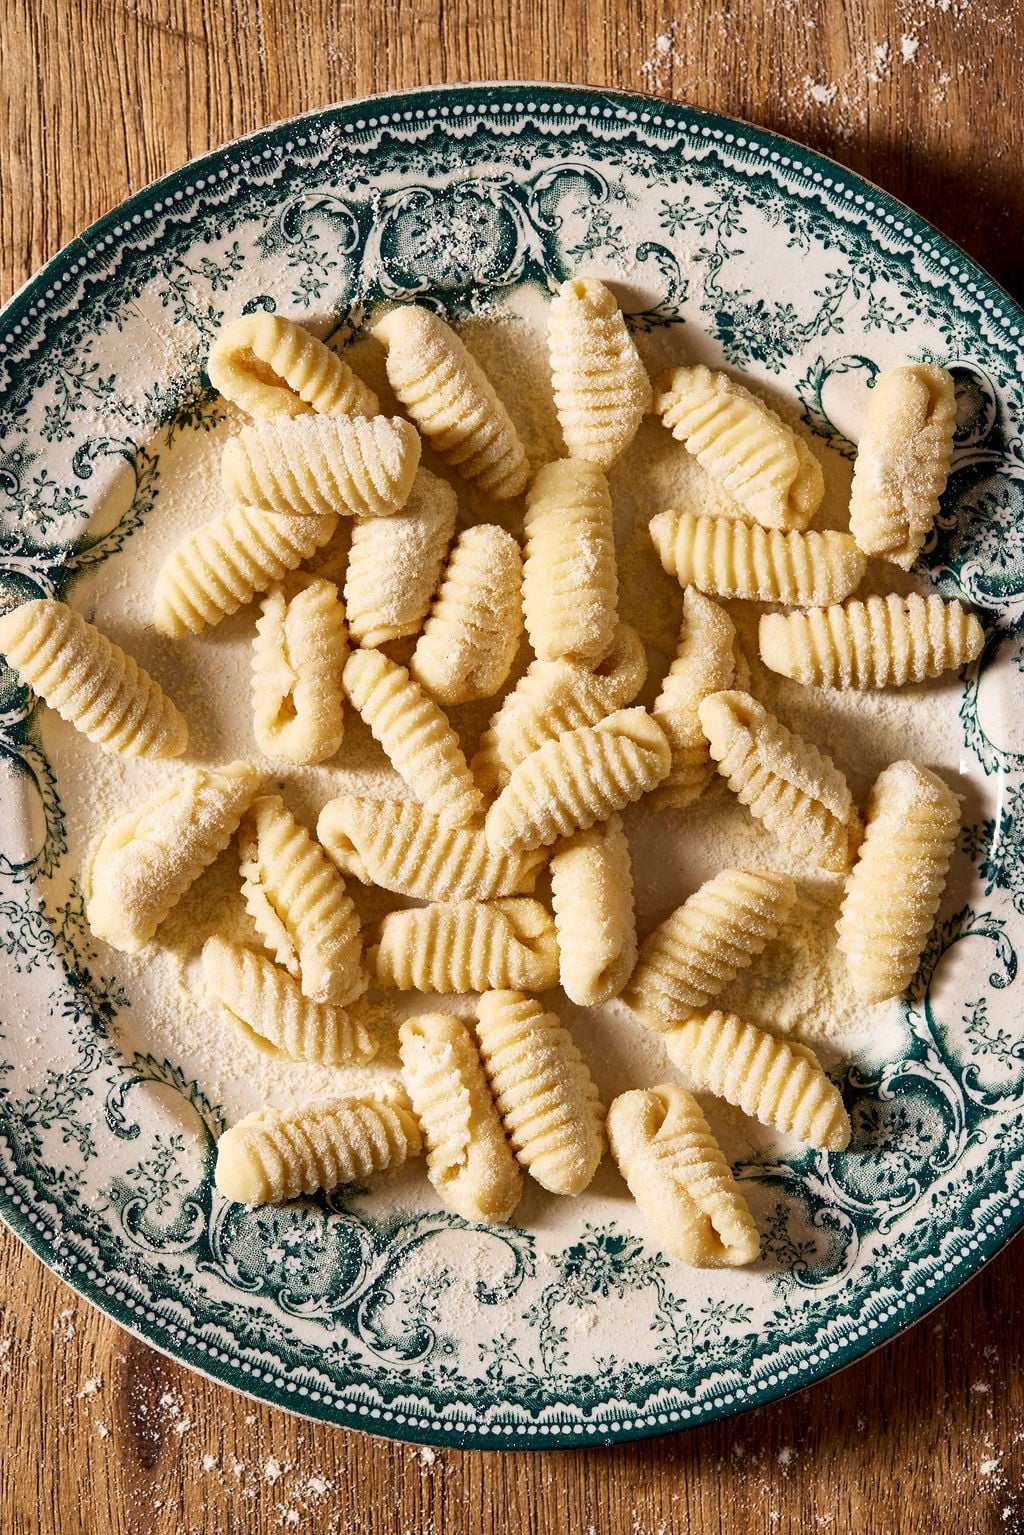
When cooking sourdough cavatelli, plan on 3-6 minutes in boiling salted water. I always recommend doing a test batch first to check for doneness- 1 or 2 at a time. Yours might be thicker than mine. The final texture should be soft and tender, but notably chewy. Strain with a slotted spoon and transfer directly into a simmering pasta sauce of your choice.
PS: If you don’t want to cook them right away, cover and store your sourdough cavatelli at room temperature for ~1 or chill for 6-8 hours to overnight. I usually make mine in the morning, chill, and then cook for dinner. I use this high-sided sheet pan with lid which is also perfect for storing my sourdough bagels and focaccia too.
Food Styling & Photography: Saltwater Studio
By signing up, you agree to receive emails from The Clever Carrot. Unsubscribe at any time.
Easy Homemade Sourdough Cavatelli Pasta
- Prep Time: 1 hour 15 minutes (including rest time).
- Cook Time: 6 minutes
- Total Time: 1 hour 21 minutes
- Yield: 2–4 people as a starter or light main course 1x
- Category: Sourdough Discard Recipes
- Method: Hand-shaped
- Cuisine: Italian
- Diet: Vegan
Description
This easy homemade sourdough cavatelli pasta recipe is made by hand with fine semolina flour and sourdough discard (no egg). They’re soft, tender, and irresistibly chewy! Choose from a same-day or overnight fermentation option to deepen the flavor.
Ingredients
- 175 g (~1 cup) fine semolina flour (Caputo semola reminicata)
- 75 g ( ~1/3 cup) warm water
- 50 g (~1/4–1/3 cup) sourdough starter (*See notes 1)
Instructions
For best results, please weigh your ingredients with a digital scale (you’ll get slightly different results using measuring cups).
- Add the semolina flour to a wide shallow bowl. Make a well in the center (I use the bottom of a small bowl and move it around in a circular motion). Add the warm water, followed by the sourdough starter.
- With a fork, gradually mix the flour and water together, starting in the center well and working your way outwards. The mixture will look creamy at first, then crumbly (like wet sand).
- When the dough starts to come together, ditch the fork, and mix by hand to form a cohesive dough- it will feel gritty and stiff. (*See notes 2). Cover with plastic wrap and rest for 5-10 minutes. The dough will be softer and easier to knead in the next step.
- After resting, knead the dough for 2-4 minutes on a wooden board. To do so: push into the dough with the heel of your hand, rocking it back and forth, turning it intuitively as you go. The dough is stiff. Just keep moving it around until the texture changes from gritty to smooth. That’s when you’ll know it’s done. It should feel slightly chalky on the surface too.
- Gently pat the dough into a plump disc, cover, and rest for 1 hour to relax the gluten. Alternatively, chill overnight to ferment. (*See notes 3).
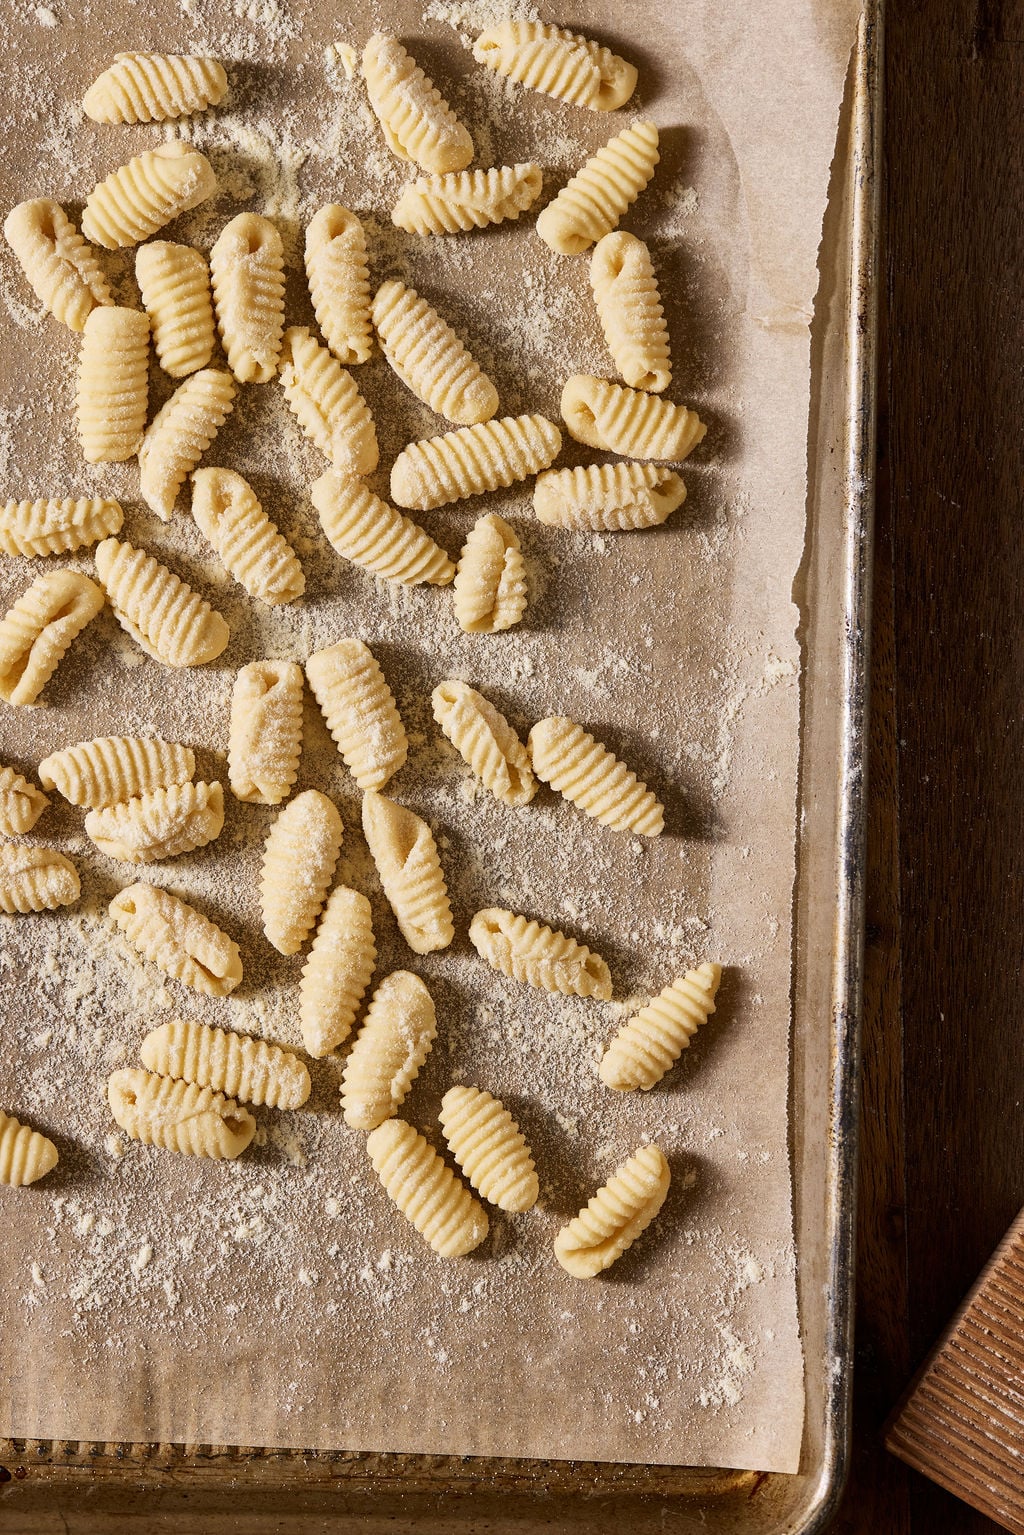
- To shape the cavatelli, line a sheet pan with parchment paper; dust generously with semolina flour. Your cavatelli will land here.
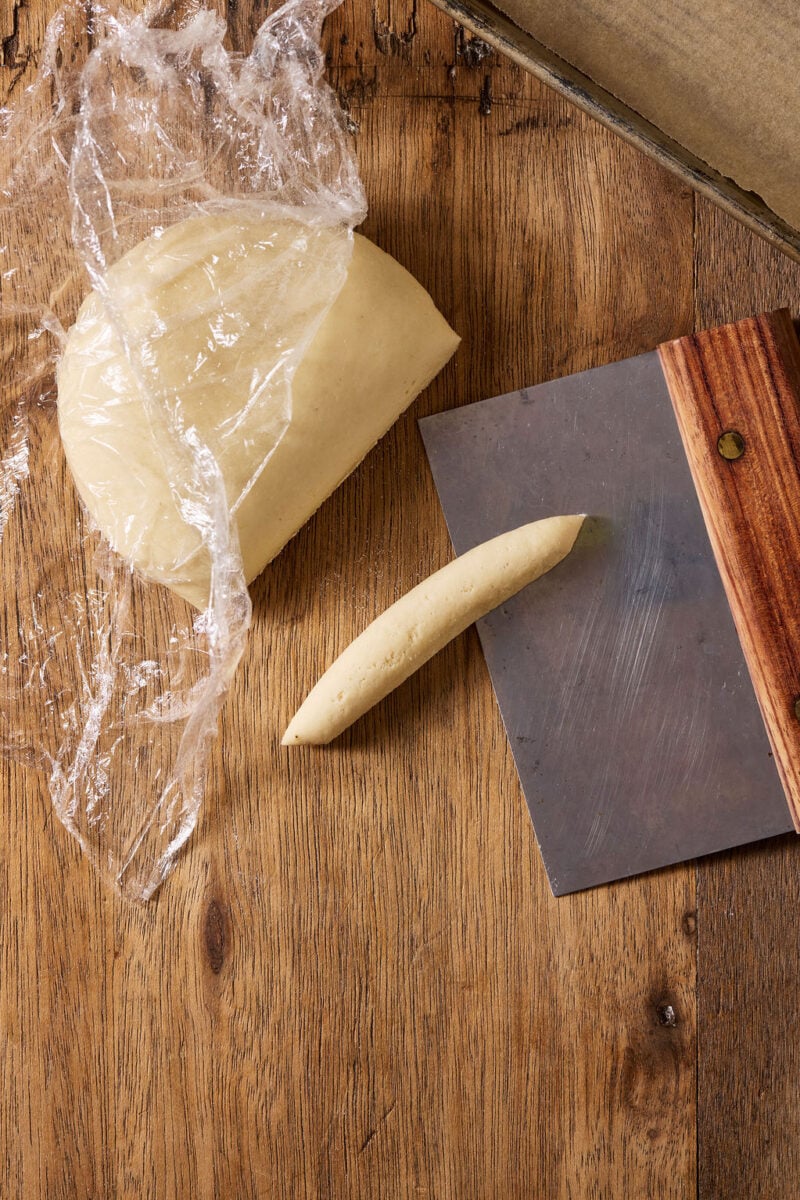
- Uncover the disc of dough. Cut off a strip, about one finger width in thickness. Make sure to keep the rest of the dough covered in plastic wrap (it will dry out).
- On a non-floured surface, roll the dough into a rope, about 5/16 to 3/8-inch thick (e.g. thicker than a pencil, but not quite as thick as a Sharpie). Roll using the palms of your hands instead of pressing down with your fingertips for an even shape.
- Cut across into ¾-inch pieces.
- Using a gnocchi board: place a piece of dough near the top. Press your thumb into the top corner and push downward – it will naturally roll over itself. Make sure to apply firm pressure! This will create a little dip in the center which is perfect for catching the sauce. Each cavatello should not be completely sealed shut.
- Place onto your semolina dusted dish. Keep covered with a clean dish towel or inverted sheet pan as you work.
Notes
Notes & Tips:
- The sourdough starter does not have to be active. Recently fed & collapsed starter OR good quality sourdough discard is good (100% hydration, fed with white flour).
- The texture of your pasta dough will depend on the viscosity of your starter, plus ambient temperature. The variables! If the dough is very, very dry and cannot absorb all of the flour when mixing, lightly wet your hands, shake them off, and then work the dough until it comes together. If it’s too soft or sticky, add a little bit of semolina flour.
- The longer the dough rests, the softer (and stickier) it will become, especially in hot weather. This is problematic when shaping – the cavatelli might stick to your gnocchi board. If this happens, lightly dip a cavatello in some semolina flour and then roll down the board.
- Shaping nuances: when you press the cavatello from the top corner down, you’ll get a different shape compared to when you press straight across, it will be more squat, like fat caterpillars. 🤓 Play around and see what you like best.

Comments
Betty says
This recipe was really good. Plus it was easy to make and a great use of discard! Just wondering if I can freeze these, and then boil from frozen.
Betty Bayer says
Can you freeze these cavatello?
BlueNunzio says
Wonderful recipe! Really quick & easy to make, nice change from the egg based pasta’s. Goes great with Emilie’s Ragu sauce.