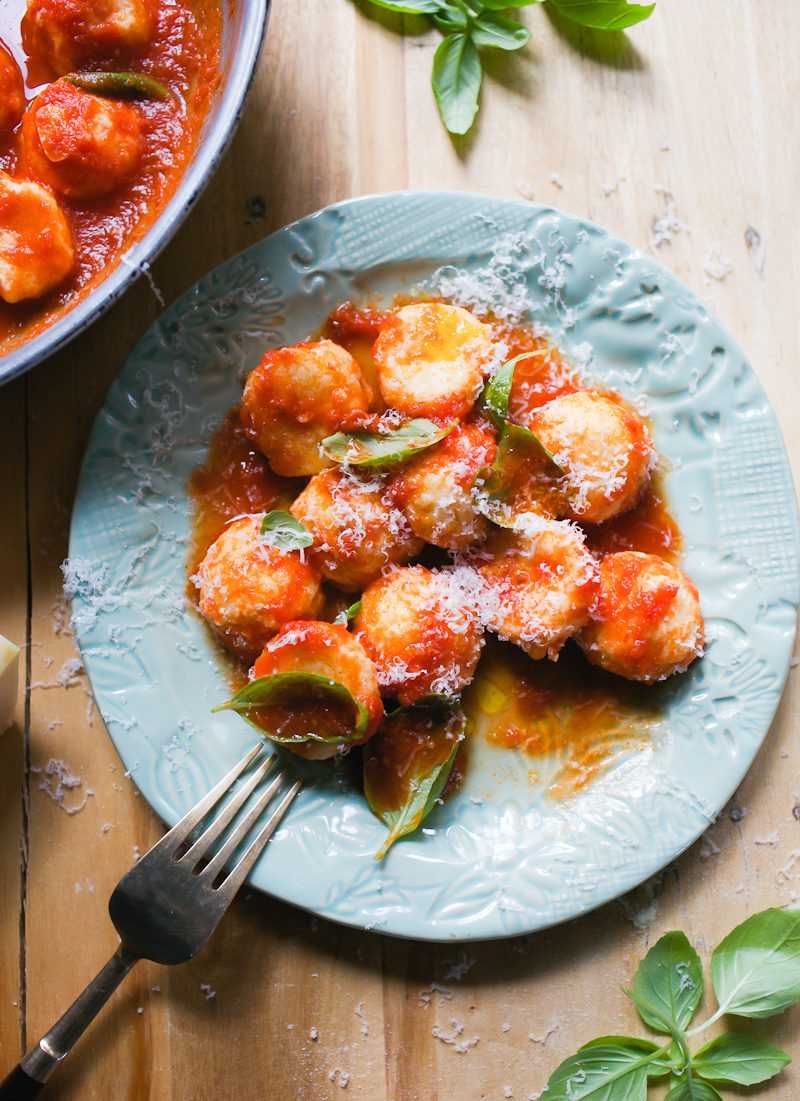
My recipe for homemade ricotta gnocchi (step-by-step) comes together with 6 simple ingredients in under 30 minutes. My secrets? Use a cookie scoop for easy handling and coat the gnocchi in fine semolina flour so they don’t fall apart. Try it with my fresh homemade ricotta. Serves 4.
When you think of gnocchi, it’s easy to assume you’re referring to potato gnocchi, which is the most common type of pillowy dumpling. But gnocchi can be made with ricotta too, which is a delicious alternative to its famous cousin.
They’re quicker to prepare (just mix everything together – no potatoes to boil here!), the flavor is more mild, and the texture is light and fluffy in a unique “spongey” type way. Both versions are excellent, just different.
What To Expect.
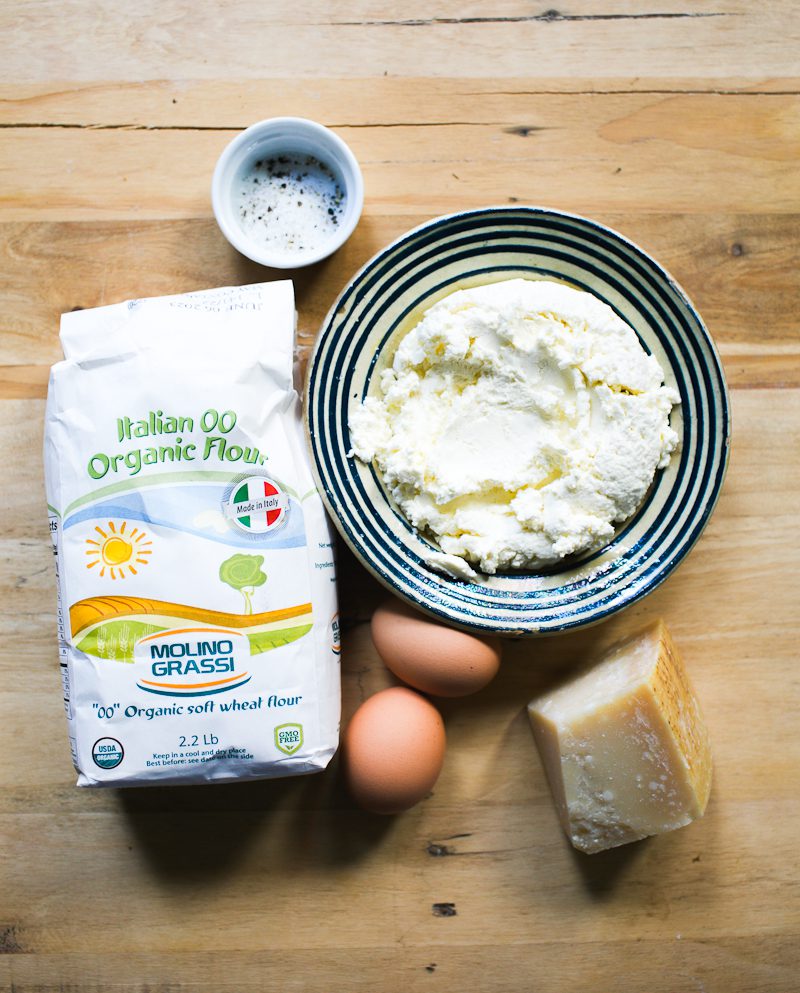
In this post, you’ll learn how to make my ricotta gnocchi with step-by-step instructions and 6 simple ingredients: ricotta, eggs, parmesan cheese, flour, salt & pepper. You can use homemade ricotta or store-bought (I use homemade in the images below).
You’ll have enough gnocchi to serve 4 people, and they freeze perfectly of you want to make them ahead. I love ricotta gnocchi with my Ragù Bolognese or a simple pomodoro sauce from the freezer.

How To Make Ricotta Gnocchi: Step-By-Step Recipe
Step 1: Make The Gnocchi Dough
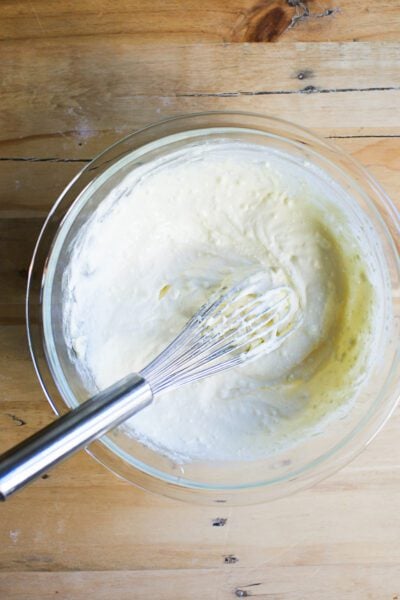
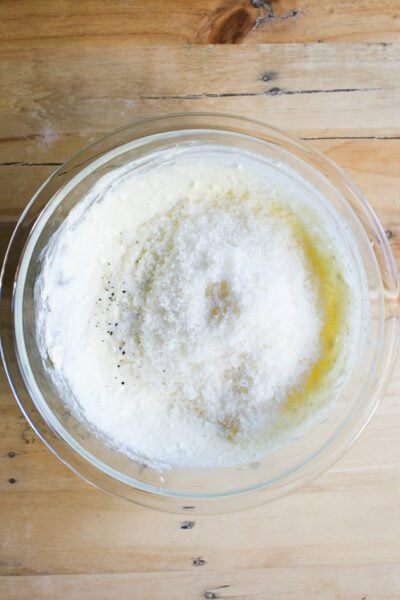
Whisk the ricotta and eggs together in a large bowl. If using fresh homemade ricotta, the texture will be stiff and lumpy at first because it’s cold from the fridge; this is ok. If using store-bought ricotta, it will be more fluffy. Either way, mix until well blended.
Add the parmesan cheese, salt and pepper.
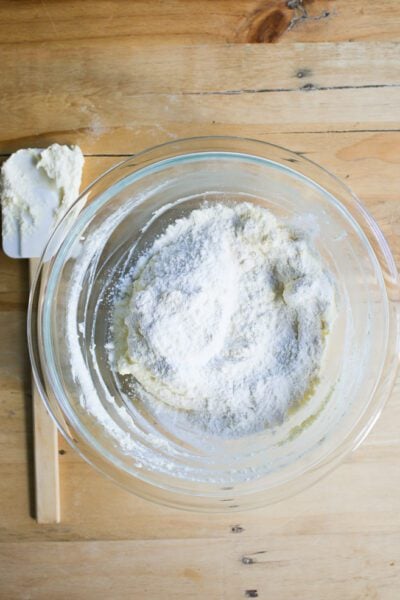
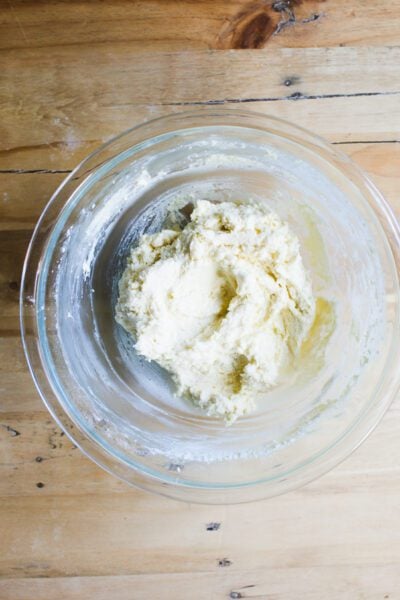
Fold the flour into the ricotta mixture. Do not over mix! It should be slightly sticky, but not wet, like cookie dough.

Step 2: Assemble The Gnocchi
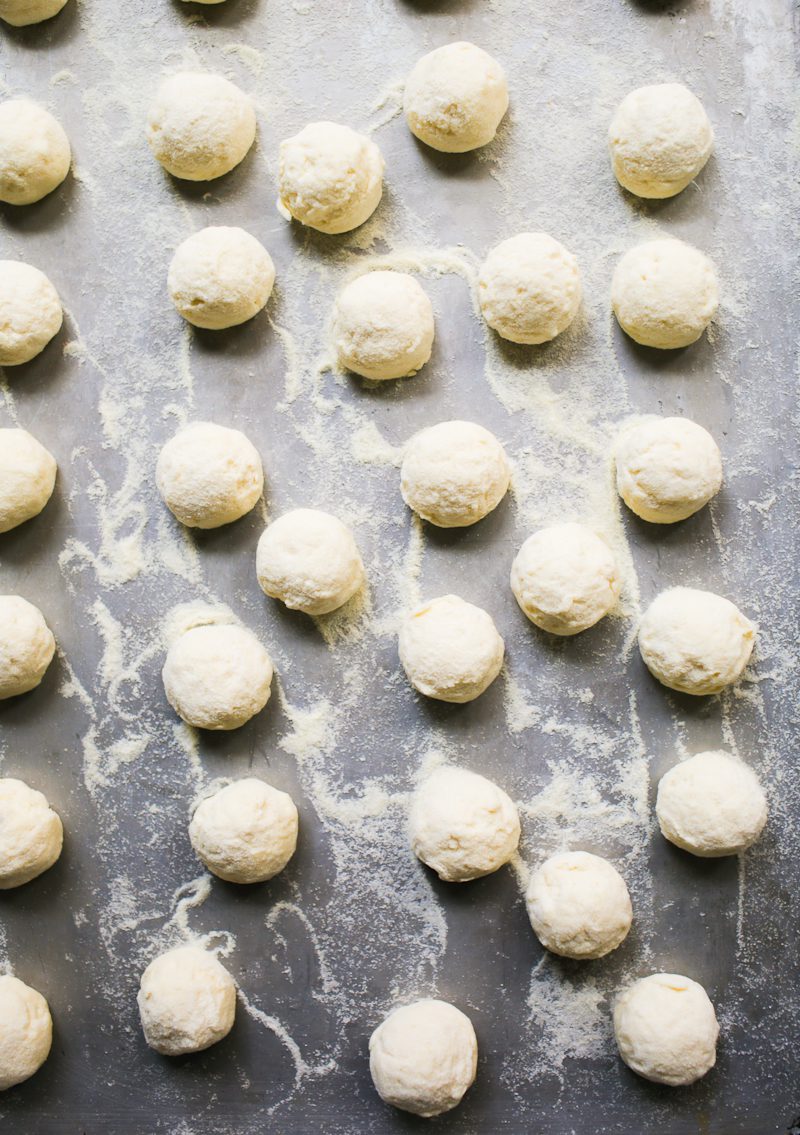
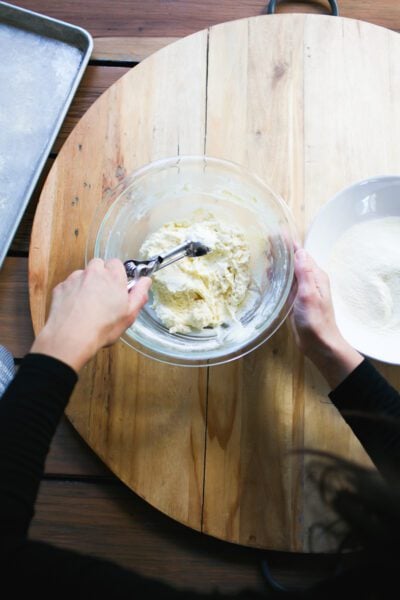
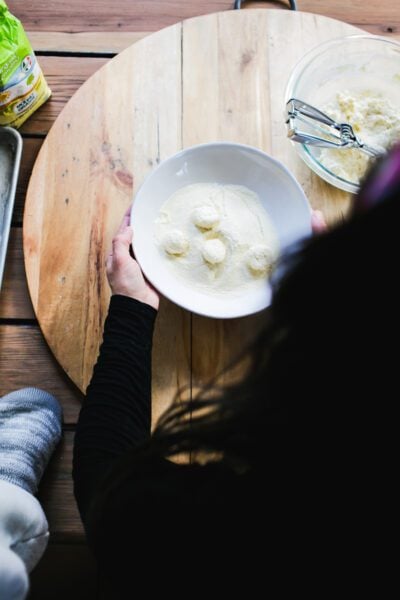
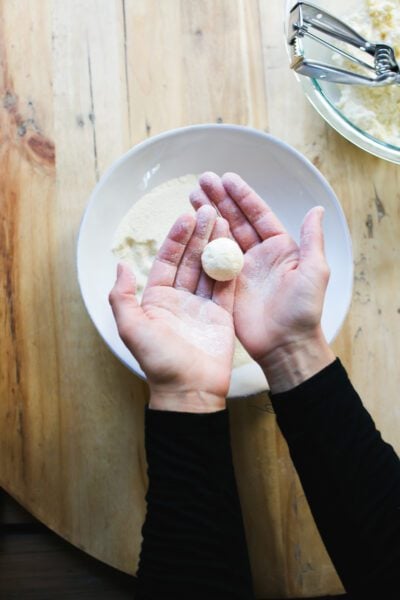
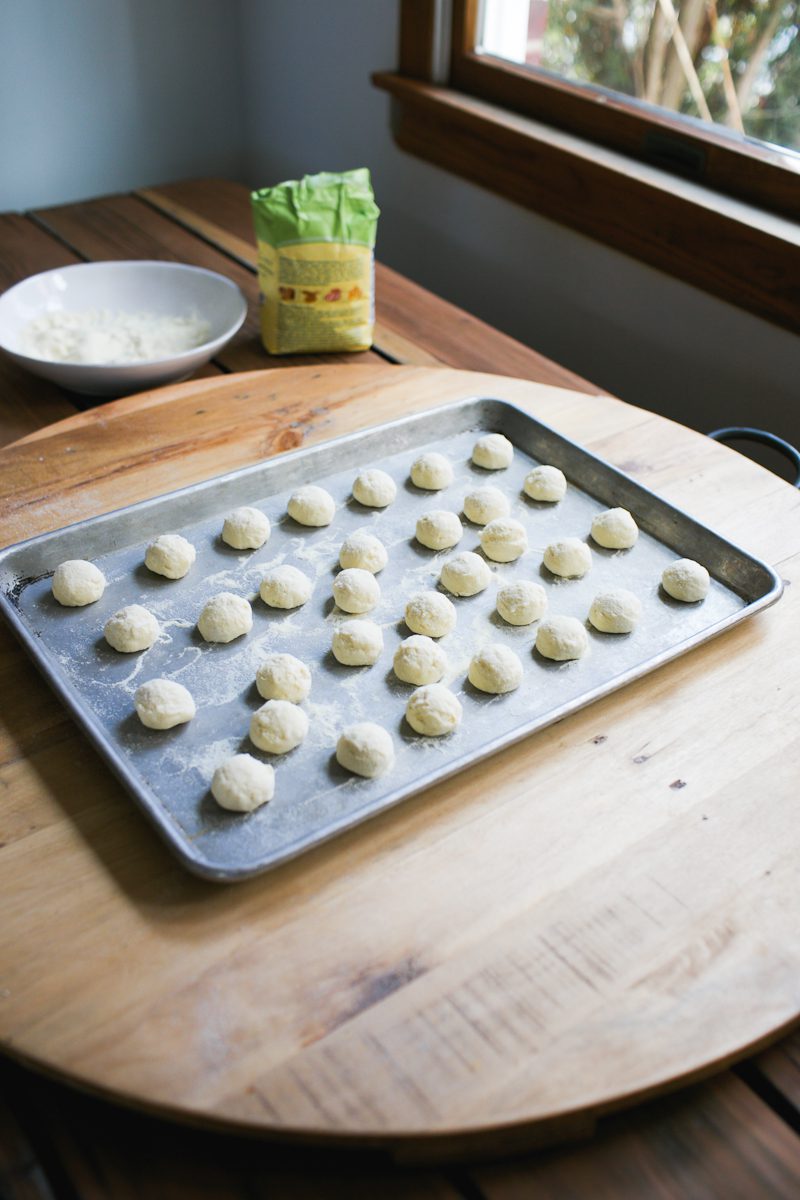
Using a cookie scoop, portion a few scoops of dough into the bowl of semolina flour. Gently roll around to coat. Use your hands too, until they are well coated. Transfer the gnocchi to a semolina dusted sheet pan. Portion out the rest of the dough. At this point, if you are not ready to cook the gnocchi, store them in the freezer.

My Ricotta Gnocchi Tips
- Taste! Taste! Taste! Ricotta is mild in flavor. Taste the ricotta gnocchi mixture, adding more salt as needed. This is important. The last thing you want is tasteless gnocchi.
- Drain store-bought ricotta: It usually contains more moisture than homemade ricotta. If you skip this step, the gnocchi might fall apart when boiled. 30 minute drain time is sufficient.
- Always do a test batch: Gnocchi are notoriously temperamental. Sometimes they fall apart. Sometimes they’re underdone in the center. Do a test batch first. This is THE BEST advice I can give you with regards to mastering homemade gnocchi.
- Enjoy right away! Ricotta gnocchi taste best when cooked and served immediately. They are light and fluffy. As they sit, they begin to firm up slightly.
By signing up, you agree to receive emails from The Clever Carrot. Unsubscribe at any time.
Light and Fluffy Homemade Ricotta Gnocchi
- Prep Time: 20 mintues
- Cook Time: 5 minutes
- Total Time: 25 minutes
- Yield: Serves 4 (32-34, tablespoon-sized gnocchi, about 15g/.5oz each) 1x
- Category: Ricotta
- Method: Boil
- Cuisine: Italian
- Diet: Vegetarian
Description
My recipe for light and fluffy homemade ricotta gnocchi is made with 6 simple ingredients: ricotta, eggs, Parmesan cheese, salt, pepper and 00 flour. I use fresh homemade ricotta because I’m obsessed with it’s creamy texture, and I’m always looking for new ways to use it. However, store-bought ricotta will work too. I’ve tested them both. You’ll need a cookie scoop to easily (and quickly) portion out the dough.
Ingredients
- 265 g (1 heaping cup) homemade ricotta (*if using store-bought ricotta see note below)
- 2 large eggs (total cracked weight: 110 g/3.9 oz)
- 50 g (1 packed cup) freshly grated parmesan cheese
- 1/2 tsp. fine sea salt
- Black pepper
- 70 g (about 1/2 cup) Tipo 00 flour or all purpose flour
- 85 g (about 1/2 cup) semolina flour, for dusting
Notes:
*Store-bought ricotta has a different texture than homemade ricotta. It’s more fluffy (when cold) and it contains more liquid. Drain the ricotta first before using. Scoop 1 1/2 cups (330 g) of ricotta into a fine mesh strainer set over a bowl. Drain for 30 minutes or until you get 1 heaping cup (265 g/9.3 oz) of drained ricotta. Don’t worry if it’s not exact.
Instructions
- Prep your station: Pour the semolina flour into a wide shallow bowl. Dust a rimmed sheet pan with semolina flour; set aside.
- Make the gnocchi dough: Whisk the ricotta and eggs together in a large bowl. If using fresh homemade ricotta, it will be stiff and lumpy at first; this is ok. If using store-bought ricotta, the texture will be fluffy. Either way, you’re looking for a cohesive, well blended mixture.
- Add the parmesan cheese, salt and pepper. Mix with a rubber spatula. Give it a taste. Add more salt and/or pepper if needed.
- Fold the flour into the ricotta mixture. Do not over mix. The final texture will be slightly sticky, but not wet. It should look like cookie batter.
- Assemble the gnocchi: Using a tablespoon-sized cookie scoop, portion a few scoops of dough into the bowl of semolina flour. Gently roll around to coat. Use your hands too, until they are well coated. Transfer the gnocchi to a semolina dusted sheet pan. Portion out the rest of the dough.
- At this point, if you are not ready to cook the gnocchi, store them in the freezer (see directions below). Or proceed to the next step.
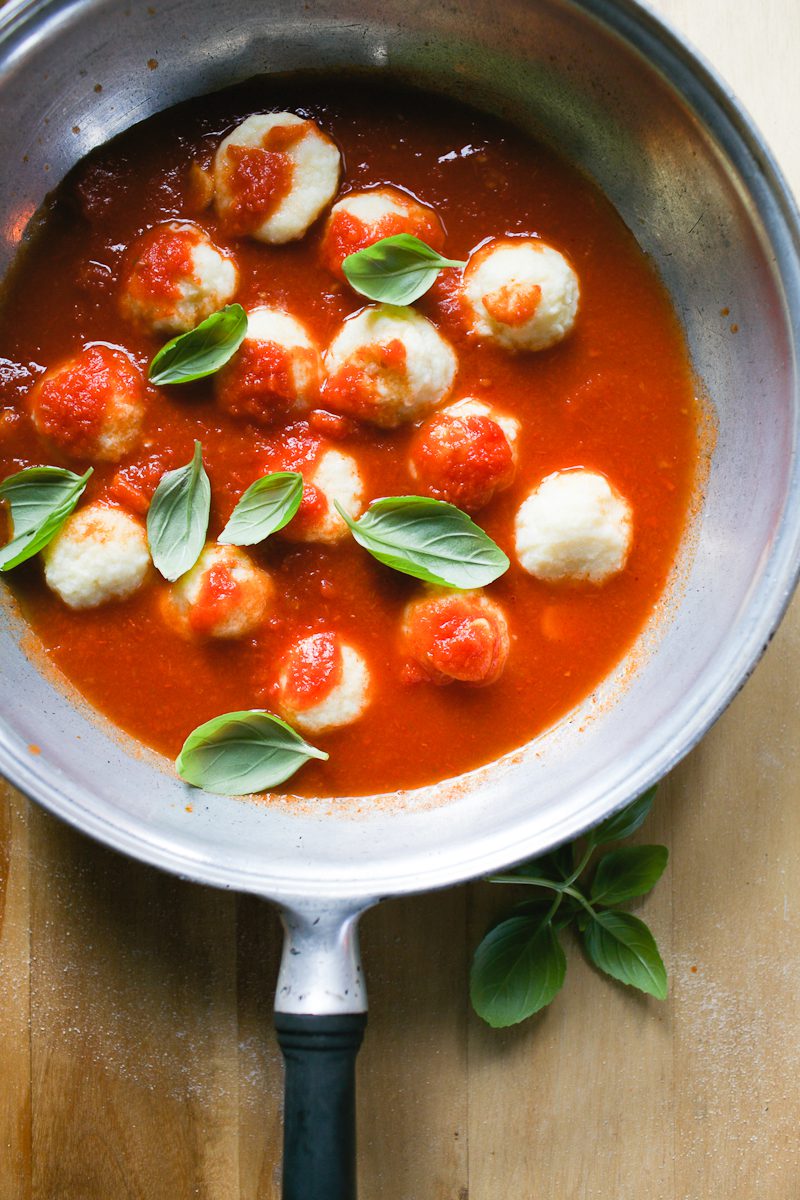
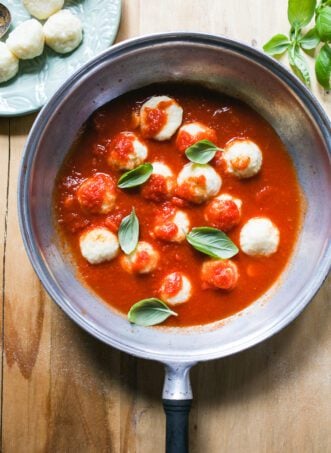
- Prepare your sauce: before cooking the gnocchi, have a simple sauce simmering and ready to go on the stove (you’ll drop the gnocchi right into the sauce after boiling). Use a wide, 12-inch pan. Gnocchi are quick to cook and are best enjoyed immediately after boiling- they are the fluffiest. As they sit, they get more firm.
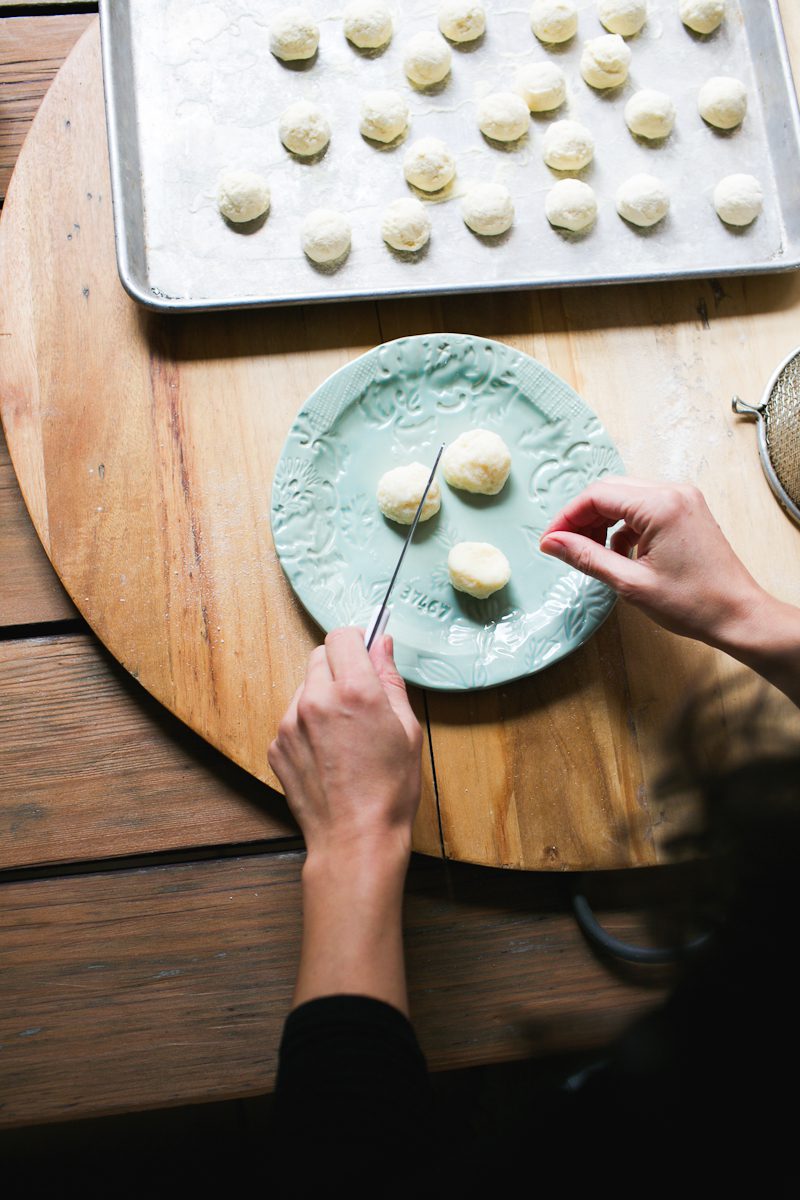
- Cook the gnocchi: First, do a test batch. Drop 1 gnoccho into a pot of boiling salted water (it will sink, and then float). Once it floats, boil for 5 minutes, lowering the heat only slightly, if it’s boiling too rapidly. You don’t want it to break apart. Remove the gnocco to a plate, slice it in half, and check the inside texture: it should be fluffy and fully cooked through. If any ricotta oozes out from the center, it needs more cooking time. Do another test batch until you get the timing right. Then cook the rest of the gnocchi. Note: I like to do this in 2 separate batches- gnocchi are delicate!
How To Freeze Ricotta Gnocchi: Arrange the gnocchi on semolina dusted sheet pan. Freeze until solid. Transfer to a zip-top bag or airtight container. Store in the freezer up to one month. To cook (frozen), do a test batch as indicated above, increasing the boiling time to 7 minutes, or until cooked all the way through.

Comments
Claire Witbeck says
Made both your ricotta recipe and then this gnocchi recipe and they turned out both beautiful and delicious! Definitely appreciate all of the extra details in your directions. Thanks for sharing!
AnnieR says
These are heavenly, I am quoting my better half. I made 36 gnocchi and 3 of us ate them all. The Ricotta I used from costco was plenty thick do I didn’t need to drain it. This came together pretty quick so I put them in the freezer until I was ready to cook them. The directions are precise. Once one floated to the top I put a timer on for 8 minutes. Perfection. I will make these regularly from now on.
Emilie Raffa says
Love this feedback Annie, thank you! I’m thrilled you enjoyed the gnocchi. Thanks for the tip about Costco ricotta too. Do you remember the brand by any chance? I want to check it out.
Andrew says
I’m in Canada. The Costco here, at least, is Saputo, Ricotta di Compagna, 11%mf.
Christine M says
Ok so I tried this with store-bought Ricotta and it works. I think your advice about testing the gnocchi before cooking the whole batch is KEY! I still have making your homemade Ricotta on my list!
Emilie Raffa says
Yes! I’m glad you’ve found this tip helpful. I do this with homemade ravioli too :)
Tim Colman says
Beautiful way you teach
Emilie Raffa says
Thanks so much Tim! :)