This easy, step-by-step fresh pasta recipe and video will teach you how to make soft, silky, homemade pasta in 1 hour (with or without a machine). Fresh pasta is one of life’s greatest pleasures: use this versatile dough to make fettuccini, lasagna noodles, homemade ravioli, pappardelle pasta and more.
But here’s what I’ve learned after 5+ years of consistent practice: it’s all about the dough. Master the soft and supple texture (never dry or crumbly!) and the rest is easy.
In this post, I’ll teach you my exact method for perfect pasta dough, which can be used to make fettuccini, lasagna noodles, homemade ravioli, pappardelle pasta – whatever you love most. You can make it by hand, with a KitchenAid stand mixer, or in a food processor.
What Sets My Recipe Apart
A better formula for bigger batches. The classic pasta ratio “1 egg + 100 g flour per person” works fine for 1-2 servings, but not always when you scale up. My version delivers consistent results, whether you’re cooking for 2 or 6.
Higher hydration. Most pasta dough’s are 50-60% hydration. Mine is 61%, which makes it softer and easier to knead by hand. No more crumbly dough!
Homemade Pasta Ingredients
Because egg-based pasta dough contains only 2 ingredients, it’s important to understand the subtle nuances that makes a good dough even better. Below are my personal tested recommendations for flour types, brands, and egg size.
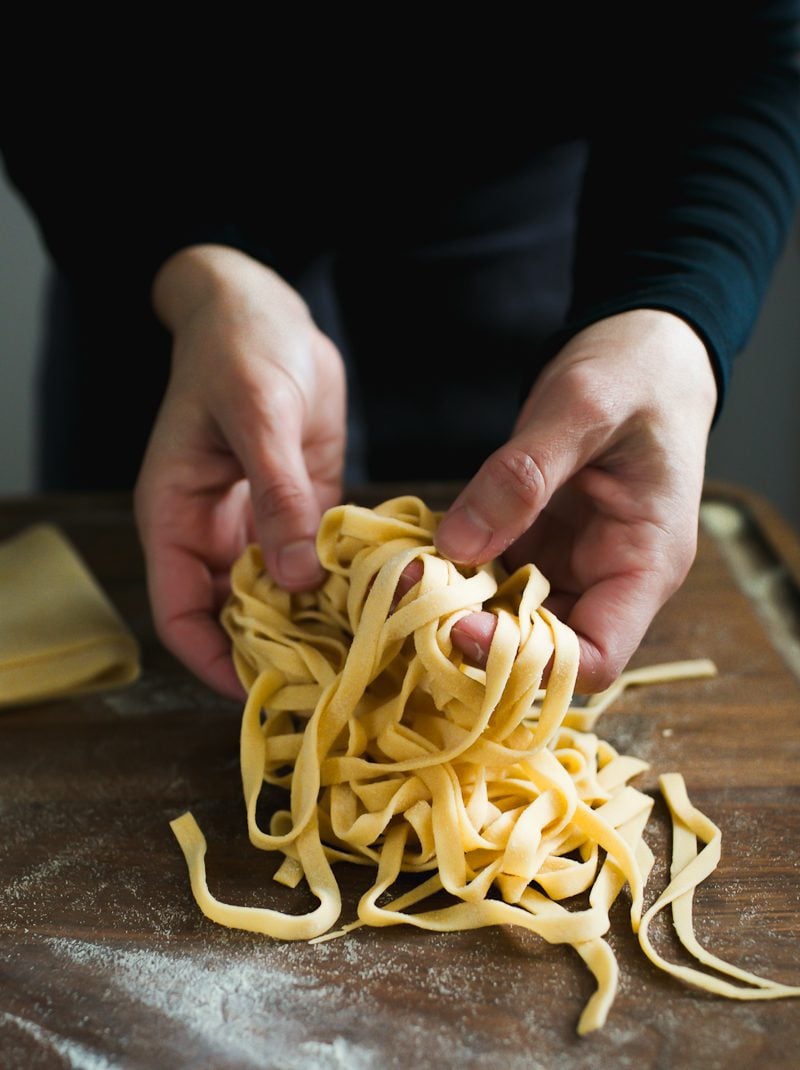
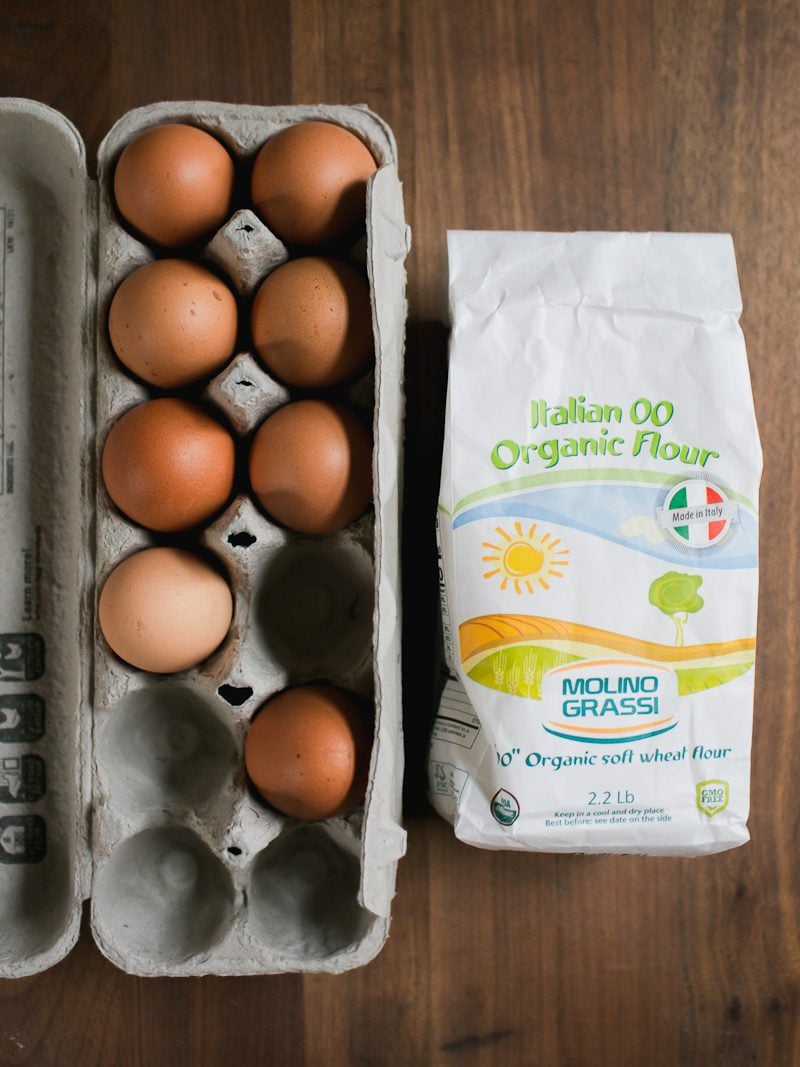
Italian Tipo 00 flour: this fine milled, soft wheat Italian flour creates light, tender pasta. The texture feels like baby powder. I like Molino Grassi or Caputo. For comparison, I tested this recipe with Bob’s Red Mill 00 flour and King Arthur’s Pasta Flour Blend and it wasn’t the same at all (too chewy). If you can’t find Italian 00 flour, substitute with King Arthur all purpose flour instead.
Large eggs + yolk: Size matters! I use large eggs (~55-58g each) to ensure the dough contains the correct amount of moisture. Too little egg = dry, crumbly dough.
My Best Homemade Pasta Tips
Make space. You’ll need a long, clutter-free surface to roll the dough. Pasta sheets can measure up to 3 ft long! The kitchen table is ideal.
Weigh your ingredients (including the eggs). This is my secret to soft, supple, never dry or crumbly pasta dough (note: if you’ve used measuring cups in the past, and the dough was dry, too much flour was packed into the cup. A digital scale will get you the most accurate results every time).
Wrap it up. Pasta dough dries out fast. I keep mine wrapped or covered with an upturned bowl.
How To Make Pasta {Step-by-Step Recipe}
Step 1: Make Pasta Dough
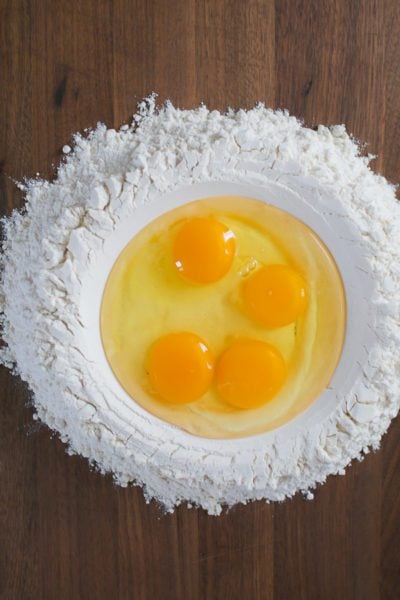
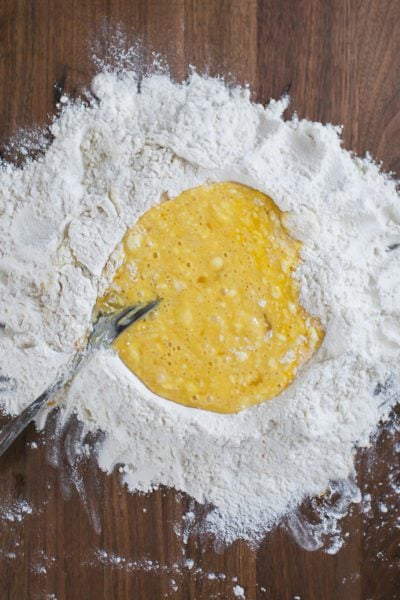
To Start: Mound 300g flour onto your work surface (or dump it into a large bowl for easier clean up). Make a well in the center, add 185g cracked eggs, and beat with a fork to mix in the flour. Then finish by hand to form a rough dough. Be patient! It’s a dry dough. If bits of flour remain, I’ve found that adding a few drops of water or olive oil helps it along.
Cover and rest for 10 minutes. This step is often skipped in most recipes, but it’s essential. Coming from my bread baker’s perspective: the dough needs time to hydrate (soften). It will be much easier to knead by hand.
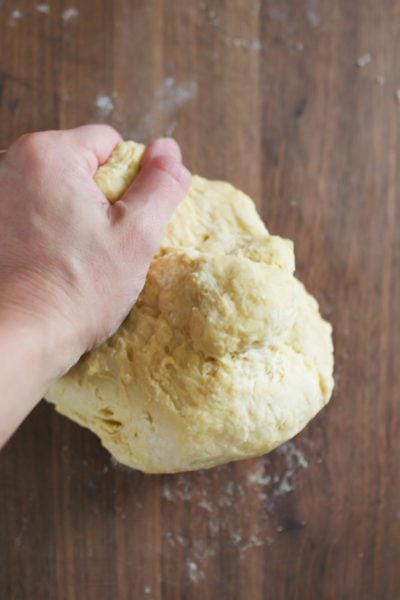
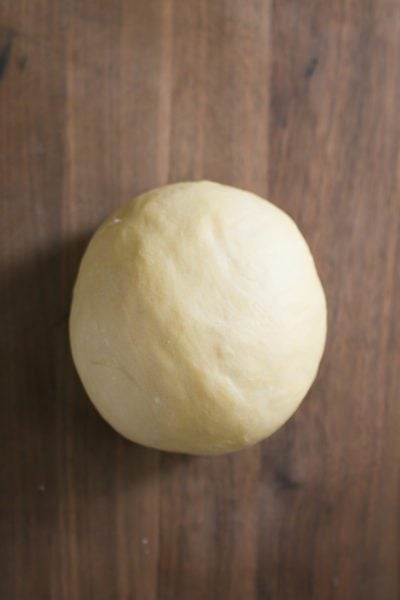
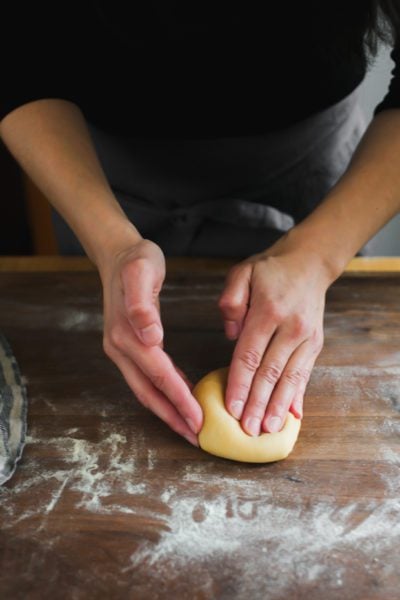
Now, knead the dough for 5-7 minutes using the heel of your hand. It will start out stiff and dense, but soften as you go. The goal is a smooth and pliable dough that springs back when poked.
Step 2: Roll Fresh Pasta Sheets
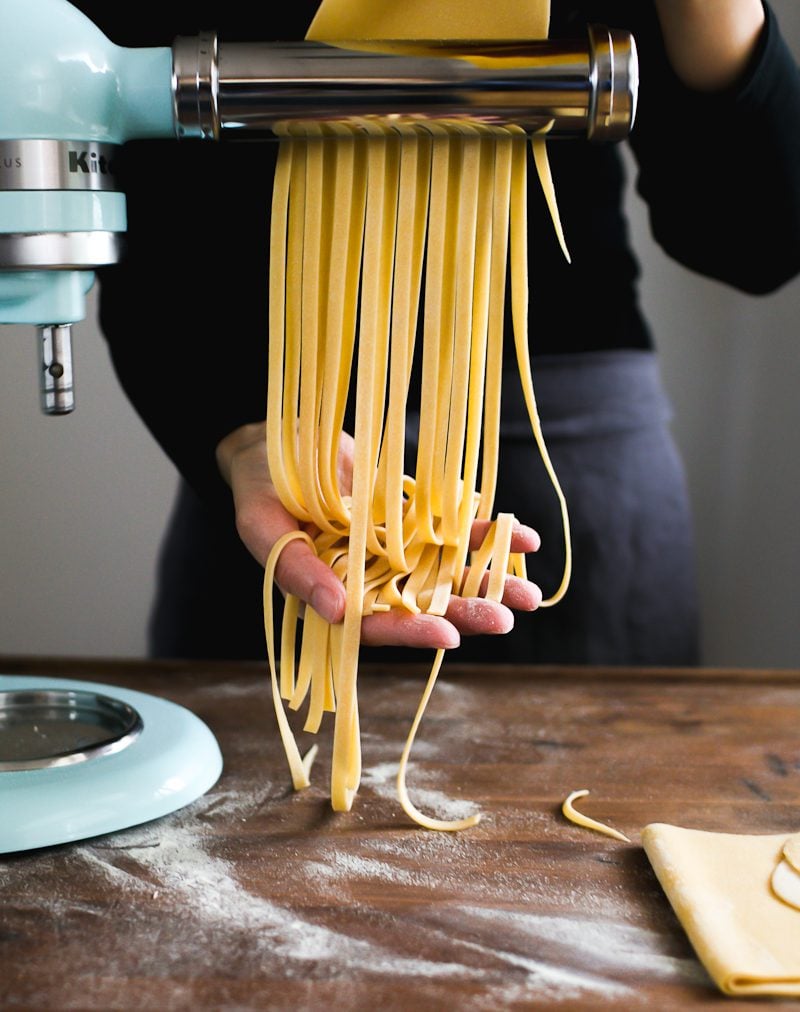
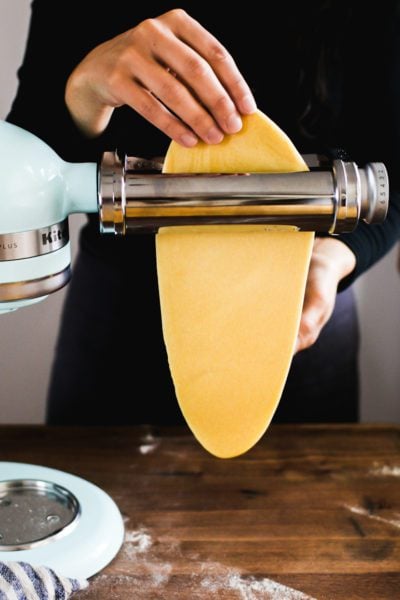
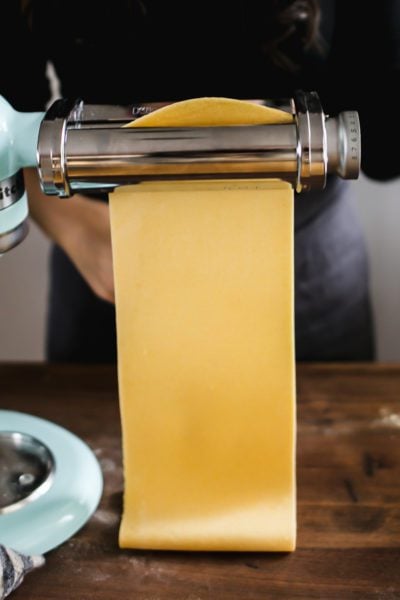
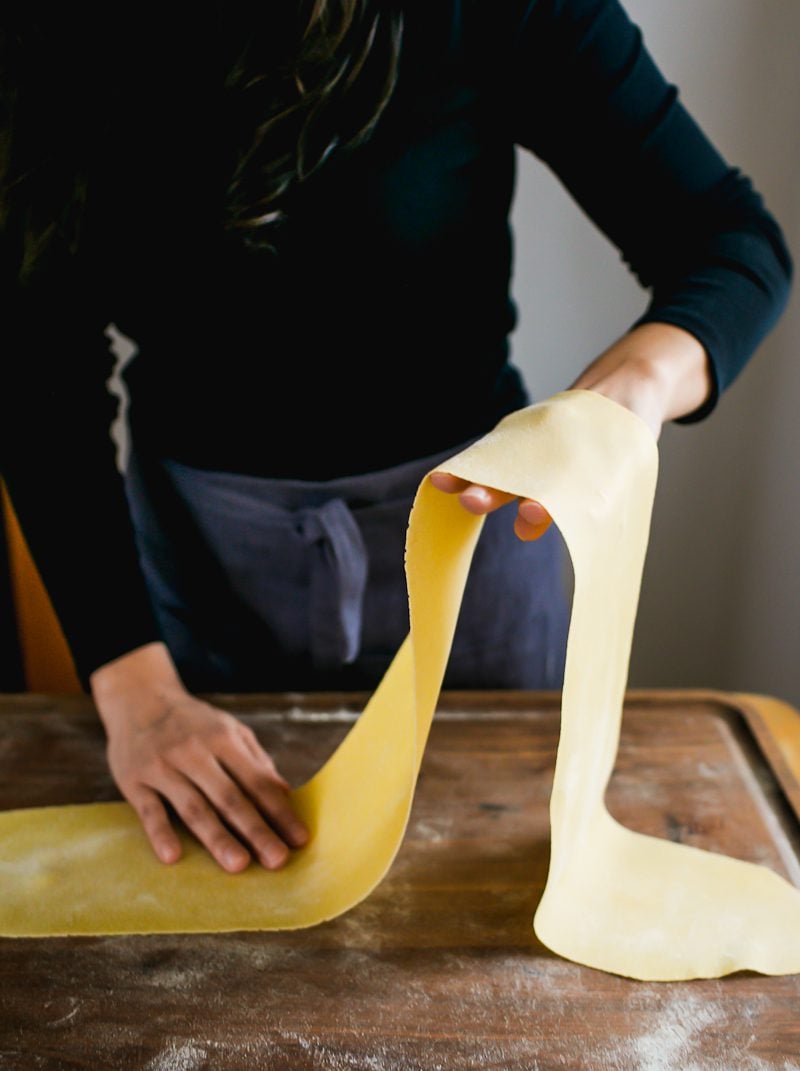
The next step is to cut the dough into 4 equal pieces. Flatten one piece into an oval disc and send it through the roller on the widest setting (#1 on the Kitchen Aid attachment). I like to send it through again for a smoother finish.
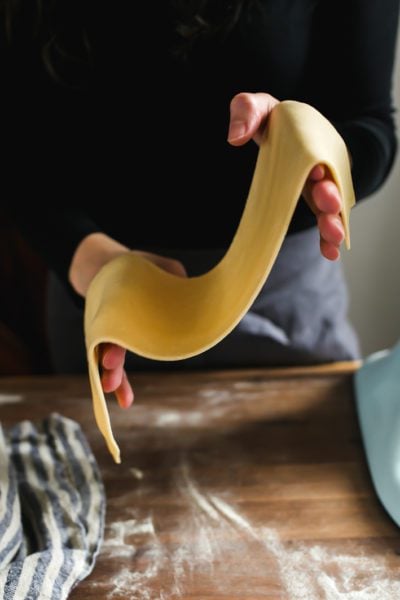
Then, continue rolling it through settings #2-4 (2x on each setting) for fettuccine, pappardelle and tagliatelle. Go up to #5 if you’re making homemade ravioli. The pasta sheet is ready when it’s slightly translucent and your can see your hand underneath.
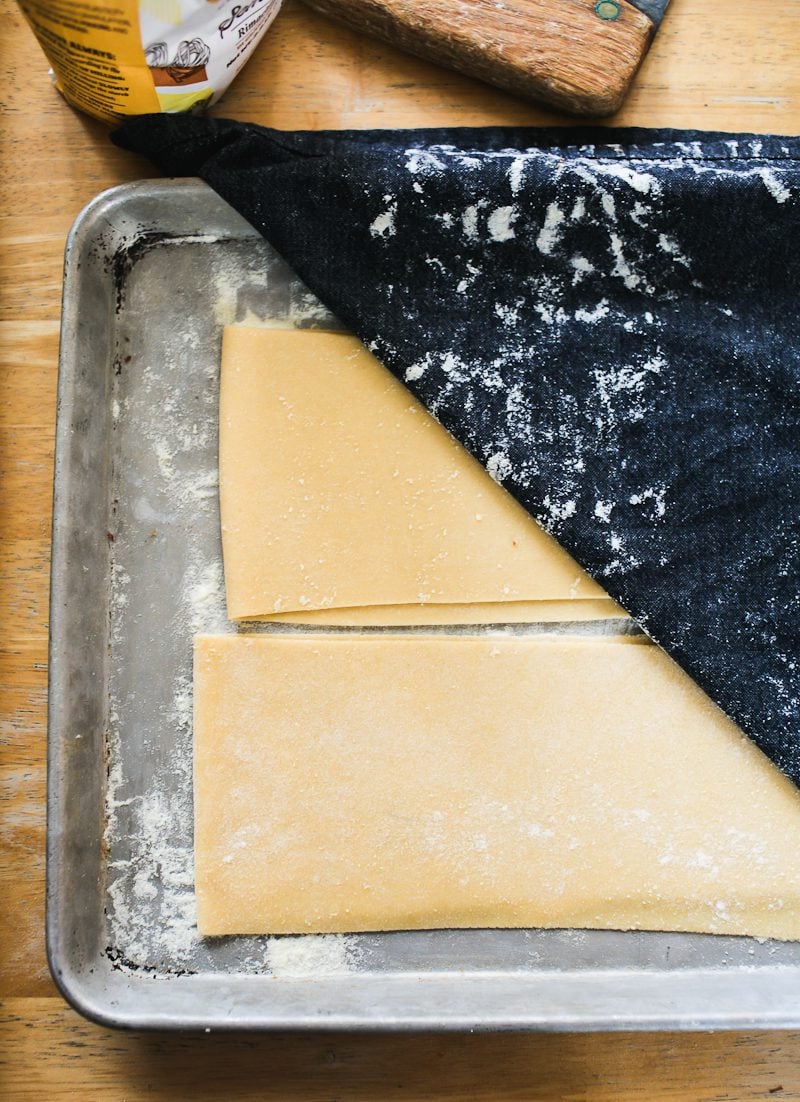
When you’re done, fold the pasta sheet in half and lay it on a semolina dusted sheet pan to prevent sticking.
Tip: Why Semolina Flour? It absorbs less moisture than regular flour and helps to prevent sticking. Rice flour works too. My surface is always covered in a blanket of semolina flour while I work!
Step 3: Cut Sheets Into Pasta
Before cutting, I like to semi-dry the pasta sheets first but hanging them over a chair, rod, or on a hanger (~5-15 minutes). I’ve found that this simple step makes the dough easier to cut; they’re less soft and doughy, and it helps to prevent the pasta strands from sticking later on. They have a unique leathery feel to them!
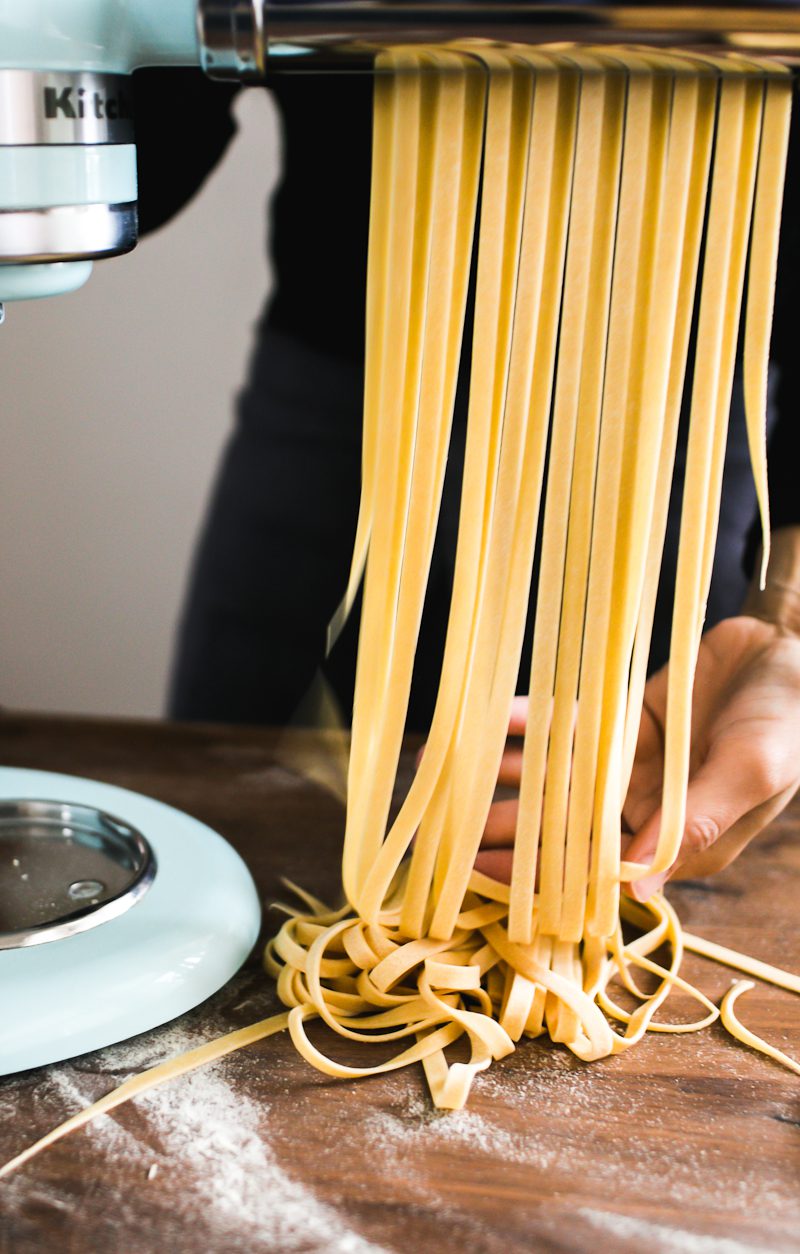
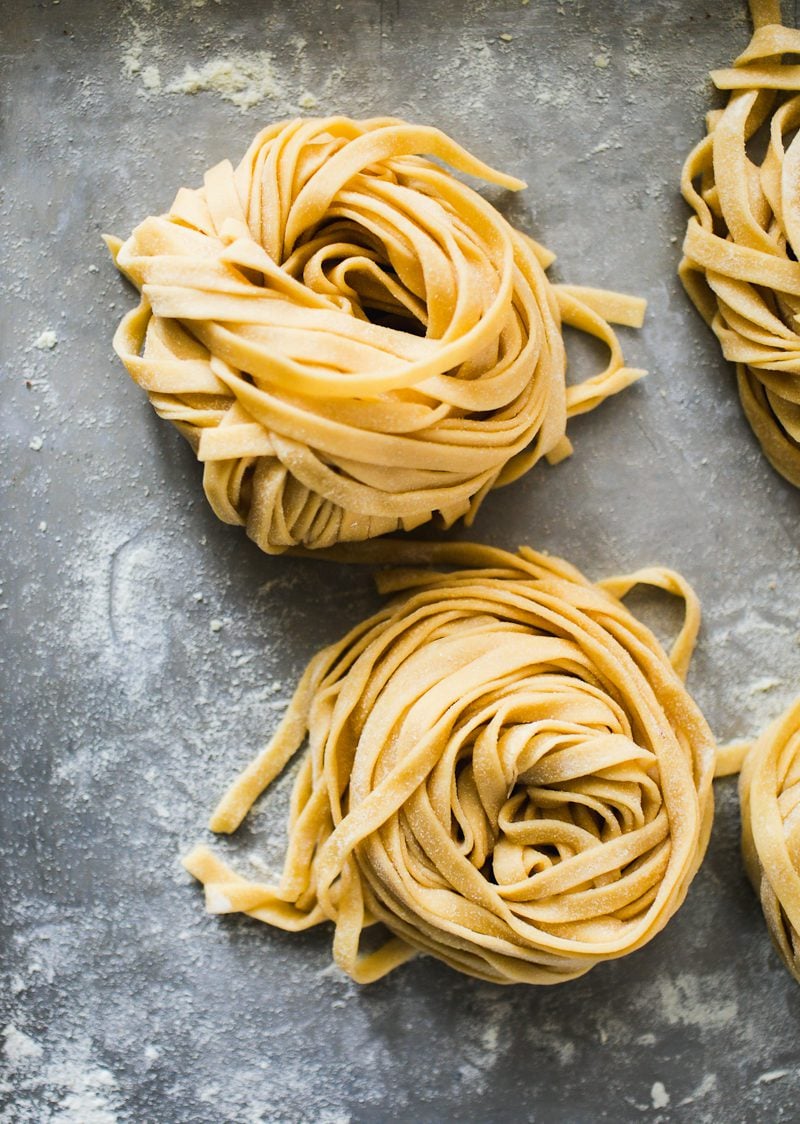
Once that’s done, cut a pasta sheet in half and send it through your desired cutter attachment. Dust the strands well with semolina, then form into nests or lay flat (I prefer the latter option for smoother, less wrinkly pasta).
Step 4: How To Cook Fresh Pasta
If you’re cooking right away, simply add your pasta to a large pot of boiling, salted water. Cook for ~2-5 minutes depending on thickness and shape. I always recommend tasting a pasta strand first to check for doneness (do so at the 2 minute mark and adjust from there).
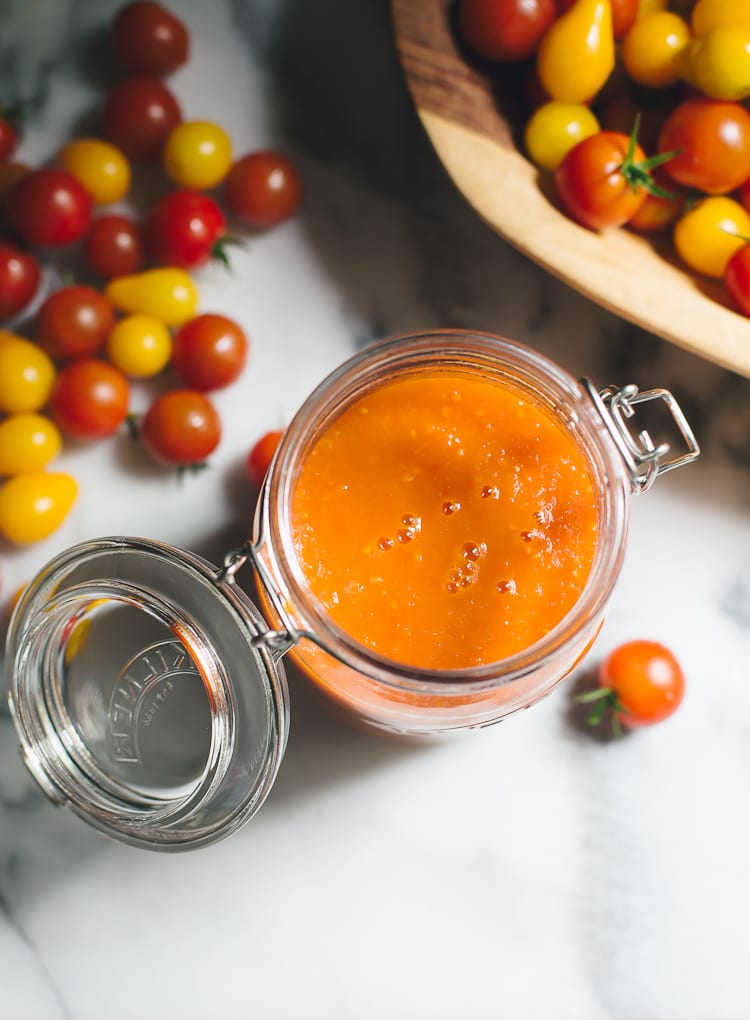
Then, don’t drain it! Transfer your pasta directly into your sauce with tongs. Some of my favorite pasta sauce recipes include my Ragù Bolognese Sauce, Authentic Pomodoro Sauce (Fresh or Canned) and this vibrant Classic Italian Basil Pesto (Pesto alla Genovese).
How To Store & Freeze Homemade Pasta
On a personal note, I never make homemade pasta right before serving. I’ll do it earlier in the day or freeze some to get ahead.
To store (room temperature or chilled): Keep well-floured pasta on a tray, covered with plastic wrap or in an airtight container. Leave at room temperature if cooking within 1-2 hrs, or refrigerate fro up to 12 hrs. I recommend cooking homemade pasta on the same day it’s made to avoid discoloration or sticking if chilled past 24 hrs.
To freeze: Let pasta air-dry (uncovered) for 15-20 minutes to prevent sticking. Then portion into zip-top bags or containers and freeze for up to one month. In my experience, if left in the freezer for too long, the pasta will become dry and brittle. Cook straight from frozen, no need to defrost first.
What’s Next?
Once you’ve mastered this recipe, I’ve written how-to guides for homemade lasagna noodles, ravioli, and a signature, original sourdough pasta that can be made on the same day or fermented overnight.
By signing up, you agree to receive emails from The Clever Carrot. Unsubscribe at any time.

Beginner’s Guide To Fresh Homemade Pasta
- Prep Time: 1 hour
- Total Time: 1 hour
- Yield: Serves 4
- Category: Homemade Pasta
- Method: Handmade
- Cuisine: Italian
- Diet: Vegetarian
Description
This easy, step-by-step fresh pasta recipe will teach you how to make soft, silky homemade pasta made from flour and eggs, in just 1 hour (with or without a machine). It’s an all purpose pasta dough: use it to make homemade fettuccine, pappardelle, homemade ravioli and more.
For timing, the process is broken up into 3 parts: making the dough, rolling the dough into pasta sheets, and cutting the pasta into noodles. Tips shared below for using a Kitchen Aid Stand Mixer, food processor and doing it by hand.
Ingredients
- 300 g Italian Tipo 00 Flour (I recommend Molino Grassi or Caputo)
- 3 large eggs (see note below)
- 1 large egg yolk
- Semolina flour, for dusting (rice flour can be used)
*Note: the total combined weight for the eggs & yolk (cracked) should be 185 g. Because eggs size will vary, make up the difference, if needed, with an extra egg yolk or olive oil. Olive oil makes the dough more soft, supple and satisfying to work with.
Pasta Equipment (choose one)
- Kitchen Aid Stand Mixer (w/ pasta attachments)
- Pasta Machine
Tips:
- Make space. You’ll need a long, clutter-free work surface to handle the dough. The kitchen table or kitchen island is perfect.
- Weigh your ingredients (including the eggs). This will ensure the correct texture of the dough. If your eggs are too small, the dough will be dry and crumbly.
- Wrap it up. Pasta dough can dry out quickly. Keep it covered with wrap or a kitchen towel.
Instructions
Step #1: Make The Dough
The Traditional Way (by hand):
- Add the flour to a large bowl. Make a well in the center; add the eggs and yolk.
- Whisk together with a fork, and then combine with the flour. When the texture becomes stiff, finish by hand to form a rough dough. If dry bits of flour remain after a few minutes of mixing (be patient, it’s a dry dough) add a few drops of water or olive oil to bring the dough together.
- Form the dough into a ball, cover with an upturned bowl or with plastic wrap, and let rest at room temperature for 10-15 minutes- it will be easier to knead.
- Knead the dough for 5-7 minutes. Do this by folding the dough over itself, pushing it forward with the heel of your hand, turning slightly as you go. I literally rock the dough back and forth (watch the video). The texture will be very stiff at first- it’s not bread dough. But rest assured, by the 2 minute mark it will start to soften. Keep kneading until the dough is soft, malleable and has a talcum-like finish. It should “bounce back” slowly when poked.
- Form the dough into a ball, cover tightly with plastic wrap, and rest at room temperature for 30 minutes.
Stand Mixer Instructions:
Fit the machine with the dough hook. Add the flour and eggs to the bowl. Mix until combined. Knead on speed #1 or #2, about 4-5 minutes. Form the dough into a ball, cover tightly with plastic wrap, and rest at room temperature for 30 minutes.
Food Processor Instructions:
Add the flour and eggs to the bowl. Pulse several times until the dough comes together. Remove the dough to your work surface and let rest for 1 minute. If the dough is a bit sticky after resting, add a sprinkle of flour. Knead by hand for 1-2 minutes (the food processor does most of the kneading for you). Form the dough into a ball, cover tightly with plastic wrap, and rest at room temperature for 30 minutes.
Step #2: Roll The Dough Into Pasta Sheets
Set up your station: Dust your work surface with semolina flour. Dust a sheet pan with semolina flour (your pasta sheets will land here). Fit the stand mixer with the roller attachment. Grab a kitchen towel. You’re ready to roll.
- On your work surface, cut the pasta dough into 4 pieces. Working with one piece at a time, flatten the dough into a 6-8inch oval patty. Keep the remaining doughs covered in wrap otherwise they will dry out.
- Set the pasta roller to #1 which is the lowest/widest setting on the Kitchen Aid. With the machine running, send the dough through the roller. Now, send it through again (so, 2x total). Note: if you are using a hand crank pasta machine, refer to the manufacture’s specific instructions for rolling the dough- the settings might differ but the process is the same.
- Continue to roll the dough through settings #2-4, (2x) on each setting. Do not pull on the sheet as it comes through the roller; just guide it along gently. If at any point the dough becomes sticky, dust with semolina flour. I keep my work surface dusted with semolina at all times. This way I can coat both sides of my pasta sheet easily and quickly while I work.
- Your pasta sheet is ready when it’s beautifully thin and somewhat translucent (you should be able to see your hand underneath). Don’t worry if the ends are not perfectly straight; you can always trim them with a knife.
- To finish, dust the pasta sheet generously with semolina, fold it in half, and place onto your floured sheet pan. Cover with a kitchen towel. Repeat the rolling process for the remaining 3 doughs.
Step #3: Cut The Pasta
- Before cutting, I like to dry my pasta sheets ever so slightly. This firms up the final texture giving the strands a more “leathery” finish, rather than a soft and doughy feel (this will prevent the pasta from sticking together later on).
- To Dry: Hang the pasta sheets over the back of a chair for about 10-15 minutes or so. Keep your eye on the time; you don’t want the sheets to dry out completely. You will be able to feel the difference.
- To Cut: take a pasta sheet and cut it in half. Trim the ends, if you like. Run the sheet through your desired pasta cutter attachment to create strands. Alternatively, cut the dough by hand.
To Store: Heavily dust the pasta strands with flour. Coil around your hand or arrange loosely on a tray. Cover with plastic wrap and hold at room temperature if cooking within 1-2 hours. Alternatively, store in the fridge for up to 12 hrs. checking occasionally, to make sure the strands are not sticking. Note: Pasta left in the fridge past 24 hrs might oxidize, discolor and/or stick together.
To Freeze: Allow the pasta to air-dry, uncovered, for 15-20 minutes before freezing. The helps to prevent sticking. Portion into ziptop bags, remove the air, and freeze, up to 1 month. Cook directly from frozen, no need to defrost first.

Comments
Rozel Robbertze says
Will try just don’t have pasta machine but a ba,d roller
Heather says
Great video and recipe! First time pasta maker and the fettuccine came out perfect!
Thank you so much for a fantastic post.
Nina says
Hi, after mixing the ingredients and forming into a ball, how long exactly does it needs to rest? On the recipe by hand it says 10-15 min, while on the recipe with a stand mixer it says 30 min? Thank you
Emilie Raffa says
Hi there! For pasta by hand: after forming the dough into a ball, you let it rest for 10-15 minutes (step #3). Then, you knead it (step #4), followed by a longer 30 minute rest (step #5). When using a stand mixer, the dough is kneaded in the bowl for for 4-5 minutes, followed by a 30 minutes rest. So, bottom line: both methods require a 30 minute rest after kneading; they just follow different steps to get there.
Kathie says
I used 1 cup AP flour and 1/2 cup of Semolina flour. Noodles came out perfect.
I am making a shrimp scampi.
Thank you for a wonderful tutorial.
Emilie Raffa says
This sounds sooooo good. Yum. Thanks for your feedback Kathie!
Nancy says
Recipe was so easy to follow. The detailed instructions and pictures really helped. Excellent recipe for beginner pasta makers. Thank you!
Bob says
Just followed this recipe for the first time.
Really simple to make and shape using my pasta maker.
Feedback from wife and daughter was that it was restaurant quality, really light.
BM says
Hi Emilie,
I’d like to dry my pasta to give as gifts. I read somewhere else that it’s dangerous to leave homemade pasta with eggs in it at room temperature for more than 2 hours, but I’m sure it will take at least 24 hours to fully dry for storage, so I’m confused. What’s the best process for this? And how long can my gift recipients keep their pasta before it goes bad?
Thank you!
Barry says
Hi I’m in the process of making this right now, since there’s only two of us and we don’t need a whole pound of noodles, I was wondering, when I take the dough ball and cut it into four pieces can I freeze two of those pieces as is to use later, or should they be processed and made into noodles before freezing?
Emilie Raffa says
Hi Barry! Great question. You can actually do both, although in my experience, you’ll get better results freezing the actual noodles. It’s very easy to do, and you cook them straight from frozen. Plus, it won’t take you that much longer to cut the dough into noodles now, while you’re processing the rest. Hope this helps.
Marge says
Your step by step instructions and video are wonderful and it is such a pleasure to see exactly how something so intimidating can be done so easily.
I would like to try making your dough recipe when I make pierogi. Do you think it would work? I normally make my pierogi dough with 8 cups of all purpose flour, 7 large eggs (1-1/2 cups) and 1-1/2 cups of water. This was my mother’s way of doing it but I tend to have a problem when sealing the edges. The edges become too thick in the process and I’m wondering if my ingredient ratio is causing the problem.
Any suggestions? Thanks so much
Emilie Raffa says
Hi Marge! This is a really interesting question. To start, your pierogi dough is notably different from this pasta dough recipe, mainly because it contains a good amount of water which makes the texture a lot softer. In comparison, pasta dough is dry (but malleable) like play-doh. And this recipe doesn’t contain water at all. So, if you used this pasta dough for pierogi, they might come out more like ravioli. They won’t be as soft and chewy either. Does that makes sense? It’s still doable. The end result will just be different.
You mentioned having trouble sealing the edges. They are too thick. I don’t think the ingredient ratio is the problem. I think the issue is technique. My sense is that you are either not rolling the dough thin enough and/or the dough shrinks back during the rolling process because the gluten is not relaxed enough. This will make the edges thicker. Because you are folding the dough over to create a seal, the initial roll has to be thin because the sealed side doubles up to create one single layer.
Going forward: Do you have a pasta machine at home? You might be able to use it to roll the dough nice and even. If not, a rolling pin is fine. I would let the dough rest after rolling; if it shrinks back let it rest and roll it again until you are happy with the thickness. Hope this helps!
Marge says
Those are excellent suggestions. I do all my rolling by hand and I will be making several batches in the coming days. I’ll let you know how they turn out after making the changes. Thanks so much, especially for your quick response!
Emilie Raffa says
No worries at all. My pleasure. I’m genuinely interested in how they’ll turn out!
RM says
love this recipe! One question for you:
If I’m making it and will have to leave it about 90 minutes before I can cook it, do I still do the 10-15 mins of drying/hanging before I cover in Saran Wrap?
or do I do the drying step immediately prior to cooking? (Or would I not have to dry at all since it will sit for 90 mins regardless?)
Emilie Raffa says
Hi there! I think I get what you’re saying 🥰 Let me back up to clarify: before cutting the pasta sheets into noodles, I semi-dry the sheets first, for 5-15 minutes depending on temperature. This makes cutting easier and the noodles less likely to stick together. Does that make sense? I’m assuming you did this step.
So then, once your noodles are cut (and you can’t cook them right away) I would just cover the tray with plastic wrap or an inverted sheet pan at this point. They should be semi-dry enough from the previous step. Alternatively, you could infact dry/hang them again if you want and then cover. It really just depends on what you want to do, and your timing. So you have options. Hope this helps!
Melissa says
Can this recipe be used for Whole Grain pasta? If so, what would the substitutions be?
Emilie Raffa says
Yes absolutely. Try 50/50 whole wheat flour + Tipo 00 flour by weight. The egg amount stays the same. For example: 150 g whole wheat flour, 150 g Tipo 00 flour + 185 g eggs/yolk cracked weight.
Heads up: comparatively speaking, whole wheat pasta dough made this way won’t feel anything like regular pasta dough. It will feel a bit strange at first when mixing. I found that it needed a longer rest, about 20 minutes or so, before kneading (admittedly, it was cold in my kitchen when testing this dough, so that could have been a factor too). Anyway. Knead it well and let it rest for a good hour afterwards. Whole wheat flour absorbs more water than Tipo 00 so it definitely needs time. Then roll into sheets and cut into pasta noodles. Spelt flour works too.
Ellie says
Hello :-)
I just want clarify the resting of this pasta dough;
first rest is 10 minutes after forming dough into a ball, then
the second resting (after kneading by hand) is 30 minutes?
Sorry, but I got confused .
However, I am over the moon because…this was my very first time making pasta dough.
My large eggs weighted 170 g, so I took out about 3 Tbs of 00 flour. Then did add 1/2 tsp olive oil because the dough felt a little dry.
In the end, it rolled out really good in pasta machine. Thank you, thank you, thank you for thorough tutorial of this recipe and the filling recipe for Ravioli! I made it for supper today and it was great!
Emilie Raffa says
Hi Ellie! You are correct: Mix the dough and let rest for 10 minutes (this short rest makes the dough MUCH easier to knead in the next step). Then after kneading, shape the dough into a ball, cover with wrap, and let rest again for at least 30 minutes before rolling into pasta sheets. PS: I’m so glad it worked out for you. Just read your comment elsewhere re: the rosemary in the meat filling. Yay!🥰
Sunny Zickefoose says
Emilie – Can I used AP flour for this? If so would it be the same measurements?
Emilie Raffa says
Yes. You can use AP flour instead of Tipo 00 (same amount by weight).
Tom says
Just made this recipe. First time making fresh pasta and it worked like a dream. Thank you so much. Just wondering if it is possible to scale up the ingredients to make a bigger batch for my hungry family.
Emilie Raffa says
Tom, this is excellent feedback. Thank you. To scale up, I would just double the recipe to make approximately 2 lbs. total.
Lori says
I thought the dough was a little dry but the pasta I made (ravioli with the Clever Carrot Mushroom Ravioli recipe) was really tender and delicious. I like the combo of semolina and AP flour as it takes some of the toughness out of the semolina only recipes I have tried. Thank you for sharing your recipe.
Emilie Raffa says
Hi there! Yes, the dough is supposed to be dry. This is perfect for pasta (although it might seem a bit weird). You are very welcome for the recipe and I’m so glad you tried it. Thanks for the feedback :)