This recipe for light brioche hamburger buns proves that you can make seriously good hamburger buns at home. With a dough that’s simple to make and easy to handle, you’ll never buy brioche burger buns from the store again!
We like our burgers on soft, buttery brioche-style rolls and this recipe looked like a great starting point to experiment. What’s interesting, is that this brioche burger bun is lighter than traditional brioche (hence the title). It’s still soft and fluffy, but not quite as eggy and rich. Even the color is a bit lighter. Incredible.
In my opinion, nothing beats all-natural bread. Whether it’s a thick slice of sourdough bread or sandwich bread, good quality hamburger buns are absolutely life-changing. The taste, quality, and healthiness can’t be beat. These buns are the perfect vessel for sandwiches too! Just wait until you try them.
How to Make Light Brioche Hamburger Buns
Step #1: Make the Dough & Let it Rise
To begin, mix your dough using a stand mixer. It will be very sticky and have a shaggy appearance.
Place a damp kitchen towel directly over the bowl and allow it to rest until it has doubled in size. Depending on how warm your kitchen is, this will take about 1-3 hours (mine took 1 1/2 hrs @ 70 degrees F.)
TIP: Giving the dough enough time to rise is crucial in bread baking. In the past, I have rushed this step which caused my bread to be very dense. Rise times will vary, so be patient. Remember to watch your dough and not the clock!
Step #2: Cut The Dough
Once your dough has risen, dump it out onto a lightly floured work surface.
Then, gently flatten the dough to get rid of any air bubbles. Using a bench scraper (or a chef’s knife) cut the dough into 8 equal portions.
If you have a digital kitchen scale weigh each portion so that they’re all the same size. Do this by weighing the entire ball of dough first and then divide by the number of rolls you want to make.
Step #3: Shape Into Balls
To shape, gently flatten each piece of dough like a pancake.
Pull up each side pinching it together in the center. Repeat until the ball is sealed. Flip the ball over (seam side down) and move to an un-floured part of your board. It will be easier to roll this way.
To finish, place your palm over the top and gently roll into a smooth ball.
Transfer each ball onto a parchment lined baking sheet.
Step #4: Second Rise
The dough will need to rise again, this time for a shorter period than the initial rise.
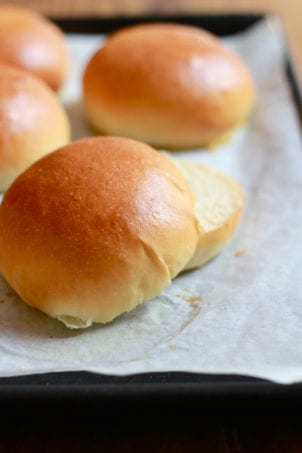
The balls should look puffy and slightly risen, about 1- 1/2 hrs. When they’re ready, gently brush each one with egg wash.
See how puffy they are?
TIP: At this point, you could add sesame seeds to the top of your rolls if you’d like.
5.) Bake The Dough
Preheat your oven to 400 F. and place a shallow metal baking pan on the oven floor.
Before the dough goes in, add about 1/2 cup of water to the pan to create steam. This will help keep the bread nice and moist.
Bake for about 15-20 minutes or until golden brown. Transfer to a wire rack to cool completely.
More Brioche Recipes to Try!
PrintLight Brioche Hamburger Buns
- Prep Time: 15 minutes
- Rise Time: ~4 hours @ 70 F:
- Cook Time: 20 minutes
- Total Time: 4 hours and 35 minutes
- Yield: 8 buns
- Category: Yeast Bread
- Method: Oven-Baked
- Cuisine: American
- Diet: Vegetarian
Description
Adapted from the NY Times, this recipe for light brioche hamburger buns is perfect for BBQ fare, sandwiches (try bacon, egg & cheese!) and so much more. You’ll never buy from the store again!
Ingredients
Dough
- 1 cup warm water, about 75–85 F
- 3 tablespoons warm milk (I prefer whole milk)
- 2 teaspoons active dry yeast
- 2 1/2 tablespoons granulated sugar
- 1 large egg
- 3 cups bread flour
- 1/3 cup all-purpose flour
- 1 1/2 teaspoons fine sea salt
- 2 1/2 tablespoons unsalted butter, softened
Egg wash
- 1 large egg
- splash of water
Toppings
- sesame seeds (optional)
Instructions
- Whisk together the warm water, milk, yeast and sugar; set aside. Beat the egg in a separate bowl.
- Add the flours, salt, and butter to the bowl of a stand mixer. Using the paddle attachment, mix the ingredients until the butter is the size of pebbles.
- Add the yeast mixture and the beaten egg. Run the mixer on medium-low speed (I used #3 on my Kitchen Aid) until a dough forms, about 5-8 minutes.
- Scrape down the sides of the bowl if necessary, and shape the dough into a ball. It will be sticky. Cover bowl with plastic wrap or a very damp kitchen towel, and let the dough rise until it has doubled is size, about 1- 3 hours @ 70 F. *See notes below.
- Line a baking sheet with parchment paper. Using a floured dough scraper (or chef’s knife), divide the dough into 8 equal pieces. If you have a scale, weigh each piece to guarantee that they’re all the same size.
- To shape the dough into balls, gently flatten each piece like a pancake. Gather the ends and pinch the dough to seal in the center. Flip the dough over, cup the surface with your palm, and roll into a ball. Transfer to your baking sheet, placing them a few inches inches apart. Cover and rest for 1-2 hours, or until puffy and slightly risen.
- To make the egg wash, beat the egg with a splash of water. When the buns are finished with the 2nd rise, gently brush each one with egg wash. At this point, you could add sesame seeds to the top of your rolls.
- Preheat your oven to 400 F. and place a skillet or metal baking dish on the oven floor. Before the dough goes in, add about 1/2 cup of water to the pan to create steam. This will help keep the bread nice and moist. Bake for about 15-20 minutes or until golden brown. Transfer to a wire rack to cool completely.
Notes
Giving your dough enough time to rise is crucial in bread baking. Rise times will vary depending on temperature, so be patient. Remember to watch your dough and not the clock!
Comments
Victoria says
Just made these today for burgers. Very easy!! The dough was a bit messy to work with without wet hands (got lazy), but so worth it!! Thanks for your recipe! Mine looked just like yours… That’s rare! :-D
A C says
I made these buns today.. they looked amazing until i added the egg wash and then they all flattened :( they still tasted pretty good but were not tall fluffy buns like the ones in the photos.
Emilie says
Hmm… not sure why that happened! I’ve never heard of an egg wash flattening the dough. Perhaps it was slightly over proofed? Sorry I can’t be of much help :)
Rachel says
These were awesome! They smelled wonderful while baking. And oh boy, you were not kidding that the dough would be wet and sticky. I felt like it took an act of God to remove it from the blades and then my hand!
Emilie says
Hi Rachel! So glad you like them! Yes, the dough is sticky ;) Sometimes I flour my hands a bit when dealing with the dough, that might help!
Jon Golsteyn says
I just made these today because I needed some rolls for the sliced rump roast with gravy that I had.These were amazing,maybe the best roll I ever had.The buns are real thick and soft and are perfect for beef or turkey with gravy.The recipe was very easy and the only thing I did differently was not putting the pan with water in the oven(I forgot)and I baked them at 375 degrees for 15 minutes.They turned out so good.Now I have a recipe that I will always use instead of buying expensive rolls at the store.Thank you very much for this recipe.
Hilda Chang says
Hi Emilie,
Nice to know there is a lighter version of brioche recipe, I love brioche though try to watch my weight as well. If I use instant dry yeast,do I need to modify any other ingredients ?
Thank you.
Hilda
Emilie says
Hello Hilda,
You’re in luck- this recipe uses instant dry yeast! It’s sometimes referred to as rapid rise or fast acting yeast…
M says
Thanks for posting this recipe, I made them and they’re just perfect! Look just like the picture and totally delicious.
I find though that they break up under a big juicy filling where the burger buns I can buy in store hold together til the last bite.
Does this happen to anyone else – or is there something I can do differently when making them?
Thanks again!
Gena says
I am an amateur chef at a summer market and historically have purchased rolls from a local bakery for my dishes. I decided this winter that I would take the time to find a good recipe so I wouldn’t have to spend $1 for each slider sized roll this up coming summer. This is a keeper!!! I was so impressed with texture as well as flavor…not to mention looks. They are amazing. I used all purpose flour (I added 3 cups and then eye balled maybe enough to make it a high moisture dough – I make old fashioned donuts with a high moisture dough as well and have an eye for what it should look like) and they turned out great. I proofed them for 1 hour in my oven for the initial ferment, and then for half an hour for the second ferment. I will be making this again but weighing out the flour to get a weight as I like using weights to bake large batches with so I can get consistent results as well. Thank you again! Amazing!
Zach says
We have made these buns plenty of times now they are the best hamburger buns EVER! We would never go back to buying buns because these are so perfect and easy to make!!
Emilie says
That’s wonderful to hear! Enjoy!
fayola says
I used this recipe and it was super easy. My bread came out a lovely golden color and is still soft and tasty after 2 days. Thanks for this great recipe.
Sophie says
Emilie,
After making quite a few (ok, lots of) adjustments based on what I had at home, I’m thrilled to say these are fantastic. You’re a clever carrot! I bake my own bread all the time, but being in Italy, usally a simple focaccia/crusty rolls. I miss the soft rolls from the UK, so thought I’d try these.
I converted the whole lot to grams, used soy milk and sunflower spread (margarine) instead of dairy, and instead of bread flour, manitoba 0 flour, plus a bit of 00 pasta flour. I also made them by hand. Yup, by hand. I just kept stirring and scraping for 10 minutes while I watched a documentary!
It’s also very cold where we are right now, so I just went for the three hour/two hour rise without paying too much attention… and they were divine. Shiny brown tops and sesame seeds that stayed on, fluffy and soft and gorgeous. I just made veggie burgers and roasted fries to have with them, and I can’t quite believe they came from my very own hands (and this magic recipe, of course)! They’re honestly store-bought quality, which gives me faith in doing as I do, making everything from scratch.
I can’t wait to browse your site for some more baking ideas. I’ve got the bug! Hopefully won’t have to tinker around with the next ones quite so much, haha. Thank you again lovely baker! :D Xx
Emilie says
Hello Sophie! Thank you so much for your feedback! I’m absolutely delighted that you had success with the recipe, and what incredible adjustments you made! Now that you’ve got the bug, I hope you have a go at some of the other bread recipes here on the site. Happy Baking! xx
Michele says
Hi! I’m excited to try this! About how large were the finished buns? I need mine to be about 2″ in diameter.
Thanks!
Emilie says
Hi Michele!
These are larger than 2″ rolls, about the size of a standard hamburger bun. If you want something smaller, you can divide the dough into smaller portions to achieve your desired size.
Dana says
These turned out great! Bakery quality! I subbed veggie oil for butter, all purpose flour for bread flour, and water for milk as that’s what I had at home and there seems to be no deleterious effects. This will be a go-to roll recipe for me as you could make a lot of variation from the theme: sweeten the up with some cinnamon and sugar on top or maybe more savory with some shredded hard cheese! Thanks for the recipe!
Also- just an aside- I wish comments would filter so I could see feedback more easily from people who have actually made the recipe- because there’s a lot of comments (deservedly so) merely stating how tasty and beautiful they look. One of the deciding factors for me trying a recipe at all is comments from people who have made the recipe and if it’s harder for me to find constructive comments like that I usually don’t try the recipe. Just something to think about in the future….
Fazzy says
You are quite the clever carrot. Essentially doubled your recipe to make 40 slider size buns. Perfect at 400 for 20 min. Crusty,flaky crust and soft,fluffy middle. Thank you!!
Peter says
Very nicely presented page and recipe. I am a bit of a brioche burger bun nut and tried your recipe and it works really well. The crumb is excellent! I learned this little trick if you want the crust to be softer – just put the buns in a ziplock bag for a day or so and the residual moisture will be absorbed by the crust.
Emilie says
Wonderful! So glad you liked the recipe. And thanks so much for the tip! :)
Lavonne cooper says
Can I use my bread maker for the dough? Do I need to adjust the ingredients and can I form the buns straight from the bread maker and place them in the oven?
Emilie says
Hi there! I’m sure you could use your bread maker for this, however, I haven’t tested it myself so I’m unsure how to advise!
If I were you, I’d look through the manual (with recipes) that came with the machine. Look for something similar to this recipe and follow the instructions from there. That would be the best bet! Good luck :)
Megan says
Hi Emilie! Just wanted to let you know that I tried this recipe and it worked out great. Haven’t made brioche before and was super happy with the result. I only had light rye bread flour so though they might turn out a bit dense, but gave them a little extra time on the second rise and they turned out really light. Cooked the buns the night before and kept them in a zip lock bag until we ate them the next day – they were still super soft. Also worked well in the sandwich press the day after. I’ve linked to your recipe over at my blog :)
Thanks!
AtulNHS says
It’s 2 in the morning when i finished baking this bun. It is all worth the effort! Fyi, i didnt divide the dough into 8 propotions. Instead i baked them once as one huge 8-inch bun as i have an 8-inch beef burger patty and no huge bun could be found around in any store in my country. I am from Brunei btw and I am very satisfied with your recipe. Easy to follow, easy to bake. :) thank you so much for sharing the recipe.
Anjum says
I really want to make these but I don’t have a standing mixer, can I use an electric whisk?
Shannon says
Made this yesterday to accompany short rib burgers… I was a bit intimidated by the process (I am not a baker and most attempts at bread and bread related products have been failures for me) and even along the way I was concerned that they weren’t going to come out BUT they were PERFECT. The only thing that was a bit different for me was that I too left them in the kitchen for the first rise at ~70 degrees (thermometer read 70-72) but the dough just wasn’t rising. My husband turned the oven on and set the dough on top and it rose beautifully… the second rise was the same, they weren’t rising until I propped the door open to the oven for a bit ~81 degree kitchen temp. Anyway, lovely rolls and this will be my go to recipe!
Emilie says
Hi Shannon! Fantastic!
Sometimes the rising process just takes a bot longer… it’s possible that your ingredients were cold, which would increase the length of time. As for the second rise, again it all depends. That’s why it’s always best to watch your dough and not the clock ;) But, since they turned out okay, you did it!
Jane says
I just had to comment because I made these yesterday.
I have never baked any bread or anything like that before and your instructions were so easy to follow and my buns turned out exactly like yours! Everyone loved them, I had them with beef brisket and coleslaw. So yummy.
I feel lucky to have gotten brioche right for my first time, but I must thank your recipe and instructions!
Thanks so much :)
Jane
Emilie says
Jane, that’s fantastic! Thank you for taking the time to comment- I love feedback. Glad you had success baking bread for the first time, that’s incredible. I’ll be dreaming of brisket and coleslaw for the rest of the day ;)
Andrew says
These are the best for burgers! A lot of home made bun recipes are way too hard and crusty to use as hamburger buns but these are the real deal. Soft, airy and slightly chewy, but still substantial enough to hold a sizeable burger patty!
I hate the cheapness and taste of… well I don’t want to name names, but I’ll just say I WONDER how I lived with grocery store buns my whole life! Thanks Emilie!
Emilie says
You are quite welcome, Andrew! Love this comment- too funny ;)
Marty D says
I will never use another recipe again. I’ve tried others, but was disappointed by something about all of them. These are what I was looking for. Soft but sturdy enough, beautiful, and easy to work with. These will be perfect for my pulled pork I worked so hard to smoke yesterday!
Emilie says
Hooray! I can definitely relate to your frustrations- bread quests are quite serious business and I’m so glad that you are happy with these rolls. Your homemade pulled pork sounds divine. I’d love to hear how it all came out. Cheers! Thank you!
Dinah says
Thank you for the best brioche bun recipe! These have never ever failed me and are now a family staple. So much better than anything bought! I have shaped them into hot dog rolls as well. The children ask for this all the time. I follow the reciepe to the letter and it the buns come out perfectly. Yummy! Dinah
Tony says
This is an Amazing recipe, i use it now in my restaurant , people love it as i do! Thank you it is amazing! ~Chef Anthony
Emilie says
Oh my goodness, that’s one of the best complements I’ve ever received! What kind of restaurant? How fantastic. Thanks for sharing, Anthony!
George says
made as per recipe, but they turned out to be dense, not light as shown in the picture above. What did i do wrong?
Emilie says
Hi George!
So sorry to hear that! There are a couple of factors that could have contributed to heavy/dense bread.
One possibility is that you added too much flour by accident. But most likely, it’s because of an inadequate fist rise. How long did you let the dough rise after you mixed it? It can take anywhere from 1-2 hours to double in size depending on how warm your kitchen is. If this step is rushed, the gluten will not have time to develop therefore resulting in dense bread. Also, how long was your second rise? This could be a potential factor too.
Brian says
Also meant to add…used the Tangzhong or Water Roux method with this…works beautifully :). Cheers
Brian says
Wonderful stuff…so soft and fluffy, just thought I would mention since I only cook for one or two folks usually, for those that prefer, you can freeze this dough after the first proofing and it still comes out nicely…first time baking this I portioned the dough in quarters, froze three in individual zipper bags (light coat of shortening on the inside, and do your best to remove all the air…check in about an hour and remove any additional gases from yeast activity) and used the last quarter to make 2 buns. When you want to use it, just take it out a couple hours ahead, let thaw for about 30 minutes, will still be stiff but if you work it a bit by hand will warm quickly, then form your buns as usual and let them rise that second time and carry on as usual…don’t know if you should freeze for more than about a week though as I’ve never tried longer than that…once again though really good stuff
MJ says
Hi!
I would love to try your recipe. I did one before but it just turned out like a scone and I was so miserable after. The problem is – I don’t have a kitchenaid and I was wondering, is it possible to hand-knead the dough and still have it turn out as amazing?
Emilie says
Hi MJ! Don’t give up! Do you know how many ‘scones’ I’ve made before getting it right? ;)
You can make this by hand, but it will require a fair amount of decent kneading to develop the gluten. And if not properly developed, it will taste quite dense. This dough is wet, which is why I prefer the stand mixer for easy kneading. But don’t let that stop you- I say, give it a go and see how it turns out. Good luck!
Taylor says
Do you think it would be possible to make a recipe of this into baguettes instead of buns? Baking time would be different I know but I’d definitely like a brioche baguette.
Nicoletta @sugarlovespices says
Hi Emilie, I just wanted to say I tried your brioche buns recipe today and my husband used them in his bbq brisket slaw recipe. They’re absolutely amazing. In the next couple weeks we are going to post the recipes of both the buns and the brisket and if you want you can take a look. And of course I am going to link to your recipe.
Mike says
Great recipe ….had problem during the second rise…I covered them loosely with plastic wrap, but it got stuck on them and the tops were ruined after removing…any ideas???
Emilie says
Hi Mike,
Sorry to hear about that! Next time, lightly coat the plastic wrap with cooking spray or gently brush with olive oil. This way they won’t stick.
Linda says
hi!,
I weighed everything out very carefully and after the first rise, the dough was so sticky it was impossible to handle. I had to use a lot of flour to make it manageable so that I could roll it. Unfortunately, the dough spread out a lot and it didn’t work out. Any thoughts?
Thanks,
Linda
Emilie says
Hi Linda,
It sounds like there was too much water in your dough. Even though you weighed your ingredients (that’s great!) this often happens in bread baking. Sometimes you have to add more flour or water depending on your surrounding temperature. Keep in mind, this dough is naturally wet. So for next time, I would recommend adding a touch more flour to the initial mix to see if you have better results. Also, if your balls of dough aren’t shaped tightly enough they well spread.
Linda says
Thank you so much, Emilie! I’ll give it another go.
Emilie says
No worries! Good luck :)
Nikki says
Hi! So I saw this recipe the other day and it looked so easy, and all the comments were good, so I thought I’d try it! However after the second prove I know have a baking try full with one big blob of dough and I can’t think how I’m going to salvage it… Any suggestions? I followed the recipe so carefully and can’t think where I went wrong.. though before the first prove I did think my dough was a bit wetter than yours looks in the photos … I had to use a ton of flour just to be able to shape it into balls! If anyone has any ideas let me know asap! Thanks!
Nikki says
Thinking of just throwing it all in a loaf tin and seeing what happens!
Emilie says
Hope it came out ok!
Nikki says
Hey! So I left it about another 30mins and then just scraped it all off the tray and made 8 new rolls (I had worried this would ruin all the proving…) and just went ahead and baked them. And they turned out great!!! Definitely think my mixture was too wet though as when I shaped them they kept falling flat like pancakes… So I just got them in the oven as quick as possible and then they rose and all was well :)
Thanks for such a great recipe!!
Emilie says
Hi There!
When your dough is wet like that, it definitely needs more flour. Sometimes this happens due to inaccurate measuring or just because it needs more flour on that particular day. The good news is that now you know what extremely wet dough feels like- next you make this, add more flour until you are able to shape it comfortably. These things happen in bread baking and you have to make adjustments as you go!
Good luck and let me know how it goes!
fiona says
This recipe is fantastic ! Only discovered it last week and have made numerous batches now. we’re headed into autumn now so perfect for our soups and burgers. This would have to be the most successful and easiest recipe I’ve come across. Tonight we did half and half wholemeal flour with a touch extra yeast for safety and they were perfect ! Thank you so much for sharing !
Emilie says
Hi Fiona! Glad you liked it. These rolls are definitely great for soups and burgers- you can make them mini too ;) Enjoy!
Michelle Farrell says
I was wondering how many oz the dough weighs out to when you portion them.
Emilie says
Hi Michelle,
Weigh the entire ball of dough first and then divide by the number of buns you’d like to bake. That will give you the weight for each one.
Paige says
Hi Emilie
Your recipe looks really good. How long can I keep these buns after baking? If I wanna make a smaller batch, do I just halved all the ingredients?
Emilie says
Hi Paige,
These rolls are best consumed within one day of baking. Since they do not contain any preservatives, they really don’t last that long.
I wouldn’t have the recipe; I would follow it as is and freeze any remaining baked rolls for future use. Just make sure they’re completely cool first. Then all you have to do is defrost them when you’re ready. That would be your best bet!
luneseven says
Thank you very much for this wonderful yet uncomplicated recipe!
I made 16 mouthwatering slider buns that came out perfectly after an initial rise of 1-45 min and a second rise of 1 hour.
My husband and guests were happily surprised to know I could bake. :-)
Emilie says
That’s fantastic! So glad the rolls were a hit. Thanks so much for taking the time to leave feedback. I really appreciate it :)
Tawny says
I am very new to making bread. The other recipes I have made said to shape the dough into a ball and put in a bowl with a little oil and coat all sides. Do I not do this with your recipe? I was just worried the dough would be very hard to work with and get out of the bowl after rising. Thanks.
Emilie says
Hi Tawny,
What you read about oiling the bowl is very common in bread baking, although not necessary for every recipe. Since there is butter in this dough there’s no need for oil. However, if you feel more comfortable adding a little to prevent sticking certainly go ahead! Do what works for you.
Good luck & happy baking! :)
Monica says
I am so glad I found this recipe on pinterest. The buns, which came out beautiful, were just what I needed to make a tri-tip sandwich made with aïoli and BBQ sauce. Thanks for your step-by-step instructions and the caveat that the dough is sticky.
Emilie says
Hi Monica!
Thanks for the feedback- I love it! Oh my goodness, your tri-tip sandwich sounds absolutely delicious. It’s not even 9AM here, and I’m already craving that for lunch!
Glad you found the tutorial helpful :)
Sara says
I am making these right now and my kitchen smells beyond delicious. So excited for these buns, and such a simple recipe to follow, I love it!
Emilie says
Hi Sara!
Oh, I know that smell! I’m so glad you found the tutorial helpful. Thanks for the feedback, enjoy! :)
Rosie says
Thank you for this recipe, pictures, and hints. Made these today for hamburgers tonight. They turned out so, so good! Perfect in every way thanks to all the information and details. I’ll be keeping this on hand and NEVER buying those bad grocery buns again!
Natasha says
Hi Emilie! Greetings from hot and muggy Kuala Lumpur!
Thanks to your informative blogpost and step-by-step pictorial, my family and I tucked into light brioche buns at dinner today. I must say I almost gave up after the first proofing – it was my first time working with such wet, gloopy dough! I read the other comments that some have kneaded the dough by hand – my hat’s off to them. :)
Thought I’d share my outcome. I was experimenting to make minis for sliders; since this was my maiden attempt, I made half of your given recipe (I.e. For 4 buns), then portioned 30g of dough per bun after the first proofing. Managed to yield a dozen minis, each almost 2.5 inches in diameter. The next time I make your recipe, I’ll bake it as a loaf, just as you recommended in an earlier feedback. Thanks once again!
Alexander says
Another excellent post – thanks so much! I found that combining the flour, sugar, salt, and chilled butter in a processor and then pulsing with a dough blade was a decent substitute for a mixer. I then proofed the yeast in the warm milk and water, added the eggs and mixed the dough by hand, adding a few folds to get nice gluten structure. I say eggs because I trimmed back the water and replaced with an additional egg. Once the dough had doubled I placed it in the fridge for 2 hours to assist in the cutting and shaping. They turned out absolutely delicious.
Cheers! Alex @ImmortalPestle
Emilie says
Hello Alexander! That’s brilliant. Thank you for sharing your tips. It’s funny, because I just lent my stand mixer to someone and your processor method comes in handy right about now. Perfect timing! And yes, chilling the dough after the initial rise is smart; the butter has a chance to solidify and makes the dough easier to handle. Good on you! So happy to hear you enjoyed the recipe.
Liana says
Hi Emilie. I made these last night and they look great but to my Aussie taste they are too sweet and rich to use as a hamburger bun – but..think would be perfect for a brioche ice cream sandwich – maybe rum n raisin w some pistachio brittle ..or breakfast w jam.
But I did have some problems with them rising.I’ve never had a problem w bread or brioche before I just put it in the fridge for 4-8 hours but this was flat. So I took it out let it come back to room temperature put it back in the mixer added 2 more teaspoons of yeast sponged with some water and mixed it again adding a bit more flour and this time it rose..just in case anyone has the same problem.
So I’m still on the hunt for a plain soft hamburger roll if you have a recipe?
Emilie says
Hello Liana,
Glad you liked the recipe. You’re right- they would be perfect for brioche ice cream sandwiches. I had that once in Sicily ;)
I am happy to help troubleshoot with regards dough rise:
Did you put the dough in the fridge after the initial mixing stage? OR after you shaped them into buns? And did you do this to delay baking?
Putting dough in the fridge slows down the rise rate. It will never look as puffed and round when compared to dough risen in a warm environment. But it’s still rising. That’s most likely the reason why your dough looked flat. It rose again when you brought it back to room temperature because of the temperature increase.
Surprisingly, this recipe does’t need additional yeast to rise- it’s all about controlling the temperature.
Because it is summer by you, I would just mix up the dough and leave it to rise at room temperature (if your schedule allows). It should rise very quickly- maybe 1 – 1 1 /2 hours. Shape into buns and do a short second rise. Bake as directed.
Does that make sense?
I don’t have another soft hamburger roll recipe as of yet! Perhaps you could decrease the sugar and butter in this recipe? That might be more to your liking!
I hope this info helps, Liana! Happy baking & good luck!
Anh says
This is amazing! I’ve been searching high and low for a brioche recipe that did not require the baking skills of a trained chef/baker. I will be making this this week so I’ll let you know how it turns out.
Thanks so much!
Emilie says
Thank you, Anh! Personally, I love this recipe. I can’t even tell you many times I’ve made these buns. And once you get the hang of it you can make loaves, sliders, etc. Have fun with the recipe! Let me know if you have any questions!
Lisa says
Hi there, just wondering if the buns you made were normal sized hamburger buns? I am planning to make them for sliders just want to get an idea of how much to make. thanks :)
Emilie says
Hi Lisa!
Great idea! Yes, this recipe yields normal sized hamburger buns, slightly on the larger size. It calls for 8 buns, but sometimes I make 10. You can easily make sliders (about 16-20 depending) on the size you want. Does that make sense?
Good luck and happy baking! :)
Paul says
Hi – Looking to make these to go with my speciality home made pulled pork on Sunday, but what exactly is 2.5 tablespoons of butter? Would like to get that right because the amount of liquid usually affects bread quite substantially. Thanks!
Emilie says
Hi Paul! These buns will be perfect for pulled pork… getting hungry just thinking about it!
You are absolutely correct in having the exact measurements in bread baking. Are you using stick butter? That’s what I use and it has measurements on the wrapper. I line my knife up to 2 1/2 tbsp. and slice.
If you prefer you can weigh the butter with a kitchen scale. One stick of butter is about 4 ounces. So 2 1/2 tbsp. would be roughly 1.25 oz.
Happy baking :)
Paul says
Thank you so much (not sure we have stick butter in the UK so the weight is perfect).
I actually made a test batch last night and these are amazing! A little patience required but not difficult at all.
The fact they are not too buttery means when toasted they are perfect for the pulled pork.
Thanks again!
Emilie says
Ahhh! I would’ve sent you the measurement in grams- my apologies. I thought you were here in the US. I actually prefer to work in grams anyway ;)
I’m happy to hear they turned out well. You are quite welcome, Paul. Enjoy!
Medzi says
Wonderful buns. Turned out perfect the first time around. Love the whole site.
Emilie says
Oh good! I love a success story! Have fun with the recipe, Medzi and thanks for stopping by to comment :)
sheema says
Thanks for the receipe ,First time baking the bun I found the bun slightly heavier and denser than the burger buns bought at bakeries.I used organic breadflour ,each bun weighed 111GM ,How to make the bun less heavier and lighter ,what is the differnce in using only all purpose flour instead of bread flour .Thanks
Emilie says
Hi Sheema!
Great questions(s)!
1.) With regards to heavy burger buns, another reader had asked something similar so I’ve copied my response. See below!
2.) The difference between bread flour and all purpose is that it has a higher protein content which gives the bread a better overall structure (and texture). If you used only all purpose, the buns would be more cake-like and not quite as chewy. The type of flour in this case does not affect the weight.
In my experience, there are several factors that can make bread hard/tough/dense/heavy.
Here are some examples:
1.) Too much flour. This particular brioche dough should be extremely wet & sticky. Adding too much flour will make it heavy & dense. Make sure to WEIGH all of your ingredients for accuracy. King Arthur Flour has an excellent master conversion chart that you can reference.
2.) Initial rise time too short. This used to be my #1 problem with homemade bread baking. I always rushed this step and every single time it led to heavy, dense bread. Rise times will vary depending on temperature and yeast strength, so it’s crucial to watch your dough and not the clock. Depending on the day, this dough can take anywhere from 1 1/2-3 hours @ 80 degrees F to rise. In the colder, winter months it will usually take longer. It also helps to proof your dough in the same container every time so you can visualize how fast/slow the dough is rising. When it hits a certain point, you know it’s done. You can monitor the rise time better this way.
3.) 2nd rise time too long. Your dough does not need to rise for as long as the initial rise, nor does it need to double in volume. It’s ready when it’s slightly puffy. If it rises for too long, it will not get enough oven spring to create a round shape. Instead it will be heavier & flat. For the second rise, I usually let my dough rise for 45 min- 1 hour @ 80 F. Again, when it’s cold it might take a little longer (I never go over 1 1/2 hours). When it doubt, it’s better to underproof.
4.) Not enough steam in your oven. Often times this will cause the exterior of the bread to get really hard which hinders the rising process in the oven. Usually your bread will tear or ‘blow out’ as a result.
I hope this helps, Sheema! If you have anymore questions please feel free to get in touch.
Maureen says
Can this recipe be doubled? Thanks.
Emilie says
Hi Maureen! Yes, this recipe can be doubled :)
Jenn V says
I’ve been using this recipe for years via another food blogger. They always taste great but they end up flat. Using your shaping technique I’ve finally perfected these! Thanks so much!