This no-knead artisan bread recipe is perfect for beginner bakers. Made with instant yeast and baked in a Dutch oven, my easy step-by-step photos and instructions will teach you exactly how to make crusty, bakery-style bread at home— no kneading required.
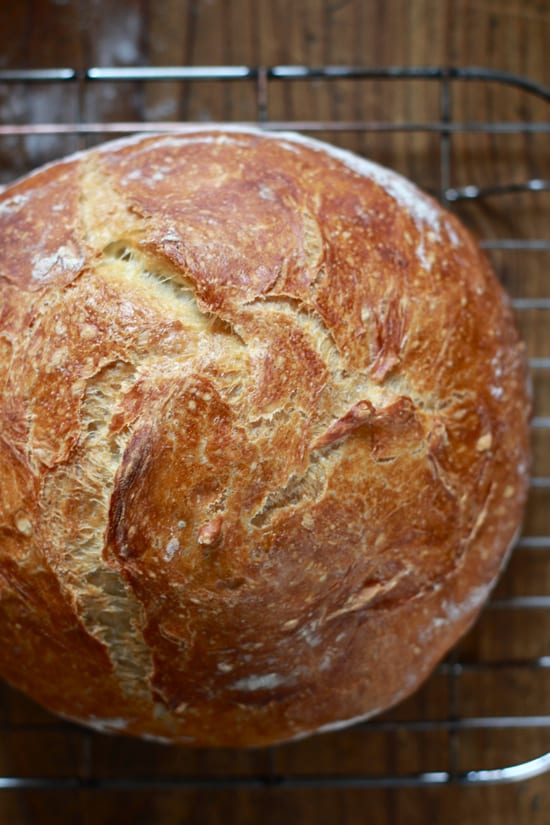
Interested in baking homemade bread? Jim Lahey’s No-Knead Bread recipe is an excellent starting point. His method follows an incredibly easy formula: mix the dough and let it rise overnight. That’s it.
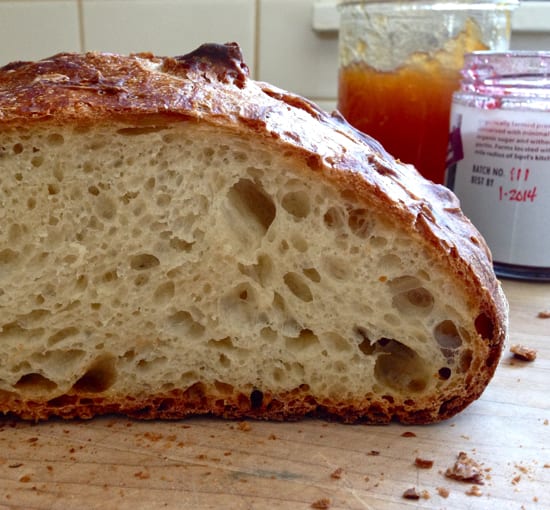
You don’t need a stand mixer or a bread machine, and there’s no kneading involved! Just 2 minutes of prep time and the rest is hands-off. The result? A gorgeous, perfectly golden crusty loaf with a soft, chewy interior.
How To Make Easy Homemade Bread (Step-By-Step Recipe)
Step 1: Mix The Dough
First, clear away all kitchen clutter: bills, toys, rogue phone chargers— you’ll want a clean surface to work on.
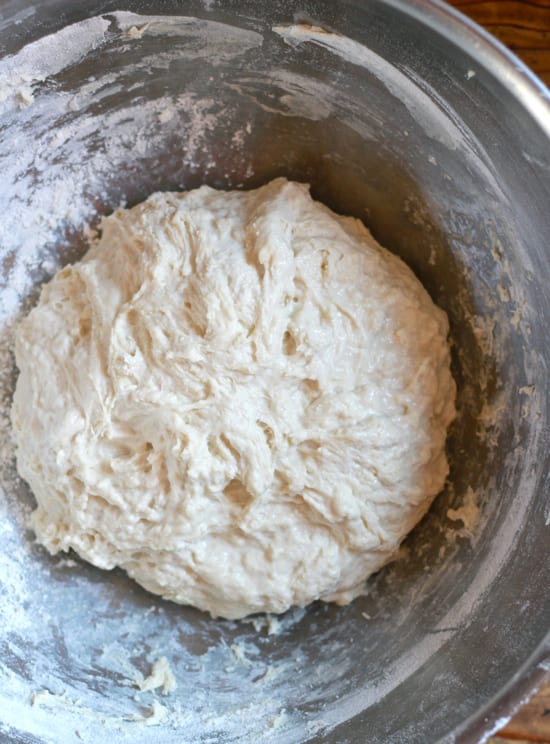
In a large bowl, mix the dry ingredients: flour, instant yeast, and salt. Add water and stir to combine. As the dough thickens, switch to your hands and bring everything together. It’ll look shaggy, wet, and sticky.
Instant Yeast vs. Active Dry Yeast: What’s The Difference? While both types of yeast make bread dough rise, instant yeast can be added directly to the dough. Active dry yeast needs to be dissolved (or “bloomed”) in warm water first. If that’s what you’re using, bloom it before mixing.
Step 2: Let The Dough Rise (Overnight)
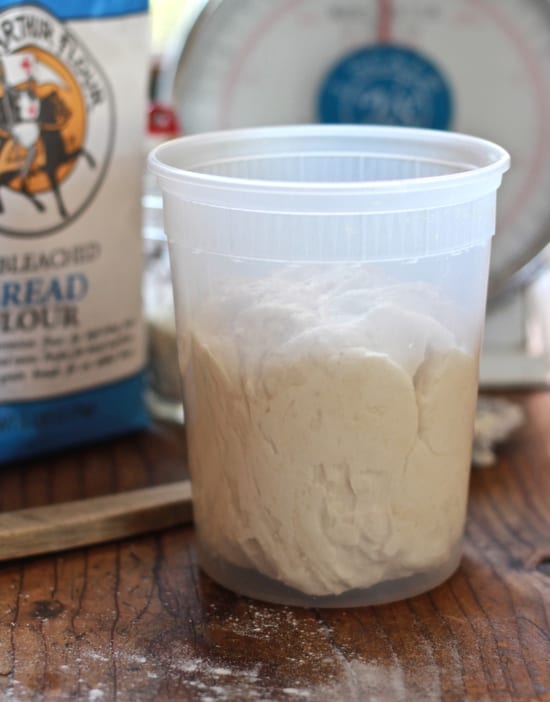
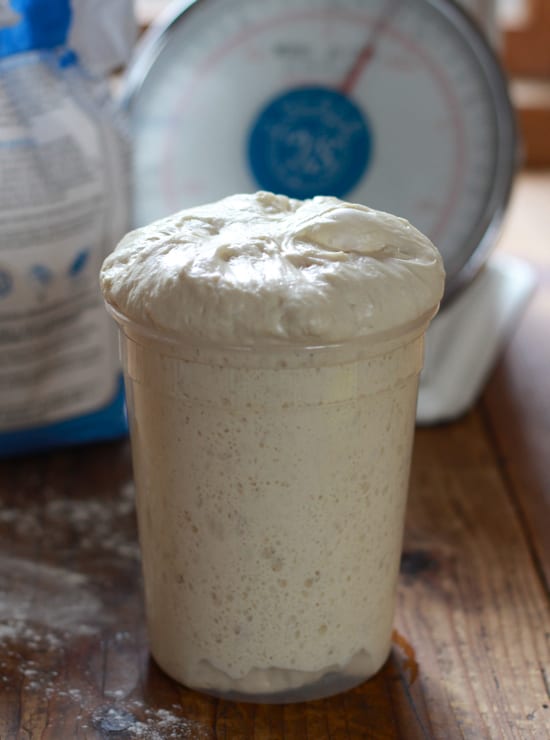
Transfer the dough to a lightly oiled container and cover loosely with oiled plastic wrap to prevent sticking. Let it rise at room temperature (about 68-70 degrees F) for 12 hours to overnight.
Your dough is ready when it has puffed up in volume, about 1.5–2x the original size. You will also see lots of bubbles.
Pro Tip: If your kitchen’s chilly and the dough seems sluggish, place it in the microwave with the light on (door ajar). The gentle warmth helps wake up the yeast (my friend Celia gave me this genius tip!).
Step 3: Shape The Dough (And Let It Rest Again)
Flour a piece of parchment paper. Remove the dough from its container and place it on top. Fold the dough in half (like a book) and then fold it again. Sprinkle the surface with more flour to prevent sticking.
To shape: gently tuck the edges of the dough under itself to form a round ball. Place seam side down on the parchment like so…
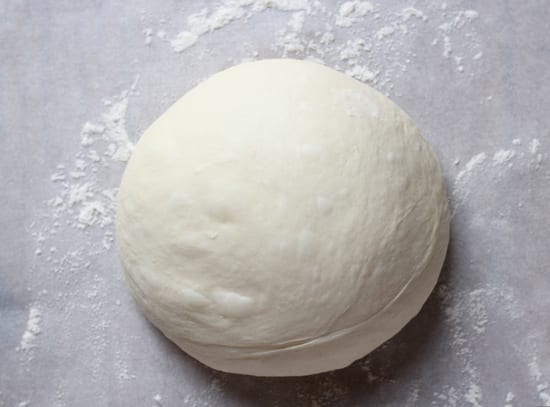
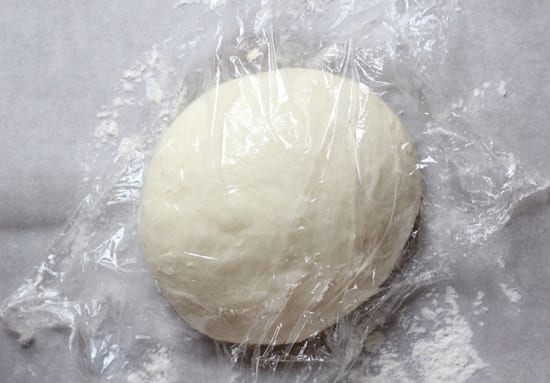
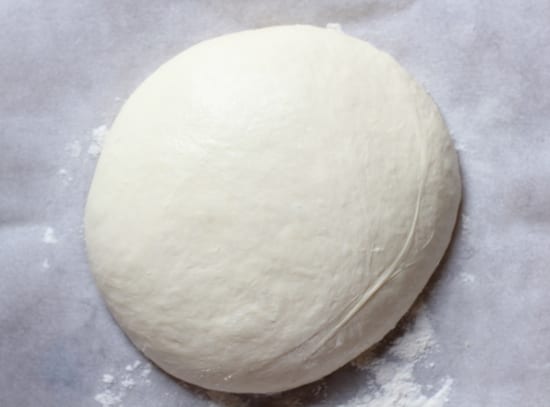
Cover loosely with oiled plastic wrap and let it rest again until puffy. It will start to spread out slightly as it rises- this is ok. The 2nd rise will not take as long as the first, but expect to wait about 30 minutes- 1 hour depending how warm your kitchen is.
Step 4: Preheat The Oven
About 30 minutes before baking, preheat your oven to 500 F with a Dutch oven inside (lid on).
Why a Dutch oven? Steam is essential for that shiny, crisp crust. The pot traps moisture, which allows the dough to form a beautiful, artisan-style crust (for reference, baking without steam might cause the crust to harden too quickly which equates to dense and heavy bread). No Dutch oven? Any heavy oven-safe pot with a lid will do, as long as it can heat up to 450 F+.
Once the pot is hot, carefully slide your hand underneath the parchment paper and invert the dough into the pot. The seam will now be facing up. Take a look…
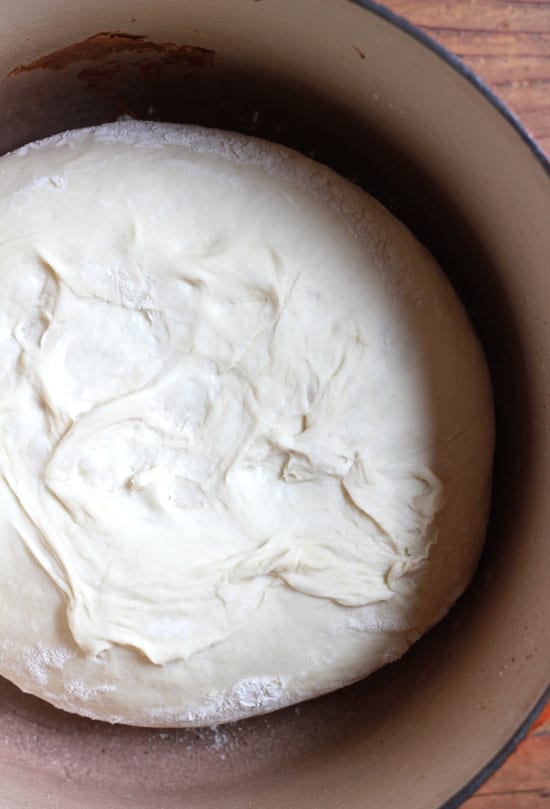
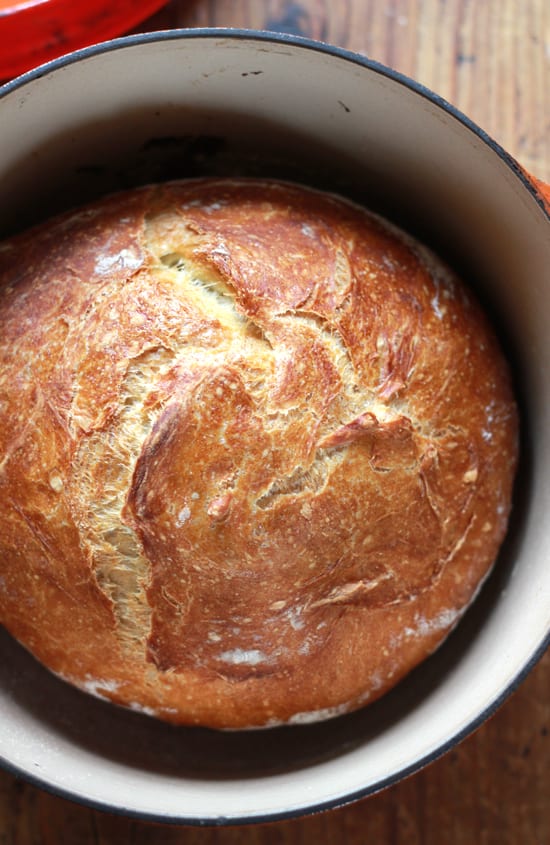
Step 5: Bake The Dough
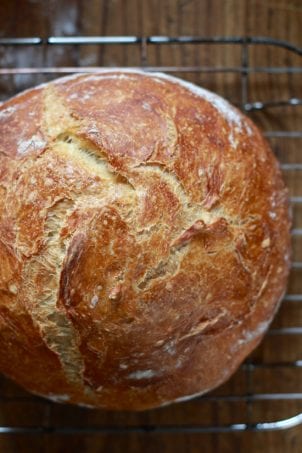
Place the pot in the oven and immediately lower the heat to 400°F. Bake covered for 40 minutes, then uncover and bake for another 15–20 minutes until the crust is deeply golden.
Want to be sure it’s fully baked? Check the internal temperature. It should read 200–205°F. I use this digital thermometer and swear by it.
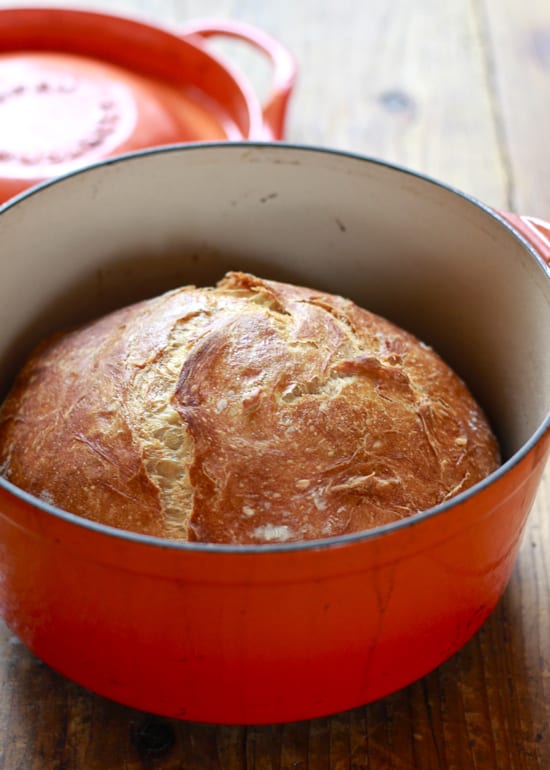
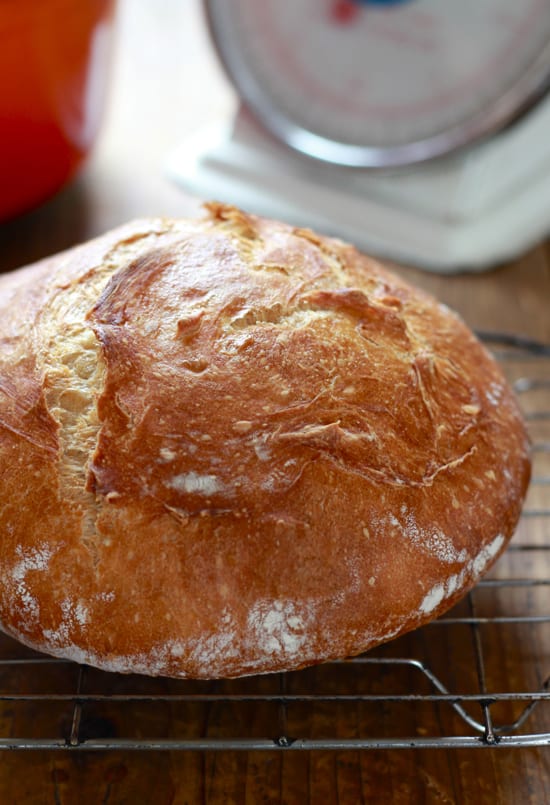
Step 6: Let It Cool
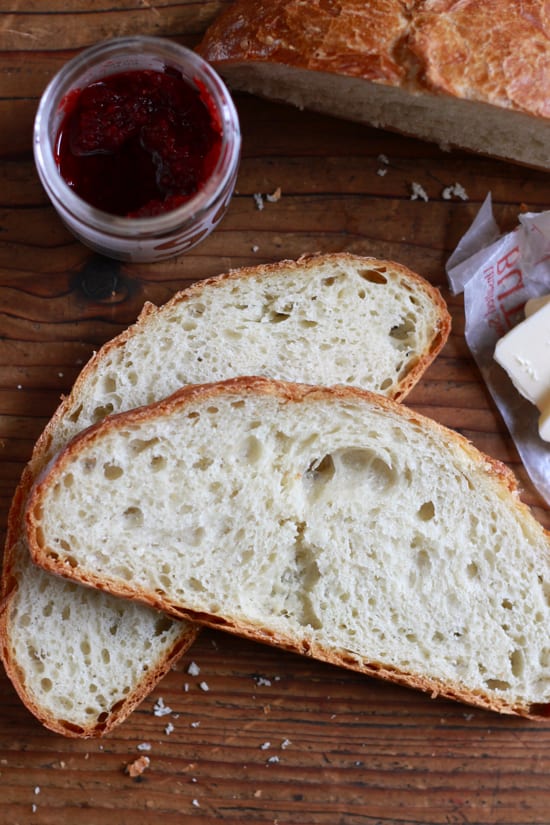
Transfer the loaf to a wire rack. Tap the bottom— it should sound hollow and feel light. You’ll hear it crackle as it cools (bread music!). Let it rest for at least 1 hour before slicing. Cutting too soon can result in a gummy crumb. Trust me, I speak from experience. And there you have it: easy, no-knead artisan bread!
Final Thoughts…
When I first started baking, I had no idea what I was doing. Jim Lahey’s no-knead method changed that. It’s forgiving, low effort, and tastes like you bought it from a fancy bakery! If you’re just beginning your bread journey, this recipe will give you the confidence to level up— to sourdough bread, light brioche hamburger buns (fan favorite!), pull apart brioche rolls, and beyond. Not only does it taste good, this loaf cost less than $1 to make!
By signing up, you agree to receive emails from The Clever Carrot. Unsubscribe at any time.
Jim Lahey’s Easy No-Knead Artisan Bread
- Yield: 1 loaf 1x
- Category: Yeast Bread
- Method: Oven-Baked
- Cuisine: American
- Diet: Vegan
Description
An incredible recipe for no-knead artisan bread baked in a Dutch oven. I like to make the dough in the evening (after dinner) to rise overnight. It’s fantastic for sandwiches, crostini, and to mop up delicious sauces! Recipe adapted from Jim Lahey’s No-Knead Artisan Bread.
Ingredients
- 390g (3 cups) bread flour (not all-purpose) + more for dusting
- ¼ teaspoon instant yeast
- 1¼ teaspoons fine sea salt
- 320g (about 1 1/3 cups) water
Notes
I use King Arthur Bread Flour & SAF instant yeast. You can use any 5 1/2- 6 quart Dutch oven, cast iron, enamel, Pyrex or ceramic bakeware (with lid) that can heat up to 500 degrees F.
Instructions
In a large bowl add the flour, yeast, salt and water. Stir until a rough dough forms. If it seems very dry, add more water.
Transfer to an oiled container and cover loosely with plastic wrap. Let rise for 14 hours- overnight, at room temperature (about 70 degrees). Your dough is ready when it has puffed up in volume, about 1 1/2 -2x its original size. *See note below.
Lightly flour a sheet of parchment paper and place the dough on top. Fold dough in half and then fold it in half again.
Shape the dough into a ball by tucking the sides underneath itself, and place onto the paper, seam side down. Cover and rest again until puffy but not fully risen, about 30 minutes- 2 hours depending on how warm your kitchen is.
Preheat your oven to 500 F. Put a (6 quart) dutch oven pot inside for 20 minutes. When ready to bake, remove pot from the oven. Place your hand underneath the parchment paper and invert the dough into the pot. The seam will be facing up. Cover the pot with the lid.
Place your bread into the oven, and reduce the temperature from 500 to 400 F. Bake for 40 minutes, covered. Remove the lid and bake for an additional 15 to 20 minutes, until golden brown.
To make sure that the bread is completely cooked through, take its temperature. Carefully tip the bread onto its side and insert a thermometer into the bottom. It should read 200-205 F. If not, place it back into the oven until it is ready (extra time in bread baking is a good thing). If you’re worried about the top getting too brown, put the lid back on.
When your bread is ready, transfer to a wire rack to cool. It should feel light and make a hollow sound when you give it a knock underneath. Let it cool for at least 1 hour. Cutting it too soon might ruin the texture resulting in a gummy crumb!
Notes
If your dough isn’t puffed and bubbly after the initial rise, place it in the microwave with the light on (keeping the door ajar). The warmth from the light will give the yeast a boost. My friend Celia gave me this tip and it works like a charm, especially in chilly kitchens!

Comments
silva says
have you ever tried adding sunflower seeds or other seeds in it? how about other flours? like rye? i really want to try but I’m not sure if i have to make adjustments to the water, and if you have tried i would appriciate it if you can share what and how. Thank you
Emilie says
Hi Silva, you can absolutely play around with this recipe but it will take some trial and error. I know that whole grain flours including whole wheat and rye will benefit from additional water (as you mentioned). Seeds, dried fruits, and nuts need to be soaked before adding to the dough. Unfortunately, I cannot give you specific measurements or amounts as I have not baked these alternate versions myself. Don’t be afraid to experiment! Make bread crumbs or French toast if it doesn’t work out. Best of luck ;)
Abby Tonks says
This bread is the best! I was a little hesitant over the long baking time and high temperature, but I have made it three times already, and it always comes out gorgeous. Really amazing and tasty. I always thought it would be impossible to make an artisan bread without a wood fired oven. I am a potter, and now I feel inspired to create some bake ware just for this bread. I can’t wait to try your other recipes!
Emilie says
Thank you so much Abby! It’s wonderful to hear that you liked the recipe. Baking at a high temperature always is a little nerve-racking but it’s so important in bread baking in order to get a nice, high rise. isn’t it a good feeling knowing that you can replicate similar results at home? Bread baking is a beautiful art. I would love to see some of your artistry work. Homemade bakeware would be perfect for this :)
Mary says
Hi there,
I’ve made this twice and while it tastes amazing – my loaves aren’t coming out as tall as yours. I follow along with each step and the dough looks like it’s tracking right along with the recipe. Any ideas why my loaves could be coming out a little flatter? Thanks for any help!
Mary
Emilie says
Hi Mary!
I apologize for the late reply (somehow I missed this one!)-
There are a couple of reasons why your bread could be coming out flatter than the pictured loaves.
My guess is that it wasn’t shaped tightly enough before going into the pot (causes spreading), or the oven wasn’t hot enough to allow an adequate oven spring (rise).
As a solution, make sure that when you’re shaping the dough into a ball, that you create a good seam underneath to keep it together. It needs to be tight. This definitely takes a little practice, as I struggled with this when I first started baking. In addition to shaping, instead of letting the dough rise on a sheet pan, place it in a cloth-lined, floured bowl (small) or brotform if you have. This will hold its shape so that it doesn’t spread out. Then, invert the dough into your Dutch oven right before baking. And finally, double check the temperature of your oven with a thermometer for accuracy. The hotter it is, the better the oven spring!
I hope these suggestions help. Do let me know how it goes, and if you have any other questions I’m happy to help :)
Diane Radford says
I have been making this no knead recipe for a little while and I form the loaf on the parchment paper and when it’s time to bake the loaf, I just cut the parchment a couple of inches larger than the loaf and plop the whole thing down in the dutch oven.
Emilie says
Hi Diane! That’s actually a great idea- so much easier to transfer. Thanks for the tip! :)
susanne ellis says
This bread is fantastic! Glorious! I am from Germany and that is the best bread I had (homemade or purchased) since coming to the US in 1997! It reminds me a lot of loafs of bread I had in France. Now if I could only find a great recipe for rye bread and I’d be in bread heaven!!!
Thank you so much for this wonderful recipe. =)
Emilie says
Oh my goodness! That is SO great to hear! It really is hard to find good bread these days, especially in the supermarkets. It makes me so happy that you had success with this particular loaf. Isn’t it yummy? I pretty much bake all of my bread from scratch these days, supplementing with store-bought here and there. I don’t have any recipes for rye bread, but if I come across one I will definitely post a recipe. Thanks for stopping by Susanne :)
Peter G says
I have a very similar recipe and find using a light beer for about 1/3 of the total liquid works very well.
Emilie says
What a great substitution! I’ll have to give that one a try (it’s always good to have these tricks up your sleeve) The beer must add some good flavor too… :)
William Riedinger says
The bread tastes great and easy to make. The only problem is that I end up with larger bubbles at the top. I noticed in the photo above that the bubbles are more evenly distributed. Any suggestions?
Emilie says
Hi William,
Just to be sure- which photo are you referring to? This way, I’ll have a better idea on how to advise. Thanks! :)
William Riedinger says
The 2nd photo from the top.
To analyze it further your bread has overall larger air “bubbles” mine tend to be finer towards the lower half of the loaf with the upper ones larger(1″ ea.) which makes the upper crust paper thin
Emilie says
Hi William,
There could be several reasons for experiencing an ‘uneven’ crumb.
Based on my personal experience, possible factors include:
1.) Dough was too cold- whenever I bake with dough straight out of the fridge, the crumb towards the bottom crust is always finer or more dense. The loaf of bread itself is also heavier. So now, whenever I fridge proof I like to do the second rise at room temperature for at least an hour, (sometimes 2) depending on how cold the kitchen is and how puffy the dough looks. As a result, the crumb and overall loaf is pretty even in texture, fluffy and light.
2.) Are you using the Dutch oven to bake? Sometimes if you take the lid off too soon, the outside crust will harden before the bread has had a chance to fully rise. This will result in an open or big crumb towards the top crust. When then bread can no longer expand, the crumb towards the bottom crust becomes more dense. Does that make sense? Maybe keep the lid on longer to trap in more moisture which is essential to good oven spring and bread expansion.
I hope this helps! Please let me know how it goes if you continue to experiment or if you have any other questions :) Best, E
William Riedinger says
Thank you for taking time to offer suggestions. I reviewed your original instructions and noticed that you put the dough in the dutch oven upside down. I had tried doing that the first time I made this bread and had difficulty in the transfer (sticking to the parchment paper even floured) so I was letting it rise and baking it with the P paper. I tried flipping it again and that solved the bubble problem but Ive found that I need to use a lot of flour and the dough is spread way more then yours (over 12″)making transfer even harder also your bread doesn’t have that much flour on it after its baked, I don’t mind some but not to excess
Angie | Big Bear's Wife says
my husband LOVES all kinds of bread. I am excited to give this a try!
pym says
lovely recipe..i am hungry. i have a very, very old oven which will only go up to 400-425 degrees will my bread come out okay? thanks
Emilie says
Hi there!
Do you have an oven thermometer? I ask because the temperature in old ovens can be off sometimes, even though you might think it’s heated to the correct temp. So if you have one, definitely use it! That will help.
Baking at 500 F helps to boost ‘oven spring’ or rise, so baking at a lower temperature may not give your bread that initial push it might need. However, I’ve baked bread at 425 F before and it came out just fine! It all depends! Go for it :)
linnyrae says
Thank you for such a great recipe and tutorial! I made the bread and fell in love! It is now my “occassion” recipe. Making 2 loaves tonight, 1 for new neighbors & 1 for a “Thank You”!!! Just wondering if anyone has tried to make a Roasted Garlic Loaf with this recipe. I have been contemplating mixing in a handful of garlic cloves when doing the folding step. Not sure if I should do anything to the garlic before incorporating into the dough. Any suggestions?
Emilie says
You are so welcome Linnyrae! I am SO pleased that you had success with the recipe. Isn’t baking in a Dutch oven amazing? Who knew?!
I’ve never attempted making bread with roasted garlic, but I’m sure there are several recipes out there on the internet that will help guide you. What a yummy idea.! If you end up making it this way, definitely let me know~ I’d love to try it out. Thanks for stopping by! :)
Trixie says
WOW!!! This bread is delicious! I added Herbs de Provence but that was the only change I made. It is perfect, and tastes just as good (maybe better) as the $7 artisan loaf sold up the street.
Thank you for the very clear instructions! This is my new favourite bread!
Emilie says
Hi Trixie!
I’m so glad that you liked the bread! Isn’t it yummy? I haven’t bought a loaf of bread in months ever since I started baking my own. I got hooked!!! I usually make my dough after dinner, let it rise overnight, and then bake it off in the morning. It’s a great routine. Then I pack my freezer full of bread to use whenever I need it. I think I’ll try it out with herbs de provence next. Sounds fantastic! Thanks for stopping by and commenting. I really appreciate the feedback! :)
linnyrae says
What a great idea!!! I LOVE Herbs de Provence but never thought of putting it in the bread. I love to sprinkle it on my steaks before grilling. Having it in the bread would be a GREAT accompaniment! Thanks!
Emilie says
Doesn’t that sound lovely? Maybe Herbs de Provence and roasted garlic… I think that will be a hit! ;)
chef andy says
This bread is GORGEOUS! It looks super tasty, I can’t wait to try it out!
Cynthia Larame says
This is great! My husband loves bread and as soon as he saw the picture he wanted some! I can’twait to get all of my ingredients and start making this recipe!
Thanks!
Laura (Tutti Dolci) says
Gorgeous bread, can’t wait to try this out!
alison@thisbloominglife says
Thanks for your encouragement of my bread. Yours looks absolutely amazing! What size pot do you use? I have one but wonder if it might be too big (26cm). Thanks.
Emilie says
Hello Alison,
Thank you!
I use a 6 quart dutch oven that is about 10 inches wide. I think yours will work just fine! If you’re a bit unsure, you could always use something smaller (see recipe for additional options!) Just make sure that your bakeware is at least 4-5 inches deep, has a lid/cover, and can be heated up to 500 F. Good luck! :)
sara says
Alison,
I use a deep soup pot and cover it tightly with foil since it doesn’t have a lid…and still absolute perfection!
sara says
I am very excited. Just pulled the finished product out of the over and it looks exactly like the picture. Now I have to wait impatiently for an hour until it’s cool enough to eat. Aaah! That may be the longest hour ever. I am very excited though. My daughter looked at me and said in her very blasé 19 year old way: You’re excited because you baked bread?” to which I replied “YES!”. I am sure it will be delicious! Thanks so much. I can’t wait to bake my next bread!
Emilie says
HOW WONDERFUL!!!!!! Don’t you just love when a recipe works out? Yes, I agree with you- the hardest part is waiting for the bread to cool! I’ve cut into it way sooner and the crumb turned out really gummy. I have no patience, but sure learned my lesson! And that’s funny about your daughter’s reaction…but trust me, I can relate to how you felt. Bread baking sure is an accomplishment! I haven’t bought bread from the store in weeks. I’m loving the fact that I can make my own now :)
sara says
p.s. So we couldn’t wait the full hour…family got cranky just watching the gorgeous bread…and they lovesd it…so here I am, a week later, about to bake my next loaf. I am also going to bake the individual Irish soda breads this afternoon (don’t you just love baking and cooking?!)…I’ll let you know how they turn out, of course, but I have no doubt they will be smashing!
Emilie says
Oh, I’m so glad that your first loaf turned out well! Quite motivating to bake more, isn’t it? I like to make a bunch of loaves and freeze them. This way I have my own little stash of fresh bread for sandwiches, soups, etc. I’m working on a honey whole-wheat version as well. I’ll share that with you as soon as I’m done tweaking the recipe!! :)
sara says
Emilie,
Since I have had such success with your recipe, any suggestions for making an easy and delicious, gorgeous challah? I have looked at lots of recipes but none of them have absolutely intrigued or inspired me.
Emilie says
Hi Sara! You know, I’ve never made challah before. But now that you’ve put the idea in my head, I will be on the look out for a good recipe. I will keep you posted!
PS- Great idea about covering your pot with foil instead of a lid. I’m glad it worked out!
Barbara Bamber | justasmidgen says
This is just the most stunning loaf of bread, Emilie! What an accomplishment and your instructions are so helpful. I’m in a sourdough course later this month and can only hope my bread turns out so pretty!! xx
Emilie says
Thank you Smidge! It was a lot of fun to make and I’m officially on the bread baking band wagon! I just received some of Celia’s sourdough starter in the mail. How wonderful that you’re taking a sourdough class. I hope you learn lots so you can teach me ;) xx
Anne @GtSlamseysFarm says
Wow, your bread looks fabulous. I never bother to knead my dough any more as it works so well without, but have never cooked it in a dutch oven. If I use my cast iron pan, do I need to grease it first or can I just plop the dough in?
Emilie says
Hi Anne,
I love cooking bread in the dutch oven! The lid traps the steam inside, and then once it’s removed the bread becomes a deep, golden brown. It’s amazing.
About your cast iron pot- The original recipe did not call for greasing the pot. I believe they recommended adding cornmeal to prevent sticking, but I didn’t do that (I’m not a fan of cornmeal texture on my bread). I read other versions of this recipe where they didn’t use anything at all, which is what I did.
I just preheated my pot (un greased) for 20 minutes @ 500F. Then I added the dough, reduced the temp. to 400F, and let it bake away. I’ve never has a problem with sticking.
If you’re a little unsure, you could always give your pan a little grease, or utilize the cornmeal method. Just make sure your pan is preheated. This might be good for the first time to test it out?
Do you plan on covering the pan with a lid? Just curious…
Hope this helps! xx E
Karen Harris says
I can’t wait to try your method here. I have been addicted to artisan bread since I discovered the Artisan Bread in 5 Minutes a Day recipe. The recipe is very similar to yours but I love cooking it in a Dutch oven.
Emilie says
Hi Karen,
Yes! The recipe here is very similar to the Artisan Bread in 5 Minutes a day (but has less yeast and is a slightly wetter dough). The method of baking in a dutch oven is amazing! It traps the steam inside making the bread moist and delicious. When you remove the lid, the outside becomes all golden and crusty. I’ve made it several times with success! If you make it, let me know how it goes. Thanks for stopping by :)
Robert says
Hi I would like to bake a sourdough loaf question ? where came I get the wild yeast? Thank You
Emilie says
Hi Robert,
You will need to create or purchase a sourdough starter. This is the medium that develops wild yeast and bacteria, which can be used in lieu of commercial yeast.
Kelly @ Inspired Edibles says
Emilie, your bread turned out so beautifully… just look at that loaf! A crusty gorgeous exterior and soft, tender interior. To be honest, I have never had the patience to make my own bread so this recipe is perfect for me. Your step-by-step instructions (and photos) are so helpful. I wonder if I could add a couple tablespoons of dried or fresh herbs to the mix, how that might go? I think the whole family would just love this recipe! Thank you.
Emilie says
Hi Kelly,
Thank you! I never thought that I would have the patience either, but after success with this recipe, I’m hooked! I’ve been making several loaves a week and just popping them into the freezer. It’s like my own personal bakery ;)
As far as adding herbs to the recipe- I’d say go for it! I’ve never done it myself (dried or fresh) but it can’t hurt. Maybe add just a touch your first time around and see how that goes? I’m also working on a whole wheat version as well. I hope you enjoy the recipe! If you have any questions, I’m more than happy to help.
Sandra @ Kitchen Apparel says
Oh my lord, I almost tried to spread some butter on my computer screen!
Emilie says
Ha Ha…thanks Sandra! My little guys scoffed this up like wolves ;)
celia says
Emilie, what a fabulous tutorial! When you sent me a photo of that loaf, I was astounded that it was both yeasted and no-knead – it looks better than most artisan loaves I’ve seen! Thank you for the linky, and may I offer a suggestion? Go to your local hardware store, and buy yourself a pair of leather welding gloves. They’re quite cheap here (under $20/pair), and they will save your hands and forearms from burns as you’re manoeuvring the hot pot around. I’ve written about them a bit in the past:
http://figjamandlimecordial.com/2012/03/06/little-kitchen-things/
PS. Has your starter arrived yet? Heidi got hers the other day! :)
Emilie says
Hi Celia,
Thanks! I was concerned that it was a bit too long, but I felt like I had to include every detail!
Ooo, leather welding gloves? Sounds serious ;) I actually got my battle wound from grabbing the pot without gloves! It was one of those things- the kids were running around, it was noisy and I just grabbed the 500 F pot without thinking! It was painful, but it’s getting better now. I’m going to go check out your link.
I didn’t get the starter yet- I’m waiting with bated breath! (Heidi got hers already? Wow! That was fast!) I’ll keep you posted :) xx
Don Morgan says
Welding gloves are great in the kitchen and out with the barbecue or grill. Make sure they are dry! Wet gloves equals rapid heat transfer and possible steam burns!
Cora Sobus says
Look wonderful but do you leave it on the parchment paper to bake?
Lauren says
Can I use active dry yeast? And if so how?
Emilie Raffa says
Hi Lauren! Active dry yeast can be used. Just use it in the same fashion, as per the recipe.