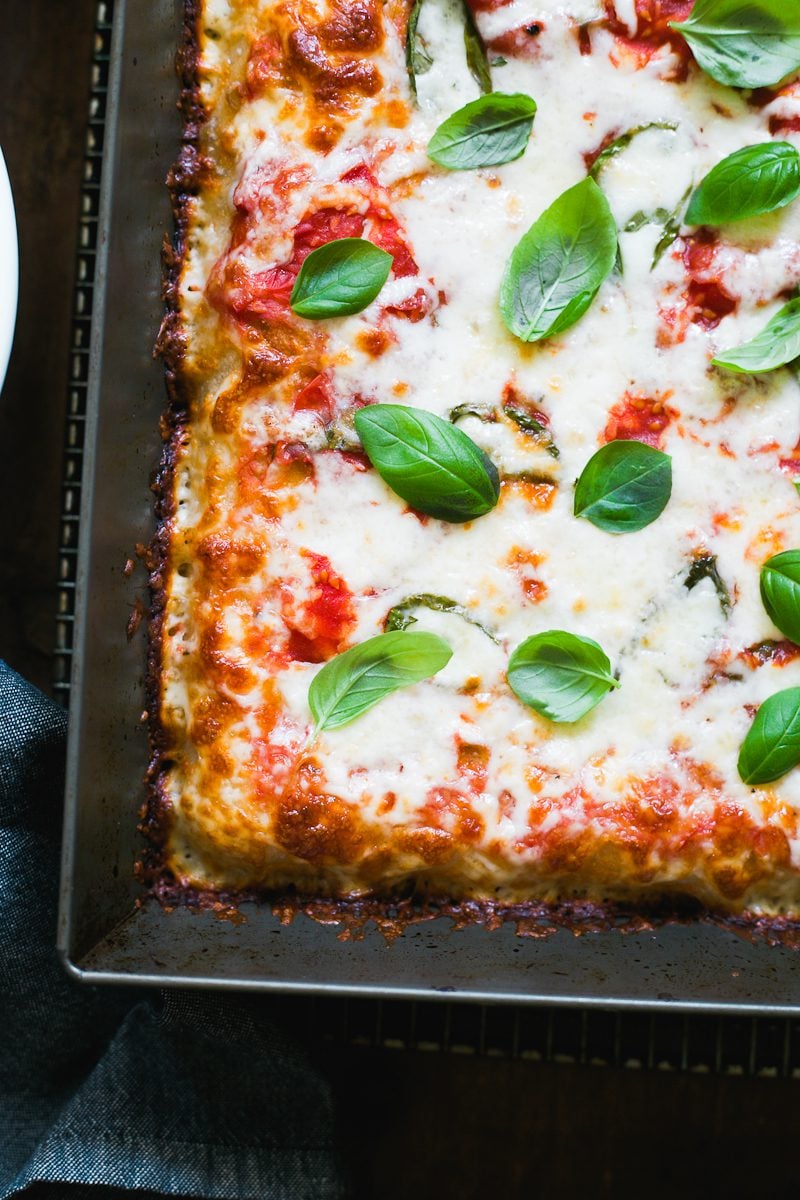
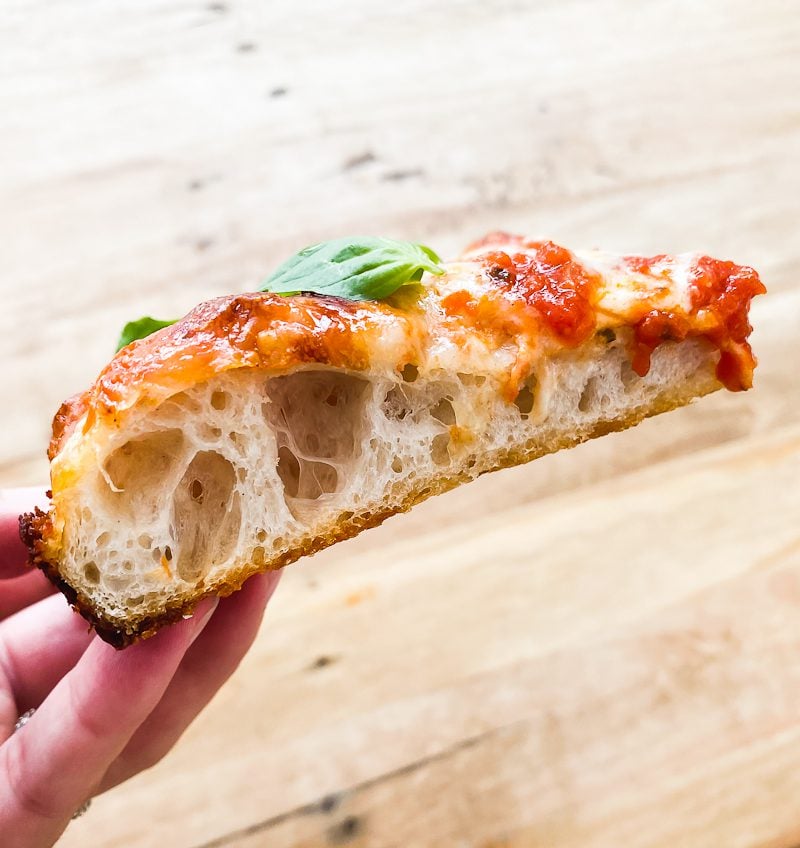
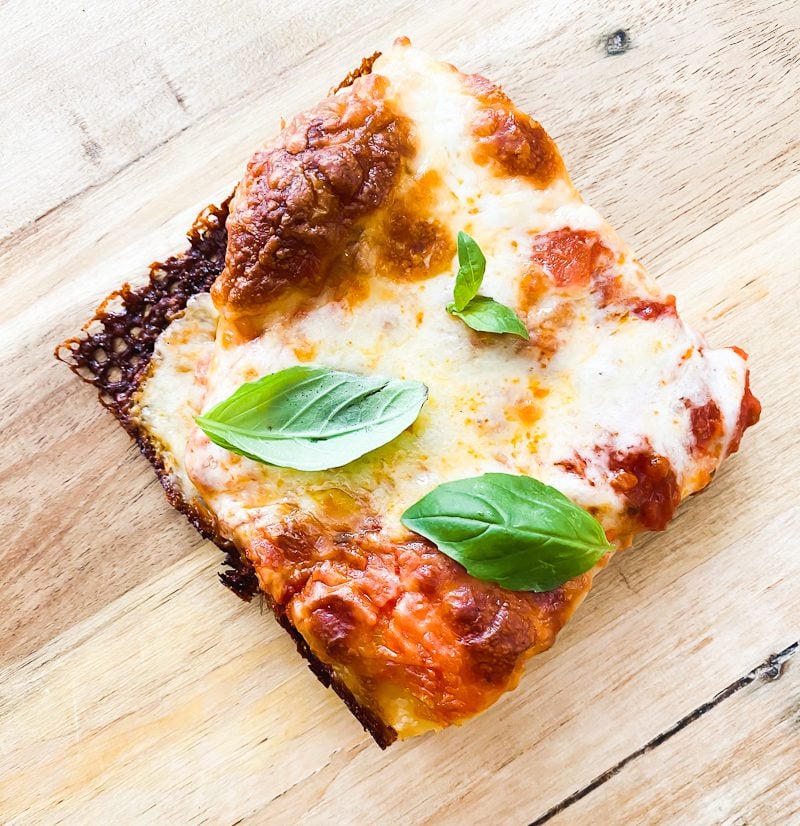
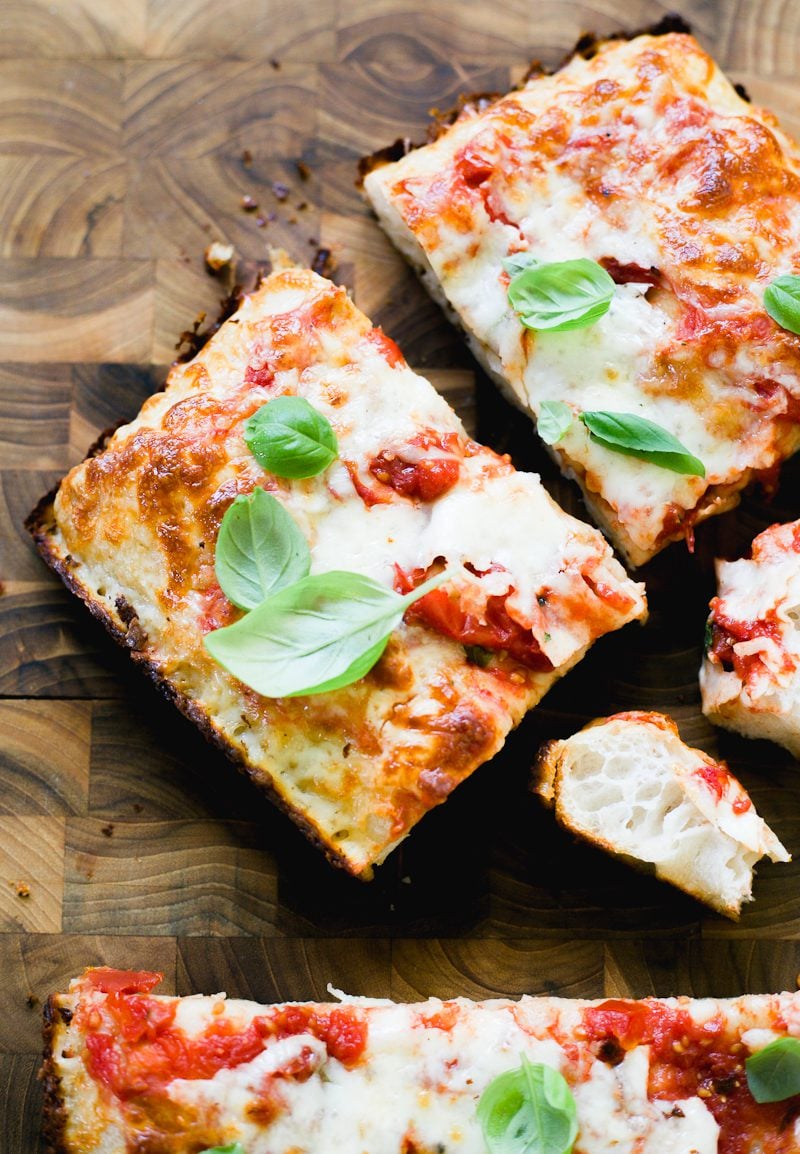
My sourdough pizza crust features a crisp, golden base and an open, airy crumb made with active sourdough starter. This easy pan-baked method includes par-baking tips, a 1-minute “no-cook” pizza sauce, and a step-by-step video to guide you.
I used to think making sourdough pizza at home required a vault of professional tools – the steel, the stone, the peel! And while helpful for Neapolitan-style pizza, there’s a faster workaround if you’re starting from scratch.
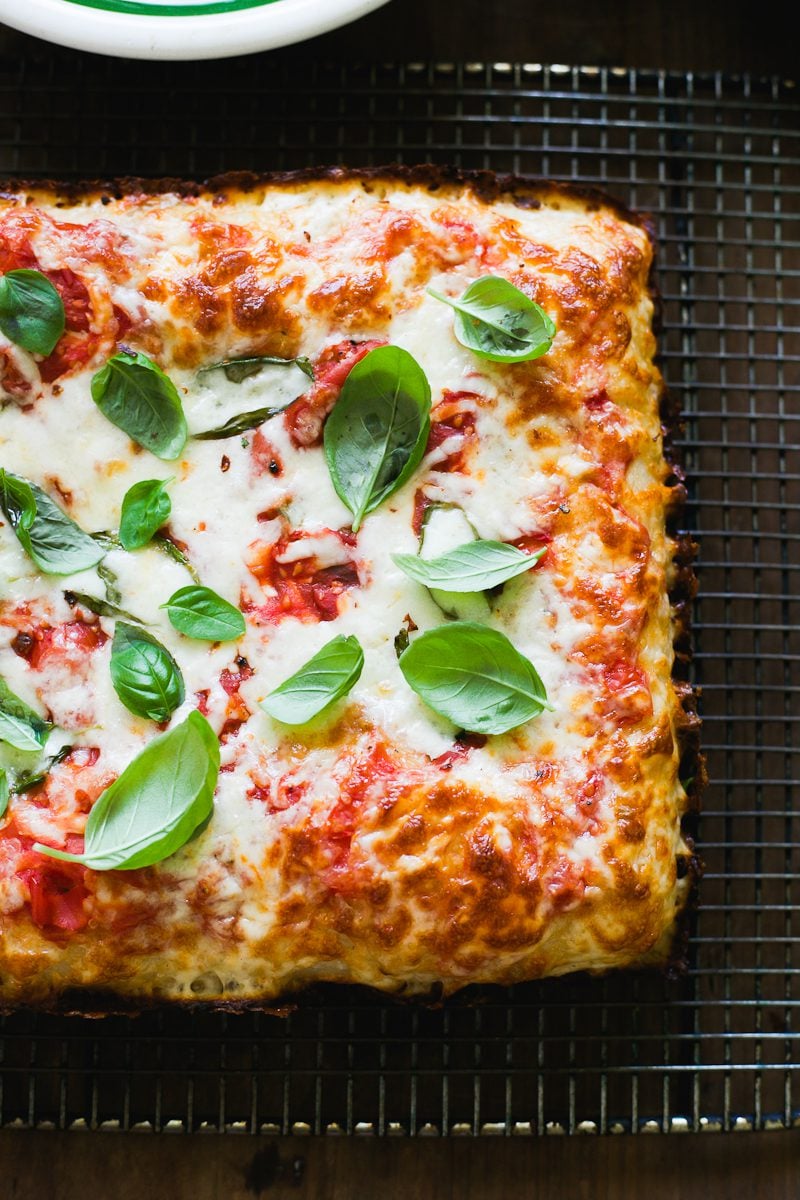
My pan-style sourdough pizza recipe is baked in a standard 9×13-inch pan you probably already own (think: sourdough brownies or lasagna). The results are spectacular: light and airy with crispy, cheesy edges the whole table will fight over!
The dough is adapted from my popular sourdough focaccia recipe in Artisan Sourdough Made Simple with a few tweaks for pizza: less flour for a thinner crust, bread flour for extra strength, and a new dimpling technique to even it out.
What To Expect
In this post, I’ll teach you how to make crispy, pan-style sourdough pizza, step-by-step with a video to guide you. You’ll have enough to feed 4–6 people.
I’ve also included 3 key points to elevate your game:
- A simple par-bake method so you can prep ahead
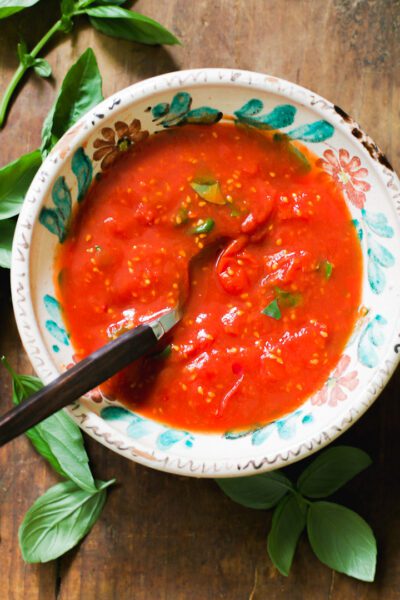
- A 1-minute no-cook pizza sauce that tastes like it simmered all day
- A flexible baking schedule to make sourdough pizza work on your time
How To Make Sourdough Pizza, Step-by-Step Recipe
Below you’ll find clear step-by-step instructions. For a printable version with measurements, scroll to the end of this post.
Step 1: Make The Dough
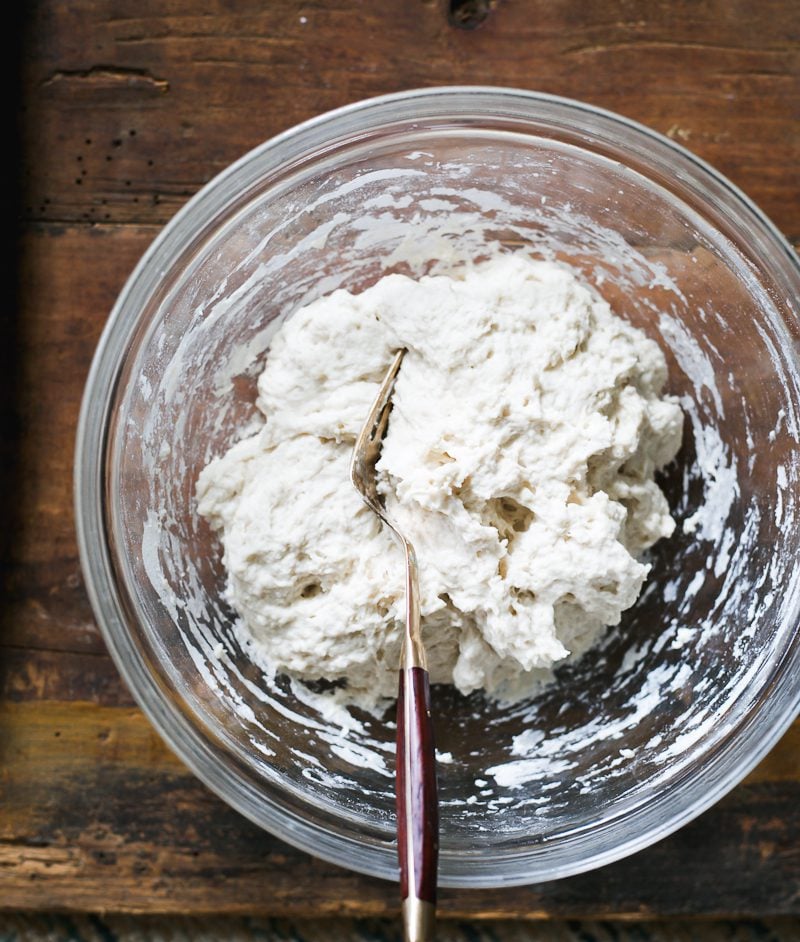
To start, combine the sourdough starter and water in a large mixing bowl. Add the flour and salt. Mix with a fork, and then finish by hand to fully incorporate the flour. Cover and let rest for 30 minutes at room temperature.
Then fold the dough over itself several times, similar to the stretch and fold method, to create a rough ball. The dough is now ready to rise!
Step 2: Bulk Rise
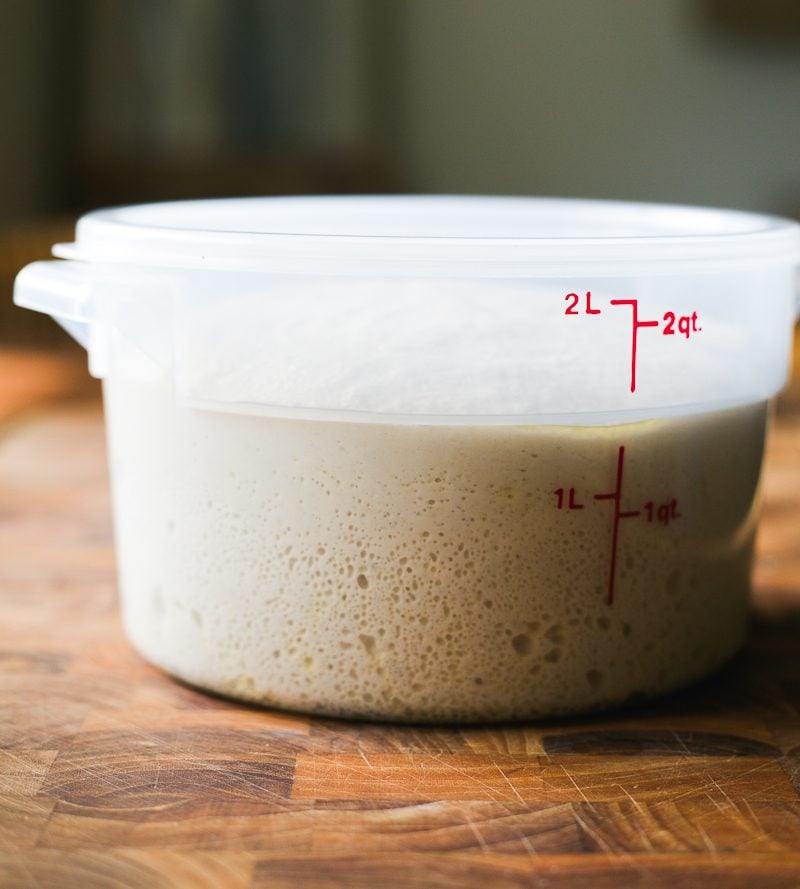
Transfer the dough to a lightly oiled high-sided 2 qt. dough tub. Cover and let rise overnight at room temperature, about 68 F for 10-12+ hrs. The dough is ready when it has almost doubled in size.
Note: if your ambient temperature is warmer /colder than 68 F, the dough will take shorter/longer to rise, respectively. Watch the dough and not the clock. Rise times will be different for every baker.
Get ahead tip: During the bulk rise, use this time to make the pizza sauce, grate the cheese and gather any additional toppings you will need.
Step 3: Dimple The Pizza Dough {2 Times}
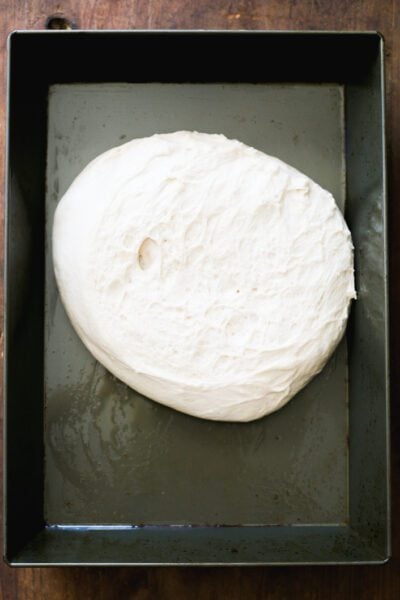
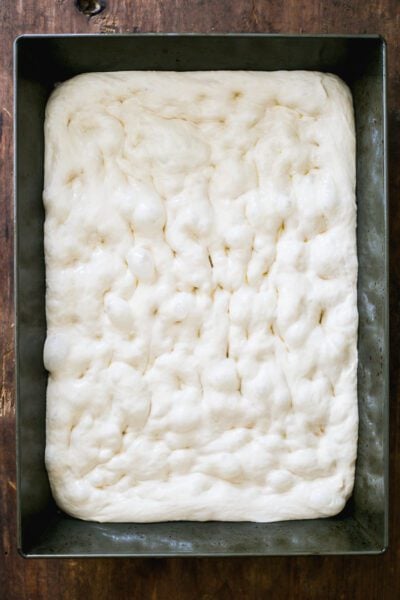
Coat a non-stick 9×13-inch baking pan with olive oil and then place the dough inside. With oiled fingertips, gently dimple and stretch the dough to reach the corners and sides. If the dough is relaxed, it will naturally spread out. If it’s tight, which is normal after a long rise, the dough will resist. Simply take note of your dough at this stage. Don’t force it. Watch my video for visual instruction.
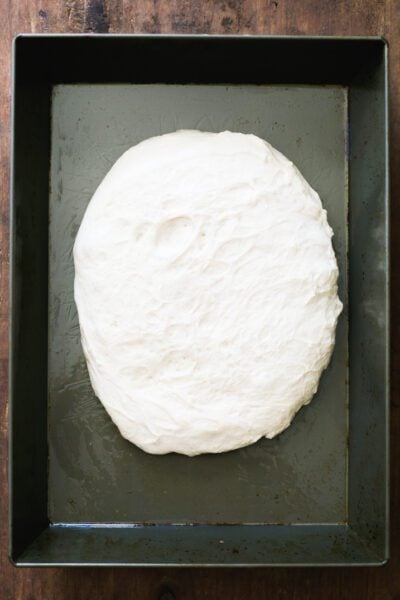
Cover and rest in a warm spot for 30 minutes. Then dimple the dough again, just like you did before, gently lifting and stretching it as you go. Cover and rest for another 30 minutes.
Best warm spot to rise pizza dough? Sourdough pizza dough benefits from a warm rise during the dimpling stage, about 78 F. It really aerates the finished dough when baked. To create your own “warm spot” which is necessary when the ambient temperature is cold, you can do two things: set a proofing box to 78 F OR keep the dough (covered) in a switched off oven with the light turned on for heat. Both tips work like a charm in my drafty kitchen.
About The Baking Pan
I use this non-stick baking pan for sourdough pizza and sourdough focaccia. It’s truly non-stick. Because it’s made with dark, heavy gauge aluminum you will nail a perfect, golden pizza crust every time. Unfortunately, the price has gone up since my initial purchase (as with everything these days). But trust me when I tell you: it’s worth the investment. Remember, it’s not a single use item.
What about glass or ceramic pans? Any pan will work. But glass and ceramic pans conduct heat differently, which means the pizza crust won’t brown the same. Experiment as you see fit, moving the pan closer to the heat source if necessary during baking.
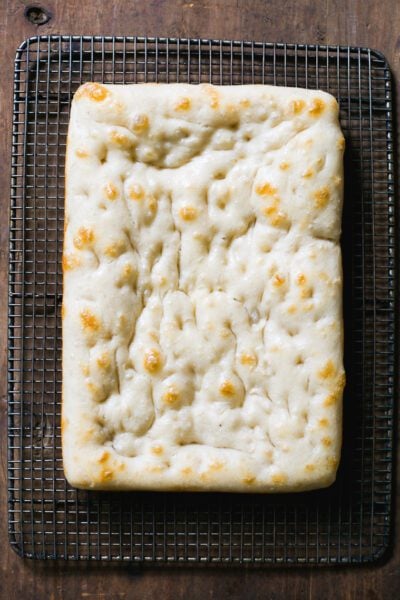
Step 4: Par-Bake the Pizza Crust
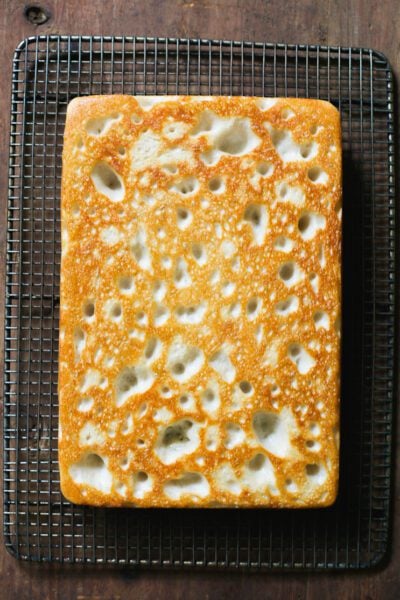
Bake on the bottom rack @ 450 F for 15-18 minutes, or until the surface is set and the bottom crust is golden brown. Use tongs to peek underneath the dough to double check.
Understanding the Par-Bake: Par-baked pizza crust is essential to pan pizza. First, it supports the weight of heavy toppings like sausage, mushrooms, olives, caramelized onions etc. Second, because the dough is baked prior to adding the sauce and cheese, it ensures the dough is fully cooked before the cheese melts (a common problem, fyi). Finally, par-baked pizza crust allows you to make pizza in advance- this is key for timing. Store wrapped par-baked pizza crust at room temperature for up to 6 hours. Or keep in the freezer for up to 3 months.
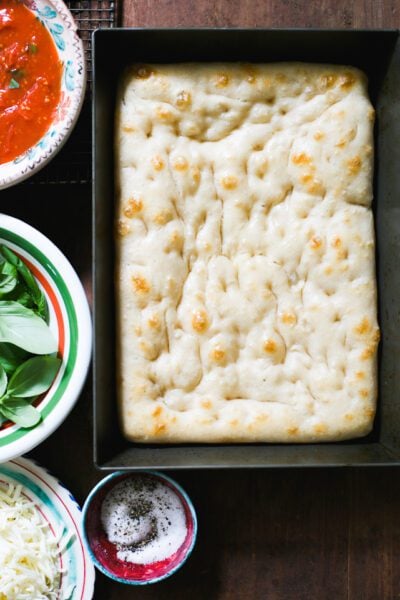
Step 5: Assemble & Bake Pizza
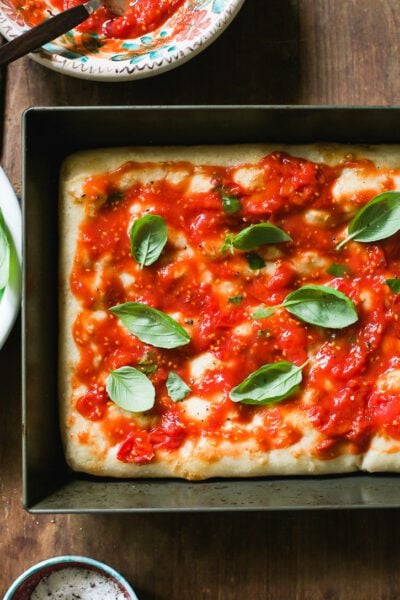
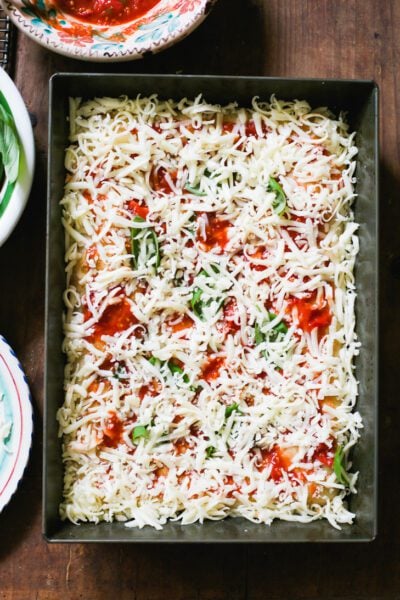
Top the par-baked pizza crust with tomato sauce. I spread it all over the surface including the crust. Season with salt and pepper. Add the basil leaves, a fresh grating of Parmesan cheese and drizzle with olive oil. Sprinkle with mozzarella cheese taking it to the corners and sides for crispy edges. Bake @ 450 F, middle or top rack this time, until the cheese is melted and broiled in some spots, about 12-15 minutes. You can even stick it under the broiler to really crisp it up.
Sample Sourdough Pizza Baking Schedule
There’s no one right way to do this. But here’s my go-to schedule: an overnight rise, a quick par-bake the next day, then assemble and bake by dinnertime. Adjust the timeframes as needed. What matters most is understanding the rhythm.
- Day 1 (PM): Mix the dough in the late evening and let rise overnight at ~68°F (20°C).
- Hot weather tip: In summer, skip the overnight rise; it will overproof. Make the dough in the morning or early afternoon instead.
- Optional: Prep the no-cook pizza sauce and grate your cheese after the dough is mixed.
- Day 2 (AM):
- Par-bake the crust. Store at room temperature (or freeze it).
- Day 2 (PM):
- Assemble and bake fresh, sourdough pizza by dinner.
By signing up, you agree to receive emails from The Clever Carrot. Unsubscribe at any time.

Crispy Sourdough Pizza Crust (No Stone or Steel)
- Prep Time: 14 Hours
- Cook Time: 30 minutes
- Total Time: 14 hours 30 minutes
- Yield: Serves 6
- Category: Sourdough Bread
- Method: Oven-Baked
- Cuisine: Italian
- Diet: Vegetarian
Description
My sourdough pizza crust features a crisp, golden base and an open, airy crumb made with active sourdough starter. This easy pan-baked method includes par-baking tips, a 1-minute “no-cook” pizza sauce, and a step-by-step video to guide you.
Ingredients
For the Sourdough Pizza Dough:
- 50 g active sourdough starter
- 250 g water
- 360 g bread flour
- 7 g fine sea salt
For the Pizza Toppings:
- 240 g (1 cup) quick “no-cook” pizza sauce, Sicilian tomato sauce or pomodoro sauce
- Fine sea salt
- Black pepper
- Handful fresh basil
- Freshly grated Parmesan cheese
- Olive oil
- 226 g (8 oz) whole-milk mozzarella block cheese, shredded, about 2 1/2 cups
Notes & Tips:
- Please watch my video for visual instructions. It’s really helpful when dimpling the dough!
- This is the non-stick baking pan I use. You’ll get perfect, golden pizza crust every time. If using a different pan, especially if it’s not non-stick, line the bottom with parchment paper to fit the inside dimensions of the pan (no overhang). Dark pans are best for heat conduction and crust color.
- I bake my sourdough pizza @ 450 F. I know my oven. However, if you prefer to bake at a lower temperature, approximately 425 F, you can. Increase the bake times to 18-20 minutes, for both the par-bake and actual pizza bake.
- Please use quality whole-milk mozzarella cheese (block cheese, not bagged shredded). Bagged shredded cheese contains too many anti-caking agents which will wreck your pizza. The cheese will taste dry and plasticky. Cube any small chunks that are too small to grate, and stick in the corners of the pan for extra crispy edges.
- Use room temperature ingredients. No cold sauce! This will ensure a crisp, pizza crust crust. It will also keep the oven temperature hot and stable, not steamy.
Instructions
Make the Dough
Before you begin: refer to my pizza baking schedule in the blog post above. This will give you an idea of when to start the dough. Below, I do a long, overnight rise @ 68F.
- In the evening, combine the sourdough starter and water in a large mixing bowl (I use a fork to mix). Add the flour and salt.
- Continue mixing, and then finish by hand to fully incorporate the flour. Cover with plastic wrap or a clean kitchen towel and let rest for 30 minutes at room temperature.
- After resting, return to the bowl and fold the dough over itself several times, similar to the stretch and fold method, to create a rough ball. The dough is now ready to rise.
Bulk Rise
- Transfer the dough to a lightly oiled high-sided 2 qt. dough tub.
- Cover and let rise overnight at room temperature, about 68 F for 10-12+ hrs. The dough is ready when it has almost doubled in size. If your ambient temperature is warmer /colder than 68 F, the dough will take shorter/longer to rise, respectively. Watch the dough and not the clock. Rise times will be different for every baker. (see Note #1).
Get Ahead Tip: While the dough is rising, use this resting time to make the pizza sauce, grate the cheese and gather any additional toppings for your pizza.
Dimple the Dough {2 Times}
- Coat a non-stick 9×13-inch baking pan with 1 tablespoon of olive oil. Use your hands to rub the bottom and sides of the pan.
- Remove the dough directly into the pan. With oiled fingertips, gently dimple and stretch the dough to reach the corners and sides of the pan- that’s the end goal. If the dough is relaxed, it will naturally spread out. If it’s tight, which is normal after a long rise, the dough will resist. Simply take note of your dough at this stage. Don’t force it. Watch my video for visual instructions.
- Cover the pan with an inverted baking sheet and rest in a warm spot, such as a proofing box set to 78F or a turned off oven with the light on, for 30 minutes.
- After 30 minutes has elapsed: return to the pan and dimple the dough again, just like you did before, gently lifting and stretching it as you go. Cover and rest for another 30 minutes. Preheat your oven to 450 F now.
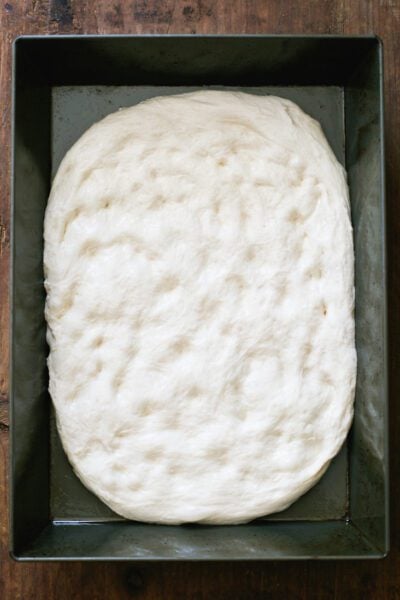
- After the second 30 minutes has elapsed, you’re ready to par-bake the pizza crust.
ParBake Pizza Crust
- Place the baking pan on the bottom rack. Bake the dough @ 450 F for 15-18 minutes, or until the surface is set and the bottom crust is light golden brown. Use tongs to peek underneath the dough to double check. The bottom crust color depends on the type of pan you’re using; adjust the time or oven rack as needed.
- Remove the pan from the oven. You are now ready to assemble and bake pizza (see Note #2).
Assemble & Bake Pizza
- To Make Sourdough Pizza (now): Top the par-baked pizza crust with tomato sauce. I spread it all over the surface including the crust. Season with salt and pepper. Add the basil leaves, a fresh grating of Parmesan cheese and drizzle with olive oil. Sprinkle with mozzarella cheese taking it to the corners and sides for crispy edges. Tuck any remaining cheese cubes into the corners. Bake @ 450 F, middle or top rack this time, until the cheese is melted and broiled in some spots, about 12-15 minutes. You can even stick it under the broiler to really crisp it up.
- To Make Sourdough Pizza (later): Transfer the par-baked pizza crust to a wire rack to cool. You want to aerate the underside so the crust doesn’t get soggy. Once completely cool, cover tightly in plastic wrap and store at room temperature for up to 6 hours. When ready to bake, return the pizza to the same baking pan (don’t bother cleaning it; any leftover oil is fine), assemble and bake as directed above.
Notes
Note #1: Refrigeration Option. after the bulk rise is complete, the pizza dough can be stored in the fridge for up to 1 day if you run out of time. This is optional. To do so: shape the dough into a ball and place into an oiled, non-stick 9×13-inch baking pan. Cover tightly with lightly oiled plastic wrap and chill overnight. When ready to continue, the dough must rest in a warm spot (I use a proofing box set to 78 F OR a switched off oven with the light on) until it comes to temperature and no longer looks dense- this will take a few hours. Then dimple the dough following the directions in the next step.
Note #2: How to Store Par baked Pizza Crust: Wrap cooled par-baked pizza crust at room temperature for up to 6 hours. Or keep in the freezer for up to 3 months. Defrost at room temperature.


Comments
Sophia says
Hi! I love all you sourdough recipes so much, I’ve been testing a lot and they produce great results!! This one was also great, got great bubbles in my crust! I used vegan cheese instead due to a dairy intolerance, and muir glen brand pizza sauce, and it was delicious! Thank you for the wonderful recipes!
Leslie says
I have the Lloyds grandma pizza pan 16×12 inches, do I need to double the dough recipe? Also, I LOVE your book!
Sue says
I really like your recipes!! At the moment pizza has been dimpled and is resting. But I’m making a half recipe and going to bake in a cast iron frying pan. I wish you’d include a note on halving recipes for those of us who aren’t a family.
I’ve also tried to adapt your sourdough cinnamon rolls to make sourdough orange rolls (February 22, 2023 orange rolls recipe from Genevieve Ko in NYT). Could you provide tips on adapting? The sourdough rolls I made were eatable.
Victoria says
You could make the whole recipe, cut into two dough balls and then freeze the other half. That’s what I do and bonus, a pizza dough that you don’t have to make again! :)
Linda says
I am making this for the second time right now! It is awesome dough. I must admit my first time I did not par bake. I will not do that again!! I have my own fresh bail ( have you ever had the Purple Basil? it is sooo good! I am using a little of both green and purple, pepperoni, onion and baby bellas! Moz and parmesan both !
Your cookbook is amazing and I have just about made everything in it!! very well written, easy to understand!
Deb says
My pizza dough was stickier than yours even after the 30 minute rest in the bowl after mixing. Should I have added more flour or used less water? Even after the overnight rise, it was still very sticky and did not form into a ball. My kitchen temp is higher than the 68 to 70 degrees, so the dough-rise overnight was more. Is this a problem or can I just deflate the dough before putting it on the pan for the 30 minute rest, etc? Thanks!
Next, I’m going to try the focaccia! I have lots of starter to use!!!
Kelly Gaudinier says
I made this recipe twice without incident (doubling the recipe both times) but this time when I did it, it was EXTREMELY STICKY. Is this the evidence of less than ideal starter?
I’ve added flour and it has not helped.
Amazing recipes all over your site!! I only now (after months of using and perusing your sourdough recipes) that you do in fact have other categories!
Thank you for all of your hardwork
and your insight.
David says
This might be obvious, but when par-baking do I leave the dough covered or uncover it? Sorry, it just doesn’t specify in the recipe…
Love your whole site btw the way. Been making bagels with your starter and recipe for a month and they are fantastic! :)
Supriya Kutty says
My mouth is watering just reading this and looking at the pics. Now that that the weather is getting hotter, this sounds like perfect comfort drink after a long day.
Kathleen says
This was delicious! I even bought a dough rising tub and the exact pan to try to make this sourdough pizza crust for the first time! Thanks for the great tips.
My only question – during the par bake, my crust shrank about a half inch/inch. I read after some google searches it’s because I didn’t let the dough rest enough and the gluten tightened. After the bulk rise, the dough seemed pretty pliable and even able to get to the edges of the pan if needed, I did the 2 rests and dimpled to the edge. Should I increase the rest time to an hour for each to prevent this from happening?
BTW – I have your cookbook and it has changed my life! I feel so confident using everything in there, and it turns out amazing. Thanks for being a wonderful author and chef.
Elie Mironidou says
Hi, can you bake the pizza straight away without pre baking it?
Emilie Raffa says
I would recommend par-baking it first. This step ensures that the dough is fully cooked before the cheese melts, which is a common problem with pan pizza.
Jackie says
This was an awesome homemade pizza! My only question is…my cheese was sliding off from the crust! What did I do wrong?
I’m going to try again. Did I have too much oil on my dough?
Mer says
Years ago I read a hint addressing the problem of toppings sliding off. It was to lightly brush a thin coating of watery sauce gently on top the uncooked dough, then par-bake as directed. This will make the top of the baked dough tacky enough to help the next layers of sauce, cheese, etc. to not slide off after they are added and cooked. I do this all the time with a different recipe that I’ve used for prebaked pizzas. It works.
Alison says
Hi! This recipe looks amazing (like everything you put out!). First, can I double the recipe or would it be better to just make a bunch of crusts over a few days and freeze? I have a lot of mouths to feed :)
Emilie Raffa says
Hi Alison! Totally get it. When I double this recipe, I actually make two crusts and bake side-by-side (I have two pans). It’s easier this way, and much easier space-wise to freeze!
Jennifer says
Hi, I noticed that you only have a room temp and freezer option for making ahead. Could this be made a day ahead and refrigerated? Or how long would someone need to thaw before cooking?
I tried this the other night and it was a winner for my picky eater and it is now his birthday party request. We did however use our cast iron sheet pan and finished on our Traeger. AMAZING!
Joan says
Looking forward to trying this! Could I use the typical 00 flour most use for making pizza dough?
Emilie Raffa says
Hi Joan! If this was a round, Neapolitan-style pizza baked at a super high temperature, I’d say yes: use the 00 flour. But since this is a pan pizza, bread flour or even high protein all purpose flour is best for this specific style. Now, of course you can experiment. And if you do, I’d love to know. Enjoy!
Gemma says
I just made this – such amazing pizza! Can I also use the dough to make thinner pizza on a stone?
Allison Drysdale says
Just to clarify, I measured 360g of flower and that was more than one bag of flower. Are you sure this is correct measurements?
Emilie Raffa says
Hi there! 360g is correct. What size bag of flour are you using? 360g is approximately 2 3/4 cups.
Kaylee Khoshaba says
excited to try this but I cannot print the recipe without the adds covering the text. thats super frustrating.
Emilie Raffa says
Totally agree. I can get than fixed for you. Sit tight and I’ll circle back when it’s fixed. Thanks for letting me know!
Kaylee Khoshaba says
Thank you for the quick reply! I figured out that it only covered the text when I tried to print with smaller font- just to save paper.
I appreciate it! It’s rising for some weekend pizza now 🎉
Emilie Raffa says
Ahh… this makes sense. Good to know. All set and enjoy!
Jill says
I should also add that I am working my way through all of the recipes in Artisan Sourdough Made Simple and each one has turned out well!
Emilie Raffa says
Omg, thank you so much! This makes me so happy. Thrilled you like the book. xx
Jill says
I made this sourdough pizza crust last week and it was fantastic. I would like to make calzones this weekend. Can I use the same recipe for the dough?
Emilie Raffa says
Hi Jill! Sure can :)
Sarah says
Do you think splitting the dough and baking the crust in cast iron would work? I am excited to make this recipe!
Emilie Raffa says
Great question! To clarify, when you say splitting the dough, do you mean halving this recipe? Or doing the full recipe, splitting the dough after it’s fully risen, and baking back to back in the oven? A cast iron pan should work. However, oiling a cast iron pan and baking it at a high heat might cause it to smoke! Just keep an eye on it, and/or line the pan first.
Kari says
So excited to make this! Timing issues means I need to par bake at 8 am tomorrow. Can I leave it at room temp until 5pm? You said 6 hours so I wasn’t sure if I could stretch that.
Emilie Raffa says
Hi Kari! Great question. Yes: 5 PM is fine. Just wrap it well. The 6 hour mention has some flexibility :)
Michelle says
We made this for the first time tonight and it was absolutely delicious! The crust was crispy and tangy and the finished product looked beautiful. I do think next time we might add a little something to the sauce just to give it a bit more flavor, but like so many of your sourdough recipes this was a home run. My husband is already planning to make it again soon!
Emilie Raffa says
Fantastic! Thanks so much for the feedback Michelle :) This pizza is sooooo flexible and easy to customize. Have fun with the recipe!
Hester Bausback says
Great recipe, simple to follow with a wonderful tutorial. If you want to become a successful baker follow the Clever Carrot. Buy her cookbook and it will make all your sourdough dreams come true.
Emilie Raffa says
Hester, you are too kind. Thank you so much!
Happie says
Delightful! What a great guide and the video is super helpful too.
We are VERY much looking forward to trying this out, it looks just amazing!
(Review provided by a support team member for theclevercarrot.com)
Emilie Raffa says
Thank you SO much! xx
CMR says
Forget about a turkey for Thanksgiving! I want to make this pizza! Once again you share another amazing recipe and I just want to dive into those pictures and grab a bite! Thanks Emilie!
Emilie Raffa says
Haha… yes, please do! I hope you enjoy :)