This post will teach you how to make a beginner sourdough starter at home, step-by-step. All you need is flour, water and a little bit of patience. Before you know it, you’ll have your very own bubbly, active sourdough starter to make my best sourdough bread recipe, sourdough focaccia and more! Grab your personal sourdough starter feeding chart.
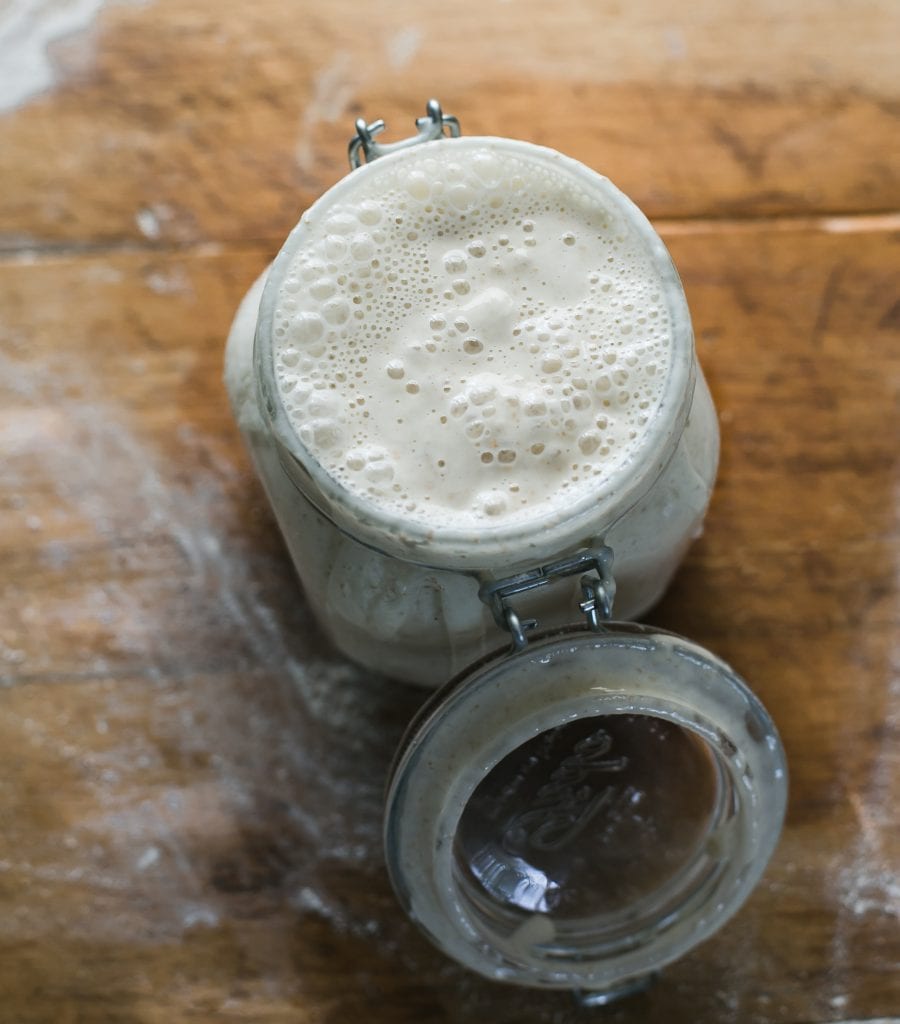
Looking to bake sourdough bread? First: you’ll need a sourdough starter. Without it, your bread won’t rise. It’s the absolute heart and soul of sourdough baking. Creating a sourdough starter from scratch is not hard to do. However, the process is intimidating, especially for beginners. Let’s change that.
Adapted from my bestselling book Artisan Sourdough Made Simple, I will demystify and simplify the process with step-by-step recipe instructions. In approximately 7+ days (yes, it takes that long- there are no shortcuts) you’ll get approximately 1 cup of bubbly, active sourdough starter which is more than enough to make bread, including my best sourdough bread recipe with olive oil (most popular recipe on my blog!). More sourdough bread recipes here.
Sourdough is more than just a recipe; it’s an understanding. So before we dive in, let’s define.
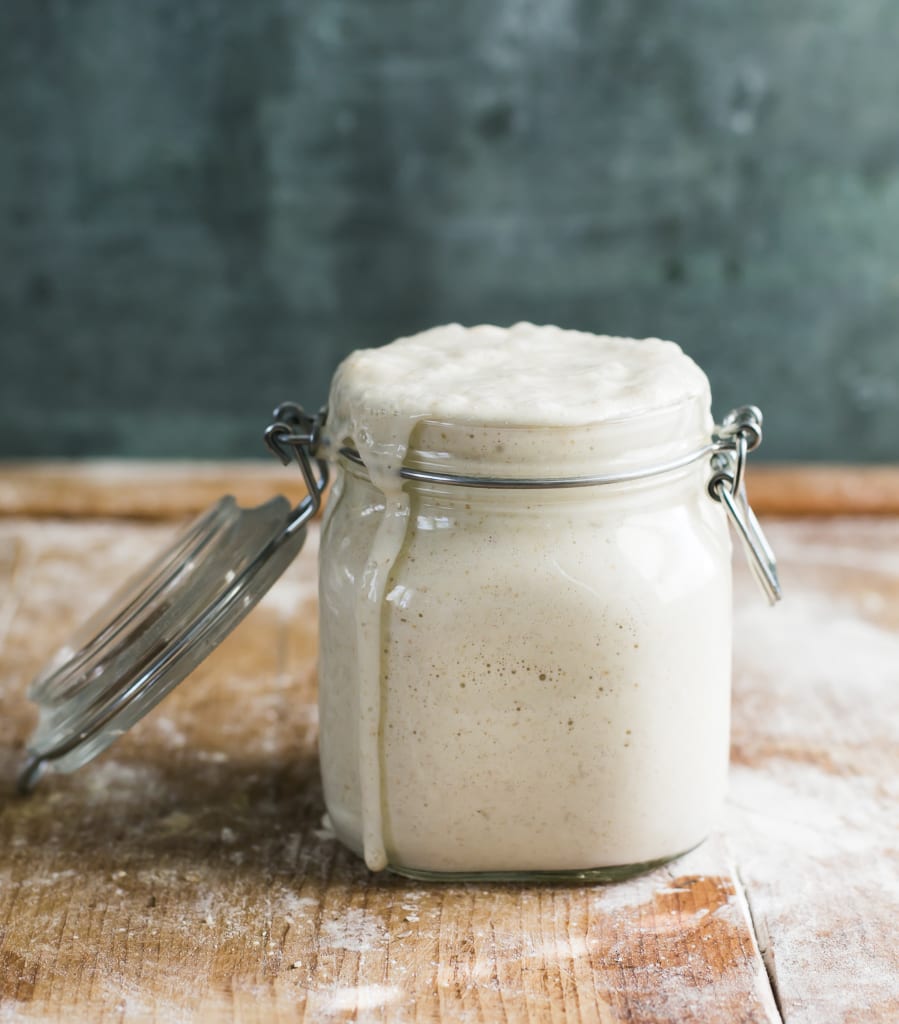
What Is Sourdough Starter?
A sourdough starter is a live, fermented culture of flour and water filled with wild yeast and bacteria from our environment. A small portion is added to sourdough bread dough to make it rise. Commercial yeast IS NOT required.
Sounds a bit weird, right? Of course it does. Know this: natural “wild” yeast is all around us. It can be found in a bag of flour, in the air, on your hands etc. Just because you can’t see it, doesn’t mean it’s not there and doing its thing. It’s like magic.
How Long Will It Take?
To create a sourdough starter from scratch, the overall process will take 7 days (or more) from start to finish. It’s not instant. First, you’ll create the starter with whole wheat flour to jumpstart fermentation. Then, you’ll continue to feed it with regular all purpose flour or bread flour to cultivate the wild yeasts and friendly bacteria. Once it’s created, you’ll keep it alive with ongoing feedings and care, which you can read about here.
When Will It Be Ready To Use?
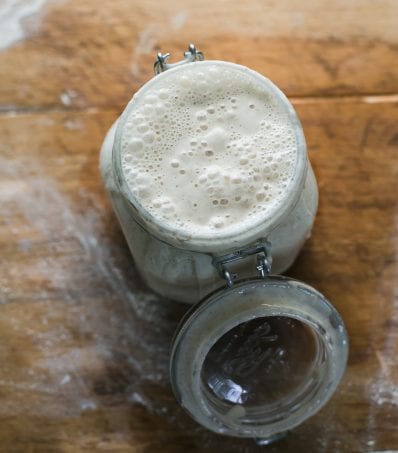
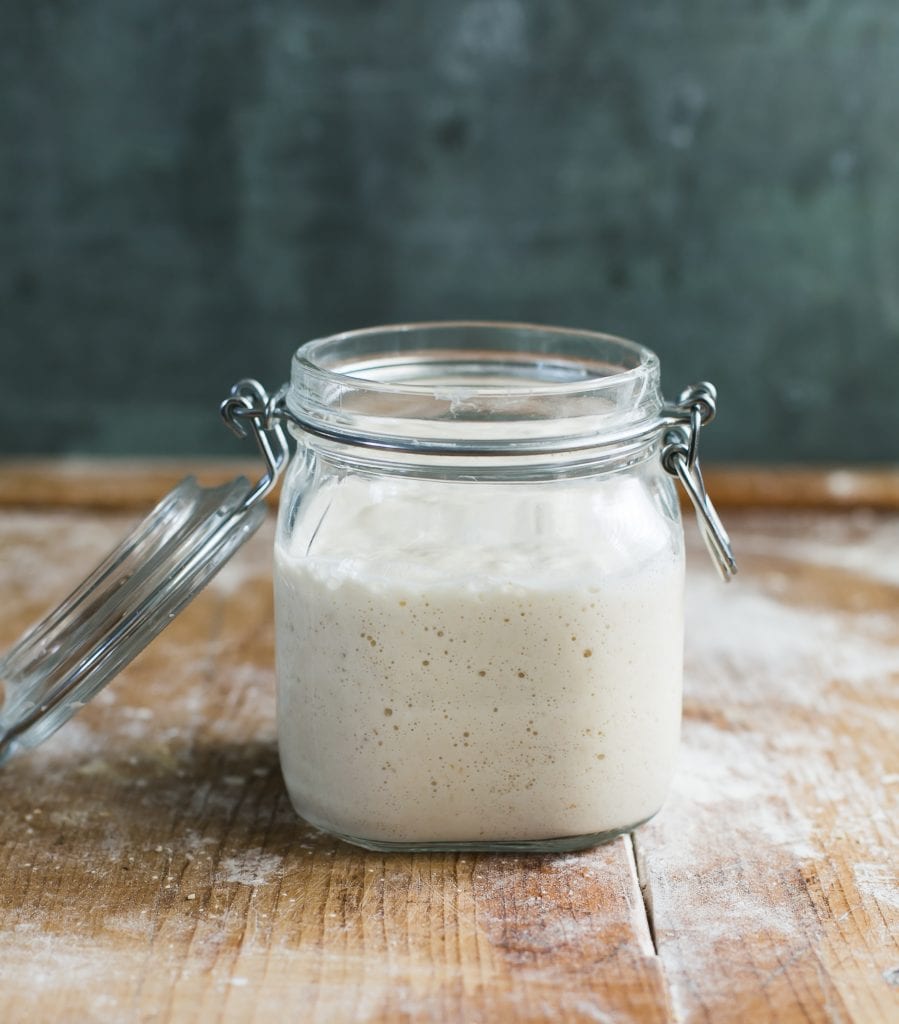
Your starter is ready to use when it has doubled in size, with plenty of bubbles on the surface and throughout the culture.
NOTE: It’s not uncommon for it to take up to two weeks or more for the starter to become active. It all depends. I know this timeframe sounds a bit vague, but growing yeast in a jar (that’s basically what you’re doing) can be unpredictable at times. Please be patient if the process takes time for you- it’s normal.
Is It Difficult To Do?
Absolutely not! In short: you’re basically adding flour and water to a jar, feeding it with more flour and water and waiting for it to become bubbly, active and double in size. That’s it. Most of your time involvement is hands-off. Can I ask you a favor though? Don’t overthink it. There’s a ton of sourdough information out there, and you will fall down a major rabbit hole if you start poking around. Just stick to this tutorial for now, follow the steps as written and just go for it.
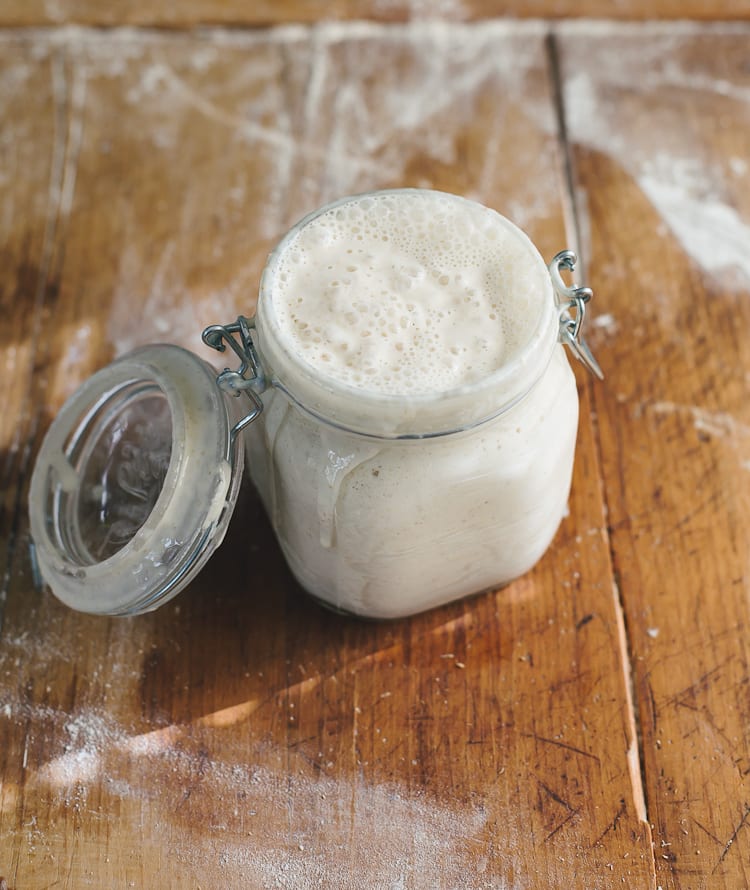
Beginner Sourdough Starter Recipe {Step-By-Step}
You Will Need:
Supplies
- 3/4 L jar (I use this one)
- Digital scale
- Small rubber spatula
Ingredients
To create the sourdough starter on Day 1:
- 60 g (1/2 cup) whole wheat flour
- 60 g (1/4 cup) water
To feed the sourdough starter each day (Days 3-7):
- 60 g (1/2 cup) unbleached all purpose flour or bread flour
- 60 g (1/4 cup) water
NOTE: Use regular, unbleached all purpose flour or bread flour for best results. I use flour from KAF, Trader Joe’s or Whole Foods. As for organic flour, I first learned that it wasn’t always successful when first creating a sourdough starter (sourdough can be finicky). However, due to the widespread use of glyphosate, I’ve been inspired to re-test with organic flour. The results were good. Please experiment with what resonates. For the water, filtered or tap water is fine. Use the latter if you know it’s mostly chemical/chlorine free.
Day 1: Make The Sourdough Starter
- First, download and print out this chart. It’s your daily “at a glance” feeding schedule to keep you on track.
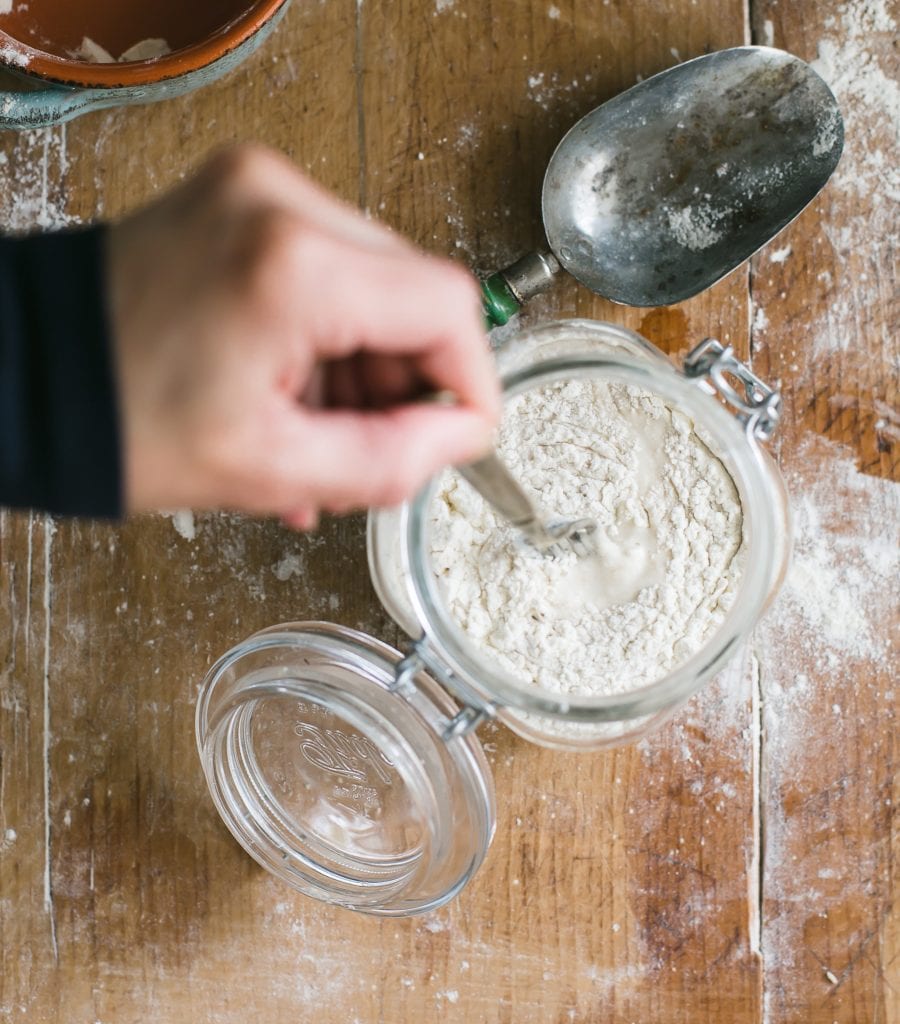
- Add 60 g (1⁄2 cup) of whole wheat flour and 60 g (1⁄4 cup) of water to your sourdough starter jar. Total yield: 120 g sourdough starter.
- Mix with a fork until smooth; the consistency will be thick and pasty.
- Cover with plastic wrap or a lid, and let rest in a warm spot, about 75 F for 24 hours.
Temperature Tips: Temperature is very important. If it’s too cold, your starter won’t rise and the process will take longer. Consider the following tips if you’re looking for a warm, 75 F spot. Place your starter on a cookie sheet inside the oven (turned off) with the light on for a only few hours to give it a boost (please don’t leave it there overnight- the environment will become too warm). Monitor the temperature with an oven thermometer. You can also use a proofing box set to your desired temperature, or a microwave with the door ajar and the light on.
Day 2: Got Bubbles?
- Today, you’re going to check if any small bubbles have appeared on the surface.
- Bubbles indicate fermentation, which is what you want. However, it’s okay if you don’t see anything right away; the bubbles might have appeared and dissolved overnight while you were sleeping. This happens quite often.
- You do not have to do anything else on Day 2. Just let it rest in your warm spot for another 24 hours. Feel free to stir once or twice to oxygenate the mixture.
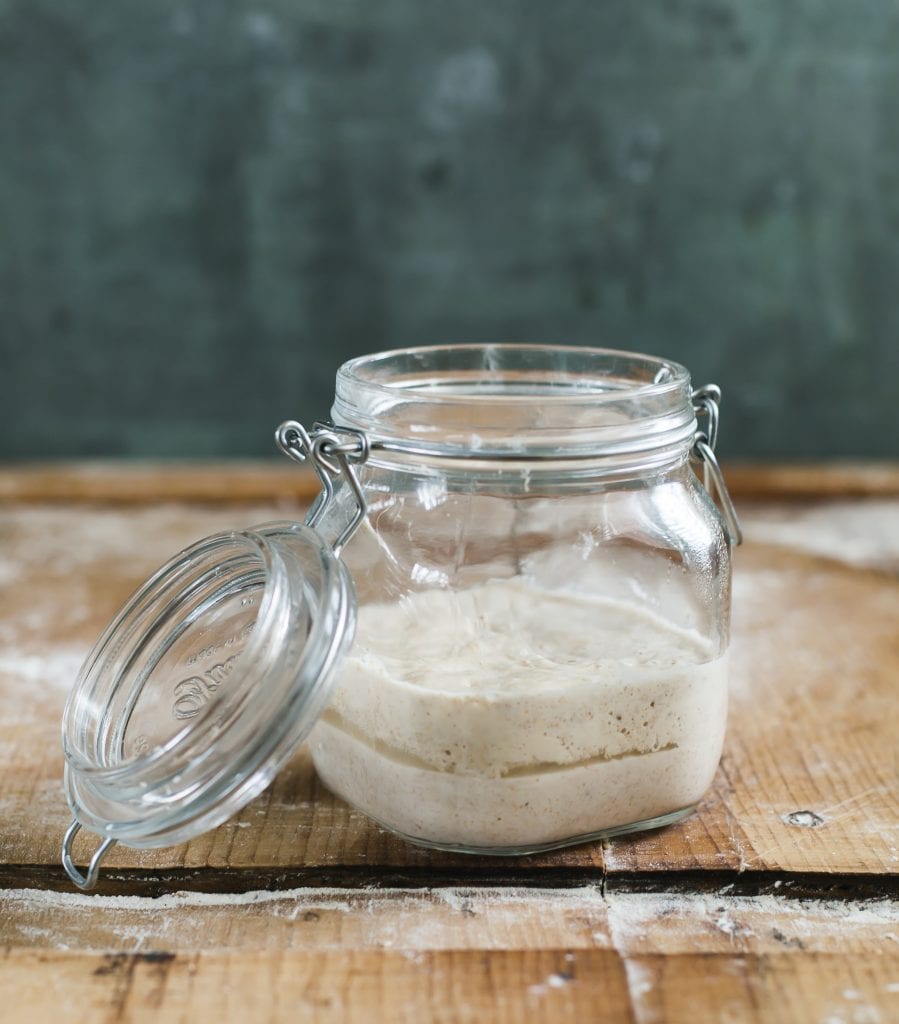
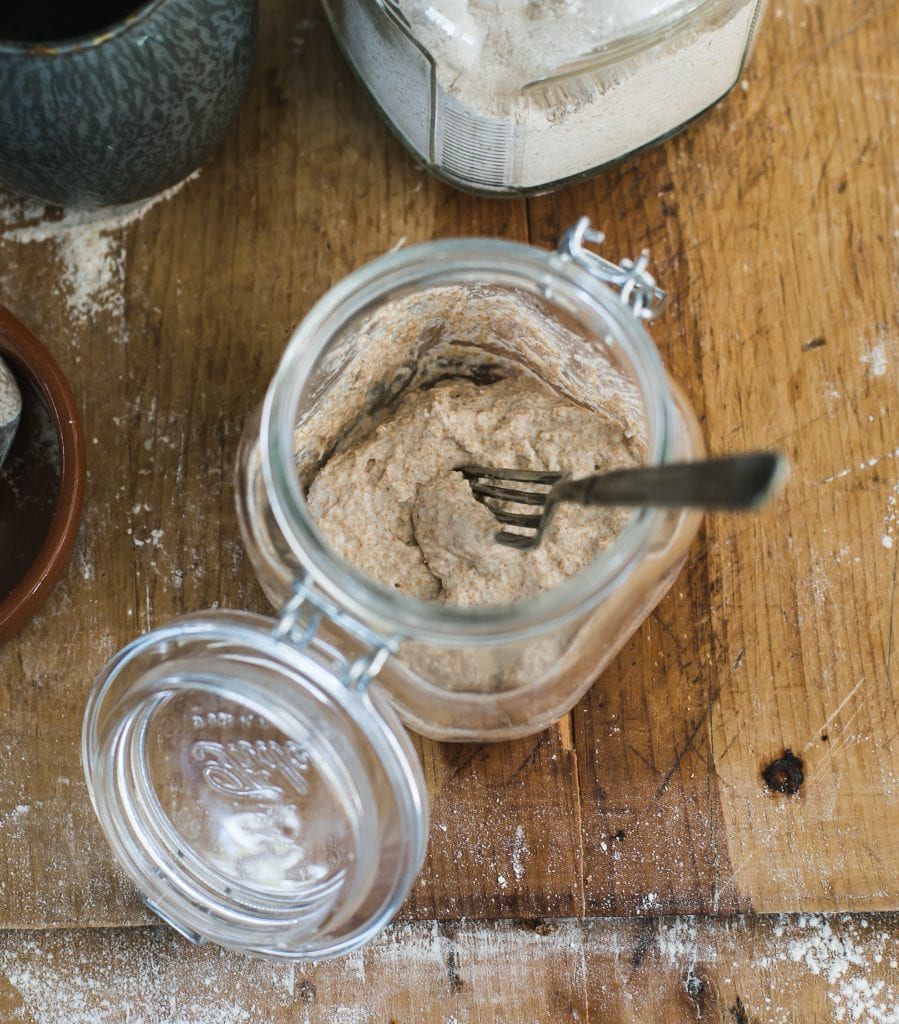
Tip: What’s That Brown Liquid? During the creation process, and even after your starter has been established, a dark liquid might appear on the surface (the image below shows the liquid in the middle of the starter). This liquid is called “hooch” and is an indication that your starter is hungry. It also has a very distinct smell, similar to rubbing alcohol or gym socks. This is normal. Don’t freak out. Any time you see this liquid, it’s best to pour it off before feeding it with fresh flour and water.
Days 3-7: Feed Your Sourdough Starter
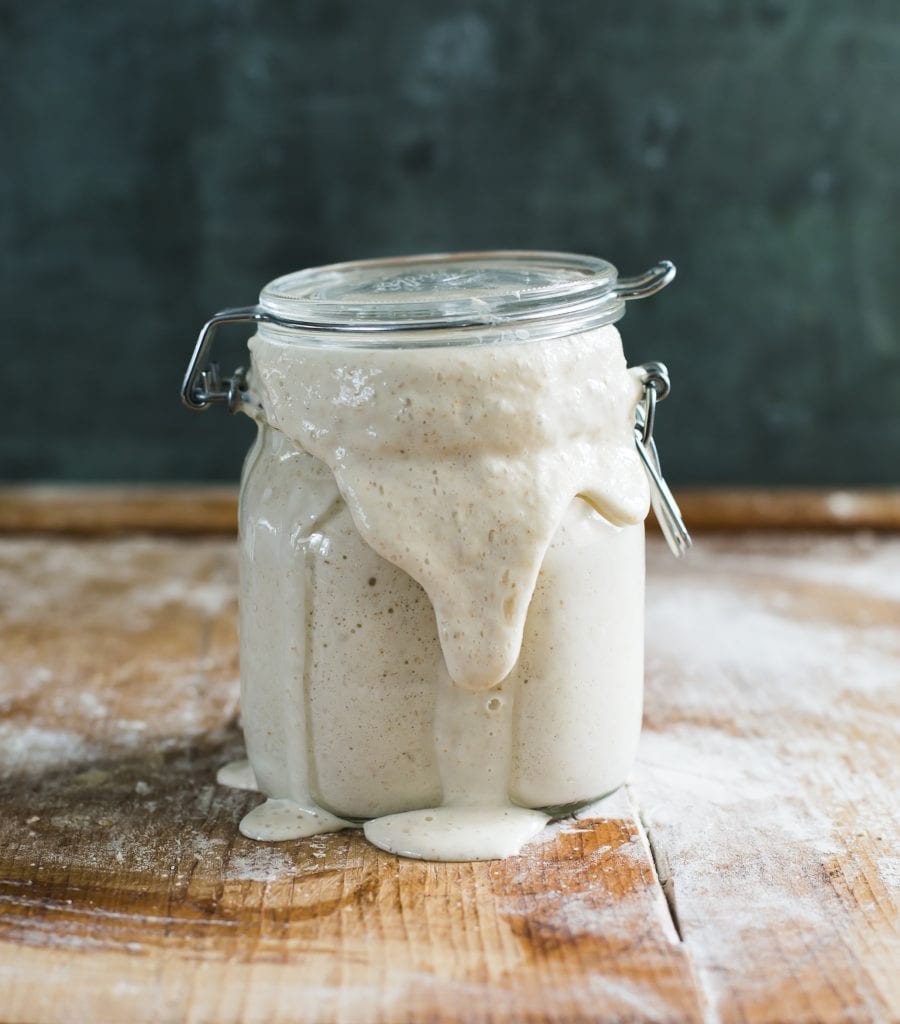
Whether bubbles are visible or not, it’s time to start the ongoing feeding process. As the natural yeasts begin to develop, your starter will rise. Bubbles will form on the surface. Eventually, your starter will fall back down or “collapse” indicating that it’s time to feed it again. The goal: is to increase the total quantity to about 236 g (1 cup) following the specific feeding ratio outlined below on each day.
Before you begin, a few tips for success:
- Establish a feeding schedule. Feed your starter at the same time each day. This will train your starter to rise and fall predictably, which is what you want. Consider feeding your starter in the morning when you wake up. Again, this is where my feeding chart comes in handy.
- Track the growth. Place a rubber band or piece of masking tape around the jar to measure the starter as it rises. When it falls, you’ll see streaks of starter on the sides of the jar.
- Keep your jar clean: Use a small rubber spatula to scrape down the sides of the jar to prevent mold growing up the sides.
- Be patient. This is a slow, gradual process. Remember: temperature (75 F) and consistency (daily feedings @ approximately the same time each day) is key.
Day 3:
- Remove and discard half (60g) of your sourdough starter from the jar. To do so: use a spoon to scoop it out, or pour the starter directly into a bowl to weigh (you can also just eyeball it- the amount doesn’t have to be exact). The texture will be very stretchy.
- To the jar: Add 60 g (1⁄2 cup) of all-purpose flour + 60 g (1/4 cup) of water. Mix with a fork until smooth. Scrape down the sides with a small rubber spatular. The texture should resemble thick pancake batter or plain yogurt at this point.
- Cover and let rest in a warm spot, 70-75 F for 24 hours.
- Total yield: 180 g starter.
Day 4:
- Remove and discard half (90 g) of the sourdough starter.
- To the jar: Add 60 g (1⁄2 cup) of all-purpose flour + 60 g (1/4 cup) of water to the jar. Mix well and scrape down the sides.
- Cover and let rest in a warm spot for 24 hours.
- Total yield: 210 g starter.
- Note: The growth of your starter might appear to slow down on Days 3-4, after switching to all purpose or bread flour for the ongoing feedings. This is normal. Your starter needs more time to adjust. Be patient.
Day 5:
- Remove and discard half (105 g) of the sourdough starter.
- To the jar: Add 60 g (1⁄2 cup) of all-purpose flour + 60 g (1/4 cup) of water. Mix well.
- Cover and let rest in a warm spot for 24 hours.
- Total yield: 225 g starter
Day 6:
- Remove and discard half (112 g) of the starter.
- To the jar: Add 60 g (1⁄2 cup) of all-purpose flour + 60 g (1/4 cup) of water. Mix well and scrape down the sides.
- Cover and let rest in a warm spot for 24 hours.
- Total yield: 232.5 g starter
Day 7:
- Remove and discard half (116.25) of the sourdough starter.
- To the jar: Add 60 g (1⁄2 cup) of all-purpose flour + 60 g (1/4 cup) of water. Mix well, and scrape down the sides.
- Cover and let rest in a warm spot for 24 hours.
- Total yield: 236 g starter
Day 7-8: A Sourdough Starter Is Born!
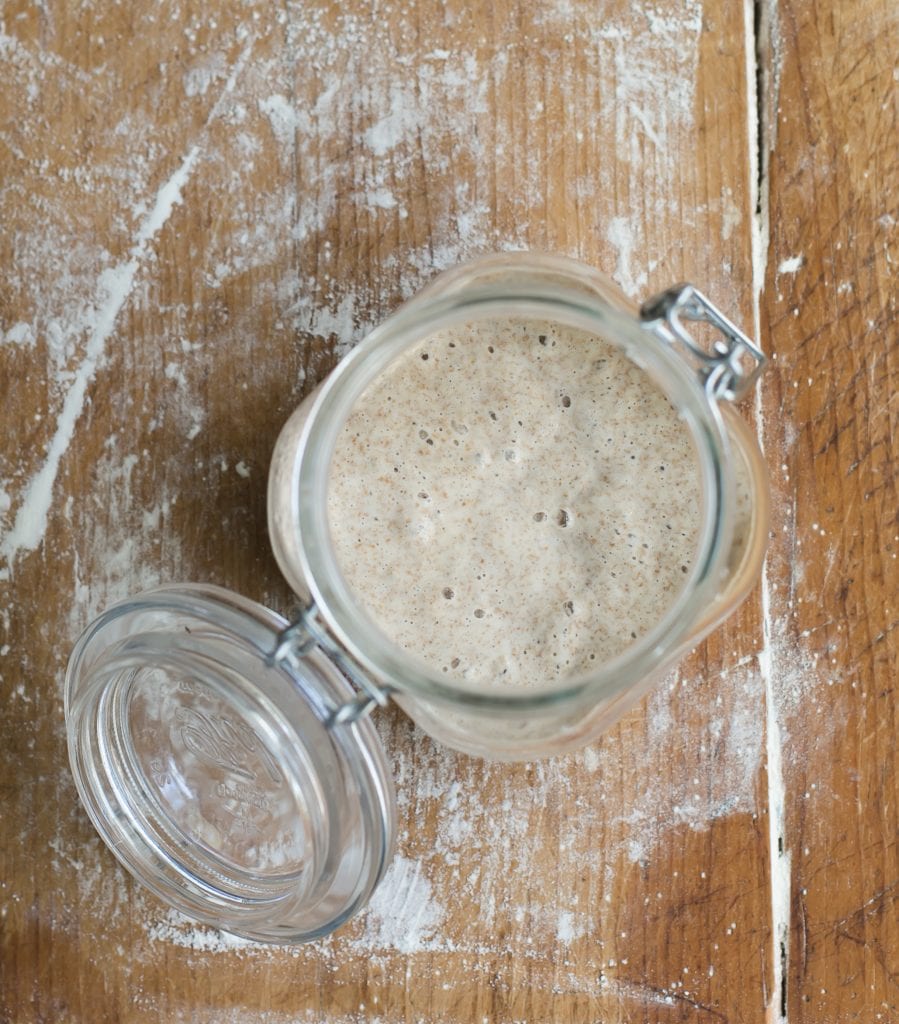
- By now, your sourdough starter should have doubled in size. You should see plenty of bubbles, both large and small. The texture will now be spongy, fluffy, and similar to roasted marshmallows (think: s’mores). It should also smell pleasant and not like stinky gym socks. If these conditions are met, your starter is now active.
- The very last step is to transfer your sourdough starter to a nice, clean jar. Do this only if your current jar needs a good scrub. Otherwise, leave it as is.
- In keeping with tradition, you can also name your sourdough starter (and please do). My starter is called Dillon after my oldest boy. It’s bright and bubbly, just like him ;)
- Now you’re ready to bake. Start with my beginner sourdough bread recipe- you’re going to love it!
Feeding & Maintaining Sourdough Starter For Ongoing Care
So you’ve created a sourdough starter! Now what? Just like any living creature, your starter must be kept alive with regular feedings, proper storage, and ongoing care to keep to maintain its strength. If your starter is not strong, your bread will not rise. Once you’re starter is established, read my companion article to learn exactly how I do it- Feeding Sourdough Starter: My Best Tips & Tricks. Have more questions? Read troubleshooting your sourdough starter.
Note: You will need to feed your starter every time prior to making bread dough and to maintain it (keep it alive).
How To Store Sourdough Starter
At Room Temperature: If you bake often, let’s say a few times a week, store your starter at room temperature. This will speed up fermentation, making the starter bubbly, active, and ready to use faster. Room temperature starters should be fed one to two times a day, depending on how quickly they rise and fall.
In the Fridge: If you don’t bake that often, store your starter in the fridge covered with a lid. You’ll only need to feed it about once a week or so to maintain its strength when not in use (you can just feed it cold and then pop it back in the fridge right afterwards; no need to warm it up first). When you are ready to make dough, feed your starter at room temperature as needed, to wake it back up.
Frequently Asked Questions & Helpful Info:
1.) Can this sourdough starter be made with all purpose flour only?
Yes. The process might take a little longer.
2.) Can sourdough starter be made with bread flour only?
Yes. Because it’s more “thirsty” than AP flour, add more water if the texture is too thick.
3.) Can this sourdough starter be made with whole wheat, spelt flour or rye flour only?
Yes. Like bread flour, whole grain flour absorbs more water than all purpose flour, so adjust the texture with additional water your starter is too thick.
4.) Can sourdough starter be made with bleached flour?
Yes. But it’s not recommended. The chemicals can throw off the fermentation process. Some readers have reported success, however. Your choice!
5.) Why do you use whole wheat flour in the beginning of the recipe? And then switch to all purpose flour for the ongoing feedings?
Whole wheat flour is used to jumpstart the fermentation process. All purpose flour or bread flour is used for the ongoing feedings because it’s inexpensive, practical and suitable for everyday baking.
6.) On Days 3 & 4, my starter is not as bubbly compared to Days 1 & 2. Growth is slowing down. Why?
As mentioned in question #5, whole wheat flour is used in the beginning to jumpstart fermentation. This is why you saw bubbles right away. When you switch to all purpose or bread flour for the ongoing feedings, growth will inevitably slow down on Days 3-4, as your starter needs time to adjust to the new flour. This is normal. Growth is still happening.
7.) For the daily feedings, you mention to feed your starter “equal parts” flour and water by weight. For example: 60 g (1⁄2 cup) flour + 60 g (1⁄4 cup). But the volume conversions (measuring cups) are not equal. Is this a typo?
No. It’s not a typo. “Equal parts” refers to feeding by weight only. Not measuring cups. Here’s why: different ingredients weigh different amounts based on density. For example 1 cup of flour can weigh anywhere from 125-150 g depending on how it was packed into the measuring cup. 1 cup of water can weigh anywhere between 236-250 g. Because weights are constant, it streamlines the process for accuracy. It is the preferred measuring unit in bread baking. The volume approximates are listed for convenience because not everyone has a scale.
8.) Can I use the sourdough discard from Day 1-7 for something else?
In the beginning, I typically don’t recommend using the discard (it’s usually really smelly and discolored). I recommend using the discard after the starter has been established. However, everyone will have a different experience with this. If it looks good- use it! And yes, you can save it to create a new, separate sourdough starter if you’d like. For more info please read Sourdough Discard 101: Recipes & Faqs Answered.
By signing up, you agree to receive emails from The Clever Carrot. Unsubscribe at any time.
Beginner Sourdough Starter Recipe
- Yield: appx. 236 g (1 cup)
- Category: Sourdough Starter
- Method: 1-Bowl
- Cuisine: American
- Diet: Vegan
Description
Looking for an easy, sourdough starter recipe for beginners? Adapted from my bestselling book Artisan Sourdough Made Simple, follow my no-nonsense, step-by-step guide for practical tips, tricks, and ongoing care- anyone can do it. Use it to make my famous golden, crusty sourdough bread recipe.
Please read my notes below before you begin.
Notes, Tips & Expectations:
- Download & print personal sourdough starter feeding chart {here}.
- The overall process takes ~7+ days, if the temperature is warm enough, ideally 70-75 F. However, it can take up to 2+ weeks or more for a strong starter to become established. Do not ignore the importance of temperature.
- Growth will seem to slow down on Days 3-4. This delay is commonly called a “false” start. It’s also normal- the yeast needs time to cultivate. Please be patient!
- You will need one large 3/4 L jar, or something of similar size (I use this one). Place a rubber band or piece of masking tape around the jar to measure the starter’s growth as it rises.
- To clarify feeding your starter: “equal parts” refers to equal weights only, not measuring cups. Example: 60 g (1/2 cup) flour + 60 g (1/4 cup) water. Same weight. Different volume. Not a typo. Why? Flour is light, fluffy and full of air pockets, so it takes up more space in a measuring cup (but weighs less than water). Water is more dense and compact; it takes up less space but weighs more than flour. That’s why their cup measurements don’t match, even when their weights are identical. Many bakers get confused by this. I’ve included volume measurements for convenience since not everyone owns a scale. But, do choose one measurement system and stick with it for feeding!
Ingredients
Note: Once your starter is established, make your first loaf using my sourdough bread recipe.
- 1x (5lb) bag all purpose flour or bread flour (I use either KAF, Trader Joe’s, or Whole Foods)
- 1/2 cup (60g) whole wheat flour (I use KAF whole wheat)
- Water, preferably warm around 85 F
Instructions
Before you begin: Establish a feeding schedule. Meaning, feed your starter at the same time each day. This will establish consistency, which sourdough starters love. Consider feeding your starter in the morning when you wake up.
Day 1:
- Combine 60 g (1⁄2 cup) of whole wheat flour + 60 g (1⁄4 cup) of warm water in a large jar. Mix with a fork until smooth; the consistency will be thick and pasty.
- Cover with plastic wrap, reusable wax wrap, or a lid and let rest in a warm spot, about 70-75 F for 24 hours. Temperature is important.
- Total approximate yield: 120 g starter
TIP: Looking for a warm, 75 F spot? Place your starter on a cookie sheet inside the oven (turned off) with the light on for only 1-2 hours (it can get hot in there, so keep you eye on it!). Center rack is best. You can also use a proofing box set to your desired temperature, or a microwave with the door ajar and light on.
Day 2:
Check to see if any bubbles have appeared on the surface. If you don’t see anything, it’s okay. The bubbles might have appeared and dissolved overnight while you were sleeping. Feel free to stir once or twice to oxygenate the mixture. Otherwise, you don’t have to do anything else now. Rest the starter for another 24 hours.
TIP: During the creation process, and even after your starter has been established, a dark liquid might appear on the surface and throughout the culture. It has a very stinky smell, similar to rubbing alcohol or gym socks. This liquid is called “hooch” and is an indication that your starter needs to be fed. It’s normal. Any time you see this liquid, it’s best to remove it along with any discolored starter present.
Day 3:
- Remove and discard half (60g) of your sourdough starter from the jar. To do so: use a spoon to scoop it out, or pour it directly into a bowl to weigh (you can also just eyeball the amount- it doesn’t have to be exact). The texture will be very stretchy.
- To the jar: Add 60 g (1⁄2 cup) of all-purpose flour + 60 g (1/4 cup) of water. Mix with a fork until smooth. Scrape down the sides with a small rubber spatular. The texture should resemble thick pancake batter or plain yogurt at this point.
- Cover and let rest in a warm spot, 70-75 F for 24 hours.
- Total yield: 180 g starter
Day 4:
- Remove and discard half (90 g) of the sourdough starter.
- To the jar: Add 60 g (1⁄2 cup) of all-purpose flour + 60 g (1/4 cup) of water to the jar. Mix well. Scrape down the sides.
- Cover and let rest in a warm spot, 70-75 F for 24 hours.
- Total yield: 210 g starter
Note: The growth of your starter might appear to slow down on Days 3-4, after switching to all purpose or bread flour for the ongoing feedings. This is normal. Your starter needs more time to adjust. Be patient.
Day 5:
- Remove and discard half (105 g) of the sourdough starter.
- To the jar: Add 60 g (1⁄2 cup) of all-purpose flour + 60 g (1/4 cup) of water. Mix well. Scrape down the sides.
- Cover and let rest in a warm spot, 70-75 F for 24 hours.
- Total yield: 225 g starter
Day 6:
- Remove and discard half (112 g) of the sourdough starter.
- To the jar: Add 60 g (1⁄2 cup) of all-purpose flour + 60 g (1/4 cup) of water. Mix well. Scrape down the sides.
- Cover and let rest in a warm spot, 70-75 F for 24 hours.
- Total yield: 232.5 g starter
Day 7:
- Remove and discard half (116.25) of the sourdough starter.
- To the jar: Add 60 g (1⁄2 cup) of all-purpose flour + 60 g (1/4 cup) of water. Mix well. Scrape down the sides.
- Cover and let rest in a warm spot, 70-75 F for 24 hours.
- Total yield: 236 g starter
Day 8:
When your starter is fully active, do the float test. Feed your starter, wait for it to double in size, and then drop a teaspoon of bubbly starter into a jar of water; if it floats to the top it’s ready to use.
Storage Options
If you bake often, store your starter at room temperature (feed it 1x-2x a day to keep it active). If you plan to bake only once in a while, store it in the fridge to preserve its strength (feed it 1x a week). When storing your starter in the fridge, there’s no need to bring it to room temperature first before feeding it. Just give it some flour and water and pop it back in the fridge.


Comments
Brenda Penn says
Hi Emilie,
Brenda here from Yahk/Kingsgate BC. I have been following your days of feeding sourdough starter only to realize I was using 60g of water and 60g of flour in the same measuring cup with no results. Yesterday I used proper measuring cups, one for liquid and one for dry measuring.
In your outline, you state the amount to discard, for example, from Day 3: Remove and discard half (90 g) of the sourdough starter. I am assuming the(90g) is the discard, or is it what you’re left with to feed?
Kristen says
Hi,
After day 7, how much do you discard and feed, if you think your starter needs more time.
Thanks!
Racina Ventrello says
Hello! I am on day 5 of my starter and I have been feeding it APF can I switch to Bread flower from now on as I am running low on the all purpose flour.
Thank you
Janice Siminiuk says
I followed your instructions perfectly. Then I thought I put the completed starter in my fridge as I wasn’t ready to use it. But OH NOOOO I put it in the freezer by mistake 😭 Is it destroyed?
Megan says
I’ve become overwhelmed with baking and so I’m planning to keep my starter in the fridge and feed it weekly. My qustion is, if I take it out of the fridge friday morning and feed it – using it to start a loaf friday night – should I just leave it out after feeding?
And if I’m using a recipe that needs active starter, does that mean I should feed it again Friday night? Is it “active” right after feeding or do I need to wait for the bubbles and the growth (which I would see by Friday night!)
Emily says
I notice that you use a mason jar type for the starter, do you close the cover completely so it is tight or just cover?
mario says
Don’t make this complicated? It’s very simple? LOL…Look at the list of directions and the steps involved to create this starter! Do yourself a favour…either spend the 5$ and purchase a live starter on marketplace, or just buy a sourdough bread freshly made for the same price every morning at your local grocery chain! Now that’s simple and worth it! Or spend 7 days and a few hours trying to prepare this the right way to save a handful of dollars and hope it comes out right! LOL No thank you!
Chris says
Those of us that make our own sourdough starter and bread – enjoy it, find it relaxing, and personal pride in the accomplishment. Made with love to share with family and friends. Why knit a sweater or make your own furniture? – because we choose to – we love doing it.
The only reason to be on this site is if you want to make something delicious from scratch. So try it before you knock it or please take your negativity elsewhere. Find a hobby creating something from scratch – you’ll see.
EDEN NAVARETTE FLORESCA says
Hi! I’m on my 11th day, but there’s only a little lift, maybe 0.25 inches. It has small bubbles, consistency is just like pancake batter. It’s been cold and I put my starter jar on top of my Wifi router as the temp there is warm and constant. On the verge of giving up! Appreciate some tips, thank you in advance!
Dawn says
Hi I put my jar on a heat register, it doubles overnight every time
Sara says
Add 2g of sugar
Debbi Propp says
What part of the USA is producing roundup flour? You mentioned that glyophosphate flour doesn’t work as well. What brand do I avoid. There is a few brands here in rural areas because of size we don’t have access or the money to purchase trader joes or KAF
Tiffany Ruble says
Hello and thank you for the detailed explanation and love that there are pictures as well! I was wondering, what do you do with all of the discard? And when your starter is established and you begin using it to bake, should the starter be doubling in size every time you discard and feed?
Ingo says
this is my first time trying, since I’m in Cancun it is extremely hard to maintain the Temperature, after searching for a long time I found a sourdough Incubator online ( cooling and warming), just big enough to hold a 1L jar. , the second challenge is/was to find a flour that has more than 10% protein, I finally found 11.5%, It’s ok to start with whole wheat but In general I don’t like Whole grain flour. Measuring the weight of 1/2 cup of flour was actually 78g so I adjusted the water.accordingly.I also bought Rye flour because that is my end game.sourdough rye bread. also only 10% than I found online I also found Vital Wheat Gluten (VWG) to raise the protein level I ordered it but I will start a starter without it for the first time. I keep my progress updated.
Amanda says
I’ve been working on making my first ever sourdough starter since December 10th with the help of this recipe. I just baked my first ever sourdough bread this Christmas Eve and it’s golden and crispy! Can’t wait for it to cool down so I can cut into it and hopefully have a tasty bread to celebrate Christmas morning!
Thank you for making this recipe and sharing it with us all – you made it easy to follow, easy to understand, and made it an exciting journey!
Dawna says
Hello,
I would like to have use less flour, water and starter perportions. How low can I go? 25 gm starter, 50 water and 50 flour? (10 of which is rye)
thanks
Dawna
Chriss Melancon says
I’m on day 2 of my starter. K made the executive decision (ha ha) to use King Arthur wheat & all purpose flour. Seeing how active the bubbles are becoming, it was a good choice. Thank you for making something that I considered ‘too intimidating’ actually very simple. *I prayed over it, too. That couldn’t hurt! 😆
I’m hopeful!!!
Joane Azenha says
Hi Emily! Thanks for this amazing and easy to follow guide. It’s my first time making a sourdough starter, though I have always wanted to try. I am on day 8 and it looks and smells really good. Silly question: From now on, how much do I feed it and do I still need to discard some when feeding it?
I am looking forward to many happy bakes with Clyde (I will by Bonnie in this relationship!)
Jennifer Martinez says
I have the same questions.
Cris says
This was incredibly helpful. You explained everything so detailed. Thank you!
Sandra B says
No need to throw out discard, whether for beginner starter or feeding. I use a 48 oz jar and add 1/8 of a cup daily and use weekly or bi-weekly or put in refrigerator. I’ll take it out the night before dough prep and add bread flour and water (50/50) it’s ready in the morning.
And, thank you for your wonderful recipes, I am enjoying the experience!
Nandini says
I need some advice. I foolishly added half a cup of water along with half a cup of flour everyday for 7 days already. The starter did rise everyday and showed bubbles as in the recipe so I didn’t suspect anything and didn’t realize until today. This morning as well after feeding it incorrectly it has still almost doubled in size. Should I throw the starter away or still use it to make bread and how? Any help is much appreciated.
Paige says
I did the same thing! Though realized on day 5. I googled what to do and it’s still useable but had to discard 3/4 of it and feed it double the amount of what I had been feeding it. So one cup of flour and 1/2 cup water.
Callaway says
Worked great!
Meredith says
Hi! I’m on day 5 I believe, and have a few questions! First of all, when I first started my starter I used whole wheat flour and warm filtered water as per your measurements. The dough was immediately a pretty tough ball. My sourdough making sister said, no that’s no good. Try again. So I did, with APF, and got the same result however this time I stayed the course. I fed it on day 2 by accident, and the next day it was big and fluffy! Yay! Now, my sister also noticed on day 4 that it was so much starter and I likely won’t need that much getting started. SO..I switched to feeding it 1/4 cup bread flour and 1/8 cup water (after discarding more than usual so try to maintain relative amounts). Was this a huge mistake? I am ready to start fresh if I need to, but just hoping it’s ok!
It also has not risen as much today and smells …funky, but no hooch.
Alabama Barb says
I started my sourdough starter using Emilie’s recipe during Covid. It is still alive after 4 years and is happy in my refrigerator! I do not discard any of the starter before feeding it and do switch it to clean glass jars every so often. Truth told, these starters are tough and can be ignored for weeks (months) as long as refrigerated. Mine even survived a move:-)
Emilie Raffa says
Sourdough starters are definitely more resilient than one would think! It’s such a learning process, one that each baker must experience to see understand the value. Thank you for sharing your experience!
Zann Reid says
I forgot to discard before feeding my starter, am on day 4. Will it be ok or should I start over?
Emilie Raffa says
No need to start over! You can discard more at your next feeding to catch up. Focus on the consistency of your starter as your continue to fee it- it should look like thick pancake batter.
Erica says
This is my first time making a starter; I am using a glass jar with sealing, hinged lid. Can the lid be kept sealed tight during the making of a starter?
Emilie Raffa says
Yes. You can keep it sealed shut or rest the lid on top. Either option is fine. Just a heads up about sealed jars: as your starter grows it will build up pressure which can potentially break the jar. Just keep your eye on it.
beth says
Thanks. I started baking sourdough bread during covid, with great success! Now, the rabbit hole has captured me. No matter what I do, most of my loaves have hockey puck texture! I have always baked 50/50 white and wheat, in past have had better luck with AP than with bread flour..now I’ve tried it all to no avail. My home is not very warm; I have used oven lights to create warmer space–have tried both with and without using fridge for final proof (flop!). Now I wonder–I’ve been using rye flour in my starter, which is nice and bubbly–could that be the problem?
Hope you can help me!
Emilie Raffa says
Hockey puck loaves are very relatable- sadly we’ve all been there! But on the other side of this frustrating initiation is valuable insight. So, I’ll lead with this: when troubleshooting *any* sourdough bread recipe you need to treat it like a formula. If you make changes to the formula, or miss the indicated temperature for rise times and so on, the formula will break. You’ll end up with less than edible bread.
Because I do not know the recipe you’re following, can you go back to your process line by line and spot any gaps? I would start there. Then feel free to circle back with any additional questions. PS: off the top of my head, I feel like rye in your starter is not the issue (unless you’re using a very big amount). Again, I’d have to examine your process.
Princess M says
Hi,just want to say thank you for the recipe.I have always wanted to bake sourdough bread and have always been a bit scared. A friend of mine suggested that we try it together so she got a different recipe and I got yours. Anyway my starter was perfect and the one she made wasn’t good and I used your sourdough bread recipe afterwards and it was delicious. I can’t wait to try your other recipes.
Emilie Raffa says
You’re very welcome. Thank you for this. I love how you decided to take the plunge and tackle sourdough together. It’s like having a gym partner! 🤣 Keep going, have fun baking, and continue to share your story!
Susan says
Thank-you so much for this. You have done a lot of valuable work here!💞
I made sourdough bread from a bread book which I passed on to someone much younger than myself. This was before the internet which makes things easier but didn’t think of it. There is something comforting in making your own bread, actually anything from scratch as you know what’s in it and can avoid all the preservatives and unnecessary ingredients.
Thank you so much!
Susan
Emilie Raffa says
Your kind words are well received. Thank you, Susan. Yes: scratch-made foods are highly rewarding. I’ve given this a lot of thought over the years… is it the food itself? Or the transformation process we get to experience in between? I’d argue it’s both, and it’s one of the greatest gifts to give and receive. 🥰
Marisa says
Hi Emily,
I have been using your fantastic recipe book for three years with great success. I have bought it many times as a gift for beginner sourdough users.
I have one question today……after being away for 6 weeks, with my starter in the fridge, I was going to revive it, but I am not sure if there is mold on the surface. How do I decide whether I have mold or not? I hate to start all over, but I don’t want to take a chance either.
I wish I had taken a photo. The surface was quite thick and very grey.
Any suggestions?
Emilie Raffa says
Hi Emily! If the surface is slightly discolored (gray) with dark liquid on top, it’s not mold. It’s hooch, a byproduct of your starter’s exhaustion indicating it needs to be fed. On the other hand, if what you’re looking at is dark, spotted and fuzzy, it’s most likely mold. Mold also likes to grow on the sides of the jar too. That’s another indication. You will have to go with your gut on this one since I cannot see what it looks like!
Laura says
This may be a silly question.. would I use the entire starter to make one loaf of bread? Or can I save some to continue growing?
Jayden says
Not a silly question at all! You don’t need to use the entire starter for one loaf. Most recipes only use a portion of it, for example the one on this site only calls for 150g. You can take what you need for baking and keep the rest to feed and continue growing for future loaves.
Kelly Titchner says
I have a question…when you weigh your sourdough do you weigh before or after you stir it? I never thought about until today when I weighed him before I stirred and was shocked how much he had grown compared to other days when I weighed after I stirred. P.S I am a beginner
Lex says
Stirring or mixing something does not change its weight. ;-)
David Jones says
Started perfectly now we will see if I can bake some bread!!
Susan Cunning says
Keep the lid closed or put on some press and seal or anything that keeps it tightly sealed so it can grow in the cozy warm jar 👍👍
Darlene Byrne says
I measured exactly as per the recipe and my starter is a dough consistency… will it liquify over the course of the week?
Shirley Christianson says
Well stated!
Sarah says
Silly question: do you keep the lid of the jar open or closed?
Becki Porter says
I’ve used nearly all my starter for a recipe but there was probably about 2 tablespoons left. I’ve fed it with the usual 1/2 cup flour and 1/4 water as per the recipe and mixed, leaving it in a warm place to effectively start again. Was this right or should I have just washed the jar thoroughly and started completely brand new? My thinking was at least a bit of the starter could mix with the new feed
Aisha says
Hi, how did your bread come out
Alixie says
Hi!! I’m trying to reactivate a starter. I got some from my dad, and I’ve fed it a few times, I’ve had it for a year or two… and I’ve never made bread with it. I discarded and fed it, it doubled overnight. I tried the float test, it sank immediately. Do I just discard and feed again? Then let it grow, and then go from there?
Gaby H. says
Hi there! I’ve been following the steps closely and I’m in the 8th day. My starter has grown only like 10%… i can see bubbles but is not doubling the size… i started with whole weat and feedings with bread flour, keeping temp 75-76F …. should I be doing something else?
Dave says
Thank you for this clearly written and informative post!
My starter was fed yesterday morning, approximately doubled in volume, and then was left unattended overnight. I intend to use it once this week to make your cinnamon roles. Should I discard, feed it, and then return it to the fridge until later this week, or can I just put in the fridge as is and take it out when needed?
Thanks again for providing these delicious and easy-to-follow recipes!
Jenny says
Hi! I started yesterday but mine isn’t pasty. It just looks like a big, dry solid ball of dough. :/ Should I restart? I used .5 cup of whole wheat flour and .25 cup of water. It just seems much drier than the pic.
Michelle says
I believe she said whole wheat flour is more thirsty than all purpose or bread flour. You should add water if it is too thick, like you described as a dough ball. You may need to start again. I have found that 60g of water is very close to 1/3 cup in my liquid measuring cup.
Shannon says
I’ve been following this recipe and the first 3-4 days it was doubling and bubbling but I’m on day 10 (and switched to 12 hour feedings) and that’s not happening anymore. There’s a slight rise at best. On day 6 it was big and bubbly and doubled but it was midnight so baking wasn’t practical and it hasn’t done it since. My apartment has been pretty consistently between 71-75 degrees. But the temp has been going up today.
Do I need to start over? Or just keep going?
Mallory says
I am currently on day 3 and I by accident assumed that 60g flour is the same as 60g water and I added 1/2 cup of water to my start. I am using bread flour so hoping it won’t affect it too much since bread flour is a bit more “thirsty”. Can you confirm that I’ll be all set? Or should I start over?
Beve says
Woke up to day 5 and was so excited to see more bubbles and an inch rise! Just did day 5! Can’t wait for tomorrow and eventually giving her a name! 💖💚💛
Bhumika jain says
I am ready with my starter on day 8. I have few questions as I am first time bread baker –
1. I will now bake a bread using your recipe and take out lot of starter from this. Should I just keep the remaining amount in fridge for now?
2. When I feed it next week, how much should I discard before adding 60 flour and 60 water?
Trent Endresen says
Hello I was wondering why my starter is ending up watery I follow the recipe and keep it around 70-80 degrees
Dannie says
I was so excited to try this recipe. I’ve been struggling with sourdough for years and have not been able to make a starter successfully. I’m at day 6 and I do not think this is going to be successful. It’s extremely liquidy, just a couple of bubbles and no rise. It’s been this way for about 2 days. The first couple of days was fantastic I was thrilled. But unfortunately I think this was another flipped starter. Proper flour was used, slightly warm water and a controlled temperature measured with a thermometer ranging around 73-75. I torn between trying again or giving up. Really sad it didn’t work.
Sid C. says
I used this recipe and my starter is ready to use after 5 days! I am so excited! Wish I could send pics here. Thank you!!!
Erin says
Does the wheat flour need to be unbleached? I’m not finding it in any stores. I’m excited to try this!
Julie says
After day 7, if it still needs more time, do i continue with your ratio of 1:0.5:0.5 from day 7? Or do i swap now to 1:1:1. Thank you!
Joyce Delap says
What do you do with the discarded half each time? Can this be made into a second lot of starter.
Nour says
Hi, my first 4 days my starter was doubling in size every night. After day 5, the starter is still very bubbly and has a marshmallow texture but it isn’t doubling in size. I tried the float test but it didn’t pass it. Any recommendations?