Description
Looking for an easy, sourdough starter recipe for beginners? Adapted from my bestselling book Artisan Sourdough Made Simple, follow my no-nonsense, step-by-step guide for practical tips, tricks, and ongoing care- anyone can do it. Use it to make my famous golden, crusty sourdough bread recipe.
Please read my notes below before you begin.
Notes, Tips & Expectations:
- Download & print personal sourdough starter feeding chart {here}.
- The overall process takes ~7+ days, if the temperature is warm enough, ideally 70-75 F. However, it can take up to 2+ weeks or more for a strong starter to become established. Do not ignore the importance of temperature.
- Growth will seem to slow down on Days 3-4. This delay is commonly called a “false” start. It’s also normal- the yeast needs time to cultivate. Please be patient!
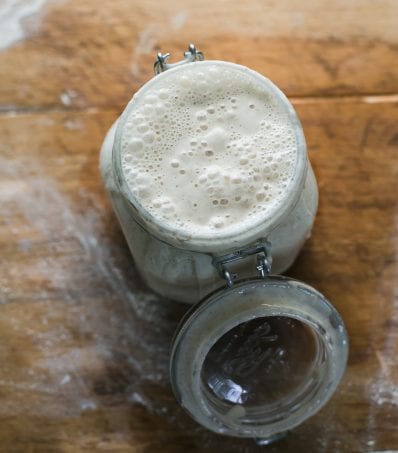
- You will need one large 3/4 L jar, or something of similar size (I use this one). Place a rubber band or piece of masking tape around the jar to measure the starter’s growth as it rises.
- To clarify feeding your starter: “equal parts” refers to equal weights only, not measuring cups. Example: 60 g (1/2 cup) flour + 60 g (1/4 cup) water. Same weight. Different volume. Not a typo. Why? Flour is light, fluffy and full of air pockets, so it takes up more space in a measuring cup (but weighs less than water). Water is more dense and compact; it takes up less space but weighs more than flour. That’s why their cup measurements don’t match, even when their weights are identical. Many bakers get confused by this. I’ve included volume measurements for convenience since not everyone owns a scale. But, do choose one measurement system and stick with it for feeding!
Ingredients
Note: Once your starter is established, make your first loaf using my sourdough bread recipe.
- 1x (5lb) bag all purpose flour or bread flour (I use either KAF, Trader Joe’s, or Whole Foods)
- 1/2 cup (60g) whole wheat flour (I use KAF whole wheat)
- Water, preferably warm around 85 F
Instructions
Before you begin: Establish a feeding schedule. Meaning, feed your starter at the same time each day. This will establish consistency, which sourdough starters love. Consider feeding your starter in the morning when you wake up.
Day 1:
- Combine 60 g (1⁄2 cup) of whole wheat flour + 60 g (1⁄4 cup) of warm water in a large jar. Mix with a fork until smooth; the consistency will be thick and pasty.
- Cover with plastic wrap, reusable wax wrap, or a lid and let rest in a warm spot, about 70-75 F for 24 hours. Temperature is important.
- Total approximate yield: 120 g starter
TIP: Looking for a warm, 75 F spot? Place your starter on a cookie sheet inside the oven (turned off) with the light on for only 1-2 hours (it can get hot in there, so keep you eye on it!). Center rack is best. You can also use a proofing box set to your desired temperature, or a microwave with the door ajar and light on.
Day 2:
Check to see if any bubbles have appeared on the surface. If you don’t see anything, it’s okay. The bubbles might have appeared and dissolved overnight while you were sleeping. Feel free to stir once or twice to oxygenate the mixture. Otherwise, you don’t have to do anything else now. Rest the starter for another 24 hours.
TIP: During the creation process, and even after your starter has been established, a dark liquid might appear on the surface and throughout the culture. It has a very stinky smell, similar to rubbing alcohol or gym socks. This liquid is called “hooch” and is an indication that your starter needs to be fed. It’s normal. Any time you see this liquid, it’s best to remove it along with any discolored starter present.
Day 3:
- Remove and discard half (60g) of your sourdough starter from the jar. To do so: use a spoon to scoop it out, or pour it directly into a bowl to weigh (you can also just eyeball the amount- it doesn’t have to be exact). The texture will be very stretchy.
- To the jar: Add 60 g (1⁄2 cup) of all-purpose flour + 60 g (1/4 cup) of water. Mix with a fork until smooth. Scrape down the sides with a small rubber spatular. The texture should resemble thick pancake batter or plain yogurt at this point.
- Cover and let rest in a warm spot, 70-75 F for 24 hours.
- Total yield: 180 g starter
Day 4:
- Remove and discard half (90 g) of the sourdough starter.
- To the jar: Add 60 g (1⁄2 cup) of all-purpose flour + 60 g (1/4 cup) of water to the jar. Mix well. Scrape down the sides.
- Cover and let rest in a warm spot, 70-75 F for 24 hours.
- Total yield: 210 g starter
Note: The growth of your starter might appear to slow down on Days 3-4, after switching to all purpose or bread flour for the ongoing feedings. This is normal. Your starter needs more time to adjust. Be patient.
Day 5:
- Remove and discard half (105 g) of the sourdough starter.
- To the jar: Add 60 g (1⁄2 cup) of all-purpose flour + 60 g (1/4 cup) of water. Mix well. Scrape down the sides.
- Cover and let rest in a warm spot, 70-75 F for 24 hours.
- Total yield: 225 g starter
Day 6:
- Remove and discard half (112 g) of the sourdough starter.
- To the jar: Add 60 g (1⁄2 cup) of all-purpose flour + 60 g (1/4 cup) of water. Mix well. Scrape down the sides.
- Cover and let rest in a warm spot, 70-75 F for 24 hours.
- Total yield: 232.5 g starter
Day 7:
- Remove and discard half (116.25) of the sourdough starter.
- To the jar: Add 60 g (1⁄2 cup) of all-purpose flour + 60 g (1/4 cup) of water. Mix well. Scrape down the sides.
- Cover and let rest in a warm spot, 70-75 F for 24 hours.
- Total yield: 236 g starter
Day 8:
When your starter is fully active, do the float test. Feed your starter, wait for it to double in size, and then drop a teaspoon of bubbly starter into a jar of water; if it floats to the top it’s ready to use.
Storage Options
If you bake often, store your starter at room temperature (feed it 1x-2x a day to keep it active). If you plan to bake only once in a while, store it in the fridge to preserve its strength (feed it 1x a week). When storing your starter in the fridge, there’s no need to bring it to room temperature first before feeding it. Just give it some flour and water and pop it back in the fridge.