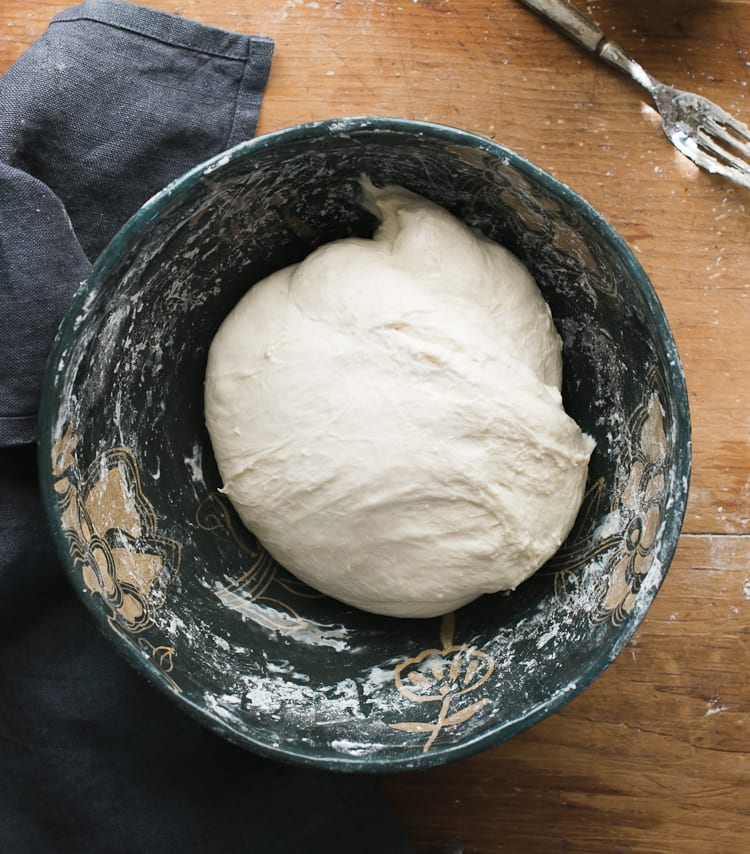
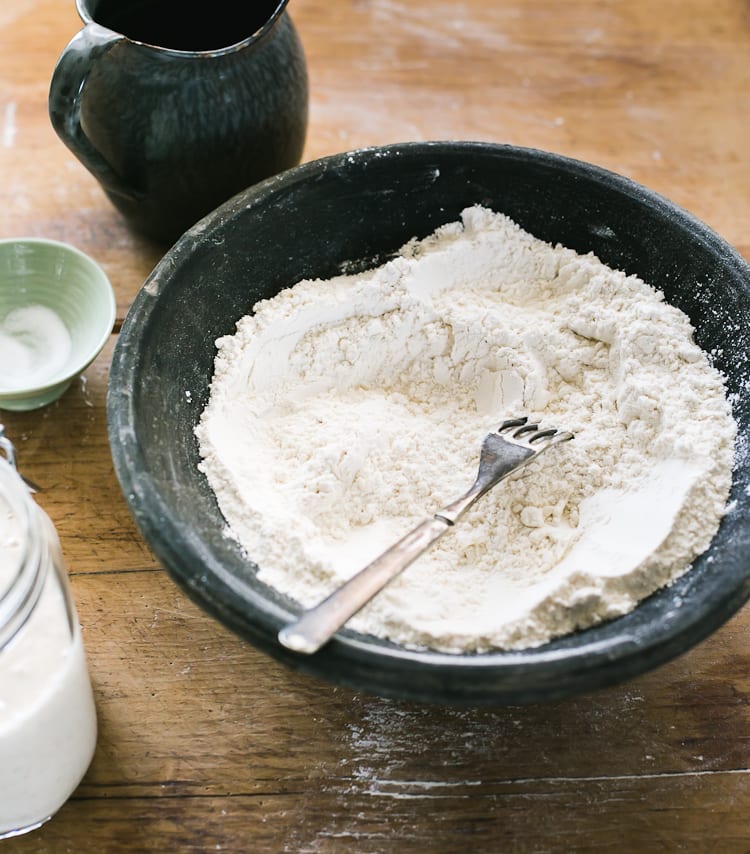
Imagine this: you’ve got a beautiful bubbly starter, you’re ready to make the dough, and everything is set for an overnight rise. You’ve followed the sourdough bread recipe to a T! Nothing could go wrong, right?
Except, when you wake up the following morning the dough has barely risen at all. Maybe only a few inches. The dough is cold, dense, and sort of lifeless (just like your mood). What gives?
First, what you’re experiencing is totally normal.
We’ve all been there no matter how easy the recipe might be. Ask any baker. In my experience however, temperature is usually the main culprit and luckily there are ways to control it.
But first, you’ll need to consider (and rule out) additional culprits that like to throw a wrench in your rise time game.
What most people don’t know, is that sourdough is like a web; each step is connected to the next.
That means when troubleshooting, it’s never just ‘one thing’ that causes your bread to flop. You have to consider how each step works together and what happens to the bigger picture when something goes wrong.
Sourdough Rise Trouble Shooting Steps:
Test Your Starter
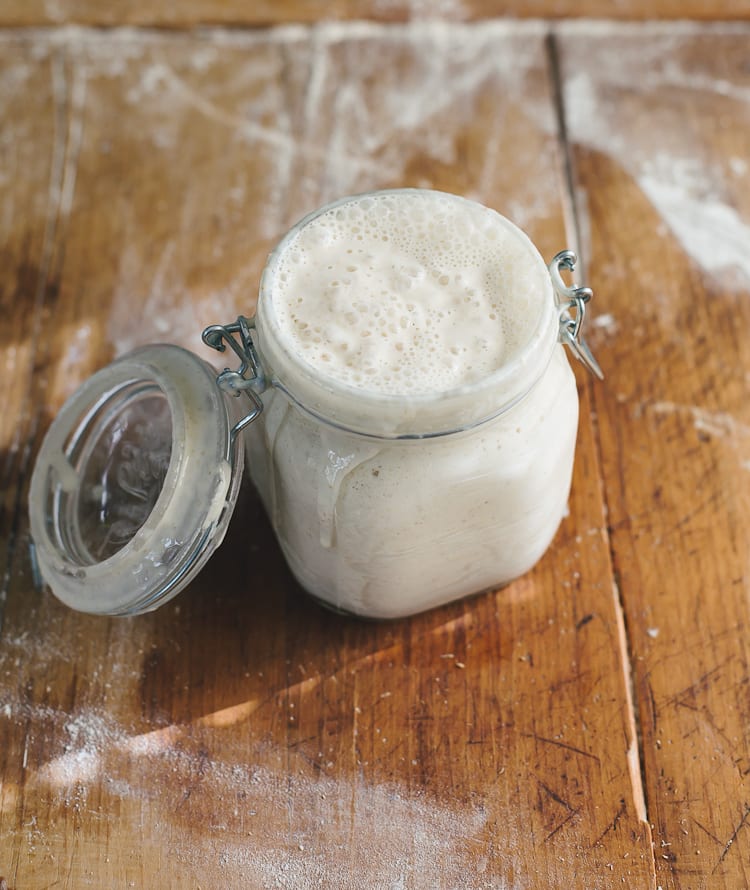
First, let’s talk about your sourdough starter. If it lacks power and vibrancy, your bread won’t rise. So, how can you test to be sure it’s okay? After giving it a good feed, it’s ready to use when it shows all of the following signs:
- doubled in bulk size (use a rubber band to track its growth as it begins to rise and fall).
- bubbles on the surface and throughout the culture.
- spongy texture similar to roasted marshmallows.
You can find more info regarding sourdough starters, ongoing care, FAQ in my book (p 16-23).
Once your starter shows all of the signs, make sure it passes the float test. To do the test, drop 1 tsp. of the starter into a glass of water; if it floats to the top it’s strong and ready to use.
The more you get to know your starter the more it will ‘speak’ to you, and eventually you’ll bypass this test altogether.
Check The Temperature
Assuming your starter is ready to use, the next step is to address the temperature. As mentioned above, temperature is usually the culprit when your dough is taking forever to rise.
Why? Because temperature controls time.
Simply put: if the weather is cold, your dough will take longer to rise. If the weather is warm, your dough will rise faster. This concept applies to ALL bread recipes, so get used to it and be flexible.
As a guideline however, bakers will often provide a specific temperature with an approximate rise time to help you out.
Here’s an example:
Let’s use my Everyday Sourdough from Artisan Sourdough Made Simple. The approximate rise time is 8-10 + hours at room temperature, defined at 70 F.
What does this rise time and temperature mean exactly?
Let’s say it’s winter in New York, and the temperature is about -20 F outside. Your thermostat is set to 70 F inside. You’ve made the dough, let it rise overnight on the kitchen counter at 70 F, and in the morning it has barely risen. What happened?
Here’s the deal: regardless of what your thermostat says, if it’s – 20 F outside, I can guarantee the temperature inside is not 70 F.
It’s most likely colder than you think! I learned this the hard way. Drafts, poor insulation, doors opening and closing etc. will not only change your current room temperature, but it changes the temperature of the dough too. My kitchen is the coldest room in the house, so I know this all too well.
Plus, if your body is cold and you’re wrapped up in 100 cable-knit sweaters, think about how the dough feels… To remedy this, you’ll need to deviate from the recipe to suit your personal environment.
In other words, in this example, your dough needs more time to rise beyond the 8-10+ hour timeframe- it’s just too cold. And this is okay.
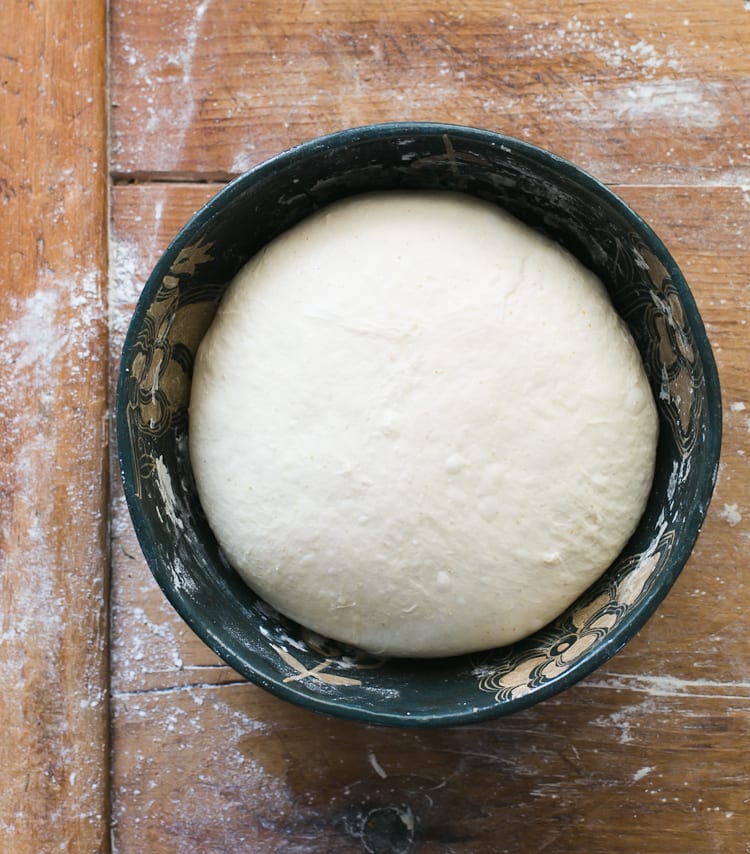
Remember, the dough is ready when it has doubled in size. This is your visual marker. Don’t even bother baking it if it still looks dense after 10 hours. Watch the dough and not the clock. Conversely, if you live on an island and it’s 90 F, the dough might be ready in only 4-5 hours.
Look On The Bright Side
While colder temperatures and extended rise times might initially frustrate you, the experience will always hand you a gift.
It develops your intuition and leads you away from second guessing yourself. Intuition is a baker’s secret weapon. With practice and repetition, you’ll learn how to marry the variables (time, temperature, specific instructions etc.) with intuition (adjusting rise times, rising locations, and just doing your own thing ) without thinking twice.
Trust the process, okay?
Now, let’s move on to see how we can control the temperature…
Use Warm Water To Control The Temperature
If the weather is cold and your dough won’t budge, please use warm water during the initial mixing phase. It will help to jumpstart the rising process.
I actually use warm water 90% of the time when making dough (I tend to use cooler water in the summer). The exact water temperature doesn’t really matter in my opinion. Between 80-90 F is good. It just shouldn’t be too hot. Use your judgement.
Also: do you store your flour in the fridge? Some people do this to prevent bugs from nesting in the bag. If you fall into this camp, remember, cold ingredients = cold dough.
Use A Proofing Box To Control The Temperature
The only way to really keep your dough at a constant temperature free of drafts and fluctuations is to use a proofing box.
If you’re unfamiliar, proofing boxes are basically like mini green houses for your dough. You can set the box to your desired temperature and go about your day (or night) worry free. Except, they’re really not so mini come to think of it.
These boxes are about the size of a microwave, they take up prime counter space, and worst of all- they are not cheap! I have a proofing box that collapses flat for easy storage, which I love but it cost over $150. The brand name is Brod & Taylor.
If a proofing box is not an option for you, there’s an easy a way to create a bootleg version at home.
To do so, adjust your oven to the lowest setting (mine is 200 F). Once it’s ready, shut it off. Stick an oven thermometer inside and wait for the temperature to drop to about 75-80F. Then place your dough inside (the bowl must be oven-proof, and a damp cloth should rest over the top to prevent a skin from forming on the dough). Allow to the dough rise in this warm, somewhat controlled environment until it has doubled in size. You can also use this tip for the dough’s second rise too.
Note: Please make sure your oven does not go above 8o F. If the temperature is too hot, many things can happen that might wreck your dough. For example, extreme heat + cold dough creates excessive condensation, which leads to a wet and sticky texture. Wet and sticky dough is difficult to work with and shape. In fact, you might have to shape the dough more than once if it’s spreading too much.
Extreme temperature can also lead to over-proofed dough, if the bowl is left inside of the oven for too long. And finally, too much heat might kill your starter power, resulting in flat and dense loaves.
I’ve experienced all of the above factors and it’s really frustrating. My best advice? Please monitor your dough when it’s inside of the oven so you have an idea of what’s going on- all ovens are different, all doughs are different. Eventually, you’ll get a sense of how long the dough will take to rise and you’ll be able to make better adjustments as you continue to observe.
Conclusion
So, let’s re-imagine this scenario once more: you’ve got a beautiful bubbly starter, you’re ready to make the dough, and everything is all set for an overnight rise on the kitchen counter.
This time, you know it’s freezing cold outside and you have a hunch the dough might not be ready in the morning. Low and behold, you are correct.
Quick to think, the following morning you create a proofing box using the oven trick mentioned above. In just a few hours the dough is soft, supple, and double in size. Success!
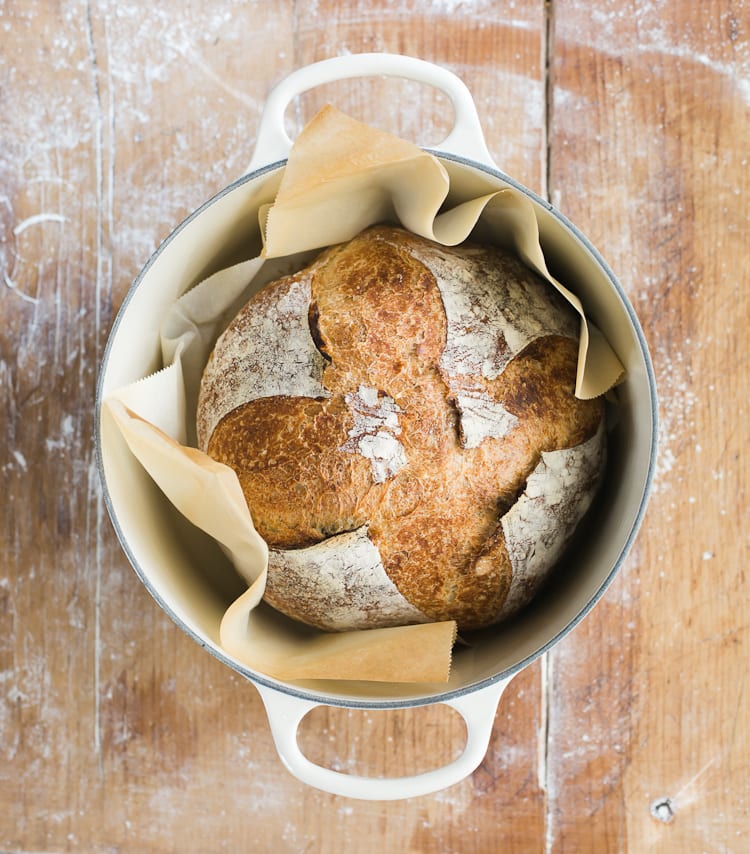
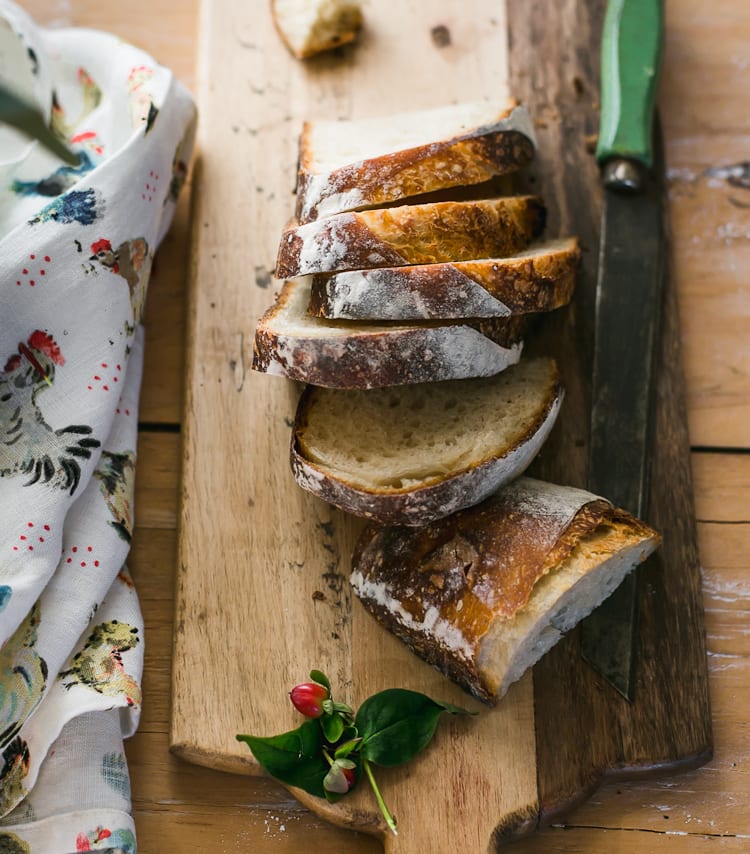
Once the dough is baked, you slice a piece of warm, crusty bread at just the right moment and inhale the aroma that has come from your creation. Slather on some salted butter and revel in your newfound accomplishment! You deserve it!
• • • • • • • •
If you have questions regarding the rise of your sourdough starter, please click here.

Comments
Jessie says
Hi Emilie,
I recently purchased your book and my sourdough starter will be ready in a few days for my first loaf! I’m so excited to try baking sourdough after spending way too much money purchasing it. I’m having the opposite conditions to many of the people posting – where I live it’s approximately 30 degrees celcius (around 90F). For the bulk fermentation overnight, would you recommend doing this partly on the bench and then in the fridge?
Thanks!
Emilie says
Hi Jessie! Thank you for purchasing the book :) To answer your question, you can do a few things: use cooler water to slow down the rise, start the dough later than you normally would (I make my overnight doughs late in the evening when the weather is hot), and/or bulk ferment at room temperature for a few hours and then refrigerate the bowl overnight. As with anything, you’ll have to play around with these tips to see what works for you and your environment. But hopefully it will help!
Sally says
Thanks so much for all the info, I bought your book and it’s great. I’m in Australia and I tried the bulk fermentation in the oven overnight. My dough was looking lovely at 11pm but this morning it is like a wet batter – overproofed I suppose. We’re in a weird lockdown like the rest of the world it seems and I hate the idea of wasting these ingredients. Do you have any ideas as to how I can resurrect the dough? Or can I use it for something else? Many thanks for any help!
Emilie Raffa says
Thank you, Sally! I agree with you: it sounds like the dough was over proofed. When doing an overnight rise, especially in warm weather, make sure to start later in the evening to ensure that the dough will rise correctly.
To save the dough, make focaccia :) There is a recipe with baking times in the book… xx
Susan Morrison says
As you are experiencing, it’s been VERY cold where I live in northern Vermont (normal) and on the southeastern coast of Maine (abnormal) for the past several weeks. I’ve been baking all of our bread for over 40 years and since we’ve never lived in new or finished houses and almost always heated our houses and cooked on old wood stoves, I’m very familiar with (shall we call it) ‘fluctuating’ heat in the kitchen. In Montana the house was so cold I had to put my dough in my (airtight) VW Beetle on a south-facing driveway in order to get it to rise. In most places I just don’t let it sit over night – I start it early in the morning and let it rise throughout the day. In times when I have had access to a gas or electric oven, like Elizabeth, I found that simply using the light in the oven was enough to do the job. I’ve also experimented with DIY tricks like Mim’s great solar box, heating soapstones/pizza stones, warm towels, high shelves, etc. all to good effect and I make sure all my ingredients are at least at room temperature. The situation I find more challenging is the difference between high and low pressure or humidity – sometimes, you just have to wait a day to bake. I can’t imagine paying for a ‘proofing box’ – after all, humans have been figuring out ways to bake their bread for several thousand years without manufactured contraptions so our ‘superior’ modern brains and a little creativity ought to work just fine. Besides, a slow rise usually produces great texture! Tonight we’ll be remembering you with not only a loaf of your bread, but a simmering pot of Minestrone as well. Can’t wait! Stay Warm!
Emilie says
Susan, you are too funny! ” A VW Beetle and a south-facing window…” I can just picture it (what we do for love, right?). As you’ve outlined above, sourdough is a craft that forces us to be present and pushes us to find confidence in our own methods and abilities. What works for some may (or may not) work for others. And to me, that’s what bread baking is all about! Sharing these fantastic bits of wisdom (or crumbs, if you will) and forging real connections with others.You’ve shared some wonderful info here. Thank you for taking the time to tell your sourdough story. I hope you enjoyed that soup ;)
Quinn Losselyong says
We use a seed starter warming mat and that seems to work quite well.
Emilie says
That’s a really great idea, too! Thanks for sharing :)
Mel says
I use a heating pad set on medium. I cover it with a bath towel and then place the bowl on top. Then I cover the bowl with another towel.
I watch the temp carefully.
Works for me!
Emilie Raffa says
Hi Mel, what a great tip. Thank you!
Meg says
I use a silicone daisy cover and it seems to keep a constant temperature. I also find that if it’s not doubling, I put it in the proofing basket and wrap that…. I think when it’s taking too long to rise, it needs moving on to the next step. It means it’s longer in the proofing basket than usual. I make spelt loaves with a spelt starter and the starter never gets to that really bubbly stage but I know when she’s ready….. I also think in the colder weather, I adding more wet works…. I’ve been making a zucchini loaf like this…. And lighten then flour mix a bit…. And I always mix the starter with the warm water and make sure I always leave the dough after a first very gentle mix, no salt, before leaving to bulk rise…
Love the book…. If anyone hasn’t got it yet…. A must!
Emilie says
Thank you for all of your fantastic tips Meg! This is what bread baking is all about: sharing knowledge, advice, and the little bits of wisdom along the way :)
Elizabeth says
I find that leaving my dough in the oven with just the oven light on maintains the perfect temperature and is draft free.
Shirley ward says
Sounds great. I have a microwave that is above my range and I can leave the range light on which heats the microwave to a perfect temperature to raise the dough. Happy baking, Shirley
Emilie says
Hi Shirley! This is an excellent tip too. Thanks for sharing!
Sis Adger says
I tried the oven light twice, but both times, my dough overproofed and just did not work out. This tip might be great for some ovens but for mine, the light is much too warm.
Emilie says
This has happened to me as well… you might want to leave the oven light on for only a few hours (jnstead of all night) and then shut it off. You can also try mixing the dough later in the evening to buy yourself more time in the morning. Hope this helps!
Emilie says
Hi Elizabeth! Yes, I agree! It’s a great tip.
Traci | Vanilla And Bean says
Such great tips, Emilie! Thank you for sharing. Even though I’ve now baked at least 20 loaves from your book, I struggle a bit with knowing when the dough is ready after bulk fermentation. Like you said, it’s not about the time, rather, but when the dough is ready. Reading your book and tips here helps remind me of all the little things a sourdough baker needs to be aware of and I know with practice and patience, I’ll improve. BTW – I love the float test – wish there were one that specific for showing when the dough is ready after bulk! Thank you for your encouragement, Emilie! xo
Emilie says
Hey Traci! Knowing when the dough is ready definitely takes a bit of practice. Here’s a tip from the book that might help: for loaves made with 500g of flour, use an 8-inch clear bowl (nothing bigger!) for the dough to rise. When it reaches to about 3/4’s of the way up, or even slightly less, it’s most likely ready or ‘double in size.’ I use this tip ALL THE TIME. Even when I’m tempted to rush the dough, I look at the bowl to see if the dough has hit the 2/3- 3/4’s mark. And then I wait… I like clear bowls too, because I can see what’s going on inside of the dough. Look for airy bubbles! If you are using a different bowl that’s bigger and stainless let’s say, it’s a little harder to judge unless you have some experience under your belt. Please let me know if this helps! Your loaves are always seriously beautiful. xx
Melanie C. says
A clear bowl! Genius.
Anna says
Hi, my starter is at its peak in the morning, how can I change this or will it still give good results using it in the evening when it’s deflating? Ideally I need to make my loaf around 11 am, but that doesn’t work for bulk fermentation, or could I do the bulk fermentation in the fridge??
Emilie Raffa says
Anna, what time do you want to start making the dough?
Melanie C. says
Hi Emilie.
I commented on your last post (the one about the fabulous cinnamon buns) that I’ve been using the heating belt I usually surround my kombucha crock with to surround my starter jar and keep it happy and bubbly. It works very well. However, I have been having trouble with getting my bread dough to rise. I’ve tried the trick of heating my oven to 300F for one minute, then shutting it off. I also have a very cold kitchen and this did not work because the oven quickly became cold again during the night. Also, the damp towel placed over the bowl gets very cold which seems to hold
the cold temperature in the dough.
I have the old-fashioned steam heat radiators with wooden covers. My thermostat is set to 65 at night. I switched to covering the bowl with plastic wrap, placed the bowl on the radiator in my dining room at 10 PM, then covered the whole thing with a small blanket. When I got up at 5 AM, the dough had risen perfectly.
I once opened a bag of flour, only to find stringy stuff in there from whatever bugs had invaded.
And that was a brand new bag! Since then, I store everything in the largest Mason Jars. Keeps the
mice away too.
Thanks for all your information Emilie. And Happy New Year.
Emilie says
Hi Melanie! I remember you ;) In fact, I’m working on a sourdough starter post and I’ve referenced your tip re: kombucha heating pads to boost its rise time. Thanks again for that, by the way.
Regarding the rise of your dough: all ovens are different so I’m not surprised it was cold inside the following morning. It happens. You know what you can try instead? Just leave the oven light on all night while the dough rises inside. This way, your oven won’t be cold or at least not as cold in the morning; the heat from the light should provide steady warmth for the duration of the rise. As with anything however, you’ll have to play around with this tip to see if it even works for your conditions. I did the light bulb trick last night… My oven gets super hot, so I only left it on for 4 hours, turned it off, and then let the dough rise overnight in the dark. In the morning, it was almost over proofed!
On a different note- I love your radiator trick! I grew up with those steam heaters when I was a kid and I can totally imagine your setup. And yes, I’ve had many bugs and weird stringy things in my flour, too. Can’t they just nest somewhere else?!
Hope all this info helps, Melanie! xo
Melanie C. says
Thank you for the light bulb trick, Emilie. I will have to try this. I never thought the bulb in my oven would get the oven even slightly warm. I will definitely experiment with that one. If that fails – back to the radiator!
Always look forward to your new posts. :0)
Emilie says
You’re welcome! I know, me either! Same goes for a microwave lightbulb (if you have one). xx
Melissa says
FYI- bug eggs are in the flour when you buy it at the store, they get in there at the mill. My husband is in the industry. Some batches are worse than others, some have none. You never know! They just don’t always hatch unless the temperature is right. Just wanted to share in case you thought it was your storage issues! We keep all our flours in the freezer :)
Yocheved A says
I have to keep all grains and nuts in the freezer, because of bugs and mice. I bought a large chest freezer for cheap, and it’s paid for itself many times over.
Mim says
I solved the temperature problem by putting my covered bowl of dough in a black cardboard box that I set in the sun. I cut vents in the box so that the heat wouldn’t build up. Solar proofing box for about, oh, $1.59 tops. Worked like a charm.
Emilie says
Wow! That’s such a cool idea! I’ve never heard of that before, Mim. Thanks so much for sharing that tip with us. I know what I’ll be Googling later, lol.
sylvia says
I live in Southern Ca. and I love my Brod & Taylor home proofer. When things get slow or need an even controlled temperature I use my B&T . It folds up and slides into a kitchen draw when I’m done.
I can’t say enough about it…other than check it out. If you live where it get’s cold. I couldn’t imagine not having one these proofer’s. I’m not a rep. for this little home proofer but, I do love baking sourdough breads, pizza’s and pastries.
Warm Wishes,
Sylvia
Melanie C. says
Thanks for this info Sylvia. I had never heard of this and just checked it out.
It looks wonderful.
Emilie says
Hi Melanie! I use the same proofer- I highly recommend it.
Melanie C. says
If you say so, I think I’ll have to get one! :)
Emilie says
Hi Sylvia! Thanks so much for your comment. You know it’s funny, I have the exact same B&T proofer ;) I bought one when I was writing my book because I couldn’t wait around all day for my dough to rise! I love that it folds up (very convenient), although I have to admit: I bake so much I never end up breaking it down, lol. I also share the box with my mom, and when it’s not with me I have to come up with other ways to get that dough to rise (hence the reason for this post). But like you’ve mentioned, it’s very helpful and I couldn’t imagine baking without it when it’s cold. Thanks again! xo
Jim says
Same here. Bros and Taylor folding proofer is the BEST. During winter here in North Texas, I use it regularly. Yeast bread, sourdough, or Ciabatta. Works great. Stores nice. All good.
Annie says
Can i successfully add yeast to my sourdough? I use a potato starter. Putting it in a glass if water to test it doesnt work because it is mostly liquid. Thanks for the help.
Emilie says
Hi Annie,
Unfortunately, I’ve never worked with a potato starter and/or added yeast to my culture. If I were you, I would experiment. Perhaps you can pour out some of your starter in a separate jar, add the yeast, and see what happens? Good luck!
vincenzo says
what’s the point of adding yeast in your sourdough? would be like adding caffeine to a decaffeinated coffee
Emilie says
Hi Vincenzo, this particular article does not refer to adding commercial yeast to sourdough; perhaps you are referring to one of the comments? Some bakers (professional and home bakers a like) will add commercial yeast to sourdough to create a hybrid loaf to give the rise a guaranteed boost. This isn’t wrong necessarily; it’s just not pure sourdough bread. This of it like ordering a half caffeinated beverage from Starbucks ;) Hope this helps!
Amy says
Hello,
This is my first attempt at making sourdough from the beginning. I grew up with homemade breads of all kinds (Scottish Irish grandmother whom lived in a polish neighborhood that made ALL types of ethic foods, breads, from many cultures (so blessed) I have now been experimenting with different types from pita to now sourdough myself (she passed many years ago wish I would have learned more). My only worries are converting exact measurements (UK grams into US cups etc.), and the proofing of course. I was wondering if anyone has tried those thermal bags for transporting warm, cold, iced foods and beverages or small cooler-warmed up? I live in a manufactured home and not sure that it keeps a steady household temperature. The oven seemed to over proof other doughs. Actually have a couple other questions lol. Does it need to rise twice for 5hrs each? That’s what I’ve read. For baking, will a very seasoned cooking stone work? Thank you for this step, I stumbled upon it. Happy baking everyone!
Sorry so long
Emilie Raffa says
Hi Amy! Growing up with all kinds of homemade breads is a real treat! For best results, I wouldn’t convert UK grams to cups. Stick with the original weight measurements only. I haven’t tried the thermal bags for proofing, but it doesn’t hurt to experiment. You might have some luck with that. Do you have a microwave? If you stick the bowl of dough inside, with the door ajar, the light stays on and the whole thing acts like a small proofing box. I’ve tried it and it works. For my recipes/formulas, the dough doesn’t need to rise twice at 5 hrs each (that might be specific to another baker’s method). Finally, you can bake on a seasoned cooking stone, but you’ll need to invert some kind of oven proof lid/bowl over the dough to mimic baking in a a covered pot- you need the steam for a high rise. If not, you’ll need to find another way to steam your oven which can be quite cumbersome. Hope all this info helps! Happy baking to YOU!