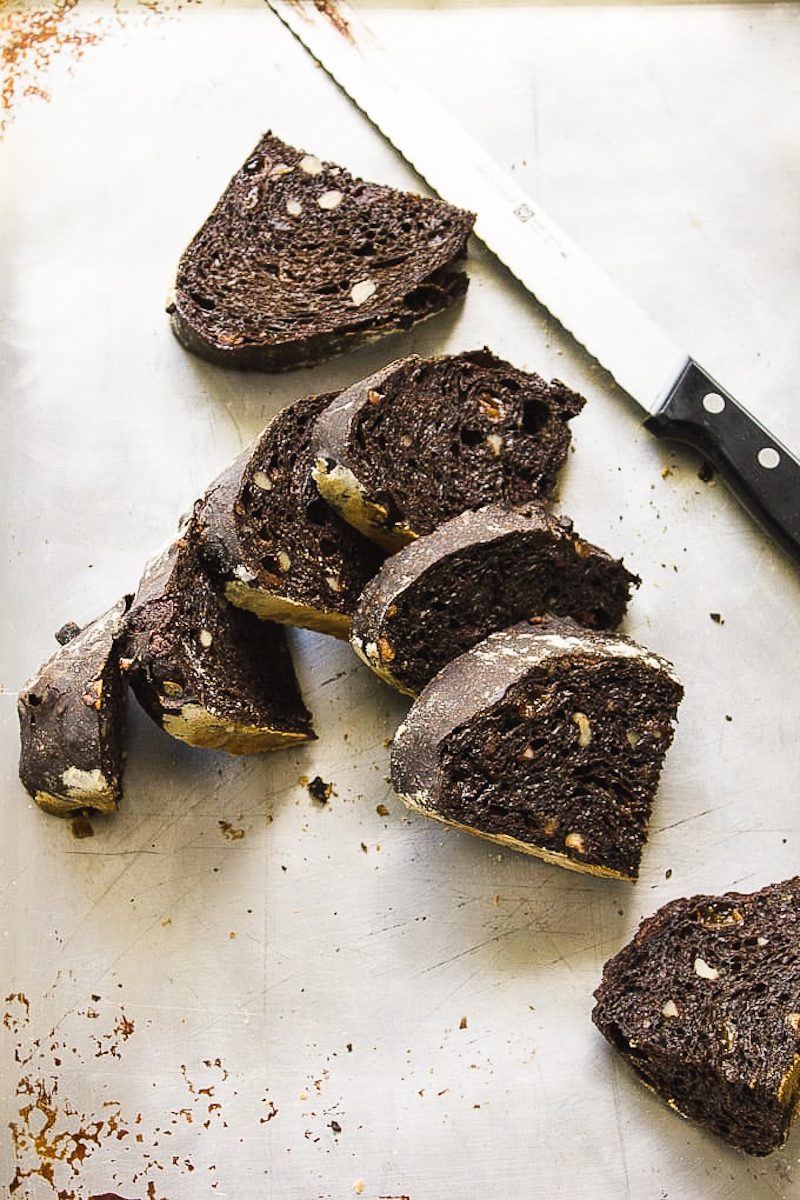
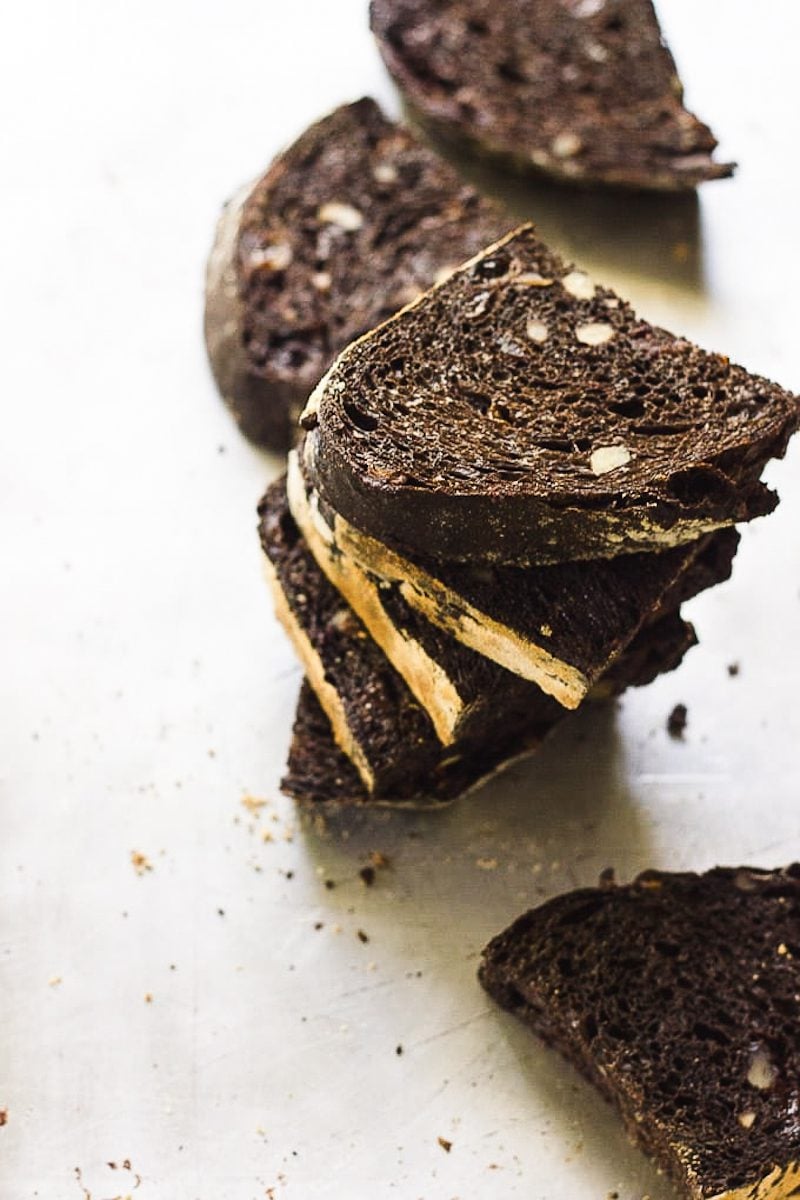
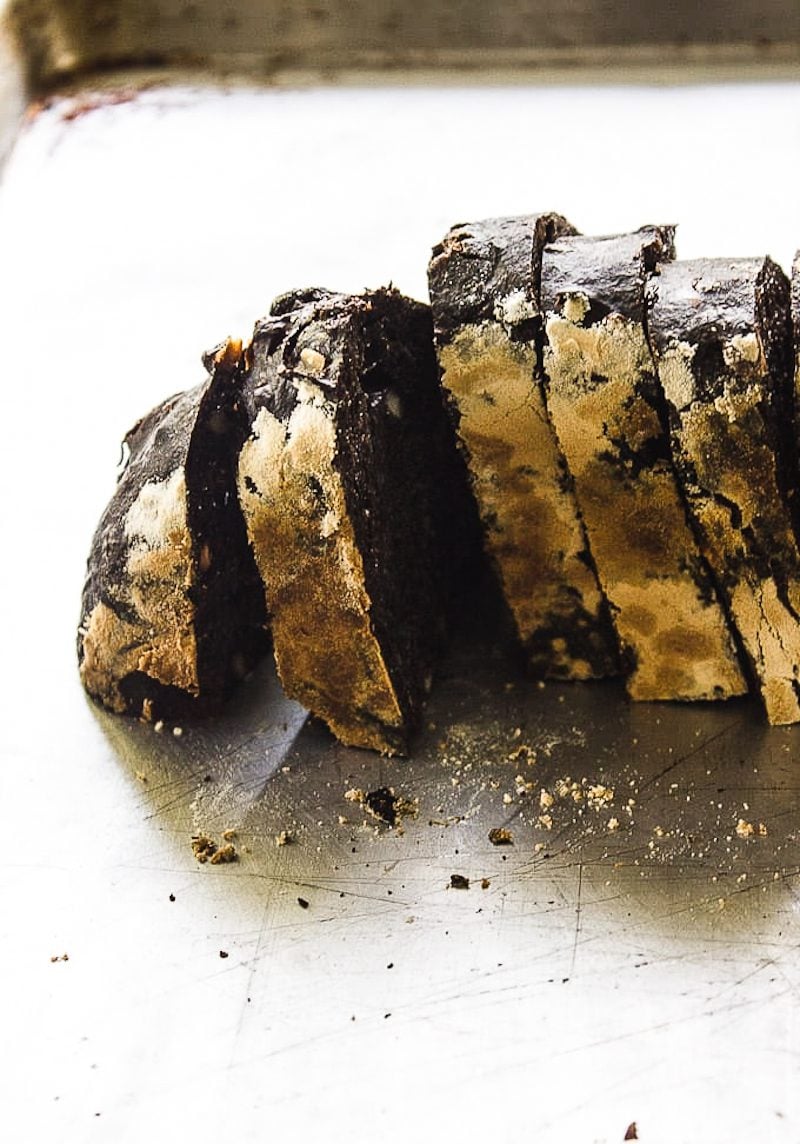
This chocolate sourdough bread recipe is soft, chewy and full of rich chocolate flavor. Made with real cocoa powder, vanilla-soaked raisins, and decadent chocolate chips, it uses active sourdough starter to naturally leaven the dough (which comes together by hand in under 10 minutes!).

Chocolate Sourdough Bread: could there be a better combination?!
Adapted from my beginner sourdough bread recipe, this unique chocolate sourdough loaf is packed with rich chocolate chips, crunchy walnuts and vanilla-soaked raisins (soft and chewy too!). I wrote this recipe years ago, and to this day it’s still one of the most popular sourdough bread recipes on my blog!
For variety, I highly recommend you try the peanut butter almond version too, which you can find in my book Artisan Sourdough Made Simple. I love leftover slices, toasted, with pats of salted creamy butter.

It Took 3 Tries To Get This Recipe Right.
Round #1: Cocoa Powder
To make chocolate sourdough bread, I initially assumed adding cocoa powder to the dough would make it taste like chocolate cake. It didn’t. Although the texture was nice, the final product wasn’t chocolatey at all. It needed something…
Round #2: Chopped Chocolate Chunks
To elevate that chocolate flavor, I added chunks of good-quality bar chocolate to the dough. You know what happened? It melted into the dough. Unlike chocolate chips from the bag (think: Nestle semi-sweet morsels), most chocolate bars do not contain stabilizers to keep them from melting. It added too much fat to the dough. This round was a fail (but mental note for Round# 3).
Round #3: Chocolate Chips, Dried Fruit + Nuts
In this final version, my base dough included cocoa powder for color and richness. But the addition of chocolate chips meant chocolate in every bite while dried fruit and nuts made it texturally interesting (at least to me anyway). I used a combination of raisins which I soaked in vanilla and chopped walnuts. Dried cherries or hazelnuts would be fantastic, too.

How to Make Chocolate Sourdough Bread
Method at a glance:
- Mix dough by hand
- Let dough rest for 1 hour (autolyse)
- Salt and fillings added after autolyse
- Stretch and fold every 30 minutes for 2 hours during the bulk rise
- Bulk rise at room temperature (currently 65 F here) overnight, about 12-14 hours
- Second rise approximately 45 minutes- 1 hour
- Bake in Dutch oven at 400 F for 20 minutes (covered) + 40 minutes (uncovered)
A Few Tips:
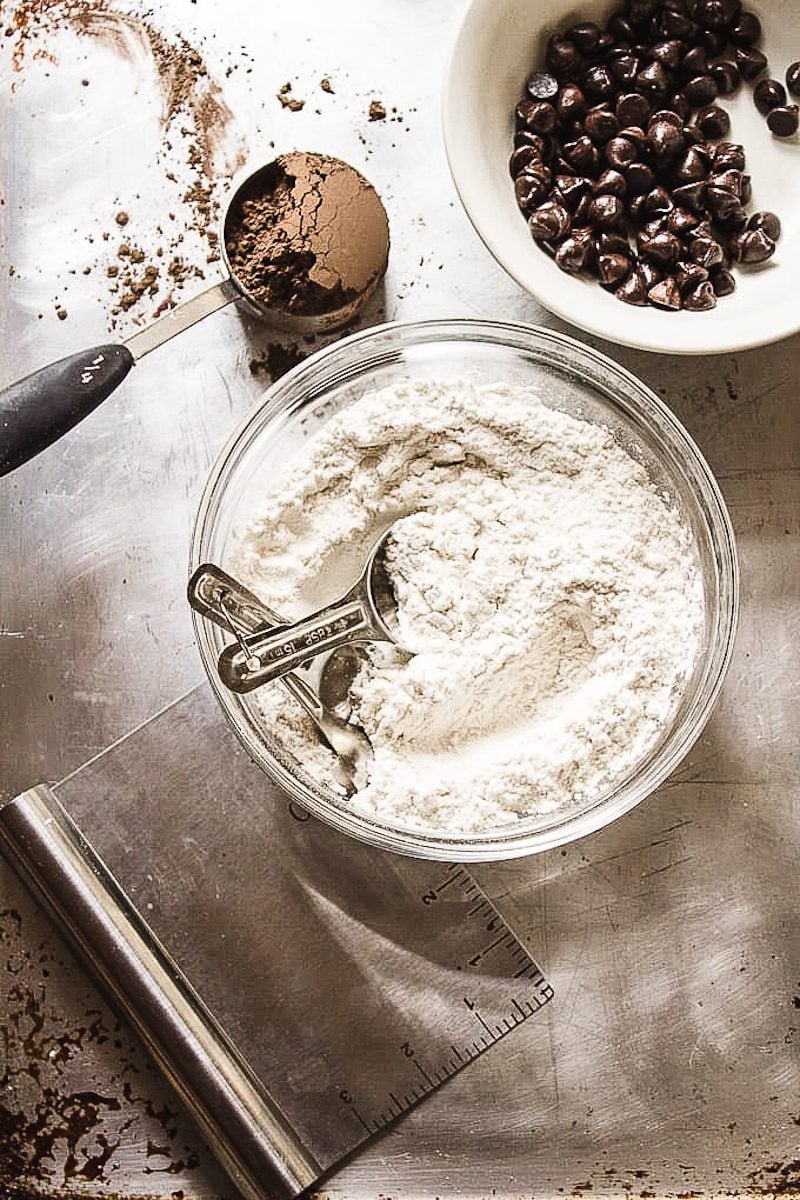
- Weigh your ingredients. A digital scale for accuracy is a must in bread baking. Alternatively, if using measuring cups please lightly spoon and level your flour.
- Chocolate dough is stiff. The cocoa powder tightens up the texture of the dough- this is normal. Give it more time to rise, in a warm spot, as needed.
- Use a Dutch oven or Bread Pan. Steam is essential for a lofty high rise and artisan crust. The easiest and most reliable way to create steam is choosing a baking vessel with a lid.

By signing up, you agree to receive emails from The Clever Carrot. Unsubscribe at any time.
Chocolate Sourdough Noir
- Prep Time: 10
- Cook Time: 1 hour
- Total Time: 1 hour 10 minutes
- Yield: 1 Loaf 1x
- Category: Sourdough Bread Recipes
- Method: Oven-Baked
- Cuisine: American
- Diet: Vegetarian
Description
This chocolate sourdough bread recipe is soft, chewy and full of rich chocolate flavor. Made with real cocoa powder, vanilla-soaked raisins, and decadent chocolate chips, it uses active sourdough starter to naturally leaven the dough, which comes together by hand in under 10 minutes.
Ingredients
- 150g bubbly, active sourdough starter
- 350g water, preferably filtered
- 50g sugar (vanilla sugar is nice)
- 1 tsp. vanilla extract or 1 vanilla pod, seeds scraped
- 500g bread flour
- 50g cocoa powder*
- 9g fine sea salt
- 65g chopped walnuts
- 65g raisins
- 150g semi sweet chocolate chips
- powdered sugar for decoration
* I used Hershey’s Special Dark, a blend of natural and Dutch process cocoas
** You will need a 6 quart Dutch oven for baking
Instructions
Make the Dough
In a large bowl combine the starter, water, sugar and vanilla. Stir with a fork. Sift the bread flour and cocoa powder together and add to the bowl. Squish everything together with your hands until all of the flour is absorbed. Cover with plastic wrap and let it rest (autolyse) for 1 hour. Note: use this time to soak the raisins in a splash of vanilla extract for extra flavor (optional). Drain and pat dry before using.
To the dough: Add the salt, walnuts, raisins and chocolate chips. Lift and fold the dough over itself several times and squish with your hands to incorporate. The dough will tear slightly as you fold. Don’t worry- this is normal. Work the dough as best you can until it comes back together into a rough ball.
Bulk Rise
Cover the bowl with plastic wrap and a clean kitchen towel. Leave it in a warm spot to rise. Your dough is ready when it no longer looks dense and has increased in volume about 1½- 2x its original size. This can take anywhere from 10 hrs @ 68 F; 5-6 hrs @ 75 F; 3-4 hrs @ 80 F depending on the temperature of your ingredients, the potency of your starter and surrounding environment (**see notes below). Optional Step: about 30 minutes into the start of the bulk rise, you can stretch and fold the dough.
Stretch & fold: To strengthen your dough, do a series of stretch and folds every 30 minutes for the first 2 hours of bulk fermentation. Simply gather a portion of the dough, stretch it upwards and then fold it over itself. Rotate the bowl ¼ turn and repeat until you have come full circle. You will have completed 4 folds. Try to keep the fillings tucked into the dough and not on the outside. This will prevent burning when baked.
Shape the Dough
To cut and shape the dough, divide your work surface in half; lightly flour one side (for cutting) and leave the other half clean (for shaping). Remove the dough from the bowl and place onto the floured section. You do not need to ‘punch down’ the dough; it will gently deflate as you fold and shape it. Cut the dough in half to make 2 loaves, or leave it whole for a single loaf. To shape, use a bench scraper to move your dough to the non-floured section (if there is any flour present it will be difficult to shape- brush away any excess). Gather the dough, one side at a time, and fold it into the center. Flip the dough over and place it seam side down. Using your hands, gently cup the sides of the dough and rotate it using quarter turns in a circular motion. You can also pull it towards you to even out its shape. Repeat this process until you are happy with its appearance.
Second Rise
Place the dough into a cloth lined 8-inch bowl or floured/lined proofing basket. It will need to rise again, about 30 minutes to 1 hour. It is ready when the dough is slightly puffy, but not double in size.
Towards the end of the second rise preheat your oven to 400 F. Cut a sheet of non-stick parchment paper to fit the size of your baking pot, leaving enough excess around the sides to remove the bread.
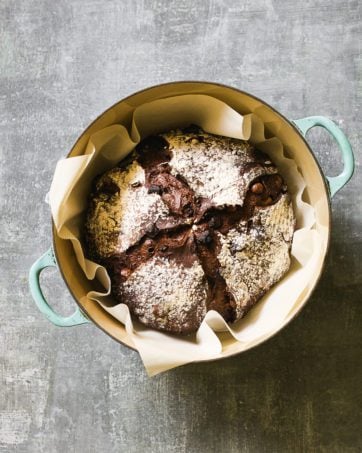
Score the Dough
Place the parchment over the dough and invert the bowl to release. Using the tip of a bread lame, small, serrated knife or a razor blade, make four shallow 4-inch long cuts at 3, 6, 9, and 12 o’clock around the dough. Use the parchment paper to transfer the dough to the baking pot.
Bake the Dough
Place your bread into the oven (lid on) and bake for 20 minutes. Remove the lid, and continue to bake (uncovered) for an additional 40 minutes. During the last 10 minutes of baking, crack open the oven door. This allows the moisture to escape, leaving your bread with a crisp crust. You can also take the internal temperature of your bread to double check that it is done. For sourdough, it should read about 205 F.
Cool
Remove the bread from the oven, and cool on a wire rack for at least an hour before slicing. Dust with powdered sugar before serving.
Notes
Because sourdough does not contain commercial yeast, it takes considerably longer to rise. In the summer months, it can take anywhere between 3-4 hours @ 85 F whereas in the winter, about 8-12+ hours @ 65 F. In the winter, I make my dough in the afternoon and leave it to rise overnight at room temperature. In the warmer months, I bulk ferment in the fridge to slow down the rise time.

Comments
Gabrielle says
How would this turn out if I added more water? I don’t use the nuts and raisins, and it tastes great, but the dough is quite dense/dry. Thank you for any insight.
Casey says
Delicious! Beautiful on its own. I enjoyed a slice toasted with cottage cheese, cherries, and maple syrup!
Emilie Raffa says
Casey, this sounds so delicious. I love cottage cheese and never would’ve thought to include it here on toast. Yum. Thank you!
Amanda says
I made the recipe, but I found it online. I went to double check my artisan sourdough made simple book and I didn’t see it in there.
Emilie Raffa says
Hi there! This specific recipe is not in my book (however, there is a variation with peanut butter chips and an almond crust). Hope this helps!
Giovanna says
I made this and it was excellent. I followed the recipe exactly and it came out great. I wouldn’t make any alterations to the recipe. The vanilla soaked raisins were such a nice touch and just the right amount of sweetness. Even my family members that aren’t big chocolate fans loved it.
Katie says
SO good! Thank you for sharing heaven haha. Question… if I do the two smaller loaf option, is there a different baking time for each?
Kathryn says
Looks amazing.
Do you think this recipe could be made using well-established, active gluten-free sourdough starter? If so, do you have any suggestions for which gluten free flour(s) to use?
Thx Kathryn
Caitlin says
How long can I leave this in the fridge before baking? Trying to make it ahead of time for an event!
Stephanie says
I’m really excited to bake this recipe. I have a 2 month old starter, Bertha, that I’m using. Plenty of gusto in her. I stretched, as recommended, for 2 hours and then let it rest overnight on the counter. It was a very large bowl of dough when I got up this morning. I opted to make 2 smaller boules. I have one of the loaves in the oven right now @ 400 degrees. I took the lid off at 20 minutes and am baking for an additional 20 to see if that’s enough. I just have one oven and one large Dutch oven to use so I can only bake off one loaf at a time. I’m hoping that I can troubleshoot the bake times with the first loaf so at least one of them comes out just right. Do you have separate times for smaller loaf baking? I didn’t see anything in the instructions. Maybe I missed it?
Melissa M says
You can keep one in the fridge ready to flip and score while the one bakes. Cold dough is actually easier to score!
Jennifer says
This is by far the best bread I have made to date. The texture is what you wish all bread would be! Just enough sweetness, chewy tender crumb and a crunchy crust. Wow. Just perfect. I’m planning to make this at the holiday’s, if I can wait that long. Not to mention it’s a beautiful looking bread! Thank you!
Kenzie says
I’m making this today! Is it possible to bake without preheating? (I usually put my loaves in a cold Dutch oven, inside the oven right when I turn it on to preheat and bake with the lid on for about 50 minutes at 450° including the preheat time)
Can I bake this the same or does it work better to preheat the oven first? Super excited to try either way!
Clo says
I bake my sourdough as you said same method and time. Have you tried the cold method? I think it would work. I just found this recipe and look forward to making in the next few weeks.
Mandy says
I’m fairly new to sourdough, but I attempted this recipe and it was wonderful! Very tasty and I will be making it again!
Stephanie Noble says
Hi there!
I just made this bread and I had some issues with the moisture. Once I mixed up the bread last night, it looked like the texture of play dough, so not very wet. I used cacao powder instead of cocoa powder. Could that be where my issue is? It just doesn’t feel anywhere close to the texture of other sourdough bread I’ve made, moisture wise.
Mandra Gurthet says
Linda says
Megan says
Made this last week and it was a huge hit! Am I able to sub maple syrup for the sugar?
Mandra Gurthet says
I notice that there’s no call for steam in this recipe… do you not recommend adding mist or steam during the first part of the bake?
Emilie Raffa says
Hi there! When bread dough is baked in a pot, the lid traps in the moisture creating natural steam. No need to add mist. Hope this makes sense!
K.P. says
Can I do the second rise in the refrigerator?
Wendy says
I’m a sourdough newbie but followed the instructions exactly (minus the second rise, which I did overnight in the fridge!). This bread turned out AMAZING and is such a crowd-pleaser. If I can do it, truly anyone can!
K.P. says
oh, thank you. I didn’t see your comment when I asked my question. I don’t have time to bake it this afternoon so planning on putting in the fridge overnight and baking in the morning. did you let it come to room temp first or did you put in the oven cold?
Maribeth says
This has been a big hit. It is not terribly time consuming to make but is fabulous. I would love to introduce some whole grain flour to this recipe. What ratios would you use to start? Thanks!
Lisa says
I made this bread yesterday fermented overnight in the fridge after shaping. Baked it off this morning it turned out beautiful. I only had mini choc chips so used those walnuts and raisins. Family is in love with this bread.
Emilie Raffa says
Sounds delicious! Love mini chocolate chips :)
Kelli Goodson says
Hello…could I shape the dough and put it in the refrigerator overnight and bake the next day?
Emilie Raffa says
Yes! Absolutely. This will work.
The Hungry Hunt says
Oh my goodness! This bread is delicious and I can’t wait to make it again and hopefully have some leftovers to make some of the things I have planned for it!!
Dave says
No refrigeration before Baking like noral sourdough? If not why?
Thanks.
Emilie Raffa says
Hi Dave! Chilling the dough, typically during the second rise, is a popular optional step; it’s not always required for sourdough bread recipes. Doing so can potentially deepen the flavor of the finished bread. It’s also convenient to store the dough in the fridge to bake when ready.
Baker Bean says
Emilie, thank you, thank you so much for sharing your recipes which are spot on! I’ve been baking sourdough for a couple of years now and everything from your site turns out great! Your video to learn basic sourdough is wonderful. I’ve made that, light wheat sourdough, your cinnamon raisin buns with sourdough and last night just baked off the Chocolate Sourdough Noir. Magnificent!! I’ve tweaked some of the recipes alternating flours and they still have a very good texture/crumb. My chocolate SD noir has a bit of a tight crumb but, it baked beautifully. I’d love to share pictures if allowed.
Emilie Raffa says
This is SO fabulous to hear! Thank you so much. You are a rockstar ;)
Randie Shapiro says
I followed with the exception of leaving out fruit and nuts because I’m a chocolate purist and this is the most wonderful bread in the history of chocolate. Thank you! Making it again right now for a gift. I have some black cocoa powder which gives it a very dark look, too.
Emilie Raffa says
Sounds absolutely delightful. I love the black cocoa powder… so rich and decadent!
Pam says
Is the amount of sourdough started so high to help the dough rise or to add addional flavor? Not everyone in my family loves the taste of sour dough like I do, and I was ordering if I could reduce the amount of starter?
Emilie Raffa says
Hi Pam! When I first wrote this recipe, years ago, I typically baked with 150 g of sourdough starter. That’s just how I was taught. This amount doesn’t guarantee a faster (you need warmth + strength for that too). However, you can decrease the total amount to 100 g if you prefer for this recipe. If using a 100% hydration starter, just add 25 g water + 25 g flour to make up for the difference.
Carol says
This is a fabulous recipe. I just had a slice that o dipped on my coffee. Yum!
Emilie Raffa says
Oooo yum! Sounds so good. I just tried an espresso Torinese the other day (espresso, hot chocolate and foamed milk) and I can only imagine how good this bread would be with that.
Ann Clay says
Made this recipe this weekend. I chose not to include the chocolate chips as I want the bread to be more savory. This is the best recipe I have came across. Definitely a keeper !
Emilie Raffa says
Excellent, so great to hear!
Eunice says
Thank you for the wonderful recipe. I’m going to try it today. Just one question.. Do I need to keep my Dutch oven in the oven as it preheats? From reading the recipe it doesn’t sound like I should preheat the oven with the Dutch oven inside, which is unlike regular artisan sourdough recipes. Thank you for your help in advance.
Emilie Raffa says
Hi Eunice! It’s up to you. I typically don’t preheat my Dutch oven anymore (too many wrist burns); however you are more than welcome to do so. You’ll have excellent results either way.
Diane says
Love this recipe! I’ve made it several times for my family and as a gift.
Eunice says
Hi Beth, would you mind telling me if you put the Dutch oven inside the oven while it was preheating, or the Dutch oven was cold when you put the dough in? Thank you.
Emilie Raffa says
Thanks so much Diane! :)
tess says
Tried this recipe today and the result looks amazing! can’t wait to slice into the boule. Thank you for sharing this!
Emilie Raffa says
You’re very welcome. I hope you enjoyed it :)
Louisa says
Just made this on a snowy day and it was delicious!!! Used dried cherries instead of raisins.
I stretch and folded ever 30 minutes for two hours and then let sit on countertop (65°house) for 12 hours.
-450° lid on for 12 minutes
-400° lid on for 20
-400° lid off for 40ish minutes until internal temperature reached 205
Emilie Raffa says
I’m loving the addition of dried cherries! I think I might prefer them to the raisins these days? Oh, I don’t know… I like both. Thanks for sharing your schedule with us, Louisa. Looks fantastic!
Yvonne says
I use dried cherries in this recipe all the time. My preference! Love it!
Emilie Raffa says
Yay! So glad!
Maria says
I made this today without the nuts and raisins. I baked it for 50 mins on a cold dutch oven, and then another 40 mins without the dutch oven. Simply delicious, perfect amount of sweetness. Thank you so much for this awesome recipe!
Emilie Raffa says
This is perfection, Maria. Thanks for sharing!
TJ Penn says
I’m afraid I may have just wasted very expensive ingredients! My dough is like very thick cake batter? I’ve done 3 stretches and the texture has not changed. The dough is not spreading at all, very thick. Is this they way it should be? Did I measure something wrong?
Emilie Raffa says
Oh no! It’s really hard to say without seeing a picture. However, the texture of the dough should in fact be stiff and/or thick at first. But it shouldn’t look like cake batter (I’m imagining a thick, pourable cake batter?). If that’s the case, where’s it’s pourable-looking, there’s too much water in the dough from a measurement miscalculation. Make sure to weigh your ingredients for best results. As for the stretches: if the dough is still tight in between sets, extend the resting time in between sets. An extended rest will always relax the dough, and relaxed dough will always stretch with ease. This is not to be confused with spreading (this is not a high hydration recipe); however when in doubt, just give it more time. Hope this helps!
Katelyn Walker says
This bread is delicious! I ran out of active starter so I used about 75g and it still turned out excellent. Soaking the raisins in homemade vanilla extract made all the difference. I will definitely be making this again- thank you for sharing such an amazing recipe!
Bailey says
Hi,
I’m excited to try out this recipe but I had a few questions:
Can you use raw cacao powder instead cocoa powder? Also can we sub in coconut sugar or monk-fruit sugar instead of cane?
Thank you!
Mary Beth Keim says
I used 40 grams of honey instead since I try to avoid refined sugar and it turned out phenomenal!
Janey says
How to get sour dough starter?
janerachal1951@gmail.com
Kelly B says
I loved this recipe….although I did do one substitution….instead of raisins soaked in vanilla, I used dried cherries soaked in rum and dark chocolate chips. Wow! Thanks for so many great ideas and recipes.
Jaime Wogerman says
Hello, do you preheat the oven with the Dutch oven inside? Or do you leave it room temp until baking time?
Also, does the baking time change for the smaller half loaves? Thanks!
Mary Beth Keim says
She mentioned in a prior response that she preheats without it in the oven almost always now
Sari says
If you make two loaves and want to bake one and freeze one, would that work? Does it change the baking time?
Jaime Wogerman says
I am wondering the same!!
Marisa says
I think you’re better off baking both loaves and then (once cooled) wrapping the baked loaf in foil and zippered plastic bag and freezing. I do this all the time and it’s great. If you want a crispy crust again after thawing, just put into a 350F oven for about 15 minutes.
Brenda Archer says
You can par-bake and then freeze your loaf once it cools. Then defrost it the day you want and finish baking it the day you want to eat it. To par-bake, pull out of the oven about 20 minutes before it’s done baking. Let cool completely, then freeze. After defrosting, cook for 20 minutes.
Kenneth says
Added cranberries instead of raisins, I am waiting till my girl leaves for work,form it let it rise. Surprise. To be continued.
Emilie Raffa says
Sounds absolutely brilliant. And super sweet. Hope she likes it. Enjoy!
Isabel Cooper says
A delightful chocolate bread. Moist like a cake but firm like a moist bread. I love your attention to detail. I read it all and all your tips sure help.
Sadie says
This delicious bread deserves more than 5 stars. The crust is crisp but not tough, and the crumb is a bit open, a bit chewy, soft and moist. It’s great plain or toasted. I was delighted that my baked loaf looked identical to the one pictured with the recipe. I added 1 tsp instant espresso, 1/2 tsp cinnamon, a pinch of cayenne, used natural almonds and raisins, and used fewer chocolate chips, but didn’t make any changes to the dough. The bulk fermentation was 12 hours at cool room temperature and the dough had more than doubled. For the final proofing I portioned the dough into a large boule and a test bun (125 g dough for the bun). I baked the bread in a preheated cast iron dutch oven and followed the tip about putting a baking pan on the rack below to prevent the bottom from getting too brown. The bread baked for a total of 50 minutes to 208°. The bun was done in 27 minutes. Thank you for an excellent recipe and detailed instructions.
Megan says
Hello, I love your book and all of your recipes and can’t wait to try this. Can you confirm the nuts and fruit are not soaked in water? I make the fruit loaf a lot and know you soak the fruit and seeds for that in water with vanilla and cinnamon. Thanks!!
Emilie Raffa says
Hi Megan! For this recipe, the raisins are soaked in vanilla. You can do a combo of vanilla and water if you want- it’s up to you. Enjoy!
Barbara says
An excellent recipe, as always. Your book is my sourdough bible. The dough is stiff, but letting it hang off my hand for a few seconds as I worked around the bowl gave it some stretch. I dusted my counter with cocoa instead of flour, which I came up with while making chocolate biscotti. It worked very well, and the result was a rich, chewy, chocolate loaf. A keeper!
Debbie Moorhead says
Emilie,
I baked this chocolate sourdough this morning. Oh My! So delicious! I
Made two loaves with the recipe and reduced the baking time a bit. A keeper recipe for sure! Thank you!
Fondly,
Debbie
Garnett Hutchinson says
Wonderful – getting my starter ready today! You’re the best! Happy Valentine’s Day XO
Susan says
If I wanted to add yeast to speed the process along, how much should I add?
Emilie Raffa says
Hi Susan! I would add about 1/4- 1/2 tsp. Make sure keep your eyes on the rise times and adjust as needed.
Garnett Hutchinson says
HI Emilie, I want to make this as a Valentine’s gift but would like to do that several days ahead. Can I freeze it after it has cooled from cooking? How would I refresh it? Thanks for all your terrific recipes and info!
Emilie Raffa says
Hi Garnett! Absolutely. Once the loaf is completely cool, wrap in several layers of plastic wrap and freeze. To refresh, defrost at room temperature and re-heat in a low oven for best texture. Dust with powdered sugar to serve and enjoy right away! You can make incredible french toast with the leftovers. What a lovely gift to give! xx
Ellie says
I’m a beginner with sourdough and this was only my second bread. Wow, I can’t believe I made something this delicious! I followed the steps and it was not difficult at all. I did sub dried cherries for the raisins. I’ll be making this to bring to Easter brunch and am looking forward to wowing everyone!
Peter says
Hi Emilie,
I am curious, did attempt #2 leave you disssatified? I am not a fan of chocolate chips and would like to use a good semi sweet chocolate pieces for this. As i haven’t tried this yet and i don’t seem to find my self adversed to the chocolate melding with the dough.
So, i quess did you find the second attempt unpleasant.
Thanks,
Peter.
Emilie Raffa says
Peter, this is an excellent question. I wasn’t dissatisfied, however the chocolate flavor was not pronounced enough. When the bar chocolate melted into the dough, it didn’t make the bread sweeter or more chocolatey… if anything it changed the texture changed the most. The fat from the chocolate made the crumb more plush, rather than soft, chewy and spongey which is what I was looking for. And again, it didn’t taste like chocolate! This bread really needs actual “bites” of chocolate. I would recommend experimenting with your preferred chocolate and see how it goes.
Jim Henderson says
Emilie,
I use your book as my bible but I’m confused about the amount of starter you’re using here. Almost all the recipes in your book use 50g of starter yet here you’re using 150g. That’s a substantial difference. Also you make no mention of olive oil in your book.
Which recipe should I be following?
Thanks
Jim Henderson
Emilie Raffa says
Hi Jim! The amount of sourdough starter can vary from recipe to recipe. It doesn’t have to be the same across the board. It’s really up the the baker, how much they’d like to use, etc. etc. More specifically, for me, I used to bake with 150 g starter for every loaf. But as time went on, I found that 50g (even up to 100g) was more practical to maintain and better for my baking schedule. That’s why you’re seeing a difference in my recipes. You can follow whichever one you’d like. Sourdough always evolves. Regarding the olive oil, this does not have to be in every recipe as well. It’s just a fun addition, at times, to make the interior crumb more plush.