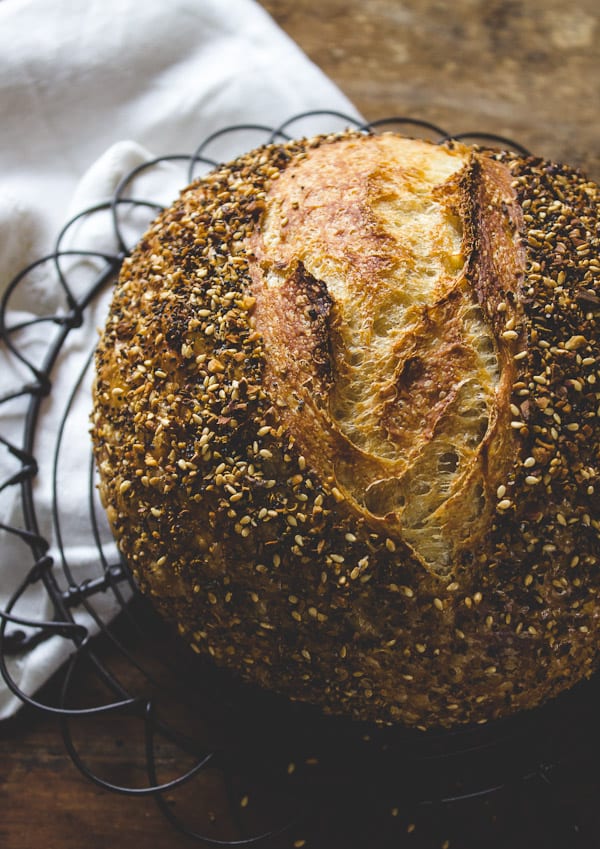
Current obsession: dukkah.
My first introduction to dukkah was in South Africa, back in 2007. Did I ever tell you that my husband is from there? Yes, he hails from the land of lions and wildebeest (bet you didn’t know how to spell that).
Anyway, we were grabbing a bite at a local restaurant where they served us dukkah, bread and olive oil as a prelude to our meal. At the time, I had absolutely no clue what it was but quickly learned that this complimentary nibble was quite common throughout the country.
So what is dukkah, exactly?
Pronounced ‘doo-ka’ it’s an Egyptian spice blend made up of toasted nuts and seeds. It reminds me of an everything bagel, minus the onion (and the bagel). The idea is to dunk your bread in olive oil first, and then swipe it through the dukkah. It’s nice and crunchy and has a wonderfully unique flavor.
Fast forward to present day and a new thought: let’s bake it on the bread.
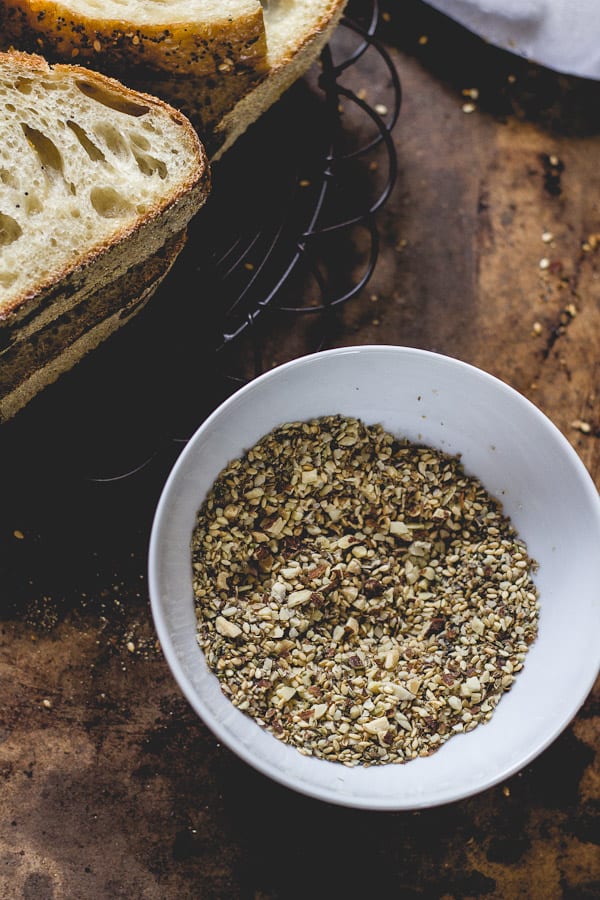
The concept of dukkah might seem a bit foreign to you, but it is very easy to make at home.
All you need is a food processor. I prefer making it myself because most store-bought blends are a little too cumin heavy for my taste.
In fact, I leave out the cumin altogether in my recipe. It gets an Italian upgrade with some fennel seeds instead.
For the sourdough, here is the breakdown:
- 50/50 whole wheat + bread flour starter (100% hydration)
- 1 hour autolyse
- Salt added after autolyse
- Stretch and fold every 30 minutes for 2 hours
- Bulk ferment at room temperature (currently 72+ F), about 5- 6 hours
- Refrigerate overnight for 2nd rise
- Rest dough for 1/2 hour, then slash
- Bake in Dutch oven @450 F for 20 minutes (covered) + 40 minutes uncovered
- Crack open the oven door during the last 10 minutes of baking to harden the crust
To clarify this crazy bread talk, please visit my beginner’s guide for all things sourdough.
I had my best friend read this post prior to publishing, and she asked me flat out- so what’s the point of baking it on the bread? Why not just dunk?
Good point.
Here’s why: because you get to do things like toast it golden, rub it with garlic, and then submerge its crunchy goodness into soup….
You get to make sandwiches stacked with grilled chicken, tomato and avocado that will change your life…
You get to enjoy them as croutons, where their final destiny could only be a bed of crunchy greens with lemony caesar dressing… (catch my drift?)
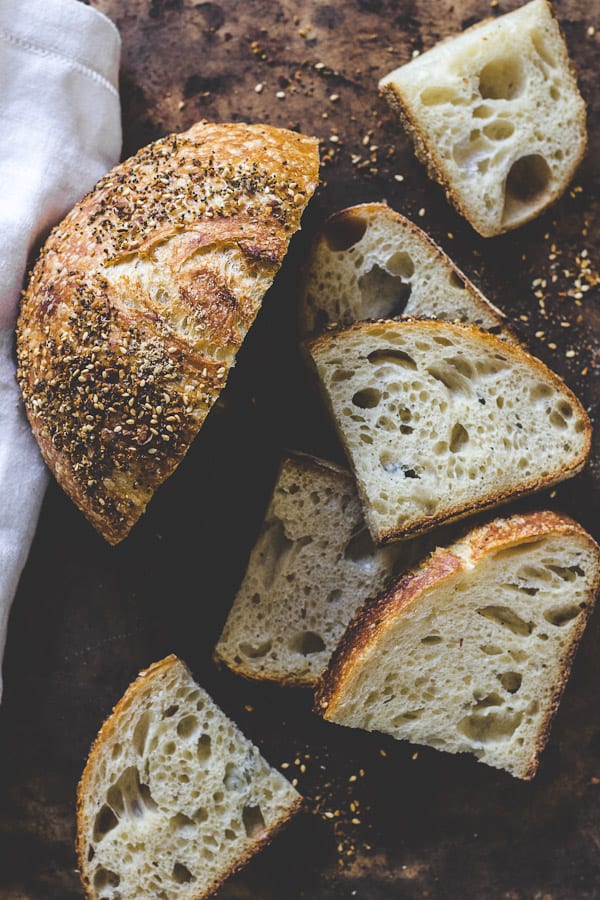
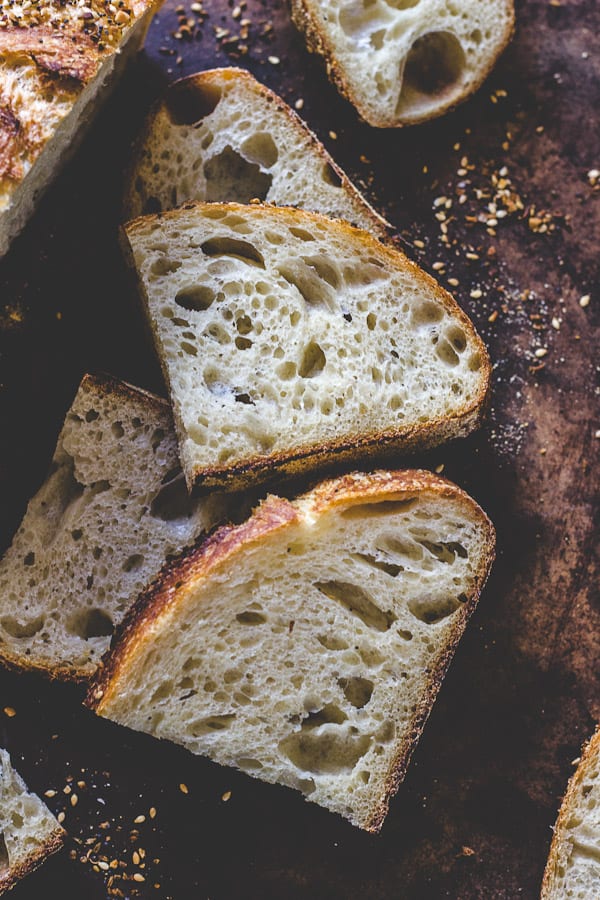
The seeds and spices create this harmonious paring that’s different from the usual bread-dunking suspects. I will warn you though, the dukkah will fly all over the place when you try to cut the bread!
But that’s ok, just rip off a chunk and do this…
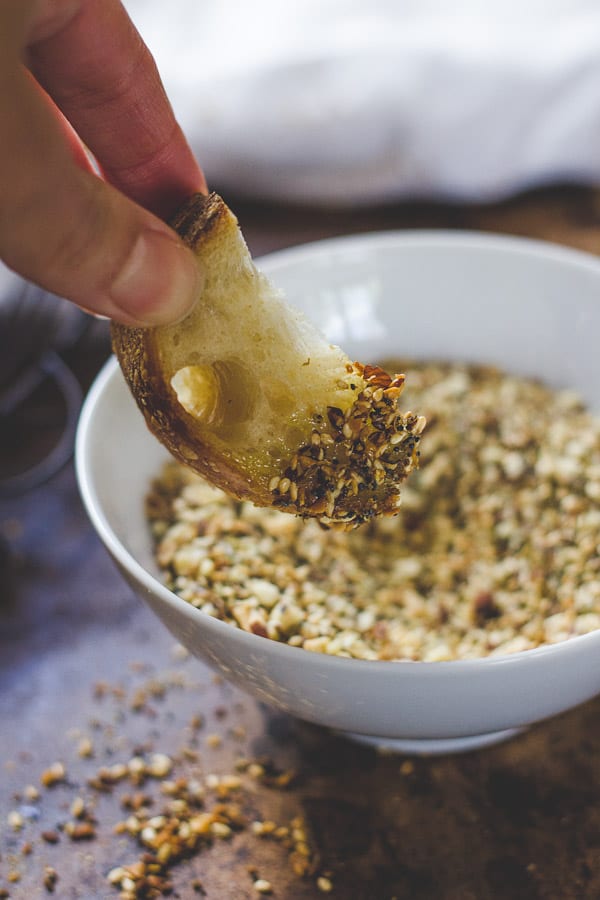
You see? We’ve now come full circle.
Tips:
- Store your dukkah in an air-tight container in the fridge or freezer until ready to use.
- Save any dukkah seeds that fall off your bread when slicing. Sprinkle them on salads, soups and croutons.
- I like to bake my bread dark, which means that the almonds will get pretty toasty (which I don’t mind). You can always reduce the oven temperature to control the browning rate. Bake at 450 F for 20 minutes (covered), and then lower the temperature to 400 F. Continue to bake for an additional 40 minutes until golden (uncovered).
- This bread is best if consumed within the first 1-2 days of baking. If you prefer, you can cut the dough in half to make 2 small loaves. Eat one + freeze one.
- To freeze, wrap your bread in plastic wrap and then in foil. It should last up to 3 months.
By signing up, you agree to receive emails from The Clever Carrot. Unsubscribe at any time.
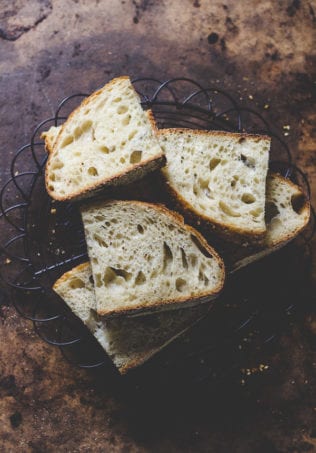
Dukkah Sourdough Bread
Ingredients
For the Dukkah
1 cup whole almonds
¼ cup fennel seeds
¼ cup coriander seeds
½ cup sesame seeds
1-2 tbsp. poppy seeds
For the Dough
150g bubbly, active starter
350g water, preferably filtered
500g bread flour (not all purpose)
9g fine sea salt
fine ground cornmeal, for dusting
*You will need a 6 quart Dutch oven for baking
** The starter I used for this recipe is 50/50 bread flour + whole wheat (100% hydration)
*** This recipe was tested with King Arthur, Gold Medal + Pillsbury bread flour
Instructions
- For the dukkah, place the almonds, fennel and coriander seeds into a food processor. Pulse until coarsely chopped. You want the texture not too chunky, yet not too fine. Stir in the sesame and poppy seeds. Store in an air-tight container until ready to use.
- To make the dough: in a large bowl, combine the starter, water and bread flour. Squish everything together with your hands until all of the flour is absorbed. Cover with plastic wrap and let it rest for 1 hour. Add the salt + ½ tsp. of water (to help it dissolve). Lift and fold the dough over itself several times, and squish with your hands to incorporate. The dough will tear slightly as you fold, and the salt will not fully dissolve. Don’t worry- this is normal. Work the dough as best you can until it comes back together into a rough ball. At this point, you shouldn’t feel any grains of salt beneath your hands.
- Bulk fermentation: Cover your bowl with plastic wrap and a clean kitchen towel. Leave it in a warm, sunny spot to rise. Your dough is ready when it no longer looks dense, and has increased in volume about 1½- 2x its original size. This can take anywhere from 3-12 hours depending on the temperature of your ingredients, the potency of your starter, and surrounding environment. *See note below.
- Stretch & fold: To strengthen your dough, do a series of stretch and folds every 30 minutes for 2 hours during bulk fermentation. Simply gather a portion of the dough, stretch it upwards and then fold it over itself. Rotate the bowl ¼ turn, and repeat until you have come full circle. You will have completed 4 folds.
- Cut the dough: When your dough has risen nicely, it’s time to cut and shape the dough. Divide your work surface in half; lightly flour one side (for cutting) and leave the other half clean (for shaping). Remove the dough from the bowl, and place onto the floured section so that it does not stick. You do not need to ‘punch down’ the dough; it will gently deflate as you fold and shape it. Cut the dough in half to make 2 loaves, or leave it whole for a single loaf.
- Shape the dough: Use a bench scraper to move your dough to the non-floured section. Gather the dough, one side at a time, and fold it into the center. Flip the dough over and place it seam side down. Using your hands, gently cup the sides of the dough and rotate it, using quarter turns in a circular motion. You can also pull it towards you to even out the shape. Repeat this process until you are happy with its appearance. Brush away any excess flour from the dough.
- To coat the dough, add all of your dukkah to a large bowl. Roll the dough around in the seed mixture until well coated. If there is too much flour on the dough, the dukkah will not stick.
- Second rise: Place your seeded dough into a cloth lined basket. Cover with plastic wrap and refrigerate overnight.
- Prepare the baking vessel: When you are ready to bake, remove the dough from the fridge and allow it to rest for about ½ hour (in the bowl). Preheat your oven to 450F. Generously coat the bottom of a Dutch oven with cornmeal or line with parchment paper to prevent sticking (I prefer the latter option). Sprinkle a good amount of cornmeal on top of the dough as well (this will be the bottom once it’s flipped over). Carefully invert the dough into the pot, cornmeal side down.
- Slashing the dough: Right before your bread goes into the oven, make a shallow slash about 2 inches long in the center of the dough. Use a bread lame, sharp pairing or serrated knife.
- Bake the bread: Place your bread into the oven (lid on) and bake for 20 minutes. Remove the lid, and continue to bake (uncovered) for an additional 40 minutes or until deep, golden brown. I like to bake my bread dark, but if at any point the top is getting too brown for your liking, turn down the oven to 400 F. During the last 10 minutes of baking, crack open the oven door. This allows the moisture to escape, leaving your bread with a crisp crust. You can also take the internal temperature of your bread to double check that it is done. For sourdough, it should read about 205 F.
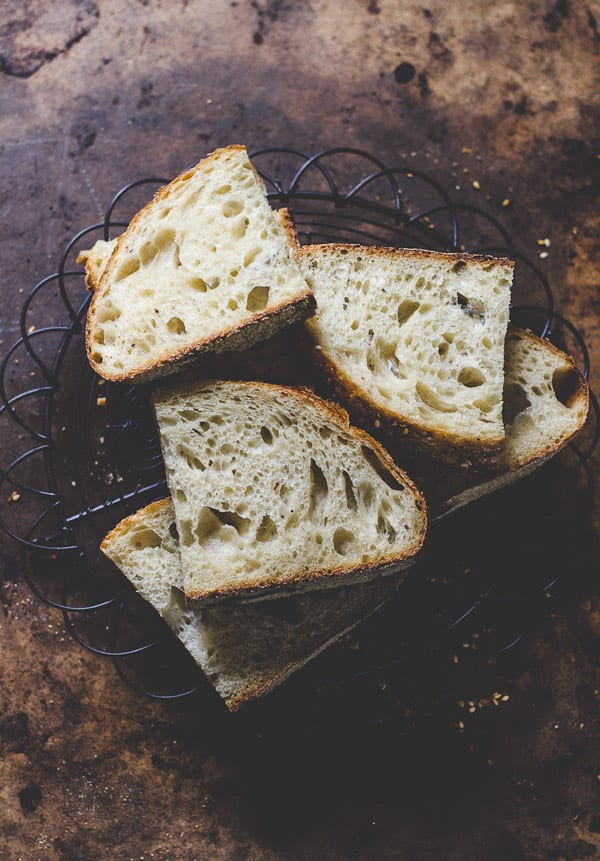
- Cool: Remove the bread from the oven, and cool on a wire rack for at least an hour before slicing. The longer you wait, the easier it will be to cut. Don’t slice into it too soon or else the texture will be gummy!

Comments
Michael says
Is 350 g of water correct? It made my bread so sticky. Normal sourdough recipe only calls for 250 g.
Emilie Raffa says
Hi there! Yes, the measurements are correct. The amount of water can vary from recipe to recipe. It’s not set in stone. Bakers do this to achieve different bread styles. However, if you prefer 250g you can use that amount instead- no problem.
Nitika says
Hi! I get very confused with starter hydration math, after baking for more than 4 years! So for this, if I use 50gms whole-wheat , 50 gms bread flour, 100 gms water – how much should the ‘previous’ starter be? also 100gms?
Lucy says
Hi! I’m struggling recently with my loaves and I can’t figure out why! I made your chocolate noir sourdough and it turned out amazing, since I’ve tried both the artisan and this recipe and my loaves have even crumb but are so flat! I’ve tested Dutch oven/steam tray, different oven temperatures. My starter was almost doubled when I used it and the dough rose double overnight. Any other ideas on what I can experiment with??
Laura says
So far every one of your recipes here have been amazing! I particularly love the chocolate noir and walnut raisin (I use figs). I plan to try the dukkah this weekend. I have your book, but have yet to try those recipes because I have a question about the amount of starter. I noticed the recipes in the book use less starter than these online – is there a reason for that? The amount of flour and water seems similar. I’ve had such good luck with the recipes with 150g starter, I’m a bit nervous to try less : )
Thank you!
Laura
Emilie Raffa says
Hi Laura! That’s wonderful to hear, thank you. I get asked this question quite often. Please refer to the FAQ section in my Beginner Sourdough Post for all the details! The amount you use is totally up to you.
Nicole says
I’m also a little iffy about putting my bread overnight in the fridge to rise because the last time I did that the bread (made using your AP flour recipe) came out quite dense? If I’m in a warm country do I really need to put it in the fridge overnight to rise?
Emilie Raffa says
Hi Nicole! You don’t have to refrigerate the dough. This technique is optional if you want to slow down the rise. It’s totally up to you. Regarding dense bread, it could be numerous things: dough was baked before it doubled, over proofed, inaccurate measuring, dough was too cold etc. etc. Retrace your steps and see if anything rings a bell. Hope this helps!
nicole says
Thanks! I ended up refrigerating the dough overnight and it came out beautiful! Once again, your recipes have made my tummy happy. Thank you! :)
Emilie Raffa says
Oh that’s great to hear! Glad it worked out :)
Nicole says
The bread looks amazing!! Can I use an all AP flour starter with this instead of the bread flour and wholegrain starter you used?
Emilie Raffa says
Hi Nicole! You most certainly can. It will be great :)
Ines says
Hi, will it be as good if the second rise is not in the refrigerator?
Emilie Raffa says
Absolutely! It will be great. :)
Thouraya says
Yum! I recently got gifted a jar of Dukkah and was wondering what I can make with it. This is perfect.
I just started my first sourdough starter. I know you say no bread maker is needed but ummm would I be able to use a bread maker? I have one and we’re facing a gas shortage so I can’t use my oven. :(
Emilie Raffa says
Hi there! I haven’t tested the recipe with a bread maker, but I’m sure you can give it a go. Let us know how it turns out :)
Debra Fuller says
Do you have any advice on Sourdough Rye? I’ve had 2 failures. Trying your Dukkah recipe but with Rye starter and just Caraway Seeds in the dough. ? Think it will work better because it has more water in it? We’ll see what happens.
Your Sourdough for beginners is so excellent. I’ve been at this for years and missed Sourdough when I went to baking school. Have made 6 successful rounds. Delicious!!!
Any advice on Rye would be welcome. Thank you so much.
Emilie says
Hi Debra! Thanks so much for your feedback! Okay, so for the rye… would you mind telling me what your challenges are with your current recipe? I think with a little bit more info I can help! Rye can be a little tricky because it does not have as much gluten as regular wheat flour, so just that alone will cause the dough to react differently. I will email you as well just in case you don’t get this! x
Amanda says
Hello, I made your sourdough noir this past weekend and loved it. I made one big loaf. I want to try this dukkah recipe this weekend, but split it into two loaves instead. I want to buy the proofing baskets but I never know what size to buy. What size do you use for a recipe like this, for each half of the dough? Also, do you have any tips for preventing burning on the bottom? My sourdough noir did burn a bit, and also got kind of stuck to the dutch oven. I did use the cornmeal as suggested.
Jessica says
Thank you for the great recipes! I am excited to try this one, but I am worried about the proving in cloth step…. I have tried this on numerous occasions but have never managed to do it without the dough completely sticking to the cloth. Last time I even used way more flour than I thought I would need! Any suggestions?
mardi says
what a gorgeous piece of art that i want to replicate and devour. but i need some help, if you don’t mind? what exactly do you mean by bread flour, is that considered a strong flour? i live in spain and am only able to find wheat and spelt flour (whole and white). and for environmental and health reasons i would prefer to use local organic flour.. i have a sourdough starter that i have been feeding white organic wheat flour. i have yet to make a loaf as i am trying to find the right recipe to work with. what would you suggest i use to achieve your bread here? thank you in advance for your guidance.
Emilie says
Hi there! Bread flour is higher in protein than regular flour or ‘plain flour’. I think your equivalent is either ‘baker’s flour’ or ‘strong flour.’ This type of flour is preferred in bread baking for better gluten development in the bread. It adds excellent structure and texture. However, if you can’t find it, substitute with what you have (white organic wheat flour). The texture will be slightly different, but it’s a good place to start! Good luck! Happy Baking!
Shawna says
I have this bread rising right now. It is beautiful.
I added a bit of the dukkah topping as I did my stretch and folds. I couldn’t help myself.
{Your beginners guide was most helpful to me as I spent months learning sourdough.}
Shawna says
…. I am a bit confused.
When I have seeded the dough, before it’s final rise in the refrigerator, is the seeded side down in the cloth lined basket?
Emilie says
Hi Shawna,
Yes, place the dough seeded side down. Anytime dough goes into a cloth lined basket or banneton, you want the the seam facing up, looking at you. :)
Emilie says
Wonderful! I’m so happy to hear that you are enjoying the sourdough process- isn’t it addicting?! Glad you’ve found the tutorial helpful :)
Hill says
Thank you so much! I have two left hands in the kitchen, I hate cooking. When I am asked to bring something for a school meeting sweat breakes out. Yes I am the one bringing the popcorn… My partner loves to cook, he comes home after a ten hour work day and starts cooking because it relaxes him! I cannot get my head around it, amazing. Then my sister in law showed me how to make sourdough bread and something clicked. Maybe it is the slowness of it all, plus only two or three ingredients and not a whole list that makes me nervous… I browsed the internet to find a recipe I could understand and follow and stumbled on you blog. Can you believe I made my own starter? Then I went on to make the Dukkah bread and wow, I did it!! Thank you so much for explaining it all so clearly, step by step. You definitly made the kitchen a less scary place for me!
Jessica says
Is this made with a 100% hydration starter?
Emilie says
Hi Jessica,
Yes it is. You can read the breakdown method right after the 3rd photo in the post.