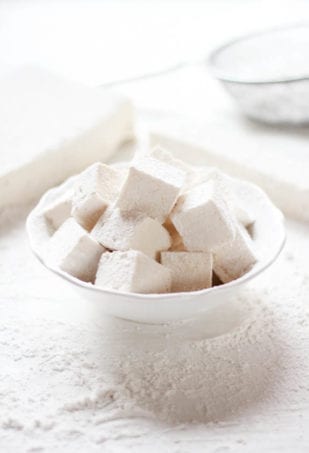
This marshmallow recipe is a messy job, but totally worth it! Tons of tips and tricks shared for the fluffiest marshmallows ever. Your cup of hot cocoa awaits…

How To Make Marshmallows
There are a few ways to do this. But first, it’s interesting to note that most marshmallow recipes contain corn syrup and/or raw egg whites which makes them soft and fluffy. The problem is, I’m not a fan of corn syrup and most people freak out about raw eggs. So, what is one to do?
Use evaporated milk.
Yes, it’s true. I’m not exactly sure what kind of magical powers it posses. But evaporated milk does in fact makes the fluffiest marshmallows ever, without having to add any of the above ingredients. It’s the best kept secret.

Here’s another tip- your cooking tools are just as important as your ingredients. If you’re short on any of them, the process is going to be a little bit tricky. You will need the following items in this order:
- Patience
- Clutter free workspace
- Stand mixer
- Cooking spray
- Non-stick 8×8 or 9×13 pan
- Parchment paper
- Candy or digital thermometer (this is the one I use)
- Rubber spatula
- Sifter
- Powdered sugar & cornstarch
- Sharp knife, pizza wheel or kitchen scissors
And now, kindly prepare yourself for a fleet of snowy white photos with comprehensive instructions at the end of the post (I had to lure you in somehow- this is a long one!) Sunglasses are optional.


I have to say, this marshmallow recipe tastes way better than store-bought, and the best part is, you have total control over the quality of ingredients. Of course they’re a bit messy, and yes your fingers will get sticky- but the truth is, they’re a lot of fun to make. Once you have this basic recipe down you can add different extracts, toppings and sugars to make it your own (try it with my homemade vanilla sugar!). Follow these tips and tricks, and you will have beautiful, fluffy marshmallows every time.
Tips:
- Space is your friend. If your kitchen lacks counter space, move this project to a clean kitchen table. Position your stand mixer near an outlet, and set up all cooking tools and ingredients before you begin.
- Prepare your pan right away. Marshmallows set very quickly, so be sure to have your pan prepped and ready to go. All pans need to be generously coated in cooking spray and lined with parchment paper. I recommend using something non-stick, but glass or metal will do.
- Do I really need a candy or digital thermometer? Yes. In order for your marshmallows to set properly, the milk and sugar must be heated to approximately 235-240 F. Regular thermometers only go up to 220 F. This is the thermometer I use for my sourdough bread, and it works here too.
- Get to know your rubber spatula. This is the one and only tool that will get the fluff out of the bowl. Keep in mind, because marshmallows are very sticky you will not be able to scrape every last bit out of the bowl. You will not have a perfectly smooth finish to the top as well. This is all OK.
- Powdered sugar & cornstarch… why both? Even though powdered sugar has a small amount of corn starch in it, additional cornstarch acts as a moisture barrier preventing the marshmallows from becoming sticky. Make sure to sift your mixture before coating the marshmallows (you don’t want any clumps!).
***And last but not least- because evaporated milk is a tan color, your mixture will initially be brown. Do not fret! After 10-15 minutes of mixing on high speed your marshmallows will become a soft, creamy white color. I was skeptical at first but it’s true.


By signing up, you agree to receive emails from The Clever Carrot. Unsubscribe at any time.
Homemade Fluffy Marshmallows
- Yield: 6–8 servings 1x
- Category: Dessert
- Method: Mixer
- Cuisine: American
- Diet: Gluten Free
Description
It’s a messy job, but totally worth it! This recipe uses evaporated milk, which is my best kept secret for fluffy homemade marshmallows. No corn syrup or raw egg. The marshmallows need to set overnight before cutting into delicious squares. Recipe adapted from Food Network.
Ingredients
Ingredients
- cooking spray
- 1/2 c. water + 1/4 c.
- 3 tablespoons (3 packets) unflavored powdered gelatin
- 2 c. sugar
- 1/2 c. evaporated milk
- 1 vanilla bean or 1 tbsp. pure vanilla extract
- 1 1/2 c. powdered sugar
- 1/2 c. cornstarch
Cooking tools:
- clutter free workspace
- stand mixer
- non-stick 8×8 or 9×13 pan*
- parchment paper
- candy or digital thermometer**
- rubber spatula
- sifter
- sharp knife, pizza wheel or kitchen scissors
Tips:
*I recommend using a non-stick pan, but glass or metal will do. For thick marshmallows, use an 8×8 pan. For thinner marshmallows, use a 9×13 pan.
*In order for your marshmallows to set properly, the milk and sugar must be heated to approximately 235- 240 F. Use a candy or digital thermometer to double check.
Instructions
- Generously coat the bottom and sides of your pan with cooking spray. Cut a piece of parchment paper to fit the inside; you should have about 2 inches of overhang on each side. These will be your ‘handles’ for easy removal.
- Pour 1/2 cup water into the bowl of a stand mixer fitted with the whisk attachment. Add the gelatin and allow to soften, about 10 minutes.
- Meanwhile, in a large saucepan combine the sugar, evaporated milk and 1/4 cup water. Whisk over low heat until the sugar has dissolved. Then, increase the heat and bring the milk mixture to a gentle boil. Continue to cook without stirring, until a digital thermometer registers 235- 240 F, about 10-15 minutes or more, depending on the heat.
- Add this hot milk mixture to the gelatin and beat on low speed until incorporated (see important note below).
- If using a vanilla bean, slice it in half lengthwise with a pairing knife. Scrape out the seeds using the blade of the knife. Add the seeds (or vanilla extract) to the mixer.
- Increase the speed to high and beat until thick, fluffy, and tripled in volume, about 10-15 minutes. Your marshmallows will be a glossy, creamy white color.
- Using a rubber spatula, quickly scrape out the mixture into the prepared pan. Lightly coat your spatula with cooking spray and smooth out the surface. Marshmallows set very quickly, so you will need to work fast. Do not worry about getting every last bit of marshmallow out of the bowl or making the top perfectly smooth! Allow the mixture to set, uncovered (not refrigerated) for at least 8 hours- overnight.
- After the marshmallows have set, add the powdered sugar and cornstarch in a large bowl. Whisk thoroughly to combine.
- Spoon some of the mixture into a sifter, and sift over the top of the marshmallows and a cutting board.
- Using the parchment handles, remove the marshmallows from the pan and place onto your board.
- Dust a large chef’s knife, pizza wheel, or kitchen scissors with the powdered sugar/cornstarch mixture so that they do not stick to the marshmallows.
- Cut the marshmallows into 1-inch squares. Toss the marshmallows into the mixture to prevent sticking.
- Store in an airtight container for up to 1 week.
Notes
Because evaporated milk is a tan color, your mixture will initially be brown. Do not fret- after 10-15 minutes of mixing on high speed, your marshmallows will become a soft, creamy white color.

Comments
Brenda says
Raw cornstarch is not safe to eat. Can you recommend something else?
Emilie Raffa says
Brenda, you can omit the cornstarch and go with all powdered sugar instead.
Brandi says
Is it possible to make this without a stand mixer by hand?
Rose says
This year will be the sixth year I’ve been making this recipe for family, friends, teachers, and neighbors for Christmas. I feel bad I’m barely commenting, but I want to thank you for such an awesome, simple recipe with ingredients I’m not weary of. And they are delicious! Everyone who eats them says, “Is this what marshmallows are supposed to taste like?!” Yes! Thank you.
Dee says
3rd Christmas making these yummy marshmallows……mmmmmm. Love that creamy stuff! Marshmallow cream on my hand, jeans, arms! Tomorrow it’ll be powdered sugar! So FUN!
Caitlin Graf says
So I tried making the syrup but it crystallized. I’ve never had sugar syrup crystallize on me before. Any suggestions on getting it to not crystallize?
Dee says
Maybe you let it boil for too long trying to achieve the 250 degree mark? Looking at the comments lots of people were unable to reach 247-250, including me all three times I have made these. It gets to 225 and that is as far as it goes. I let it lightly boil for about 50-20 minutes then pour into the gelatin/water and whip away. These are really fun to make, hope you’ll give it another try.
Dee says
OOps that should have been 15-20 minutes! AND I just made another batch. Hit about 230 but that was it. Still creamy, yummy marshmallow cream after beating for 15 minutes. Love love this recipe, as do friends and family. Really easy. Soak pan and mixer bowl in hot, soapy water about 15 min. and everything comes out with a gentle scrubby on a couple of spots. YUM!
Joan says
Hi,
I love your gorgeous website. I used Martha Stewart’s recipe for marshmellows because she doesn’t use milk, but I love your beautiful pictures and clear directions. I also love everything about the design of your site. I am trying to make mine better in order to get more views. So far, my five kids, my granddaughter and two friends visit regularly. That’s it. (sob) There is so much to do to learn about taking great pics, etc. and it is daunting, but I am not giving up.Your website certainly inspires me to keep trying. I also love everything about you, your lifestyle, your recipes and your easy way of sharing.(I am a college professor, so I can’t help grading things. A+ to you. lol.)
Emilie says
Hi there! Thank you so much for your kind words- my apologies for the delayed response. An A+? You just made my day! Now, I’m off to visit your website!
Dee says
Made these last Christmas and now again for this Christmas. I managed to keep the powdered sugar from covering me and my surroundings this year! Love, love, love making this recipe and everyone loves receiving and eating them. Regarding the temperature~I also have to boil the sugar/milk mixture but believe I must need a new candy thermometer as mine only reaches 225°. This year I probably boiled less time (30 min) than last but the marshmallows are perfect. Yum-E!
Jamieanne says
Hi! I made these marshmallows yesterday and finally cut them up into squares today – they are so lovely! Someone else commented that they had to bring the sugar/evaporated milk mixture from a simmer to a boil to get it to reach the right temperature; I had to as well, and also had a layer of burnt sugar at the bottom of the pan. No worries, though, it easily wiped away after letting it soak in some hot water! Anyway, I haven’t made many marshmallows in the past, but the ones I have made, I have never been happy with. These, however, turned out perfectly and I was happy to share them with some friends, who also thought they were awesome! Thanks so much for sharing the recipe!
Emilie says
Hi there! Thank you so much for this- I really appreciate your feedback. I think it’s time to update the instructions based on that temperature issue (seems to be a common theme!). Enjoy your fluffy marshmallows, they will make great gifts for the holidays :)
Karen says
I tried making these last night and they came out amazing! Would it affect the recipe much if I reduced the amount of sugar next time? It’s just a tad too sweet
Emilie says
Hi Karen,
I’m so glad you enjoyed them! You know, I’ve thought about reducing the sugar to make them less sweet. However, I’ve never had the chance to experiment so far. I’m not sure if the amount of sugar is related to how well these marshmallows set up, but you could certainly try reducing the overall amount keeping this point in mind. Also, I would reduce or eliminate the vanilla. Vanilla enhances sweetness (I add extra vanilla to my muffins when the sugar quantity is reduced).
Hope this helps! Let me know how it goes if you decide to experiment. Have a great weekend :)
Stephanie says
so sorry if this was mentioned and I missed it somehow (I tried to read all of the comments), will these marshmallows work well for roasting? Thanks!
Emilie says
Hi Stephanie!
Yes, these marshmallows are great for roasting :)
Kim Cameron says
I’m curious about adding flavoring.
I’m making my first batch now & would love to try mint or lemon, etc.
Would I add ‘some’ when I add (or replace) the vanilla?
Thanks!
Byrnsey says
Hi – just made these and thought it might be helpful for others to comment:
Sugar/evap milk mix would not go past 227 F and so I just took it off after 15 mins on a boil.
Then whisking in stand mixer I watched for 10 mins while the mixture just stayed liquid and brown – it would not thicken., Next I decided to try the hand mixer as it goes faster – no joy. Finally I mixed 2 Tbsp more gelatin (Great Lakes the green can) with small amount of water and added it to the main mix. Aha! – finally it got thick and more creamy white. total time beating – 25 mins. I nearly gave up. But it’s very very nice tasting and I’m pleased with the look of it.
Pam says
LOVE YOUR INFO!!! Have been making ‘mallows’ like crazy since this past Christmas & happily discovered your recipe via Pinterest. Several things – I use organic essential oils for unique flavorings (EDEN on Amazon.com) the Lavender is to die for! Also, I freeze my mallows in order to dip in or cover in melted chocolate. Plus that’s how I store all my left overs in ziplock plastic bags in the freezer. Will freezing work here? Cannot wait to try this non-corn syrup method!
susie q makes says
I want to make these during the hot summer weather. Will that be a problem, the humidity, I mean?
Emilie says
Hi Susie,
You know, I’m not sure how they’ll hold up. I guess it all depends on how humid it is, but certainly a reasonable concern. I would stick to the recipe as best as possible and perhaps store in a cool place? (not the fridge). Perhaps the AC will be enough!
Alison @liaisonwithalison.wordpress.com says
I stumbled upon your site through Pinterest. I’m in love with it!!! A question about your marshmallows (SO glad they don’t use corn syrup): have you ever tried different colours and flavours? I would love to make mine pretty pastels with flavours like raspberry, lemon, coconut, lavender, etc. Any suggestions as to how I can do this? Thanks! Now to have another look at the rest of your beautiful blog…
Emilie says
Hi Alison! Thank you for your sweet words!
To flavor these marshmallows, you’ll definitely have to play around to suit your taste- I’ve done a raspberry (seedless) jam swirl which was very pretty. But you’ll have to work fast; the marshmallows set very quickly. I haven’t done coconut, but if I did, I would flavor the base with coconut extract and sprinkle the top (when wet) with toasted coconut. Or, instead of sprinkling the top you could cut the marshmallows (after they set), dip them in CHOCOLATE, and then dunk them in toasted coconut. That to me sounds really yummy.
Hope this has given you some inspiration! Let me know how it goes if you experiment with these marshmallows. Have fun!
j says
have you ever tried using pasteurized egg whites? ( in a marshmallow recipe that calls for eggs) as opposed to the milk?
Emilie says
Hi there! Nope, I’ve never tried with pasteurized egg whites. I’m not sure how that would work in this recipe, but you certainly could give it a shot. If you experiment, let me know how it goes!
Kristina says
Love, love, love this recipe! I just finished making a practice batch for my annual girls’ weekend. We’re camping this year and I wanted to bring a special dessert to enjoy around the campfire. Gotta have s’mores! I just practiced roasting a marshmallow over an electric burner to see how they would withstand heat. They don’t retain their shape like a Kraft marshmallow so you have to rotate it around the heat to keep it on your skewer, but, they get a nice crunchy brown crust on the outside pretty quickly and the middle just oozes sweet vanilla goodness. I made the practice batch in a 9×13, but think I’ll make the batch I take with me in an 8×8 so they’re a little thicker. DELICIOUS recipe. THANK YOU!!!
Emilie says
Hi Kristina! You are so awesome to stop by with your feedback- glad you liked the marshmallows. Plus, a couple other readers have wondered how they’d hold up when roasted (I haven’t done this myself) so your comment is much appreciated. Isn’t fun making this kind of stuff yourself? I’ll be dreaming of ooey, gooey s’mores for the rest of the day! Thanks again! xo
JPV says
I have tried this 4 times.
The marshmallows turned out fine, but I was never able to get the temperature up to 250°F. It gets up to 220° and stays. If I increase the heat (gradually) it starts boiling too hard and I have to take it off the heat to keep it from boiling over. The longest I kept it on the heat was 45 minutes: it maxed out at 220°F and stayed … there for 30 minutes.
I have tried it at two different altitudes 20 meters and 300 meters above sea level: no difference.
I have used 3 different thermometers: no difference.
I did 3 batches with unsweetened evaporated milk and one batch with unsweetened condensed milk: no difference.
I tried a wider pot and a smaller pot: no difference.
Any ideas?
Thanks for the recipe.
My grand-kids love making the marshmallows and everyone loves eating them. They’re a great hit! My wife was raised in Iran where they use rose-water in many recipes. She went wild over the batch I made with rose-water flavouring … and pink color.
Emilie says
Hi there!
Glad to hear you liked the marshmallows. Love the addition of rose water. I’ll have to try that :)
Here’s the thing- if you’ve made this recipe 4 times and each time they came out fine, don’t worry about the temperature not reaching 250 F. The fact that they set at 220 F is all you need. Why the difference in temperature? Not sure. But these things happen. I would just stick to your method for best results.
esther says
I really want to try this for easter and planning on using bunny silicon molds instead of a pan. In your opinion how’s the best way to transfer the mixture into the molds. Piping them or just pouring them slowly into the mold? I know that they set very fast. Thanks
Emilie says
Hi Esther,
For the easiest, precise, and least messy application, I would go for piping the marshmallow fluff into the molds. Keep in mind, you will have to work very fast and you will lose a good amount of marshmallow due to it sticking inside of the bag. It will be very difficult to ‘pour’ the marshmallows into the molds. The mixture is way too sticky! Hope this helps! Good luck. Sound like a great idea for Easter :)
Summer says
Has anyone ever used these for roasting over a fire pit? I have a feeling they may fall apart since they’re aren’t filled with so much junk ;)
Regardless I’m so excited there’s a way to make these without them being practically plastic!
sharon says
Hi. that looks amazing. 2 questions: 1- did you ever try doing it with simple syrup? I would like to make it Dairy free. Any ideas?
2- can you give me some tips for different flavors ?
Great site, thx:)
Sharon
Emilie says
Hi Sharon,
Unfortunately, I’ve never made these dairy free. I’m sure there is a good recipe out there… Have you googled anything?
For flavorings, it all depends on what you like; you could add different extracts such as coffee, or peppermint… you could swirl raspberry jam over the top… you could also dip the finished marshmallows in melted chocolate with cookie crumbs.
Hope this helps! Have fun with the recipe.
celia says
I finally got around to making these last night and they are really good! I made them with Mexican Vanilla, but the flavor of the vanilla isn’t as strong in these as I would have liked, how much more would you recommend adding? For next time of course. Also, my thermometer never got up to 240, so I just used what I had since it was starting to burn and I didn’t want to lose it. They still turned out great. But after letting sit overnight they have a crispy top. Was I supposed to put corn starch and powdered sugar on top?
Cindy says
I would absolutely love to make these for my daughter’s 1st birthday (hot chocolate bar). I tried my first dry run and I just have a few questions.
I followed everything as best as I could. When simmering the candy I could not get to 250. I has the pot on for 1 hour before I got a bit impatient. I cranked up the heat and I was able to get to 250! The only problem is once I added the candy I saw brown clumps (assuming clumps of sugar). The mixture tasted perfect. I used vanilla bean paste and it just brought everything together. I am just afraid of those clumps :-( any thoughts on how I can avoid clumps?! I did whisk the pot when waiting so long to bring to a boil.
Emilie says
Hi Cindy!
I’m glad you decided to test run this recipe before the party. Smart idea. And I love your hot chocolate bar theme :)
Quick question- what kind of pot did you use to boil the sugar mixture? And did you use a candy thermometer? If it was a small pot, you might want to use something a little wider next time so that it comes up to temperature faster.
As for the clumps, I think it was (borderline) burnt sugar. This must’ve happened when you increased the heat/time for boiling the mixture. I also believe that your sugar wasn’t fully dissolved before the heat was increased. Was the bottom of your pot coated as well? There should be no clumps whatsoever.
Bottom line: use a wider pot- not too wide, you don’t want it to boil over- and keep the heat low. Whisk well so that all the sugar dissolves. Then, slightly increase the heat, if necessary.
If you have any other questions, feel free to ask. Good luck!
Pennikins says
Just made the marshmellow into a crème – added 1/4 cup butter and once mixed, added 10 cups of rice krispies – stirred it in – pressed in two – 9 x 13 pans and letting set up now. I gave my hubby a taste and he said it was way better than store bought marshmellow. He has a corn allergy so this is a wonderful Christmas treat for both of us! – The bars are YUMMY!
Jess says
I’ve been looking for a corn syrup free marshmallow recipe (as it’s difficult and expensive to find in South Africa)!
I’ve just made my first batch of delicious homemade marshmallows!!
Thank you so very much! :)
Emilie says
Excellent! That’s great to hear, Jess! I’m so glad they came out delicious.
So curious- where are you from in SA? My husband is from there :)
Pamela Green says
What a lovely weekend project this would be and perfect gift for DIY Christmas giving!
cynthia says
These. Look. AMAZING. I am so intrigued by evaporated milk! And those all-white photos — too dreamy. :) I need to try these ASAP.
Lauren says
I just finished making these tonight! I made them in the morning and let then set for the full 8 hours. I am so in love with how they turned out! I was worried for my first time trying but they came out perfect and can’t wait to use them! Thank you!
Erin says
Hello! I am going to be making marshmallows later this week to give as Christmas gifts. I have a quick question that if you could answer that’d be fantastic.
I had originally seen Giada’s recipe and could not find a video of her making them ANYWHERE. I wanted to see how thick they ended up in an 8″x8″ pan (which is how I ended up here). Looks like you have used an 8″x8″ pan and they look like they ended up maybe an inch thick?
I bought a 9″x13″ pan to use and am afraid they’ll be too thin. I am wondering if maybe I should double the recipe so that they’ll be thicker in the bigger pan? Or would that make an insane amount of marshmallow that would be too much for the bowl of my mixer?
Just a simple question I suppose but any help would be greatly appreciated. Thanks in advanced!
Emilie says
Hi Erin! I am happy to help with regards to your question.
I used an 8×8 inch pan for this recipe. I don’t remember exactly how thick they were, but at least 1 inch (maybe a little more). In the past, I’ve made the marshmallows in a 9×13 inch pan and thought they were too thin. It really wasn’t the end of the world, but I was going for a thick and fluffy look.
DO NOT double this recipe! You’ll have marshmallows all over the place! This pretty much fills the mixing bowl to the top ;)
So, if I were you, I’d buy a non-stick 8×8 inch pan if you want thick marshmallows. You could probably find an inexpensive one at Marshall’s or Home Goods. Or, if the thinner version doesn’t bother you go for the 9×13.
I hope this answers your question! If you need anything else, please don’t hesitate to ask. Good luck! Happy Holidays :)
Erin says
Thank you so much! I’ll go out and get an 8×8 pan. :) I think they’d look a little sad if they weren’t thick and fluffy.
I definitely won’t double the recipe then. Wouldn’t want marshmallow all over the place, haha.
You certainly answered my question. Thank you again for your help and Happy Holidays to you as well. :)
julie says
What a yummy recipe! My kids and I really enjoyed them and im sure they will be a regular addition to our treat repertoire!
To make marshmallow crème or to use for rice crispy treats stop cooking the sugar mixture at a temp of 243-45′.
Elizabeth says
Hi, I just made these for our office holiday hot chocolate party! They were a huge success. My feedback from the process – the sugar took almost 20 minutes to reach 250 degrees. I’m not sure if I used too large of a pot? Ultimately I had to turn it up from a simmer to a boil to get it to move past 220 degrees. The bottom of the pan had dark brown cooked sugar stuck to it, but the rest of the sugar mix was the right temperature. I may have whipped my marshmallows for too long. Your picture has a beautifully coated whisk attachment, but my attachment was FULL of THICK marshmallow cream when I took it off. Actually though, this may have been a good thing. My marshmallows set in about 3 hours. The finished product was perfect for hot chocolate- they melted just a little, but mostly softened into a gooey molten marshmallow, sort of like the perfect roasted marshmallow center!
Emilie says
Hello Elizabeth! Thank you so much for sharing your feedback!
With regards to the sugar- it’s ok if it took a little longer to reach 250 degrees. This happens. The important part was that you used a candy thermometer to regulate the temperature, and made adjustments as needed. Sorry about the bottom of the pot! I hope it wasn’t too difficult to clean ;) These things happen too, sometimes as a result of the actual make up of the pot (too thin).
And as long a your marshmallows set properly, it’s a good thing!
Well done on your first round! I think you nailed it. Thanks again for sharing, Elizabeth. Happy holidays! :)
Christine says
Hi…. Looking forward to making marshmallows with Carnation Milk. I was wondering, I want to ship these out overseas, it may arrive in about 3 or 4 weeks…. Will these marshmallows last that long, even if I seal the bag with a sealer? Will the Carnation Milk spoil after a while in the Marshmallows? What’s your opinion on this?
Emilie says
Hello Christine!
To be honest with you, I don’t think these marshmallows will last 3-4 weeks. I’m concerned that the marshmallows will dry out. You mention sealing the bag with a sealer- is it a vacuum sealer? Or just a sealed ziploc bag?
Last year, I had some leftover past the 2 1/2 week mark (stored in an airtight container). They didn’t look fresh at all. They were slightly discolored and dry-ish. :(
I hope this helps! Let me know if you need further clarification. Happy Holidays :)
Donika@momwhats4dinner says
I have all the ingredients, I will try these out over the weekend! Been planning on making homemade marshmallows for so long…found another one today using corn syrup, don’t have any and didn’t know marshmallows can be made without it till today! Thanks Emilie, btw I love the photos!
Emilie says
Hi Donika! This is a great recipe for marshmallows without the corn syrup. The evaporated milk is amazing. Just a head’s up- I make mention in the recipe/post, but in case you missed it, the evaporated milk turns everything a tan color in the beginning. But after adequate mixing, it turns a beautiful white! Have fun with the recipe! Post a pic on IG! xoxo
Donika@momwhats4dinner says
Yes I did catch that thank you, and what a lovely white colour it turns into, it’s like magic! I don’t have a candy thermometer, but I have a little experience from making Turkish delights I figured I can tell when it’s ready, and it worked out perfectly! I allowed it to simmer for 17 minutes, just in case 15 wasn’t enough, and I whisked it for 13 minutes, and it turned out just perfect! I posted a pic on IG :) Thanks again Emilie xoxo
Emilie says
Excellent! So glad they turned out well! Thanks for sharing your feedback. I’m off to go check it out on IG! xoxo
Donika@momwhats4dinner says
Thanks, I also shared your link in my newest post on the blog! xo
Kellie says
Hi, I just tried making this and it was a horrible failure! :( the sugar mixture for boiling almost burnt when i tried to let it boil to get to the temperature (i did not have a candy thermometer on hand, but it was only boiling for less than 5 mins!). Maybe it was because of the evaporated milk, i think mine was sweetened. I was looking forward to making this for tmr’s party but looks like i’ll have to come up with another last-minute dessert!
Emilie says
Hi Kellie! So sorry to hear that. I’m happy to help you troubleshoot:
If you used sweetened evaporated milk, that was most likely the problem (you’re not talking about condensed milk, right?). For best results use unsweetened evaporated milk.
Also, it is really important to use a candy thermometer to monitor the temperature. Candy making is a science and the boiling stage is critical. If not done correctly the marshmallows will not set.
I hope this information helps! Good luck! :)
Yvonne says
Hello,
How long do these marshmallows stay fresh for? What is the best storage? I have made homemade gummy treats using gelatin and after a couple hours they get sweaty and gooey. Do these do that? Thanks
Emilie says
Hello Yvonne!
I store the marshmallows in an airtight container. They should last for about 1 week. If you’re making these as gifts, I would make them only couple of days in advance prior to giving them away. This way they will stay fresh (longer) for the recipient.
With regards to the gelatin, I’ve never had a problem with the texture. It doesn’t ‘sweat’ out as you’ve described, but I understand what you mean. Is is warm by you? The temperature and storage could be a potential factor.
Hope this helps!
Dina says
Hi!
Thank you for this interesting recepie, but I just wanted to clarify, how much gelatin you use in grams? My gelatine comes in 2g sheets, so I cannot measure it with teaspoon :)
Emilie says
Hi Dina! Great question!
After doing a little research, I’ve learned that it is very tricky converting sheet gelatin to powder. This is due to the varying strengths of different types of gelatin. It’s not an equal swap.
However, I found a response from Nigella’s team that seems very helpful with regards to conversion: http://www.nigella.com/kitchen-queries/view/Gelatine-Leaves-to-Powder-Conversion/2376
If you try this, let me know how it goes! Good luck! :)
Katy says
Hi!
Oh, what a unique recipe! I really abhore using corn syrup. Can you please tell me if you used fat free evaporated milk or low fat?
Thank you!
Emilie says
Hi Katy! Thank you! If memory serves me correctly, I believe I used Nestle Carnation regular evaporated milk. However, low fat or fat free should work as well. Let me know how they turn out! Have fun!
erika says
i only have a hand mixer. i have made marshmallows with it before. won’t it work with your recipe?? i do want to try it. my son would be so excited. i say no to marshmallows because they are made with such yuck, but your recipe is perfect for us.
Emilie says
Hi Erika! Although I’ve never made marshmallows with a hand mixer before, if you’ve had success with this method in the past why not give it a go?! Let me know how it turns- I would love to pass along that tip. Enjoy :)
LaurenOfAllTrades says
Yay for this! I was specifically looking for a corn syrup-free marshmallow recipe so that I could make marshmallows with using any ingredients packaged in plastic!
Emilie says
Yay! I hope you like it! Have fun with the recipe :)
Anise S. says
This looks absolutely amazing and the fact that they don’t contain corn syrup makes me feel less guilty about eating marshmallows. However since it does contain dairy, how long can this be kept for? will it go bad?
Abby says
Hi! I was just wondering what would be the best way to store them, and how long do they keep? Thanks :o)
Agos says
You are my savior! I wanted to make marshmallows for my blog anniversary, and I just noticed at 9 pm that I didn’t have any corn syrup. Plus I had a can of evaporated milk, which I don’t normally have, so this recipe fit like a glove (though I had to make half because I didn’t have much gelatin :P)
So thank you! If everything comes out right, they will be posted on my blog tomorrow :)
Omotayo says
Hi, I’m hoping to try this recipe bt do you know if I can use this to make fondant?
Emilie says
Hi there! I’m not really sure if you could use this recipe for fondant… I don’t believe so. I wish I could be of more help! Let me know how it goes if you try it out :)
Maya says
they looks so yumm and a must try ASAP :) a silly Q here can i use it (skipping the cooling step) as a marshmallow creme? wanna make a marshmallow butter frosting for a cake cant find the creme anywhere here and cant feed babies raw egg as well :( help please
Emilie says
Hi Maya! You know, I’ve never made marshmallow creme before so I’m not really sure if you could just skip the cooling step in this recipe. Common sense tells me no, because these marshmallows set very fast in the pan. You wouldn’t be able to spread it on anything. Have you tired Googling a recipe? That might be a good idea. I’m sorry that I could not be of more help. I hope you find what you are looming for. Good luck! :)
Nina says
Hi I’m hoping to try these ASAP! I’m in the uk and we have condensed milk which is brown and tastes of caramel and we have evaporated milk which is white and we pour cold onto puddings like cream. Which do you think sounds most like the right one? Sorry for being dim! And also have you ever tried using vegetarian gelatine? All those veggies get a raw deal missing out on these and I wouldn’t mind giving it a try! Thanks!
Emilie says
Hi Nina! No need to apologize- For this recipe you will need evaporated milk, not condensed milk. I’m not sure if you have different varieties of evaporated milk, but you are looking for one that is unsweetened. There is plenty of sugar in these marshmallows already! ;) I’ve heard of vegetarian gelatin but have never used it before. If you try it, do let me know! :)
Kate says
Oh my gosh, evaporated milk marshmallows, they sound heavenly! I am so pleased that I have stumbled upon your blog, I love it.
Emilie says
Thank you Kate!!! It’s the best secret ingredient! It makes them super moist & fluffy. Who knew, right? ;)
laurasmess says
Wow, they definitely hands-down beat any supermarket version of marshmallow! Pillowy squares of soft, sweet heaven! I’ve never eaten a homemade marshmallow but I definitely want to give your recipe a try. Thanks, I’m excited!
yasmeen says
Hi…sounds cool…can we make this with homemade evaporated milk. .in the place where I live..I dont get evaporated milk..plz reply at the earliest..thank u
yasmeen says
The one where I reduce my whole milk to half.
Emilie says
Hi Yasmeen! You know, that’s a very good question… I’m pretty sure you can use your own homemade evaporated milk, however I have not experimented with this (sorry I cannot advise!)
In order for the marshmallows to set properly, the milk and sugar mixture must reach 250 F. So whether you’re using store-bought or homemade evaporated milk, this step is absolutely crucial. Please let me know how it turns out! Good luck :)
Jennifer says
Do you think you could use this recipe to make Rice Krispies? Perhaps just cook them and obviously skip the cooling step? Thanks for the great recipe!
Emilie says
Hi Jennifer! I don’t see why not… I haven’t done it myself, but it’s worth a shot. Keep in mind, the marshmallows are very, very sticky so it might be a little bit difficult when measuring out the amount you need for your recipe. If you try it, let me know how it turns out. I’m so curious! Thanks :)
Laney (Ortensia Blu) says
These look magnificent! Hot chocolate will never taste the same again…
Emilie says
Ah yes… gone are the days of those dried little things in Swiss Miss packets. Remember those? x