Think you can’t bake artisan sourdough bread at home? Think again! Sourdough Bread: a Beginner’s guide is your go-to recipe resource for simple, easy sourdough bread without kneading. Make the dough in the morning or at night- it will come together in under 10 minutes.
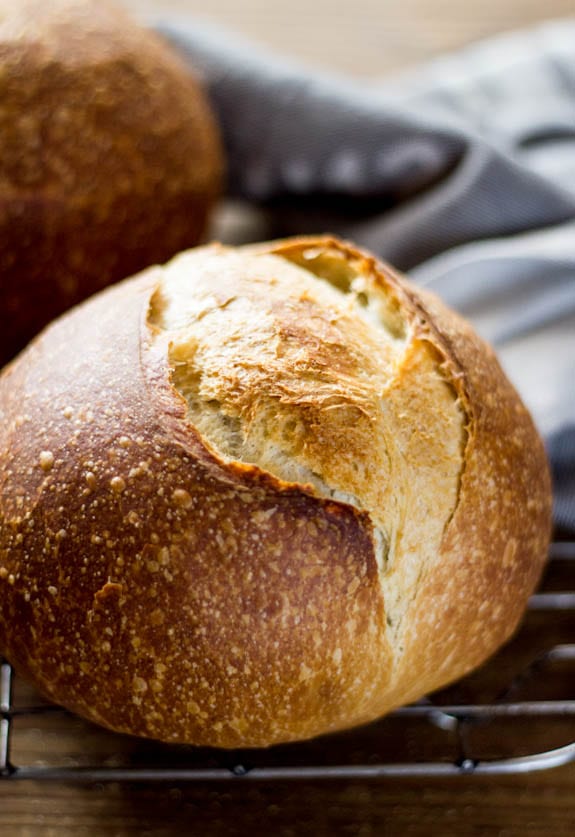
In 2013, my resolution was to bake more bread.
I researched, tested and baked countless loaves with both good and mixed results. My journey began with this no-knead artisan bread recipe and eventually, I worked my way up to the holy grail: Sourdough. My passion for creating easy sourdough bread recipes and preserving traditional culinary arts inspired my bestselling book Artisan Sourdough Made Simple which has connected me to like-minded bakers all over the world!
So, if you’re curious about sourdough bread and don’t know where to begin, you’re in the right spot. This sourdough bread recipe has been THE MOST popular recipe on my blog for over a decade and continues to earn millions of pageviews a month. Welcome to the journey.
What You’ll Learn
In this tutorial, you’ll learn how to make simple sourdough bread with step-by-step instructions and videos for guidance. There’s no kneading involved, and a bread machine or a stand mixer is not required. My sourdough bread recipe is perfect for beginners. I’ll explain a complex topic in simple terms without the stress!
But before you dive in, here’s a secret: sourdough bread is more than just a recipe… it’s an understanding.
There are similar sourdough bread recipes out there and yet no two loaves look alike. The process is all about method, timing and personal touch. Use this tutorial as a guide and make your own adjustments as you go. Once you have a few loaves under your belt, the process will become an imminent rhythm, and in the end, you will have created your very own masterpiece that is the ultimate reward. Just don’t forget to eat your mistakes (might I suggest homemade sourdough breadcrumbs)?
Jump To
- Sourdough Bread Recipe
- Step by Step Instructions
- Sourdough Starter 101
- Sample Baking Schedule
- Sourdough FAQ
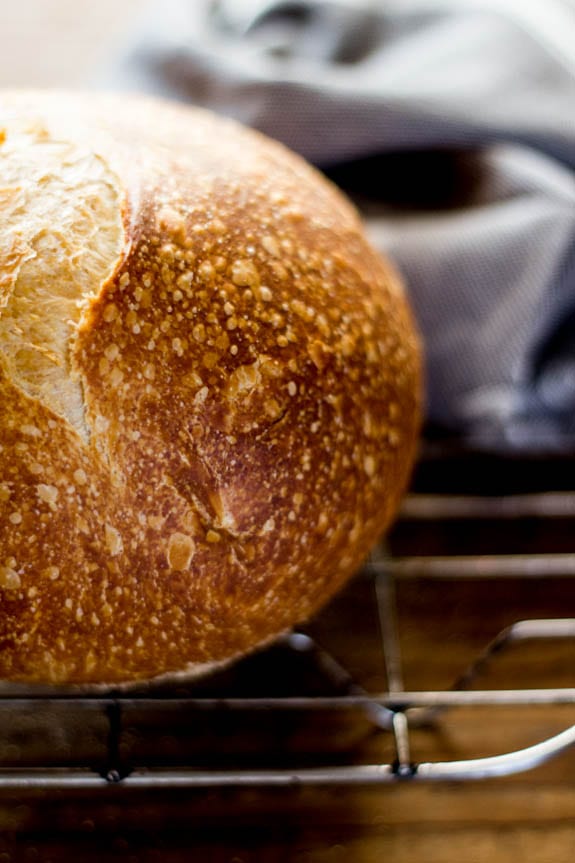
So, What is Sourdough?
In a nutshell, sourdough is slow-fermented bread.
It’s unique because it does not require commercial yeast in order to rise. Instead, sourdough bread is made with a live fermented culture a sourdough starter, which acts as a natural leavening agent.
Sourdough is known for its characteristic tangy flavor, chewy texture and crisp, crackly crust. From a health standpoint, it dominates when compared to supermarket loaves. The naturally occurring acids and long fermentation help to break down the gluten, making it more digestible and easy for the body to absorb. And it tastes darn good!
Sourdough Starter 101
Before you begin, you’ll need a sourdough starter.
Simply put: a sourdough starter is a live culture made from flour and water.
Once combined the mixture will begin to ferment, cultivating the naturally occurring wild yeasts and bacteria present within the mixture. A small portion of this culture is used make your bread dough rise.
But it doesn’t stop there.
Your starter must be kept alive with regular feedings of flour and water to maintain its strength for maximum rising power.
How to Feed your Sourdough Starter
Every baker has their own method, and with practice you’ll eventually develop your own routine.
Here’s my method: I pour off some of the culture (about half) and then feed what’s left in the jar with equal weights of flour and water. I whisk well with a fork until it’s lump-free. Then, I let it rest at room temperature or in a warm spot (75-80º F/ 24-26º C is ideal) until it becomes bubbly and active.
PS: I use this the jar for my sourdough starter and I LOVE it.
When is my Starter Ready To use?
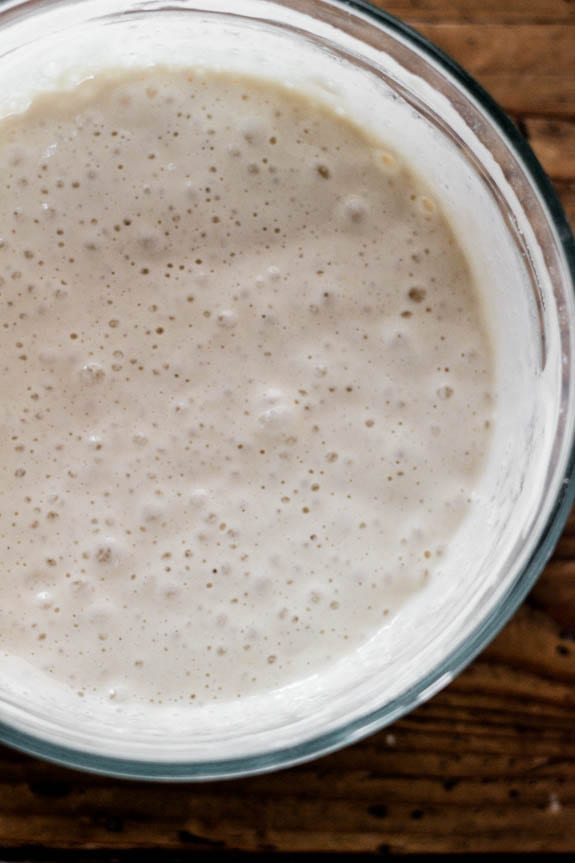
Your stater is ready to use when it becomes bubbly and doubles in size.
This can take anywhere from 2-12 hours or more depending on temperature (the warmer the better) and the condition of your starter. Be patient!
Float Test: If you’re still unsure whether it’s ready to use drop a small amount, about 1 tsp, into a glass of water. Do this when the starter is a peak height before it collapses. If it floats to the top it’s ready to use. If it sinks, your starter should be fed again.
Where to Obtain a Sourdough Starter
All sourdough starters are different.
They can be made from scratch, purchased online, or if you’re lucky, someone will share a portion of their starter with you.
Starters range from thick to thin in texture and can be made with a variety of flours. I use two different starters; one is homemade and the other was a gift from my friend Celia. She dried a portion of her starter and mailed it all the way from Sydney, Australia.
How To Use A Starter
After you’ve fed your starter and it’s bubbly and active, pour the amount you need out of the jar to weigh or measure for your recipe. That’s it.
Then, don’t forget to feed what’s left in the jar with more flour and water to keep the process going.
Any leftover sourdough starter can be used to make sourdough discard recipes, even my homemade sourdough pasta.
Storage Options
If you only bake a few times a month, keep your starter in the fridge and feed it once a week. If you’re an avid baker, store your starter at room temperature and feed it at least once a day.
Looking for more info on sourdough starters? Check out Feeding Sourdough Starter: My Best Tips & Tricks & Sourdough Discard 101: Recipes & Faqs Answered.
How to Make Sourdough Bread: Step-By-Step Guide
Step #1: Mix The Dough
Combine the following ingredients in a large bowl (I use a fork):
- 250 g water
- 150 g bubbly, sourdough starter
- 25 g olive oil
Add:
- 500 g bread flour (such as King Arthur)
- 10 g fine sea salt
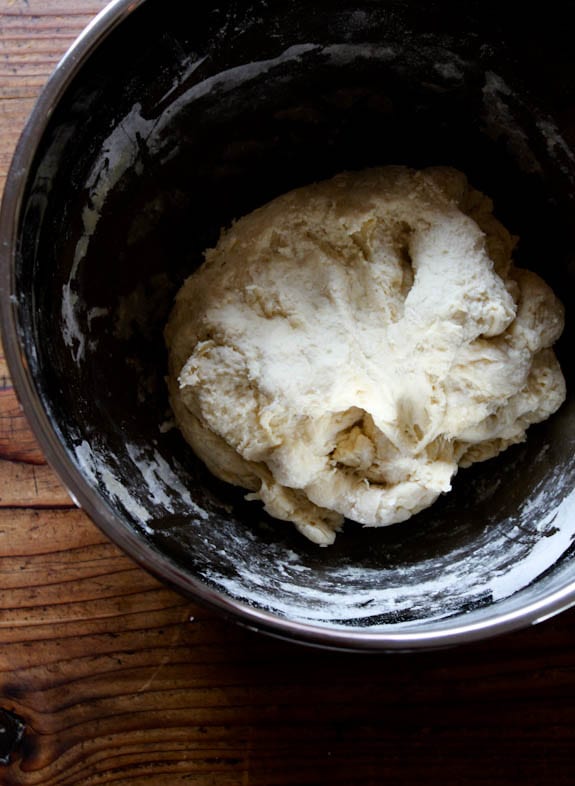
Squish the mixture together with your hands until the flour is fully absorbed. The dough will feel dry, rough and shaggy.
Cover the bowl with plastic wrap, reusable wax wrap, or a very damp kitchen towel and let rest or ‘autolyse’ for about 30 minutes. After the dough has rested, work it into a ball directly in the bowl (it doesn’t have look perfect).
TIP: For best results, weigh all of your ingredients with a digital kitchen scale. Measuring cups are not as accurate. Please visit Sourdough FAQ for more details.
What is Autolyse?
This is the first resting period right after you mix the dough.
It jumpstarts gluten development without kneading. Strong gluten = good bread.
For timing, autolyse can range anywhere from 15 minutes to 1 hour or more depending on the type of bread you’re making and your own personal baking schedule. A minimum of 30 minutes works best for this recipe. However, when time permits, I’ll let it go for an hour. The dough will become more soft and manageable to work with afterwards.
A Note on Salt: some bakers prefer to add salt only after autolyse because it might slow down the gluten development. I’ve followed this technique for years, but no longer do so. I prefer to mix everything all at once. It’s practical, effective and produces excellent loaves (plus, you won’t forget to add the salt later on!). I’ll leave the choice up to you.

Step #2: Bulk Rise
Now the dough is ready to rise.
Cover the bowl and let rise at room temperature, about 68-70 F.
How Long will it take?
The dough is ready when it has doubled in size and no longer looks dense.
This can take anywhere from 3-12 hours depending on your current room temperature, the potency of your sourdough starter and the specifics of your surrounding environment.
For example, in the summer the dough can take anywhere between 2-4 hours @ 85º F/ 29º C. In the winter, it will take longer about 10-12 hours @ 68º F/ 20º C. Temperature controls time.
And remember: because sourdough bread does not contain instant yeast it will take longer to rise. Watch the dough and not the clock. Be flexible.
Optional Step: Stretch and Fold the Dough
About 30 minutes into the bulk rise, you have the option to perform a series of ‘stretch & folds’ to strengthen the bread dough {click here for a step-by-step tutorial}. Although it’s not mandatory, this technique will add height and structure to the finished loaf and it’s fun to do.
Watch the video below!
Step #3: Divide & Shape The Dough
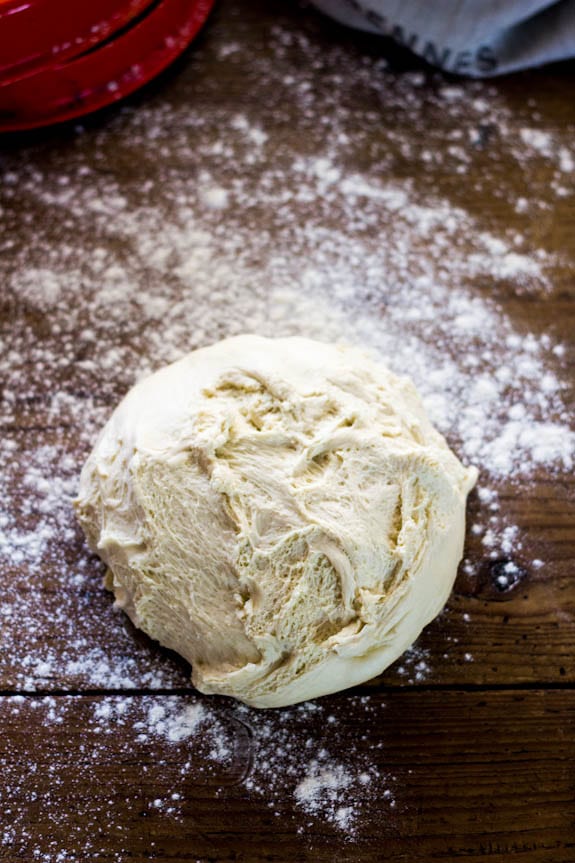
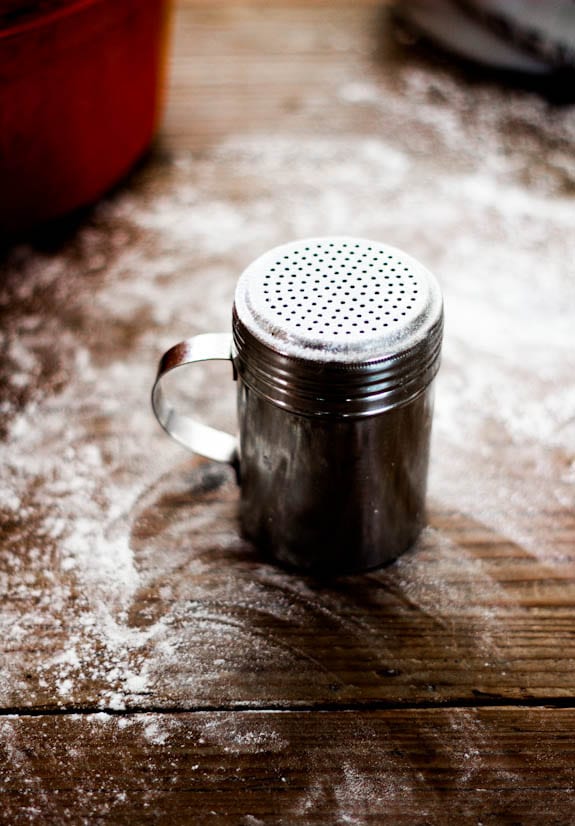
Remove the dough onto a lightly floured surface.
Cut the dough in half to make 2 loaves, or leave it whole for a single loaf.
How to Shape a Round Sourdough Boule (Loaf)
Starting at the top, fold the dough over toward the center. Give it a slight turn, and then fold over the next section of dough. Repeat until you have come full circle. Or, use the envelope shaping technique outlined below.
Watch the video!

Step #4: Choose a Baking Pot
I bake my sourdough bread in a Dutch oven.
You can also try the Challenger Bread Pan, another vessel I use for baking, that can accommodate both round and oval shaped loaves.
The pot traps in heat and moisture which is essential to achieving artisan style bread at home.
Steam plays a key role in how the bread will open up or ‘bloom’ while baking and the Dutch oven helps to control this process.
You can use any oven safe pot that can heat up to 450º F/ 232º C (including the lid and handles).
TIP: In the past, I’ve tried baking on pizza stones and cookie trays with no luck. The crust would harden too quickly, forcing the bread to tear on the bottom and sides. I used various steaming methods to remedy this, however I found them to be extremely cumbersome and not realistic for everyday use. Nothing worked. The lack of moisture in my home oven was evident and using a pot for baking was the only practical solution.
Step #5: Second Rise
After shaping the dough, it needs to rise again.
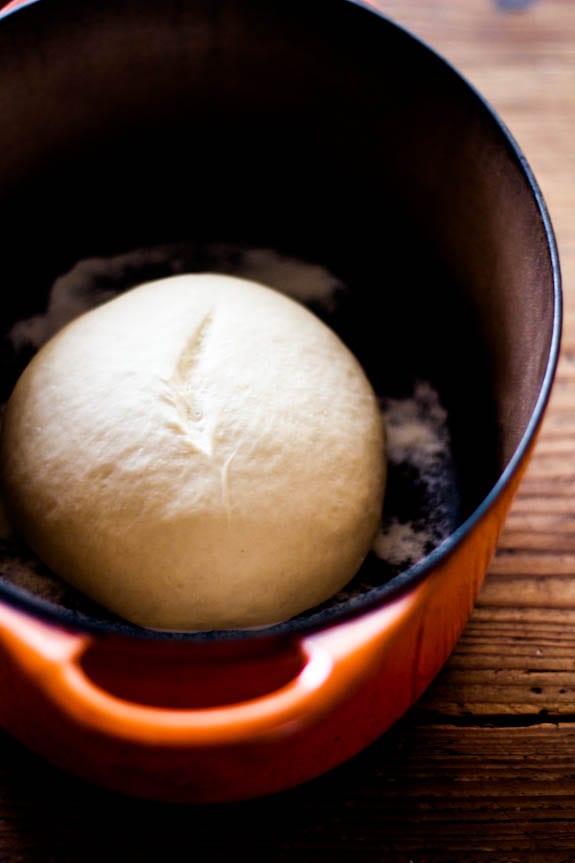
Generously coat the bottom of your Dutch oven with cornmeal (or line the bottom with non-stick parchment paper instead) and place the dough inside.
This time, the dough will rise for a shorter period about 30 minutes- 1 hour.
The dough is ready when it’s puffy and no longer dense. It does not need to double in size.
Preheat your oven to 450º F/ 232º C during the tail end of the second rise.
TIP: Instead of doing a free form second rise in the Dutch oven, use a cloth lined proofing basket or 8-inch bowl instead. Either option will contain the dough and hold its shape properly during the second rise.
Step #6: Score the Dough
After the second rise, and right before the dough goes into the oven, make a slash about 2-3 inches long down the center of the dough.
This allows the steam to escape and for the dough to expand during baking.
You can use a small serrated knife, paring knife or bread lame.
Step #7: Bake the Sourdough Bread
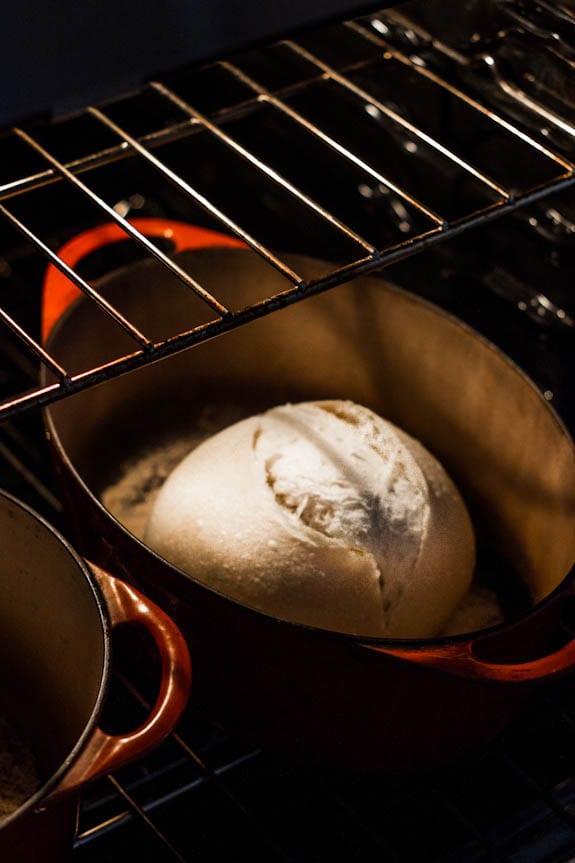
Place the lid on top of the pot and reduce the oven temperature to 400º F/ 204º C.
Bake on the center rack for 20 minutes.
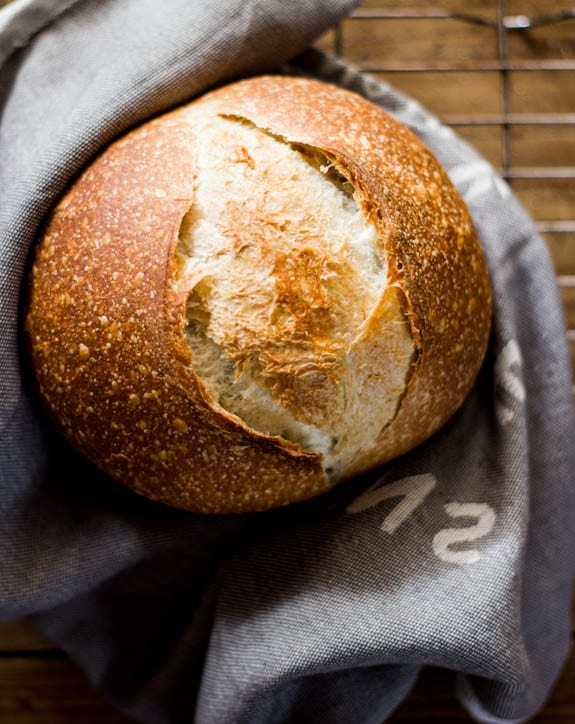
When 20 minutes is up, remove the lid. Your bread will be pale and shiny like the picture above.
Continue to bake (uncovered) for an additional 40 minutes or until deep, golden brown. The internal temperature should read 205-210º F/ 96-98º C.
Cool on a wire rack for at least a 1 hour before slicing. Be patient!
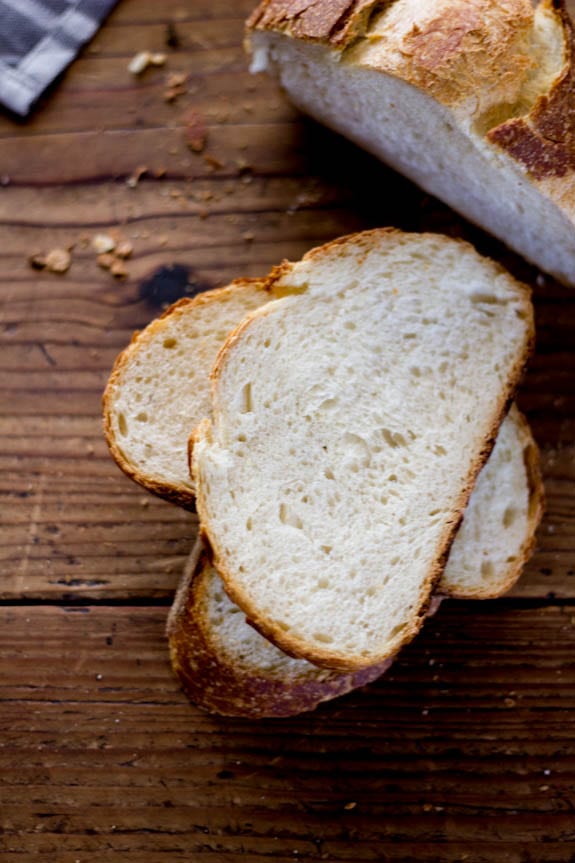
If you cut into it too soon, the texture will be gummy…
TIP: During the last 10 minutes of baking, crack open the oven door (optional). This allows the moisture to escape, leaving your sourdough bread with a crisp crust. Alternatively, remove the bread from the pot and let it bake directly on the rack. The latter produces a more crisp crust.
Additional Sourdough Recipes & Resources
Sourdough Starter:
- Beginner Sourdough Starter {Recipe}
- Feeding Sourdough Starter: My Best Tips & Tricks
- Sourdough Discard 101: Recipes & Faqs Answered
Sourdough Bread Recipes:
- Beginner’s Guide to Sourdough Focaccia Bread
- Best Sourdough Pizza Crust (No steel or stone!)
- Best Sourdough Pasta (1 hour or Overnight)
- Light Whole Wheat Sourdough
- Easy Sourdough Sandwich Bread
- Soft Sourdough Cinnamon Rolls
- Best Sourdough Pancakes
Sourdough Bread Tips & Techniques:
- How to Stretch and Fold Sourdough {Video}
- How to Shape a Round Sourdough Boule {Video}
- Why Won’t My Sourdough Bread Rise?
- Bread Flour vs. All Purpose Flour: What’s the Difference?
Sourdough Tools & Supplies:
Baking Schedule
- Friday Evening: Feed your starter, cover the jar, and leave it on the counter overnight. If you keep your starter in the fridge, it might need two feedings to perk back up (feed it in the morning & in the evening).
- Saturday Morning: Check your starter: if it’s alive and bubbling, you can make the dough to rise during the day. Or, feed it again in the afternoon to make the dough in the evening for an overnight rise. Remember to use the float test mentioned above to make sure your starter is ready to use.
- Saturday Morning/Evening (or whenever your starter is ready): Make the dough. Leave on the counter to bulk rise at room temperature. In the summer, if your dough rises quickly and you’re not ready to bake, cover the whole bowl with lightly oiled wrap and chill until ready to use.
- Sunday Morning: cut and shape the dough. Place in Dutch oven for second rise. Slash. Bake. Cool. Eat.
Sourdough Bread Recipe
Print
Sourdough Bread: A Beginner’s Guide
- Prep Time: 13 hours
- Cook Time: 1 hour
- Total Time: 14 hours
- Yield: 1 loaf
- Category: Sourdough Bread Recipes
- Method: Oven-Baked
- Cuisine: American
- Diet: Vegan
Description
This beginner sourdough recipe is perfect for bakers looking to jump right in! It’s is a low-hydration dough, meaning it will yield a ‘tight’ crumb (small holes). It is great for sandwiches and toast.
Ingredients
- 150g/ 5.35 oz bubbly, active sourdough starter
- 250g/ 8.80 oz warm water, preferably filtered*
- 25g/ .90 oz olive oil
- 500g/ 17.65 oz bread flour (not all purpose flour)
- 10g/ .4 oz fine sea salt
- fine ground cornmeal, for dusting
*For a more soft and pliable dough, you can increase the water up to 300 g- 325 g total. Please use a cloth lined bowl (instead of the Dutch oven for the second rise).
**You will need a 5 1/2 or 6 quart Dutch oven for baking
***This recipe was tested with King Arthur Bread Flour, Gold Medal Bread Flour, Pillsbury Bread Flour
Instructions
Make the Dough
Whisk the starter, water, and olive oil in a large bowl. Add the flour and salt. Squish everything together with your hands until all of the flour is absorbed. The dough will be dry and shaggy. Cover the bowl with plastic wrap, reusable wrap or a clean, very damp kitchen towel. Let rest (autolyse) for 30 minutes or up to 1 hour, if preferred.
After the dough has rested, work the dough in the bowl into a rough ball, about 15 seconds.
Bulk Rise
Now the dough needs to rise.
Cover the bowl with wrap or a very damp kitchen cloth. Let rest in a warm spot to rise. The dough is ready when it no longer looks dense and has doubled in size. This can take anywhere from 3-12 hours depending on the temperature of your ingredients, the potency of your starter and surrounding environment. For example, in the summer rise times can take anywhere between 2-4 hours @ 85º F/ 29º C whereas in the winter, the dough will take about 10-12 hours @ 68º F/ 20º C.
Optional Step: Stretch & Fold the Dough
During bulk rise, you have the option to perform a series of ‘stretch & folds’ to strengthen the dough. Start 30 minutes into the bulk rise. Gather a portion of the dough, stretch it upwards and then fold it over itself. Rotate the bowl ¼ turn and repeat this process until you have come full circle to complete 1 set. Do this once or twice spaced about an hour apart. Although this step is not mandatory, it will increase the total volume and height of your bread. Click here for a step-by-step video tutorial.
Cut & Shape the Dough
Divide your work surface in half; lightly flour one side (for cutting) and leave the other half clean (for shaping).
Remove the dough from the bowl, and place onto the floured section so that it does not stick. You do not need to ‘punch down’ the dough; it will gently deflate as you fold and shape it.
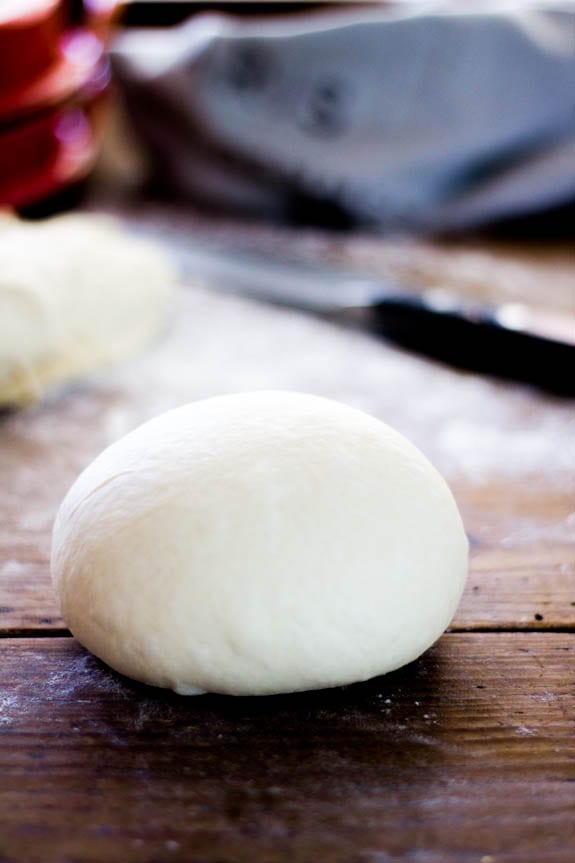
Cut the dough in half to make 2 loaves, or leave it whole for a single loaf.
To shape, use a bench scraper to move your dough to the non-floured section (if there is any flour present, it will be difficult to shape- brush away any excess). Starting at the top, fold the dough over toward the center. Give it a slight turn, and then fold over the next section of dough. Repeat until you have come full circle.
Then flip the dough over and place it seam side down. Using your hands, gently cup the sides of the dough and rotate it, using quarter turns in a circular motion. You can also pull it towards you to even out the shape. Repeat this process until you are happy with its appearance. *See note below.
Second Rise
Now the dough needs to rise again, but for a shorter period of time.
Coat the bottom of your Dutch oven with cornmeal. Alternatively, use parchment paper to prevent sticking (this is what I do, now). Place the dough inside for a second shorter rise, about 30 minutes to 1 hour and cover with the lid of the pot or a very damp cloth. The dough ready when it is slightly puffy but not double in size.
Preheat your oven to 450º F/ 232º C towards the tail end of the second rise.
Score the Dough
Right before your bread goes into the oven, make a shallow slash about 2-3 inches long (or more) in the center of the dough. Use a bread lame, sharp pairing or a small serrated steak knife. The cut should be about 1/4-inch deep.
Bake the Dough
Place the bread into the oven on the center rack (lid on) and reduce the temperature to 400° F/ 204° C. Bake for 20 minutes. Remove the lid, and continue to bake (uncovered) for an additional 40 minutes or until deep, golden brown. Keep in mind that all ovens are different; you might have to make minimal adjustments to these temperatures.
You can also take the internal temperature of your bread to double check that it is done. For sourdough, it should read about 205-210º F/ 96-98º C.
Remove the bread from the oven, and cool on a wire rack for at least an hour before slicing. Don’t cut too soon or else the inside will have a gummy texture!
Notes
When shaping, the idea is for the dough to catch enough surface tension on a non-floured area in order to create a tight ball. If there is flour present, it will slide around… and drive you nuts.
Sourdough FAQ
1.) I only have all purpose flour. Can I still make this recipe?
For best results, use bread flour for this dough. If you only have all purpose try my Artisan Sourdough with All Purpose Flour instead.
2.) Can I add whole wheat flour to this recipe?
You can, but I wouldn’t. The dough will be too dry and dense without adjusting the water quantity. Try my Light Whole Wheat Sourdough for more whole grain goodness.
3.) Your beginner recipe here uses 150g of sourdough starter. The Everyday Sourdough in your book uses only 50g. What’s the difference? And why?
- When I first learned how to bake sourdough bread, I used 150g of starter. Overtime, it was too much to maintain (especially when doubling and tripling recipes). So, I scaled down. That’s why most recipes in my book Artisan Sourdough Made Simple include 50 g of starter instead. One amount is neither right or wrong; it’s just a matter of preference.
4.) What’s the purpose of olive oil in this recipe?
Adding olive oil to sourdough was the method I followed when I first learned how to bake. The natural fat emulsifies the dough and makes a plush crumb.
5.) Why do some of your recipes call for the second rise in a Dutch Oven? And others in a cloth- lined bowl?
The freeform Dutch oven second rise will only work with dry, low hydration doughs (like this one) because it will not spread out too much. On the flip side, when working with wet, high hydration doughs you’ll need to use a cloth-lined bowl sprinkled with flour to holds it shape. Otherwise, it will spread.
6.) Why don’t you preheat your Dutch oven before baking?
Because this recipe follows a freeform second rise directly in the baking pot, it cannot be preheated beforehand. The dough will begin to cook before going into the oven!
However, if you are doing the second rise in a cloth-lined bowl as mentioned in question #5 above, you can preheat the pot if you’d like. When bread dough is placed into a hot pot it begins to expand instantly which is great for the overall shape and structure of the bread. And in fact, I use to follow this technique when I first started baking. But overtime, I found the preheat to be too cumbersome for small kitchens with little kids running around. Plus, I kept burning my wrists. Long story short: you can achieve comparable results without the preheat. The choice is up to you.
7.) Can I halve the dough to bake 2 loaves? If so, what will that do to the baking time?
Yes, you can definitely halve this recipe. Bake for 20 minutes (lid on) and 30 minutes (lid off). Check at the 45 minute mark.
8.) If I halve the recipe, where should I store the second dough if I’m not baking at the same time?
Store the second dough in the fridge until ready to bake. Place the dough in a cloth-lined floured bowl (seam side down) and use the cloth overhang to cover it. If the dough is in the fridge for longer than 1 hour, rest at room temperature while the oven heats up.
9.) How do I get the dough out of the cloth-lined floured bowl?
Open up the cloth overhang to reveal the dough in the bowl. Place a piece of parchment paper on top of the dough. Flip the bowl over. Remove the bowl and cloth. The dough is now smooth side up and ready to be scored.
10.) Can I have the measurements for this recipe in cups, please?
- 3/4 cup bubbly, active starter
- 1 cup + 1 tbsp warm water
- 2 tbsp olive oil
- 4 cups bread flour
- 1 1/2 tsp fine sea salt
NOTE: Weight and volume measurements are not equivalent, only approximate. I strongly recommend weighing your ingredients instead. With that said however, I understand the convenience of measuring cups. For best results, please aerate the flour first (I fluff it with a fork directly in the bag), then lightly spoon and level it into the cup. Too much flour will make the bread dense. If your sourdough starter is very bubbly, the volume amount might be off. If necessary, add up to 1 cup as needed. Finally: the water can be increased up to approximately 1 1/3 cups, for a more soft and pliable dough.


Comments
Melissa Boos says
I purchased a starter from King Arthur Baking and after a few days of feeding it was ready to use. I was really nervous about making my first real sourdough loaf. King Arthur suggested starting with a recipe that includes some commercial yeast but I really wanted to try a true sourdough with my starter only. I also wanted it to use bread flour. I read this recipe about 50 times and watched the video about how to shape it. It turned out amazing. It looks like something I bought. It was so easy and barely had any hands on time. My oven has a proof setting so that helped speed things up for me. I’m going to make another loaf to take to my inlaws for Easter dinner. It looks impressive and tastes fantastic!
Anna says
I’ve made a few different loafs of sourdough following your recipes.. The first i made was this loaf, the other few were from your cookbook. I’m wondering why this recipe is different than the everyday sourdough from the cookbook? Is one more recent or revised?
Dennis says
Can I cut the recipe in half
Carrie says
Hi there…. I think my starter was ready to use! However, I was following the recipe before work and *may have been in a rush* but added the salt to the water and sourdough starter. Six hours later it isn’t rising at all. Will it be a dud or should I just keep being patient? Disclaimer – I always mess up the first time I try a recipe so this is normal for me… The starter was left overnight and bubbled and rose right out of the jar so it seemed ready to try.
Jordan says
I was so intimidated to make sourdough until I found this recipe. Super easy and so far I’ve had great results!
If I wanted to add cheese or something into the dough, when would be the best time to do so?
Emilie Raffa says
Excellent! This is so great to hear Jordan, thank you :) For add-ins like cheese (or fresh herbs, chocolate chips etc) fold them them into the dough after the first rest/autolyse. They will be much easier to incorporate.
Lisa says
My starter went great! It bubbled and doubled in size after about 10 days. My problems arose when it came to making the dough and getting it to rise. I used the very seemingly active starter (but now after researching, I didn’t use it right away I used it maybe 2-3 hours after I noticed it double because I was waiting on bread flour to arrive via Amazon). Then I tried using my scale and it was broken so I used measurements. I am assuming those are the reasons I’m having problems getting it to rise. I also wasn’t sure how long to knead the bread after I mixed all the ingredients together. It didn’t specify on your recipe. Should I be working the dough once I mix the ingredients or just mix until it forms? I just mixed until it formed. It’s been over 12 hours I have let it rise inside overnight 70 degrees and it still doesn’t look like it’s doubled in size. I am going to start over and try weighing my ingredients with my new scale and using the starter as soon as it appears ready. Any other suggestions?
Emilie Raffa says
Hi Lisa! Thanks for the detailed info. Bread needs 3 key factors in order to rise: time, temperature (ideally 75- 78 F), and sourdough starter strength. They all work together. When one of these factors is out of balance, non existent or in over drive (such as a very hot ambient temperature), the rise will be effected.
In your case: your starter was probably strong enough to leaven the dough. However, because it was used after it had peaked, some strength was probably lost. Coupled with a 70 F ambient temperature (which is not that warm) the dough didn’t rise all that much. It needed more time and more warmth; does that make sense? I don’t believe the issue was related to measuring and not weighing your ingredients.
Next time: use your starter at peak height, find a warmer spot for the dough to rise (try a proofing box or a switched off oven at 75 F) and give it as much time as it needs. You might consider purchasing a high sided dough tub for the dough to rise. The measuring marks are really helpful to track its growth as is starts to rise. Hope this helps!
Kari M says
My bread didn’t rise very much in the baking processes. What are some possible fixes?
Marcia says
Me too! Not sure what happened.
Emilie Raffa says
Hi Kari! Great question. I’ve just answered this in detail above (another reader asked the same question). However, I will copy and paste my response here as well, so you can read it in your inbox :) Also, check out this post: Why Won’t My Sourdough Bread Rise?
Bread dough needs 3 key factors in order to rise: time, temperature, and sourdough starter strength. They all work together. When one of these factors is out of balance the rise will be effected. For a successful rise, do the float test before using your sourdough starter to test its strength; rise the dough in a warmer spot (ideally 75 F+. Use a proofing box of switched off low-heated oven to give it a boost); use warm water in your initial dough mix; and give the dough as much time as it needs to rise. Additionally, a high sided dough tub with measuring marks is very helpful to track its growth as it starts to rise.
Tina M says
Hi Emilie!
Love your Guide. Hoping it is as easy as it looks. I have a question about turning my liquid starter to the dry starter… After I mixed in the flour (weighing and tare on scale) the dough seems very dry… a big lump and doesn’t look like it will activate. I will wait the 6-10 hours and hope it works. What am I looking for and how will I know it is ok to put it in the fridge?
Thank you in advance!
Emilie Raffa says
Hi there! Are you looking to make pasta madre for a specific recipe? It’s definitely supposed to be stiff like dough after it’s converted. Thanks!
Mike says
Thank you! The tip on using a Dutch oven is something I’ve never heard before and is genius. I can’t even count how many fails I have had with rock hard crust. Your instructions have inspired me to pick up baking again!
Emilie Raffa says
Excellent, Mike thank you! When I first started baking, I can’t even tell you how many times I burned my wrists from that hot pot. The whole process was so clunky, including these ridiculously large/long oven gloves I stated using as a quick fix. Skipping the pre-heat works just as well. Have fun!
Tamarinde says
I am currently baking my first loaf of sourdough and somewhere I have made a mistake… I’m 25 minutes in and my sourdough no longer looks like a ball. It seems to have fallen and spread out, I won’t repeat what my teenagers said it looks like!
The starter went really well following this recipe. Hopefully the bread tastes better than it looks, lol!
Emilie Raffa says
Hi there! Oh no! I know this response is a bit late now, but for next time… It sounds like there was too much water in the initial dough mix. This could be from a mis-calculation in measuring. I’ve don’t this many times. Also: if you made any changes to the recipe, such as using all purpose flour in stead of bread flour, the dough won’t absorb as much liquid. Next time, weigh your ingredients (if you are not already doing so), use bread flour, and consider adding more flour to the dough after the first rest if it seems to wet.
liz says
Hi Emilie. I followed your starter recipe and fed my starter with all purpose flour.
Will that be a problem, given that the sourdough is made with bread flour? I read that ideally bread should be made worth the same flour used to make the starter. Should I make a new starter using bread flour? Thank you
Emilie Raffa says
Hi there! Not at all. I do this all the time. Some bakers might not agree, but I’ve had excellent results baking this way. I use ap flour and/or bread flour interchangeably to feed my starter. It’s more practical, and the convenience always ensures my starter is fed.
Sarah says
I, like most home bakers, would definitely use a scale and recommend weighing by mass. It will make a perfect product every time. Perhaps look into purchasing a scale that reads the mass back to you if you have trouble seeing (This is what my mom did). Secondly, the author/baker has already provided imperil measurements available for you in the bulk answered questions after the recipe instructions.
Angela says
I am a disabled college student on a shoestring budget. I got the foil liners for 6 quart Dutch ovens and I am covering it with foil. I will let you know how the bread turns out.
The liners were 3 for 5 dollars on Amazon or they have an option to buy 30 of them for $20 which I will probably do if it works. For the first experiment I only got the package of 3
Faye says
You can just just use regular foil it’s cheaper and works just as well the only thing about the liners is they don’t show any creases where you have to do folds it’s almost purely cosmetic
Angela says
Thanks but I meant I was using a liner without a Dutch oven on the outside. So I don’t think just foil would work
Jennifer says
I am still working on my starter and am a couple days from making it. It is coming out so good and I am so excited to make my first loaf of bread. I wanted to know about how much starter I should share if my friend wants to make some as well?
Emilie Raffa says
Hi Jennifer! Great question. The amount you share is ultimately up to you. However, a heaping cup (240g) should be sufficient.
Reka says
I have followed your starter recipe and have been making this bread. I have tried some variations, eg, cheese and herbs, cinnamon raisin, all a hit! I am now considered a pro in my group, after a couple of months, have taken the bread to potlucks, given away to friends. Now some are seeing me as an expert and have asked me to teach them how to make it. Such a fun experience. I now have my routine and haven’t purchased bread since starting with it. Thank you!
Emilie Raffa says
This is such a fabulous comment and SO wonderful to hear, Reka. You are a sour-pro ;)
Lynda says
An easy recipe with almost foolproof results
Emilie Raffa says
Thank you Lynda! Glad you had success with the recipe :)
Joe G. says
Newbie here, I use the recipe for my first loaf which was good but wanted to try other recipes. After my fifth loaf I’m back to this one, doesn’t disappoint.
Emilie Raffa says
Excellent, thanks so much for your feedback Joe! There’s always something beautiful and simplistic about a beginner’s loaf.
Alicia Sawielski says
So delicious!
Emilie Raffa says
Thank you Alicia!
Andrea Carter says
This is a great recipe, especially for beginners
hobby home bake says
Please give cup and spoon measurements, I, like most home bakers don’t use ml or grams at all . Its too much fuss and the cup and spoon is simpler as well as easier for visually impaired people or those over 40 to see the significant lines. That would be awesome.
Billy says
Most home bakers do use a scale.
Katie says
For baking, you want to be using a scale.
https://www.kingarthurbaking.com/blog/2022/02/18/how-to-bake-with-a-scale
Laura says
Weigh is the common measurement for baking because it is more precise. Using cups will lead to baking failures. You can buy a cheap scale for $10 or less on Amazon.
Roche says
How is pouring ingredients into a bowl and looking at the weight “too much fuss”? It’s easier than counting cups and spoons, not to mention more accurate.
Brittany says
I absolutely love 💕
Ashley says
Recipe is a keeper! I even tried it with dried cherries and mini chocolate chips! So so good. The top wasn’t as smooth for making a pretty design into it because of it but the taste is amazing!
Tabitha McMahon says
How do I keep my sourdough from sticking to my bowl during the bulk rise process. I am losing at least 25% of my dough when I try to transfer to my Dutch Oven. Thank you for all the great info for beginners here
Kayla says
Putting it into the fridge overnight makes it easier to handle from my experience, since the dough is cold and is less likely to stick. Also, elevation plays a really big part in terms of how sticky your dough is; I’m from London – elevation about 10m, so I have to use less water in the recipe (225g rather than 250g) but aside from that the recipe always turns out perfect.
DianeDbaker says
As first time SD baker I’ve found this the best starter & sourdough recipe! Now have a strong healthy starter made by following your instructions & onto my fourth perfect loaf. This recipe is the perfect amount for one loaf in my Emile Henry Bread Loaf Baker. Thanks so much for sharing x
Char says
I love the cookbook!
Char says
I followed the starter recipe, it got bubbly and it doubled, it floated in water! However the bread did not mix well and it’s dense, hard and not rising! Help! Second attempt to do the basic bread and I’m about to throw in the towel!
Celeste says
If you’re measuring flour with a cup make sure that you are spooning the flour into the cup gently and leveling it off before adding it to the mix. Sounds like you may have used too much flour. More efficient to use a scale and measure ingredients if possible.
Rebecca says
I’ve been baking bread since 1971 and sourdough for about ten years and this recipe is perfect for me because I can add cheese and fresh pepper and herbs and figs whatever and it never fails. I’ve found that bread is a journey and I’ll consider myself a beginner and be happy with that forever. Thank you!
Twyla Froh says
I’ve never baked bread in my entire life until now. This recipe is soo easy and the bread was stunning!! I didn’t make my own starter however. My sister purchased online and shared. Highly recommend this recipe if you’re a beginner.
Jeanette Carter says
I’ve been on a somewhat of a quest to learn sourdough. Most have turned out “ok” until I found your page. I made your recipe, followed every step to the letter. I have to say it’s the best sourdough I have ever made. It was very hard to wait for it to cool down enough to dig in. Thank you for a “sourdough for dummies” recipe. I now have a measuring stick of what to strive for moving on in my sourdough journey. Many thanks!
Emilie Raffa says
Jeanette, this is so great to hear. THANK YOU! I really appreciate your feedback. Sourdough truly is a journey, and most of all, a lesson in patience, persistence and perseverance. Have fun:)
krista says
I followed your recipe for the starter as well as this recipe for sourdough bread and both worked perfectly. I am so excited to be able to make my own delicious sourdough bread. Great recipes and tips-thanks so much!
Peggy says
I’ve been baking sourdough bread for almost three years now, but this might be my favorite recipe. I like the fact that it can all be done in one day. My previous recipes called for making a levain Friday night, stretch and folds Saturday, overnight refrigerator proofing Saturday night and baking Sunday morning. I found this tedious. Also, I like the lower hydration of this bread as I live in a high humidity area in the South.
breadmaster says
looks good
Anne says
I tried the basic sourdough recipe first time and it didn’t rise so spent a few days feeding my starter and it worked a treat second time and my bread tastes amazing!
Raine Macias says
How long do your recommend baking this recipe if you only make one loaf with the dough?
Laura Bienkowski says
Trying to make my first loaf with the sourdough recipe. When I get to the 12 hour rise, I wanted to start to mold for a basket. It’s so extra wet and stretchy. I looked for a new recipe to find you. Been using my own starter from scratch for a year. The recipe I’ll was using was dance. I am looking to find a recipe that work for me and give me the texture when needed. Artisan vs sandwich. Please help.
NW says
I don’t know a durch oven. How else can I cook this?
Cassie Ward says
I was nervous but I found this recipe super easy to follow and I’m so happy with how the bread turned out! I kept it in for 10 minutes longer than in the recipe because my oven isn’t the best :)
Anna says
Hi there!! love this recipe, it always tastes SO delicious. I however, can never get a good tall loaf. i do stretch and pull twice as recommended, but my bread comes out pretty flat comparatively. i’m wondering what might be going wrong? i follow the recipe to a T. Thank you!!
Darryl Kelbrick says
Hi, Thanks for making this sourdough lark sound more than doable! I have just bought a dutch oven but the lid does not fit perfectly (it rocks a couple of millimeters, is this okay? or does it need a perfect seal to keep the all the steam in? thanks. Darryl
Desiree says
Would adding seeds to this bread mess with the texture? If not when would you recommend putting the seeds in?
Austin says
I have an Emile Henry Ceramic Bread/Potato baker. the Capacity of the pot: 2.1 QT (2 L). Holds a 3-4 cup of flour recipe (bakes a 2 lb. loaf).
My question is if this pot is big enough to make a single load, or must I cut the dough in half to make two loaves using this recipe? Thanks!!
Austin says
question about “don’t forget to feed what’s left in the jar with more flour and water to keep the process going” how much is “more” flour/water?
Gretchen DeWilliams says
Whatever amount you used.
Katie says
Generally starter feeding ratio is recommended to be 1:1:1, meaning 1 part starter 1 part flour and one part water. You decide how much you need and decide the specific grams. I generally do a 50g:50g:50g if I don’t need a large amount for an up coming recipe.
Veronica Fortney says
I started this early in the day, making my baking time the middle of the night (poor planning on my part). we keep our house cooler (around 65 degrees). I just started my 1st rise, which I will do for an hour. Once that is complete I will need to get it into the Dutch Oven for about 12 hours. I will place it in the oven over night, but If I don’t get up until 6am, will it over proof or do you think, in the cooler climate of my house, a 13-14 hour proof is ok?
Heather says
Veronica, wondering how your bread turned out? I seem to have the same problem as you. We keep our house between 62 and 65 degrees and I believe that impacts the rising. Did you bread end up turning out ok when you let it rise for longer?
Veronica Fortney says
Thank you for the response! It was actually very dense, but i tried to stop the rise by putting it in 40 degree for a few hours. I haven’t made another loaf yet, but I am going to start it later and let it rise longer and then let you know! Thank you for your recipe and instructions! I really love having fresh items in my house and not relying so much on the grocery store for a lot of items.
Stephanie Schneider says
Our house is cold too. I have found oven proofing with either a pan of boiling water on the bottom or heating oven to 100 degrees f and turning oven off has helped a lot
Josh says
Put it in the oven with the oven light on and the oven door open a few inches. Doing this keeps my oven between 75-85 degrees inside. This is what I do for helping my starter rise also
Sunny says
I did not read the directions completely and fed y starter on day 3 before I halved it. Can I do it now or is it too late?
Ashley says
I used your sourdough starter and actual bread recipe and loved them both. Thank you for teaching me! Question – how do you store the bread after its been cooled?
Kris says
I absolutely love your step by step directions, makes it super easy to follow! This is my first ever sourdough adventure, I began with your starter recipe as well! But for some reason, in the process of shaping the dough, second rise, and scoring, it is still SO sticky that my hands are covered and it’s nearly impossible to shape and score (because the dough just sticks to the knife). I realize that I must be doing something wrong, but I can’t figure out what!
Kathy P says
I am still in the initial stage of developing my starter. I am on day 5 and she looks good. What would you recommend to develop a really strong sourdough taste?
Thank you for simplifying a very complex skill!
KP
Jessa says
This recipe has been working great! I have been dividing into two smaller loaves. If I left it as one large loaf would baking time stay the same?
Patrick says
Thank you Emilie! I just made my first loaf of sourdough, with my very first starter (his name is Souruman the Wheat – very proud of him :)
The loaf came out wonderfully, except that my score marks didn’t seem deep or wide enough. The loaf instead split on the side.
Question: Any additional guidance on how much to score the dough other than your “2-3 inch” instruction?
So excited to be making my own sourdough! All thanks to you!
~Patrick and Souruman
Emilie Raffa says
Welcome to the world, Souruman :) Great name. Scoring take practice and repetition- lots of it. And it can be a bit nerve wracking since you only have once chance (per loaf) to get it done! If your marks didn’t open up, this could be due to how the dough was fermented, the depth and length at which the score was made (or both). Ahh, the variables… To start, I would first work on technique, going a bit deeper & longer next time. When I first started, I practiced on a ball of Play-Doh (although not the exact texture of bread dough- too stiff) until I understood how to hold and adjust the blade properly. Very helpful. From there, note how long you let the dough rise for. Could it be over proofed? When scores don’t open up, this could be the issue.
Courtney says
I bought your book and came here to comment because I have a couple questions. I followed your directions to make my starter, and it’s looking great – even in the cold and dry Wyoming winter weather!
For the bulk rise, you mention stretching and folding every hour or so, up to four or five times. But since the bulk rise will take eight hours at least, are these all meant to be done in the first several hours of the rise, or just whenever I get a chance?
Second, after coming to this page, I see the recipe here is different than the beginner recipe in your book. Will that affect the outcome, and is one different than the other?
Thanks so much – am so excited to keep trying and eventually make some of the awesome more complicated recipes from your book. Hope to hear back on these questions!
Emilie Raffa says
Great to hear, Courtney! Stretch and folds are always done during the bulk rise. So yes: they are meant to be done within the first few hours. Generally speaking: for wet doughs, you can space the folds 30 minutes apart, up to 4 sets. Drier doughs (like this beginner recipe), need more time to relax in between sets, otherwise they won’t stretch- so 45 minutes to 1 hour is good, up to 2 sets. More info + video linked here.
Yes: this recipe is different than the beginner Everyday Sourdough in the book (if you scroll past the recipe here, I go into more detail as to why in the FAQ section). But in short: overtime, as I continued to bake, I preferred using a smaller amount of sourdough starter (50g vs. 150g). It was easier to maintain and worked well with long, overnight rises at cooler temperatures. Olive oil changes the texture of the crumb making it more plush. It defines the crust a bit more too. Sometimes I use it, sometimes I don’t! One bread is not better than the other necessarily- just different. Both scrumptious.
Andrew says
Any recommendations for a bread maker for this recipe?
Emilie Raffa says
Hi there! For best results, I would have a look at the manufacturer’s instructions and adapt accordingly. It should work ;)
Jenny says
I followed your recipe and did an overnight rise. I only did the optional stretch in the bowl once because I didn’t have time to do it an hour apart. But my loaf didn’t rise in the oven that much – it is quite flat. I’m wondering if either my starter wasn’t potent enough or the room I proved it in was too cold (scottish winter!), I proved it for 11 hours. It browned fine though.
Any tips?
Emilie Raffa says
Hi Jenny! Great question. It could be both variables. For dough to rise properly you need 3 things: sourdough starter strength (strong), time (as long as it needs!), temperature (ideally 75 F/ 24 C). First, check your starter. After feeding it, and waiting for it to double and rise in volume, do the float test (see this post for more info). If it floats, use it. Then, address the time. The dough should just about double in bulk volume. What did yours look like after the 11 hours? If you are unsure, purchase a high-sided dough tub with lid & measuring marks- very helpful. Finally: time. Dough rises best in warmer conditions. If you can find a warm spot in your house, even a switched off oven with the light on (for an hour or so), the process will speed up.