This post will teach you how to make a beginner sourdough starter at home, step-by-step. All you need is flour, water and a little bit of patience. Before you know it, you’ll have your very own bubbly, active starter ready to make THE BEST sourdough bread, sourdough focaccia, homemade sourdough pizza crust and much more!
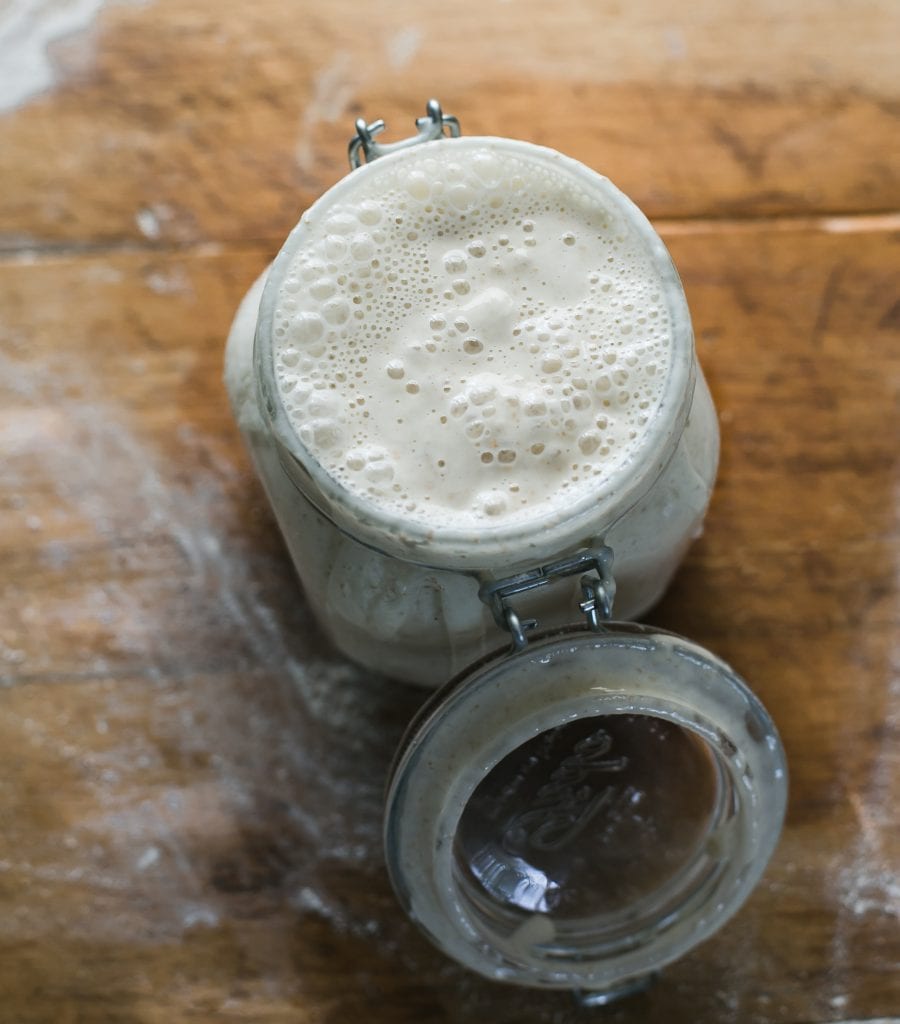
Looking to bake incredible sourdough bread? First: you’ll need a sourdough starter. Without it, your bread won’t rise. It’s the absolute heart and soul of sourdough baking. Creating one from scratch is not hard to do. However, the process can seem intimidating (especially for beginners). Let’s change that. Adapted from my bestselling book Artisan Sourdough Made Simple, I will demystify and simplify the process with step-by-step instructions.
Once your starter is established, it can be used for a wide variety of sourdough bread recipes including this scrumptious sourdough bread with olive oil (most popular recipe on my blog!), my sourdough focaccia, sourdough pizza crust, sourdough sandwich bread and soft sourdough cinnamon rolls to name a few!
What is a Sourdough Starter?
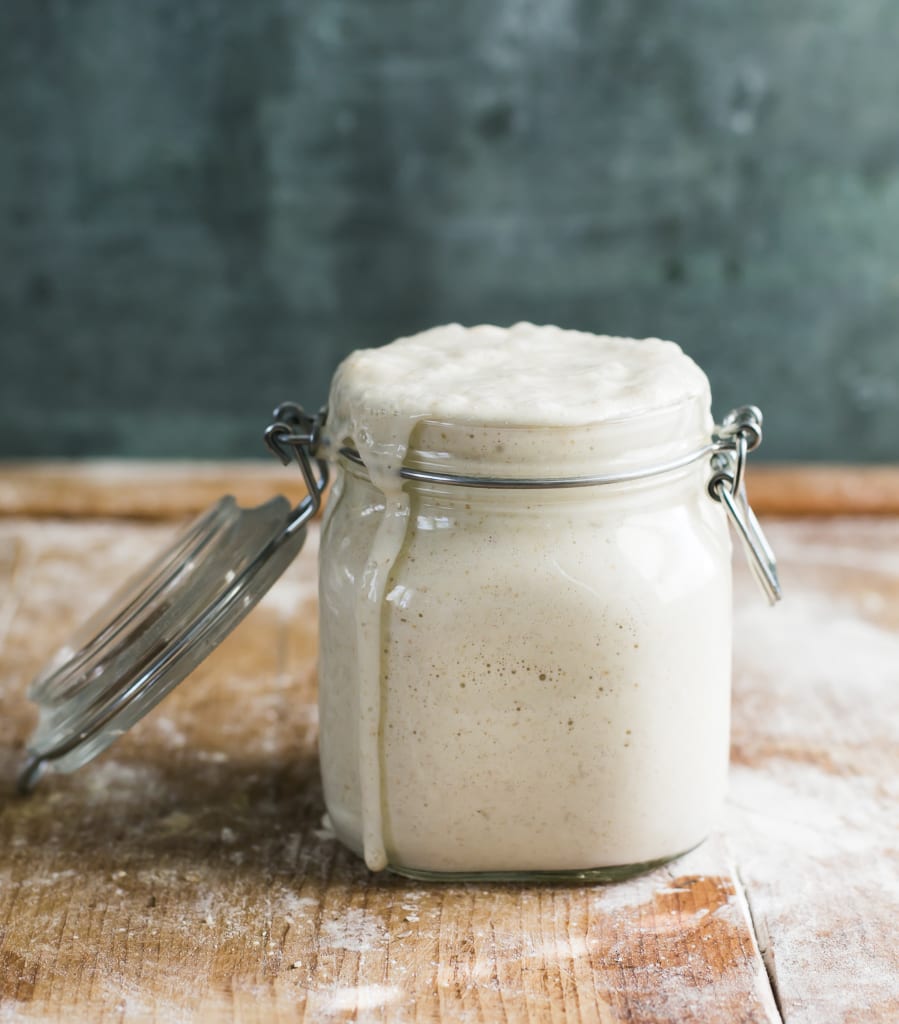
Sourdough is more than just a recipe; it’s an understanding. So before we dive in, let’s define. Simply put: a sourdough starter is a live fermented culture of fresh flour and water. Once combined, the culture will begin to ferment and cultivate the natural yeasts found in our environment. A small portion is added to your bread dough to make it rise. Commercial yeast IS NOT required.
Sounds a bit weird, right? Of course it does. And it should. Know this: natural “wild” yeast is all around us. It can be found in a bag of flour, in the air, on your hands etc. Just because you can’t see it, doesn’t mean it’s not there and doing its thing. It’s like magic.
How Long Will It Take?
To create a sourdough starter from scratch, the overall process will take 7 days (or more) from start to finish. It’s not instant. First, you’ll create the starter with whole wheat flour to jumpstart fermentation. Then, you’ll continue to feed it with regular all purpose flour to cultivate the wild yeasts and friendly bacteria.
When Will it Be Ready To Use?
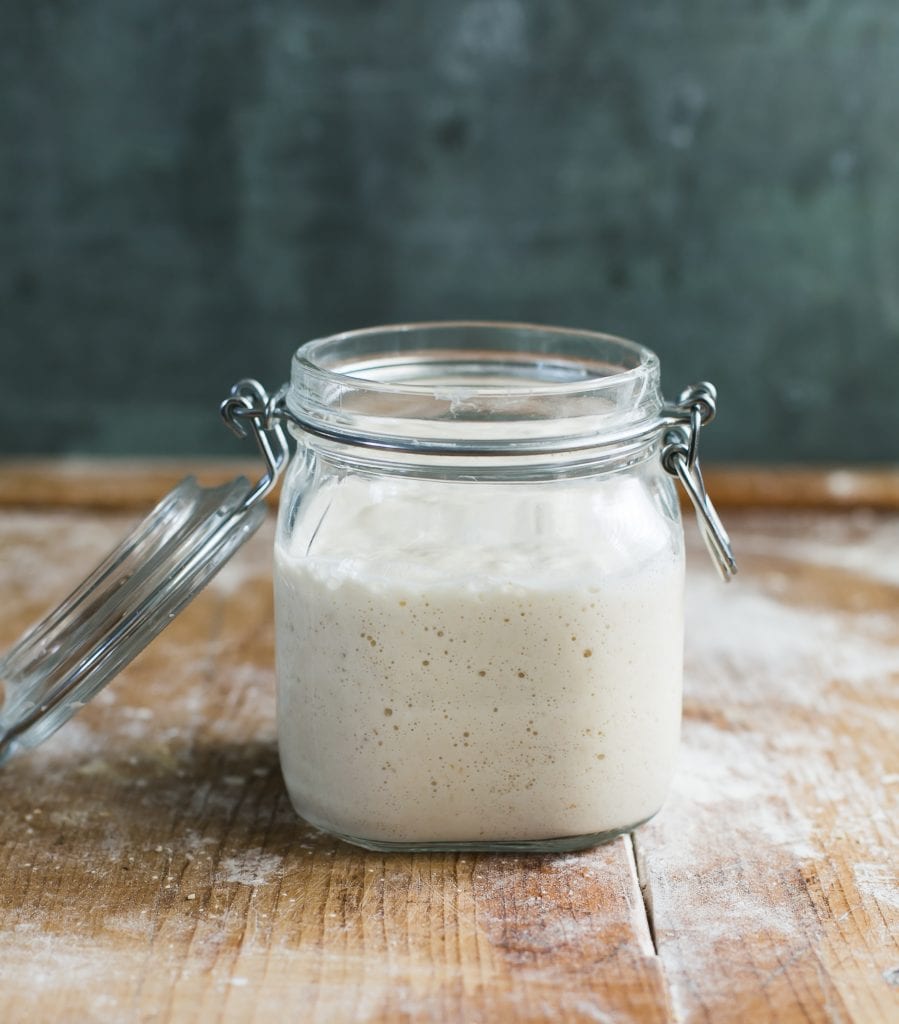
Your starter is ready to use when it has doubled in size, with plenty of bubbles on the surface and throughout the culture.
NOTE: It’s not uncommon for it to take up to two weeks or more for the starter to become active. It all depends. I know this timeframe sounds a bit vague, but growing yeast in a jar (that’s basically what you’re doing) can be unpredictable at times. Please be patient if the process takes time for you- it’s normal.
Is it Difficult to Do?
Absolutely not! In short: you’re basically adding flour and water to a jar, feeding it with more flour and water over time, and then waiting for it to become bubbly and double in size. That’s it. Most of your time involvement is hands-off. Can I ask you a favor though?
Don’t overthink it.
There’s a lot of sourdough information out there, and you will fall down a major rabbit hole if you start poking around. Just stick to this tutorial for now and follow the steps as written.
Beginner Sourdough Starter Recipe
You will Need:
Supplies
- 3/4 L jar (I use this one)
Ingredients
To create the starter:
- 60 g (1/2 cup) whole wheat flour
- 60 g (1/4 cup) water
To feed the starter each day (Day 3-7):
- 60 g (1/2 cup) unbleached all purpose flour or bread flour
- 60 g (1/4 cup) water
NOTE: Use regular, unbleached all purpose flour or bread flour for best results- skip organic. The enzymes are different which can hinder the rising process the first time around. I use either KAF, Trader Joe’s or Whole Foods. Filtered water or tap water is fine. Use the latter if you know it’s mostly chemical/chlorine free.
Day 1: Make the Starter
- Before you begin, establish a feeding schedule. In other words, feed your starter at the same time each day. This will establish consistency, which sourdough starters love. Consider feeding your starter in the morning when you wake up.
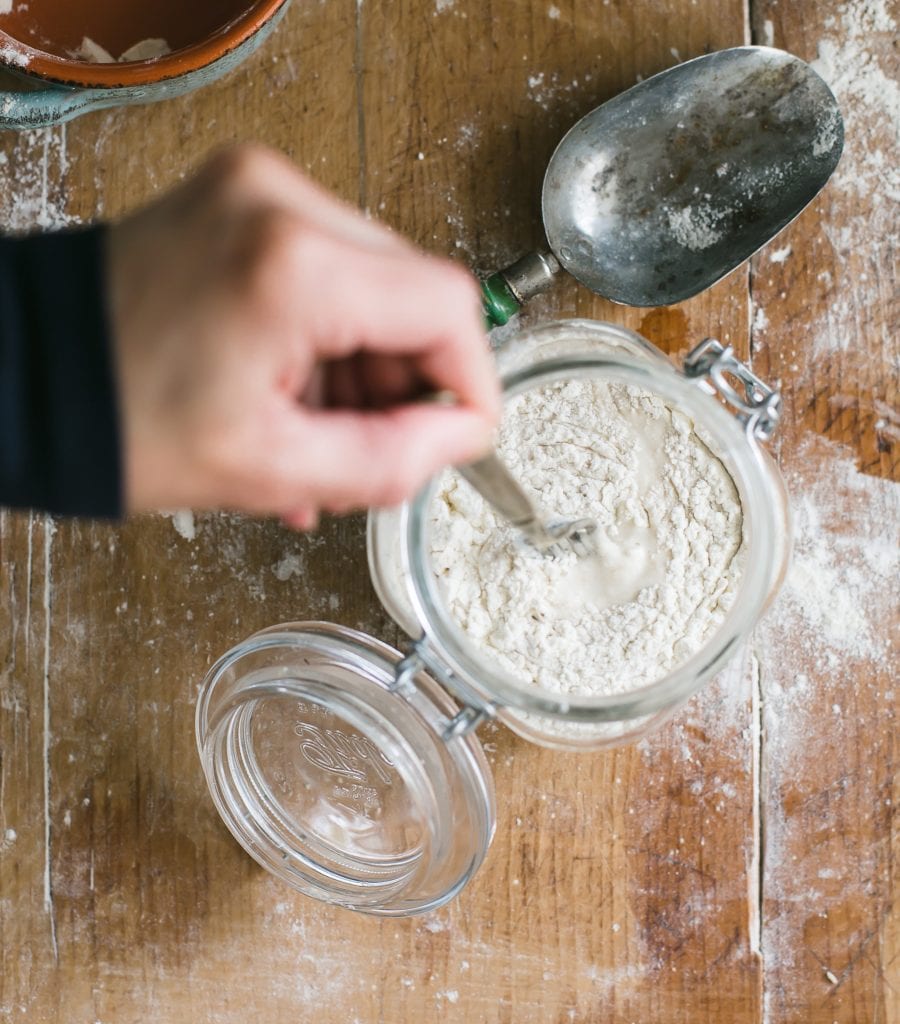
- Combine 60 g (1⁄2 cup) of whole wheat flour and 60 g (1⁄4 cup) of warm water in a large jar.
- Mix with a fork until smooth; the consistency will be thick and pasty. If measuring by volume, add more water to thin out the texture if needed. Cover with plastic wrap or a lid, and let it rest in a warm spot, about 75-80 F for 24 hours.
TIP: Looking for a warm spot? Place your starter on a cookie sheet inside the oven (turned off) with the light on for a few hours (but not overnight- it might become too warm). You can also use a proofing box set to your desired temperature, or a microwave with the door ajar and the light on.
Day 2: Got Bubbles?
- Today, you’re going to check if any small bubbles have appeared on the surface.
- Bubbles indicate fermentation, which is what you want! However, it’s okay if you don’t see anything right away; the bubbles might have appeared and dissolved overnight while you were sleeping. This happens quite often.
- You do not have to do anything else right now. It does not need any flour or water. Just rest the starter in your warm spot for another 24 hours.
Day 2 (Con’t): What’s that brown liquid?
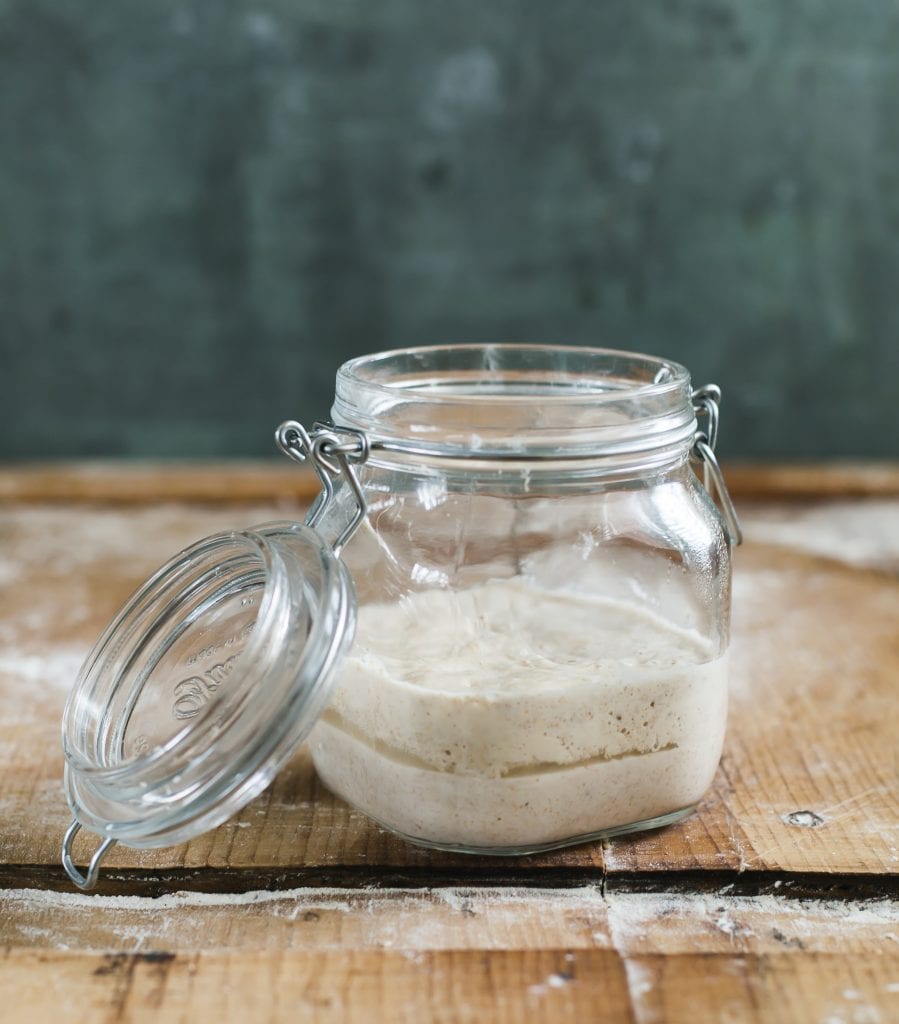
- During the creation process, and even after your starter has been established, a dark liquid might appear on the starter (the image above shows the liquid in the middle of the starter- it’s usually found on the surface).
- This liquid is called “hooch” and is an indication that your starter needs to be fed. It also has a very stinky smell, similar to rubbing alcohol or gym socks. This is normal. Don’t freak out. Any time you see this liquid, it’s best to pour it off, along with any discolored starter present. However, on Day 2 just leave the hooch alone; you can get rid of it tomorrow when you start the feedings.
Day 3: Feed Your Starter
- Whether bubbles are visible or not, it’s time to start the ongoing feeding process.
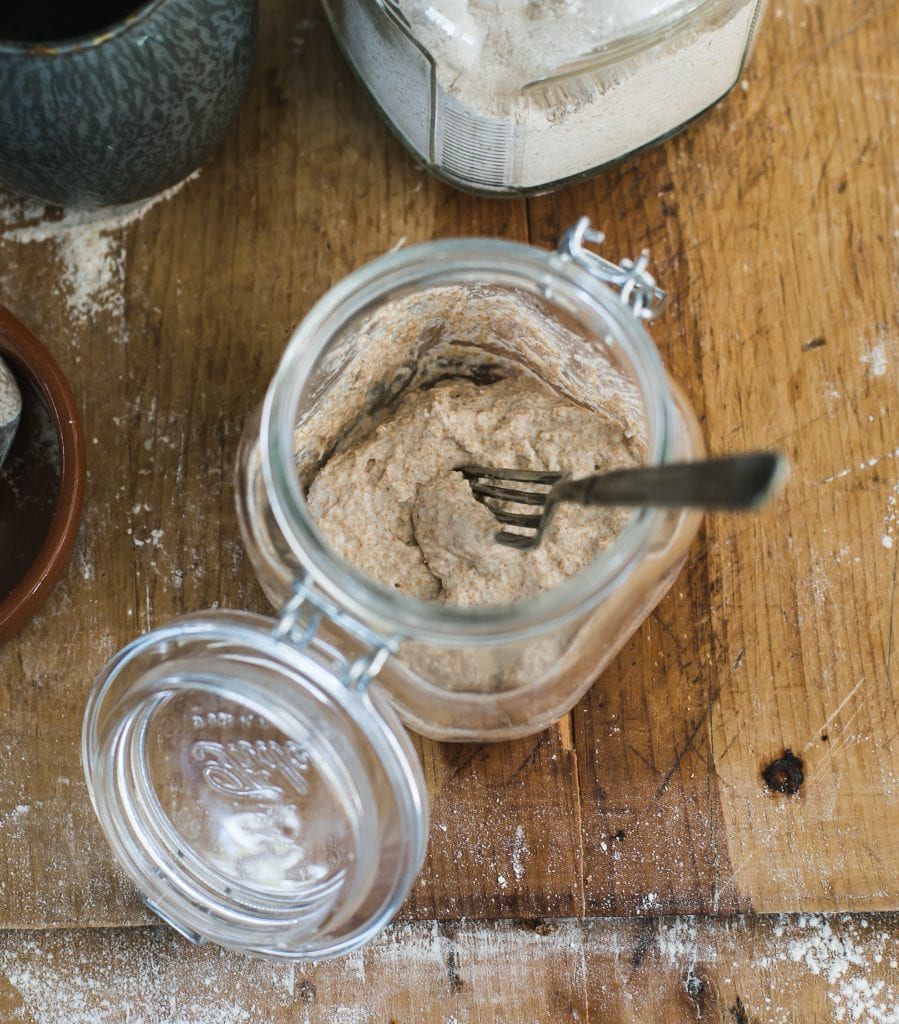
- Remove and discard approximately half of your starter from the jar (you should have about 60 g left). Use a spoon. The texture will be very stretchy. Add 60 g (1⁄2 cup) of all-purpose our and 60 g (1/4 cup) of warm water. Mix with a fork until smooth.
- The texture should resemble thick pancake batter or plain yogurt at this point so add more water as needed. Cover and let rest in your warm spot for another 24 hours.
DAYS 4, 5, & 6: Keep on Feeding!
- Repeat the same feeding process as outlined on Day 3:
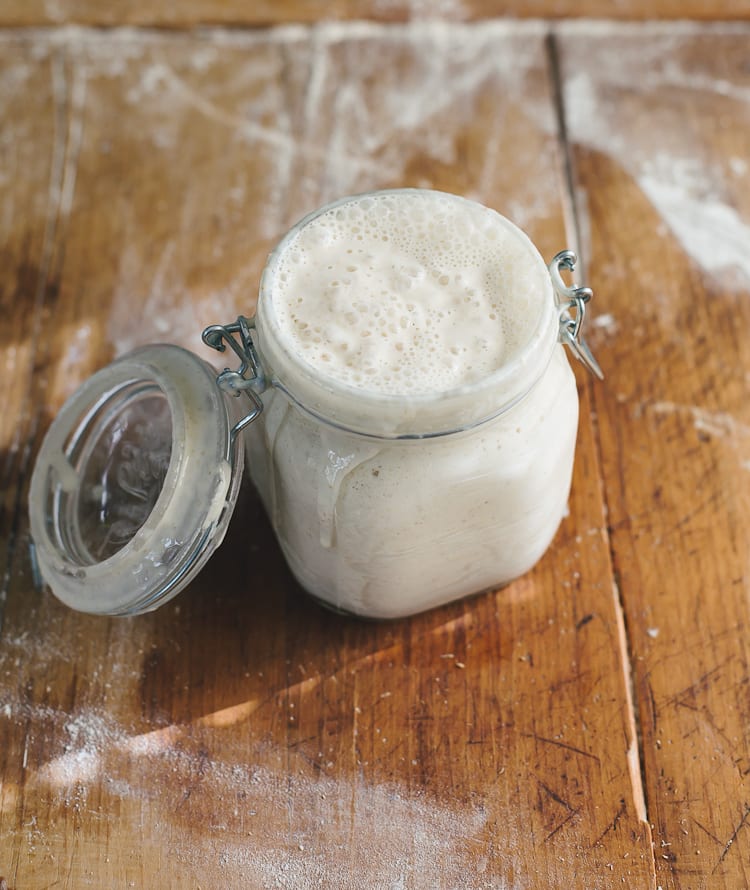
- Remove and discard half of the starter, and feed it with 60 g (1⁄2 cup) of all-purpose flour and 60 g (1/4 cup) of warm water. As the yeast begins to develop, your starter will rise, and bubbles will form on the surface and throughout the culture.
- When the starter falls, it’s time to feed it again.
TIP: Place a rubber band or piece of masking tape around the jar to measure the starter’s growth as it rises.
Day 7: A Sourdough Starter Is Born!
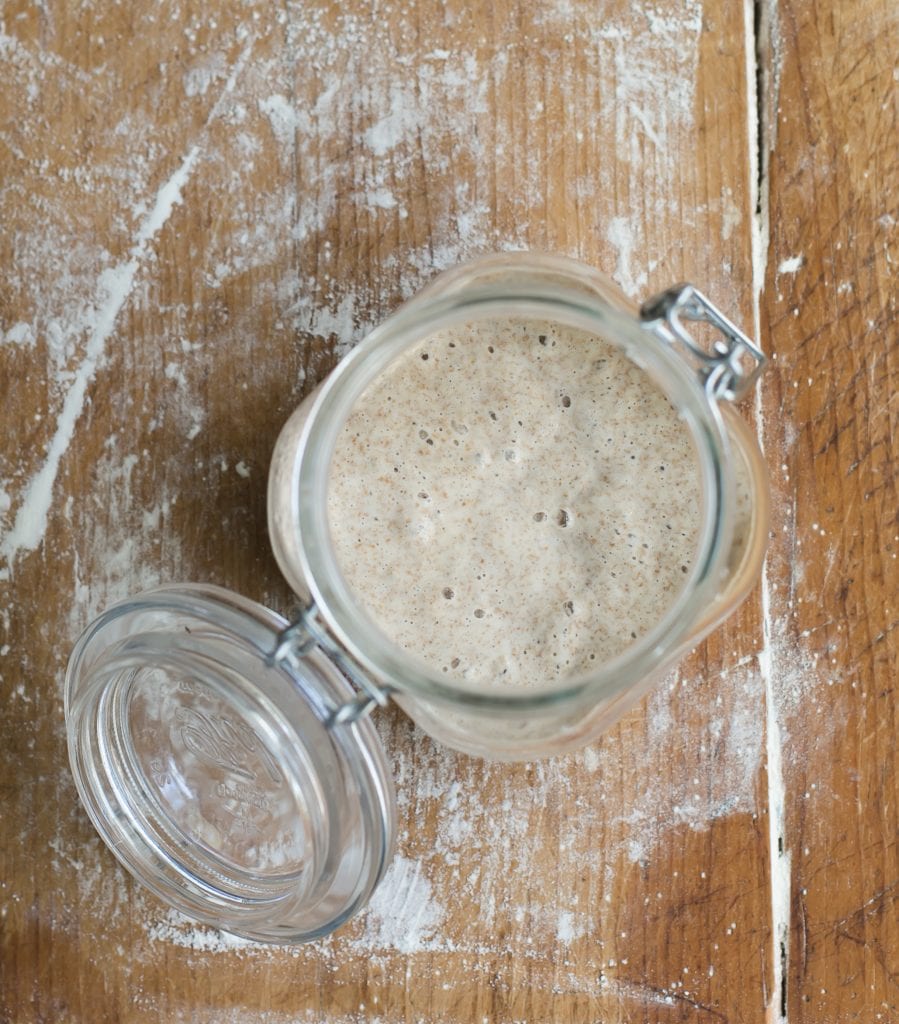
- By now, your sourdough starter should have doubled in size.
- You should see plenty of bubbles, both large and small. The texture will now be spongy, fluffy, and similar to roasted marshmallows (think: s’mores). It should also smell pleasant and not like stinky gym socks. If these conditions are met, your starter is now active.
- The very last step is to transfer your sourdough starter to a nice, clean jar. In keeping with tradition, you can also name it (and please do!). My starter is called Dillon after my oldest boy and it’s bright and bubbly, just like he is ;)
- Now you’re ready to bake! Start with my beginner sourdough bread recipe- you’re going to love it!
What’s Next? Let’s Make Bread!
- Sourdough Bread Recipe (reader favorite!)
- Beginner’s Guide to Sourdough Focaccia
- Best Sourdough Pizza Crust (No steel or stone!)
- Feeding Sourdough Starter: My Best Tips & Tricks
- Troubleshooting Your Sourdough Starter
A Few Tips for Ongoing Care…
So you’ve created a sourdough starter! Now what?
Just like any living creature, it must be kept alive with regular feedings to maintain its strength. If your starter is not strong, your bread will not rise. Caring for your starter is much easier than you’d think, and certainly won’t take hours of your time.
Note: You will need to feed your starter every time prior to making bread dough and to maintain it (keep it alive).
How to Feed a Sourdough Starter
Feeding Routine:
- Begin by removing and discarding about half of your starter.
- Replenish what’s left in the jar with fresh all purpose flour and water.
- Cover loosely, and let it rise at room temperature until bubbly and double in size. Once it falls, the bubbles will become frothy and eventually disappear. Then you’ll know it’s time to feed your starter again.
- Feed your starter everyday if it’s stored at room temperature. If you keep it in the fridge, feed it once a week.
PS: If you miss a feeding, don’t worry- your starter is not going to die. It might look ugly (and smell horrendous) but it usually just needs a few feedings to perk back up.
When is Your Sourdough Starter Ready To Use?
Your starter is ready when it shows all of the following signs:
- bulk growth to about double in size
- small and large bubbles on the surface and throughout the culture
- spongy or fluffy texture
- pleasant aroma (not reminiscent of nail polish remover/gym socks/rubbing alcohol)
If you’re having trouble spotting the signs, don’t forget to place a rubber band around the base of the jar to measure the starter’s growth.
You can also try the float test mentioned above: Drop a small dollop of starter into a glass of water. If it floats to the top, it’s ready to use.
How to Store Your Sourdough Starter
Once your starter is established, you have two storage options to consider.
At Room Temperature: If you bake often—let’s say a few times a week—store your starter at room temperature. This will speed up fermentation, making the starter bubbly, active, and ready to use faster. Room temperature starters should be fed one to two times a day, depending on how quickly they rise and fall.
In the Fridge: If you don’t bake that often, store your starter in the fridge covered with a lid. You’ll only need to feed it about once a week or so to maintain its strength when not in use (you can just feed it cold and then pop it back in the fridge right afterwards; no need to warm it up first). When you are ready to make dough, feed your starter at room temperature as needed, to wake it back up.
**TIP** For more info on sourdough starters please read Feeding Sourdough Starter: My Best Tips & Tricks.
Sourdough Starter Faqs
Yes. All purpose flour is easy to find, inexpensive and reliable for starter growth.
Yes. Because whole grain flour absorbs more water than all purpose flour, adjust the texture with additional water if it’s too thick.
Yes. Adjust the texture with additional water if it’s too thick.
Yes. But it’s not recommended. The chemicals can throw off the rising process. However, some readers have reported success with bleached flour. Your choice!
It might. To clarify: organic flour is not bad to use. The enzymes are just a bit different. This means the overall process might take longer than indicated. I recommend using all purpose flour instead because it’s more predictable (and less expensive!).
Whole wheat flour is used to jumpstart the fermentation process. If you do not have whole wheat flour, just use all purpose flour instead. The starter will be fine. I switch to all purpose flour for the feedings because it’s reliable, inexpensive and practical for everyday baking (remember, a portion of your starter is removed, discarded, or used for something else).
To refresh the acidity levels and to control the overall growth in size.
To learn more please read, Sourdough Discard 101: Recipes & Faqs Answered.
In the beginning, I typically don’t recommend using the discard (it’s usually really smelly and discolored). I recommend using the discard after the starter has been established. However, everyone will have a different experience with this. If it looks good- use it!
For more info please read, Sourdough Discard 101: Recipes & Faqs Answered.
If your starter is used to one type of flour, and then you swap it out for something else, just give it time to adjust. It might react immediately (in a good way!) or it might be sluggish at first and then eventually perk up.
For more info please read, Feeding Sourdough Starters: My Best Tips & Tricks.
Beginner Sourdough Starter Recipe
- Yield: appx. 240 g (1 cup)
- Category: Sourdough Starter
- Method: 1-Bowl
- Cuisine: American
- Diet: Vegan
Description
Looking for an easy, sourdough starter recipe for beginners? Adapted from my bestselling book Artisan Sourdough Made Simple, follow my no-nonsense guide for practical tips, tricks, and ongoing care- anyone can do it.
Ingredients
Note: Once your starter is established, use it to make my sourdough bread.
- 1x (5lb) bag all purpose flour or bread flour (I use either KAF, Trader Joe’s, or Whole Foods)
- 1/2 cup (60g) whole wheat flour (I use KAF whole wheat)
- Water (preferably warm around 85F )
Tips:
- The overall process typically takes 7 days, if the temperature is warm enough, ideally 75+ F. However, it can take up to 2 weeks or more for a strong starter to become established. Please be patient. Find a warm spot for your starter to rise (see tip in recipe below), and use warm water in your feedings if necessary to give the fermentation a boost.
- Only a small amount of whole wheat flour is used to jumpstart the fermentation process. If you don’t want to commit to a large bag, smaller bags are available in most grocery stores. Alternatively, you can use all purpose flour only.
- You will also need one large 3/4 L jar, or something of similar size (I use this one.).
Instructions
Before you begin: Establish a feeding schedule. In other words, feed your starter at the same time each day. This will establish consistency, which sourdough starters love. Consider feeding your starter in the morning when you wake up.
Day 1: Combine 60 g (1⁄2 cup) of whole wheat flour and 60 g (1⁄4 cup) of warm water in a large jar. Mix with a fork until smooth; the consistency will be thick and pasty. If measuring by volume, add more water to slightly thin out the texture if necessary. Cover with plastic wrap, reusable wax wrap, or a lid and let it rest in a warm spot, about 75-80 F, for 24 hours. Temperature is important.
TIP: Looking for a warm spot? Place your starter on a cookie sheet inside the oven (turned off) with the light on for an hour or two (it can get hot in there, so keep you eye on it!). Center rack is best. You can also use a proofing box set to your desired temperature, or a microwave with the door ajar and light on.
Day 2: Check to see if any bubbles have appeared on the surface. If you don’t see anything, it’s okay. The bubbles might have appeared and dissolved overnight while you were sleeping. You don’t have to do anything else now. Rest the starter for another 24 hours.
TIP: During the creation process, and even after your starter has been established, a dark liquid might appear on the surface and throughout the culture. It has a very stinky smell, similar to rubbing alcohol or gym socks. This liquid is called “hooch” and is an indication that your starter needs to be fed. It’s normal. Any time you see this liquid, it’s best to remove it along with any discolored starter present. However, on Day 2 just leave the hooch alone. You can remove it tomorrow when you start the feedings.
Day 3: Remove and discard approximately half of your starter from the jar (you should have 60 g left). The texture will be very stretchy. Add 60 g (1⁄2 cup) of all-purpose flour and 60 g (1/4 cup) of warm water to the jar. Mix with a fork until smooth. The texture should resemble thick pancake batter or plain yogurt at this point. Cover and let rest in your warm spot for another 24 hours.
As the yeast begins to develop, your starter will rise, and bubbles will form on the surface and throughout the culture. When the starter falls, it’s time to feed it again. TIP: Place a rubber band or piece of masking tape around the jar to measure the starter’s growth as it rises.
At a glance, your overall daily schedule with measurements should look like this:
- Day 1: 60 g flour + 60 g water = 120 g starter
- Day 2: Do nothing
- Day 3: Remove & discard half of the starter/ 60 g starter + 60 g flour + 60 g water = 180 g starter
- Day 4: Remove & discard half of the starter/ 90 g starter + 60 g flour + 60 g water = 210 g starter
- Day 5: Remove & discard half of the starter/ 105 g starter + 60 g flour + 60 g water = 225 g starter
- Day 6: Remove & discard half of the starter/ 112.2 g starter + 60 g flour + 60 g water = 232.5 g starter
- Day 7: Remove & discard half of the starter/ 116.25 g starter + 60 g flour + 60 g water = 236.27 g starter
Wondering if your starter is ready to use?
When your starter is fully active, do the float test. Feed your starter, wait for it to double in size, and then drop a teaspoon of bubbly starter into a jar of water; if it floats to the top it’s ready to use.
Storage Options
If you bake often, store your starter at room temperature (feed it 1x-2x a day to keep it active). If you plan to bake only once in a while, store it in the fridge to preserve its strength (feed it 1x a week). When storing your starter in the fridge, there’s no need to bring it to room temperature first before feeding it. Just give it some flour and water and pop it back in the fridge.

Comments
Nasia says
Help! I’m on day 9 and feeding once every 24 hours. My starter is rising slightly but not even close to doubling. Should I change something or continue on as I am?
Tom says
Your acid level may have drop you can add a little vinegar or I like using Buttermilk instead of water. Also note unless you are on well water the chlorine maybe inhibiting the bacteria grow required for SD. If you would like to make your own Buttermilk try these:
1 cup buttermilk = 1 Tablespoon white vinegar + enough milk to measure 1 cup
1 cup buttermilk = 1 Tablespoon lemon juice + enough milk to measure 1 cup
1 cup buttermilk = 1 cup plain yogurt
1 cup buttermilk = 1 and ¾ teaspoon cream of tarter + 1 cup of milk
It only take 5 mins or so to have buttermilk you can also use store bought buttermilk to make your own by adding 1/4 cup to a QT of regular milk. shake well to mix, let it stand over night then put in the fridge You can use Whole milk 2% 1% Whole milk will be thicker than the others. You might have to shake it to mix it back up as the milk fat tends to separate and sit at the top.
Hollis Taylor says
I bought the jar that you recommended, but I am a little confused about how it should be used…. Do I latch the lid shut? Or will the starter build up pressure and break the jar? Should I close it and leave it unlatched? Remove the rubber gasket and latch it?
Tom says
Latch it it would take a lot of pressure to break the jar.
Bob Chamberlin says
I have made honey whole wheat bread for years…this is a brave new world but I’m not intimidated now as I was with your method for sour dough bread. I made the starter today & it seems reasonably easy- I think the operative word is patience. More in a week
Thanks so much
Banjo Bob
Lana says
Day 3: starter rose, just little bit, then fell back down. Day 4. Liquidy starters with hooch in middle. Mixed it and Fed the starter. It had not rose since I fed it two hours ago. I am worried I’m doing something wrong. I used wheat flour , and organic All purpose flour to feed. It’s not rising at room temp. What am I doing wrong ?
(This is my second attempt in trying to make sd starter. )
Tom says
Sounds like you did not get enough wild yeast. Wild yeast is everywhere and your wild yeast is not te same as your neighbors. Keep trying or you can add some yeast from the store. Also if you can avoid the tap water sometimes the chlorine interferes with the bacteria grow needed for the SD. I use buttermilk myself it enhances the sour flavor of your starter. That is personal preface.
Heather Kelley says
We’re on day 5, I feel like it’s a little smelly. Not like socks, but I’m wondering if it’s still okay, or if I did something wrong.
KB says
It should be smelly, it’s fermenting.. Think of other fermented foods, kimchi, sauerkraut etc.. It should smell ” sour”
Mirela says
Thank you for the recipe!
There are sourdough recipes that require 100% hydration starter and according to this recipe this starter is not 100% hydrated. How do we get from this to 100%? Thank you,
Tom says
This is 100% hydration starter you got 1 part Water to 1 part flour A “100% hydration sourdough starter” means it’s 1 part water and 1 part flour. In other words, for every gram of flour there’s a corresponding gram of water, hence 100% of the flour is hydrated. This is the easiest starter to maintain since most recipes are written with a 1:1 ratio in mind.
Yun Gerbrandt says
It took about 9 days for my starter to double in size. I made my first Sour Dough bread today using your recipe. It was a hit. My husband loved it. I have more starter left and doubled the recipe for another batch. Thanks for sharing your recipe
Antoni says
After the initial 7-14 days, are you supposed to store the starter in airtight container either in the fridge or on the counter?
I would like to transfer it to a mason jar and don’t if the lid should be securely on or just loosely covering the starter.
Tom says
If you are going to be using it soon you can leave it on the counter with daily feeding and discard. So far as mason jar You want to leave enough space for expansion. If you will not be using it soon you can put it in the fridge taking it out every 2 weeks and feeding it and putting it back. You can also freeze it for up to 3 months you will need to let it thaw and feed it before using. You can also dry it by putting it out on a non sick pan also cover it I suggest using a another pan to cover it to keep dust and Fruit flies out. Once dried I break it to smaller chuck and run it in the blender to make it in to a powder. Drying time can vary from 12 hours to 3 days also you want to spread it thin on your drying sheet. The nice thing about this is it has a long shelf life. You can easily share it with anyone in the world put it into a zippered plastic bag and put into an envelope and mail it. To start it again yo will add your liquid (Water, Milk or Buttermilk) and flour at a ratio of 1:1:1 put in to your jar and let stand for 24 hours then just do a normal feeding.
Nino says
Thanks for the recipe! It took a little over 3 weeks for me, but then it finally doubled in size. After the first couple of feedings I switched to a high quality flour imported from Italy with a high W value, that seemed to help speed things up a little. Just kept it in my living room constantly, with temperatures ranging from 25-29 celsius. Just put it in the fridge a couple of days ago, after putting it in a new jar (I also switched jars after 2 weeks), and the bad smell seems to have gone now. Can’t wait to use this for pizza and focaccia.
Greetings from Europe
Izzy says
Hi Emilie, I am so excited to make Sour dough! I started my starter a few days ago, and I unfortunately missed a day of feeding. I fed it again this morning, is this ok or should I start over? Thank you so much for al of your help!
I hope you are having a great day!
-Izzy
Max Hutchinson says
Well, Emilie, I’m now more than two and a half years into making sourdough bread from your recipe. My methods have evolved to my tastes (rye mainly), but still have the basis of your recipe. Thank you very much.
Kim says
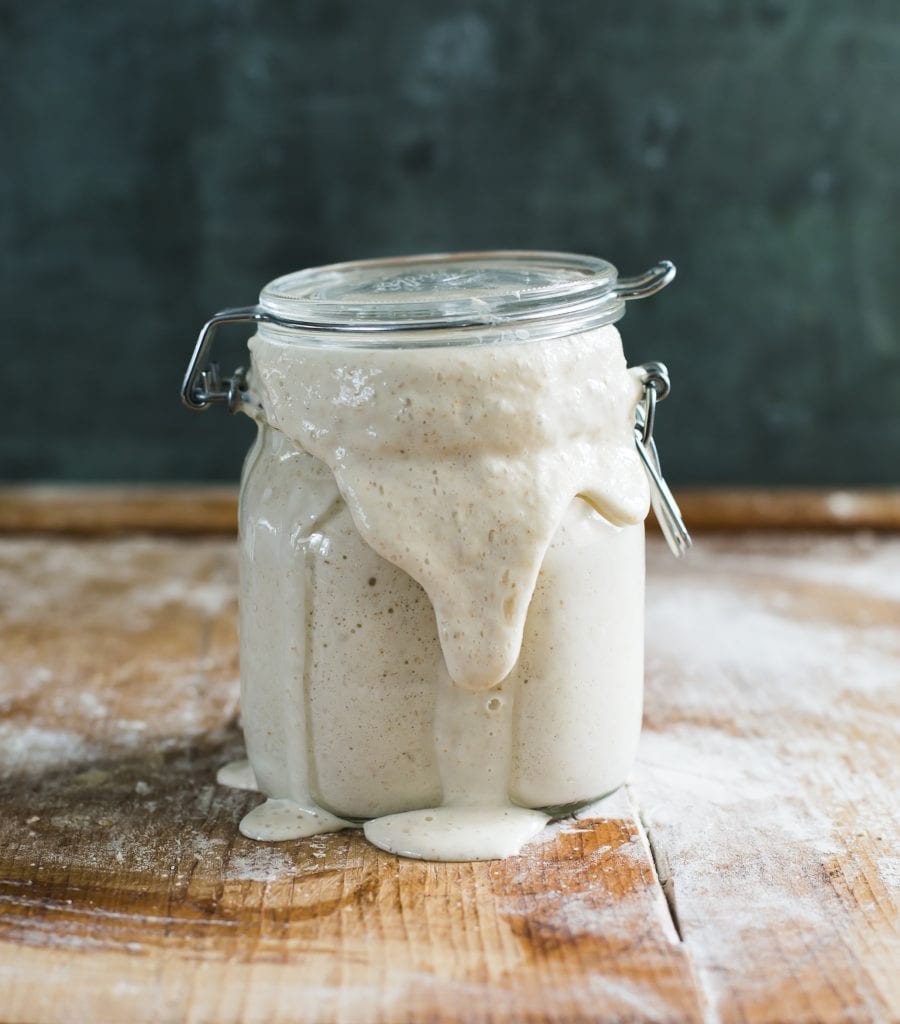
In the photos, the starter is overflowing the jar and making a big mess. I don’t want this to happen (why would anyone?). Is the jar you are recommending too small?
Anna Maria says
That’s a reference photo to show growth. You can use a bigger jar or you can put paper towels under it. Its fun to get your hands dirty in the kitchen.
Carmen Lorenz says
Dear Emily, I’m new in the country – your informative explanations and excellent tips on why and how on sourdough have been very helpful – and as EXCELLENT !
I would love to be able to find a platform where I can ask troubleshoot directly to you ?
Maria says
Just made the initial starter using 60-60 WW flour and water. The flour is sitting in a pasty lump in bottom of jar. Too thick to spread out as photos above and in your book. I’m guessing a few more grams water? Is it supposed to flow to cover bottom of jar – or did you spread it with utensil to cover bottom of jar?
Avril says
Hi Maria, the way your starter looks depends on the flour type. It also changes as the days go on. As long as you’ve stirred it really well just leave it and watch 100% flour to 100% water is the best way. When you start to make bread with it the water flour ratio is really important. I use rye flour for my main starter and it looks like a clump till the fermentation starts to do it’s magic. No it’s not supposed to flow over the top. The flowing over the top picture is just for fun. The starter goes through such different processes and sometimes you just think it’s not doing anything. It’s so exciting when it starts to live. It’s 3 weeks since your post, how is your starter now?
Maria says
Avril, after several mishaps, including “drowning” the starter and no action for several days after, I brought it back to life by feeding 1/2 whole wheat and 1/2 white flours and exercising a lot of patience. It is now a very bubbly and active starter! I learned that starter is very resilient, despite my best efforts to kill it 😂 Thank you for your support!
Avril says
Hi Maria, so glad to hear your starter is doing well 🌻
Nancy says
Hi! I love this user family recipe. I started my starter yesterday morning and in 24 hours it has doubled in size and has bubbles but still a somewhat liquidy texture!
Jeffery says
I enjoyed reading about your sour dough starter. I am making mine today.
I thank you for posting this recipe page.
I am going to experiment with this sour dough starter, as I have read that some starter are kept for generations.
I will add some flax seed mill after mine is set.
jeffery
Roxy N. says
Hello and thank you for the detailed instructions. I just made the initial day one batch. My questions is: Should the second jar be the same size as the first one or bigger? And is it possible to transfer the mix onto a clean container and wash the same jar really well to put it back in? Just wondering if it’s really important to have completely different jar…and if leaving it out while i wash the jar will jeopardize the process? If you coudl let me know so that I can order another jar. Thank you so much in advance.
Hugo Lauz says
Hello Emilie,
I did follow your detailed instructions, and had total success by day 7 as you promised. Did not get the overflowing dough to be wow photographed though, maybe next time I’ll use a smaller container. 😄
Thank you very much!
Diane Brady says
Do I lock the lid down on the jar or just close it but not latch it?
Cara Stout says
I had always felt intimidated by the idea of making my own sourdough starter. But then, I found this recipe and oh my goodness. So easy! If you follow the directions to a tee, you get an amazing result. I am so glad and so proud that I have my own sourdough starter!
Victor says
Hey, great recipee.
How much of the ready sourdough starter is usually used for let’s say baking 1 pizza or one chabatta?
Nadine says
Hello, thanks for sharing the recipe. I’m on day 3 now. I put my starter in the microwave for the first 48 hours and the smell reeked, the whole microwave didn’t smell pleasant, quite pungent. I assumed it’s from the hooch.
Day 3 comes and I keep it on the countertop as the temp was about 25c, and it’s still omitting a pungent smell. Is that normal or did my starter go bad?
Rose says
Yes it’s normal. The smell will last at least 7 days possibly 2 weeks. Don’t give up.
leo says
does it need to be a 3/4 L jar
Rose Zucchero says
No, not necessarily. Any jar will do as long as it has space to double in size.
Dani says
Is it okay if the initial whole wheat bread is organic ?
JDH says
Hello I need help, I’m on day 5 and my starter does not bubble or rise. I’m so confused because earlier in the post it says to feed 1:1:1 but the recipe directions don’t feed the starter more than 60g daily while the starter grams grow daily. Should I be feeding it more? Should I discard and start over since it has not bubbled or grown?
emma says
Hello – thank you for this easy to follow sourdough recipe! I’m wondering why I got black (and white) fuzzy mold on my starter? I followed instructions EXCEPT: On day 4 I forgot to feed. By day 6 I had both black and white fuzzy mold on side of jar. Any thoughts?
Holly F says
I have black and white fuzzy mold on my starter to on day 6 but I have fed it every day. Looking for suggestions also? I’m assuming not safe to continue
Avril says
Hi Holly, refer to my comment that I wrote to Emma🌻
Avril says
Hi Emma, lots of different ideas about scraping off mould. But I don’t agree and one of the guys I follow doesn’t either. Mould is yucky it contaminates the whole starter. If in doubt chuck it out. I’ve had mould on two of my starters over the years from neglect (me being unwell) and they got binned and the jar sterilised with Milton. I know your post was back in May but hoping that you chucked your starter 🌻
Tracey L McDonald says
I followed this step by step starter recipe. The starter is ready (passed the float test) I made a small batch Sunday and it has not risen at all! The dough feels good but not rising? I had it outside in the sun with temps 27 C and lower in the evening.
norm says
Storing starter in refrigerator and feeding weekly. Does starter need to be left out of fridge to let it rise or is it placed back in fridge right away even though it hasen’t risen?
Denny says
Can I feed my starter with whole wheat flour instead of all-purpose?
Thanks for a great tutorial!
Aiko says
I have attempted to make my own starter several times now. First time I started off with Generic supermarket whole wheat flour and after 3 weeks of feeding it every day like I should, I had at best 50% increase in volume, not doubling and no sign of improving. Tried the same with different supermarket bought flours (spelt and all purpose) but similar or worse results. Sometimes the first day seemed promising, but after that it went flat.
Since I live in northwestern Europe, thought the temperature might be the problem, so I built an isolated box with germination mat with thermostat to keep it at the right temperature. But even trying to get a started going at a constant 22-24C (72-75 Fahrenheit) and going for another 3-4 weeks did not yield satisfactory results.
A few weeks ago I thought I would give it a final try, but now I bought organic whole wheat rye at a local store that sells organic foods. The first day was very promising again, but I was cautious in my optimism, but no caution was needed. After two days the starter was doubling and another two days later it was even tripling in size! I made a levain from it, feeding that with whole wheat flour and it remained strong, consistently more than doubling.
Now I’m making various things from your book (which is awesome!) and the results are amazing. My family loves the things I make now.
So if anyone else is having trouble getting the starter going: the flour you use can make all the difference!
M. says
I’m sorry, but this sounds like you’re using your starter too early. During the initial few days the doubling is caused by another type of bacteria buildup (not the beneficial lactic acid/wild yeast). And yes, it will even pass the float test, but it’s not gonna be what you need. Be careful, I got food poisoning from baking with an unready starter.
Aiko says
No worries, I have fed the levain (as well as the actual starter) for another week and a half before actually using it as I am aware of the need for a starter to mature first. Both kept their strength throughout.
Tracy says
It’s merely a poolish or biga at this point? The Bread bible uses this glop as a preferment not “sourdough”. Curious you got food poisoning from a baked dough with preferment.
shayna says
I have been at this method for about 2 weeks and nothing! It gets a few bubbles but thats it. Its in a warm spot. I even took the temp of the starter and its right at 80. I also keep getting a thick skin on top of my starter. No matter what I try…lid cracked etc. I get the skin. I so frustrated and it feels so wasteful. Any other advice to what is going on? Oh, and I am weighing all my feedings. Thanks
mary Ann Scheel says
Make sure you are not using chlorinated water!
Shayna says
Only use filtered water.
Susan says
Same question as below…I bought the jar you use…but when is it latched tight? In all the pictures I see it is open and the started is overflowing in some…???
Why this expensive jar if we don’t need the lid???
Joe Black, Sr. says
Emilie, As for the jar you use to make and keep your starter in, Dillon, do you cover and Latch the lid while it is fermenting? Or do you leave the lid ajar? If you store it in the fridge, do I latch the lid? I don’t want to make a “starter bomb”, but I have seen Kim Chi in closed jars bubbling.
Kimberly C says
Question about feeding and storing the starter early on. After day3, do you need to store it in a warm place still? Or is room temperature okay??
I am so excited to make my own sourdough!
Addyson says
Hi, I made your sour dough starter and it looks good on day seven but it doesn’t look like how yours looked in the picture so is it ready to use, I’m only 11 and I’ve made bread before so this is not my first time but I just don’t know.
Silvia Fernandez says
Hi Emilie,
I don’t bake that often so I’ll place my starter in the fridge. On feeding it once a week, do I also have to discard 1/2 of it before feeding it?
Cat says
Thank you so much for a wonderful directions. I have a healthy, bubbly new starter. Not sure if I missed this information somewhere, but how often should you switch to a clean jar for your starter? Can it stay in the same jar without being cleaned?
Courtney says
Used whole wheat flour to start as in the recipe and then continued to feed with whole wheat instead of all purpose. Turned out great! Seemed ready in 7 days!
Amanda says
I forgot to feed it on day 3, is it garbage or can I start on day 4?
Chana Weinstein says
Hi! I have made your sourdough before and I loved it!
I am making my sourdough from scratch again and I was wondering if I can take the starter that I have to discard and put it into another jar and feed it?
Thanks
Sandra says
How much starter do you discard after day 7 if your sourdough starter is not ready to use?
Marcus Holzer says
Hey Emile,
My starter creates “hootch” every time. I do not care for the smell, so I have tossed it out; but, maybe it is ok. I am on day four and I fed it, but less water this time. So, my question is: Should the “hootch” smell like vomit at this point or am I botching your recipe?
Thanks,
Marc
PS, please help! I am determined to bake one fantastic loaf.
Laurien says
Hi Emilie, just a question on the parts that you’re discarding. On day 3, if you’re discarding half the mixture – could you pop that into another jar and feed both jars? Then halve both jars on day 4 and have 4 jars to feed? I have a few friends that are also keen on making some starter so thought maybe that was a good way to not waste the mixture and still end up with a bunch of starter jars for us all. Not sure if it works that way though?
Chelsea Burkhart says
I’m also curious on the discarding, can I just put the half that’s being discarded into another jar and just feed it like the original one?
Katrina says
Hello, I am so thankful for your website! I’m on my first sourdough starter…probably day 8 or so. I’m feeding it around 9pm overnight and in the morning it’s doubled and super bubbly. I keep thinking it’s ready but I’m scared to try to make the bread and ruin it. I’ve noticed that it’s starting to fall by midday. Am I supposed to be feeding it when I notice it has fallen? I thought I was only supposed to feed it every 24 hours. It was at the top of the jar this morning and fell a little when I opened it, but I did the test of dropping some in water and it sank. I thought it was ready, but now I’m not sure. Is it possible it sank because I didn’t test it right away?
Sandra Mcknight says
I always wanted to try sourdough bread. Today is day 7 and my starter was runny. I took off half and feed it. Is this normal. We had 3 really warm days and then it cooled back down would this effect it to make it runny
Nala Knowles says
Hi. Does it have to be whole wheat flour to start? Can I just use ap flour all the way through?
Emilie Raffa says
Whole wheat flour is used to jumpstart fermentation; however you can use all ap or bread flour instead.
Cole Reichman says
How much do you discard when your storing it in the fridge and take it out once a week to feed it?
Emilie Raffa says
Typically, just a small portion. It’s hard to give exact amounts because it depends on your starter’s current condition (healthy vs. sluggish) and the quantity of starter you have to begin with. So let me explain by example: let’s say you have 1 cup of starter in the fridge, and it’s about a week old. No hooch on top. It’s not discolored. You feed it every week. I would only pour off 1/4 cup? That should be sufficient. Now, if your starter is really old, discolored, lots of hooch, smells really bad, consider pouring off more.
Judy says
I have a bag of King Arthur bread flour. Can I use it for my feedings? Or will it interfere with the process?
Emilie Raffa says
Absolutely. I use ap flour and bread flour interchangeably for my feedings (whatever I have on I hand, I use). Bread flour is higher in protein and absorbs more liquid than ap flour- that’s the main difference you’ll run into when feeding your starter. The overall texture will be slightly thicker. Totally fine.
Elena says
Can this starter be used in bread machine?
Emilie Raffa says
I haven’t tested this myself. But I don’t see why not? If you experiment, please let me know :)
Elena says
Yes, I have tried… all worked very well. Thanks for your recipe.
Emilie Raffa says
Fantastic. Great to hear, thank you!
Joanica says
I’m gluten intolerance,some I used oatmeal flour to do it with apple cider vinegar with the mother and it’s been 5 days that I started my sourdough starter and it double in size and it smells good just like you said,I saw in another post before I found this one that apple cider vinegar helps with the process of good bacteries
Emilie Raffa says
Great! I’m thrilled it’s working for you (and learn something new everyday!).
Anita says
I read through this and at first was quite disappointed by Day 7… no rise, weird smell. So , I did a LOT more reading about starters and troubleshooting, including info from this site. I just want to mention a higher ratio such as 1:1:1 or even 1:2:2 and so on might be more helpful than ~2:1:1 as instructed here by Day 7. Yes, so very many variables that could affect how well thay works, but we learn that “feed, feed, feed” is the name of the game for those us struggling amateurs. Also when my jar was airtight, I got hooch production after every feed. I found that less-than-airtight along with a higher feed to starter ratio seemed to do the trick, after giving up on my first attempt after 1 week. I also realized 1 week is way too early to give up! Starters are apparently considered still quite young when <14 days old. There were several times, even when not airtight and with no visible hooch, that the mixture smelled strongly of acetone/nail polish remover and I would get disheartened. But I refused to give up again and realized this smell happened any time I did not discard before feeding = too many hungry yeast cells, but not spoiled! I kept mine in the same jar almost throughout my entire second attempt until around Day 12, then switched to a clean jar just because! It's finally rising actively here on Day 13 and so very full of bubbles with a more bready smell since discarding regularly, feeding AP flour twice daily, increasing my ratio to 1:1:1, using lukewarm to cool water only to avoid too much feeding activity too quickly, and expecting the process to take at least 14 days. I just want to give some hope to any other beginners who've read this wonderful place to start and know it may not go exactly as planned b/c there are so many variables! Thank you for all the fabulous details you post here, love having a beginner resource!
Emilie Raffa says
Thank you for sharing your detailed experience with us- very helpful. And most of all: encouraging. That’s the thing with sourdough, the process will be different for everyone because we are working with a living, fermenting thing! It’s something you cannot control, only observe, making changes that suit you best. Thanks again, Anita!