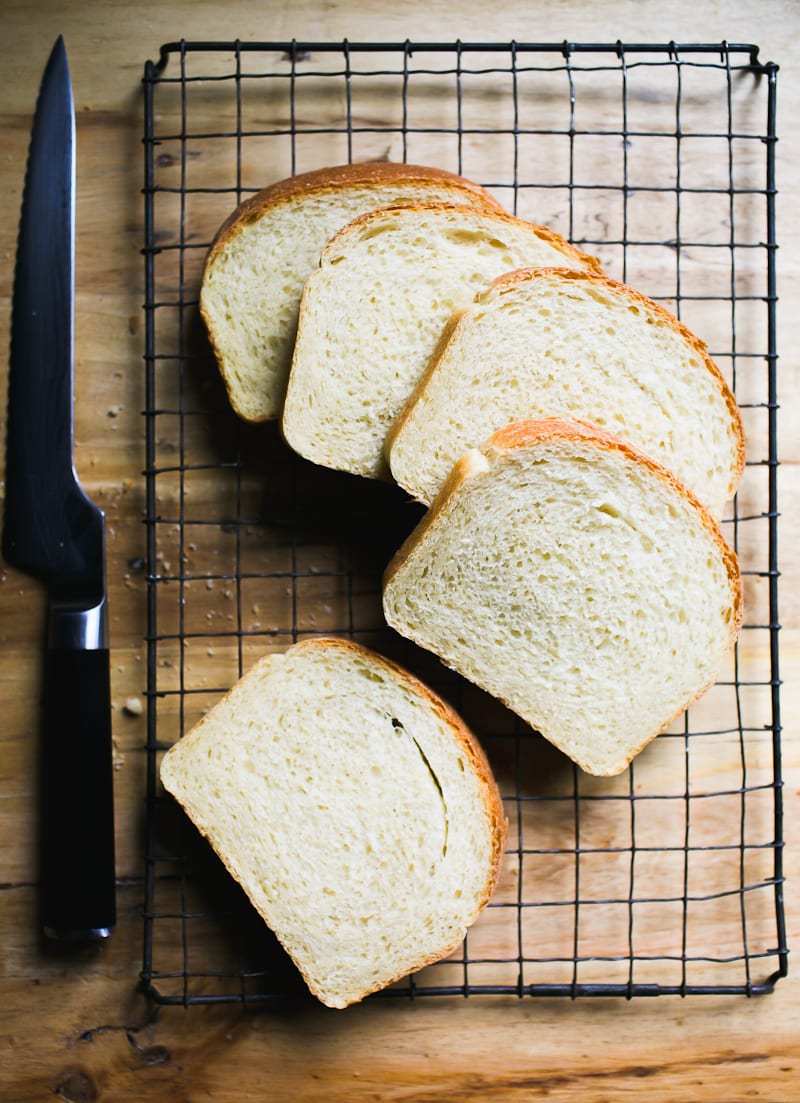
Made with all purpose flour and just a touch of butter, learn how to make soft, tender sourdough sandwich bread with bubbly, active sourdough starter. So easy! Recipe adapted from my book: Artisan Sourdough Made Simple.
Out of the 4 classic sourdough bread recipes I make weekly (sourdough bread, sourdough focaccia and sourdough pancakes), sandwich bread is the most requested by far. Why? It’s soft. Buttery. It makes the whole kitchen smell like magic. And best part about making it yourself? It’s 100% natural.
There are no chemicals or nasty preservatives in homemade sourdough sandwich bread. Just hints of creamy butter with mild, tangy sourdough flavor in every bite. In this post, I’ll show you how make easy sourdough sandwich bread with step-by-step instructions and video. You’ll also find a sourdough cinnamon-raisin and whole wheat variation, plus more recipes in my bestselling book: Artisan Sourdough Made Simple. You’ll never go back to store-bought again!

Sourdough Sandwich Bread: Ingredients & Equipment You Will Need:
- All purpose flour
- Unsalted butter
- Sugar
- Sea salt
- Sourdough starter
- Warm water
- Stand Mixer
- Loaf Pan
Recipe Tips
- No stand mixer? No problem! After mixing and resting the dough, knead by hand on a lightly floured surface for 8-10 minutes, or until smooth, soft and elastic. Do not worry about under/over kneading. This is very difficult to do by hand. Relax into the process and focus on the texture, not the time.
- Think about pan size. For a lofty-high rise, use an 8.5×4 inch loaf pan instead of the traditional 9×5 inch loaf pan. The smaller pan size will give the dough a boost. However, both sizes will work.
- Why Sugar? Enriched doughs, like this one, usually contain sugar (and butter, sometimes eggs). It adds just a hint of sweetness. This bread is not sweet. Omit if you want.
- Make it vegan. Replace the unsalted butter with your favorite plant-based, dairy free butter for a similar taste. Just watch the salt content though; some plant-based brands are very salty!
- Temperature controls time. The warmer it is, the faster the dough will rise. I’ve included helpful tips to boost the process. Full details in the recipe at the end of this post.
how To Make Sourdough Sandwich Bread
Mix the Dough
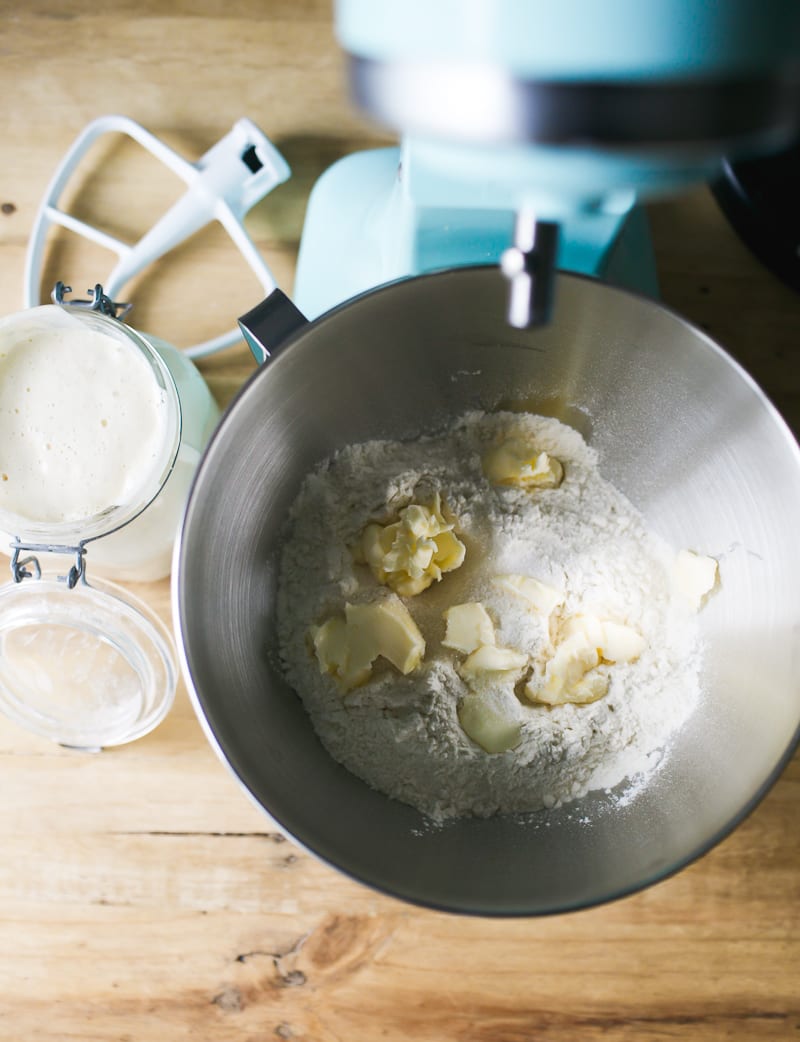
Weigh your ingredients using a scale. You’ll get better results doing so. In a stand mixer fitted with the paddle attachment: add the flour, butter, sugar and salt. Mix until the butter looks like crumbs.
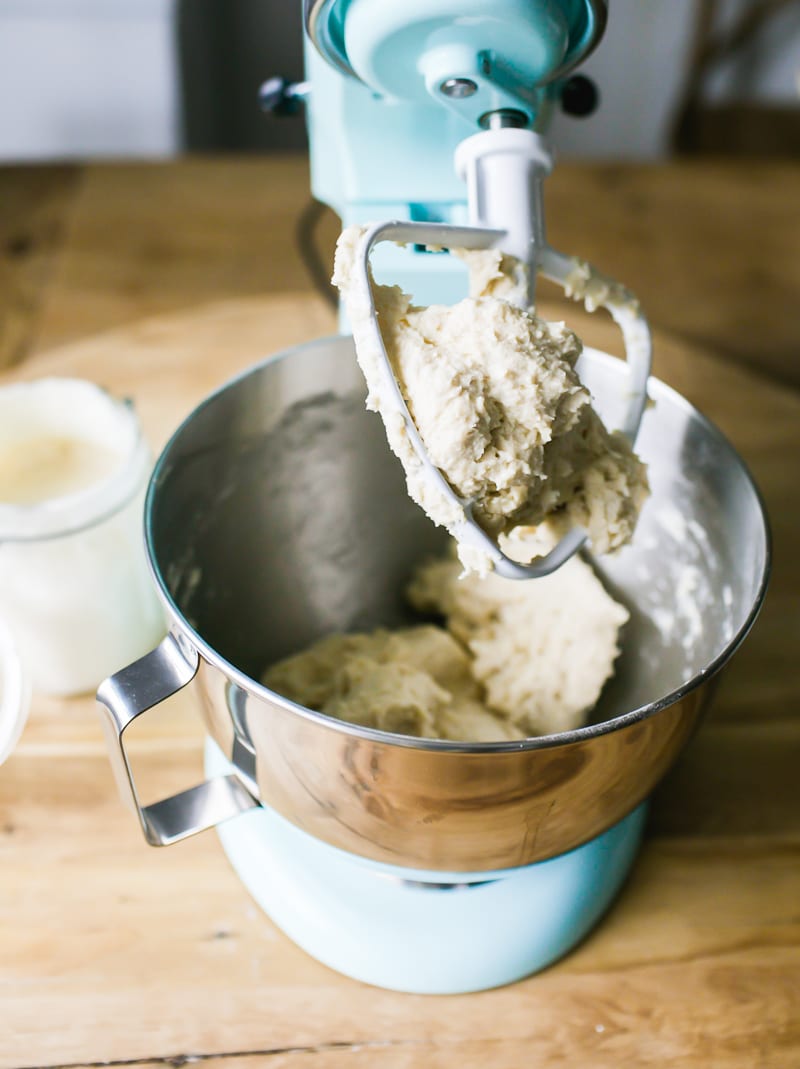
Add the sourdough starter and water; mix again to combine. The dough will feel slightly sticky and elastic at this stage. Cover with plastic wrap or a damp kitchen towel and rest for 30 minutes- the gluten needs to relax.
After the dough has rested…
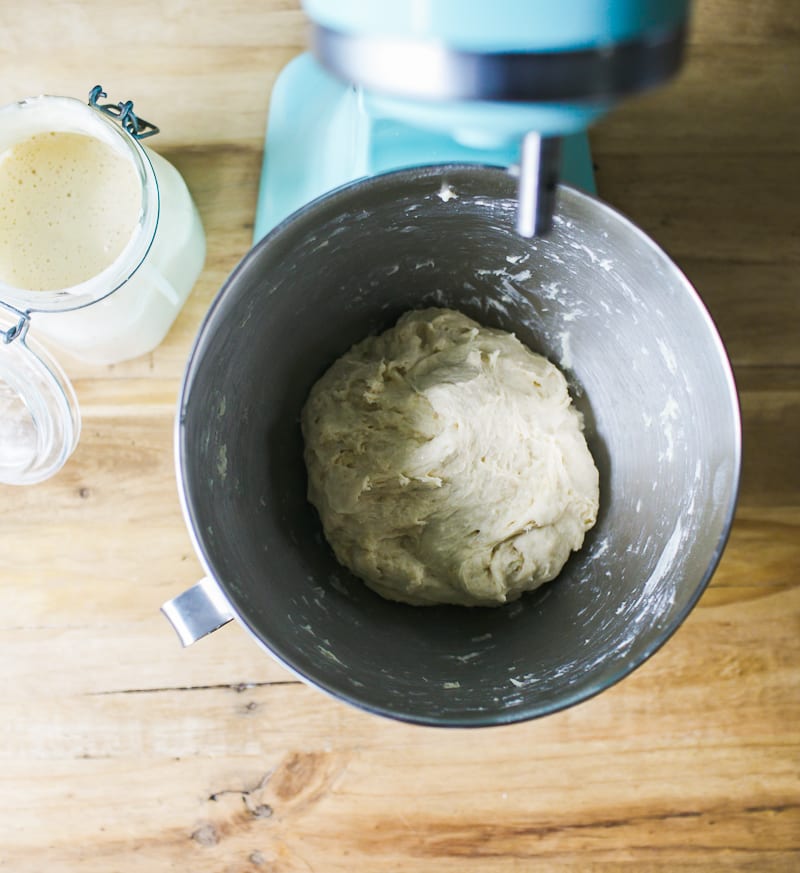
Switch to the dough hook, and run the machine on medium low to knead the dough. This should take about 6-8 minutes or so. The dough should feel soft and supple, and not stick to your hands. On this particular day, my dough was a little bit stickier than usual so I added a dusting of flour to even it out.
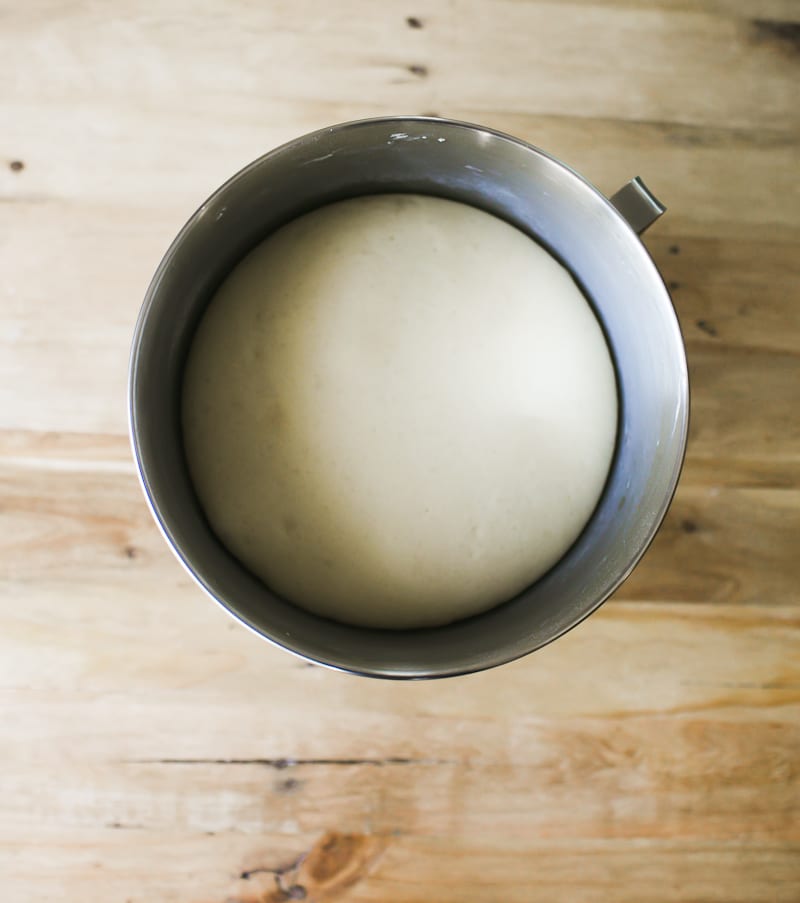
Bulk Rise
Cover the dough with plastic wrap or a damp towel. Let rise overnight at room temperature (68 F) for 10-12 hrs. The dough is ready when it has doubled in size.
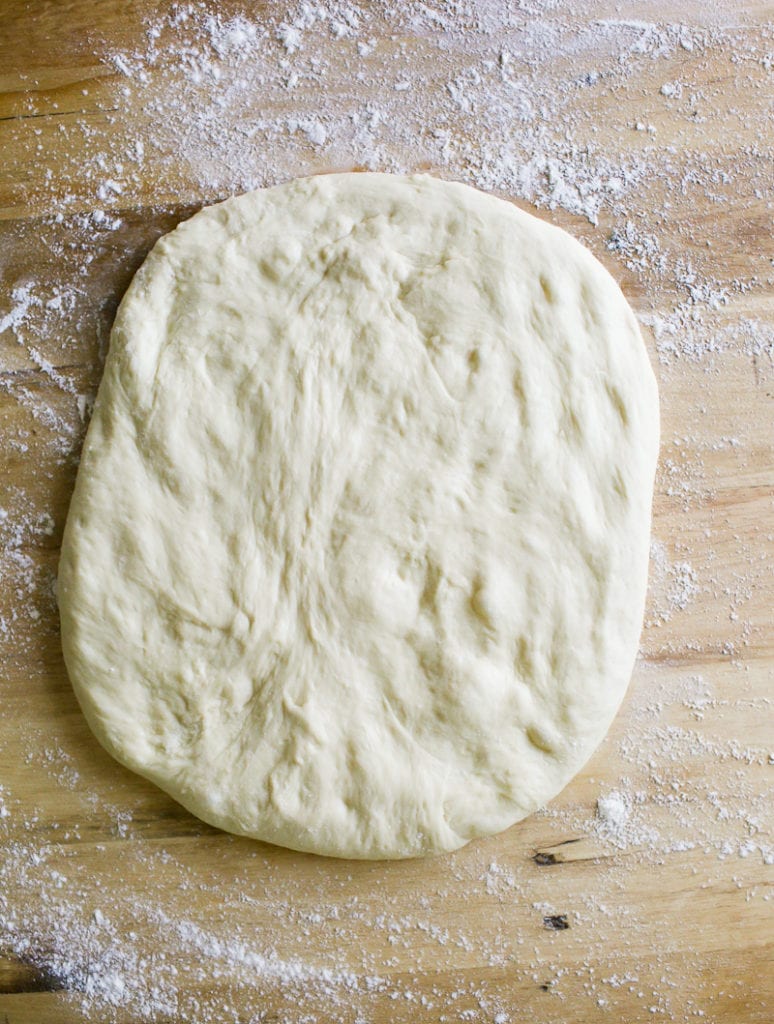

Shape the Dough
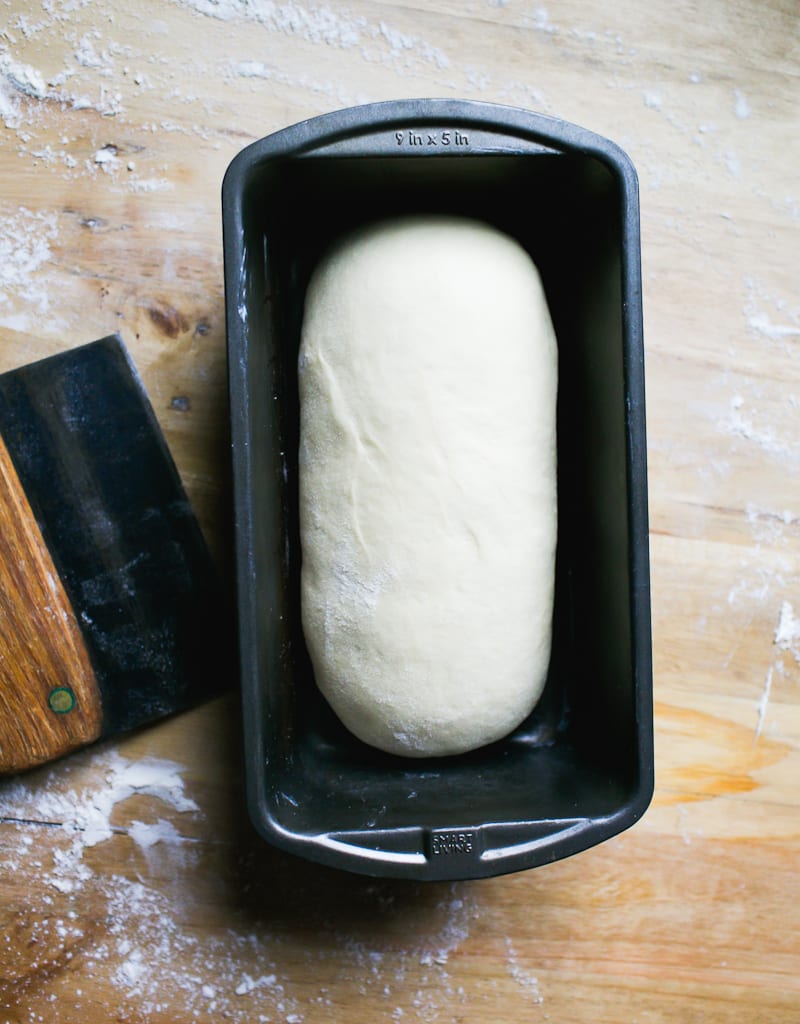
The following morning, coat a 8.5×4 inch loaf pan (or 9×5-inch pan) with softened butter.
Remove the dough onto a lightly floured surface. Gently flatten the surface to release some of the air bubbles. Sandwich bread should not have any large holes (unless you like jelly in your lap).
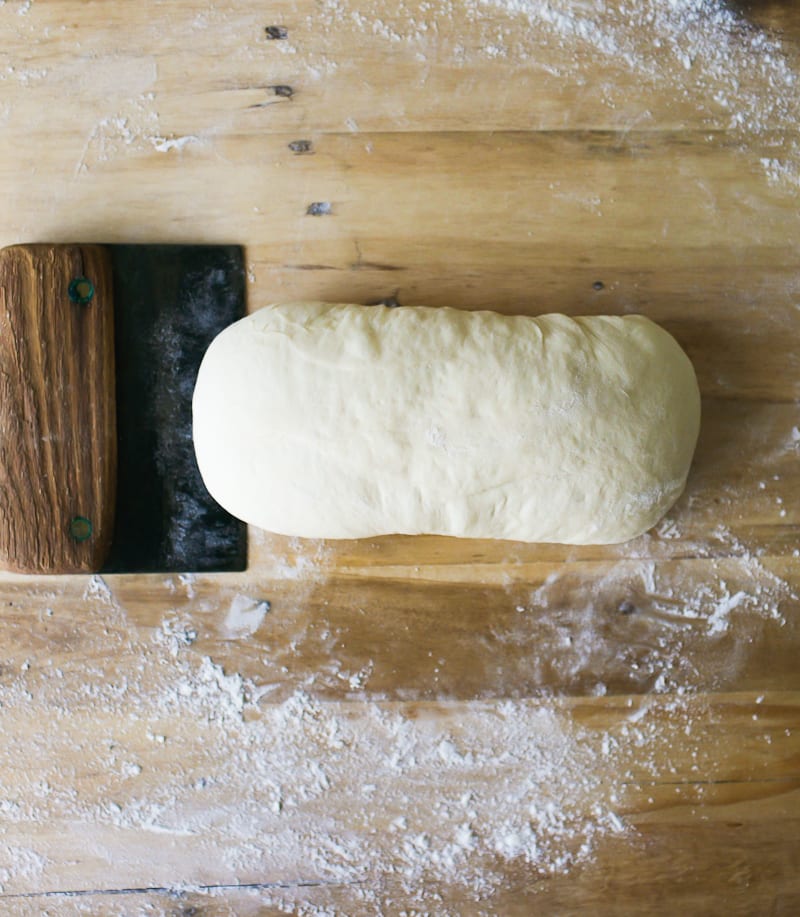
Starting at the bottom, roll the dough into a log tucking the ends underneath. Transfer to the loaf pan. Watch the Video!
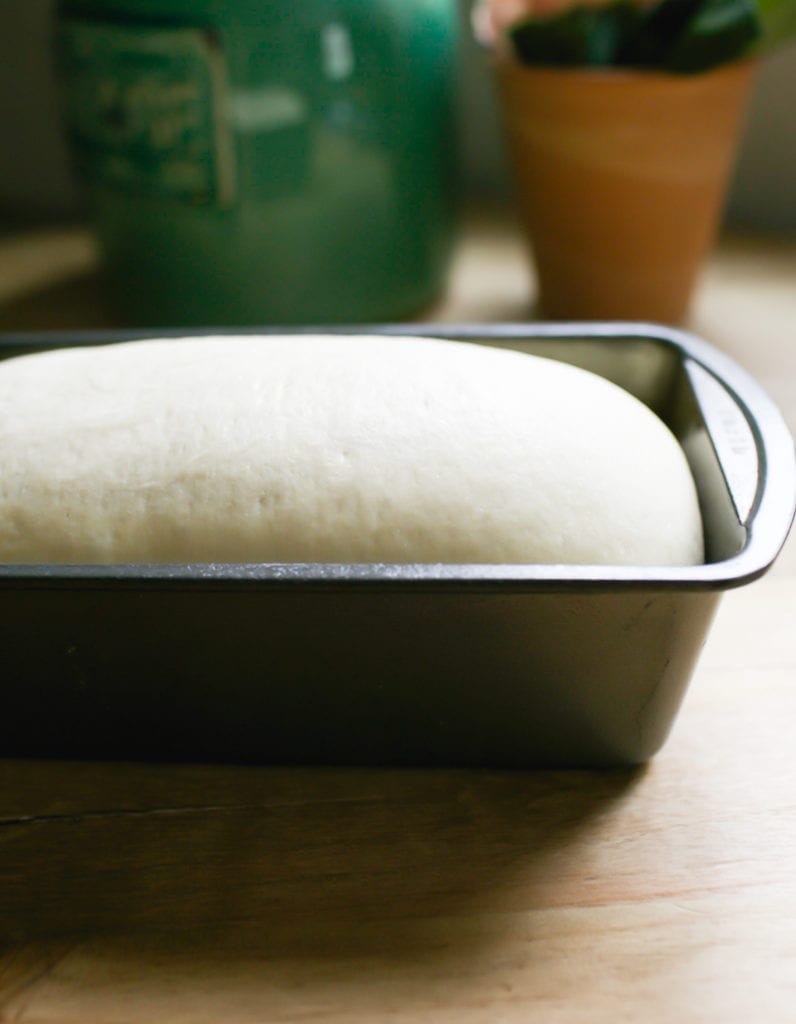
Second Rise
Now the dough needs to rise again.
This step is important because it builds back additional strength after the bulk rise. You’ll get a nice rise when it’s done correctly.
The dough is ready when the center rises to about 1-inch or more above the rim. It should look nice and puffy, and no longer dense. Be patient with this step. It takes time especially when the weather is cold. This is where the smaller 8.5×4 inch loaf pan comes in handy; the smaller size will speed of the rise. Consider using a proofing box to boost the rise.
Preheat your oven to 375 F.
TIP: For higher oven spring, preheat your oven to 500 F (instead of 375 F). Once the bread goes in, reduce the temperature to 375 F and bake as directed.

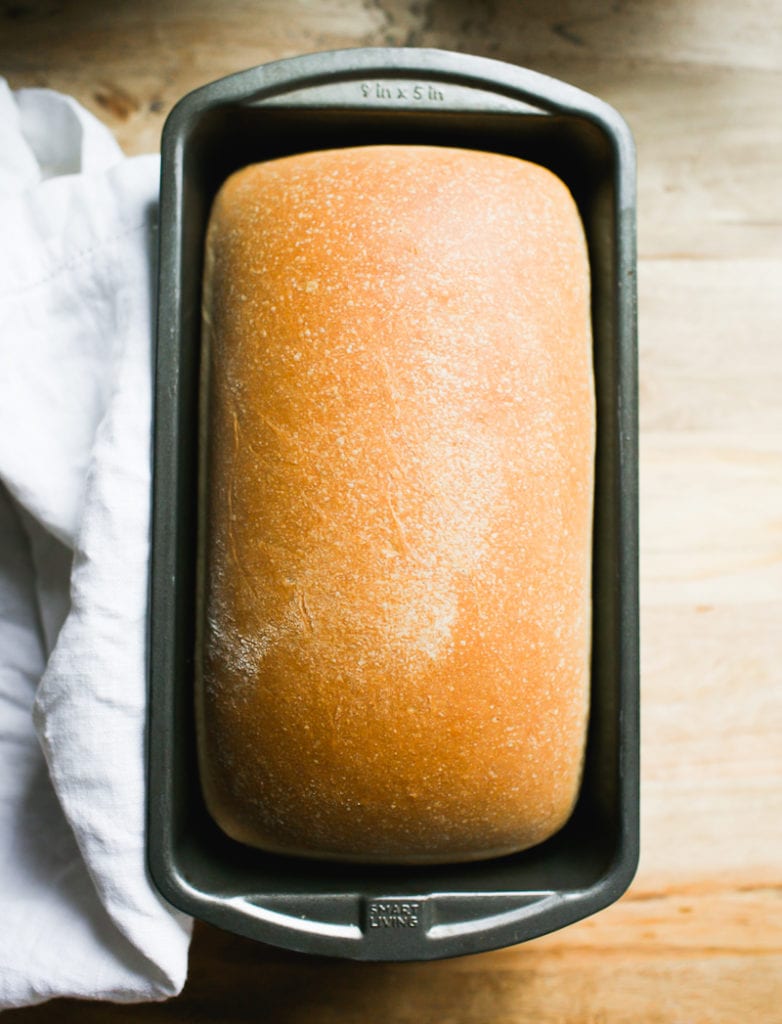
Bake the Dough
Place the dough on the center rack and bake for 45-50 minutes.
Once finished, let the loaf cool for at least an hour before your dive in. It’s worth the wait!
Additional Notes
If you have a large family, or just eat a lot of bread, I highly suggest doubling this recipe. Bake (2x) loaves side by side and freeze whatever you don’t eat. This loaf can be frozen whole, covered tightly in plastic wrap or as individual slices.
Sourdough Sandwich bread Variations
- Whole Wheat: Replace 20% all purpose flour with whole wheat or light whole wheat flour. If the dough seems dry (whole grain flours absorb more liquid), add more water as needed to achieve a workable consistency. Do this 1 tsp. at a time.
- Bread Flour: Do an even swap, adding more water if the dough is dry. For example, King Arthur Bread flour is very “thirsty” so more liquid might be needed. If using Gold Medal bread flour, which is not as absorbent, additional adjustments might not be necessary.
- Sourdough Cinnamon Raisin: Click here for my step-by-step post!
More Sourdough Bread Recipes To Try!
- Sourdough Focaccia Bread
- Sourdough Bread: A Beginner’s Guide
- Best Sourdough Pizza Crust (No steel or stone!)
- Easy Homemade Sourdough Bagels
- Light Whole Wheat Sourdough Bread

Easy Sourdough Sandwich Bread
- Prep Time: 12 hours
- Cook Time: 50 minutes
- Total Time: 12 hours 50 minutes
- Yield: 1 loaf
- Category: Sourdough Bread
- Method: Oven-Baked
- Cuisine: American
- Diet: Vegetarian
Description
A simple and easy recipe for homemade sourdough sandwich bread. Made with all purpose flour and just a touch of butter. I like to make the dough at night so we can have fresh bread in the morning. This loaf freezes well (whole or sliced). I recommend this loaf pan.
Notes
For best results, please weigh your ingredients with a scale instead of using measuring cups.
Here’s why: weight and volume measurements are not equal, only approximate! This is especially important regarding the sourdough starter. If your starter is very bubbly, 1/4 cup might only weigh 30 g which is too little for this recipe (you need 50 g). The dough will take forever to rise! Same goes for the flour… 4 cups might end up weighing way over 500 g depending on how tight the flour was packed into the cup. You’ll end up with dry dough.
I used Whole Foods 365 Everyday all purpose flour for this recipe. King Arthur and Trader Joe’s ap flour will work as well. If using another brand with a lower protein content (i.e. Gold Medal, Pillsbury, Heckers) consider reducing the total water amount by 15 g.
Ingredients
- 500 g (4 cups) all purpose flour
- 60 g (4 tbsp.) unsalted butter, softened, cut into cubes
- 12 g (1 tbsp.) sugar
- 9 g fine sea salt
- 50 g (1/4 cup) bubbly, active sourdough starter (100% hydration)**
- 270 g (1 cup + 2 tbsp) warm water
Helpful Tips:
** If the weather is not warm enough, sometimes the second rise can take longer than expected. To speed up the rise, use an 8.5×4 inch loaf pan (instead of a 9×5 inch pan), increase the amount of starter and decrease the amount of water for best results. Please choose one of the following adjustments below, keeping the rest of the ingredient quantities the same:
- 100 g starter + 255 g water
- 150 g starter + 250 g water
Additionally, because temperature controls time you can also increase your surrounding temperature for the bulk or second rise, as needed. Place the dough in a proofing box set to 75-80 F. Or, preheat your home oven to 75-80 F and then shut it off immediately (use an oven thermometer to make sure it’s set to exactly 80 F and not higher!). Place the covered dough inside until it bulks up. Do no use this option overnight- it will be too warm.
Instructions
Baking Schedule: this is an overnight dough which takes approximately 10-12 hrs to rise @ 68 F. Start the night before, in the evening, and plan to bake the following day. If it’s warmer than 68 F the dough will take less time to rise. Alternatively, start in the morning and bake in the afternoon or evening.
Mix the Dough
In a stand mixer fitted with the paddle attachment, add the flour, butter, sugar and salt. Mix on low speed until combined; the butter should look like crumbs.
Add the starter and warm water. Mix until the flour is fully absorbed (get in there with your hands to finish mixing). The dough will feel slightly sticky and elastic at this stage. Cover with plastic wrap or a damp towel and let rest for 30 minutes. Meanwhile, replenish you starter with fresh flour and water.
After the dough has rested, switch to the dough hook and run the machine on medium-low (#3 on a KitchenAid) for 6-8 minutes. The dough will feel soft and supple and not stick to your hands. If it does, add a dusting of flour.
Note: If you do not have a stand mixer, the dough can be made by hand. After mixing and resting for 30 minutes, knead the dough on a lightly floured surface for 8-10 minutes, or until smooth, soft and elastic. Do not worry about under/over kneading. Relax into the process and focus on the texture, not the time.
Bulk Rise
Cover the bowl with plastic wrap and let rise overnight at room temperature (68 F) until double in size, about 10-12 hrs. Please refer to the Baking Schedule above for additional rise time options.
Shape the Dough
In the morning, coat an 8.5×4 inch loaf pan with butter.
Remove the dough onto a lightly floured work surface. Gently flatten the surface to release any large air bubbles.
Roll the dough into a log tucking the ends underneath. Rest for 5-10 minutes. With floured hands, gently cup the dough and pull it toward you to tighten its shape. Using a bench knife, place the dough into the loaf pan seam side down.
Second Rise
Cover the dough with lightly oiled or buttered plastic wrap. Let rest at room temperature until it has risen to about 1-inch above the rim of the pan (check the height by looking at the domed center portion of the dough). You are not looking for it to double in size. For timing, this can take anywhere from 1 1/2-2 hours (or more!) depending on temperature and the amount of sourdough starter used. Remember, the warmer it is, the faster the dough will rise. Refer to the “helpful tips” at the top of this post.
Preheat your oven to 375 F. Note: For higher oven spring, preheat to 500 F instead. Reduce to 375 F once the dough goes into the oven and bake as directed.
Bake the Dough
Bake the dough on the center rack for about 45-50 minutes, or until golden brown.
Cool in the pan for at least 10 minutes, and then transfer to a rack to cool completely.
This sandwich loaf will stay fresh for up to 3 days, stored in a plastic bag at room temperature.


Comments
Liliana Torres says
Awesome recipe I did it last week. Doing it today Sunday. I was wondering if I could leave bulk rise outside 2 days to bake it on Tuesday morning or maybe Monday night? Will that be okay?
Emilie Raffa says
Hi there! The dough won’t last for two days at room temperature. It will be over proofed. You can make the dough, let it rise, and once it’s almost double in size chill the whole bowl overnight. The following day, give it more time to rise (if needed), and continue with the remaining steps.
Nic says
My family love love LOVE this bread! I’m constantly making it they devour it so quickly!
I’m just wondering though if it is possible to reduce or omit the sugar and butter and make it more like a traditional sourdough loaf (I do try to make this loaf with the larger quantity of starter as we like our sourdoughs quite sour).
Thanks,
Nic
Emilie Raffa says
Hi Nic! Absolutely. You can definitely leave out the sugar & butter to create a more traditional sourdough. You might need to increase the liquid slightly if the dough feels too dry. Enjoy!
Nic says
Thanks Emilie, I’m keen to give it a try. What about using wholewheat flour or a mix of bread and wholewheat?
Emilie Raffa says
You’re welcome! Adding wholewheat or bread flour will change the ratios a bit. First, for whole wheat flour, I’d only sub 15-20% in this particular recipe. You might have to add more liquid to compensate, if the dough feels very dry. For bread flour, you can do a full even swap, adding more liquid as needed. Enjoy!
Erin says
Can you double this bread recipe? Just curious 🙂
Emilie Raffa says
Sure can! Just make sure you have a bowl that’s large enough for the bulk rise. A high-sided dough tub isa good option and/or divide the dough in half and rise the dough in two separate bowls.
Erin says
Thanks so much! Looking forward to trying this recipe!
Elizabeth Gergen says
Hi . I made the sandwich bread and it turned out well. I like the recipe but I was wondering if you have ever made it into rolls? If so , what would the temp and bake time be?
Emilie Raffa says
Hi Elizabeth! Great idea. I haven’t tested this recipe as rolls, so I’m unable to advise with exact specifics. I’ll update here if I experiment. In the meantime, try this recipe.
Loreta says
Haha… nice remark on going to school! Crazy days!
I am making this bread today and looking forward to see how it will come out. Thank you for the recipe.
Emilie Raffa says
You’re very welcome, enjoy!
Viki says
Can I skip the sugar?
Emilie Raffa says
Hi Viki! Absolutely. Totally fine. You can skip the sugar (it adds depth of flavor, not sweetness).
Anna says
Absolutely best and easiest loaf bread! I’m making this 2-3 times a week for my family. Thank you!
Candace says
This bread has become a staple in my home and for good reason! It is such a simple dough and nice to work with! It comes out beautifully every time! The bread has such a nice texture soft with a good amount of chew!
Barry says
Love making this loaf. It is very forgiving. I do add about 2 grams Vitamin C to the flour at the beginning and that helps retard mold production. With only 2 adults at home, a loaf needs to last more than a couple days (and I hate freezing bread). This loaf does make the very best grilled cheese sandwiches. I also use a Pullman loaf pan and get a nice square loaf.
Emilie Raffa says
Barry, the vitamin C tip is fantastic. Is there a specific kind you use?
Barry says
You can get a one pound pouch on Amazon (organic, pure) for less than $10. It’s used as a bulk item in cosmetics and also by fitness buffs – it’s amazing how inexpensive it is. For those without a scale, 2gm is about 0.25 teaspoonful. Vitamin C (ascorbic acid) is an antioxidant, and there are many uses for it in the kitchen, i.e. keep guacamole from browning, add a bit to brightly colored jams to retain color.
Erin says
I’m looking at making this recipe, it looks so good! I have never made sourdough before so looking forward to it.
I have a question tho, do I have to use a stand mixer or can I do it by hand ? As I don’t own one.
Thanks
Erin
Shannon says
This recipe is wonderful. I’ve made it 3 times and it tastes amazing. The first time I made it, everything was perfect. The last time and then this morning, the bulk rise was fine, did it’s thing. I shaped it and put it in the buttered loaf pan and it’s struggled to rise. i’m on hour 3.5 and it hasn’t gone an inch above the pan. I’m baking it as is bc it’s too hot out to wait any longer to use the oven, but any ideas about what could be the issue. our house temp is set at 73. thanks.
Candace says
There could be a number of things bread can be finicky. Try the trick with pre-heating your oven to 450 then when it comes to temp put the loaves in and immediately drop the temp to the recommended cooking temperature it always helps mine spring up beautifully. Just check your bread a little earlier than the recommended cooking time to make sure it doesn’t over bake. A good thermo pen is key in the kitchen :) hope this helps!
Farmgal says
I’m out of regular AP flour at the moment. Could I use einkorn AP flour with good results? Thanks!
Mariette Nel says
With the second rise, if after your dough hasn’t risen the amount specified, for how long can you still continue to let it rise? Should you consider the time or the 1 inch above pan height? Thank you!!
Emilie Raffa says
Hi Mariette! Great question. I always say, and this goes for all of my recipes: it’s best watch the dough and not the clock. Time, temperature and starter strength dictate rise times, so really, the experience will be a bit different for all of us. The second rise per this recipe is slow and requires patience; but when the dough is puffy and just about risen to 1 inch (a little less is fine) you’re ready to go.
Jodi says
I score the top , and brush butter on top, as soon as I take out from the oven, to create a soft crust,. Delicious!
Emilie Raffa says
Jodi, sounds so good! Love brushed butter on anything! :)
Derek says
Thank you so much for posting this and all recipes. You’re doing the world a great service. Awesome bread makes the world a better place (especially when people are hangry!).
Emilie Raffa says
You are very, very kind Derek. Thank you :) x
Aida says
Hi, can i bulk rise at room temp from 12pm to 10 pm for example, then shape and put in the pan, overnight rise in fridge and cook the next day straighr from the fridge?
Thank you
Deborah says
Hi Emilie,
People have asked about using bread flour but I have seen no reply from you.
Please let us know if we can use bread flour, King Arthur for me, rather than all purpose? Also can you use fresh milled flour, whole wheat or other types etc.?
Thank you
Deb
Emilie Raffa says
Hi Deborah! Bread recipes are formulated to work with a certain ratio of flour to water. When you change the type of flour (or water amount), the results will vary. For this particular recipe, bread flour can be used. However, depending on the brand, you might need to increase the liquid to compensate for the extra protein in the bread flour itself.
Here’s what I’d do: make the recipe as is first. If the dough seems very dry, add a splash more liquid to see how it effects the texture. Whole wheat flour can be used (up to 20% here), perhaps with an increased amount of water as well. Fresh milled flours are a little different; they vary in strength depending on the wheat variety you are milling.
Debbie Van Horn says
After successfully making this recipe several times, I swapped out about 1/4 of the AP for bread flour this time (both King Arthur). The dough is a little stiffer and took about 30% longer during second proof to get nice and puffy. The finished loaf turned out a little sturdier, but still just as delicious. Didn’t want to risk subbing out any more and ruining my Monday morning toast :)
Debbie Anderson says
Easy and delicious!! As long as you have a good strong starter this recipe is almost foolproof!!
Naomi Heiskell says
This says it should sit out for 10-12 hours. My cooking times are in the afternoon though. Can I out this in the fridge for say…18 hrs? Then remove for the second rise?
Emilie Raffa says
Sure. For an afternoon rise, you can bulk during the day and refrigerate when almost double in size (it will continue to rise slightly in the fridge). The next day, proceed with the remaining steps. Enjoy!
Kathie says
Love this recipe and have had success every time I have made it. Can this be made into a light whole wheat sandwich loaf? I love the butter in the dough and wish to have a light whole wheat loaf just like the white loaf. My kids eat this loaf too. If I can add additional nutrition for them I would be a very happy mum. Love the sourdough life!
Emily says
I subbed in about 1/4-1/3 of the white flour for whole wheat with great results. Nice texture, good oven spring, good flavor, nothing sacrificed.
Kathie says
WOW! Love this loaf. I have finally found a sourdough loaf that my kids love and just devour. I served it to my lunch guests and they loved it too. It have a nice light crumb. SO easy to make with my dough hook. I would love to know how to modify this recipe to incorporate some whole wheat flour and still obtain the same light texture. Thanks for a great recipe.
Lindsay says
This was a delicious, came out with the most beautiful golden crust. My kids aren’t a huge fan of sourdough but they loved this one! I think it was gone in about a day. Guess I’ll have to make another one!
Emilie Raffa says
So glad you liked it! My kids love this loaf too- I pretty much always double the recipe. We eat one and freeze one.
Madrien says
This is the BEST sourdough Sandwich bread EVER! Without a doubt! The great beauty is that if you leave it uncut overnight on the counter then get a good bread knife you can cut it up into bare 1/4 inch slices for those in your family that are limiting their carbs! You get a wonderful slice of bread with half the calories and carbs! And so delicious!
Marina says
The recipe calls for “warm water” but I’m a diligent rule follower, so what temperature should it be? When I have baked other sourdough recipes that called for warm milk, it was specified at 105 degrees. Should I apply the same rule here for the water? Otherwise, I was originally planning to use room temperature water. I’m about to try this recipe for the first time and I plan to prep the dough tomorrow night, so hoping someone can confirm for me before I give it a try, thanks!
Emilie Raffa says
Hi Marina! For this recipe, which is based on a 68 F room temperature, warm water between 85-95 F is fine. Note: If your ambient room temperature is warmer than 68 F, room temperature or even cool water is fine. It all depends on your specific environment. For further clarification, using 105 F milk or water is not a black and white rule (unless clearly specified in a recipe). I typically use 85-95 F in winter & 55 F (or cooler) in summer. Hope this helps.
Marina says
Very helpful, thanks! I prepped the dough tonight and am afraid I overkneaded it. But I’m going to let it sit and rise and see how it all turns out tomorrow. So looking forward to homemade sandwich bread :)
Marina says
I wanted to follow up and say it turned out great, and my hubby is pleased too! No more store-bought bread! I’m making 3 loaves this week so I can freeze sandwiches for our work lunches and busy weekends. So happy for healthy ingredients and also being cost-effictive, and still delicious to eat! Thank you!
Madrien says
I have used room temperature water but lately I have been using my whey off the yogurt I make and it has turned out the same as just water. But instead of room temp I heat it to 105.
Sophia Boschin says
So instead of water you use whey to make the bread? That’s so interesting! Does at add a different flavour?
Val says
Flavour stays pretty much the same maybe slight but so much food value in whey and I use it in a great deal of my baking replacing milk etc that I think I am immune to any flavour changes. Lol
Vicki says
Amazing bread! well written, detailed instructions. My second rise took 5 hours but the wait was well worth it
highly recommend!
Stacey Zimmer says
Hi! I am new to sourdough. Tried a few other things before working up to bread. This recipe was so easy to use. The one challenge I had is the dough would get sticky when kneeding it. Add a dusting of floor and kneed some more. Would be fine then get sticky again. So didn’t kneed as long. Found was a little sticky after first rising. Is there something I am not doing correctly that is causing the stickiness? Thanks!
Tami says
I’m not the author, nor a bread aficionado, but my personal experience is that all dough has a mind of its own. Some days you will need more flour than on some other days (dependent on weather – humidity, altitude etc,). I NEVER add the exact about of liquid stated in the recipe, AT FIRST, just enough to bring it together (which could be less, more or what’s called for) and clean the surface of the bowl (a clean bowl is a happy bowl). Some days you’ll knead (pun intended) all the liquid, some days not (again weather, altitude and such play a factor). But in the end you’ll have an ever so slightly tacky (not sticky) dough to work with. I hope this make a modicum amount of sense. Happy kneading!
Keith says
My experience with sticky dough is that it’s best to let it rest 5 to 10 minutes before you add more flour. Typically, higher hydration bread has better oven spring and a crispier crust. Resting allows the gluten network to reform and tighten, which helps to reduce the stickiness.
Sarah says
Question: in the video it states to rest the dough for 5-10 minutes after removing from the long proof; in the instructions it says to rest the dough after shaping in a loaf. I’m currently in the process, so I’m going to rest after both, but would like clarification. Thank you!
Emilie Raffa says
Hi there! Yes: can do both. Totally fine. Resting depends on how stiff the dough is.
For clarification: In the video, which I do in only one take, my dough was tight after the long proof. Resting it was necessary before moving onto the next step (otherwise, it wouldn’t be relaxed enough to shape). After shaping, you can rest the dough again too, before pulling it towards you.
Hope this helps!
MILENA ARADSKI says
help! my dough isn’t budging for the second rise! not sure what could be wrong. It definitely doubled over night, and felt great under my hands while rolling it. its also about 75 degrees inmy house.
Thanks for the help!
Emilie Raffa says
Hi there! If your dough doubled overnight, then we know your starter is strong, active and adequate gluten developed. For the second rise, it just needs more time. Move your loaf pan to a warmer spot to speed things along.
Tami Winbush says
The author mentioned putting the dough in a warmer spot to rise for a second time, try the oven with the light on. Happy kneading!
Eliza J. says
Your recipes are spot on! The video was helpful, as well. I have made this recipe 4 times, and it has been excellent each time! My family loves it!
I would really love a recipe for Easy Sourdough Sandwich bread using White Whole Wheat flour. Do you have one?!
Carrie says
Love this recipe – amazing flavour! Due to user error, it tends to “split” when I put it in the oven. Am I possibly under proofing?
Maggie says
Is the sugar necessary for this bread or is it more a matter of taste?
Emilie Raffa says
Hi Maggie! The small amount of sugar actually adds depth of flavor, not sweetness. However, you are more than welcome to leave it out!
Beatrice says
I just love the detailed and we’ll to understand instructions here. Will try the recipe soon and bring my feedback
Emilie Raffa says
Fantastic! Enjoy! xx
Stacie says
Made this yesterday. Perfect. Thanks
Vickie says
This is truly a 5 star ⭐️ recipe! Thank you so much for sharing!
I weighed out the ingredients and the loaves turned out picture perfect! I’m on my second batch now and will share your recipe with everyone! God bless!
Elizabeth says
I’ll never go back to store-bought sandwich bread!
Hannah says
I made this as my very first sourdough loaf ever without having invested in scales yet and it came out perfect! Absolutely recommend.
Hannah says
I have a small update to this because some commenters below asked: I tried this again today with a 50/50 mix of Whole Wheat and AP Flours. I thought the WWF might decrease the rise, so I bumped up to the 100g starter/ 255g water ratio, and replaced the sugar with honey for flavor. It came out absolutely perfect! Got the same rise I did with the traditional recipe (with a 3 hour second rise) and its super flavorful and moist with a great crust.
Jenny says
This bread came out so light and fluffy and the flavor is wonderful! Thank you!! I’m going to make two loaves tomorrow, my whole family loves it!
Eva says
My biggest regret is not making this sooner!! I’m shocked at how easy and low maintenance this recipe is and the end result looked *almost* as good as your photos! Your instructions and photos were super helpful. I have a 2-in-1 toaster oven/air fryer that was just large enough to fit my 9×5 loaf pan, and it baked great still! Next time, I’ll have to tent it with foil mid-bake to prevent the top from browning too quickly. One tiny issue I had with my loaf is that the bottom of the bread seemed more dense than the top half of the loaf, do you have any ideas as to how to fix that?
Kimberly Robinson says
This is the first sourdough sandwich bread I’ve made, and we really like it! After the first couple times, it was very dense and not rising as much as you say it should, so I tried switching to bread flour. The texture was increased incredibly, but the rise was still not quite right. I just went to look at the video (should’ve done that to start!) I noticed a couple things are different in the video than what the steps say. Steps say to cover with plastic wrap overnight, but in the video there’s just a towel over it. Maybe that’s why mine is more moist? Secondly, after the bulk rise, the steps say to roll it out and shape it THEN let it rest 5-10 minutes. In the video, you roll it out, wait 5-10 minutes, THEN shape it. Which way is this supposed to be? Thank you!
Merryn says
Honestly I started making your cinnamon raisin version of this first…I usually do Artisan style sourdough (the bread code) which I love, but sometimes I just want a sandwhich type bread, I am aussie and I have to have my vegemite toast. So I tried this for the first time this week, and as much as I was very happy with the cinnamon raisin, I am very very impressed with this sourdough, I love it, its easy to store, slice, tastes great, keeps fresh for a long time…..very very impressed Thank you Thank you Thank you , for developing and sharing wonderful easy to follow recipes.
I am an absolute fan, and I got my contact with your work through ‘rosemary”Italian in my kitchen”
Brittany says
Today was my first time making this recipe, and it turned out great! I’m newer to the world of sourdough, and it was nice to have a softer bread for a change. I put my dough in the fridge during the second rise because I wasn’t going to be home for awhile (side note: can bread like this also overproof?). It didn’t rise at all, so I let it rise at room temp, and this still turned out great!
Emilie Raffa says
Hi there! Wonderful!
Typically, sourdough doesn’t rise much when put in the fridge (it still ferments, but at a slower pace). You did the right thing by letting it continue to rise at room temp. And yes: all dough can over proof when left for too long, especially when it’s really warm.
Brittany says
Thank you, Emilie! This is so helpful. I look forward to continuing to make this bread.
Poonam says
Hey
I have loved your recipe, keen to know how long the bread can be stored without refrigeration in tropical/humid weather conditions? How long do you store in your weather conditions?
Emilie Raffa says
Hi there! I don’t store my bread in the fridge- I just keep it wrapped at room temperature. You can always slice and freeze the loaf, pulling out only what you need to extend its shelf life.
Katherine says
I am keen to make this for my kids’ lunches so would like to add some whole wheat flour to boost the nutritional value. Just wondering what percentage you would recommend and how much extra water would be required? Thanks!
Merryn says
I would also like to know about the whole wheat ratio
Grace Stronge says
I am now on my second try of this dough. Quite easy to follow! thank you. Great for French toast!
joe says
Wonderful. I ate half of it in a day. I’ll make another one soon.
Emilie Raffa says
This happens in our house too! Glad you liked it :)
Craig says
I baked a loaf this morning and it came out fantastic, thank you for this excellent recipe and detailed instructions.
This recipe is so simple compared to the traditional artisan type bread (also baked a big loaf this morning, while the oven was hot).
Emilie Raffa says
Wonderful! And I totally agree with you: sometimes working with a different style of sourdough is just as good as the “traditional” thing. I love the versatility.
Janel says
This is the first time I’ve made sourdough sandwich bread and it was so simple! The second rise took about 3.5 hours, but other than that it went exactly as written. Thank you for the recipe!
Emilie Raffa says
Fantastic! Yes: the second rise time can vary depending on temperature and starter strength. But the end result is worth it! Glad you liked it Janel! xx
Val says
This was my first attempt at sour dough sandwich bread and I’m sooooo pleased. Minimal labor with wonderful results. Our place is cool so I did the 150g of starter and second rise still took awhile. It was sour (which I love) and a wonderful texture. Thanks for the recipe!
Michele says
I am really drawn to your attention to detail with your instructions and the information on how to adjust the starter/water according to varying conditions in the home. My sourdough journey continues as both simple and slightly more complex recipes come out of my oven. Eventually I hope to become more confident. Thank you so much for your blog; great recipes, photos and videos. I’ll be trying this recipe with my starter that is on the counter now! Have a blessed day.
Emilie Raffa says
Michele, what a vey kind comment. Thank you so much. With time, patience and persistence, sourdough is an incredibly rewarding craft. Enjoy xx
Michele says
The sourdough sandwich loaf came out perfect and tasty! I used one of the adjustments for less water and more starter and that was the ticket. Thank you.
Emilie Raffa says
Perfect! Glad it worked out :)
Daria says
Hi Emilie, I love your recipes for sourdough, they’re brilliant, easy to follow and always result in the best bread I’ve ever baked!
How do you recommend storing this loaf if I don’t want to freeze it? Leave it outside at room temp, or store it in the fridge? What’s the best way to keep it “fresh”?
Emilie Raffa says
Hi Daria! Wrap the loaf (completely cool) in plastic wrap and keep at room temperature, not in the fridge. You can also use plastic/reusable bread bags, not the cloth ones, similar to the ones you’d find sandwich bread in at the grocery store. Amazon or the King Arthur website will have them.