Made with all purpose flour and just a touch of butter, learn how to make soft, tender sourdough sandwich bread with bubbly, active sourdough starter. So easy! Recipe adapted from my book: Artisan Sourdough Made Simple.
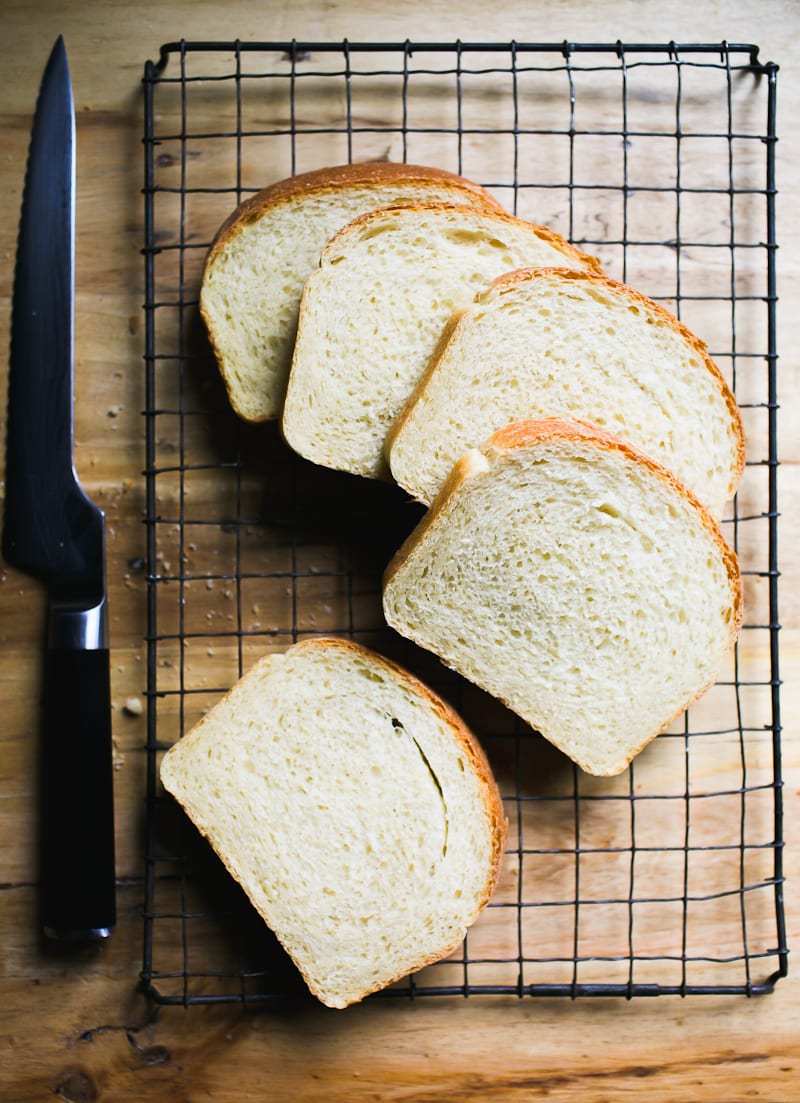
Out of the 4 classic sourdough bread recipes I make weekly (sourdough bread, sourdough focaccia and sourdough pancakes), sandwich bread is the most requested by far. Why? It’s soft. Buttery. It makes the whole kitchen smell like magic. And best part about making it yourself? It’s 100% natural.
There are no chemicals or nasty preservatives in homemade sourdough sandwich bread. Just hints of creamy butter with mild, tangy sourdough flavor in every bite. In this post, I’ll show you how make easy sourdough sandwich bread with step-by-step instructions and video. You’ll also find a sourdough cinnamon-raisin and whole wheat variation, plus more recipes in my bestselling book: Artisan Sourdough Made Simple. You’ll never go back to store-bought again!
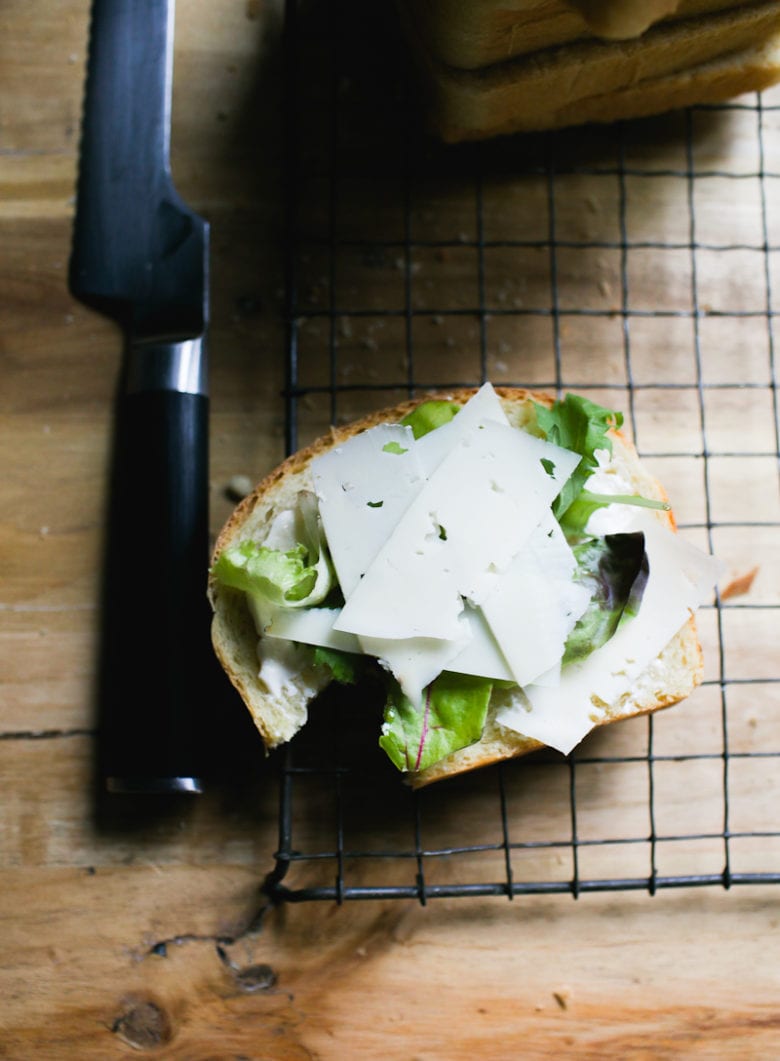
Sourdough Sandwich Bread: Ingredients & Equipment You Will Need:
- All purpose flour
- Unsalted butter
- Sugar
- Sea salt
- Sourdough starter
- Warm water
- Stand Mixer
- Loaf Pan
Recipe Tips
- No stand mixer? No problem! After mixing and resting the dough, knead by hand on a lightly floured surface for 8-10 minutes, or until smooth, soft and elastic. Do not worry about under/over kneading. This is very difficult to do by hand. Relax into the process and focus on the texture, not the time.
- Think about pan size. For a lofty-high rise, use an 8.5×4 inch loaf pan instead of the traditional 9×5 inch loaf pan. The smaller pan size will give the dough a boost. However, both sizes will work.
- Why Sugar? Enriched doughs, like this one, usually contain sugar (and butter, sometimes eggs). It adds just a hint of sweetness. This bread is not sweet. Omit if you want.
- Make it vegan. Replace the unsalted butter with your favorite plant-based, dairy free butter for a similar taste. Just watch the salt content though; some plant-based brands are very salty!
- Temperature controls time. The warmer it is, the faster the dough will rise. I’ve included helpful tips to boost the process. Full details in the recipe at the end of this post.
how To Make Sourdough Sandwich Bread
Mix the Dough
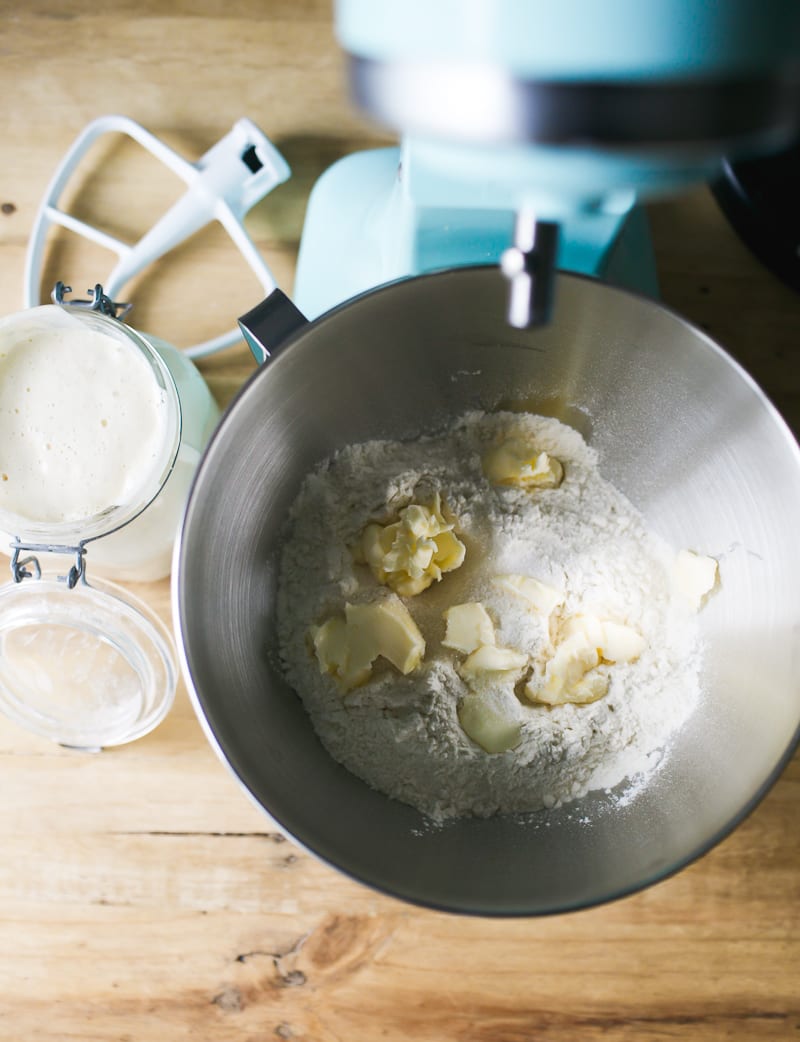
Weigh your ingredients using a scale. You’ll get better results doing so. In a stand mixer fitted with the paddle attachment: add the flour, butter, sugar and salt. Mix until the butter looks like crumbs.
Add the sourdough starter and water; mix again to combine. The dough will feel slightly sticky and elastic at this stage. Cover with plastic wrap or a damp kitchen towel and rest for 30 minutes- the gluten needs to relax.
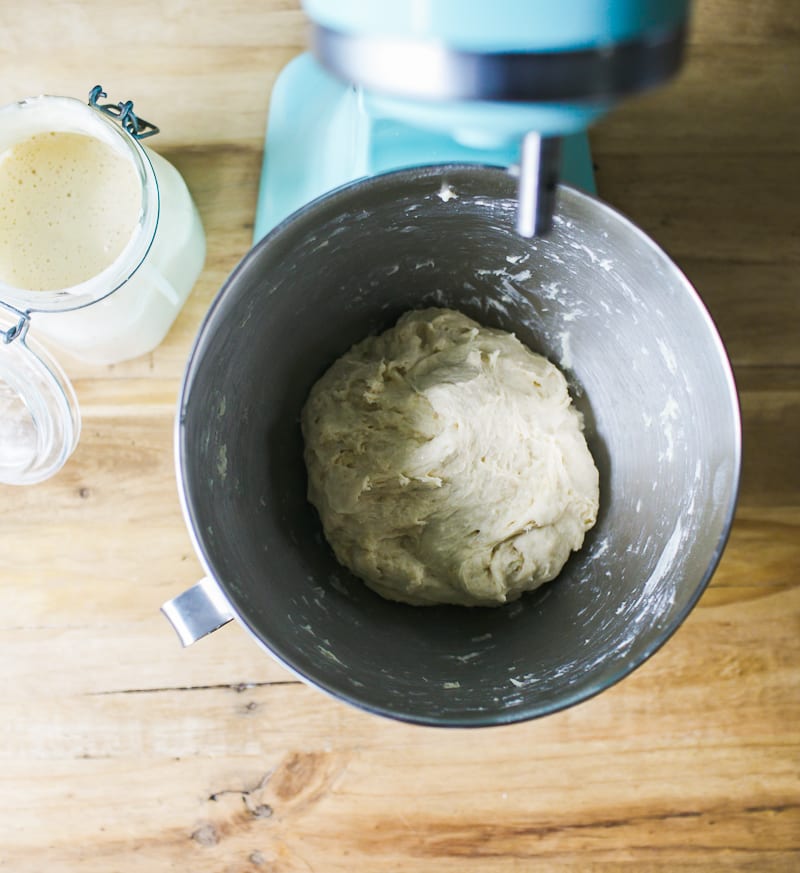
After the dough has rested…
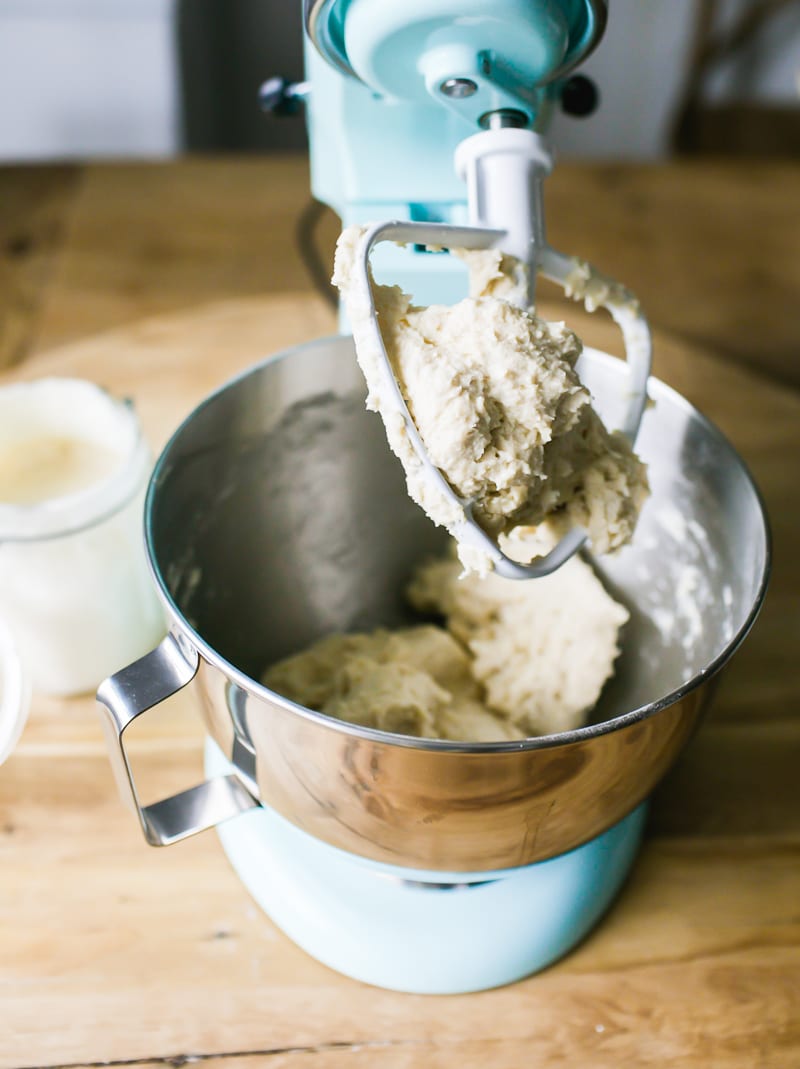
Switch to the dough hook, and run the machine on medium low to knead the dough. This should take about 6-8 minutes or so. The dough should feel soft and supple, and not stick to your hands. On this particular day, my dough was a little bit stickier than usual so I added a dusting of flour to even it out.
Bulk Rise
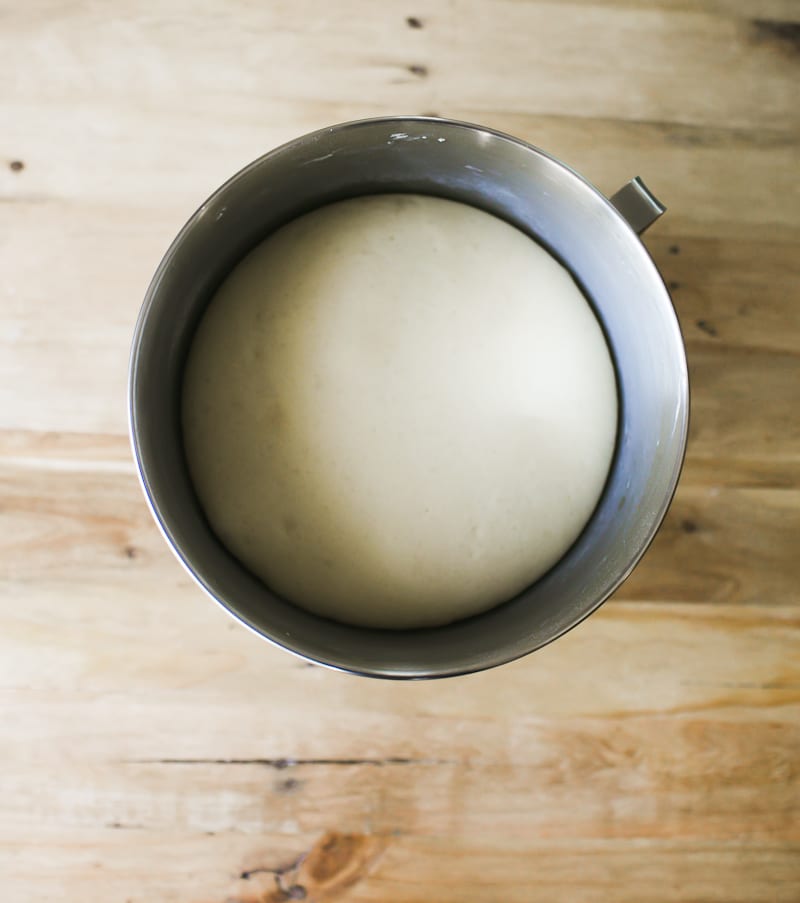
Cover the dough with plastic wrap or a damp towel. Let rise overnight at room temperature (68 F) for 10-12 hrs. The dough is ready when it has doubled in size.
Shape the Dough
The following morning, coat a 8.5×4 inch loaf pan (or 9×5-inch pan) with softened butter.
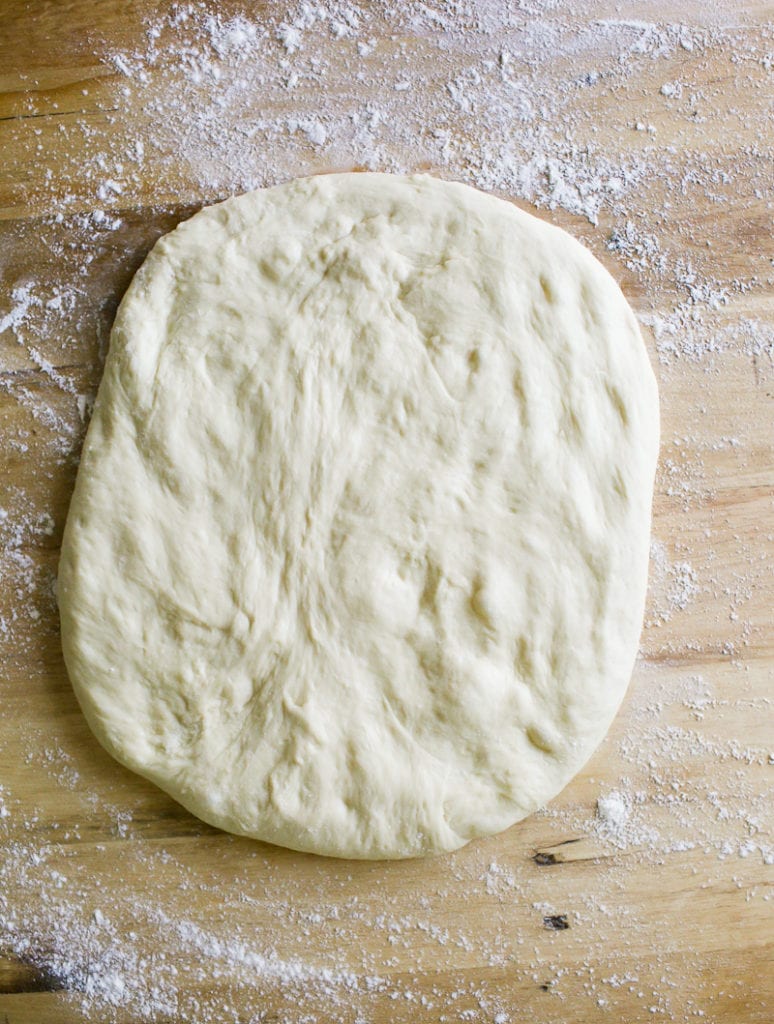
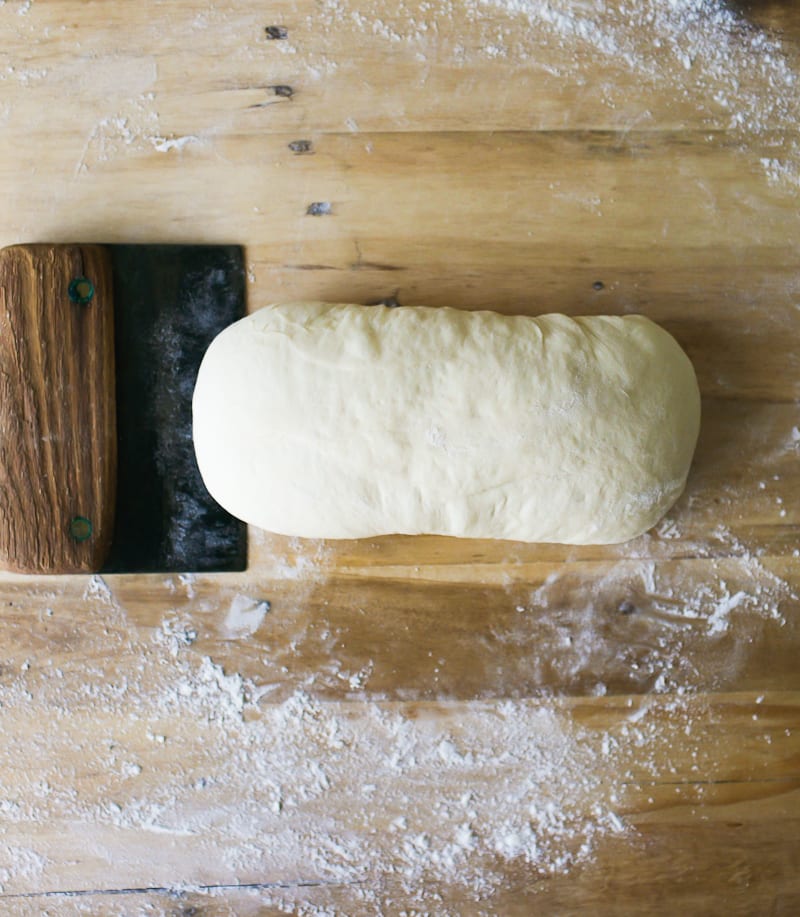
Remove the dough onto a lightly floured surface. Gently flatten the surface to release some of the air bubbles. Sandwich bread should not have any large holes (unless you like jelly in your lap).
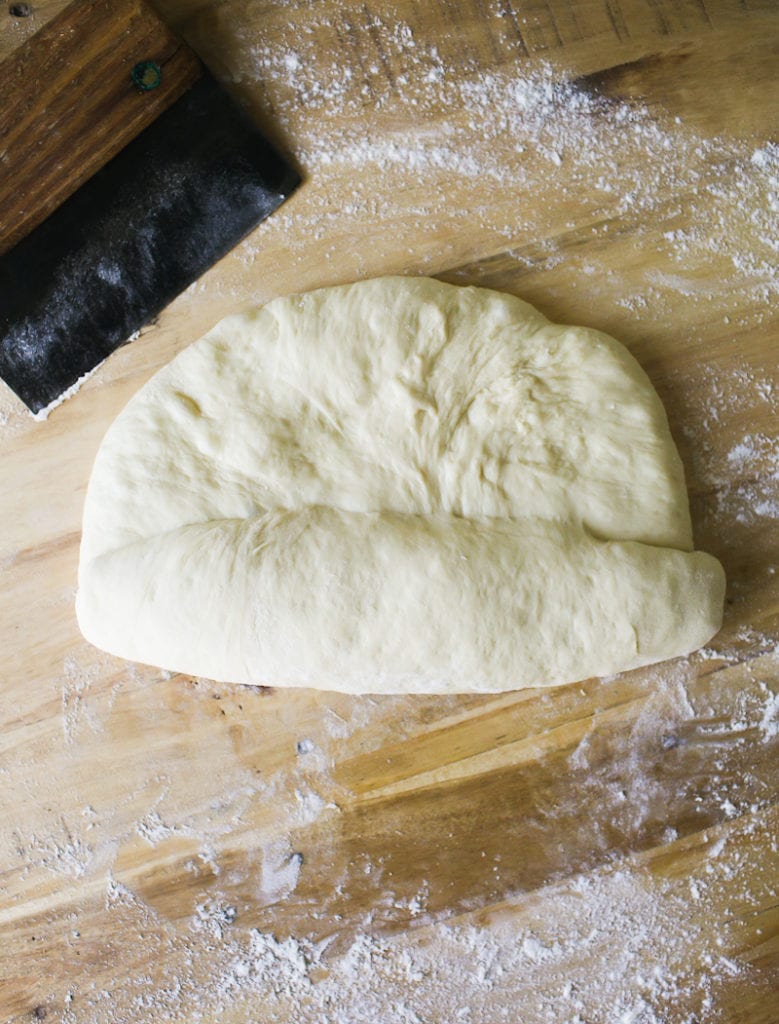
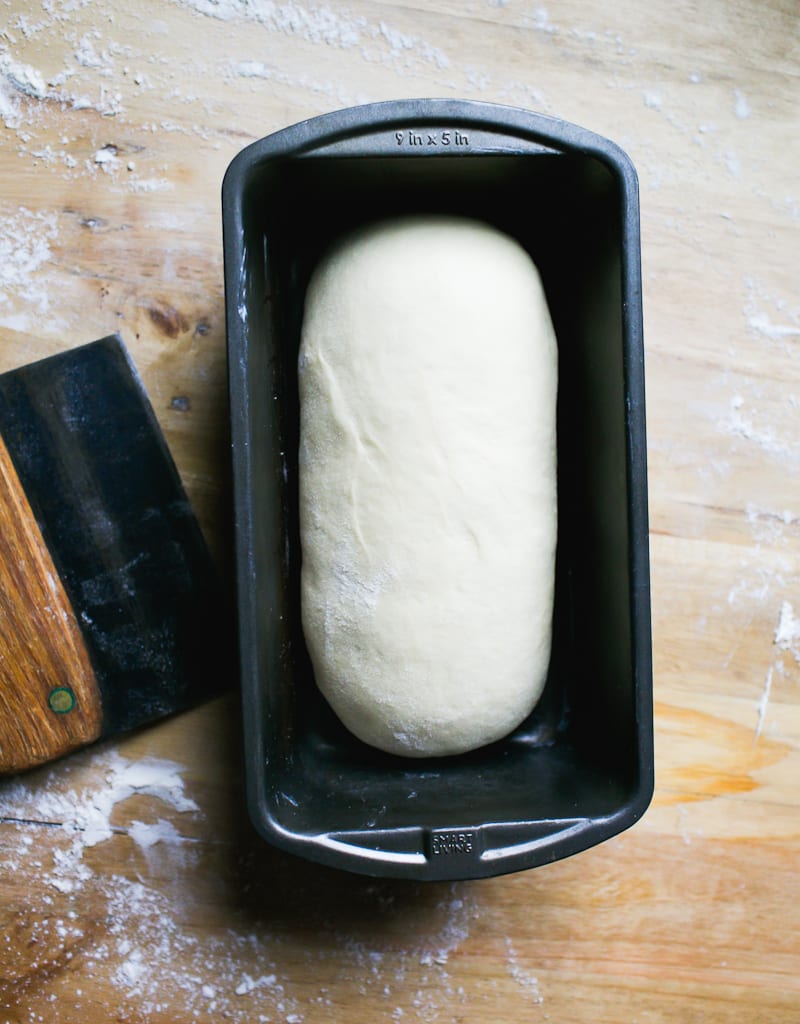
Starting at the bottom, roll the dough into a log tucking the ends underneath. Transfer to the loaf pan. Watch the Video!
Second Rise
Now the dough needs to rise again.
This step is important because it builds back additional strength after the bulk rise. You’ll get a nice rise when it’s done correctly.
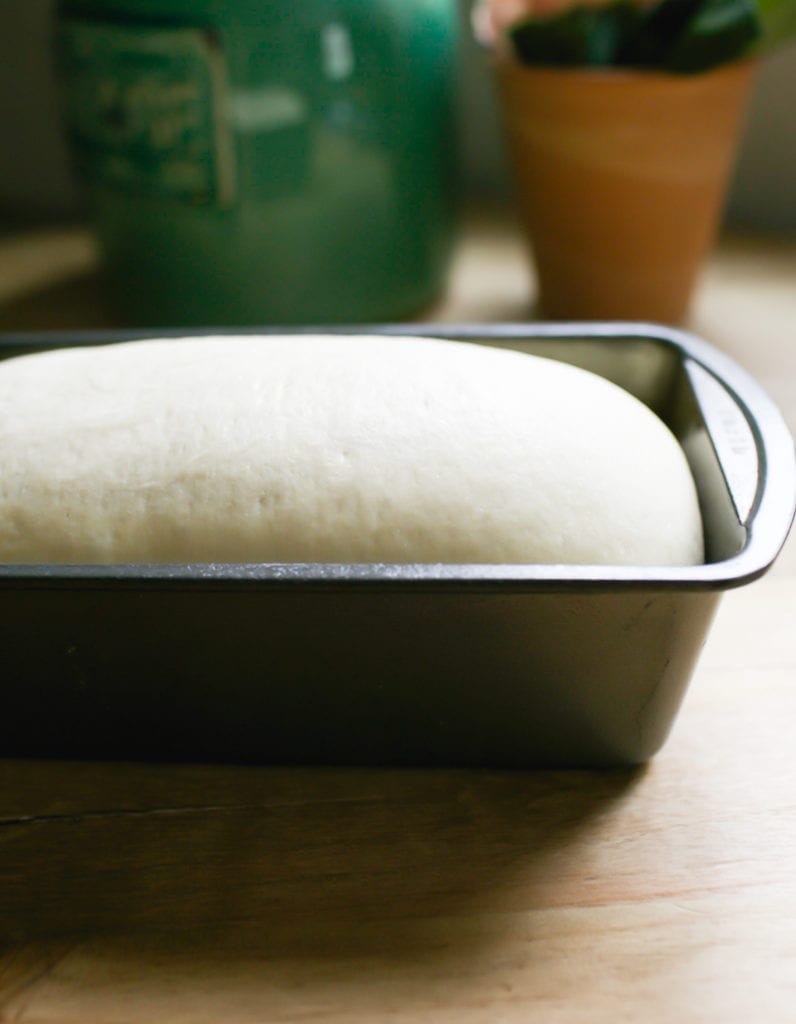
The dough is ready when the center rises to about 1-inch or more above the rim. It should look nice and puffy, and no longer dense. Be patient with this step. It takes time especially when the weather is cold. This is where the smaller 8.5×4 inch loaf pan comes in handy; the smaller size will speed of the rise. Consider using a proofing box to boost the rise.
Preheat your oven to 375 F.
TIP: For higher oven spring, preheat your oven to 500 F (instead of 375 F). Once the bread goes in, reduce the temperature to 375 F and bake as directed.
Bake the Dough
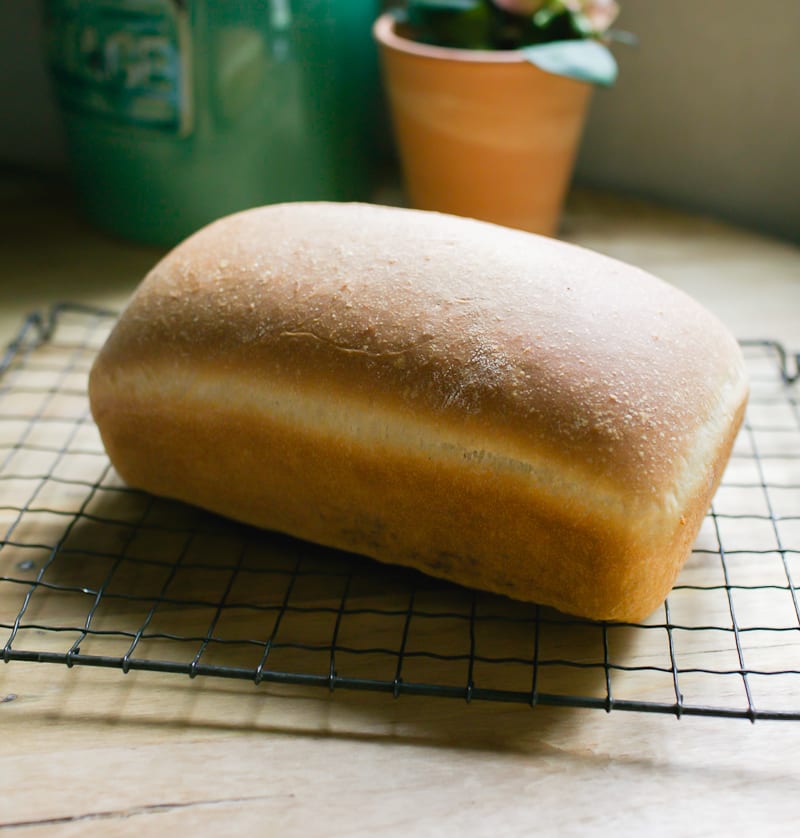
Place the dough on the center rack and bake for 45-50 minutes.
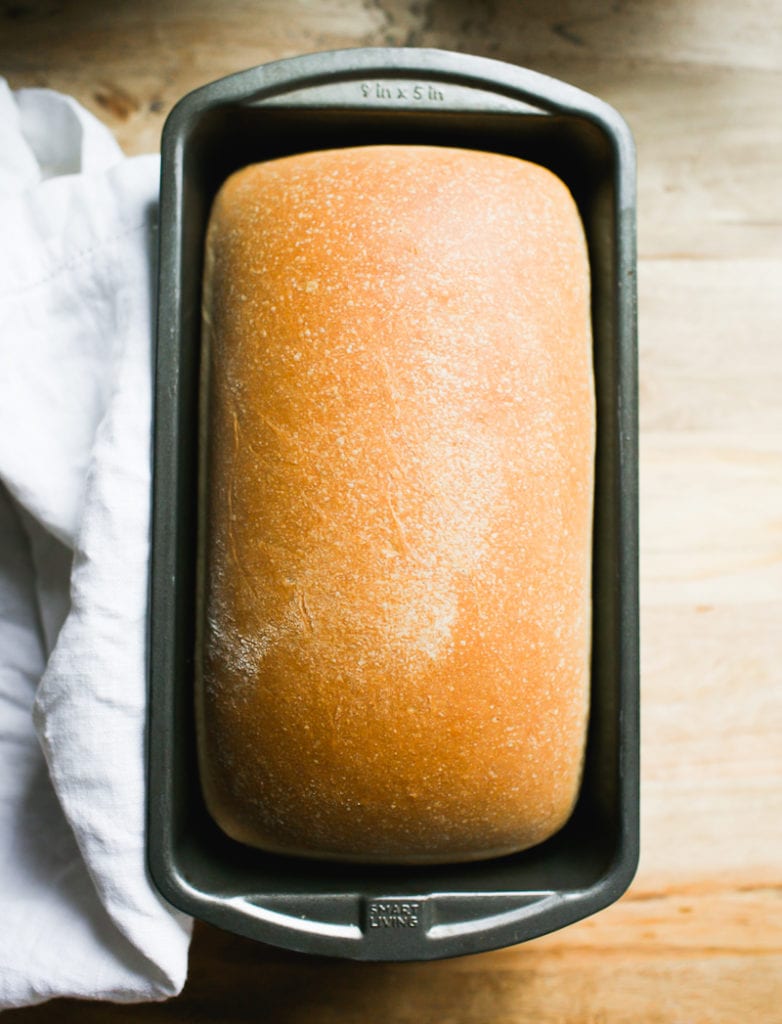
Once finished, let the loaf cool for at least an hour before your dive in. It’s worth the wait!
Additional Notes
If you have a large family, or just eat a lot of bread, I highly suggest doubling this recipe. Bake (2x) loaves side by side and freeze whatever you don’t eat. This loaf can be frozen whole, covered tightly in plastic wrap or as individual slices.
Sourdough Sandwich bread Variations
- Whole Wheat: Replace 20% all purpose flour with whole wheat or light whole wheat flour. If the dough seems dry (whole grain flours absorb more liquid), add more water as needed to achieve a workable consistency. Do this 1 tsp. at a time.
- Bread Flour: Do an even swap, adding more water if the dough is dry. For example, King Arthur Bread flour is very “thirsty” so more liquid might be needed. If using Gold Medal bread flour, which is not as absorbent, additional adjustments might not be necessary.
- Sourdough Cinnamon Raisin: Click here for my step-by-step post!
More Sourdough Bread Recipes To Try!
- Sourdough Focaccia Bread
- Sourdough Bread: A Beginner’s Guide
- Best Sourdough Pizza Crust (No steel or stone!)
- Easy Homemade Sourdough Bagels
- Light Whole Wheat Sourdough Bread

Easy Sourdough Sandwich Bread
- Prep Time: 12 hours
- Cook Time: 50 minutes
- Total Time: 12 hours 50 minutes
- Yield: 1 loaf
- Category: Sourdough Bread
- Method: Oven-Baked
- Cuisine: American
- Diet: Vegetarian
Description
A simple and easy recipe for homemade sourdough sandwich bread. Made with all purpose flour and just a touch of butter. I like to make the dough at night so we can have fresh bread in the morning. This loaf freezes well (whole or sliced). I recommend this loaf pan.
Notes
For best results, please weigh your ingredients with a scale instead of using measuring cups.
Here’s why: weight and volume measurements are not equal, only approximate! This is especially important regarding the sourdough starter. If your starter is very bubbly, 1/4 cup might only weigh 30 g which is too little for this recipe (you need 50 g). The dough will take forever to rise! Same goes for the flour… 4 cups might end up weighing way over 500 g depending on how tight the flour was packed into the cup. You’ll end up with dry dough.
I used Whole Foods 365 Everyday all purpose flour for this recipe. King Arthur and Trader Joe’s ap flour will work as well. If using another brand with a lower protein content (i.e. Gold Medal, Pillsbury, Heckers) consider reducing the total water amount by 15 g.
Ingredients
- 500 g (4 cups) all purpose flour
- 60 g (4 tbsp.) unsalted butter, softened, cut into cubes
- 12 g (1 tbsp.) sugar
- 9 g fine sea salt
- 50 g (1/4 cup) bubbly, active sourdough starter (100% hydration)**
- 270 g (1 cup + 2 tbsp) warm water
Helpful Tips:
** If the weather is not warm enough, sometimes the second rise can take longer than expected. To speed up the rise, use an 8.5×4 inch loaf pan (instead of a 9×5 inch pan), increase the amount of starter and decrease the amount of water for best results. Please choose one of the following adjustments below, keeping the rest of the ingredient quantities the same:
- 100 g starter + 255 g water
- 150 g starter + 250 g water
Additionally, because temperature controls time you can also increase your surrounding temperature for the bulk or second rise, as needed. Place the dough in a proofing box set to 75-80 F. Or, preheat your home oven to 75-80 F and then shut it off immediately (use an oven thermometer to make sure it’s set to exactly 80 F and not higher!). Place the covered dough inside until it bulks up. Do no use this option overnight- it will be too warm.
Instructions
Baking Schedule: this is an overnight dough which takes approximately 10-12 hrs to rise @ 68 F. Start the night before, in the evening, and plan to bake the following day. If it’s warmer than 68 F the dough will take less time to rise. Alternatively, start in the morning and bake in the afternoon or evening.
Mix the Dough
In a stand mixer fitted with the paddle attachment, add the flour, butter, sugar and salt. Mix on low speed until combined; the butter should look like crumbs.
Add the starter and warm water. Mix until the flour is fully absorbed (get in there with your hands to finish mixing). The dough will feel slightly sticky and elastic at this stage. Cover with plastic wrap or a damp towel and let rest for 30 minutes. Meanwhile, replenish you starter with fresh flour and water.
After the dough has rested, switch to the dough hook and run the machine on medium-low (#3 on a KitchenAid) for 6-8 minutes. The dough will feel soft and supple and not stick to your hands. If it does, add a dusting of flour.
Note: If you do not have a stand mixer, the dough can be made by hand. After mixing and resting for 30 minutes, knead the dough on a lightly floured surface for 8-10 minutes, or until smooth, soft and elastic. Do not worry about under/over kneading. Relax into the process and focus on the texture, not the time.
Bulk Rise
Cover the bowl with plastic wrap and let rise overnight at room temperature (68 F) until double in size, about 10-12 hrs. Please refer to the Baking Schedule above for additional rise time options.
Shape the Dough
In the morning, coat an 8.5×4 inch loaf pan with butter.
Remove the dough onto a lightly floured work surface. Gently flatten the surface to release any large air bubbles.
Roll the dough into a log tucking the ends underneath. Rest for 5-10 minutes. With floured hands, gently cup the dough and pull it toward you to tighten its shape. Using a bench knife, place the dough into the loaf pan seam side down.
Second Rise
Cover the dough with lightly oiled or buttered plastic wrap. Let rest at room temperature until it has risen to about 1-inch above the rim of the pan (check the height by looking at the domed center portion of the dough). You are not looking for it to double in size. For timing, this can take anywhere from 1 1/2-2 hours (or more!) depending on temperature and the amount of sourdough starter used. Remember, the warmer it is, the faster the dough will rise. Refer to the “helpful tips” at the top of this post.
Preheat your oven to 375 F. Note: For higher oven spring, preheat to 500 F instead. Reduce to 375 F once the dough goes into the oven and bake as directed.
Bake the Dough
Bake the dough on the center rack for about 45-50 minutes, or until golden brown.
Cool in the pan for at least 10 minutes, and then transfer to a rack to cool completely.
This sandwich loaf will stay fresh for up to 3 days, stored in a plastic bag at room temperature.


Comments
Heather says
This recipe is the best one I’ve tried to date. Only thing I did different, was brushed butter all over the top and sides when it was out of the oven and cooling! Thank you!
Sarah says
I accidentally used bread flour out of habit for traditional round SD loaf! How do i modify rise or baking time?!
Lynette says
Can this be baked in a Pullman pan with the lid?
Lynne Sandifar says
I’d like to try it but just found it today…I work tomorrow…but have 300g of bubbly active starter…was wondering if I could make it this evening and then put in fridge overnight and take out in the morning then come home at lunch and roll out and shape and put in pans and then leave out on counter for 2nd rise and come home approx 3 hours later and bake?
Carley says
Has anyone attempted this recipe with rye flour? Or a mix of AP and rye?
Jackie says
Again, I say, this recipe is excellent, and I am so happy to have it. I follow it to almost the end. The only thing I really must comment about is your Storing the bread in a plastic bag. I have done this for years and always wondered why the bread wasn’t as good the next day (unless it was toasted).
Since I have stopped using Plastic Ziploc bags My breads always last several days and the flavor does not change.
Erin says
How do you store it?
Jackie says
I store my bread in paper bags (I think they are coated) with a Cellophane window like are sometimes displayed in bakeries. I buy them through Amazon but are probably available in kitchen stores. Also, paper bags, waxed paper, compostable bags or foil would also work. Compostable bags are becoming more available now and are far better for the environment.
Erin says
I think where I live it is far too dry for a few of these options. Wax paper might work! I have a cloth bag lined with beeswax but not even that works.
Jackie says
I think Clough is an excellent idea! I also use Clock from time to time. I even bought some Cloth bread, bags for that reason. I’m not sure why I did not mention that. Thank you so much for reminding me!
Laura says
I am also curious as to how you store it! :)
Deborah says
How do you store it then? Just on the counter? How do you keep it from drying out?
Abby says
Made the dough tonight, haven’t baked it yet but noticed that there were balls of butter that didn’t incorporate but you could see in the dough. Bad? Wondering if this won’t work out and I wasted ingredients
Tonia says
This was an easy recipe and the bread was delicious. I tried it first with some pear butter I just finished making and it was perfect.
I’m looking forward to trying the cinnamon raisin next.
Sarah says
I have made this twice now, and both times it has been an absolute dream!!! I am questioning doing my starter right in the middle and using 75 grams, but can’t figure out how much water that would use
Also… I want to try doubling the recipe to make two loaves at once. Has anyone had luck with this? Or is it best as a single loaf recipe. Any thoughts or tips are greatly appreciated. 😊
Bethany says
I just found this recipe and I am making it for the first time and I doubled it for a larger Pullman pan. 🤷🏻♀️ we shall see how it goes.
Amanda Somerville says
How did it go?! I’m just thinking of doing this tonight
Bethany says
Turned out AMAZING! This site has some of the best recipes.
Amanda Somerville says
Great thank you! I’ll double it for the large Pullman as well then. Thanks again
Deborah says
Im making this for the first time and doubling it. Its in the oven now so we will see. All the steps looked right. I cant imagine this not turning out right.
Lisa says
This sandwich loaf is my go-to, never-fail, most favorite sourdough bread! Excellent recipe.
What would I need to change in the process to make mini loaves?
Kara says
Hi! I’ve been making this recipe for months now and it has turned out perfect and delicious every time! However, I was curious about doing a whole wheat flour combination with this recipe and was curious if you could help me with the ratios of that? I normally do this recipe with 100g of starter so how much wheat flour would I need to add along with water etc?
Thank you!
Corinne says
Hi! Did you get an answer to this? Would love to make this with whole wheat as well!
Leona says
I’ve substituted 20% (100g) of the flour for whole wheat with good results following the other ingredients exactly as stated. :) Been using this recipe since I started my sourdough journey earlier this year!
Susan says
I made this for the first time yesterday and it was absolutely fantastic. Thank you Emilie! We ate it fresh with escargots cooked with garlic. What a great meal.
Charlotte says
This recipe is it!!! No need to search for a recipe that truly produces soft supple sandwich bread! The dough is dreamy and the loaf is perfection! I did use her adjustment for more starter based on our temperatures. I have found my go to sandwich bread recipe!! Thank you!!
Charise Tucker says
I absolutely love this bread but wondering if I could us Kamut flour with it?
nellaanuam says
Kamut flour is more dense. I question that your product would be as pleasing.
Cici says
Perfect Bread! Made it yesterday.
Toma says
Made this today, started the dough last night. Everything seemed fine (novice bread maker, only 2nd recipe I have made), until the 2nd rise before baking. Stared this rise at approximately 9:30am this morning. At 3pm this afternoon still not rising to an inch above the edge of pan, but it did rise. So I decided to go ahead and bake. Why did it not rise?
Cheryl says
Just wanted to say I had the same experience. My house might be too cool or maybe my starter isn’t strong enough? I don’t know but I’m going to give it another try and do the 2nd rise in the microwave with the light on. My dough was a bit wet, I think, so I may add more flour.
Whitney says
A perfect sandwich loaf! Straightforward recipe. Will be on repeat. Thanks!
Karyne Lapensee says
Looooved this recipe ! Perfection. We made some epic gourmet grilled cheese with homemade roasted tomato soup! Delish!
Jackie says
Jackie commenting again . I get the feeling that no one believes my comment about the plastic bags ! Try storing in paper and test it out.
You certainly don’t want to ruin
this beautiful bread with plastic!
HEATHER J GRINSTEAD says
Yes !! Paper is the only way .
Cici says
Thank you for this tip.
Gill says
Makes beautiful sandwich loaf thanks.
Would I be able to make rolls using the same recipe? If so how long would I cook.
Thanks again in advance.
Patty Dameron says
I love this recipe! I opted to make a couple of adjustments. I use milk instead of water and no sugar. When the bread is ready to go into the oven, I score lengthwise and put in about 1-2 tablespoons melted butter. I even won a blue ribbon at the county fair.
AJ says
You put the butter on top? In the score mark? What’s the result?
Patty Dameron says
A nice buttery crust
Jackie says
I made this recipe with my 150 year old starter. It turned out really well. My husband will also agree. I will make this again and again. I have one thing to offer. Do not store this bread, or any other homemade bread in a plastic bag. I couldn’t figure out why my sourdough bread was not tasting as good the next day. We finally figured out that we needed to store it in non-plastic bags. I buy paper bread bags with a cellophane window from Amazon. Much better it actually lasts longer as well. Thanks for the recipe!
Lisa says
Question for Jackie
Does the bread not get dry and hard when stored in paper bags?
Jackie says
I store mine in bags I get from Amazon. They are paper with a cellophane window. If I’m keeping it longer, I sometimes wrap it also in a compostable bag – you know, those little green ones.
Erin says
Where I live it is typically very dry and if stored in paper it goes stale quickly. I even tried a cloth bread bag coated with beeswax on the inside and it still dried out. So I think relative humidity is a big factor here.
Cheryl Nicholson says
This was my first try at baking sourdough bread. It’s August in Manitoba, warm and humid weather. It took 8 hours on the second rise to bring it an inch above the edge of my loaf pan, even proofing it in the oven with the light on. I’d like slightly less density and a lighter flavor, but these are minor issues. It turned out so well for my first time. Very rewarding!
Dave Blazer says
This is the most well-written recipe I have ever used, and the bread came out beautifully. I used 100g of starter and 255g of water and otherwise followed it exactly, using hard red wheat bread flour.
Thanks, it made my first attempt at sourdough a success.
Mike says
What % rise are you looking for for the bull fermentation?
Diane Marie says
WOW!
So first time using this recipe and first time using my starter in sand which bread. My house smells amazing, because bread yum! The rise is completely epic, a nice crust, a little tang, soft yet firm, absolutely perfect and will be my go to, thank you so very much for sharing, I appreciate you!
Linda V says
This is my go-to sandwich bread recipe. I make it about every 10 days. So easy! & Delicious! There are only 2 of us, so I slice the loaf and place squares of parchment between them & freeze. The parchment gets reused forever & I can easily take out as many slices as I need. I shared the recipe with my daughter and she makes it all the time too. I love my boules and baguettes, but this recipe makes the perfect sandwich bread.
Sally says
Can I give this recipe 100 stars?!? Wow. This bread is remarkable! So soft and squishy. I have tried multiple sandwich bread recipes, searching for the perfect sourdough sandwich bread…my search is over!! Thank you for such a wonderful recipe! I really like how this recipe doesn’t have any oil, only butter. The oil seems to make bread dense instead of light and fluffy. Try this bread; you won’t be disappointed!
Jordan says
I put the dough in the fridge overnight because I wasn’t sure if I could pick it up the next day…will I be able to continue the process once I bring the dough back to room temp?
Nicole Owen says
I love this recipe! I just made this bread for the first time and it turned out great. It has a nice crust, soft inside, and has a delicious sourdough taste. The directions really helped me understand the process and its saved in my favorites!
Kacy says
My sourdough sandwich bread is always very dense (not this recipe). My problem is, my loaf is uniform as your looks and it always splits on one side. Making it very wonky. Please help.
Samantha says
Best bread ever. Any way to make a bunch of doughs and then freeze or refrigerate and use a week later? What are your thoughts.
KeenBaker says
Maybe you could try a longer second proof? That’s usually when bread splits, so might be worth a try.
Patty Dameron says
Score the top lengthwise just before baking. I throw some butter in the score. Since doing this, I have stopped having side blowouts.
Patty Dameron says
I would say if the side is blowing out, it hasn’t proved long enough or you have too much dough in the pan. When my dough was blowing out, I reduces the amount of dough per pan and then I started scoring the dough the length of the pan. No more blowouts.
Julie says
Omg this sourdough sandwich bread recipe is awesome. Thank you for sharing it. I made a loaf last week where I had to add quite a bit extra flour but today I did a double batch and dropped the warm water to 256g per loaf; likely more humid here. Excellent and highly recommend this recipe.
Michele says
Just love this recipe. I like a really tangy sourdough, so used 160 gm of starter. Also, I used 1/2 Dakota Maid bread flour -a high -protein ND flour I love -and half all-purpose. Dakota Maid is very thirsty flour, so I have settled on 160 gms of 100% hydration starter, 260 gm water with these flours. I have slashed the top with a lame, and made it without the slash -great either way.
Makes the BEST sandwiches and toast-perfect texture, great flavor.
Everyone asks when I’m baking it again!
Kenny says
In case this is of use to anyone stumbling on this, I wanted to bake this in my Breville countertop convection oven and wasn’t sure what temperature and for how long. I baked for 40 minutes @ 350 F. The color seemed right and I used an instant-read thermometer to check the temperature (208 F). I got a very good oven spring.
Jennie says
I need help! Every time I make your sandwich bread, the white or wheat from your cookbook, my bread splits on one side, instead of having a nice smooth dome. I’ve tried giving my dough more time to rise and less time to rise, but it still happens. Do I need to try a larger loaf pan or is there something else I’m doing wrong? I’m a huge fan of both your cookbook and online sourdough recipes for all my sourdough baking. Thank you!
Pvole says
If your bread splits on the side it is usually because of one of the following:
1. Underproofed (use the finger poke test)
2. Top of dough formed a tough skin during 2nd rise (cover with plastic wrap or damp towel during first and 2nd rise).
3. Oven is too dry or bread too close to top of oven so crust forms too early (try a water bath on rack under bread and set racks so top of bread is closer to center of oven).
4. Sometimes slashing bread helps. For sandwich bread I sometimes slash down middle. Right before you put in oven Sprinkle top of bread with a tiny amount of rice or wheat flour flour. Use a new razor blade or lame to make a 3/4 deep and even slash.
Good luck!
Mike says
Ok so made this recipe and did the 8×4.5 pan loaf. It exploded out the side because it had way too much dough in it. Should I have cut back on what I put in the pan if using that pan?
Ashley Eddingfield says
I did two loaves!
Aneta says
Hello, my dough doubled beautiful but did not hold its shape well, do I need to add more flour? Thank you
Sidney says
I followed all the instructions, mu loaf tastes great but didn’t rise enough. Any tips? I live at very very high altitude.
Adriana says
AMAZING!! This bread is so good. Can’t wait to make it again.
Kelly says
Does this freeze well? Turned out great!
LC says
I often freeze mine! I slice it into sandwich sized slices and then freeze. I toast up a few pieces as needed!
Maren says
I made this recipe using the dough setting on my bread machine first thing in the morning for the mixing and a warm place to rise. I took it out and put it in a bread pan for the second rise and then put it in the fridge overnight to develop a more sour flavor. Baked the next morning and it is delicious! So easy and minimal clean-up 👍
Susan says
Made this loaf today (well, started yesterday, baked today). I wanted a sourdough recipe to make sandwiches with and this one is exactly what I was looking for. Easy kneading and the end result is a light loaf with the perfect texture for sandwiches. Thank you!
Hannah says
It took quite a long time to rise but it turned out beautifully! Exactly what I was looking for – a more dense, elastic loaf of bread that doesn’t fall to pieces when you slice it. Perfect for toast, very tasty. I will definitely be using this recipe regularly, thank you so much!
Judy McNeely says
This is the best recipe I’ve ever used! I love it! The bread does not crumble when sliced and used as a sandwich!
Kaylee says
This came out tasting a bit flour-y for me. Maybe it’s because I did the recommended starter-water changes for a cooler temperature? Or maybe it has something to do with my kneading it by hand. Either way, it tastes ok, but not fantastic.
Patty says
My first try on sourdough bread was a round loaf which didn’t really make the grade. My second try was this easy sandwich loaf recipe by Emilie. It came out great! Really soft bread that held up perfectly as a sandwich and delicious as toast too. Highly recommend this recipe. I am doubling my next batch!
Patty Dameron says
I love your sourdough recipes. I am using the sandwich bread recipe but instead of adding sugar, I just use milk (no water). The bread is fantastic tasting. I have a cast iron bread pan and the bread comes out perfectly brown and done. I have also shaped the dough into hot dog or hamburger buns. I also use your other sourdough recipes.
Kaelii says
It took longer than expected for my dough to rise and it’s too late in the day for me to wait for a second rise after shaping. Would I be able to shape, place in my bread pan and refrigerate over night and bake in the morning? Maybe just let it come to room temp first?
Connie Perks says
How did your refrigerated second rise turn out?
Little Bold Lady says
Landed the recipe the first time. I can’t always say that, so it validates the clarity of the instructions. Thank you. The back story is my husband made a fantastic bacon jam and I’ve had a crave for a brie/jam jammed in my brain for a bit too long.
Therefore, woke up at midnight and woke up my starter Doughlores. Totally forced the bulk rise (even living in Cocoa Beach FL) I cranked up my oven options – yes, the vision made me desperate.
I had a beautiful loaf which I could slice thin, thick, medium – you want a slice 7mm – no problema! There is a part of me that thinks I was just lucky. But I’ll report back when I do this again.
Joseph says
I love the name of your starter!
Matt says
Made this using 80% king arthur bread flour and 20% dark rye, it definitely needed a substantial amount more water (at least 60g more water) to get the dough to not feel so tight after I first mixed it together. Other than that adjustment for my flour change everything went exactly per the plan/instructions and it came out amazing! Thanks for the recipe!