I never thought I’d bake bagels at home.
Why bother when you can just buy a dozen from the store on Sunday morning? I’m from New York where we have access to some of THE BEST bagels in the world!
After creating and testing hundreds of recipes for Artisan Sourdough Made Simple I had a change of heart.
Turns out, the fuss of making bagels was all in my head. The process is surprisingly therapeutic, the results are tastier than store-bought (when is the last time you even had a sourdough bagel?), and the dough itself is super easy to handle for many reasons:
-
-
- a.) you don’t have to knead it.
- b.) it’s so dry, you can basically shape it however you want.
-
-
- c.) if you mess up just let it rest and try again.
And that boiling part you’re secretly dreading?
Yes, yes, yes, you need to boil the bagels prior to baking to set the crust… but it’s easy! If you can make ravioli you can boil bagels at home.
So here we are, with a brand new recipe which is a twist on my Sunday Morning Bagels from the book.
For this version, I added pumpkin puree to the dough. This doesn’t make the bagels taste like pumpkin, it’s more for color and autumnal ambiance. What really gives these bagels that quintessential pumpkin taste is the topping!
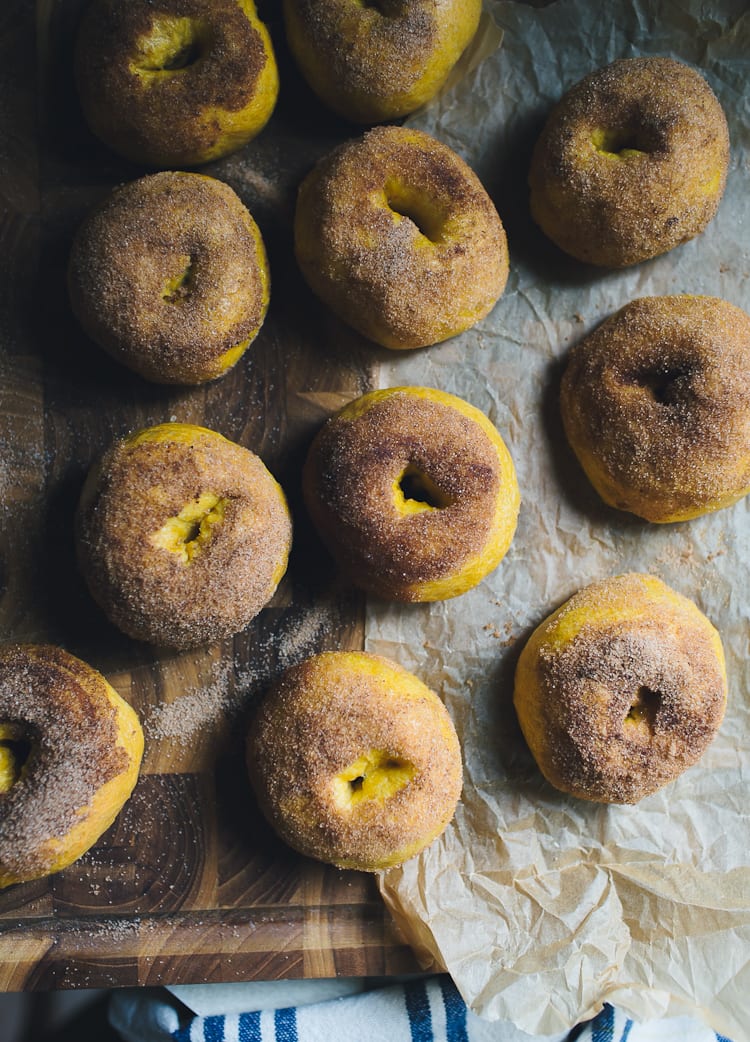
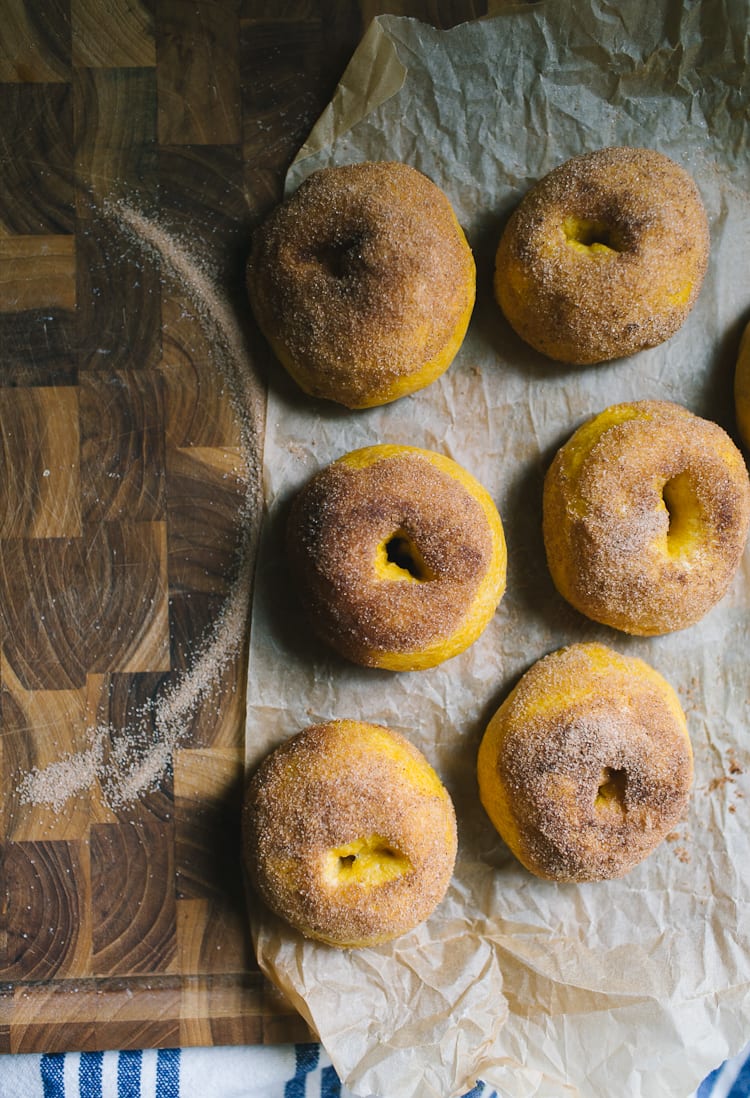
After the dough is boiled and baked, the bagels are lightly brushed with butter and dipped into a mixture of pumpkin spice and sugar. Also: these bagels are mini. Do I really need to say anything else?!
Here’s a step-by-step break down on how to do it:
Step #1: Make the Dough
It’s best to break this recipe up over two days: start the dough on Saturday evening, let rise overnight, and finish on Sunday morning.
For overnight recipes, I’ll start mixing the dough anywhere between 5-8 PM the day before. In winter, I’ll make the dough between 5- 6 PM when I know it will take longer to rise. In spring and summer when the weather is warm and the dough will rise faster, I’ll push the start time to 7-8 PM, sometimes even 9 PM. You’ll have to play around this depending on where you live.
Either way, sourdough rise times will always depend on the temperature of your specific environment and the nature of how your starter performs- I cannot stress this enough. You’re not working with predictable rapid-rise yeast where the dough will be ready in 2 hours! Be patient. Flexible. And always watch the dough (not the clock).
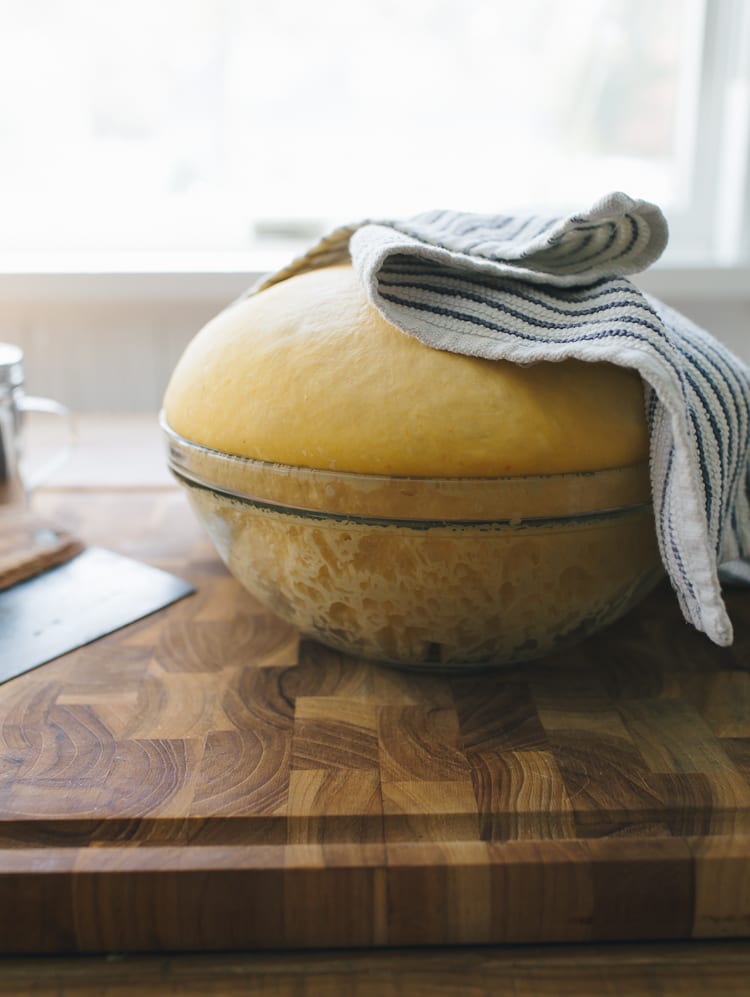
The picture above shows what my dough looked like in the morning. It actually rose way too much! My bagels turned out mighty fine regardless, so don’t worry if your dough gets really excited like mine ;)
Step #2: Cut & Weigh
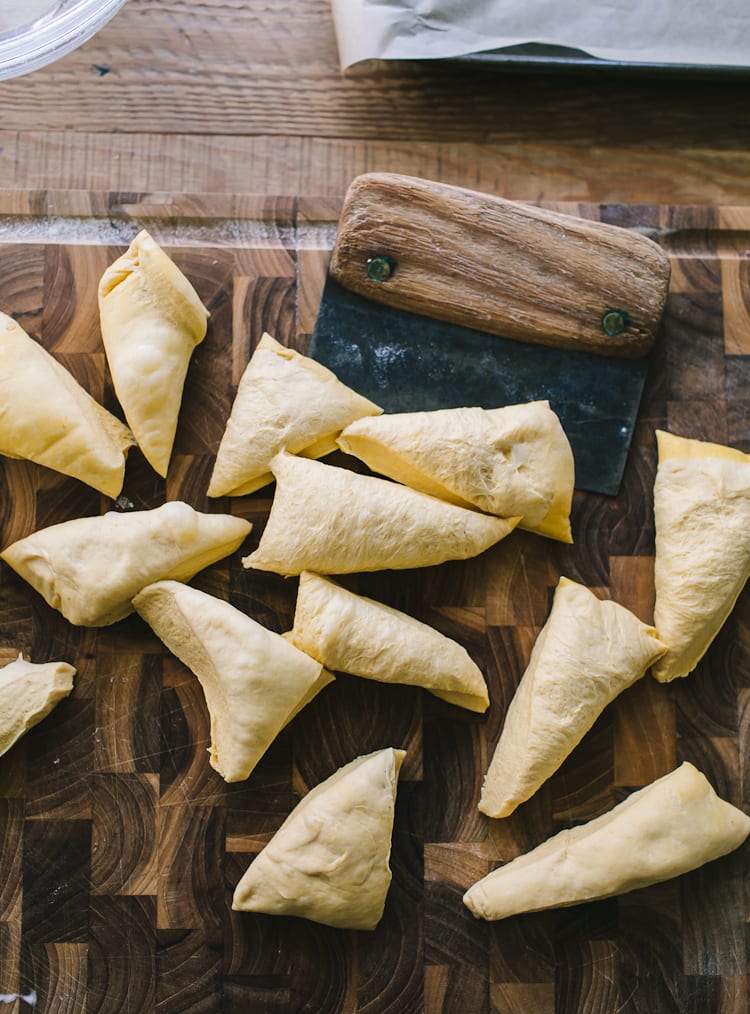
The next step is to remove the dough onto a non-floured surface.
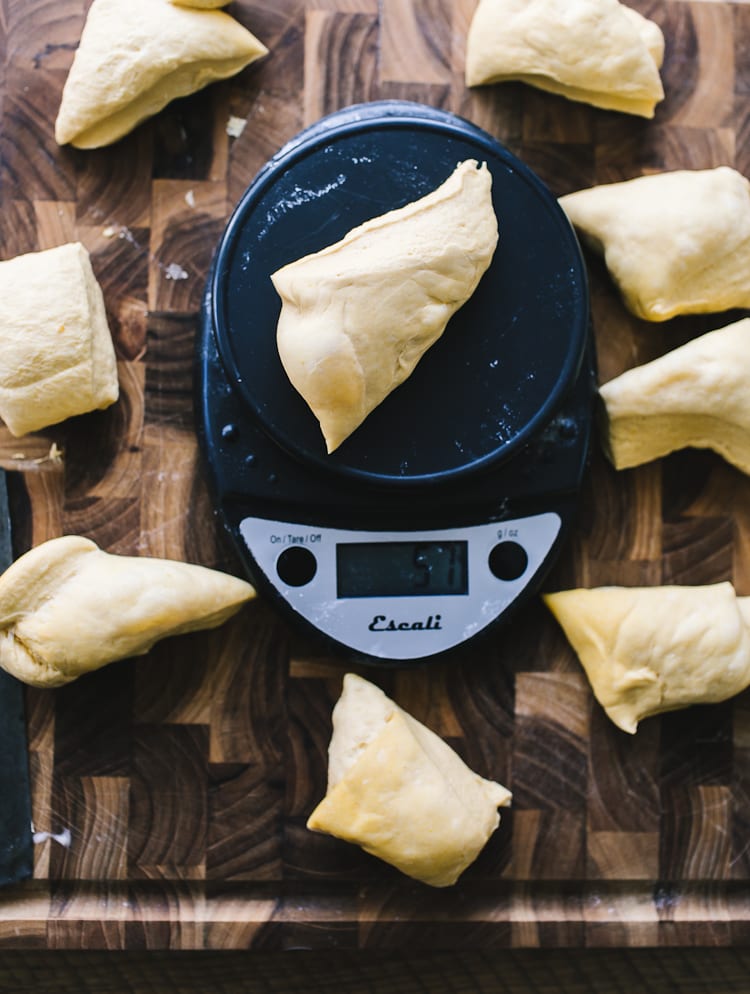
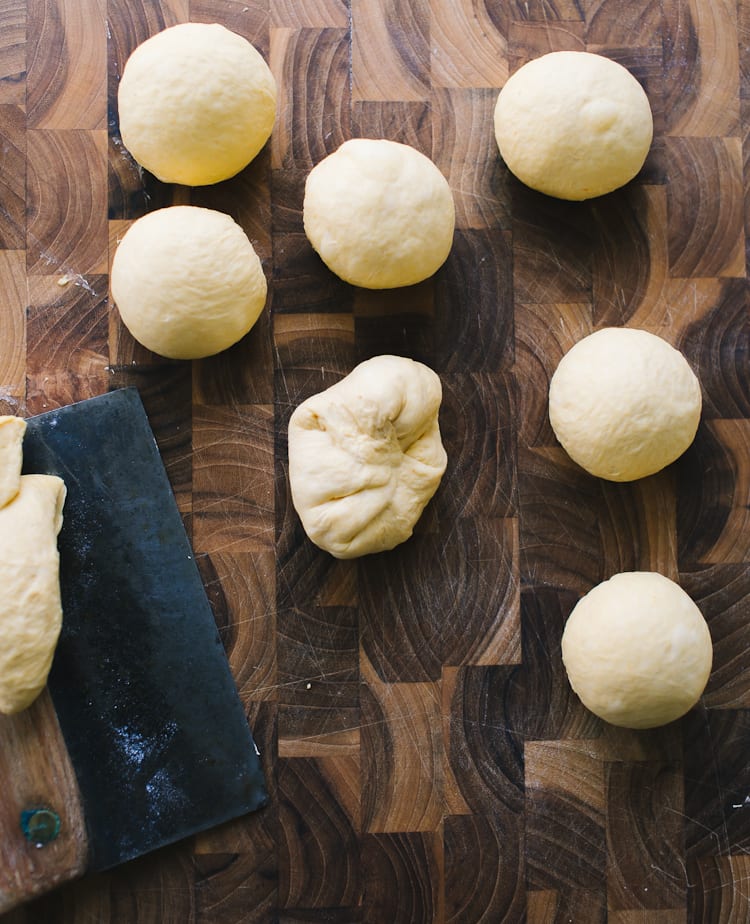
This dough is so dry, you don’t need any extra flour to prevent sticking. Cut the dough into 16 equal pieces for mini bagels. For best results, I highly suggest weighing the dough so that all of your bagels will be approximately the same size. Mine were about 57 g each.
Note: if you prefer standard size bagels, cut the dough into 8 equal pieces or about 114 g each.
Step #3: Shape the Dough
Shaping bagels is a two step process.
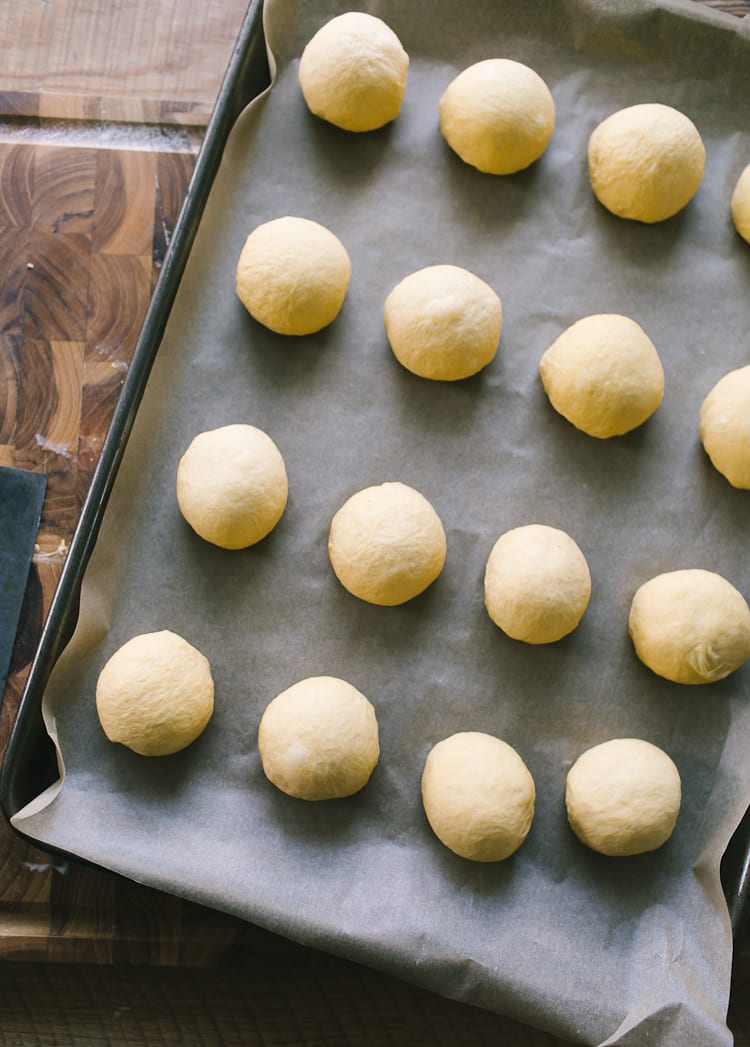
First, you’ll need to create little balls. Take one piece of dough and gather the ends towards the center (you can pinch them or push them down, if you want). Flip the dough over, and then roll it into a ball using the palm of your hand.
Place onto a parchment lined sheet pan lightly coated with cooking spray. Rest for 15+ minutes to relax the gluten.
The second step is to create a bagel shape.
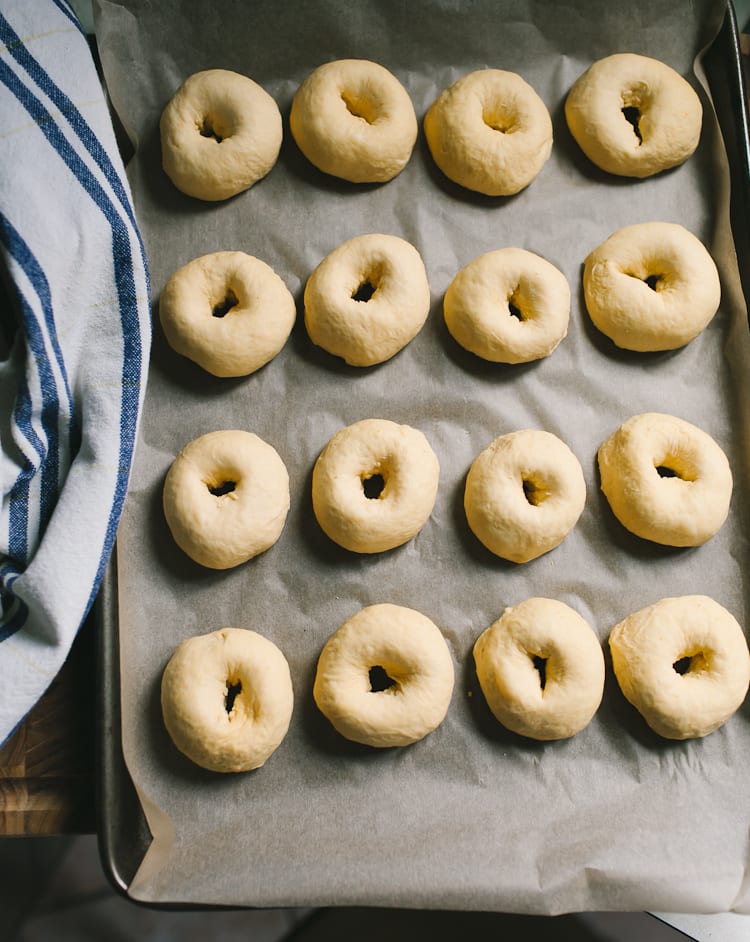
To do this, poke your finger through the center of the dough. Then gently stretch the opening to about the size of a walnut. Place back onto the lined sheet pan. Rest for another 15-20 minutes.
Meanwhile, bring a medium pot of water to a boil. Preheat your oven to 425 F. Line a second sheet pan with parchment paper and coat with cooking spray.
Step #4: Boil the Bagels
Okay, so this is probably the scariest part for most of you. I totally get it. But don’t worry, it’s really easy.
Once the bagels have finished resting, using your hands, gently lower 2-3 pieces into the boiling water- they won’t stick together. Reduce the heat to a rapid simmer if the boil is too high. Cook for 30 seconds on each side; I use tongs to easily flip them over.
Then, using a slotted spoon transfer the bagels back onto the lined sheet pan you used earlier, rounded side up (the sheet pan will get wet). Make sure to have that second lined sheet pan ready for the rest of your bagels.
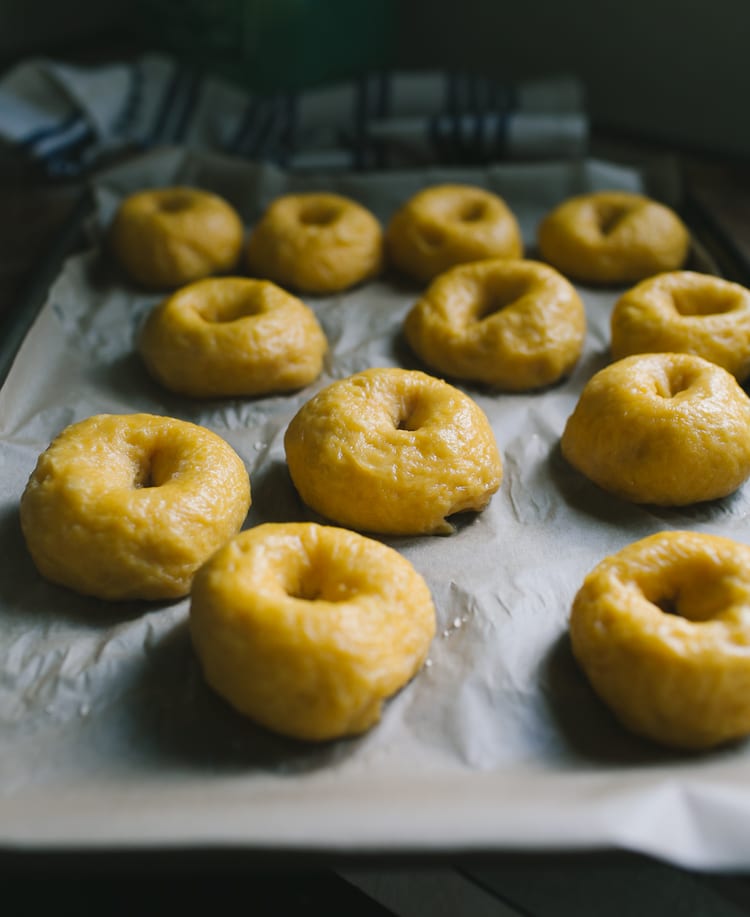
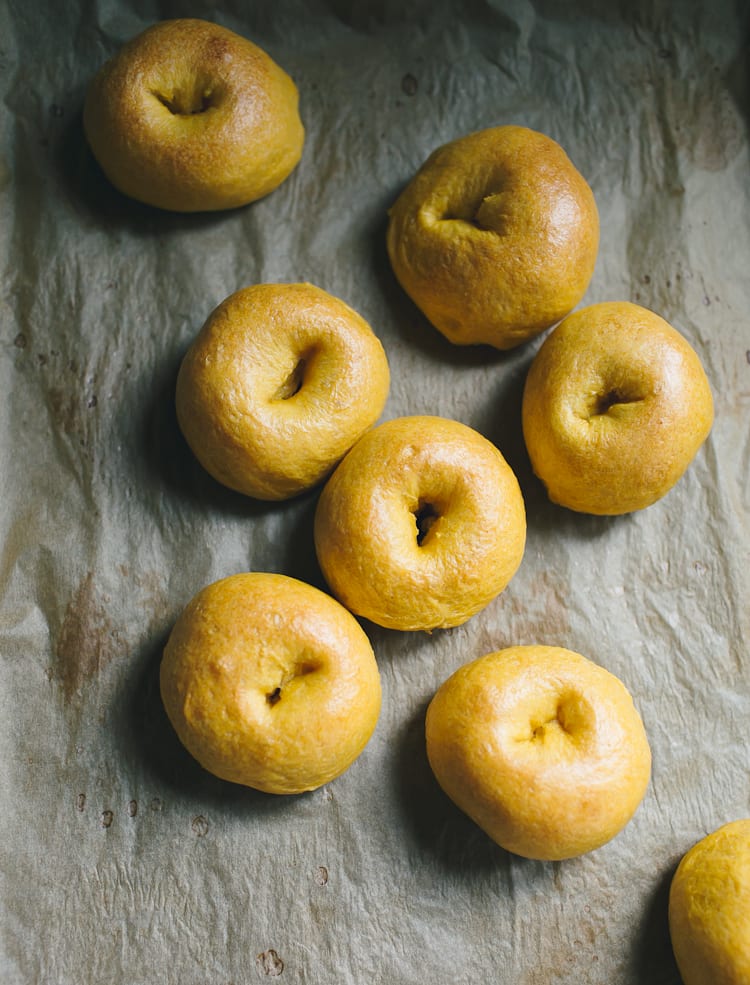
By the way, it’s completely normal for your bagels to look bumpy and weird after you boil them. The surface will smooth out once they are baked.
Isn’t that rich pumpkin color gorgeous?
Step #5: Bake the Bagels
The next step is to pop the boiled dough into the oven. You can bake both trays at one time, however I prefer to alternate them on the center rack.
Baking time should run for about 16-18 minutes @ 425F for mini bagels. They should feel light and look lovely and golden when ready. Note: if you are baking 8 standard size bagels, increase the cooking time to 22-25 minutes.
Meanwhile, melt some butter and set aside in a small bowl. Combine about 1/2 cup of sugar and pumpkin spice (to taste) in a shallow bowl for your topping.
Step #6: Coat the Bagels
This is the fun part!
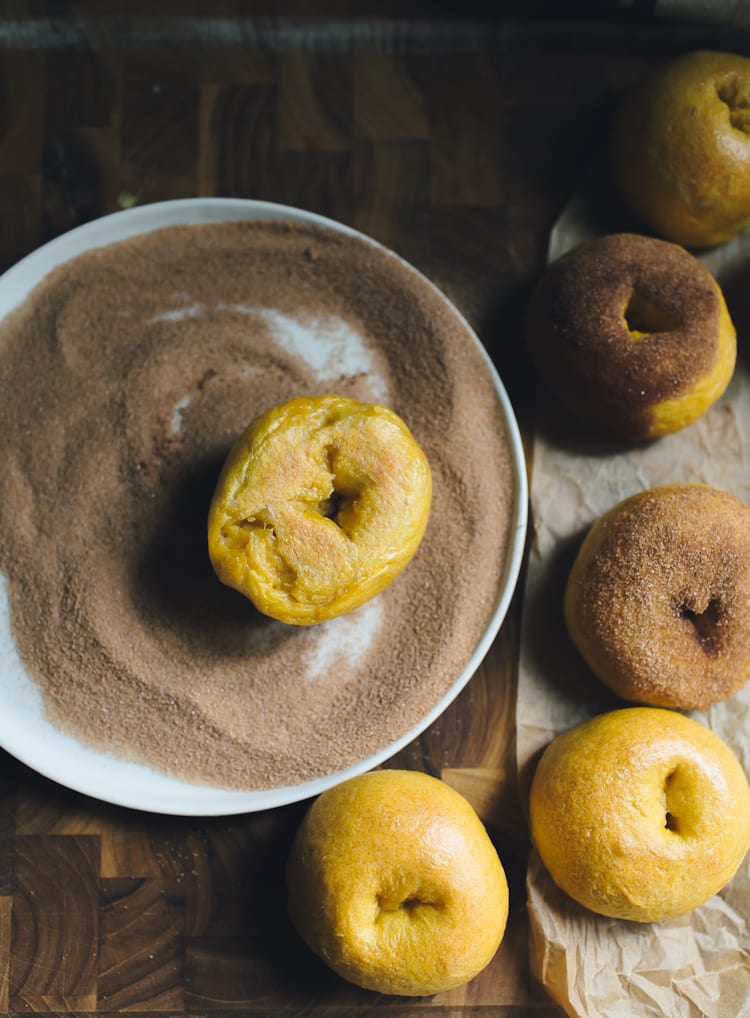
So, working with one bagel at a time brush the rounded surface with some of the melted butter. Get the sides too. If you don’t have a brush, use a folded paper towel or napkin. Then roll and press the bagel into the sugar mixture.
See?
OMG! Don’t you just want to stick your finger in that sugar?
These are soooooo good you have no idea! Seriously. Just wait until you try them! I ate one and completely burned my mouth but it was SO worth it!
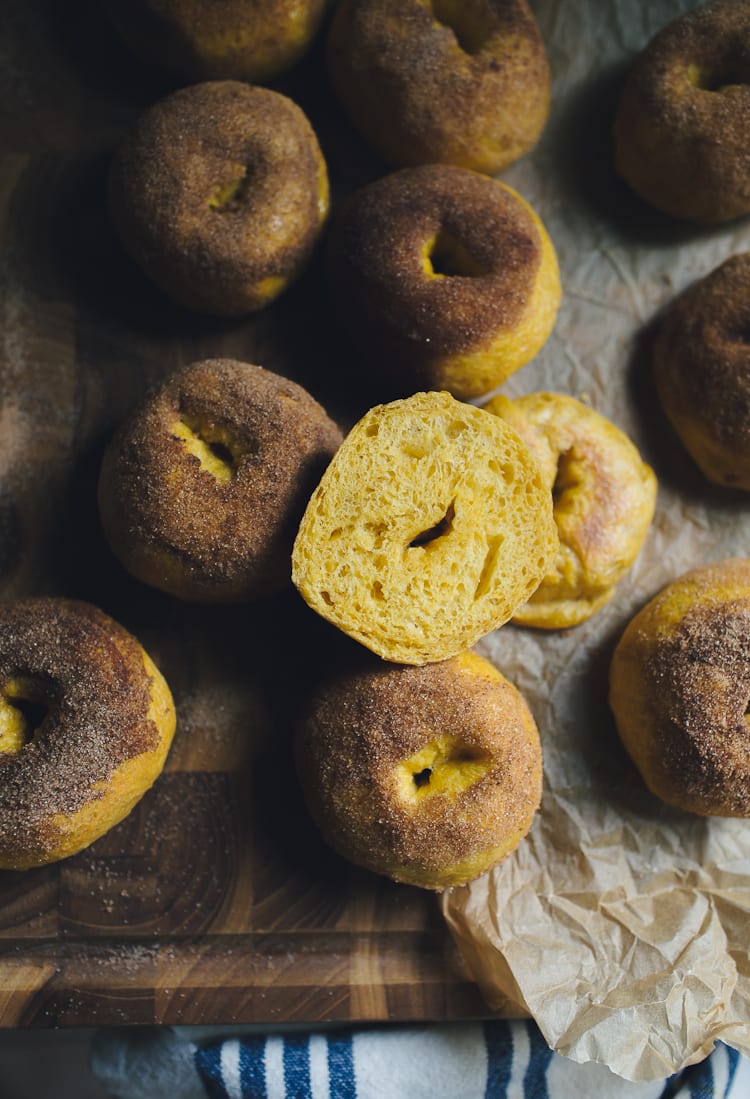
Here’s a shot of what the inside looks like… So soft and perfectly chewy!
You can eat them plain, like little warm rolls straight from the oven. Or slice and serve with softened butter or cream cheese.
MAKE THESE RIGHT NOW!
Helpful Tips
- Bagel dough is typically very stiff and dry. So, when you go to mix it by hand and it seems like a workout, you’re on the right track! Feel free to use a stand mixer if you have one. See recipe instructions below.
- When stretching out the center of each bagel to create a hole, it might shrink back slightly after resting. This is not a problem. Right before boiling them, gently re-stretch the opening and then lower into the water.
- If the bagels are boiled for too long, the crust will be thicker. I prefer about 30 seconds on each side (although I do not time this with a clock- just in my head!) and it creates a nice crispy, crackly crust.
- These bagels are best enjoyed FRESH! Eat them on the same day! Otherwise, the moisture from the sugar will soften the crust and they’re just not as good when that happens.
♦ ♦ ♦ ♦ ♦ ♦
PS: In slightly related news regarding sourdough, I have a question for you…
Would it be helpful if I compiled a list of my favorite go-to tools for baking? For example, my favorite bread knife, flour brands, where to purchase a sourdough starter… etc? Please comment your thoughts below! This idea just popped into my head as I was wrapping up this post- thank you!

No-Knead Pumpkin Spice Sourdough Bagels
- Yield: 16 Mini bagels
- Category: Sourdough Recipes
Ingredients
For the Dough
150 g (3/4 cup) bubbly, active sourdough starter
200 g (about ¾ cup + 2 level tbsp) pumpkin puree
24 g (2 level tbsp) sugar
100 g (1/3 cup + 1½ tbsp) warm water
500 g (4 cups + 2 tbsp) bread flour
9 g (1½ tsp) fine sea salt
Cooking spray, for coating
small dollop of honey
For the Topping
½ cup sugar
pumpkin spice, to taste
Instructions
- Start in the evening: In a large bowl, add the starter, pumpkin puree, sugar, and water. Whisk with a fork to combine. Add the flour and salt. Continue mixing until the dough becomes stiff; then finish mixing by hand to fully incorporate the flour. Alternatively, combine the ingredients in a stand mixer and run on low speed for 4-6 minutes. Cover with a damp towel and let rest for 30 minutes to 1 hour.
- After the dough has rested, work it into a semi-smooth ball directly in the bowl, about 15-20 seconds. You’ll notice the dough is still stiff, but much softer than it was earlier. Cover with a damp towel and let rise overnight, about 10+ hours @ 68 F. The dough is ready when it has doubled in size.
- In the morning: Remove the dough onto a non-floured work surface. Flatten into a rectangle and cut into 16 equal pieces, about 57 g each for mini bagels (or 8 pieces, appx. 114g, for standard size bagels).
- Working with one dough at a time, gather the ends toward the center, flip it over, and then roll into a ball using the palm of your hand. Place onto a parchment lined sheet pan lightly coated with cooking spray. Repeat with the remaining pieces of dough. Let rest for 15 minutes to relax the gluten.
- To shape into bagels, poke your finger through the center of each dough ball. Lift up the dough and stretch the opening to about the size of a walnut. Place back onto your sheet pan. Repeat with the remaining dough. Cover with a damp towel and let rest for 15- 20 minutes.
- Meanwhile, bring a medium pot of water to a boil. Add the honey and whisk to dissolve. Preheat your oven to 425 F (220 C). Line a second sheet pan with parchment paper and lightly coat with cooking spray.
- Add 2-3 bagels into the pot and wait for them to float; they will most likely float right away. If not, wait about 10 seconds or so. Simmer for 30 seconds on each side. Using a slotted spoon, transfer the bagels back onto the sheet pan you used earlier (you will also use the second lined sheet pan for this). Repeat boiling the rest of the bagels.
- Bake one sheet pan of bagels on the center rack for 16-18 minutes. The bagels should be golden brown and feel light to the touch when ready (22-25 minutes for standard size bagels). When finished, bake the second sheet pan.
- Meanwhile, melt the butter and set aside in a small bowl. Add the sugar and pumpkin spice (to taste) in a shallow bowl.
- When the bagels are cool enough to handle, brush the rounded surface and sides with some of the butter. Press the bagels into the sugar mixture to coat. Repeat with the rest of the bagels.
- Serve warm or at room temperature. These bagels are best served fresh.
Notes
These bagels are best served fresh and eaten on the same day they are baked. Otherwise, the sugar will moisten the surface of the bagels.

Comments
Hester says
So easy and fun to make. The bagels turned out light, with a chewy outer shell and tender inside. I made the dough the night before and let it rest overnight in the refrigerator. I took the dough out of the refrigerator the next morning, let it rest for 2 hours on the counter and then made the bagels.
They turned out amazing. Another great recipe!
Lindsay says
Yes on recommendations! especially bread knife
Amy says
I have never thought about making bagels, or had the desire to. But my friend gifted me a sourdough starter for my birthday and introduced me to your website… Best gift EVER! Now I am obsessed. I made these this morning and they are the best bagels I have ever had. I used homemade pumpkin butter instead of plain pumpkin and the pumpkin and spices really came through. These are fabulous! Thank you.
Emilie Raffa says
Amy, this is so wonderful to hear. Thank you so much! Pumpkin butter sounds AMAZING by the way. I’m going to try it! xx
Dorothy says
What about doubling the recipe? Should I double the starter or keep it the same?
Thanks!
Emilie Raffa says
Dorothy, I would double everything and make the dough in two separate bowls. Enjoy!
sam says
Great Sourdough recipes. Having used SD for years I was happy to find easy ones to share with my son who had almost no baking experience. He happily made several of them easily.
Would love to make pumpernickel bagels, wondering if you have done so and can share some tips?
Julie says
I love this recipe. Thank you so much. People are asking about different flours. I make mine with organic spealt and they turn out great.
I was wondering, since they are better fresh, is it possible to freeze a portion of the dough any where in the process like I would with croissants?
Right now I freeze them cooked and they are great if I toast them but not as is so being able to freeze before final cooking would be interesting.
Emilie Raffa says
Ooo, thanks for the tip, Julie!
You know, I’ve never tried freezing the dough. With sourdough, you just never know if the strength will hold. But I’m sure you could try it.
Personally, I’d stick with what you’re doing, freezing the baked bagels- this will yield the best texture and the most reliable results.
Joni Wilhelm says
If I bake these ahead could I successfully brush them with the butter, roll in the sugar/spice the day I’m serving these?
Emilie Raffa says
Great question, Joni. You can, but I wouldn’t. Bagels are best enjoyed on the same day that they’re baked. If you make them ahead of time to eat the next day, they might be way too dense and dry.
Joni Wilhelm says
I opted not to roll them in the sugar/spice, instead I added the spices no sugar to the dough. They are delicious!
Thank you!
Emilie Raffa says
Fantastic!
Danielle says
Delicious recipe! I added Pumpkin pie spice into dough and then topped with a spiced brown sugar crumble before baking.
Emilie Raffa says
So glad you liked it. Your additions sound AMAZING!
Cindy c says
HI there
Can’t wait to try this recipe. Why do you have to soak the raisins before adding? Can i just add them as is?
Emilie Raffa says
Cindy, the dough might dry out otherwise. It’s best to soak dried fruit beforehand or alternatively, adjust the water quantity in the dough instead.
Patricia says
Hello Emilie,
1) I’d like to make half of this recipe……would that pose any issues or need alteration?
2) I’d also like to use 1/2 bread flour & 1/2 white whole wheat flour…..I suppose addt’l liquid needed to compensate for wheat flour absorption?
I look forward to trying many of your recipes! Thank You!
Emilie Raffa says
Hi Patricia! Unfortunately, I haven’t tested this myself so I’m unable to advise on the specifics. However, I’m sure it can be done with some changes including additional water as needed so the dough isn’t terribly dry.
Kristi S. says
This is on my to try list, I just made your sourdough bagels from your book and they turned out great! I guess my question would be is there a way to get a stronger sourdough flavor in the bagels? I used the same ingredients and starter to make the sourdough bread (recipe from the website as I think I prefer it’s taste over the one in the book), but the sourdough flavor didn’t seem to be as strong in the bagels as the bread. Any tips?
Emilie Raffa says
Hi there! The “sour” flavor comes from a bunch of factors (i.e. how often your starter is refreshed, type/brand of flour used, amount if water, temperature of the dough etc). In your case, if one of these factors have changed then the flavor will change too. Try bulking the sourdough bagels at a warmer temperature for a shorter amount of time, and then chilling the whole bowl overnight (when it has just about doubled). In the morning, continue with the rest of the recipe.
ininLaura H. says
We just did these! They were amazing! I added an egg wash and coated it in Trader Joe’s Everything Bagel seasoning to 6 of them. Yum! Thank you!
Emilie Raffa says
Hi there! Sounds delicious. You’re welcome :)
Kristin says
Hello! I have your book and love all the recipes! I usually use other bagel recipes that call for a shorter bulk fermentation and then an overnight cold fermentation after shaping. How does your recipe compare to that? Would there be any merit to refrigerating the shaped bagels another night? And for shaping, I’ve usually rolled dough into logs and wrapped around my hand – does your fermentation method perform better with your shaping method? I usually like combining recipes but I was thinking that might not be the best idea…
Angela Karing says
Perfect for this coming Shabbat, thank you and God’s blessings to you and your kitchen, shalom!
Emilie Raffa says
Hi Angela, thanks so much! Enjoy :)
Kylie says
THESE LOOK AMAZING!!!
We haven’t tried these yet (adding it to our weekend baking soon!!) – but my daughter loves making pretzels, so I think these would be fun too! However, I was curious about adding blueberries….she’s been on a blueberry bagel kick, but didn’t know how to do that! Do we add fresh, frozen, dehydrated…etc.
Thanks!!
Hanna H says
Hi there! I love your book and other bagel recipe. I only have about 350 grams of bread flour. Is it okay if I use unbleached organic flour to account for the other couple hundred grams of flour needed for this recipe?
Thank you for your recipes!
Emilie Raffa says
Hi Hanna! Thank you :) Is the unbleached organic flour you have bread flour? Or all purpose?
becca says
Is there a way to make this recipe just with east and not with sourdough starter?
becca says
Yeast*
Liv says
For all of your recipes could I use a 1:1 gluten free sub or would it give me a different result? Thanks!
Emilie says
Hi Liv,
I haven’t tested this myself, so I’m unable to advise. I would experiment and see what happens. Good luck!
Phylicia says
What do you do with the dissolved honey?
Durriya Iyer says
Thank you for this wonderful recipe of bagels. I have tried so many different versions but not very successfully. These ones came out just perfect. And in the second lot, I added my own twist. Instead of pumpkin, I used strawberry puree and made sweet bagels. My daughter just loved them. Thank you again.
Keith Todd says
I just made the Pumpkin spiced bagels recipe. It was easy and turned out great. Very tasty bagels. I like all the helpful hints you give with all your recipes.
Thank you.
Diego Lopes says
I really wanna try these, they look super easy and delicious! Thanks for the recipe =)
Cecile says
Hello! I am making the bagels as I type – boiling the water atm :)
I just wanted to ask what if we don’t have pumpkin purée? Do we just substitute for more flour instead?
Emilie says
Hi Cecile,
You can certainly leave out the pumpkin puree if you wanted to make plain sourdough bagels. I wouldn’t substitute more flour however (pumpkin puree replaces some of the liquid). Simply use 250 g warm water instead. Enjoy!
Freya says
You make it look so easy (and delicious)! I’ve only attempted bagels once before and I’m ashamed to say it really didn’t work out too well. Thanks for sharing such a detailed guide with images – really helps to know where I’m at at every stage! Also, I’m glad to hear that it’s normal for them to look a little odd after the boiling stage – that should save some worrying when I make them!!
Emilie says
Hi Freya! You’re welcome :) I’ve found that step-by-step photos are very helpful when making bread. And yes! The bagels look totally weird and bumpy after the boiling stage. I always thought this was a fluke, but they pretty much look this way every single time. No need to worry :)
Freya says
Thank you for the tips :)
Diane says
Yes! I would love for you to compile a list of your favorite go-to tools for baking.
And every recipe of yours that I have tried has turned out beautifully and is so delicious. I love that you use weight measurements and that you use common every-day ingredients and that your directions are so well presented! Your work is such a pleasure to follow. Thank you!
Emilie says
Hi Diane! Thank you for your response! Stay tuned for a master bread baking list in the works :) And thank you for your sweet words regarding my work! If there is one thing I love to do it’s to cook and share, and I’m happy to hear that you enjoy following along. :)
Rachel says
I’m new to sourdough so a list of your favorite items would definitely be helpful. I’m making your overnight cranberry pecan sourdough loaf for our thanksgiving dinner.
Emilie says
Hi Rachel! Perfect! Thank you so much for letting me know. I’m in the process of writing on a master list with links- stay tuned! Hoped you enjoyed the cranberry pecan bread for Thanksgiving! x
Dehanna Watson says
I LOVe sourdough! It’s the way to go of eating bread. Getting the starter has always scared me away from the whole recipe process. I’d love your feedback and your enthusiasm to help me try.
Emilie says
Hi Dehanna! I completely agree! Regarding sourdough starters, it’s always the most intimidating part of the process because it’s mostly misunderstood (in my opinion). For that reason, I go into quite a bit of detail in my book to explain the process in a way that’s easier to digest (literally!). So, you can begin your journey there and create your own starter, or if you know someone with an already established starter maybe they will share theirs with you! I’m selling mine in small batches- please send me an email if you’re interested.
Sinon says
I am absolutely making these at the weekend.
Quick question though, my starter is part bf and part rye so if I used that and just added white bread flour that shouldn’t change the taste to much should it
Thanks
Love the recipes you keep sending is in the mail and yes could you post what tools and flour you use.
Emilie says
Hi Simon,
Great question! Honestly, you can never fully predict how your starter will perform, but common sense tells me that yours should work perfectly fine as long as it’s fed at 100% hydration (equal parts flour + water by weight) . This way, the dough consistency will be correct which is important. It should feel dry and easy to work with. Regarding flavor, I’ve had these bagels taste ‘sweet’ on some days and more tangy on others. Sourdough flavor depends a lot on how the dough was fermented in addition to the makeup of the starter itself. Hope this makes sense!
Mindy says
Do you have a post where I can learn about flavor and fermentation? I use the same fresh starter and some items come out way sour and some none at all. I’m trying to avoid the sour. Thank you.
Megan S. says
Okay, I guess bagels wouldn’t be so difficult to make. :-)
How much flour is needed? I think it got left off the ingredients list.
Emilie says
OMG! How did I miss that? Thanks so much. The recipe is updated now- 500 g (4 cups + 2 tbsp) bread flour. :)
Jessie says
Can’t wait to try these! Ever make them with mix-ins (like chocolate chips or pumpkin seeds)?
Emilie Raffa says
Hi there! I’ve only done raisins, which are really yummy!
De says
I’d really appreciate your tips. Especially bread flour brand–the brand I like seems to be discontinuing the bread flour, as I can’t find it anywhere anymore! I’d also appreciate starter brand recommendations. I tried to create a sourdough culture this week and failed. I’m either going to have to buy flakes or try again when it’s warmer and I have your book to guide me.
Emilie says
Hi there! Okay, great- thanks so much for your feedback. Our of curiosity, what kind of bread flour do you use? For the starter, I’m selling mine in small batches. Please send me an email if you’re interested! x