I have many nemeses in the culinary world, and this is one of them.
Perhaps you’ve heard of roasted chickpeas before and you would expect them to be nice and crispy, right? Hot oven = crispy skin. But when you go to make them, they’re not very crispy at all. I’m not exactly sure of the science behind this, but all I know is that if you cook them for too long they will completely dry out; if you under cook them they will be soft, not crispy.
Then I read somewhere that the secret is to remove the outer skin from each and every bean. Apparently, this is the culprit. I’ve done this once before when I was on a quest to make creamy hummus, and it’s a total pain. Never again.
Honestly, I’d rather scrub a bathtub.
And then I had an epiphany… I was making chicken cutlets for the kids the other day when I thought, I should just bread the darn things! I will create a crispy layer for the outside while the inside stays soft and creamy.
Here’s what I do:
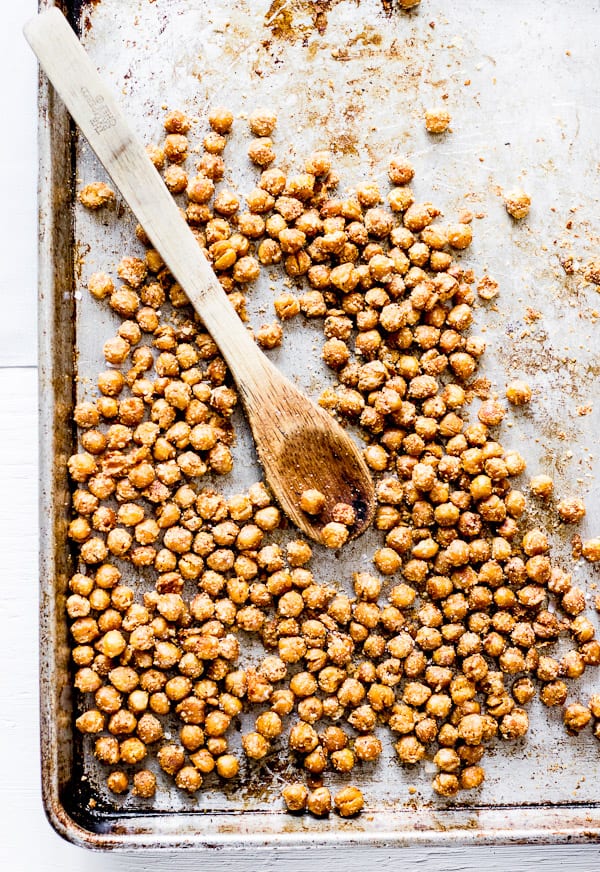
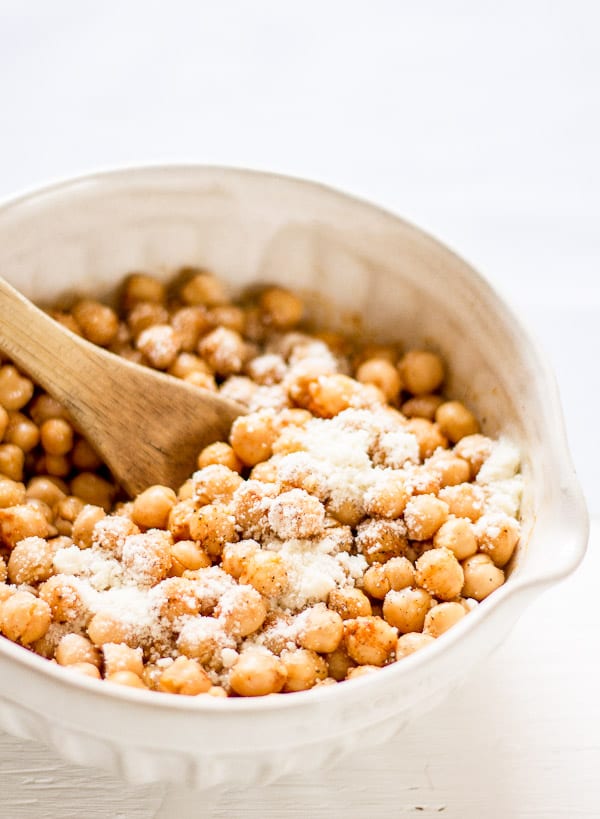
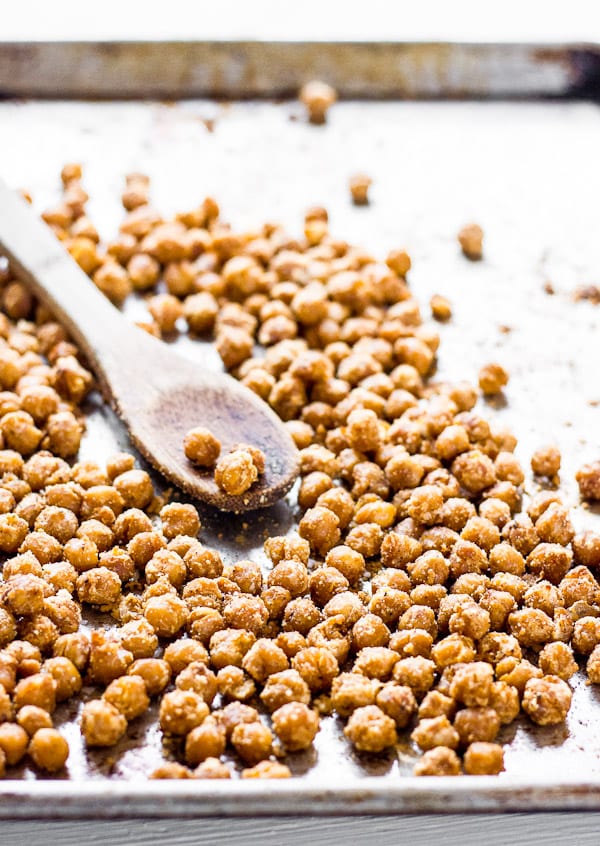
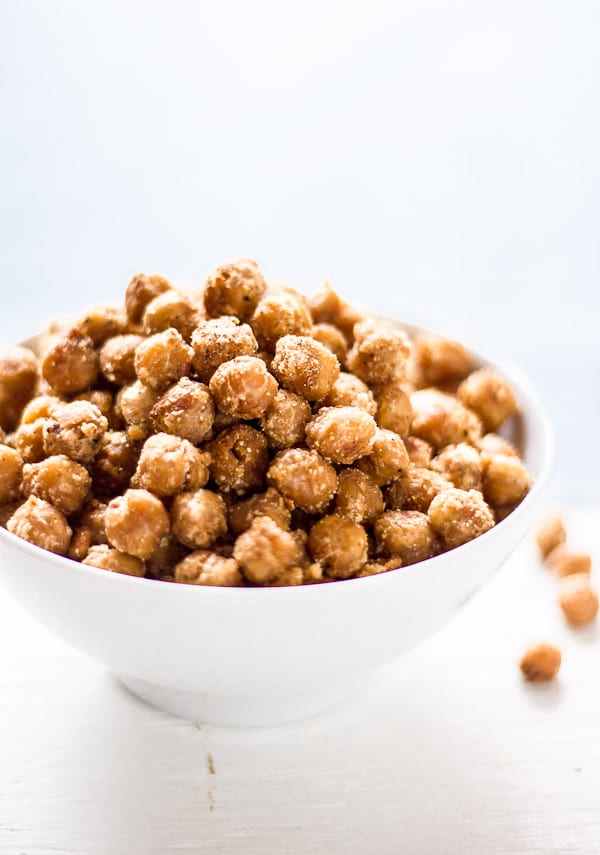
Rinse, drain, and dry the chickpeas as best as you can. Make peace with the fact that they will never be completely dry (this is OK). Roll them in flour. I found that this was a necessary step in order to soak up the extra moisture. Coat them in egg wash. This will help the crumbs stick to the beans. Dust in seasoned bread crumbs, parmesan cheese & spices. Place onto a rimmed baking sheet and spray the heck out of them with cooking spray. A nice even application will yield golden, crispy beans. Bake @425 for 15 minutes.
If you follow these steps, you will have beautiful roasted chickpeas every time. They are especially good with a squeeze of lemon over the top. Use this recipe as a base for adding your own seasonings too. It’s a wonderful and healthy alternative to a bag of chips! Serve warm.
Here’s the link to my parmesan + herb version.
Tips:
- I use whole wheat seasoned breadcrumbs in this recipe, however Panko breadcrumbs would be good as well. Just make sure that they’re seasoned for the best flavor.
- When setting up your breading station, shallow bowls are ideal. The wide surface area makes it easier to roll the beans around.
- Try these crispy chickpeas in salads and soup.
oven roasted parmesan chickpeas
- Prep Time: 10 mins
- Cook Time: 15 mins
- Total Time: 25 mins
- Yield: 2
Ingredients
Beans
- 1x 14 oz. can of chickpeas
- 1/4 c. flour
- 1/4 tsp. garlic powder
- 1/2 tsp. sweet smoked paprika
- 1/4 c. ground parmesan cheese
- 1/2 c. Italian-style whole wheat seasoned bread crumbs*
- salt + pepper
- olive oil cooking spray
Egg wash
- 1 egg, lightly beaten
- splash of water
Garnish
- 1 lemon
* You can also use seasoned Panko breadcrumbs.
**When setting up your breading station, shallow bowls are ideal. The wide surface area makes it easier to roll the beans around.
***Try these crispy chickpeas in salads and soup.
Instructions
- Preheat your oven to 425 F. Coat a rimmed baking sheet with olive oil spray.
- Rinse and drain the chickpeas. Pat dry with paper towels as best you can (they will not be completely dry).
- For the egg wash, lightly beat the egg and water in a bowl. Set aside.
- Place the flour into a bowl.
- Combine the garlic powder, paprika, parmesan cheese and bread crumbs. Mix well until everything is blended together.
- To bread the chickpeas, you will need to work in batches. Begin by rolling a small portion in flour shaking off any excess as you go.
- Coat them in the egg wash, draining off the extra liquid.
- Add them to the bread crumb mixture. Toss well with your hands so that they are evenly coated. Repeat this process until you have used up all of the beans.
- Place the chickpeas onto the prepared baking sheet.
- Coat thoroughly with olive oil spray. Shake the pan once or twice to move them around and spray the beans again. They key to a golden crust it to make sure that they have an even application of oil.
- Bake for 15 minutes, tossing once halfway through cooking time.
- Remove from the oven and season with salt + pepper.
- Serve warm with a squeeze of lemon (if desired).

Comments
Stephen Spencer says
Love this idea. And you’re right, life’s too short to peel chickpeas. I might try using Besan flour to coat them, which of course doubles down on the garbanzos, but has the added benefit of being gluten-free. Not sure about a good gluten-free breadcrumb option.
Susan says
What a wonderful recipe! Thanks so much for posting. I wonder if I could use nutritional yeast instead of the flour as I avoid glutin. Or just use rice flour? Can’t wait to make these!
Emilie says
Thank you so much Susan! I’ve never tried this with nutritional yeast or rice flour. However, if you’re going to use rice flour I would recommend ‘double dipping.’ So basically, when you’re ready to coat the beans, roll them in rice flour first, then egg, then rice flour again (does that make sense?) This should give it some nice texture. You could also season your flour with herbs and spices, to mimic the seasoned bread crumbs as per the original recipe. Have you tried any gluten-free bread crumbs? That might be a good choice as well. Do let me know how these turn out! Thanks for stopping by :)
Lara says
These look really good! Will try them! I was just wondering if you’ve ever tried it with the dried chick peas?
Emilie says
Hello Lara! I’ve never made them using dried chickpeas, but you most certainly can. To do this, soak the chickpeas overnight in fresh water. The next day, drain and place them in a heavy bottom pot. Add enough water to cover (about 2 inches above the beans) and bring to a gentle boil. Reduce to a simmer, and cook for 1- 1 1/2 hours or until tender. When finished, stir in a little salt for flavor. Remove from the heat and allow the beans to cool in the pot for maximum flavor. When you are ready to make this recipe, make sure to pat the peans dry as best as you can to remove any excess moisture. Then continue with the rest of the instructions as follows. Hope this helps! Good luck :)
laurasmess says
I’ve done the skin-removal thing for hummus before also. Sooo tedious! This breading idea is perfect for a crispy exterior, love it! I normally fry my chickpeas in a frying pan on the hob briefly before putting them into the oven, it seems to work a treat for crispy skins. I will try your method next time though. They sound delicious xx
Pam Green says
YUM! What a perfect snack. I’ll definitely have to make these. You’re so smart to bread them!
Emilie says
Thanks Pam! They make a really fun snack. Healthy too! :)
Risa says
This is the only recipe for baked chickpeas that I’ve ever even looked at a 2nd time. These are so happening. I used to peel the entire cans of chickpeas when I made my daughter’s baby food, ugh – nightmares for real.
Emilie says
Thanks Risa! Yeah, the peeling thing is a little bit crazy- who knew the chickpea could be so high maintenance?! In this recipe, the fact that the skin is still on doesn’t affect it at all. And they’re only in the oven for about 15 minutes or so which is convenient for hungry people. I hope you like the recipe. Thanks for stopping by! :)
Adri says
Great idea! I adore oven roasted chickpeas, but have never used the technique of coating them I must try this, and by the way, there’s no way I would peel each and every one either. Uh uh.
Emilie says
You must give this a try Adri! They make a great snack, especially with a cold cocktail ;)
Sandra says
Would you know I’ve never actually had roasted chickpeas? Your version sounds much better then just plain ones. Do you just east these as is, or can you put them in something like a salad or soup?
Emilie says
Really? If you like chickpeas, this might be right up your alley. You could totally eat them as is (with a cold beer or glass of wine of course) or throw them into soups and salads. I happen to really like them in salads. Lately I’ve been squeezing lemon over the top and just snacking away. No matter what you do with them, I think that they’re best warm, served straight from the oven :) xx
Alessandra (DinnerinVenice) says
These look fabulous! I love the creativity with the bread crumbs. I will have to try this.
Emilie says
I think you will like this one Ale! Do let me know if you give them a go!! :)
Emilie says
Hi Cheri! Thanks so much! Aren’t they tasty little things? Glad we’re on the same wavelength ;)
cheri says
I made something very similar to this a few days ago and I thought it was wonderful! great pics!
Maria | Pink Patisserie says
I’ve been dying to try these! Today I think I will and I’m so glad to know your trick to getting them crispy! Looks so, so good.
Emilie says
Yay! If you make them, let me know how they turn out!! Enjoy xx
PS- they’re really good with cold beer ;)
Laney (Ortensia Blu) says
Of course only you would bring roasted chickpeas to a whole new level! I love them and this method looks fabulous…(and you really took the skin off before?)
Emilie says
Ah, thanks Laney! Nah, I didn’t take the skins off for this recipe- I only did it in the past when I was testing creamy hummus recipes (apparently that’s the secret!). I will never do it again!! Chickpeas shouldn’t be too high maintenance ;) xx
Maria Tadic says
This is a very cool fact! I made these a few times and some were crispy, but as you said, a lot definitely were not. Never thought it’d be the skins! And I would never take the time to de-skin a billion chickpeas. No sir! I will have to try breading them! Yum!
Emilie says
Hi Maria! Welcome to the site! I never thought it would be the skins either, but I had no plans on testing that theory (again). I did it once and that was definitely enough for me! I really like this breading method; the coating sticks to the beans nicely and the flavor is good. As long as you spray them evenly with cooking spay before baking you will have nice and crispy chickpeas. They make a great snack. I hope you enjoy! Thanks for stopping by :)
Laura (Tutti Dolci) says
These look too good – meaning I think I’d eat the entire batch in one sitting! ;)
Emilie says
Ahhh… I said the same thing on IG, except I did almost eat the whole batch (minus 5) because I was embarrassed. They’re one of those snacks that you just keep picking at even when they’re cold ;)