This post will teach you how to make a beginner sourdough starter at home, step-by-step. All you need is flour, water and a little bit of patience. Before you know it, you’ll have your very own bubbly, active starter ready to make THE BEST sourdough bread, sourdough focaccia, homemade sourdough pizza crust and much more!
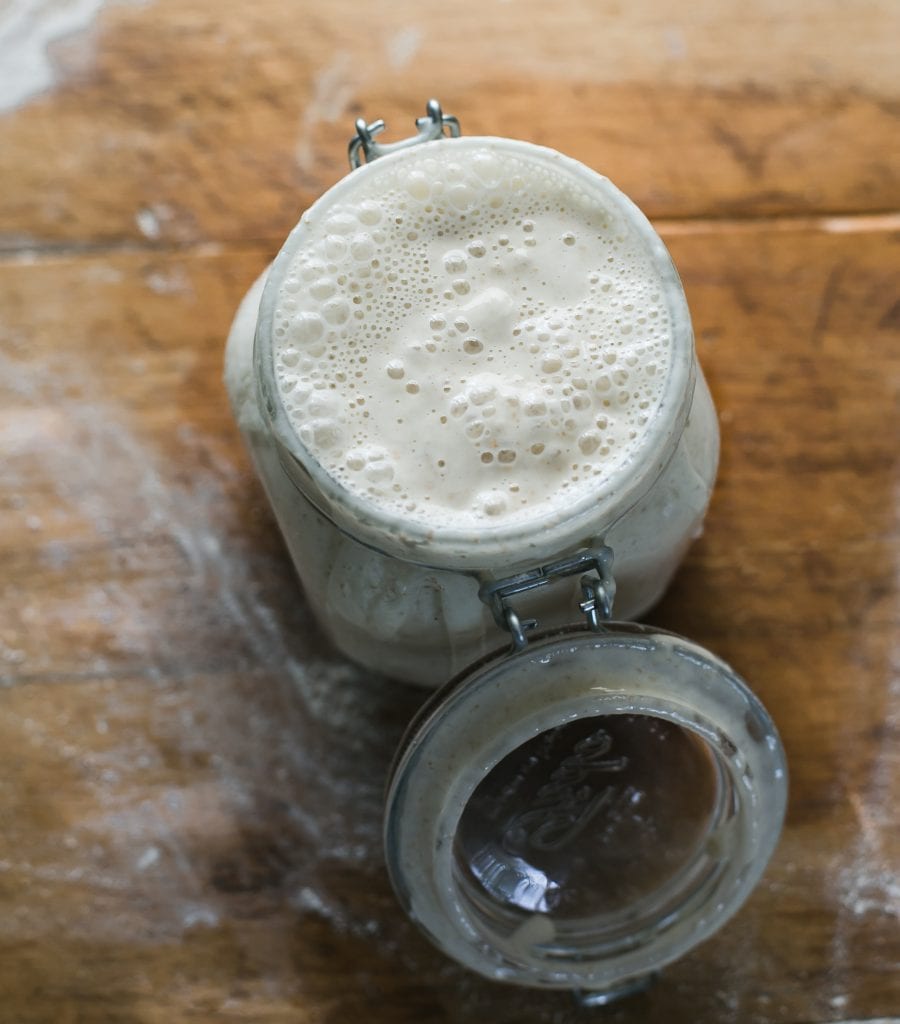
Looking to bake incredible sourdough bread? First: you’ll need a sourdough starter. Without it, your bread won’t rise. It’s the absolute heart and soul of sourdough baking. Creating one from scratch is not hard to do. However, the process can seem intimidating (especially for beginners). Let’s change that. Adapted from my bestselling book Artisan Sourdough Made Simple, I will demystify and simplify the process with step-by-step instructions.
Once your starter is established, it can be used for a wide variety of sourdough bread recipes including this scrumptious sourdough bread with olive oil (most popular recipe on my blog!), my sourdough focaccia, sourdough pizza crust, sourdough sandwich bread and soft sourdough cinnamon rolls to name a few!
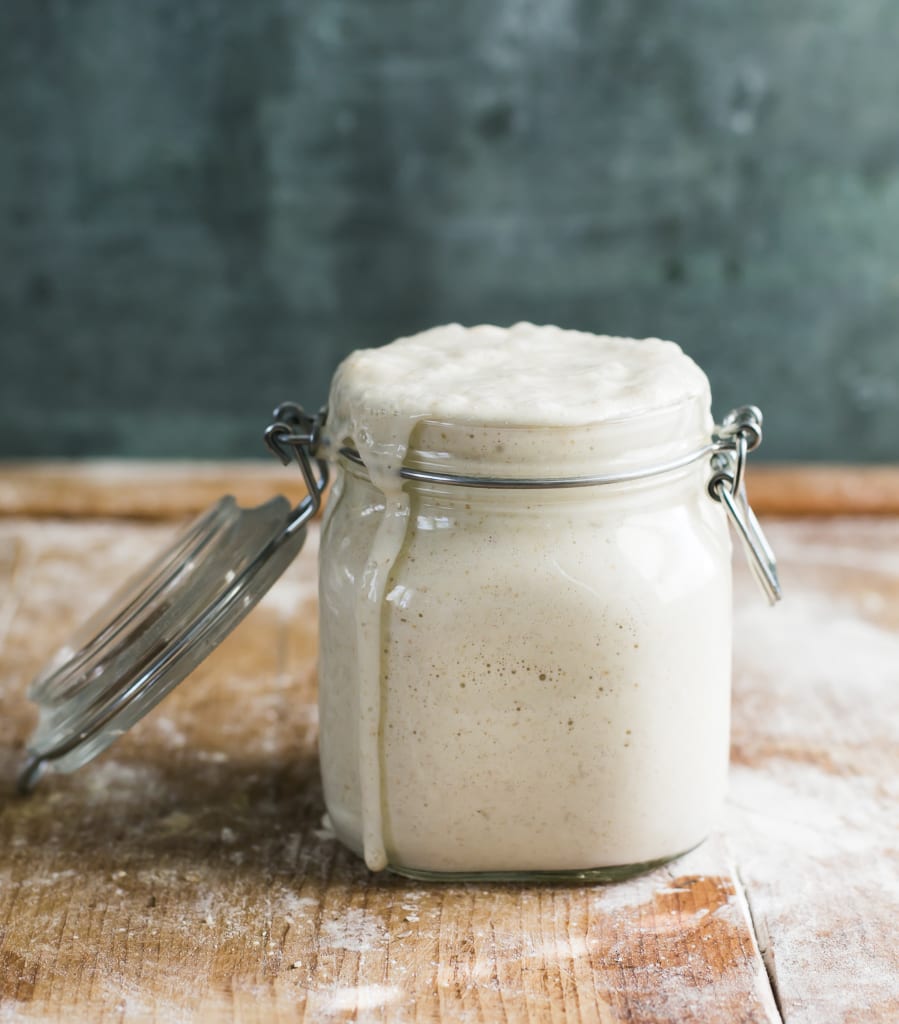
What is a Sourdough Starter?
Sourdough is more than just a recipe; it’s an understanding. So before we dive in, let’s define. Simply put: a sourdough starter is a live fermented culture of fresh flour and water. Once combined, the culture will begin to ferment and cultivate the natural yeasts found in our environment. A small portion is added to your bread dough to make it rise. Commercial yeast IS NOT required.
Sounds a bit weird, right? Of course it does. And it should. Know this: natural “wild” yeast is all around us. It can be found in a bag of flour, in the air, on your hands etc. Just because you can’t see it, doesn’t mean it’s not there and doing its thing. It’s like magic.
How Long Will It Take?
To create a sourdough starter from scratch, the overall process will take 7 days (or more) from start to finish. It’s not instant. First, you’ll create the starter with whole wheat flour to jumpstart fermentation. Then, you’ll continue to feed it with regular all purpose flour to cultivate the wild yeasts and friendly bacteria.
When Will it Be Ready To Use?
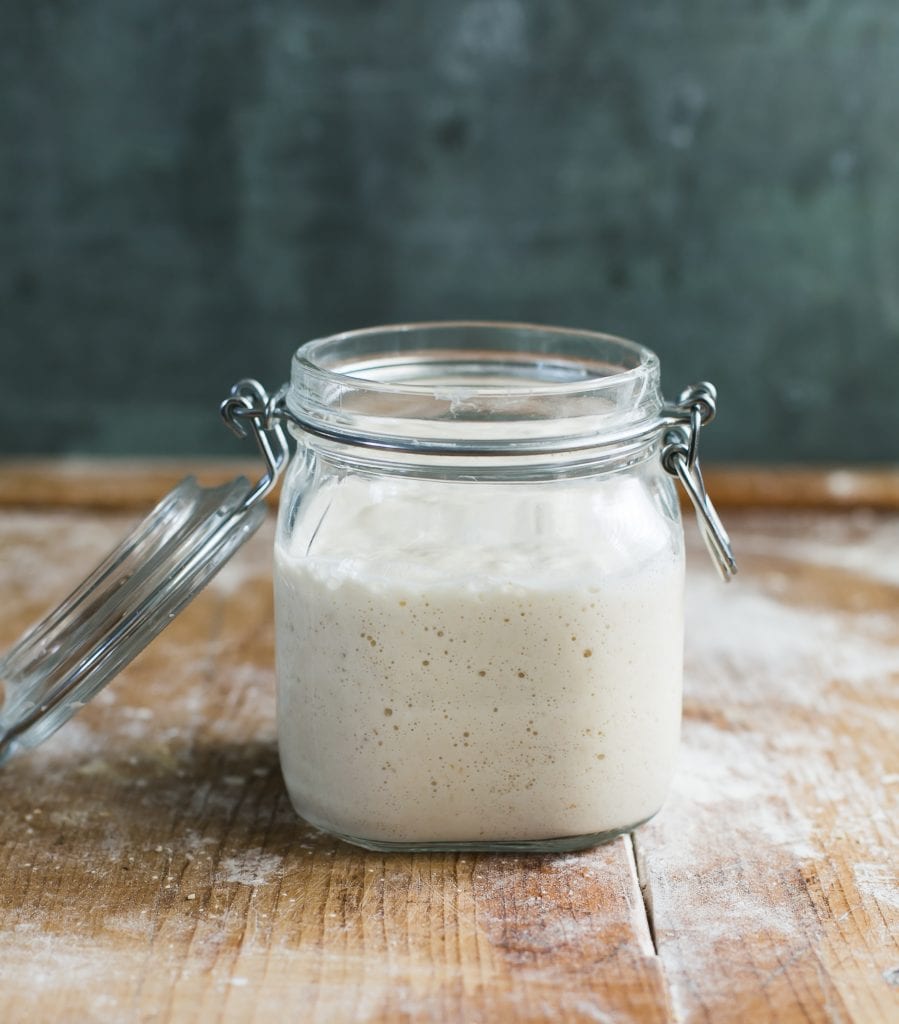
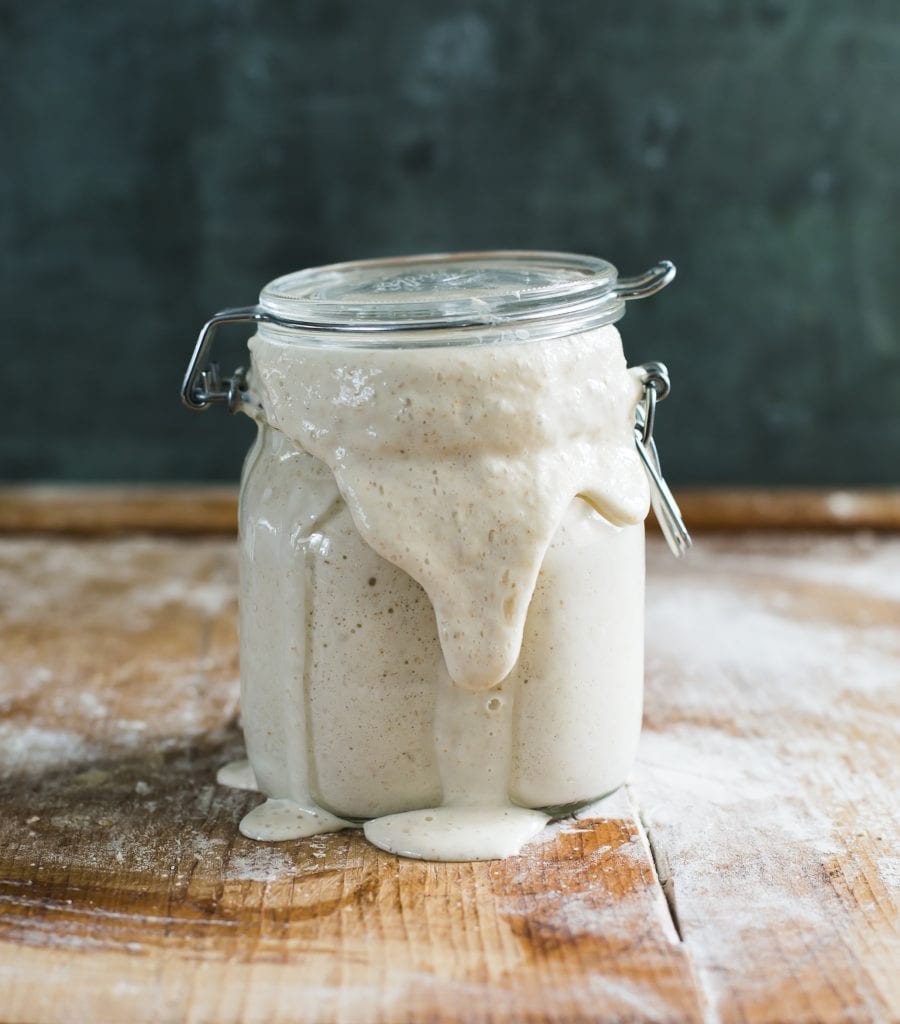
Your starter is ready to use when it has doubled in size, with plenty of bubbles on the surface and throughout the culture.
NOTE: It’s not uncommon for it to take up to two weeks or more for the starter to become active. It all depends. I know this timeframe sounds a bit vague, but growing yeast in a jar (that’s basically what you’re doing) can be unpredictable at times. Please be patient if the process takes time for you- it’s normal.
Is it Difficult to Do?
Absolutely not! In short: you’re basically adding flour and water to a jar, feeding it with more flour and water over time, and then waiting for it to become bubbly and double in size. That’s it. Most of your time involvement is hands-off. Can I ask you a favor though?
Don’t overthink it.
There’s a lot of sourdough information out there, and you will fall down a major rabbit hole if you start poking around. Just stick to this tutorial for now and follow the steps as written.
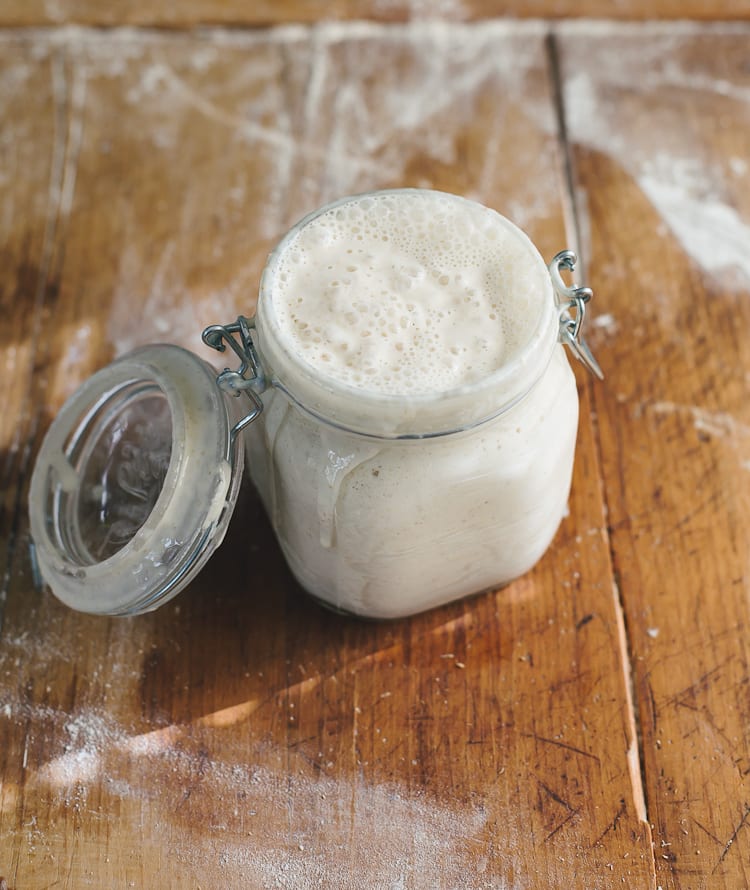
Beginner Sourdough Starter Recipe
You will Need:
Supplies
- 3/4 L jar (I use this one)
Ingredients
To create the starter:
- 60 g (1/2 cup) whole wheat flour
- 60 g (1/4 cup) water
To feed the starter each day (Day 3-7):
- 60 g (1/2 cup) unbleached all purpose flour or bread flour
- 60 g (1/4 cup) water
NOTE: Use regular, unbleached all purpose flour or bread flour for best results- skip organic. The enzymes are different which can hinder the rising process the first time around. I use either KAF, Trader Joe’s or Whole Foods. Filtered water or tap water is fine. Use the latter if you know it’s mostly chemical/chlorine free.
Day 1: Make the Starter
- Before you begin, establish a feeding schedule. In other words, feed your starter at the same time each day. This will establish consistency, which sourdough starters love. Consider feeding your starter in the morning when you wake up.
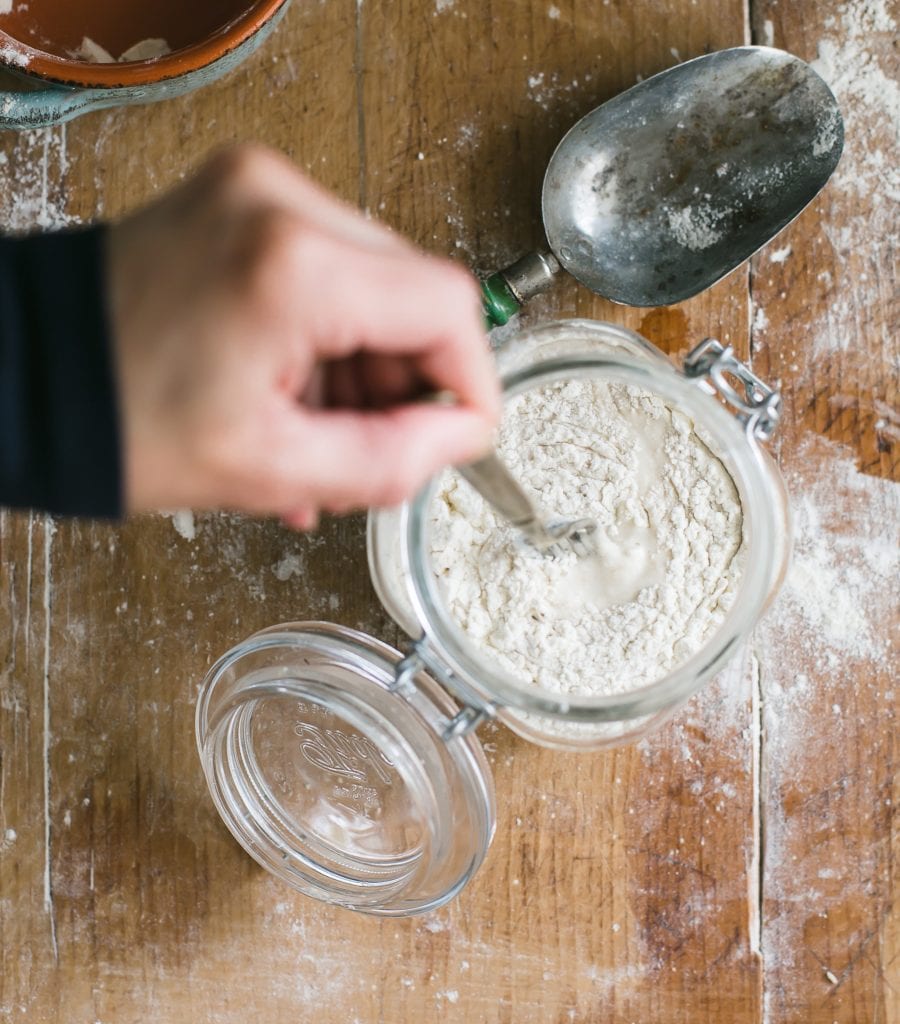
- Combine 60 g (1⁄2 cup) of whole wheat flour and 60 g (1⁄4 cup) of warm water in a large jar.
- Mix with a fork until smooth; the consistency will be thick and pasty. If measuring by volume, add more water to thin out the texture if needed. Cover with plastic wrap or a lid, and let it rest in a warm spot, about 75-80 F for 24 hours.
TIP: Looking for a warm spot? Place your starter on a cookie sheet inside the oven (turned off) with the light on for a few hours (but not overnight- it might become too warm). You can also use a proofing box set to your desired temperature, or a microwave with the door ajar and the light on.
Day 2: Got Bubbles?
- Today, you’re going to check if any small bubbles have appeared on the surface.
- Bubbles indicate fermentation, which is what you want! However, it’s okay if you don’t see anything right away; the bubbles might have appeared and dissolved overnight while you were sleeping. This happens quite often.
- You do not have to do anything else right now. It does not need any flour or water. Just rest the starter in your warm spot for another 24 hours.
Day 2 (Con’t): What’s that brown liquid?
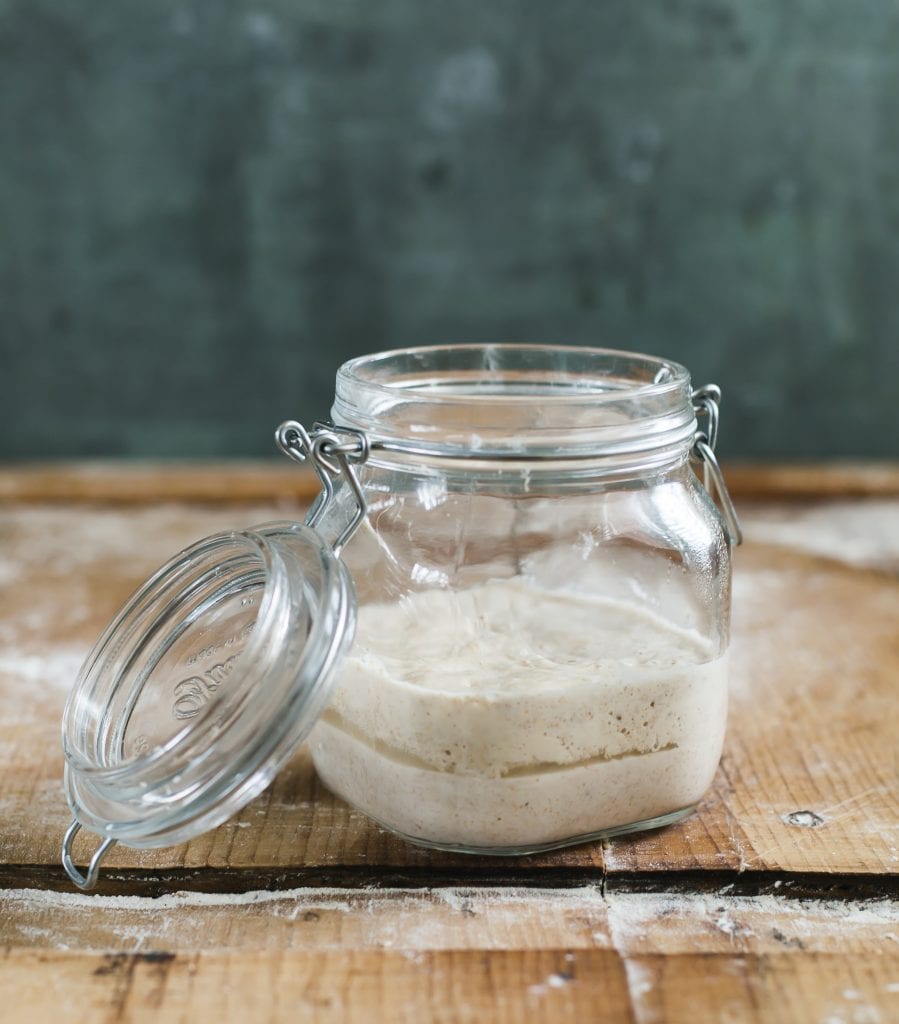
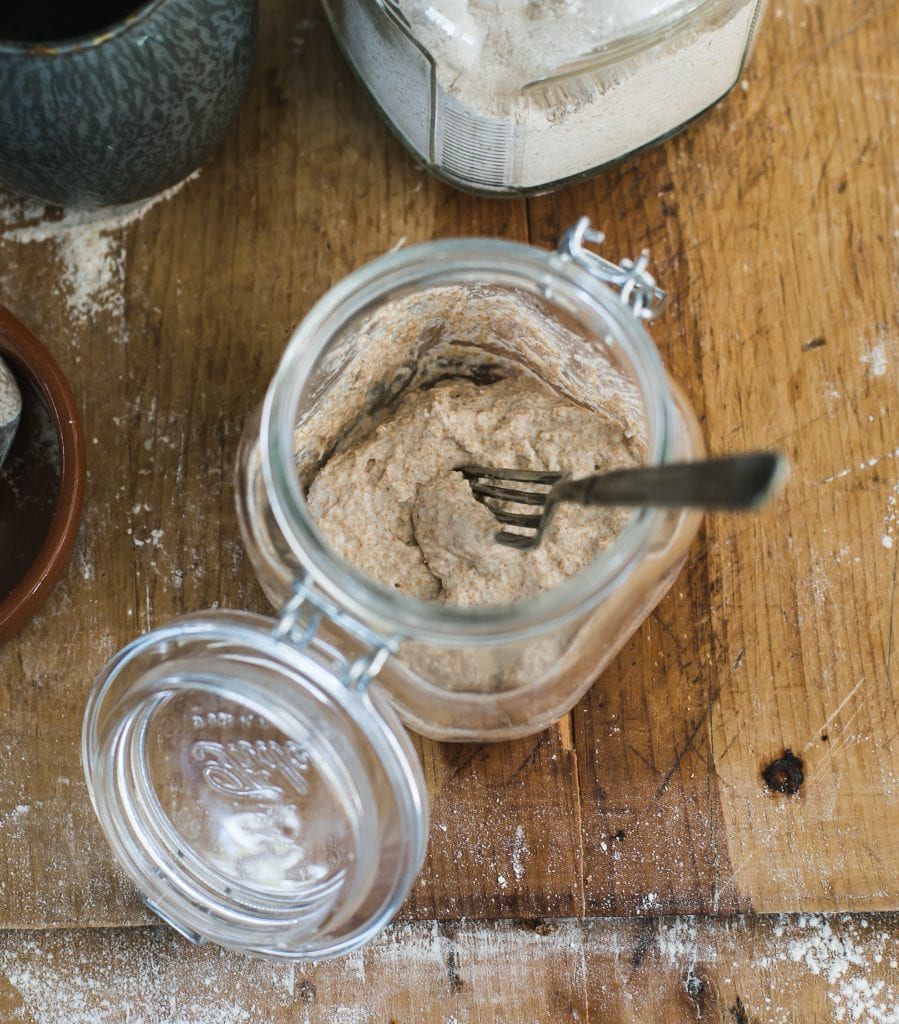
- During the creation process, and even after your starter has been established, a dark liquid might appear on the starter (the image above shows the liquid in the middle of the starter- it’s usually found on the surface).
- This liquid is called “hooch” and is an indication that your starter needs to be fed. It also has a very stinky smell, similar to rubbing alcohol or gym socks. This is normal. Don’t freak out. Any time you see this liquid, it’s best to pour it off, along with any discolored starter present. However, on Day 2 just leave the hooch alone; you can get rid of it tomorrow when you start the feedings.
Day 3: Feed Your Starter
- Whether bubbles are visible or not, it’s time to start the ongoing feeding process.
- Remove and discard approximately half of your starter from the jar (you should have about 60 g left). Use a spoon. The texture will be very stretchy. Add 60 g (1⁄2 cup) of all-purpose our and 60 g (1/4 cup) of warm water. Mix with a fork until smooth.
- The texture should resemble thick pancake batter or plain yogurt at this point so add more water as needed. Cover and let rest in your warm spot for another 24 hours.
DAYS 4, 5, & 6: Keep on Feeding!
- Repeat the same feeding process as outlined on Day 3:
- Remove and discard half of the starter, and feed it with 60 g (1⁄2 cup) of all-purpose flour and 60 g (1/4 cup) of warm water. As the yeast begins to develop, your starter will rise, and bubbles will form on the surface and throughout the culture.
- When the starter falls, it’s time to feed it again.
TIP: Place a rubber band or piece of masking tape around the jar to measure the starter’s growth as it rises.
Day 7: A Sourdough Starter Is Born!
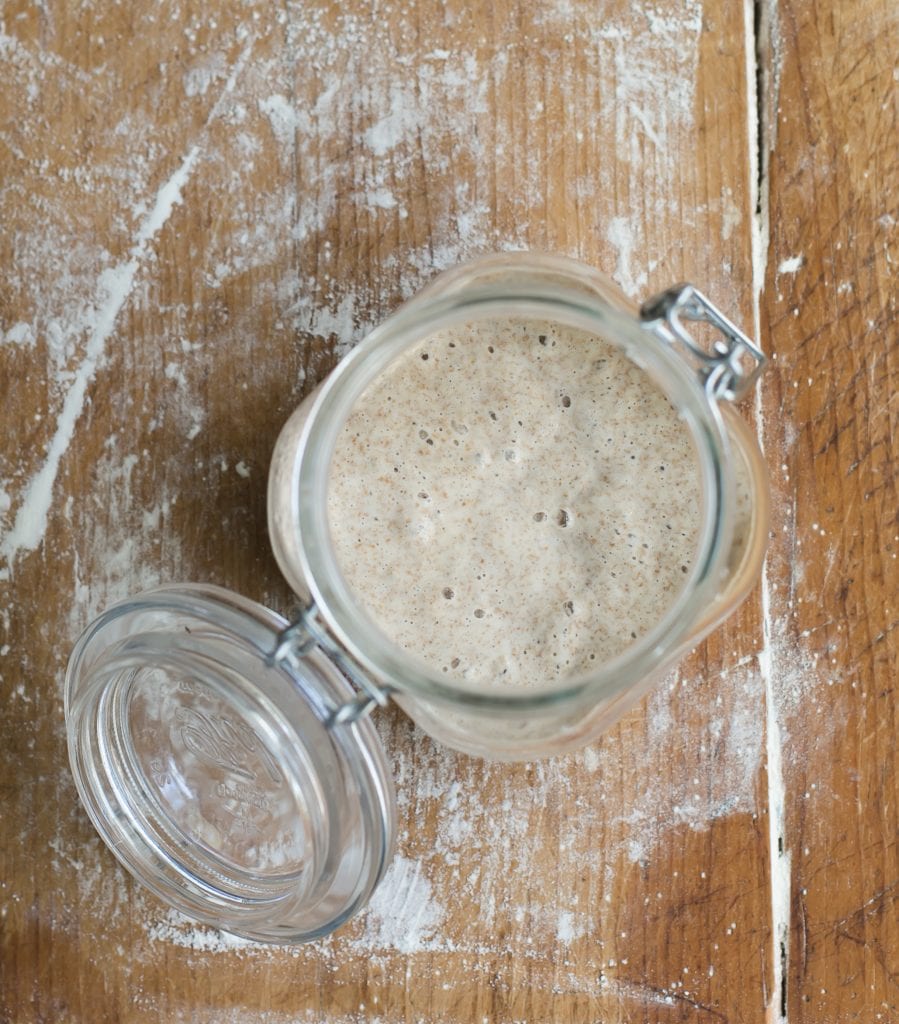
- By now, your sourdough starter should have doubled in size.
- You should see plenty of bubbles, both large and small. The texture will now be spongy, fluffy, and similar to roasted marshmallows (think: s’mores). It should also smell pleasant and not like stinky gym socks. If these conditions are met, your starter is now active.
- The very last step is to transfer your sourdough starter to a nice, clean jar. In keeping with tradition, you can also name it (and please do!). My starter is called Dillon after my oldest boy and it’s bright and bubbly, just like he is ;)
- Now you’re ready to bake! Start with my beginner sourdough bread recipe- you’re going to love it!
What’s Next? Let’s Make Bread!
- Sourdough Bread Recipe (reader favorite!)
- Beginner’s Guide to Sourdough Focaccia
- Best Sourdough Pizza Crust (No steel or stone!)
- Feeding Sourdough Starter: My Best Tips & Tricks
- Troubleshooting Your Sourdough Starter
A Few Tips for Ongoing Care…
So you’ve created a sourdough starter! Now what?
Just like any living creature, it must be kept alive with regular feedings to maintain its strength. If your starter is not strong, your bread will not rise. Caring for your starter is much easier than you’d think, and certainly won’t take hours of your time.
Note: You will need to feed your starter every time prior to making bread dough and to maintain it (keep it alive).
How to Feed a Sourdough Starter
Feeding Routine:
- Begin by removing and discarding about half of your starter.
- Replenish what’s left in the jar with fresh all purpose flour and water.
- Cover loosely, and let it rise at room temperature until bubbly and double in size. Once it falls, the bubbles will become frothy and eventually disappear. Then you’ll know it’s time to feed your starter again.
- Feed your starter everyday if it’s stored at room temperature. If you keep it in the fridge, feed it once a week.
PS: If you miss a feeding, don’t worry- your starter is not going to die. It might look ugly (and smell horrendous) but it usually just needs a few feedings to perk back up.
When is Your Sourdough Starter Ready To Use?
Your starter is ready when it shows all of the following signs:
- bulk growth to about double in size
- small and large bubbles on the surface and throughout the culture
- spongy or fluffy texture
- pleasant aroma (not reminiscent of nail polish remover/gym socks/rubbing alcohol)
If you’re having trouble spotting the signs, don’t forget to place a rubber band around the base of the jar to measure the starter’s growth.
You can also try the float test mentioned above: Drop a small dollop of starter into a glass of water. If it floats to the top, it’s ready to use.
How to Store Your Sourdough Starter
Once your starter is established, you have two storage options to consider.
At Room Temperature: If you bake often—let’s say a few times a week—store your starter at room temperature. This will speed up fermentation, making the starter bubbly, active, and ready to use faster. Room temperature starters should be fed one to two times a day, depending on how quickly they rise and fall.
In the Fridge: If you don’t bake that often, store your starter in the fridge covered with a lid. You’ll only need to feed it about once a week or so to maintain its strength when not in use (you can just feed it cold and then pop it back in the fridge right afterwards; no need to warm it up first). When you are ready to make dough, feed your starter at room temperature as needed, to wake it back up.
**TIP** For more info on sourdough starters please read Feeding Sourdough Starter: My Best Tips & Tricks.
Sourdough Starter Faqs
Yes. All purpose flour is easy to find, inexpensive and reliable for starter growth.
Yes. Because whole grain flour absorbs more water than all purpose flour, adjust the texture with additional water if it’s too thick.
Yes. Adjust the texture with additional water if it’s too thick.
Yes. But it’s not recommended. The chemicals can throw off the rising process. However, some readers have reported success with bleached flour. Your choice!
It might. To clarify: organic flour is not bad to use. The enzymes are just a bit different. This means the overall process might take longer than indicated. I recommend using all purpose flour instead because it’s more predictable (and less expensive!).
Whole wheat flour is used to jumpstart the fermentation process. If you do not have whole wheat flour, just use all purpose flour instead. The starter will be fine. I switch to all purpose flour for the feedings because it’s reliable, inexpensive and practical for everyday baking (remember, a portion of your starter is removed, discarded, or used for something else).
To refresh the acidity levels and to control the overall growth in size.
To learn more please read, Sourdough Discard 101: Recipes & Faqs Answered.
In the beginning, I typically don’t recommend using the discard (it’s usually really smelly and discolored). I recommend using the discard after the starter has been established. However, everyone will have a different experience with this. If it looks good- use it!
For more info please read, Sourdough Discard 101: Recipes & Faqs Answered.
If your starter is used to one type of flour, and then you swap it out for something else, just give it time to adjust. It might react immediately (in a good way!) or it might be sluggish at first and then eventually perk up.
For more info please read, Feeding Sourdough Starters: My Best Tips & Tricks.
Beginner Sourdough Starter Recipe
- Yield: appx. 240 g (1 cup)
- Category: Sourdough Starter
- Method: 1-Bowl
- Cuisine: American
- Diet: Vegan
Description
Looking for an easy, sourdough starter recipe for beginners? Adapted from my bestselling book Artisan Sourdough Made Simple, follow my no-nonsense guide for practical tips, tricks, and ongoing care- anyone can do it.
Ingredients
Note: Once your starter is established, use it to make my sourdough bread.
- 1x (5lb) bag all purpose flour or bread flour (I use either KAF, Trader Joe’s, or Whole Foods)
- 1/2 cup (60g) whole wheat flour (I use KAF whole wheat)
- Water (preferably warm around 85F )
Tips:
- The overall process typically takes 7 days, if the temperature is warm enough, ideally 75+ F. However, it can take up to 2 weeks or more for a strong starter to become established. Please be patient. Find a warm spot for your starter to rise (see tip in recipe below), and use warm water in your feedings if necessary to give the fermentation a boost.
- Only a small amount of whole wheat flour is used to jumpstart the fermentation process. If you don’t want to commit to a large bag, smaller bags are available in most grocery stores. Alternatively, you can use all purpose flour only.
- You will also need one large 3/4 L jar, or something of similar size (I use this one.).
Instructions
Before you begin: Establish a feeding schedule. In other words, feed your starter at the same time each day. This will establish consistency, which sourdough starters love. Consider feeding your starter in the morning when you wake up.
Day 1: Combine 60 g (1⁄2 cup) of whole wheat flour and 60 g (1⁄4 cup) of warm water in a large jar. Mix with a fork until smooth; the consistency will be thick and pasty. If measuring by volume, add more water to slightly thin out the texture if necessary. Cover with plastic wrap, reusable wax wrap, or a lid and let it rest in a warm spot, about 75-80 F, for 24 hours. Temperature is important.
TIP: Looking for a warm spot? Place your starter on a cookie sheet inside the oven (turned off) with the light on for an hour or two (it can get hot in there, so keep you eye on it!). Center rack is best. You can also use a proofing box set to your desired temperature, or a microwave with the door ajar and light on.
Day 2: Check to see if any bubbles have appeared on the surface. If you don’t see anything, it’s okay. The bubbles might have appeared and dissolved overnight while you were sleeping. You don’t have to do anything else now. Rest the starter for another 24 hours.
TIP: During the creation process, and even after your starter has been established, a dark liquid might appear on the surface and throughout the culture. It has a very stinky smell, similar to rubbing alcohol or gym socks. This liquid is called “hooch” and is an indication that your starter needs to be fed. It’s normal. Any time you see this liquid, it’s best to remove it along with any discolored starter present. However, on Day 2 just leave the hooch alone. You can remove it tomorrow when you start the feedings.
Day 3: Remove and discard approximately half of your starter from the jar (you should have 60 g left). The texture will be very stretchy. Add 60 g (1⁄2 cup) of all-purpose flour and 60 g (1/4 cup) of warm water to the jar. Mix with a fork until smooth. The texture should resemble thick pancake batter or plain yogurt at this point. Cover and let rest in your warm spot for another 24 hours.
As the yeast begins to develop, your starter will rise, and bubbles will form on the surface and throughout the culture. When the starter falls, it’s time to feed it again. TIP: Place a rubber band or piece of masking tape around the jar to measure the starter’s growth as it rises.
At a glance, your overall daily schedule with measurements should look like this:
- Day 1: 60 g flour + 60 g water = 120 g starter
- Day 2: Do nothing
- Day 3: Remove & discard half of the starter/ 60 g starter + 60 g flour + 60 g water = 180 g starter
- Day 4: Remove & discard half of the starter/ 90 g starter + 60 g flour + 60 g water = 210 g starter
- Day 5: Remove & discard half of the starter/ 105 g starter + 60 g flour + 60 g water = 225 g starter
- Day 6: Remove & discard half of the starter/ 112.2 g starter + 60 g flour + 60 g water = 232.5 g starter
- Day 7: Remove & discard half of the starter/ 116.25 g starter + 60 g flour + 60 g water = 236.27 g starter
Wondering if your starter is ready to use?
When your starter is fully active, do the float test. Feed your starter, wait for it to double in size, and then drop a teaspoon of bubbly starter into a jar of water; if it floats to the top it’s ready to use.
Storage Options
If you bake often, store your starter at room temperature (feed it 1x-2x a day to keep it active). If you plan to bake only once in a while, store it in the fridge to preserve its strength (feed it 1x a week). When storing your starter in the fridge, there’s no need to bring it to room temperature first before feeding it. Just give it some flour and water and pop it back in the fridge.


Comments
Jos says
Can you do sourdought starter whit gluten free flour ?
Emilie Raffa says
Hi there! Yes, you can. Rice flour works. So does a 1:1 all purpose GF flour such as King Arthur Measure For Measure GF flour. Keep in mind though, when ready to bake a sourdough loaf, you’ll need to follow a specific GF sourdough bread recipe; do not substitute your GF starter in a recipe that calls for a regular starter.
Pauline Newman says
My starter doesn’t look like it’s working and I have followed the directions exactly
I wish I could post a picture
It’s not rising like the pictures and this is day 4
Emilie Raffa says
Hi Pauline, don’t worry! Typically, when starters are a bit sluggish, temperature is the main culprit. Are you allowing it to rise in a warm spot, ideally 78 F? This can be hard to achieve in winter. However, there are a few things you can do: place your starter in a hot water bath to give it a boost (change out the water regularly because it will get cold). Alternatively, place the starter in the microwave, keeping the door ajar so the light stays on. This creates a mini “proofing box” with the necessary controlled warmth your starter craves. You can also do this in the oven (switched off) with the light on. if you don’t have a microwave. And lastly, patience is super important. Sometimes it can take up to 2 weeks for a starter to becomes established. Hope this helps :)
Ronalda says
So this i is my first time I’ve ever attempting to do something like this I did the 60 g of whole wheat flour to 60 g of water for my starter the next day I followed the directions not sure if I’m done it correctly. Each time I remove or discard a discard 60 g. I am using a scale so I get 60 g exactly .Then I add in my 60 g of flour and 60 g of water. I’m on day six but I see in your instructions you have it written a little different when you break it down so am I doing this right
Leslie says
Thanks so much!!
Leslie says
I want to store my starter in the frig. When i feed it each week, should i throw half away as before? Thanks!
Morghann Turner-Steele says
Sorry I’m not the page owner but yes you should discard. Follow day 7 so you still keep your starter for when you need it. Strongly recommend instead of throwing your discard, that you look at alternate recipes (I do mine on a Sunday and make crumpets)
Emilie Raffa says
That’s OK! Thanks for chiming in (I’m backed up on my responses, lol).
Emilie Raffa says
Yes: it’s best to discard a portion of the starter before feeding it again. And you’ll naturally want to do it. Most likely there will be a dark liquid on the surface and/or discolored starter underneath. This will refresh the acidity levels within your starter.
Monica says
So I have a question. My starter had turned bubbly and doubled in size around 18 hours after making. Should I still wait until day 3 to discard and feed? Thanks!
Emilie Raffa says
Hi Monica! Typically, I’d say yes. However, if the process is moving considerably faster for you, you can start feeding it now. Just make sure to keep going for the full 7 days to properly strengthen and develop the yeast.
Monica says
Thank you so much!
Byron says
Day 3 says it’s time to feed. And then days 4, 5 and 6 – repeat the feeding process described for Day 3. But it also says: “When the starter falls, it’s time to feed it again.”
Should I keep feeding on days 4, 5 and 6 or should I wait until the starter falls across those three days before feeding.
I thinking I’m breaking your rule of – don’t overthink this! Perhaps I need to feed my brain on days 1 to 100!
Emilie Raffa says
Haha… great question, Byron. Happy to clarify. The rise and fall of your starter is normal and to be expected. It’s best to feed your starter again (days 4, 5, 6 etc) when it falls. Now, if you are feeding your starter at the same time each day, it should rise and fall predictably, which will make your feeding schedule second nature. You’ll know exactly what to expect, how long it takes, when it will fall etc. Hope this helps!
Jacquelyn says
Hi! Love the simplicity of this starter recipe. I have not had success with making starters before. I am on day 3 and my starter looks dry on top and there is no liquid. Did I not add enough water? I used a scale to measure both and whole wheat flour. Do I need to start over? Thank you!
Emilie Raffa says
Hi Jacquelyn, great question. No need to start over at all! Some bakers will get liquid on the surface, others will not. It’s just something to look out for. More specifically: it’s a sign your starter is exhausted and needs to be fed. Chances are, you’ll end up seeing this liquid at some point during the process, both in the beginning when creating a starter and for ongoing maintenance.
Perry says
Hi! I am on Day 4 and I accidentally fed my starter in a 1:1:1 ratio (90g discard + 90g flour + 90g water). Should I discard half tomorrow and replenish with 60g water and flour and it will be okay?
Emilie Raffa says
Hi Perry! This response is coming in after the fact; however continuing to feed your starter regularly (and keeping in in a warm spot) will encourage activity more so than 100% correct measurements. How did it turn out?
Perry Schell says
Hi Emily!
Weeks later and my starter is finally good to go and I am baking my first loaf this weekend! Thanks for the clear guide to sourdough starter!
Emilie Raffa says
Excellent to hear. Enjoy :)
Deki says
Thank you for the thorough and simple explanations. I can’t wait to try this recipe. You made something that seems so complex look simple, thanks again.
Emilie Raffa says
You’re very welcome, Deki! I hope you were successful with creating a starter :)
Michael Duggan says
Will I be able to use the sourdough starter that I create in my KBS bread maker?
Emilie Raffa says
I don’t see why not! Just double check with the manufacturer if you’re on the fence. It shouldn’t be a problem.
Amanda says
What temperature is the water for a hot water bath in the winter? My starter is about 9 days old and I’m really only seeing some slight bubbling. Our house is colder so I’m going to try the hot water bath.
Emilie Raffa says
Hi there! The temperature is usually around 100 F. But to be honest, it doesn’t have to be 100% accurate. And most days, I just go by feel. Your starter will get a boost either way. Do be sure to change out the water bath frequently, because it will get cold when left at room temperature in winter.
Amanda Hubert says
Thanks, Emilie! I got my starter going and it’s super active now! You were definitely right about temperature being the major factor. I decided to sew a couple of rice bag heating pads to use with my starter so I wouldn’t have to babysit the water bath. I hear the rice pads in the microwave and then snuggle them around my starter yo provide a higher temp longer. I also utilized the advice of a couple of other comments/conversations in this thread to get it going…give it a day without a feed to boost the yeast and add a little extra flour to get to the right texture.
I’ve been so thankful for your blog and cookbook!
Hannah says
Hello,
I followed this recipe and started to get extremely discouraged because my starter wouldn’t double in size. I always fed my starter at the same time everyday, used digital scale for precise measurements, and kept it in a warm place (77.8 degrees F). For the first couple of days it would barely rise but would have hooch on top. It finally stopped making hooch and started to get a more yeasty/ alcohol smell. After that, my sourdough starter would only rise a quarter of its size and had a beer like smell for 24 days. I decided that I would skip a feeding (so leave it for 48 hours) and was surprised to see that the size was still increasing even though I hadn’t fed it in a while. Last night was when I fed it after the 48 hours. I looked at it this morning and it had TRIPLED in size last night and it had already fallen. I couldn’t be more excited because I had been on this journey for 27 days. So what I think happened was that my specific starter was too slow to rise so it needed more time to build up the yeast. I may have been feeding it too early (24 hours between feedings). Correct me if I’m wrong of course! But I really don’t think it was a coincidence that right after I gave it 48 hours, then fed it, it tripled overnight. I think i’m going to switch to the 1:1:1 ratio?? I’m not sure if I should?
Emilie Raffa says
The thing with sourdough, something that I love, is that everyone will have a slightly different experience. Why? Because it’s a living craft you can only control so much! In your case, the starter needed more time. You felt it. You knew it. And you were right! This is 100% ok. No need to correct ;) Going forward, if your starter is established (it’s now a few days since you posted), it’s ok to switch over to the 1:1:1 ratio. For more info, read this post (linked here). Enjoy!
Fran says
Hi. I’ve been at the starter for about 3+ weeks but I can’t get it to double in size or even display a “healthy” rise. It will bubble and then rise just a bit and then fall. It’s also pretty soupy. I’ve tried messing with water & flour ratios to no avail. It’s winter here in MA but I have it in a warm cabinet draw near a heat source so I don’t think temp is a problem. What am I missing?
Emilie Raffa says
If the texture is soupy, I would switch to KA bread flour (if not using already). It’s more “thirsty” than regular ap flour, so it will help thicken the texture. You can cut back on the water as well, just a touch. Once you’ve made the switch, let it rest in your usual warm spot and keep an eye on it. This will help.
PS: the rise and fall of a starter is normal, so what you’re experiencing is actually a good sign- there’s activity going on. However, a soupy starter will rise and fall faster than a thicker starter which throws everything off. You’ll get there!
Nancy says
This recipe turned out great. It is now bubbling away. Before I use it, I will feed it again and let it double. After removing the amount needed for the recipe, should I feed what is left in the jar and what should I do to replace the amount I took out?
Emilie Raffa says
Technically, you can do both. In my experience, it boils down to 2 things: how much starter you have in the jar and how often you plan to bake. For example, let’s say you have a large starter, appx. 240 g, and you take out only 50 g. You could feed the remaining 190 g of starter with 190 g of flour and water, respectively. Or, if this seems like too much to maintain (especially since you might not bake for a few weeks), just feed it with the amount you removed and pop it in the fridge. When you go to use it again, discard and feed at room temperature to wake it back up.
Angie Fleckney says
Fantastic, my first life was a great success just baking my second life. Thank you very much.
Emilie Raffa says
Excellent! Thanks for your feedback! :)
John says
I created my starter about 3 weeks ago using the directions….It never lost the “turpentine” smell. It would bubble and grow a bit but defiantly not double. I was religious about following directions and used the countertop method as opposed to the refrigerator. Long story short, I followed a sourdough pizza dough recipe and it required levin which included 50grams of my starter. I got minimal rise in the 24 hour bulk ferment stage and it defiantly had no bubbles. Dough was heavy and dense. When I used it to make pizza it barely rose in the oven and didn’t taste very good. I am assuming my Levin didn’t work becomes my starter didn’t work. Any thoughts, ideas or suggestions here? I was thinking of just pitching my starter and starting over? Thx
Emilie Raffa says
You are correct. The starter wasn’t strong enough to leaven the dough, which is why the pizza was unsuccessful. But you learned something. Here’s what I recommend going forward: discard most of your starter leaving about 50 g (1/4 cup) in the jar. You’re doing this is to refresh the acidity levels within the starter to get rid of the smell, without having to start over completely. Then feed it with 50 g flour and 50 g water. Use King Arthur bread flour is possible. Leave it to rest @ 78 F. If the current temp is too cold, the starter will be sluggish. Repeat the feeding process for several days, possibly a week until you see it rise and fall consistently. And then do the float test to see if it’s ready. If so, you’re ready to bake bread! For more info on feeding starters, read this post (linked here).
Annabel says
Just wondering if when you ‘cover’ your sourdough starter in day one, does it mean to put the lid on the jar to make it completely airtight, or leave a little gap between lid and jar so the starter can breathe??
Emilie Raffa says
You can do both. I like to keep it almost air-tight, meaning the lid (latch-top) rests on top of the jar but it’s not clamped.
Kerry says
Thanks for all of this great information. I followed directions and had a great starter after seven days. I’ve made two loaves although I still need to improve on my bread production. I continued feeding and planned to try your focaccia recipe today, but the starter no longer floats. Any idea why and what I should do about it?
Elena says
Was this right? ” Add 60 g (1⁄2 cup) of all-purpose our and 60 g (1/4 cup) of warm water.”
Emilie Raffa says
Yes! Its correct. Equal parts refers to the weight amount only. The conversion from volume to grams, in any recipe, is not exact. It is only approximate.
Stan says
I’m gonna try it.
Manda says
Hello. You said last step is put in a clean jar. Do I continue discarding and feeding in the new jar?
When I want to use the starter, do I just take it from the jar that has doubled after the feeding 12 hrs ago? My is double at 12 hrs.
What do I need to do if I want to freeze it for later use? Once freezed, do I just thaw, feed, let double, then I am able to use it?
Thank you so much
Manda
Marilyn says
This is a first for me and so far (7 days) it’s looking good, I found these instructions easy to use and understand, nice plain speaking and good photos to compare with what I’m seeing in my own kitchen.
Marjorie says
Thank you so much for this recipe. I followed your recipe and now have my first homemade sourdough starter.
Marjorie in Maryland
Lule says
sooo its day 3 and im ready to start feeding.. so i did but i forgot to discard half of it :( is it salvagable ? or should i start over
Teresa says
Day 1, flour and water combined, 18 hrs later bubbles and a small amount of hooch.
Flour sourced fresh milled from my local flour mill. Kitchen always warm as I bake bread daily, and use a wood burner.
Looks like my sourdough starter is underway!
Rae says
Thank you for the recipe!
I am wondering if there is a way to save the starter for about a month without feeding it?
Andra says
Hi, I’m on day 8 of a first-time starter and I’ve got lots of bubbles and a certain thick frothiness going on – however, I’ve yet to see it rise to double its size. Two feedings ago it almost got there, but now it’s returned to minimal rise over a 12 hour period! I keep it in the oven with the light on for a few hours a day and then turn if off when it seems like it’s getting too hot. Should I keep going? It fails the drop test. Thank you in advance….
Theresa says
Do you have a oven thermometer to check the actual temperature? I am on day 7 of making starter and keep the over light on the whole time to keep everything at 80 degrees. I’ve been feeding the starter at around 12 hour increments and it seems to be doubling now. It was sluggish on day 5, so I added a little rye flour. Good luck!
Andra Boudreau says
Hi Theresa! I do have a thermometer but find that the heat of the light will cause the temp to rise past 80 degrees if left on for more than a few hours. I really have to keep a close eye on it. So you’re feeding yours twice a day rather than every 24 hours? I didn’t see that mentioned anywhere so I didn’t dare :) haha. I’m now on day 15 and although it’s active and fluffy, it still fails the drop test — just barely. This morning it sat on the surface of the water for a few hopeful seconds and then promptly sunk like a stone. Still hasn’t doubled in size. Anyway, did the rye flour seem to help?
Theresa says
Yes! I just mixed in about 25 grams of rye flour and it did help. I’ve looked up a bunch of recipes and most say to feed at 12 hr increments when starting the starter. Mine is about like melted marshmallow so I think it’s close.
Shame about your oven light. Could you change the bulb?
Stephanie says
Hey! Super excited about this recipe! My mama and I have been trying new things together and this was one of them. We’re on day 9 and For the last 4 days Jack has doubled in size. As it’s winter and cold we’ve been doing the oven light trick. Tonight we decided to make your bread recipe. Jack was double in size and full of small bubbles. I have the dough in the oven with the light on for the first rise and it’s been almost 4 hours and the dough has only grown a little bit. Any tips on what we can do? Thank you!
Splash says
Hi, I have a non-typical question. I have kept the same starter over 10 years. It’s always come back, even when I neglected it a bit. But I noticed the last couple of times, it wasn’t rising much. I still used it to bake bread and it worked fine. Now, it doesn’t rise at all when I feed it. It does produce a very small amount of bubbles and some hooch. I tried taking a bit of it and feeding it anew (with equal amount starter, flour and water), to no avail.
I am using the unbleached KAF and filtered water. I have never had this problem in years of keeping my starter. It even came back when my husband accidentally microwaved it a bit. This breaks my heart. Has it been taken over by some other organism? Should I start over?
Emilie Raffa says
Ooo… great question. You know, as with all living things, this can happen. Starters can be unpredictable. But my gut feeling is that it’s not dead and you do not need to start over. Has anything in your feeding routine changed? For example, are you using a different type of water? Is it resting in a new spot? Did you always feed it with KAF all purpose? Any additional info you can provide would be great. I have a few ideas.
Splash says
Wow, thank you for such a quick response. I didn’t change anything about the feeding schedule, which was really sloppy and not consistent anyway. I have used different, mostly all-purpose unbleached white flour. I would just dump out some (and make pancakes with it), spoon in some flour and water without measuring, mix and either leave it on the counter or the hot water heater if I was using it, or stick it in the fridge if I wasn’t. It was so robust for so many years that I never thought it would stop responding. The only thing I can think of is that this time, when it didn’t rise, I repeated the feeding a couple of times so it feels “diluted” perhaps. But now it’s discoloring on the surface and there is an amber layer of liquid, but no bubbles… :( It’s been sitting on the counter for several days.
Patty Burrell says
In my starter I had drained the fluid, fed it then it was riding and bubbling. My question is about the smell – it’s not good like yeasty. It’s like sour – is that good?
Emilie Raffa says
Hi Patty, the smell should definitely be more yeasty with only hints of sourness (not strong like vinegar). To get rid of the smell, you just need to refresh the acidity levels. Do this by feeding your starter more often and/or not letting it sit more than 12 hours without feeding it.
SILVIA FERNANDEZ says
I’m on day 10 of first time starter. When I started I was following somebody else method that I found online. I started with 30 grm of AF and 30 grm of water feeding it from the first day every 12 hrs. I did the discard only once a day. Even though I see fermentation going on and a little bit or rise, it has not risen much. I don’t know if to keep on waiting to see fermentation like I see in your pictures or start over. Any suggestions will be greatly appreciated it.
Emilie Raffa says
Hi Silvia! Typically, when a fed starter doesn’t rise or bubbly quickly, temperature is the main issue. It’s not warm enough for fermentation. It’s ideal to let it rest in a location that’s 75-78 F. So that’s the first step. If this is not possible, I recommend a hot water bath: fill a small bowl, just a little bit, with hot water. Place the starter jar inside (make sure it’s not submerged). Keep an eye on it, and watch for small bubbles to appear throughout the culture especially at the bottom of the jar.
Cathy says
Thanks. I am enjoying your cookbook. Pictures and directions are stellar.
Emilie Raffa says
Thank you Cathy!!!
Cathy says
Can you double a sour dough recipe
Emilie Raffa says
Hi Cathy! Sure, you can double a sourdough bread recipe. I recommend doing so in a large, high sided dough tub. Or, make the dough in (2) separate bowls.
Cami J says
In your other blog post (https://www.theclevercarrot.com/2021/01/feeding-sourdough-starter-my-best-tips-tricks/) you say that you use a 1:1:1 ratio. But in your instructions above the amount of started increases by each day. You start out 1:1:1 but then go to 90 g starter + 60 g flour + 60 g water | 105 g starter + 60 g flour + 60 g water. This isn’t 1:1:1. Maybe I am overthinking it but I am new to sourdough and not sure what measurements I should be using. Please help!
Emilie Raffa says
Hi there! This recipe, the beginner sourdough starter, goes by a different ratio to build up the total quantity to approximately 1 cup. The other post, the one you’ve linked here, refers to the feeding ratio once the starter has been created (1:1:1). Does that make sense? In short: follow the measurements here if you’re making a starter from scratch. Switch over to 1:1:1 once it’s up and running. Hope this helps!
Cami says
This was VERY helpful! First-time sourdough starter over here, so I’m making sure I have it all right!!
Emilie Raffa says
Great! Enjoy! :)
karen crispo says
Thank you I am going to try this tomorrow 😊
Jessica Vetter says
I am on day 3 and when I added my flour and water, I accidentally added 1/2 cup of warm water instead of 1/4 cup. Will it be ok, or do I need to start over?
Emilie Raffa says
Hi there! It’s ok. No need to start over. You’ll need to add more flour to compensate for the additional water added. Otherwise it will be too runny!
ann lindberg says
My experiment was doing well until yesterday – day 6 – when it didn’t rise but still has bubbles on top so I discarded half today and added the flour and water as in the past, mixed it well and am leaving the tope loosely covered at room temp. What do I do if it dose not rise again? Start over?
Emilie Raffa says
Hi Ann! The rise and fall of your starter is normal. It’s to be expected even after you starter has been created. Continue to feed and monitor it. It will rise. You just have to give the starter time. Move to a warm spot if necessary to give it a boost.
kevin says
So you apply atight seal to the jar
Emilie Raffa says
Hi there! I do. If too much pressure builds up, I loosen the latch and let it rest on top.
Kevin says
I have tried my sourdough started twice (i’m on the third day of the second try) and I have yet to get a full rise or bubbles or anything. i’ve kept it in a temperature between 74-80 degrees but there have been a couple times that it has dropped to 72 degrees. will that cause this problem?
Alexandra says
Hi, thanks so much for this detailed post on how to make sourdough starter!
For the warm spot, can I put the jar in a sunny place on the kitchen counter?
Emilie Raffa says
Hi Alexandra! Yes. A sunny spot on the counter is fine (as long as it’s not too hot!). You’re looking for 75-78 F.
Grey says
Mine didn’t rise and then developed black mold after seven days. Ended up tossing it all.
Emilie Raffa says
Hi there! Oh no! Mold can happen sometimes based on climate and other variables. Not sure where the mold appeared for you, but next time (if there is a next time) scrape down the sides of the jar with a mini rubber spatula. This will inhibit mold growth.
Greg says
Thanks for the reply. In my case, the air is dry (US west coast) and the mold developed along the inside of the rim. I will try the spatula approach. My son is keen on getting his homemade sourdough bread, so I’ve got to keep working on it. Thanks for the tip!
Jessica Rarey says
I have a question!!! I accidentally skipped “day 2” and went straight to “day 3.” The starter was very warm and bubbly though. Do I need to toss the whole things and start over or can I fudge on the 2nd day of ‘rest’ and it will still come out okay?!?
Thank you!
Emilie Raffa says
Hi Jessica! You’re totally fine! Just keep going. It will come out fine as long as you continue to feed it, and let it rise in a warm spot 75-78 F.
Jen D. says
I don’t know what I’m doing wrong… I’ve tried 3 different times for at least 2 wks each over the past couple months, and none of them have worked. They start out strong with the whole wheat and get all bubbly, then I switch to all purpose and they seem to gradually die. I am using King Arthur unbleached all purpose flour. I’m currently 8 days into the one I’m working on and its the same song, third verse. The float test is a fail each time. I have it sitting on the counter above my dishwasher that I run almost daily, which gives some warmth. I’ve read your post so many times, I think I have it memorized. haha
I don’t want to give up! I really want it to work! Any thoughts???
Emilie Raffa says
Hi there! Here’s what’s happening: after Day 2, when you switch to white flour for the feedings, the growth slows down. Why? Because the yeasts need time to cultivate, grow and get used to the new flour. It might look like the starter is dead, but it’s not; it just needs time and patience. Next time, try this. Start from the beginning again (if you need to) and on Day 3 use KA bread flour instead of all purpose. It’s a little higher in protein and enzymes which will give your starter a boost. Be sure to keep it in a warm spot 75-78 F, and/or use slightly warm water in your feedings. You can even use a hot water bath while it rises- I do this all the time in winter. Warmth is key for fermentation. Then watch and take note. These tips should help get you on your way.
Haven Marsh says
Emilie, my starter is 7.5 days old, but it has never doubled or gotten much larger in volume. I dropped a small dollop into a glass of water yesterday, but it didn’t even form a ball, and it didn’t rise to the top of the water. It is a bit bubbly, and it doesn’t smell bad anymore. Do you think it’s even alive and eventually usable?
Emilie Raffa says
Hi Haven! If you see bubbles, even just a little bit, it’s is a good sign. There’s activity going within the culture which means it’s not dead. I would continue to feed it until it perks up. Perhaps cut down on some of the water if the texture seems to runny, and then track how long it takes to rise. When it’s at peak height, not after it has collapsed, do the float test again.
Christina says
I had a question , i just started my sourdough this morning and im seeing liquid and its brownish , is that normal ??
Emilie Raffa says
Hello! Yes, unfortunately brown liquid is normal. It’s a sign that your starter is exhausted and needs to be fed. Do so with fresh flour and water, making sure to pour off and remove any residual liquid and/or discolored starter underneath. Then give it some love!
Bill Head says
I received a starter kit from my daughter and have been following a recipe that came with the kit. After 6 days, my starter is not rising. I have not drained any liquid that I’ve seen accumulate, but have tried to feed it accordingly. Frustrated, I went on line and found your recipe today, so, I discarded 1/2 of the starter and added 1/2 cup of flour and 1/4 cup of warm water. I’m storing the starter in a cabinet above the fridge, and it seems like an ideal place temperature wise.
Question: Should I throw this starter out and begin anew or give it a few more days?
Help!
Emilie Raffa says
Hi Bill! Thanks for your comment. I’m not sure where you are in the process now. However, the starter can be saved if it’s fed properly and left in a warm spot to ferment, which is what you’re doing now. If after 2 weeks you’ve had no luck, then I’d start over in your case, only because I’m unfamiliar with the directions of the kit you started with.
Jeanine says
Love this recipe, has worked so well for me and I’ve made 3 loaves of bread with it so far:) Quick question though, so I need for feed my starter before putting it in my fridge? Thanks!
Emilie Raffa says
Fantastic! This is SO great to hear ;) Yes: feed your starter before storing in the fridge to maintain the yeast.
Gabriella says
Do we refrigerate the starter during the seven days or after the seven day
Emilie Raffa says
Hi there! During the 7 days, the starter is kept at room temperature. After 7 days has elapsed, storage location is your choice. You can either keep it at room temperature or in the fridge- it’s up to you.
Rebeca Iacob says
After my starter is established do I still need to discard half everytime I feed it?
Joyce says
Yes, it says for ongoing care after starter is established.. to begin by removing and discarding about half of your starter. Replenish what’s left in the jar with fresh all purpose flour and water. Frequency depends on whether it’s stored at room temp (1-2x/day) or in the fridge (1/week).
Emilie Raffa says
Yes! Thank you!
Joyce says
Just started 3 days ago and it’s already looking great :) I was wondering on Day 4, when I’m supposed to discard half of the starter, should the total I should be discarding be 60g every time like Day 3 or the full half (90g in this instance) every time? Sorry if this is a confusing question!
Brittney says
I am wondering the same thing. I am just staying day 3, so I got rid of half and fed it. Tomorrow will I discard half of the entire stater or 60g?
Joyce says
Actually I just saw that she listed the numbers after the recipe towards the bottom, so it should be half the entire starter! Sorry for overthinking it hehe but my starter has been established!
Kathleen says
When storing the starter in the fridge, does it need to come to room temperature before using it? I know you say you don’t need to bring it to room temperature when feeding it.
Also, if I have all purpose flour but it doessn’t specifiy unbleached can it be used?
Emilie Raffa says
Yes. It needs to be at room temperature before using. It won’t work otherwise. Here’s what you do: Remove your starter from the fridge. It’s dormant. To re-activate it, give it a feed and let rest at room temperature until it bubbles and doubles in volume. You might need to do this several times over a few days. It doesn’t always work instantly.
Heather says
Hello, good step by step instructions.
How much sourdough will I need for 10 kilos of pizza dough?
Emilie Raffa says
Hi there! It depends on what pizza dough formula you’re using, and the rising schedule you want. Do you have a recipe? Are you converting a yeast pizza dough to sourdough?
Heather says
Reply…..Hi,, I use dried yeast and a 00 flour, water salt and oil. The dough is kneaded for 10 minutes, left to rise and then made into balls ,, the balls kept in the fridge..they are knocked down and left to rise for at least 2 hours before opening and baked in a wood oven